
Subway Tiles for Backsplash: Style, Installation & Tips
Subway tiles are one of the most enduring choices for kitchen and bathroom backsplashes, offering a perfect blend of function and style. Their rectangular shape and clean lines give them a classic quality that fits almost any home design approach.
In this guide, we’ll cover why subway tiles remain so popular, the many style options available, and practical advice for installation and care.
From classic white to bold colors, from glossy shine to subtle matte, subway tiles offer countless ways to upgrade your space.
If you’re planning a DIY weekend project or consulting with professionals, this comprehensive look at subway tile backsplashes will help you make informed choices for your home improvement.
Why Choose Subway Tiles for Your Backsplash?
Subway tiles have become a go-to choice for homeowners looking to update their kitchen or bathroom walls.
Their clean lines and simple design make them suitable for nearly any home style while offering practical benefits that go beyond just good looks.
1. Classic Design
Subway tiles have stood the test of time in home design. First used in New York City subway stations in the early 1900s, they’ve moved from public spaces to private homes without losing their charm.
These tiles work well with many styles – they can look sleek in a modern kitchen, cozy in a farmhouse setting, or authentic in a vintage-inspired space.
2. Easy to Clean and Maintain
The flat, non-porous surface of subway tiles makes them very simple to clean. Food splashes and cooking stains wipe away with minimal effort, making them perfect for busy kitchen areas.
Many homeowners choose darker grout colors between white tiles to hide potential staining and reduce cleaning time.
3. Affordability and Availability
Subway tiles offer great value compared to many other backsplash options. Their basic shape means they’re often less costly to make and buy.
You can find these tiles in most home improvement stores, tile shops, and online retailers in a wide range of materials (ceramic, porcelain, glass), sizes, and finish types to fit any budget.
Subway Tile Styles for Your Backsplash
Choosing the right subway tile style can make a big difference in the look of your kitchen or bathroom. From colors to finishes, each option creates a unique feel while maintaining the simple, clean look that subway tiles are known for.
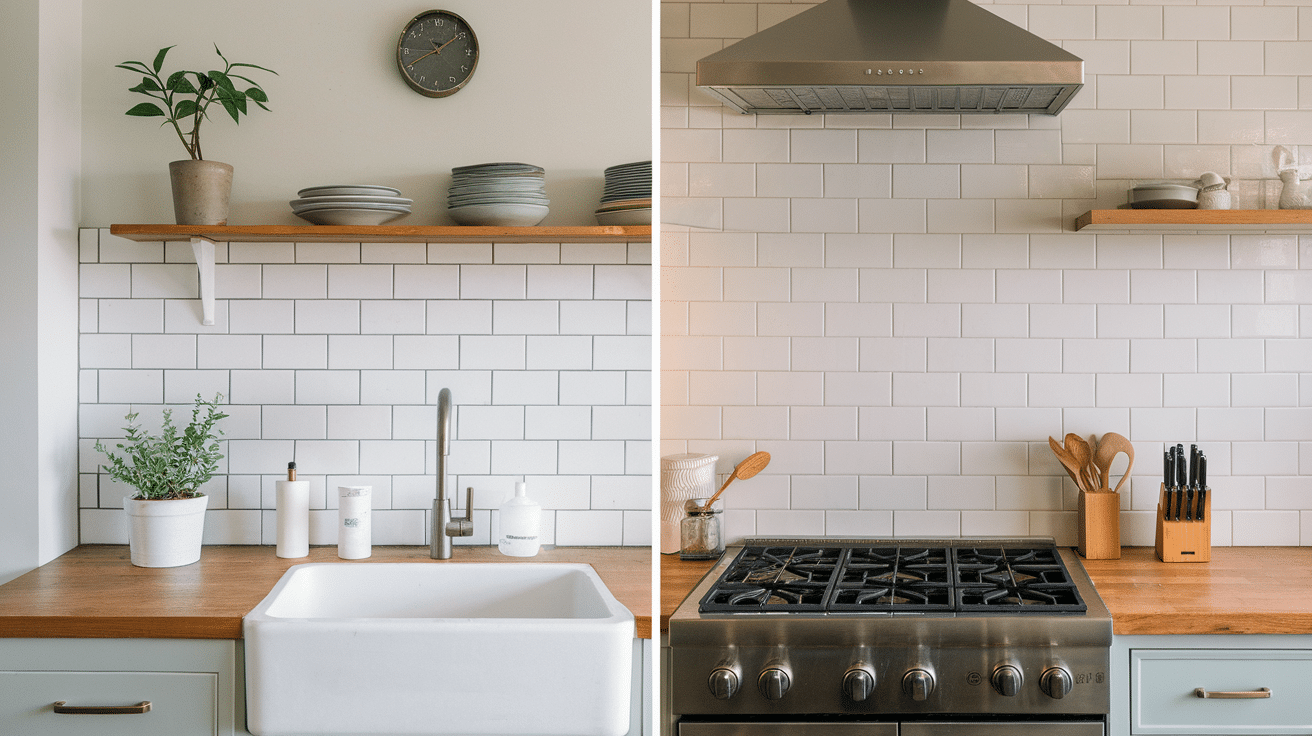
Classic White Subway Tiles
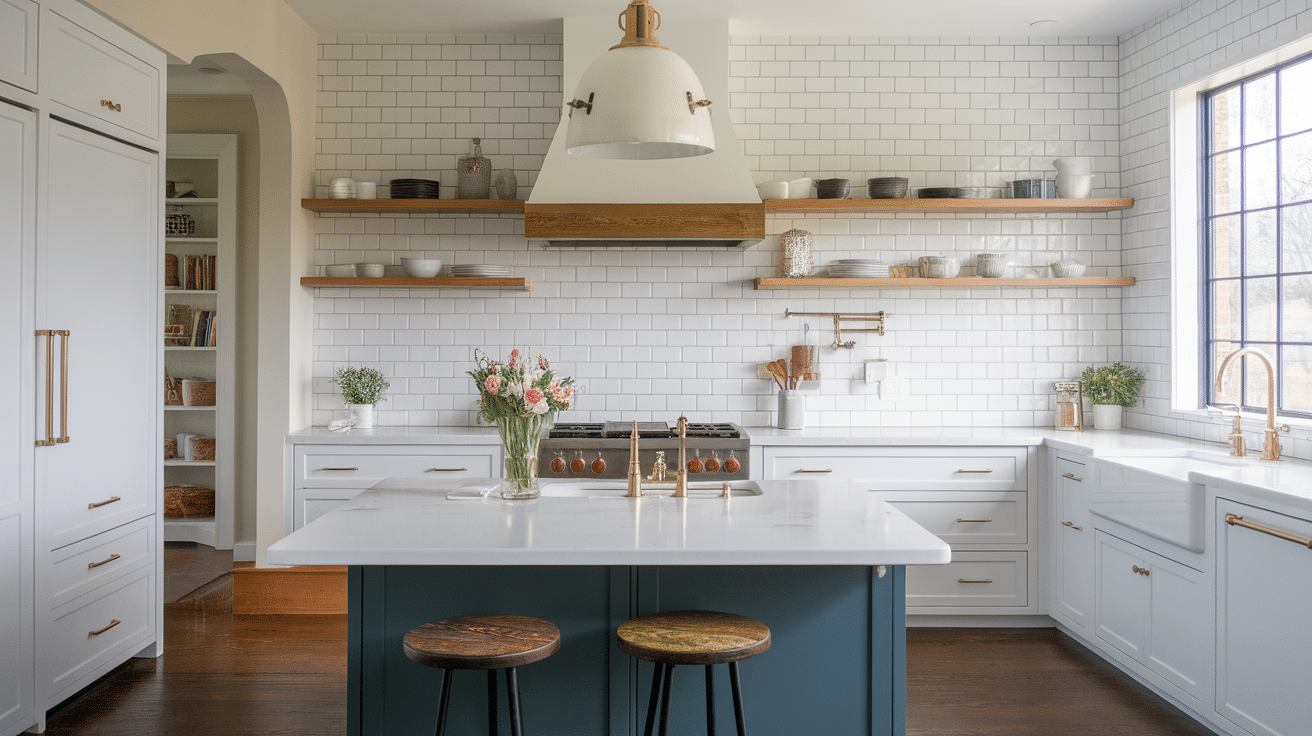
White subway tile is the most common choice for backsplashes across America. Its clean, neutral look fits with almost any kitchen color scheme or cabinet style.
White subway tiles create a bright, open feeling that works equally well in small bathrooms or large kitchen spaces. They provide the perfect backdrop that lets other design elements in your room stand out.
Colored Subway Tiles
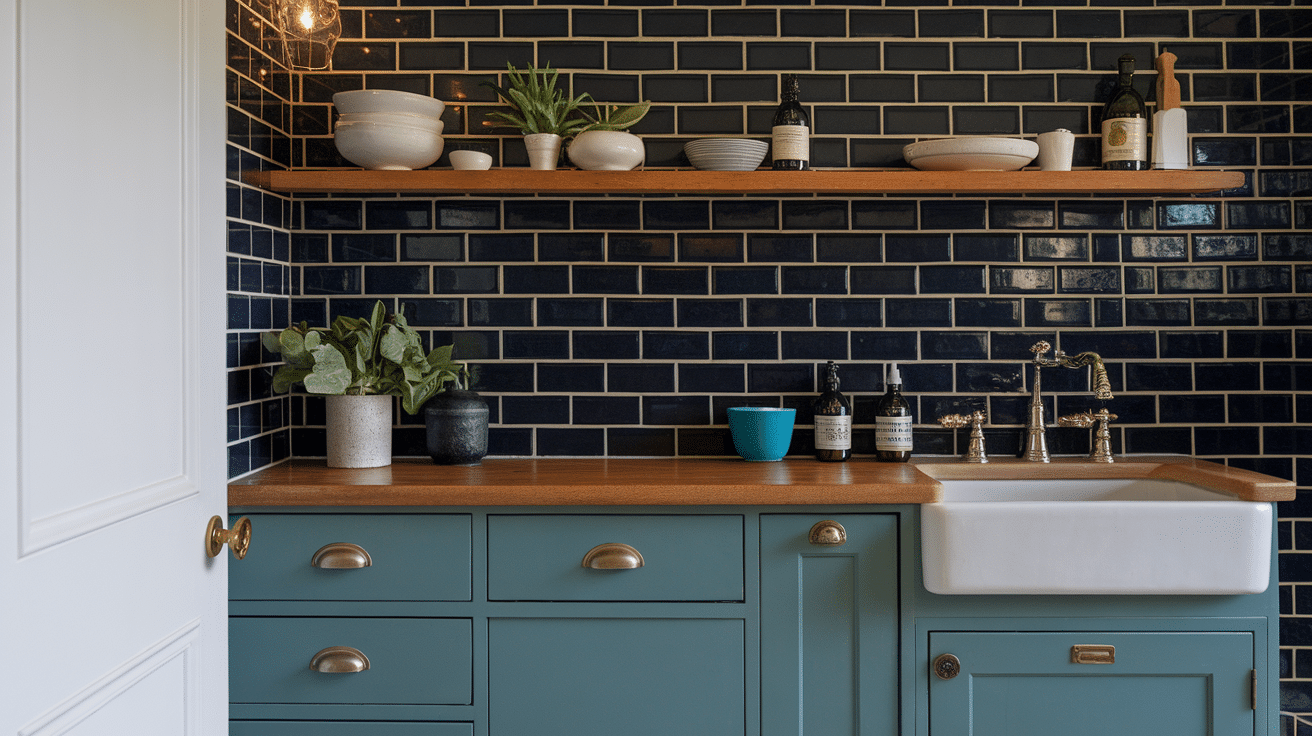
If you want something beyond the traditional white, colored subway tiles offer a way to add interest to your space. Gray subway tiles provide a modern, subtle variation that still feels neutral but with added depth.
Black tiles create a bold, striking contrast, especially when paired with light-colored cabinets. Blue and green options bring a splash of color that can tie together other design elements in your kitchen or bathroom while still looking tasteful.
Tile Finish & Style Comparison
The chart below breaks down how different tile finishes and edges affect the look and function of your subway tile backsplash.
Each option offers unique benefits that work better in certain rooms and with specific design styles.
| Feature | Glossy Finish | Matte Finish | Beveled Subway Tiles | Flat Subway Tiles |
|---|---|---|---|---|
| Appearance | Shiny, reflective | Soft, non-reflective | Slanted edges with shadows | Clean, straight lines |
| Light | Makes spaces appear larger | Creates a warm, cozy feeling | Varied light reflection | Consistent reflection |
| Cleaning | Shows spots and fingerprints | Hides smudges | Complex edge cleaning | Easy to wipe clean |
| Durability | Shows scratches | Hides wear | Edge protection | Visible edge damage |
| Best For | Small spaces needing light | High-traffic areas | Traditional/vintage designs | Modern/minimalist spaces |
| Installation | Standard | Standard | More complex alignment | Straightforward |
| Visual Impact | Bold, eye-catching | Subtle, understated | Defined tile borders | Minimal emphasis on tiles |
When making your final choice, think about how the tiles will look with your existing cabinets, countertops, and lighting. Take home samples and test them in your space at different times of day.
The right subway tile can tie your whole kitchen or bathroom design together while offering easy maintenance for years to come.
Design Ideas for Pairing Subway Tiles with Your Space
When adding subway tiles to your home, consider how they’ll complement your existing space while providing both style and practical wall protection.
Subway Tile Backsplash in Kitchens
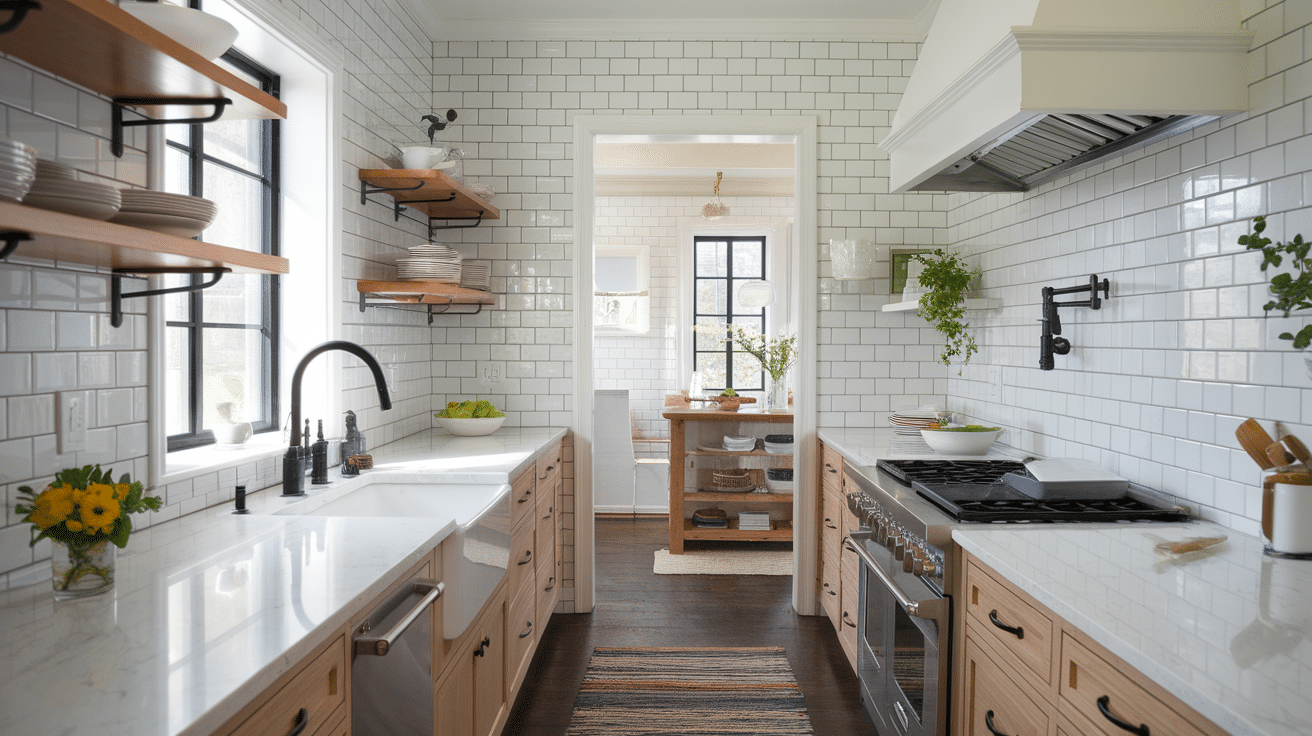
White subway tiles with black grout offer a clean, modern look that’s especially striking with white cabinets and dark countertops. They make an ideal backdrop for open shelving and complement farmhouse sinks without competing for attention.
For stove areas, extend tiles up to the hood or cabinets for maximum splash protection. Around countertops, be sure to use waterproof grout with proper sealing.
Subway Tiles in Bathrooms
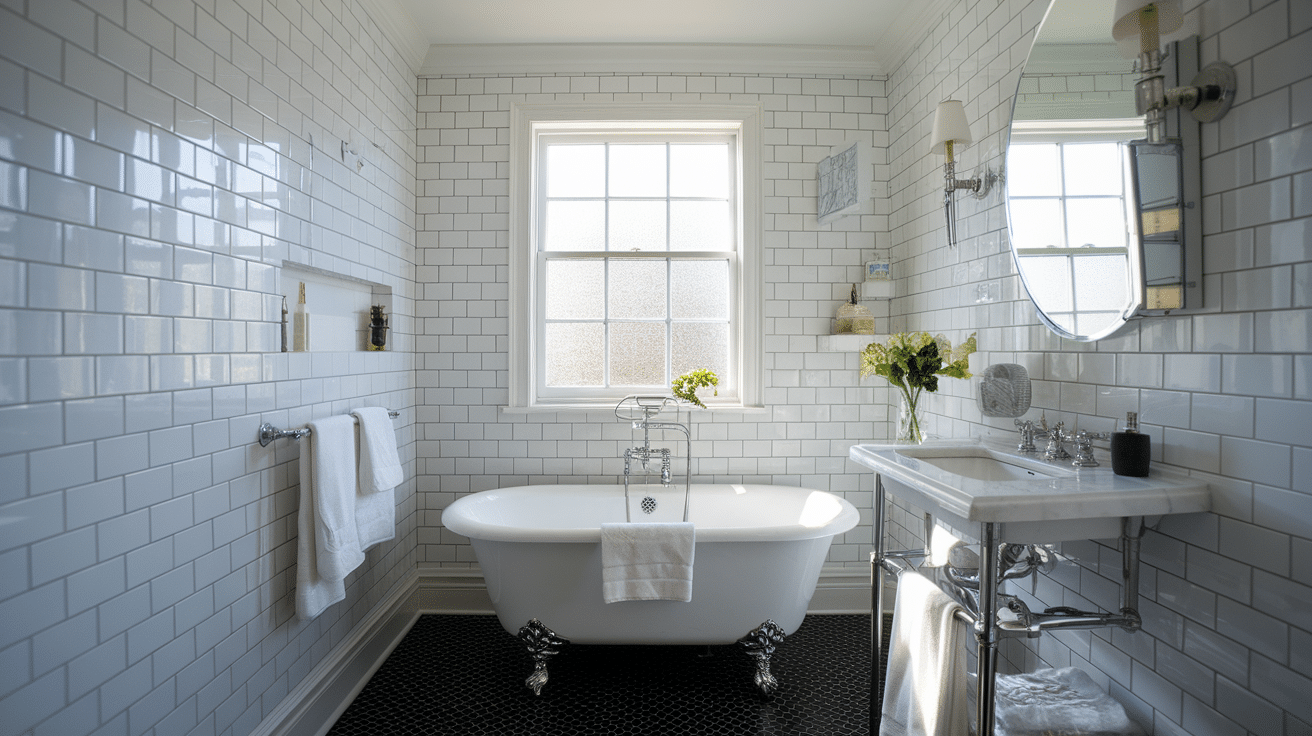
Subway tiles help create a clean, bright feeling that makes small bathrooms feel larger. The horizontal lines can visually widen narrow spaces, while light-colored tiles reflect more light.
For personalization without changing the tiles, try colored grout, like blue or green with white tiles. For more color, choose subway tiles in soft blues or greens.
Subway Tile for Statement Walls

The subway tile pattern you choose can dramatically change how your space feels.
Herringbone layouts create a sense of movement and added texture, making them ideal for shower walls and kitchen backsplashes where visual interest is desired.
Vertical arrangements draw the eye upward and make ceilings appear higher, perfect for small bathrooms or narrow spaces that need to feel larger.
Diagonal patterns offer unexpected visual interest that works beautifully on accent walls or around fireplaces.
For a more traditional look with a pattern, basketweave arrangements add classic charm to bathroom spaces while maintaining a timeless appeal.
How to Install Subway Tiles for Your Backsplash
Installing subway tiles might seem like a big job, but with the right tools and steps, it can be a rewarding weekend project.
Good preparation is key to getting a professional-looking finish that will last for years.
Preparing the Surface
Your wall needs to be ready before any tiles go up. Remove all outlet covers and make sure the wall is completely clean—free from dust, grease, and old paint chips.
The wall should be smooth and flat for kitchen backsplashes; you may need to sand down bumpy areas or fill in holes with spackling compound.
Measuring is crucial for a good-looking result. Find the center point of your wall and mark vertical and horizontal lines as guides.
This helps ensure your tiles will be straight and evenly spaced, with cut tiles of equal size at the edges. Plan your layout on paper first to avoid awkward small cuts in visible areas.
Step-by-Step Installation
- Using a notched trowel, apply tile adhesive to a small section of wall, working in areas about 2-3 feet wide.
- Place your first tile at your marked centerpoint, pressing firmly into the adhesive.
- Add tile spacers between tiles to maintain even gaps for grout.
- Continue adding tiles in rows, checking frequently with a level to ensure they’re straight.
- Use a wet saw or tile cutter for edge pieces that need to be cut.
- Allow the adhesive to dry completely (usually 24 hours).
- Mix grout according to package directions and apply with a rubber float, pushing it into the gaps between tiles.
- Wipe away excess grout with a damp sponge before it dries.
- Allow the grout to cure fully before sealing (if needed) and replacing outlet covers.
DIY vs. Professional Installation
Installing subway tiles is a project many homeowners can handle themselves with basic tools and patience. The tiles’ simple shape makes them easier to work with than more complex designs.
DIY installation typically costs less for materials in an average kitchen, saving on labor costs that professionals might charge.
However, hiring a professional makes sense for larger spaces or complex patterns like herringbone. Professionals bring experience with tricky cuts around outlets and corners, ensuring a cleaner finish.
They also work faster—what might take you a weekend can be done in a day. If your walls have serious damage that needs repair or if you’re uncomfortable using tools like wet saws, professional help will save you stress and potentially costly mistakes.
Popular Grout Options for Subway Tile Back Splashes
Grout might seem like a small detail, but it has a big impact on the appearance of your subway tile backsplash.
The right grout choice can highlight your tiles or help them blend for a more unified appearance.
Light vs. Dark Grout

Grout color significantly impacts your tile’s final appearance and functionality.
Light grouts (white/cream) create a clean, seamless look ideal for modern kitchens and making spaces feel larger, though they show stains more readily.
Dark grouts (charcoal/black) highlight individual tiles and tile patterns, making them perfect for industrial or farmhouse styles and busy cooking areas where stain resistance is crucial.
Choose light grout for a continuous look with colored tiles or dark grout to emphasize tile patterns while concealing cooking stains.
Epoxy Grout vs. Cement-Based Grout
Epoxy grout resists stains, water, and chemicals, making it ideal for kitchen backsplashes. While costlier and harder to work with, many find the long-term benefits worth it.
Cement-based grout is easier to apply and more forgiving during installation but needs sealing and maintenance to resist stains and water.
Subway Tile Backsplash Maintenance Tips
Keeping your subway tile backsplash in top condition requires minimal effort but consistent care.
Regular maintenance prevents staining and extends the life of both tiles and grout, preserving your backsplash’s fresh appearance for years to come.
For tile cleaning:
- Wipe daily with warm water and soft cloth
- Use mild dish soap for regular cleaning
- Apply baking soda paste for stubborn stains
- Clean mineral deposits with equal parts vinegar and water
For grout maintenance:
- Seal grout yearly to prevent staining
- Use oxygen bleach solution with a soft brush for whitening
- Repair any cracks promptly to prevent moisture damage
To prevent mold:
- Run exhaust fans during cooking to reduce moisture
- Wipe backsplash after cooking that creates steam
- Fix any nearby plumbing leaks immediately
- Use a squeegee on bathroom tile after showering
Common Mistakes to Avoid When Installing Subway Tiles
Even skilled home improvers make mistakes when working with subway tiles. By knowing what to watch for, you can avoid the most common installation problems and create a professional-looking backsplash.
For the best results with your subway tile project:
- Start tiling from the wall’s center to create a balanced pattern
- Check with a level frequently to maintain straight rows
- Seal grout 2-3 days after application to prevent stains and water damage
- Use a rubber float at a 45-degree angle for proper grout application
- Clean excess grout within 15-30 minutes using a damp sponge
- Ensure grout sits slightly below the tile edge rather than covering corners
Conclusion
Subway tiles remain a smart choice for backsplashes due to their clean look, durability, and design flexibility.
If you prefer classic white, bold colors, or interesting patterns, subway tiles can match your home’s style while providing practical wall protection.
Choose your tile type based on both your design wishes and how much upkeep you’re willing to do. For simple layouts, you might feel confident tackling installation yourself using our tips.
For complex patterns or larger spaces, a professional installer can ensure a flawless finish that will look good for years to come.


