How to Propagate Spider Plant at Home: Easy Steps
One day my spider plant had exactly one baby dangling off a thin stem. A few months later, I had nine plants, three friends asking for cuttings, and zero idea how it multiplied so fast.
If you’ve ever looked at your own spider plant’s tangle of dangling plantlets and wondered if they’re just decoration or something you can actually grow into full plants, you’re about to find out.
In this blog, I’ll walk through everything you need to know about how to propagate spider plant babies, from choosing the right plantlet to getting it settled into its own pot.
I’ll also cover variety differences, timing, common mistakes, and aftercare so your new plant has the best possible start. If you’re a first-time propagator or just looking to expand your collection, this blog covers it all.
What are Spider Plant Babies?
Spider plant (Chlorophytum comosum) babies, also called plantlets or spiderettes, are small offshoots that grow from long, wiry stems called stolons.
These stolons arch outward from the base of a mature parent plant and naturally produce plantlets at their tips, with no special effort required.
Each baby arrives already partially formed – with a small rosette of leaves and often visible root bumps at the base. This is what makes them so easy to work with compared to other houseplant cuttings that need to develop from scratch.
Once a parent plant is mature enough, it produces these babies regularly, giving you a steady supply of new plants to propagate, share, or grow out into full-sized spider plants.
What Makes Planting Spider Plant Babies So Easy
Spider plants produce baby plantlets naturally, without any special coaxing, making them a sustainable landscaping option for your eco-friendly garden.
This built-in trait is what makes planting spider plant babies such a beginner-friendly project. A few traits make this plant especially forgiving for beginners:
- Ready-made plantlets: Arrive already formed, so there’s no need to cut mature leaves or stems to start a new plant
- Quick rooting: Roots develop fast in both water and soil, often within a few weeks
- Tolerant during rooting: Plantlets handle a wide range of light and humidity levels, unlike more sensitive houseplant cuttings
- Minimal transplant shock: New plants rarely struggle once moved from water to soil or repotted.
How to Propagate Spider Plant in Simple Steps
Learning how to propagate spider plant starts with choosing a healthy baby and giving it the right conditions to form roots. The process is simple when you do each task in the right order.
1. Choose a Healthy Spider Plant Baby
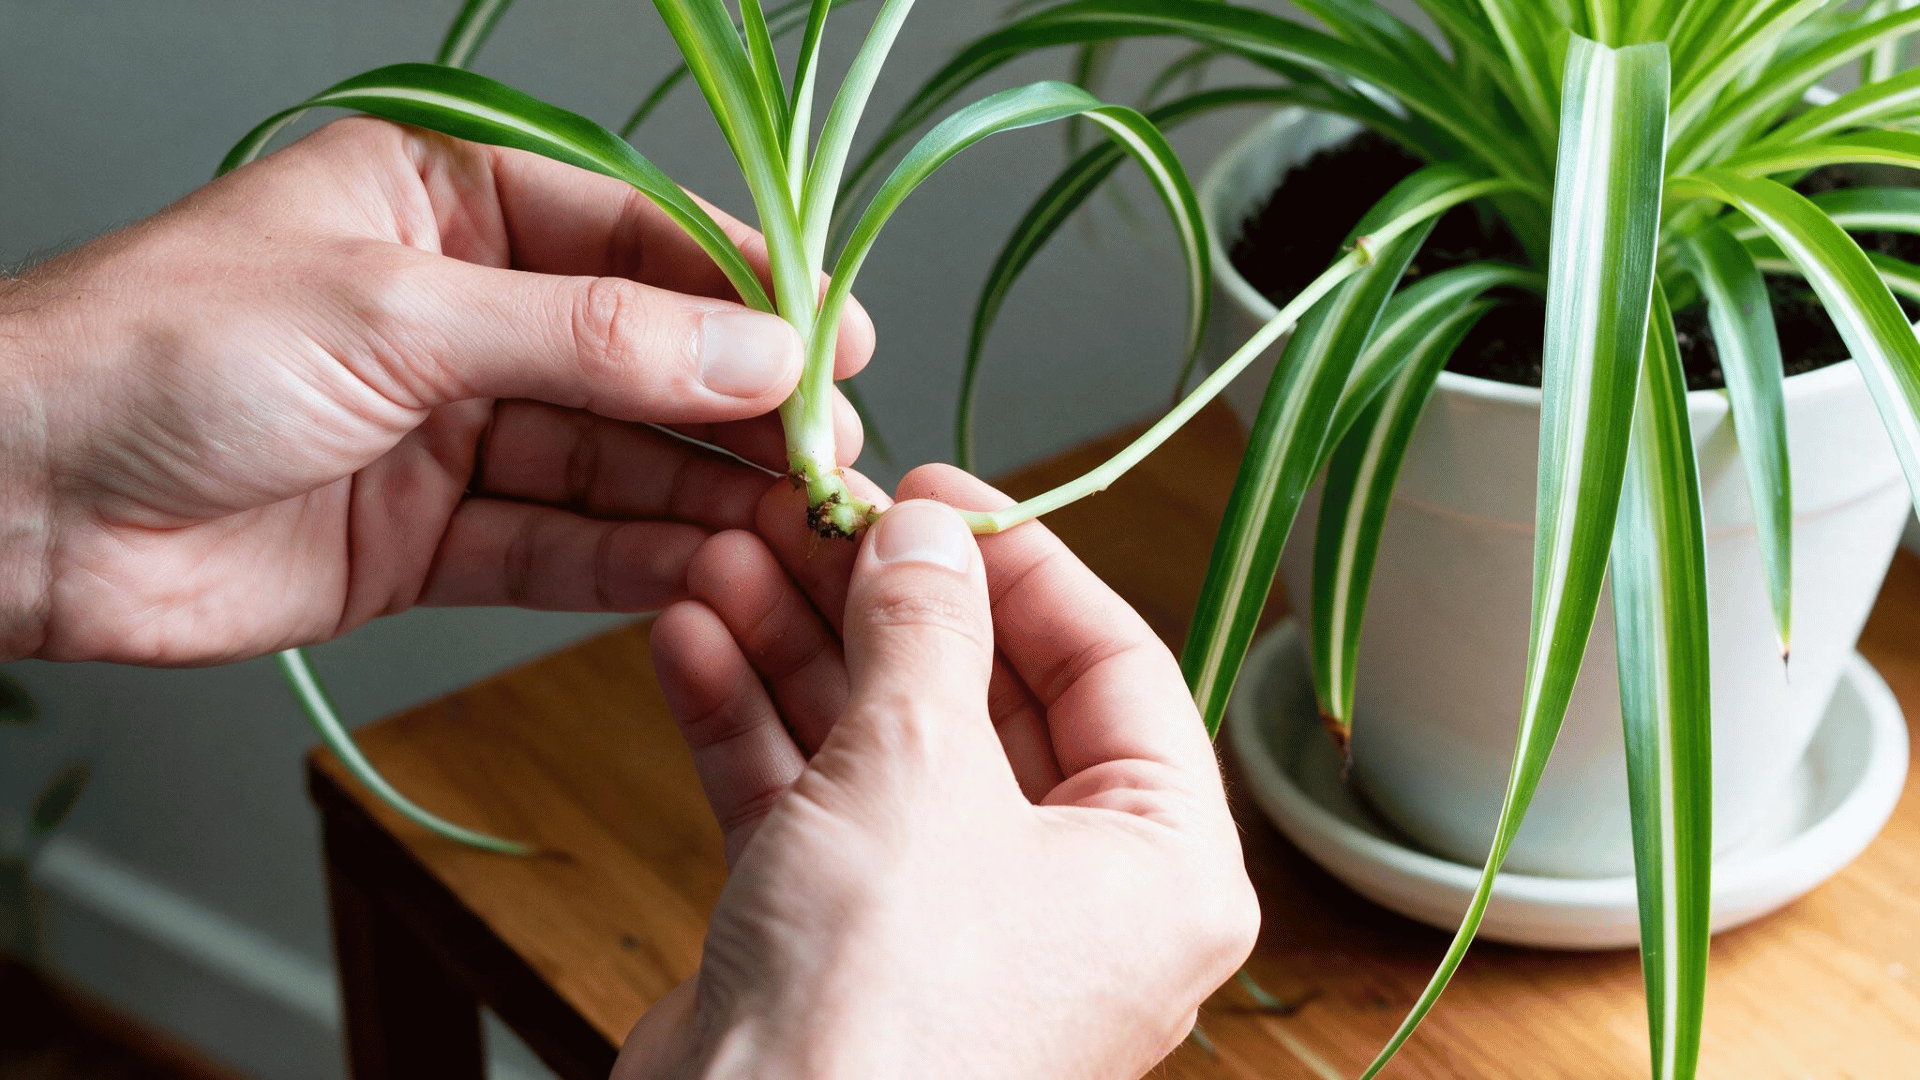

Start with a plantlet growing from one of the long runners on the parent plant. A healthy baby with visible root bumps is often easier to propagate.
Look for these signs:
- Choose a baby with several firm, green leaves.
- Check the base for small white root bumps or short roots.
- Avoid plantlets with mushy areas, heavy browning, or damaged leaves.
- Pick a baby growing from a healthy parent plant.
2. Get the Supplies Ready

Prepare everything before removing the baby from the parent plant. This makes it easier to place the plantlet into its rooting setup right away.
Keep these items nearby:
- Clean scissors or pruning snips for a precise cut.
- A small jar filled with water for water propagation.
- A small pot with drainage holes for soil propagation.
- Loose potting mix and room-temperature water within reach.
3. Cut the Baby from the Runner

Find the thin runner connecting the plantlet to the parent plant. Make one clean cut without damaging the base or any small roots.
Follow these points:
- Hold the baby gently near its base.
- Cut the runner close to the plantlet.
- Keep any visible roots or root bumps intact.
- Avoid pulling or twisting the baby from the stem.
Tip: I prefer waiting until small root bumps appear before cutting the baby because it gives the plantlet a good starting point.
4. Root the Baby and Maintain Growing Conditions

Spider plant babies can develop roots in water or directly in potting mix. Pick one method, keep the base moist while the leaves stay dry, and maintain stable conditions while roots form.
Follow these steps:
- For water rooting, place only the base in a small jar of water and replace it if it becomes cloudy.
- For soil rooting, place the base into lightly moist potting mix and keep the soil lightly moist rather than soaked.
- Keep the leaves above the water or soil surface at all times.
- Place the container in bright, indirect light and keep it away from strong direct sun while roots are forming.
5. Check for Root Growth

Give the plantlet enough time to form a healthy root system before moving it. New leaves and stronger roots are good signs that the baby is settling in.
Look for these signs:
- Water-grown roots reach about 1 to 2 inches long.
- Several roots begin growing from the base.
- New leaves start appearing.
- Soil-rooted babies feel more secure in the pot.
6. Pot the New Spider Plant

The final part of how to propagate spider plant is moving a rooted baby into its own container. A small pot and careful watering help it adjust after planting.
Key pointers:
- Choose a small pot with drainage holes.
- Place the roots into loose potting mix without bending them sharply.
- Keep the crown just above the soil when planting spider plant babies.
- Water lightly and let excess moisture drain from the pot.
Spider Plant Varieties and the Right Time to Plant Them
Spider plant varieties differ in leaf pattern, shape, and growth habit, but their planting needs are quite similar. For most spider plants, March through June is the preferred planting window. July and August can also work well indoors if the plant is protected from intense heat.
| Spider Plant Variety | Main Features | Recommended Planting Time |
|---|---|---|
| Vittatum | Green leaves with a broad white stripe through the center | March to June, with April and May being especially suitable |
| Variegatum | Green centers with creamy white leaf edges | March to June, once new spring growth begins |
| Bonnie | Curled green and white leaves with a compact form | April to June, when indoor conditions are warmer |
| Hawaiian | Green and cream striped young leaves that become greener with age | April to July, during active growth |
| Solid Green | Solid green leaves without white striping | March to July, when root growth is active |
| Zebra Grass | Narrow green leaves with pale margins | April to June, with steady light and mild temperatures |
Tip: For more reliable rooting, I’d suggest keeping the room around 65°F to 80°F and placing newly planted babies in bright, indirect light.
Mistakes to Avoid When Propagating Spider Plant Babies
Even a plant this easy to propagate can fail under a few avoidable conditions. Most issues come down to timing or overcorrecting on care, both of which are simple to fix once you know what to look for.
Watch out for these common missteps:
- Cutting too early: Removing plantlets before roots have started forming, which lowers survival odds
- Skipping the water rest: Using chlorinated tap water straight from the faucet without letting it sit out first
- Overwatering after transplant: Soaking newly potted babies too often, which leads to root rot
- Ignoring acclimation: Moving a plantlet from water rooting straight to soil without adjusting it to lower humidity first.
Aftercare Tips for Newly Propagated Spider Plants
The first month after propagation determines if a new plant thrives long-term or struggles to catch up. Once it’s past the initial rooting stage, care becomes far simpler and shifts closer to routine maintenance.
| Care Need | Best Practice | When to Apply |
|---|---|---|
| Light | Place in bright, indirect light and avoid harsh direct sun | Throughout early growth |
| Water | Water when the top inch of soil feels dry | Check every few days |
| Fertilizer | Use a diluted balanced fertilizer once roots are established | After about 4 weeks |
| Repotting | Move to a slightly larger pot when roots fill the current container | As the plant becomes root-bound |
Most of the plants I’ve propagated this way are now full, mature spider plants in their own right, producing plantlets of their own.
Final Thoughts
Learning how to propagate spider plants is one of the more rewarding things you can do as a plant owner.
The process is forgiving, the results are quick, and before long you’ll have more plants than you know what to do with.
From my experience, the biggest difference between success and failure comes down to patience – waiting for roots to form before cutting, and not overwatering once the baby is potted.
Get those two things right, and the rest tends to take care of itself.
I hope this guide gives you the confidence to get started. With the right timing and a little attention in those first few weeks, your spider plant babies will thrive.
Frequently Asked Questions
Do Spider Plants Need to Flower Before Producing Babies?
Usually, spider plants produce small flowers along their runners before or around the time plantlets begin forming.
Do Spider Plant Babies Need Rooting Hormone?
No, spider plant babies naturally develop roots and normally establish well without rooting hormone.
Can Spider Plants Be Grown From Seeds?
Yes, although seed propagation is less common. Seed-grown plants may also differ in appearance from the parent plant.