How to Install Recessed Lighting: A DIY Guide
Installing recessed lighting is a great way to brighten any room without taking up ceiling space. Whether you’re working on a kitchen, living room, or hallway, recessed lights offer a clean, modern alternative to traditional fixtures.
This guide walks you through the entire process from planning the layout to wiring and finishing so you can get it done safely and confidently. With the right tools and a little patience, you’ll have a beautifully lit space without hiring anyone.
What You Need to Know Before Installing Recessed Lighting
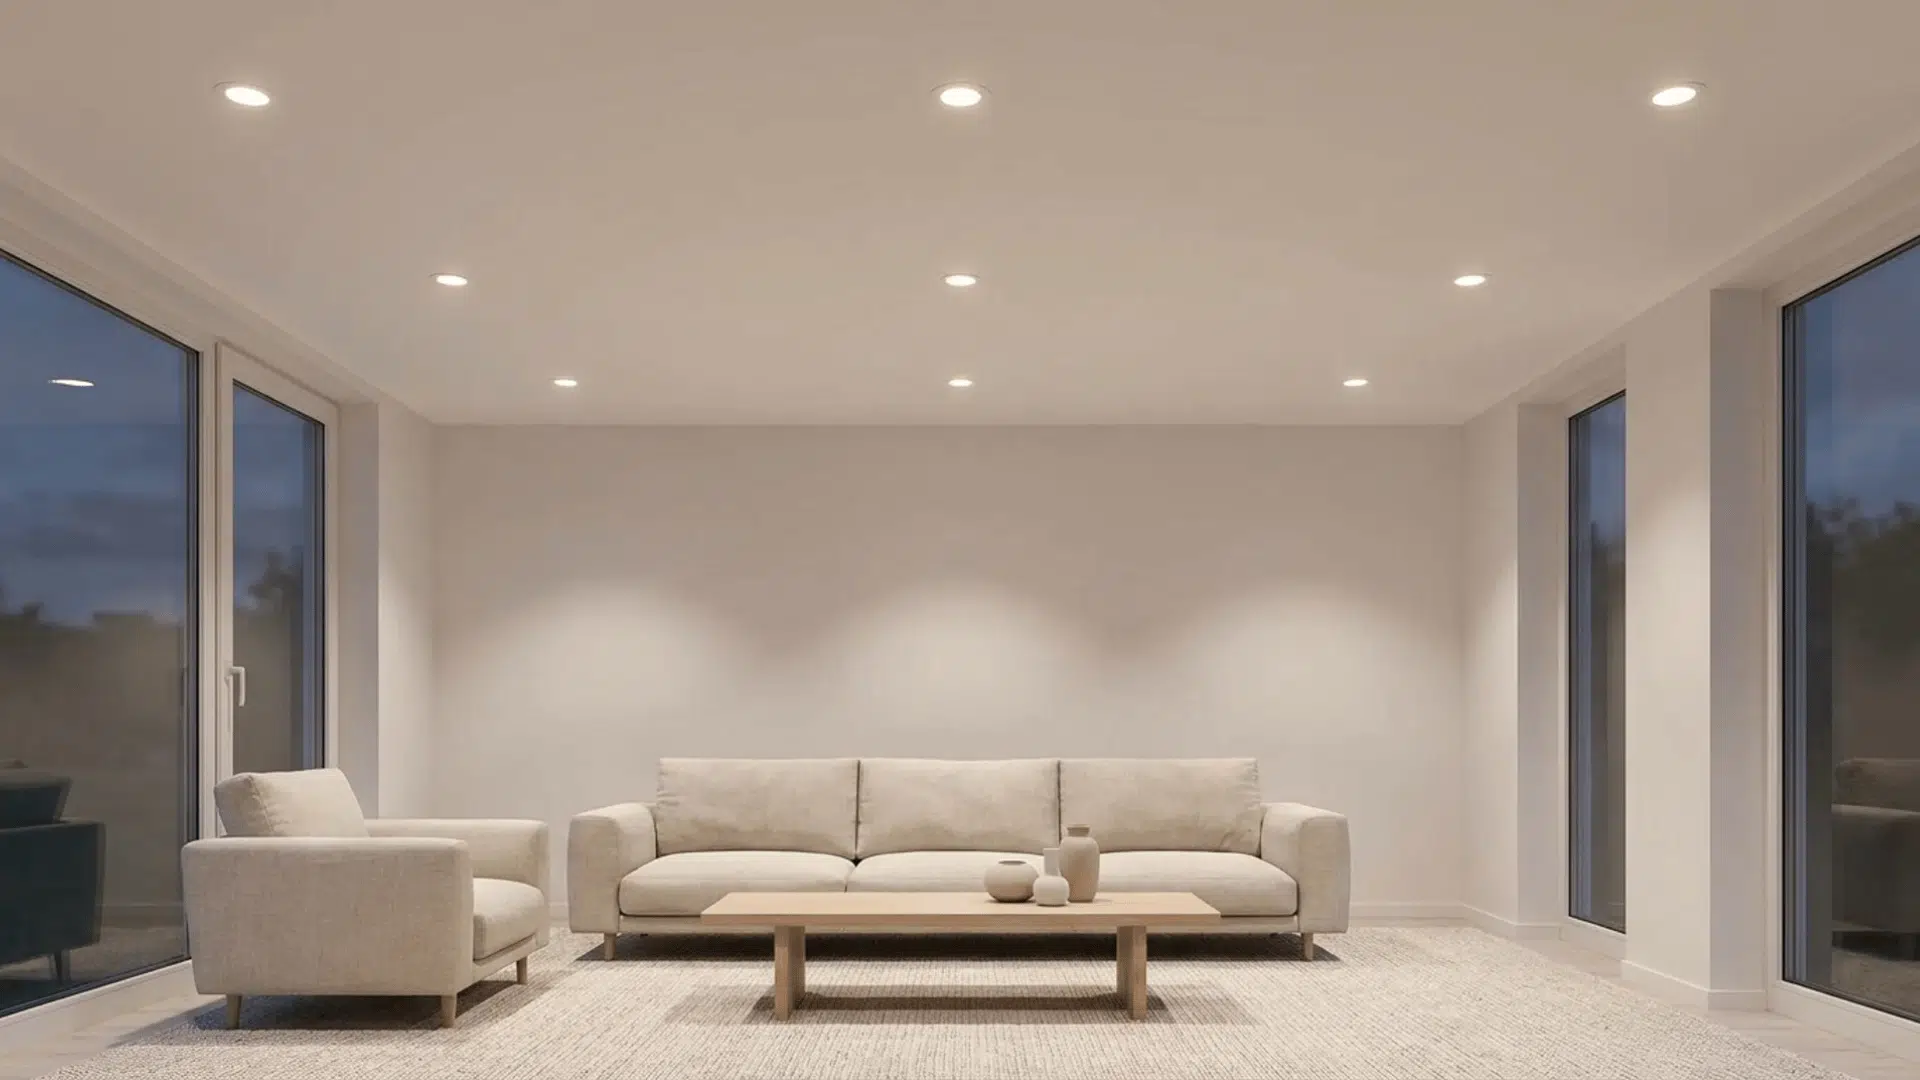
Before you start, a little prep goes a long way. Recessed lights sit flush with the ceiling, so there’s no hanging fixture or bulky shade, just clean, even light across the room.
Safety comes first. Always turn off the power at the breaker before touching any electrical components.
You’ll need a few basic tools: a hole saw for cutting ceiling openings, a screwdriver to secure the fixtures, and a wire stripper for the electrical connections.
Also, check your circuit before you begin. Make sure it can handle the additional load, and plan your wiring route before cutting anything.
Preparing the Ceiling for Installation
Getting the ceiling layout right is one of the most important parts of recessed lighting installation. Careful measuring and clean cuts help the lights sit evenly, fit properly, and avoid unnecessary ceiling damage.
1. Measure and Mark the Placement
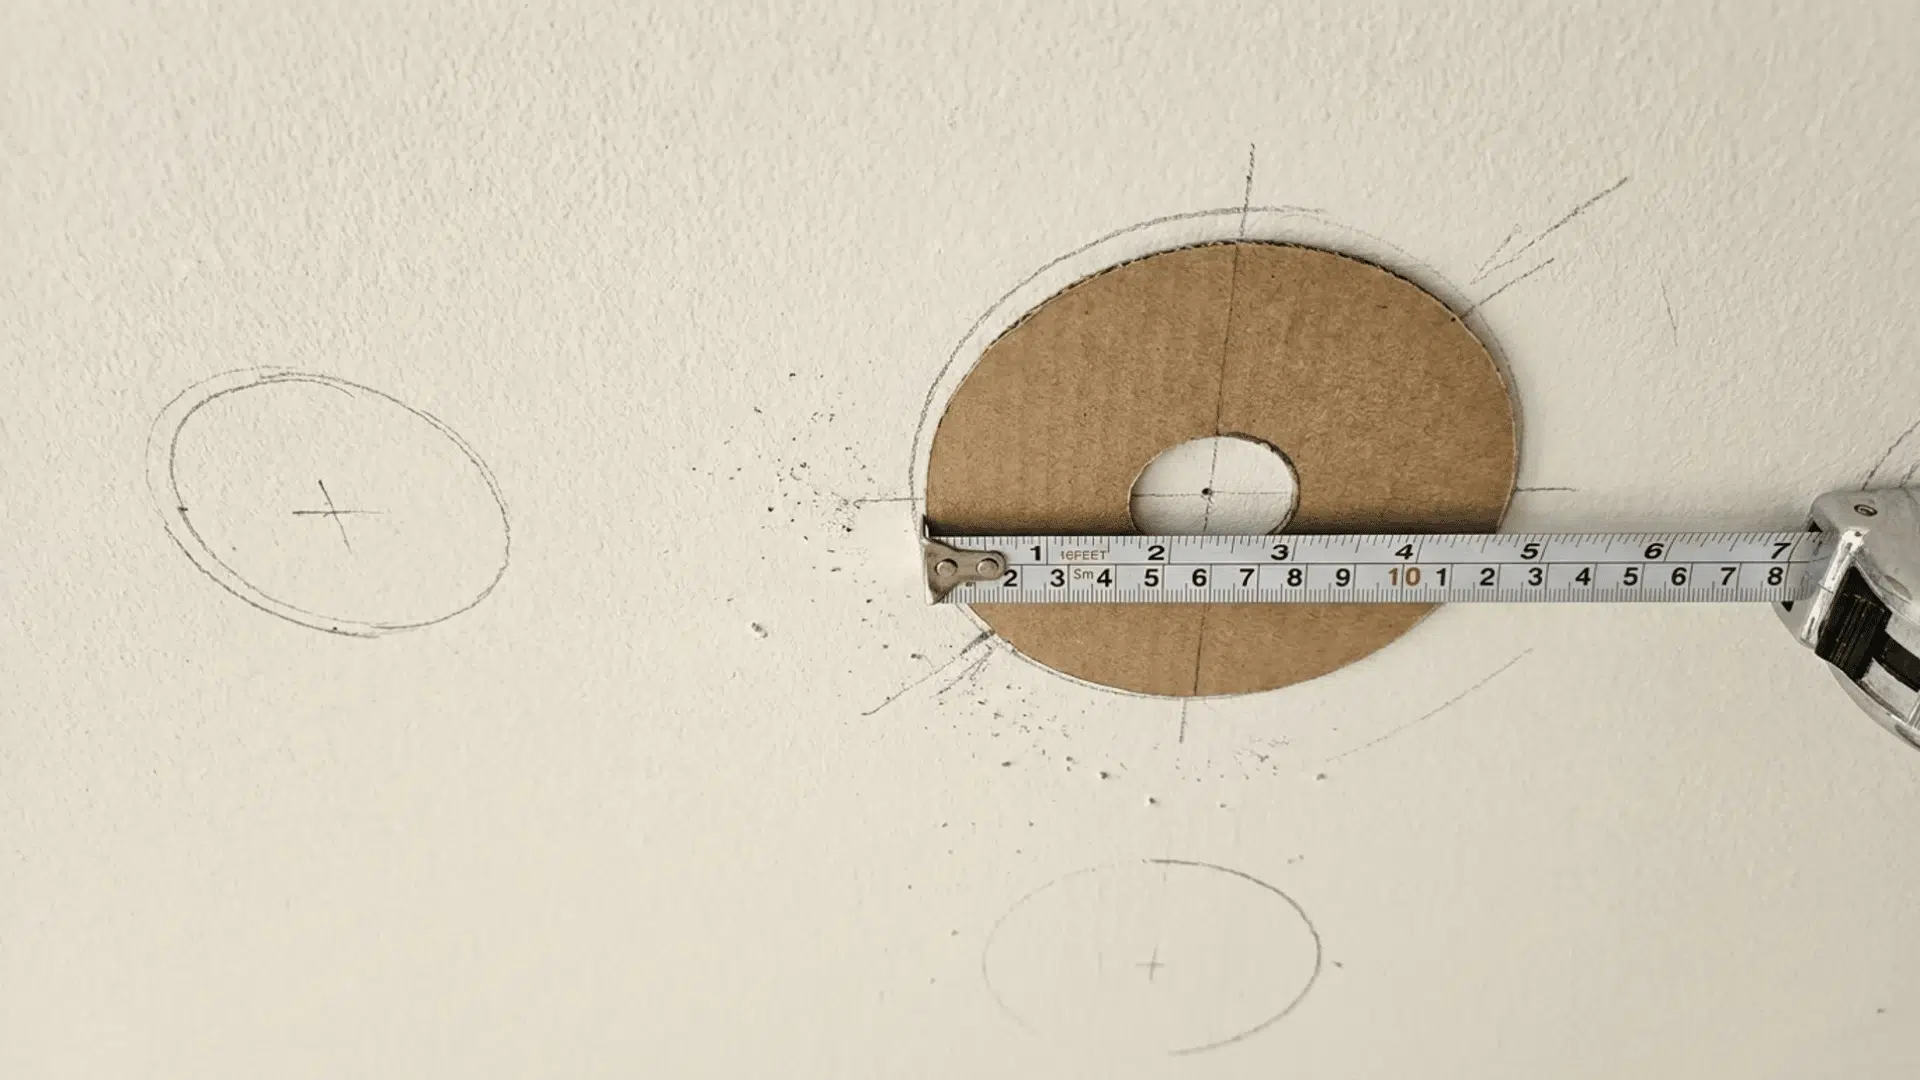
- Use a tape measure to mark the exact locations for each recessed light.
- Ensure the marks are straight and aligned for an even layout.
- Use a template to ensure consistency in hole placement.
2. Select the Correct Hole Saw

- Choose a hole saw with a diameter that matches the diameter of your recessed light housing.
- Double-check the manufacturer’s specifications to confirm the size.
- Consider a variable-speed drill for greater precision.
3. Cut the Holes with Care
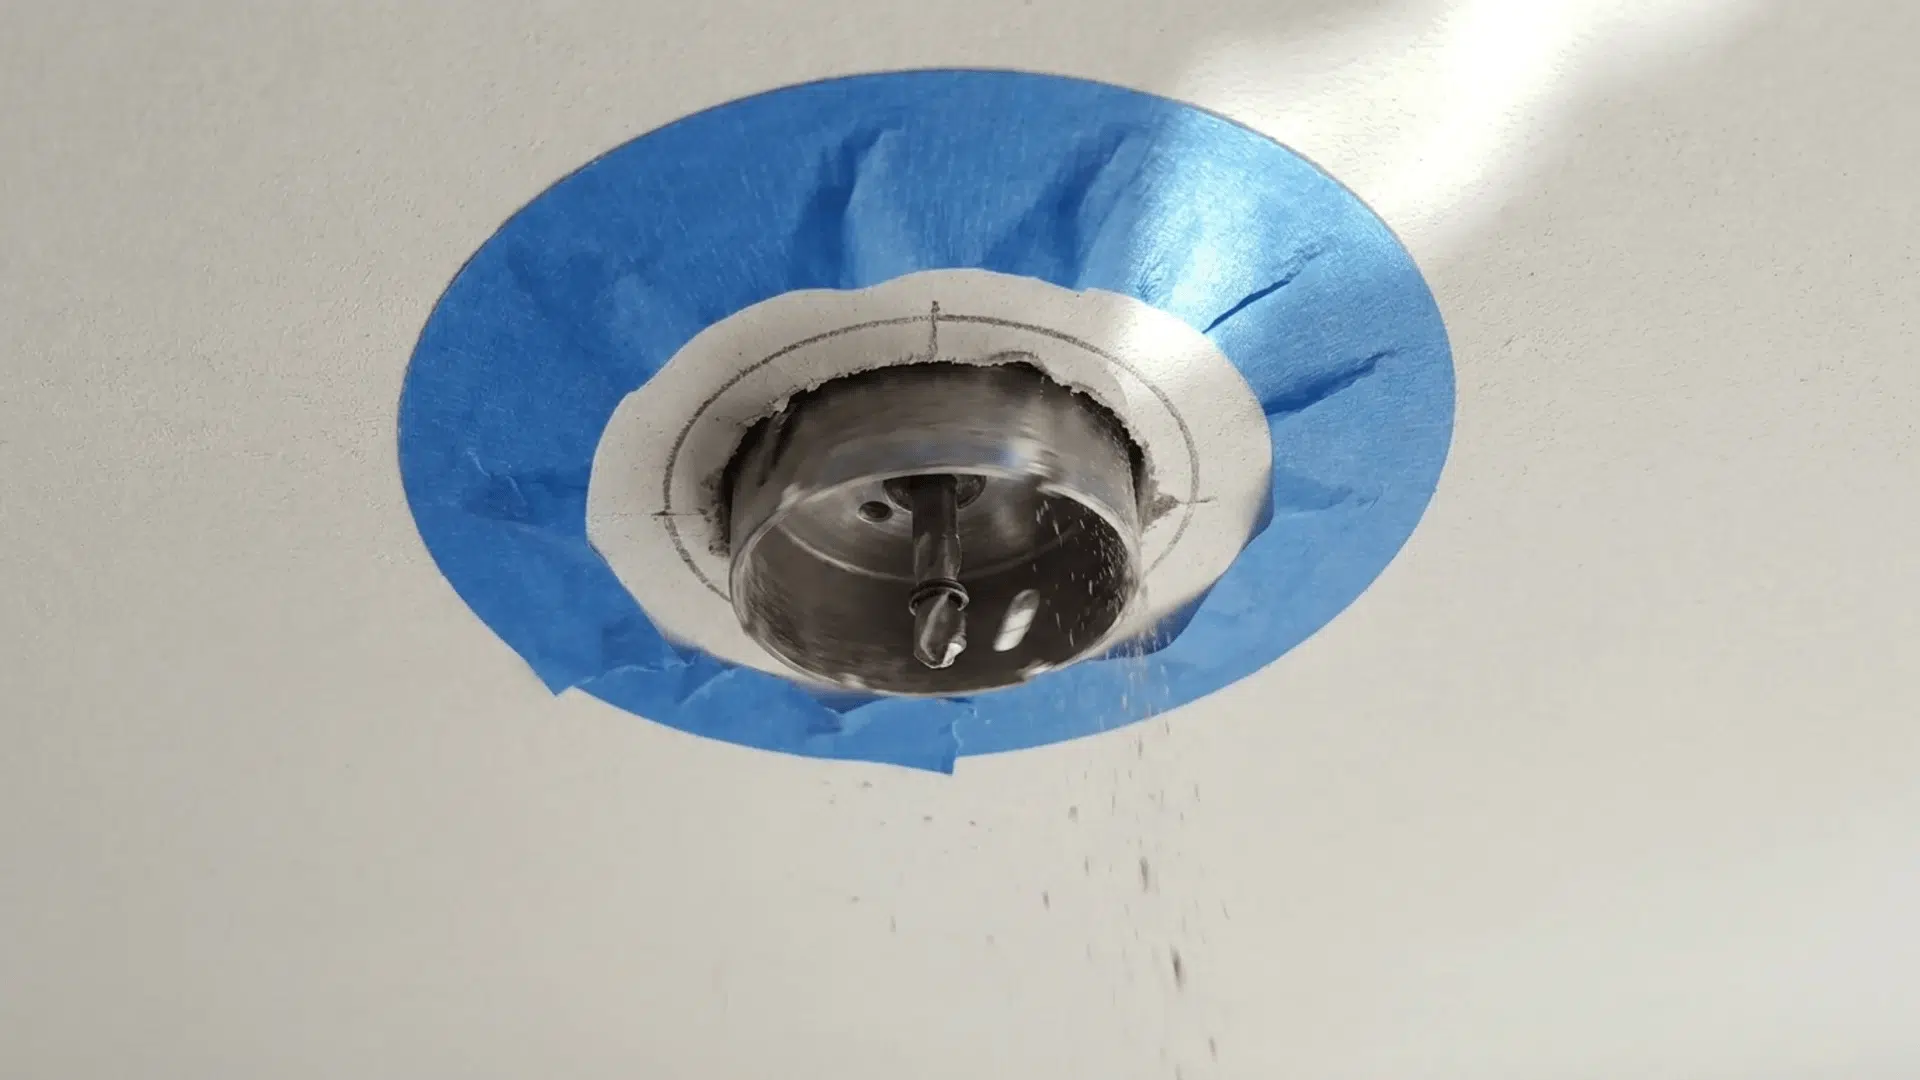
- Start drilling slowly to avoid damaging the ceiling or the hole saw slipping.
- Maintain a steady hand and keep the drill straight for clean edges.
- Use painter’s tape around the marked area to prevent ceiling damage and ensure accurate cutting.
Installing the Recessed Lighting Fixtures: Step-by-Step
Installing recessed lighting fixtures becomes much easier once the ceiling holes and wiring are properly prepared. Taking your time during installation helps the lights fit securely, work safely, and create a clean finished look.
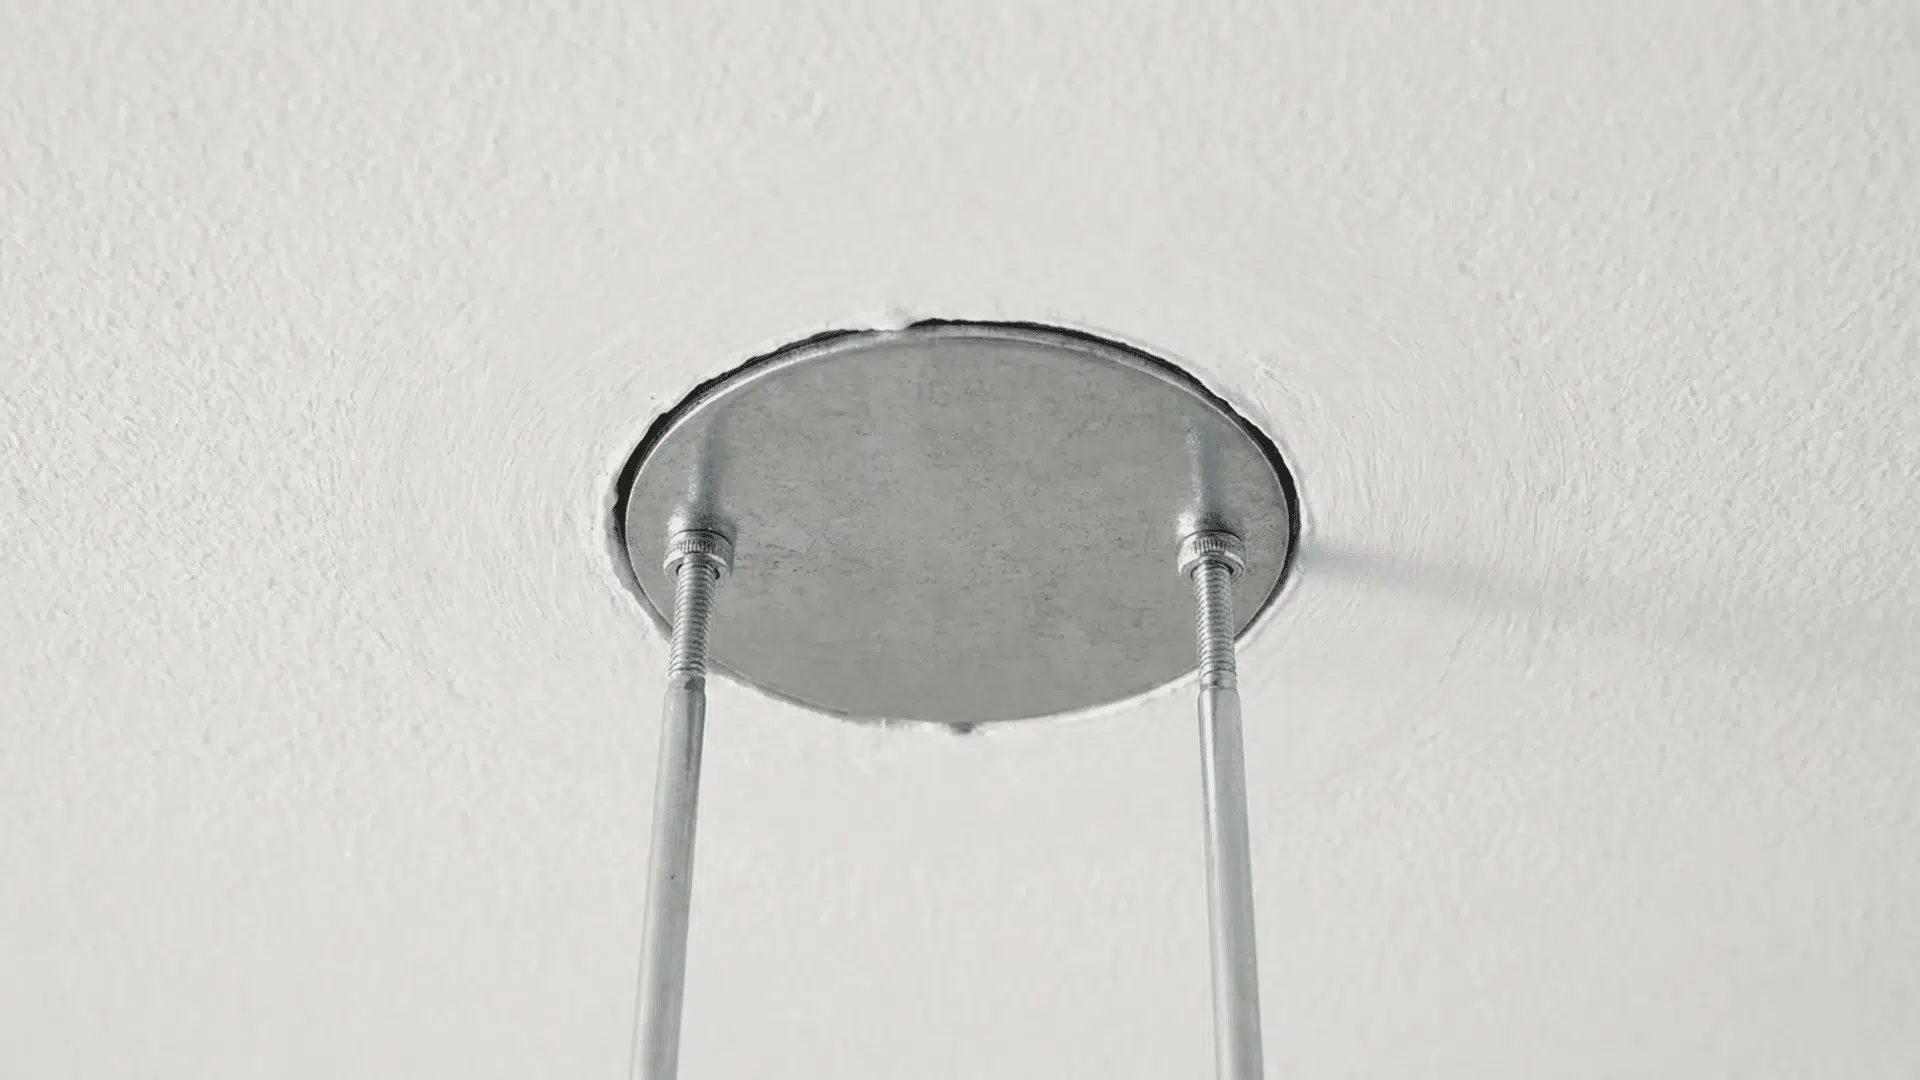
Step 1: Insert the Can or Housing
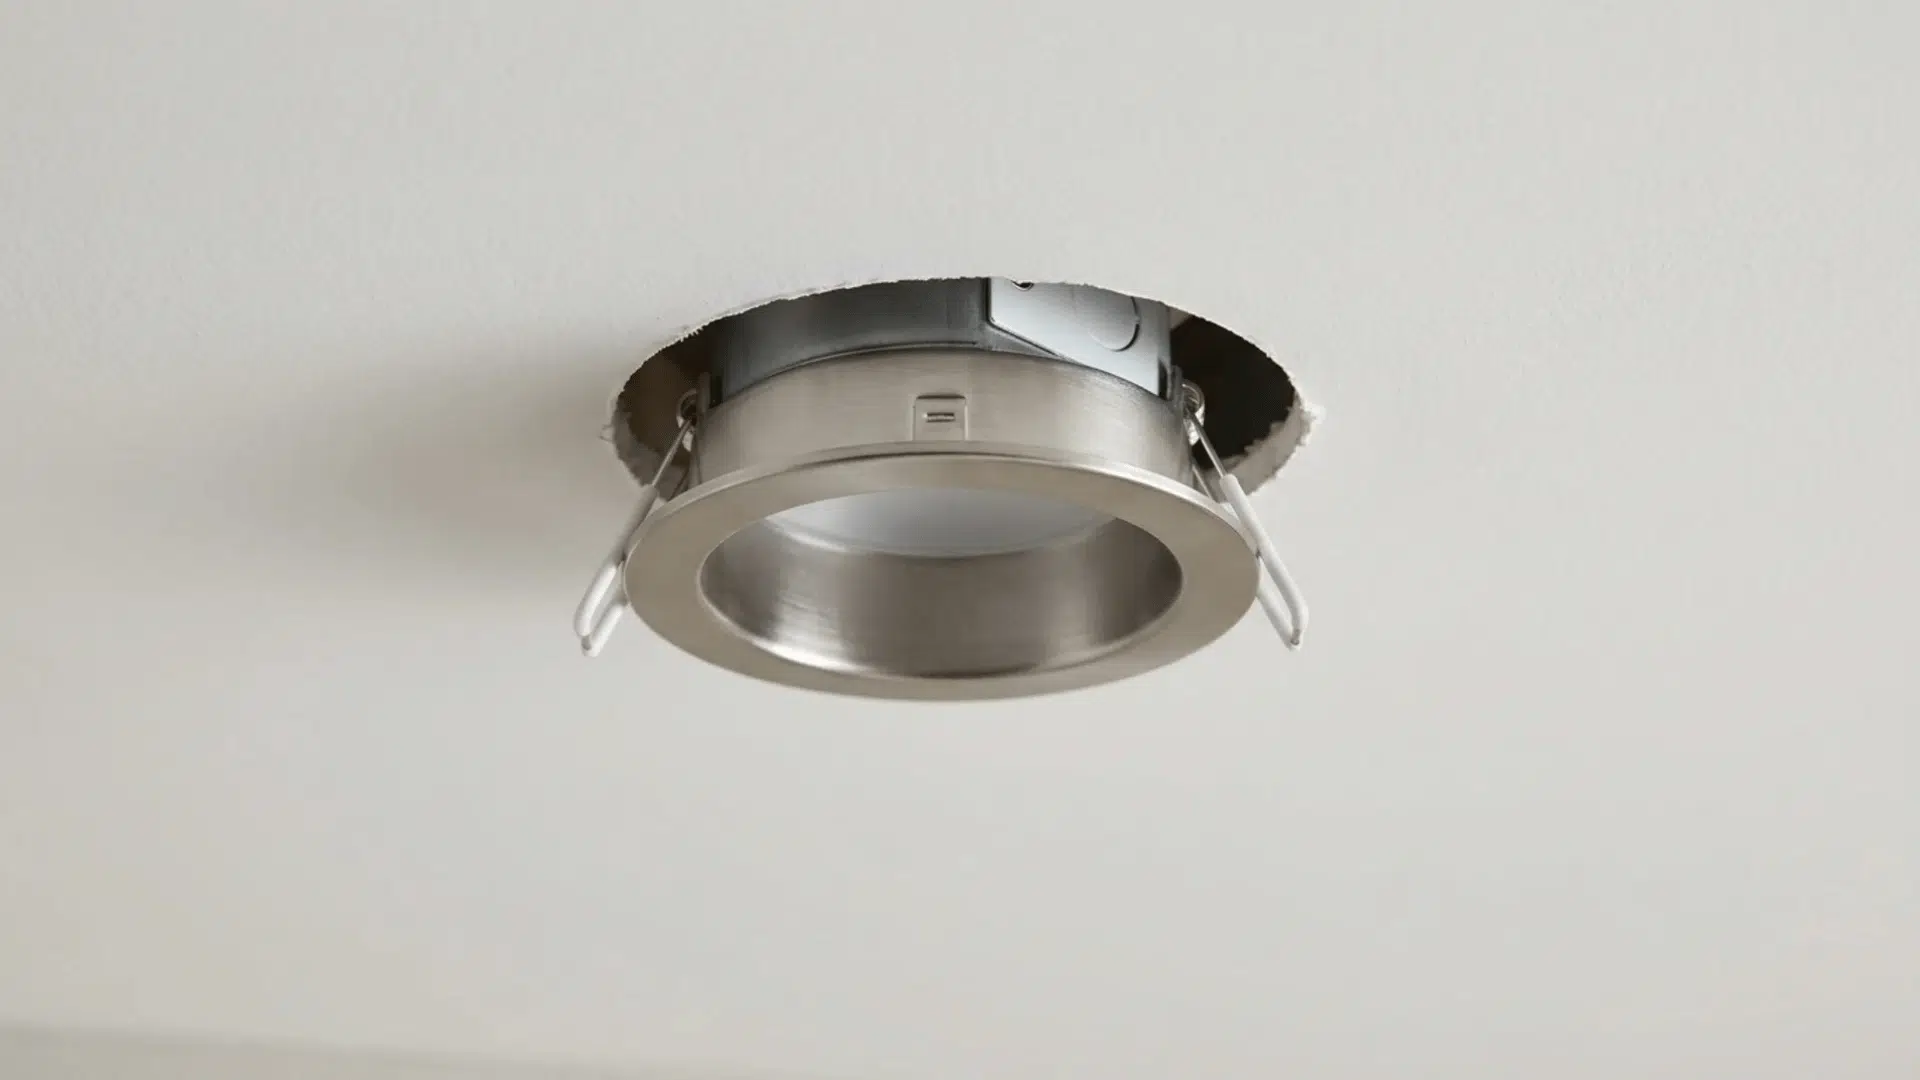
Begin by placing the can or housing into the hole you’ve cut in the ceiling. Gently slide it into the opening, making sure it fits snugly and sits flush with the ceiling.
Take your time to ensure it’s positioned correctly. If needed, adjust the housing slightly to ensure it’s level and fully seated, as this will prevent issues when securing it later.
Step 2: Secure the Fixture
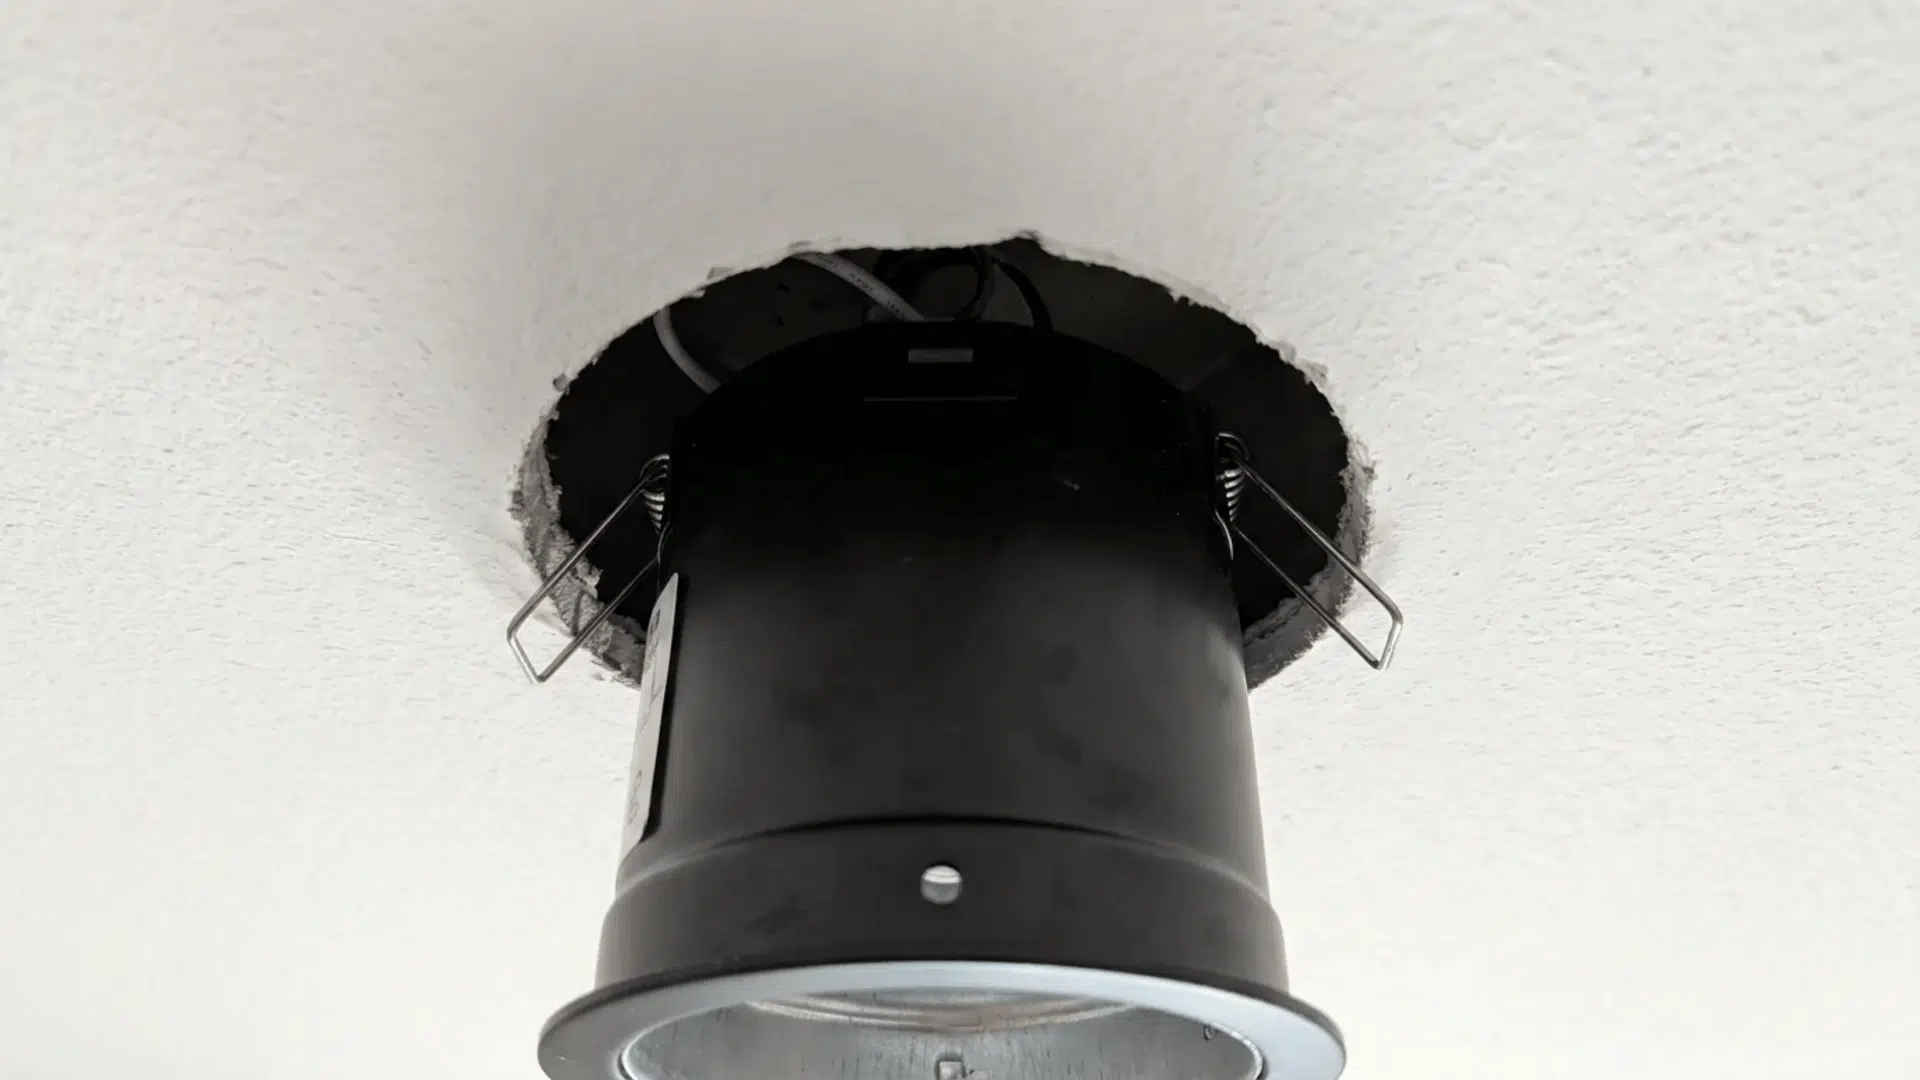
Use the spring clips or brackets that come with your recessed light housing to secure the fixture in place.
Adjust the clips or brackets as needed to ensure the can is securely held and doesn’t shift. This will keep the fixture stable once installed.
Step 3: Connect the Wiring
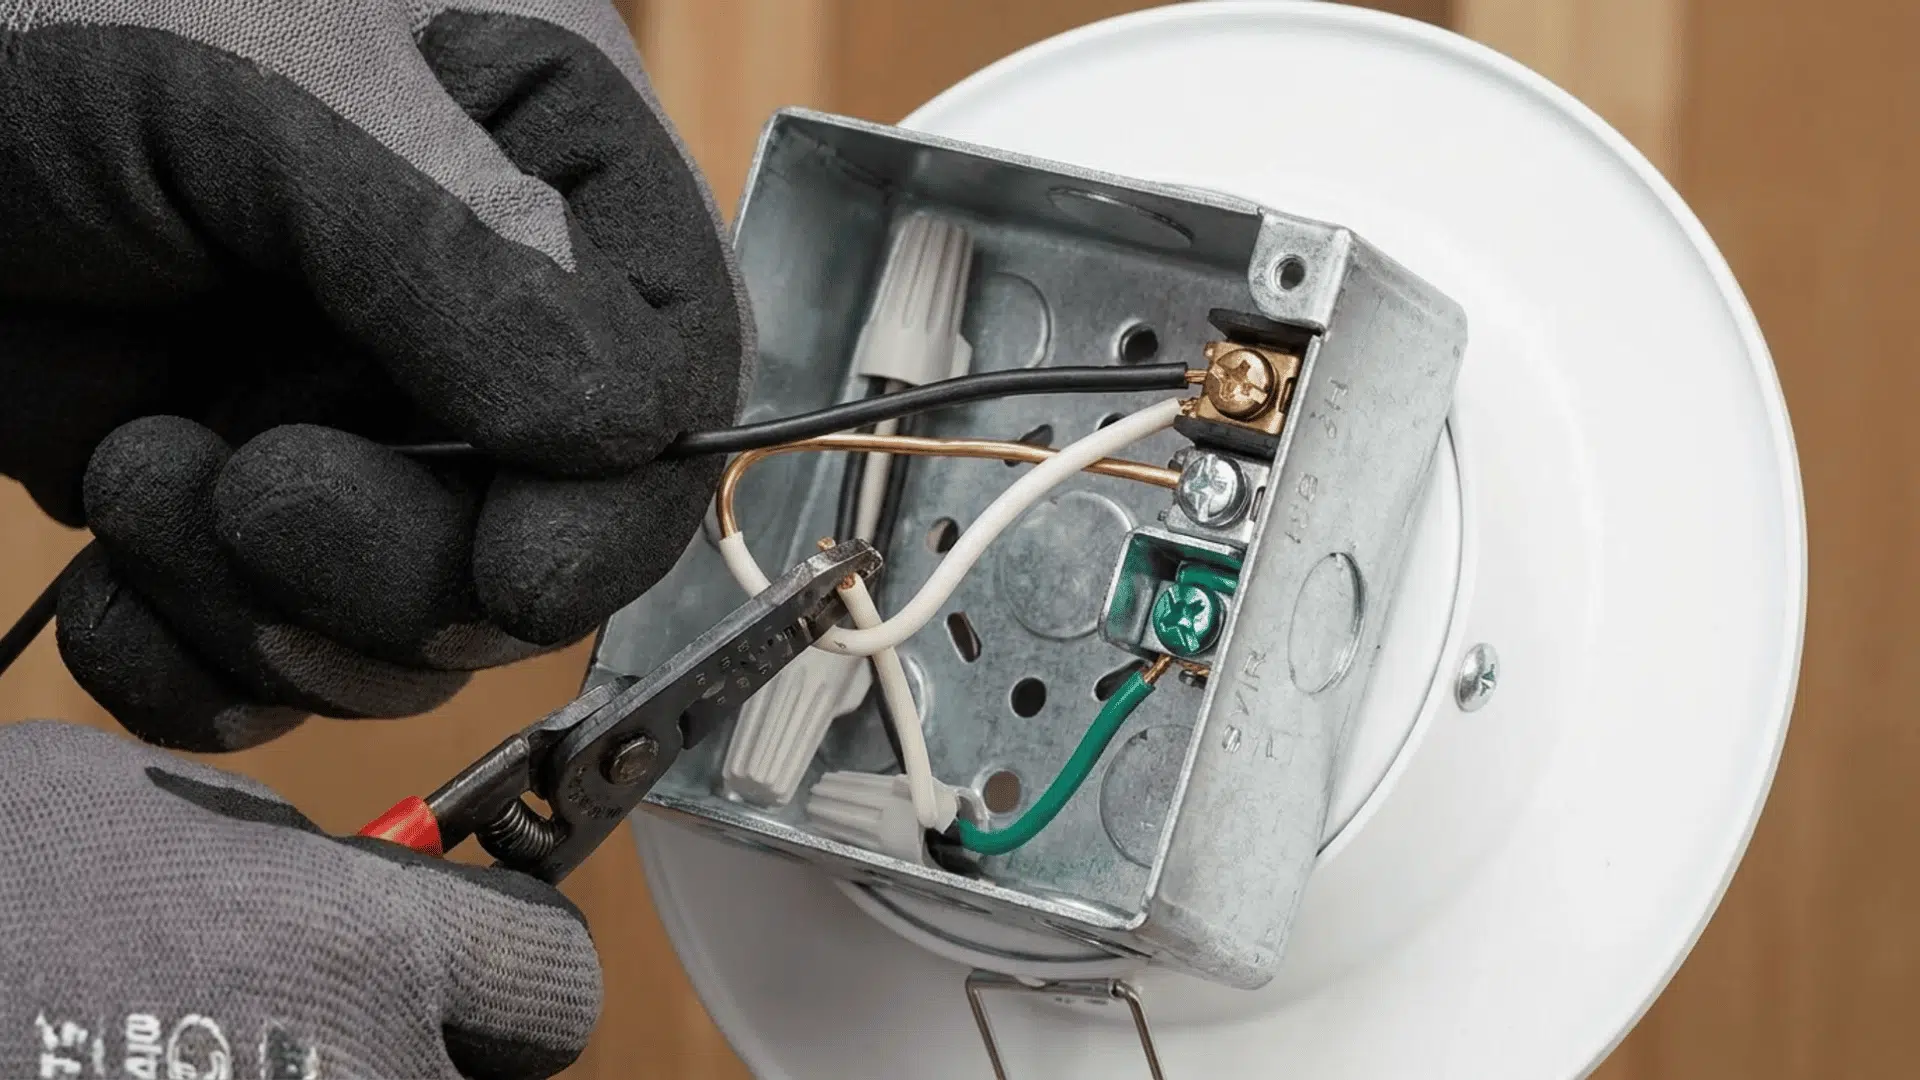
Strip the wires and connect them to the corresponding terminals on the fixture’s junction box.
Typically, the black wire connects to the brass terminal, the white wire to the silver terminal, and the ground wire to the green terminal. Make sure the connections are firm and secure.
Step 4: Tuck the Wires Into the Junction Box
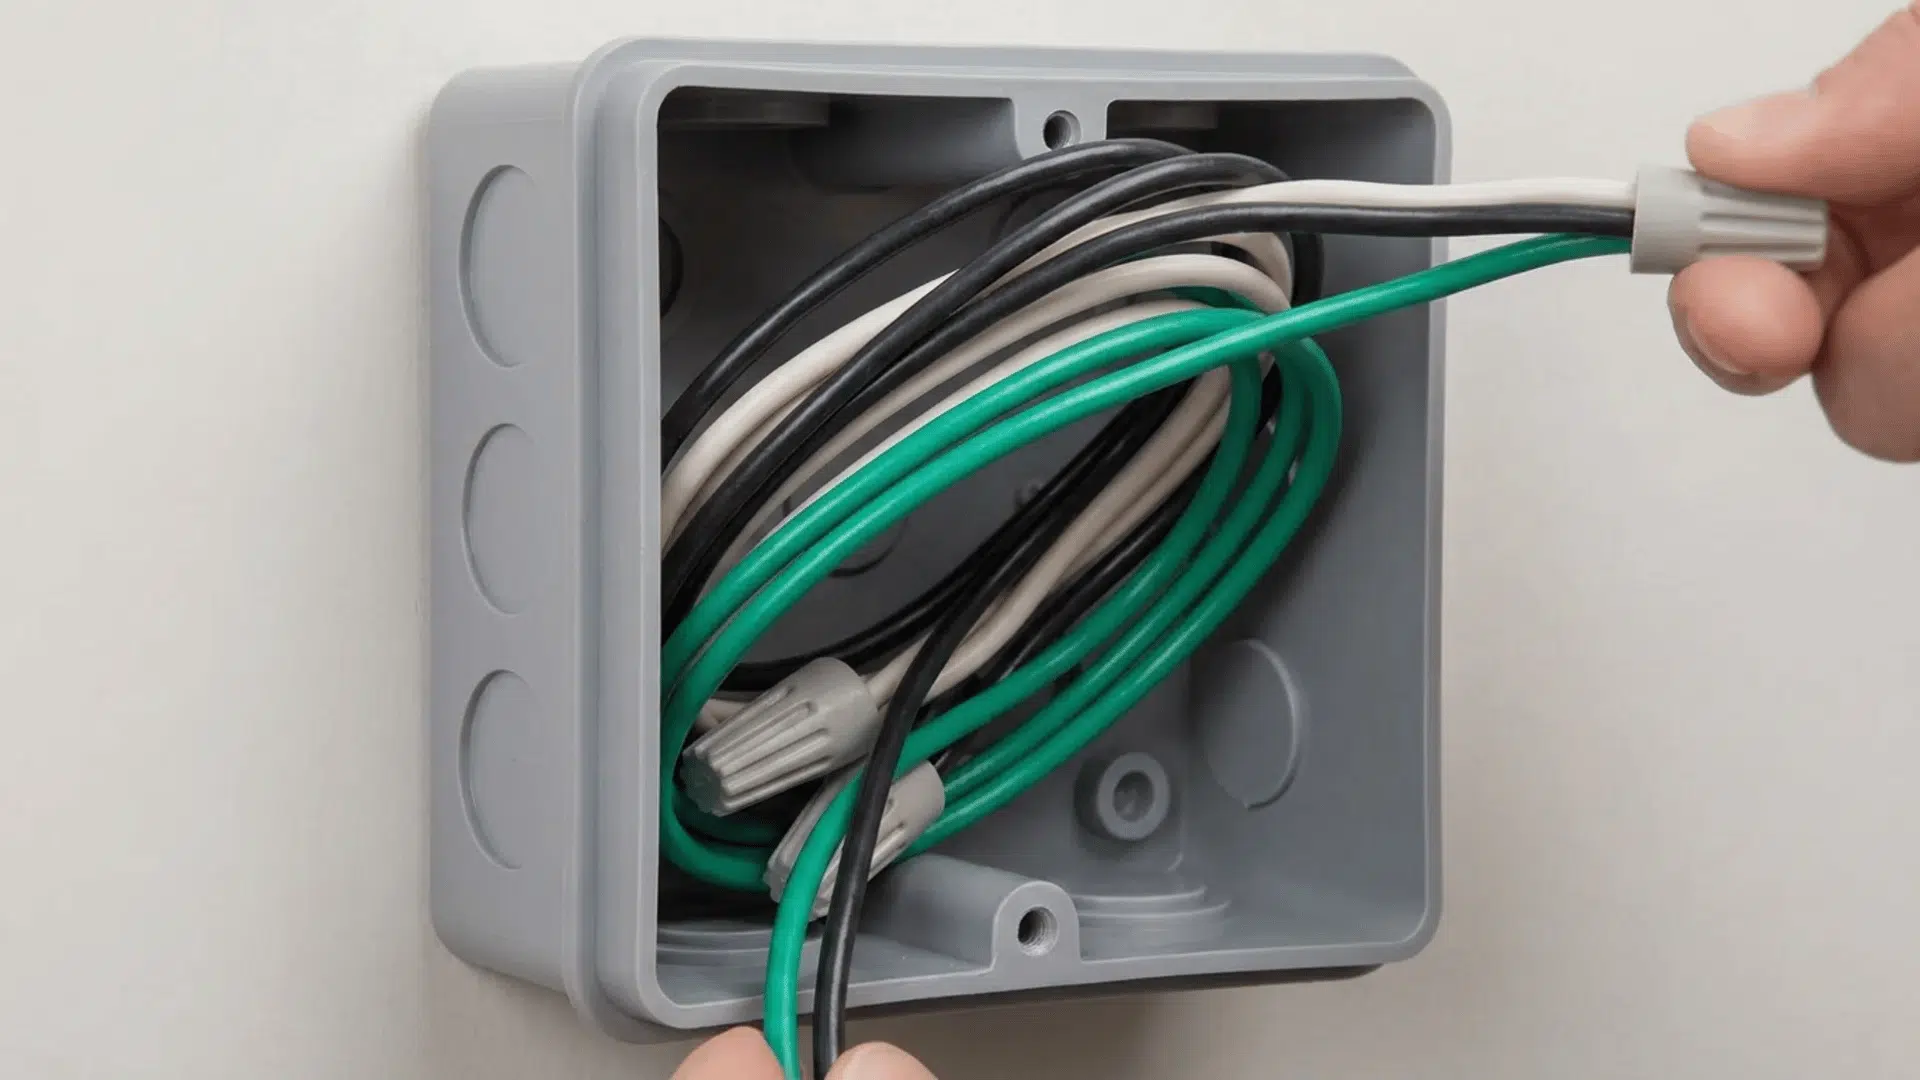
After connecting the wires, carefully tuck them into the junction box, making sure none are exposed or at risk of being pinched.
This helps prevent any electrical issues down the road. Use a non-metallic tool to gently push the wires in, ensuring they’re neatly arranged and won’t interfere with the cover.
Step 5: Secure the Junction Box Cove
Finally, attach and secure the cover to the junction box, ensuring it is tight and flush with the ceiling.
This will protect the wiring and complete the installation process. Double-check that the cover is secure and there are no gaps, as this will prevent dust or debris from entering the box.
Connecting and Testing the Electrical Wiring
- Connect Wires: Join the black wires, then the white wires, and finally the ground wires.
- Secure with Wire Nuts: Twist wire nuts on each connection.
- Verify Connections: Ensure all wires are firmly connected.
- Test Power: Turn the power on and check the lights. If they don’t work, recheck the connections.
Finalizing the Installation: Trim and Bulbs
With the wiring done, press the trim into the recessed housing until it sits snugly against the ceiling.
Choose a bulb that fits the fixture’s wattage rating and your brightness needs. LED bulbs are a good default; they run cooler and use less power. Twist the bulb in securely before moving on.
Do a final check on each trim piece – no movement, no gaps, and nothing loose.
How Much Does It Cost to Install Recessed Lighting?
| Cost Component | DIY Installation | Professional Installation |
|---|---|---|
| Per Fixture Cost | $75 – $150 | $150 – $500 |
| Materials (Fixtures, Wires, Bulbs) | $30 – $100 | Included in the service cost |
| Labor Costs | None (self-installed) | $100 – $300 per fixture |
| Total Cost (per fixture) | $75 – $150 | $250 – $800 |
Tips for a Professional Finish
A few small details make the difference between an okay result and one that looks professionally done. Keep these in mind before you wrap up:
- Space lights evenly for uniform coverage across the room
- Use IC-rated cans if the fixtures will be in contact with insulation
- Install dimmable switches for adjustable light levels
- Choose high-quality trim for a cleaner finish
- Match bulb wattage to the fixture rating. Don’t overload the circuit
- Test each light before doing the final trim install
- Wipe down trims and bulbs before installing to avoid smudges
Conclusion
Recessed lighting is one of the more rewarding DIY upgrades you can do at home. The process is manageable when you take it step by step, measure carefully, wire safely, and test before you finish.
Done right, the result is clean, even lighting that looks like it’s always been part of the room.
Which room are you starting with? If you run into any issues during installation, reach out. We’re happy to help you work through it.