23 DIY Wine Rack Ideas: Easy Projects for Every Skill Level
Want to show off your wine collection without spending a fortune? Building your wine rack is easier than you might think. With some basic tools and materials, you can create a custom rack that fits your space perfectly.
Either you need a small countertop display or a full cabinet, there’s a DIY option that works for you.
In this guide, we’ll share simple wine rack ideas that anyone can build, plus tips to avoid common mistakes.
Get ready to create something useful and good-looking that will keep your bottles organized and properly stored.
Why Build Your Wine Rack?
Making your wine rack is a smart choice for several reasons. First, you’ll save money since you only need basic materials like plywood, which costs much less than buying a pre-made rack.
You can also customize the size to fit exactly where you need it – in a cabinet, on a counter, or as a standalone piece. The style and color can match your home perfectly when you build it yourself.
Plus, it’s a fun project that gives you a useful item you’ll enjoy for years. The sense of accomplishment when you finish and place your first bottle in your creation makes the effort worthwhile.
DIY Wine Rack Ideas
Looking for smart ways to store your wine collection? These DIY wine rack ideas range from basic builds to more complex projects.
You’ll find options that fit any space, style, or skill level – all while adding a useful and good-looking addition to your home. Try one this weekend!
1. Herringbone Pattern Wine Rack
This eye-catching wine rack features a striking herringbone pattern that is both useful and beautiful. It can be built quickly using eight pieces of 1×8 pine wood and a pocket-hole jig.
The magic happens when you add two different color stains to make the pattern stand out. Sand everything smooth, add your finish, and you’ve got a perfect gift for any wine lover.
The angled slots keep bottles secure and properly stored at the same time.
2. Wall-Mounted Pallet Wine Rack
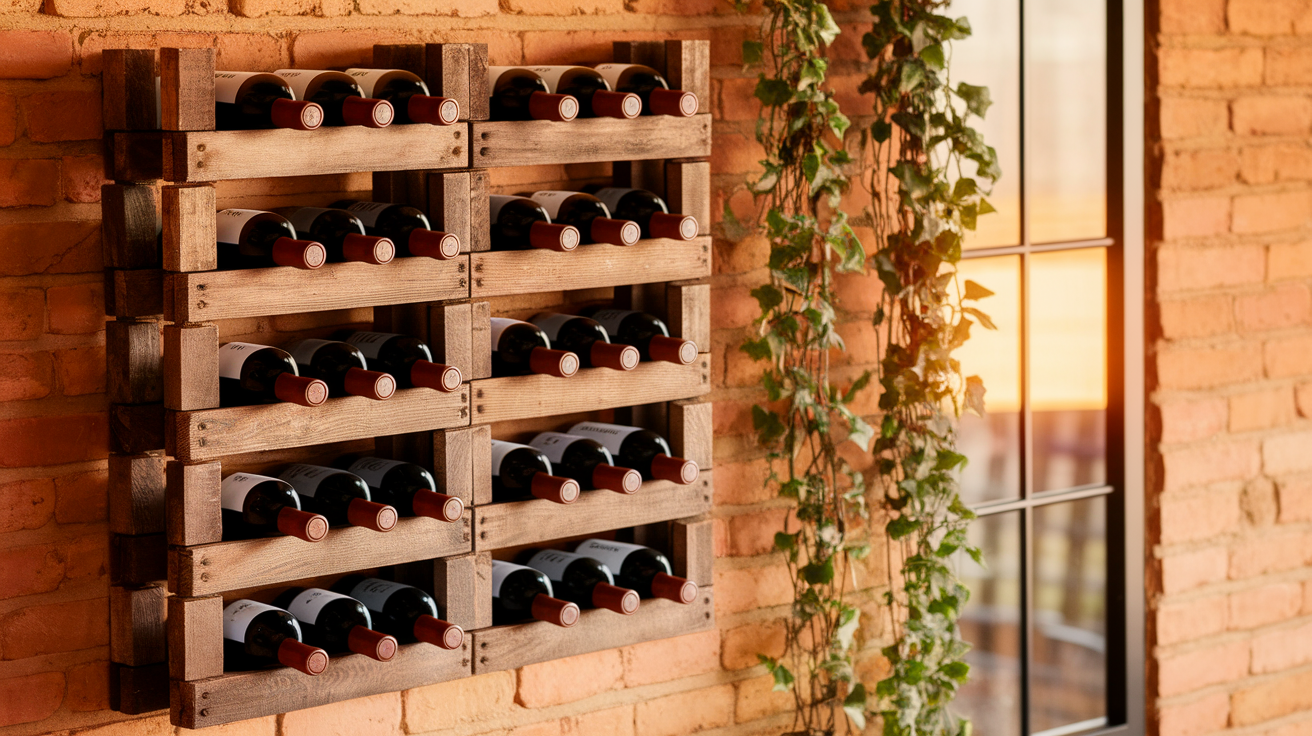
Turn old pallets into a useful wall-mounted wine rack that adds rustic charm to any room. Pallets are often free from stores that would otherwise throw them away.
Clean the wood, sand it smooth, and cut it to your needed size. The natural gaps in pallet boards work well for holding wine bottles securely.
You can keep the weathered look or add stain for a more finished appearance. This project is perfect for outdoor spaces like patios, too.
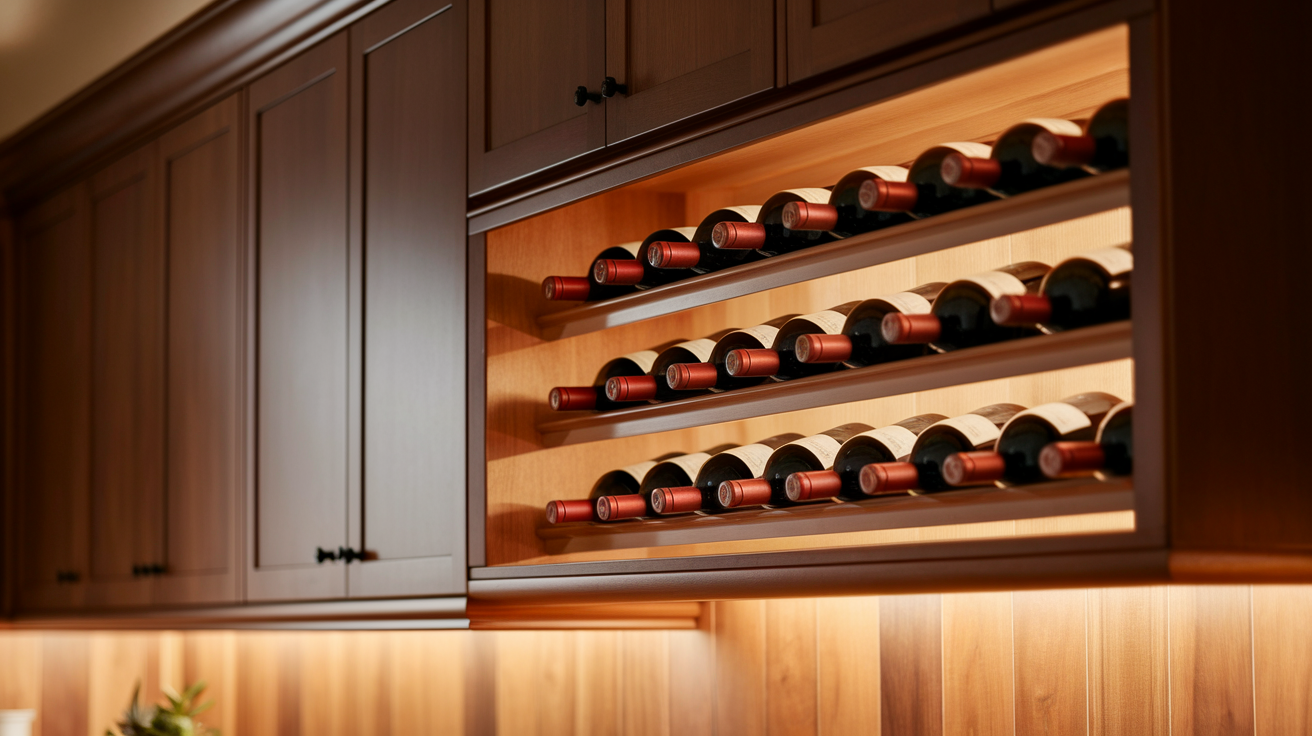
3. Under-cabinet hanging Wine Rack
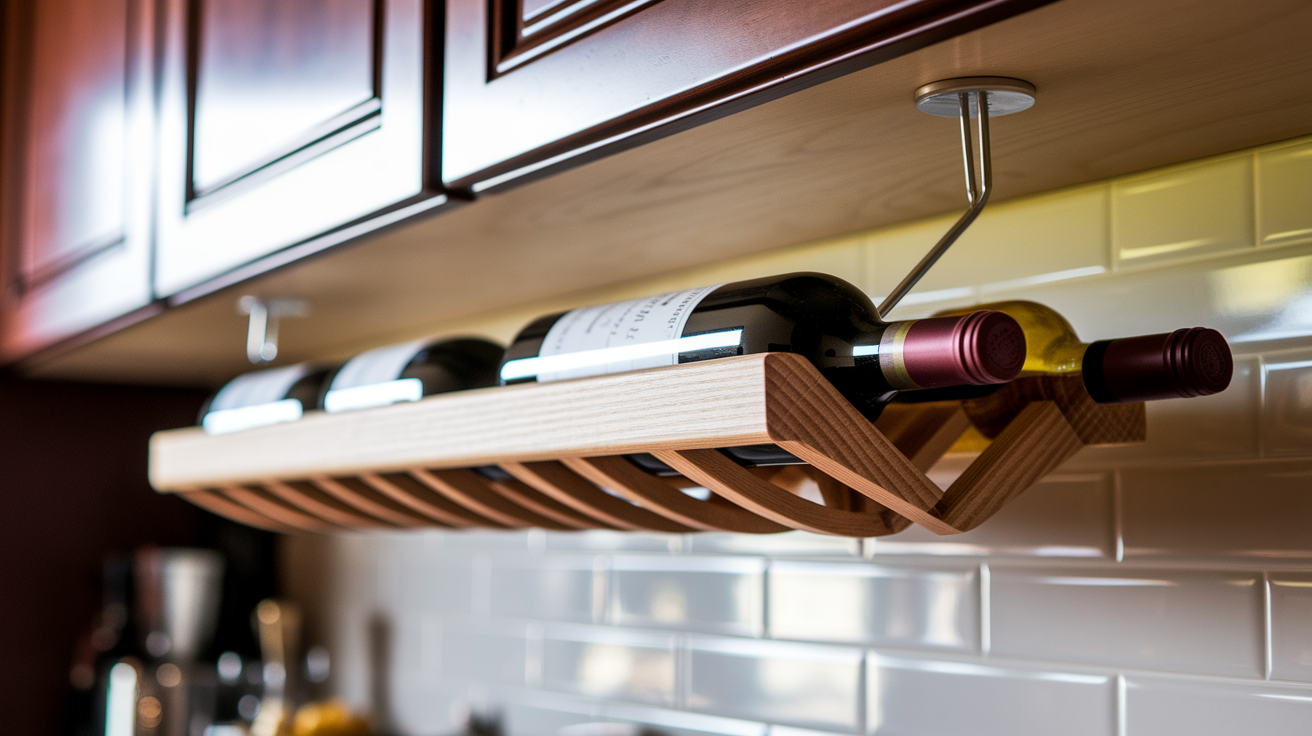
This smart hanging rack makes use of wasted space beneath your kitchen cabinets. All you need are two 1x4s and a strip of 3/4-inch plywood cut to the length of your cabinet. This design can hold several bottles in an often unused spot.
The bottles slide in horizontally, keeping corks moist and your wines properly stored. The rack stays out of the way but keeps your favorite bottles easily within reach when cooking or entertaining.
4. Grid-Style Plywood Wine Rack
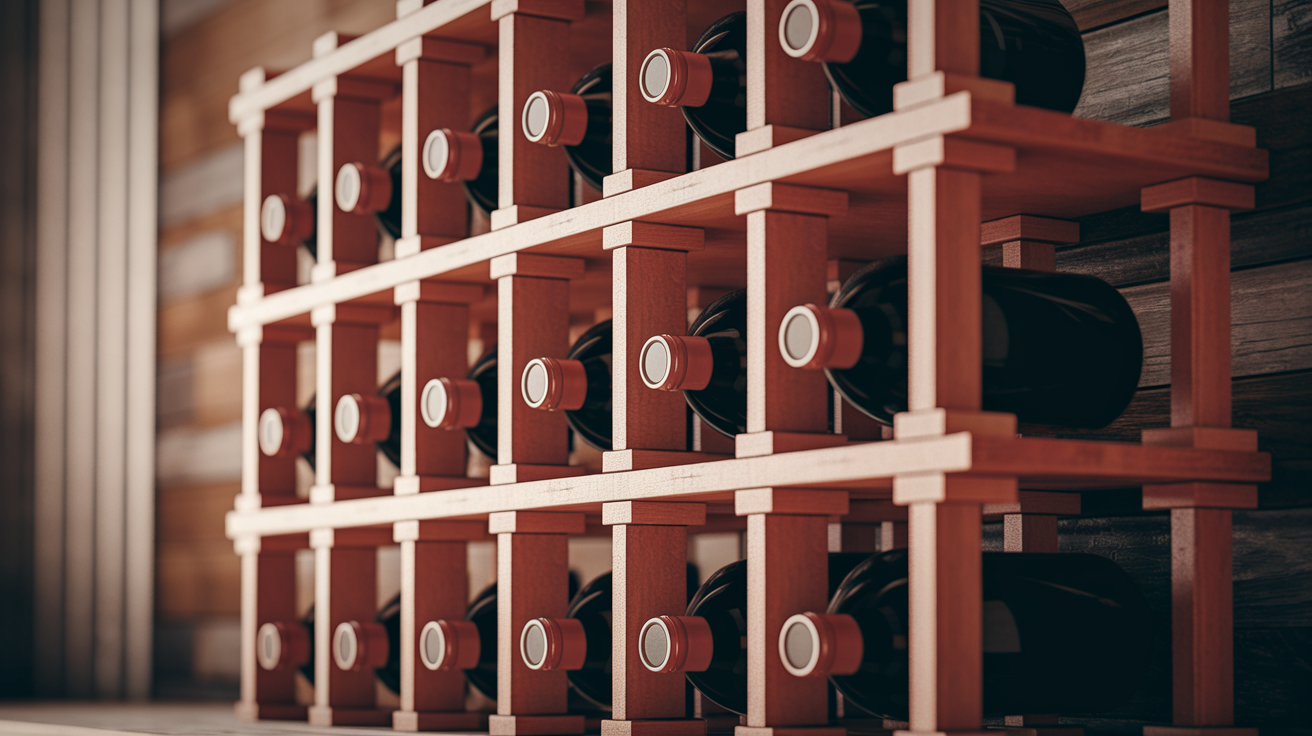
This strong, versatile design works either as a standalone unit or built into a cabinet. Made from 3/4-inch plywood, the interlocking grid creates perfect spaces for wine bottles.
The design is clever – horizontal and vertical pieces fit together with cut slots, meaning no screws needed! You can make it any size to fit your space exactly. The finished piece is heavy-duty enough to hold many bottles safely, making it great for serious collectors.
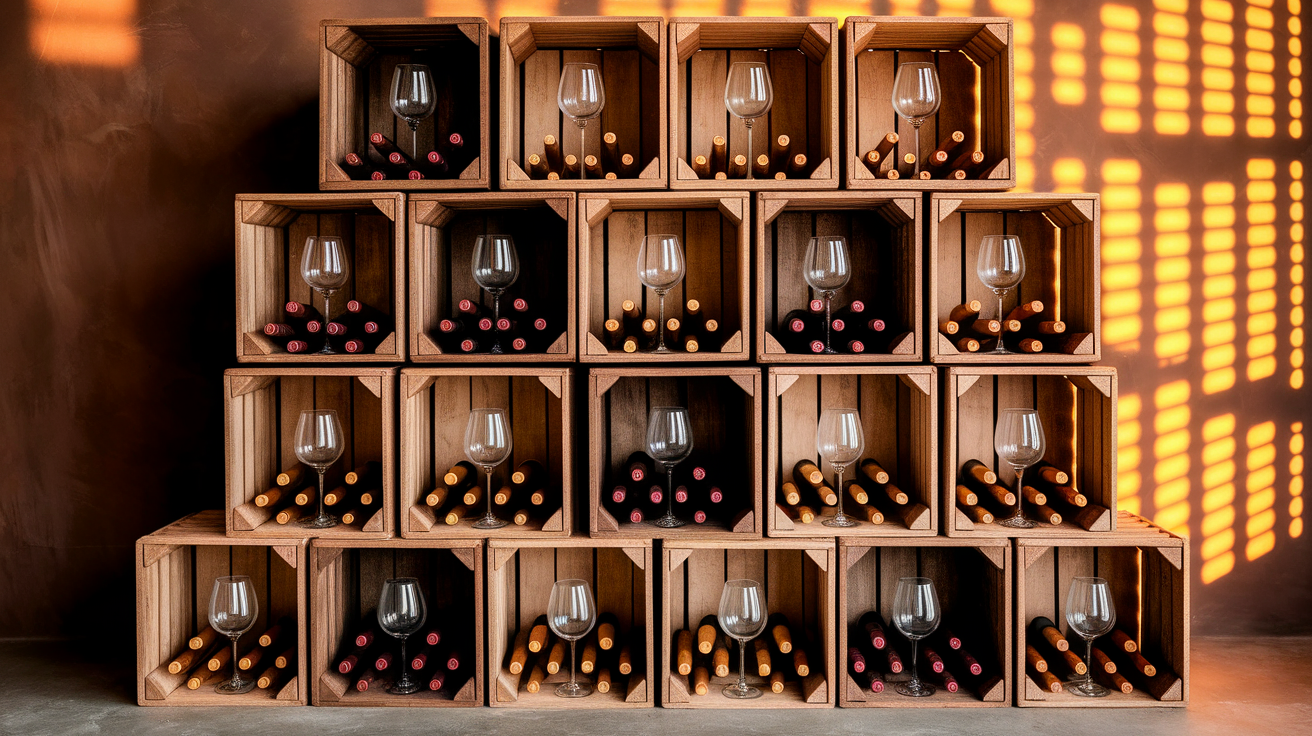
5. Wine Box Storage Rack

Wine boxes with built-in dividers make perfect storage containers – and they’re often free! Visit any store that sells wine and ask if they have empty boxes to give away.
These boxes, originally designed to protect glass bottles during shipping, have cardboard dividers already in place. Besides wine, they work wonderfully for organizing shoes, small items, or craft supplies.
Stack multiple boxes for more storage or paint them to match your home style.
6. Spiral Cellar Wine Rack
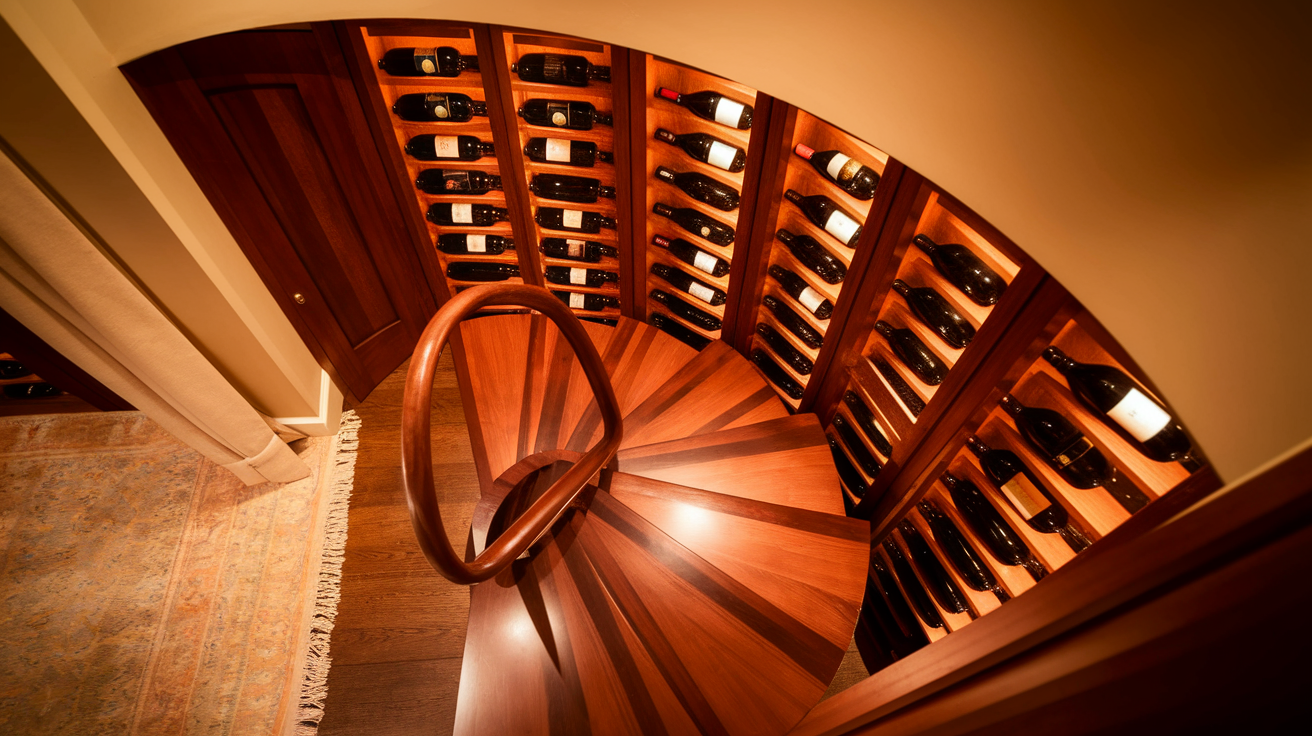
Create a hidden wine storage area with a spiral staircase under your floor. While advanced, this project offers amazing results.
A narrow spiral staircase leads to shelves that can hold hundreds of bottles in temperature-controlled conditions. The entrance can blend with your flooring or hide under a throw rug.
This option saves space since you go down rather than out, and it naturally keeps wine at ideal storage temperatures.
7. Compact Countertop Rack
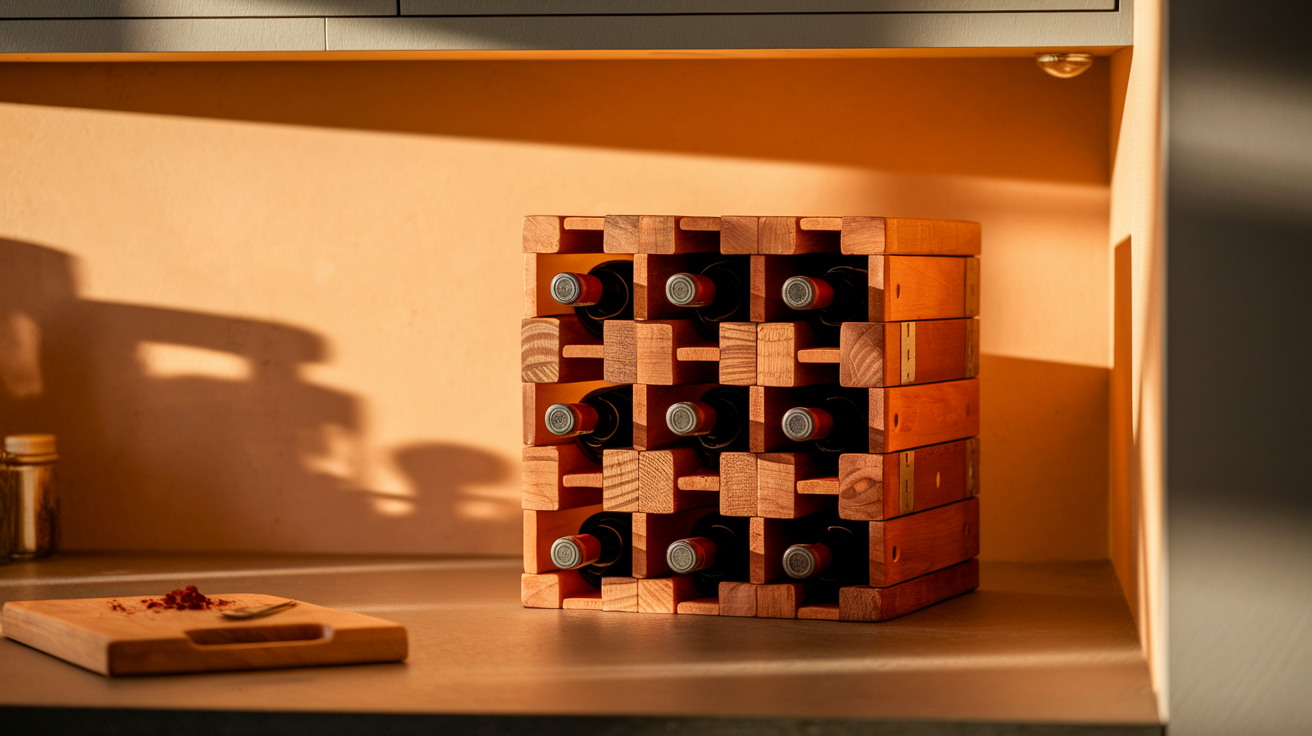
Small kitchens need smart storage solutions, and this compact rack fits perfectly. Build a small grid rack that holds 6-12 bottles in a tight countertop footprint.
You can make it from scrap wood for an almost free project that still looks great. The short height means it can sit under upper cabinets, and the small size makes it easy to move when needed.
This is perfect for apartments or for keeping your everyday drinking wines handy.
8. Metal Pipe and Wood Rack
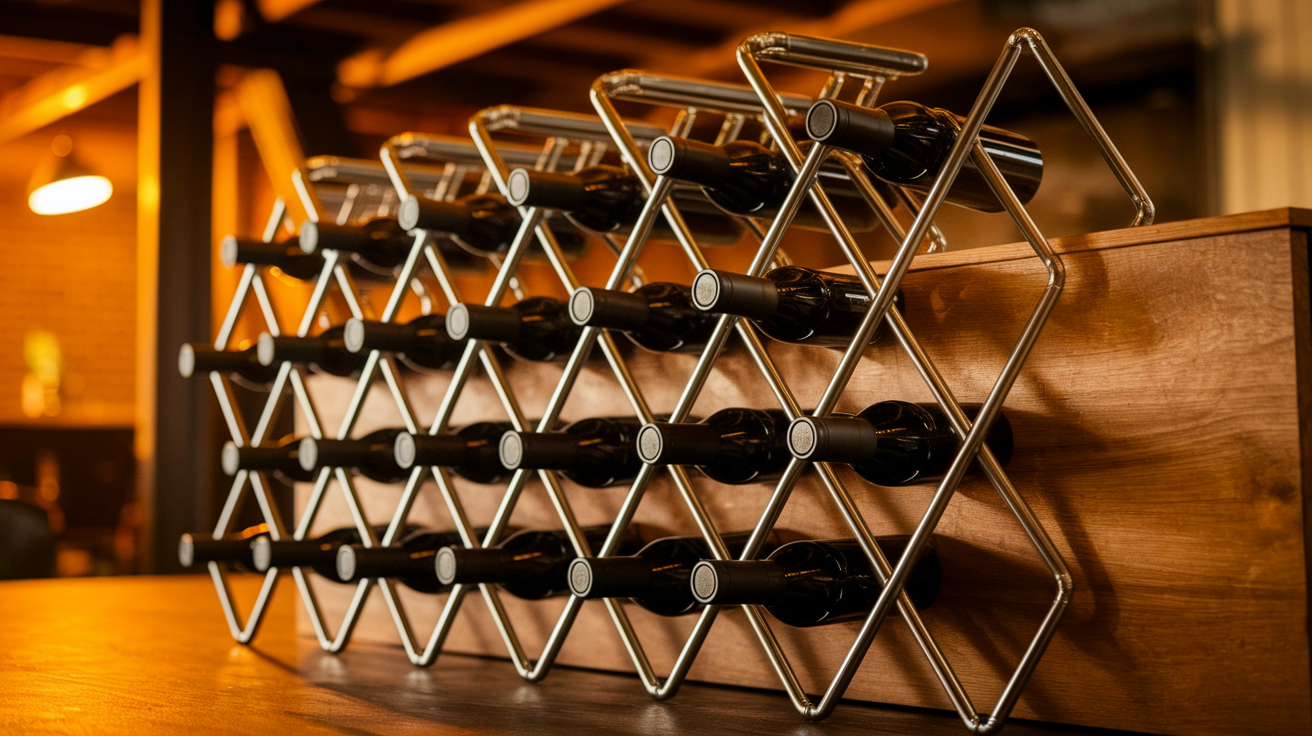
Using metal pipes and wooden boards, create an industrial-looking wine rack. This style works well in modern homes with raw or industrial themes.
Buy pipes and fittings from any hardware store, then attach them to wooden boards for a strong, stable rack. The metal adds a tough, urban feel, while the wood warms up the look.
You can adjust the size easily by using longer pipes or more wood pieces.
9. Over-the-Fridge Wine Rack
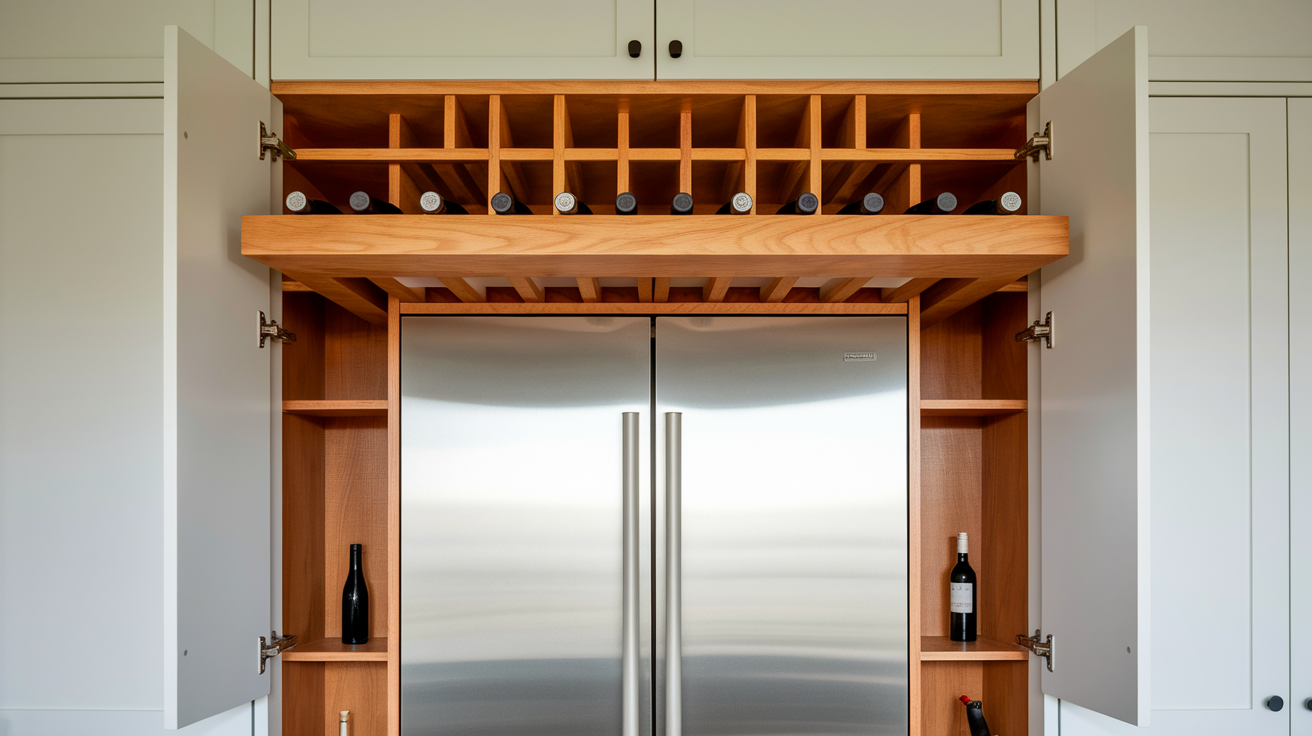
The space above your refrigerator is often wasted, but it’s perfect for wine storage. Build a custom rack to fit this spot exactly. Since heat rises from the fridge, this works best for wines you’ll drink soon rather than for long-term storage.
Cut holes in cabinet doors above the refrigerator and add a supporting board inside to hold bottles securely. This smart solution makes use of space that would otherwise collect dust.
10. Simple Ladder-Style Wine Holder
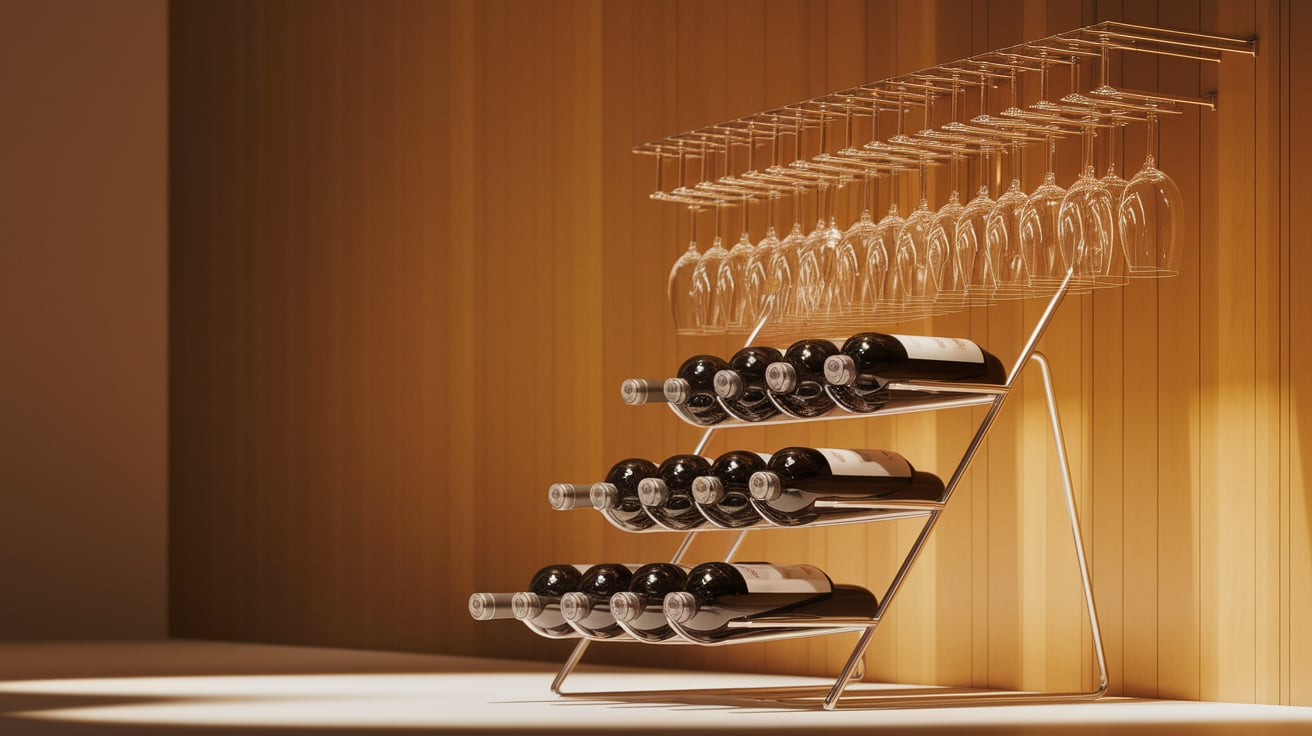
A leaning ladder rack offers easy-to-build wine storage with a modern look. Create a ladder shape with wide steps designed to hold wine bottles safely. The leaning design means it needs no complex wall attachment – prop it against a wall.
You can add hooks or racks for wine glasses, too. The open design makes it easy to see your full collection at a glance while taking up minimal floor space.
11. Minimalist Wall Grid
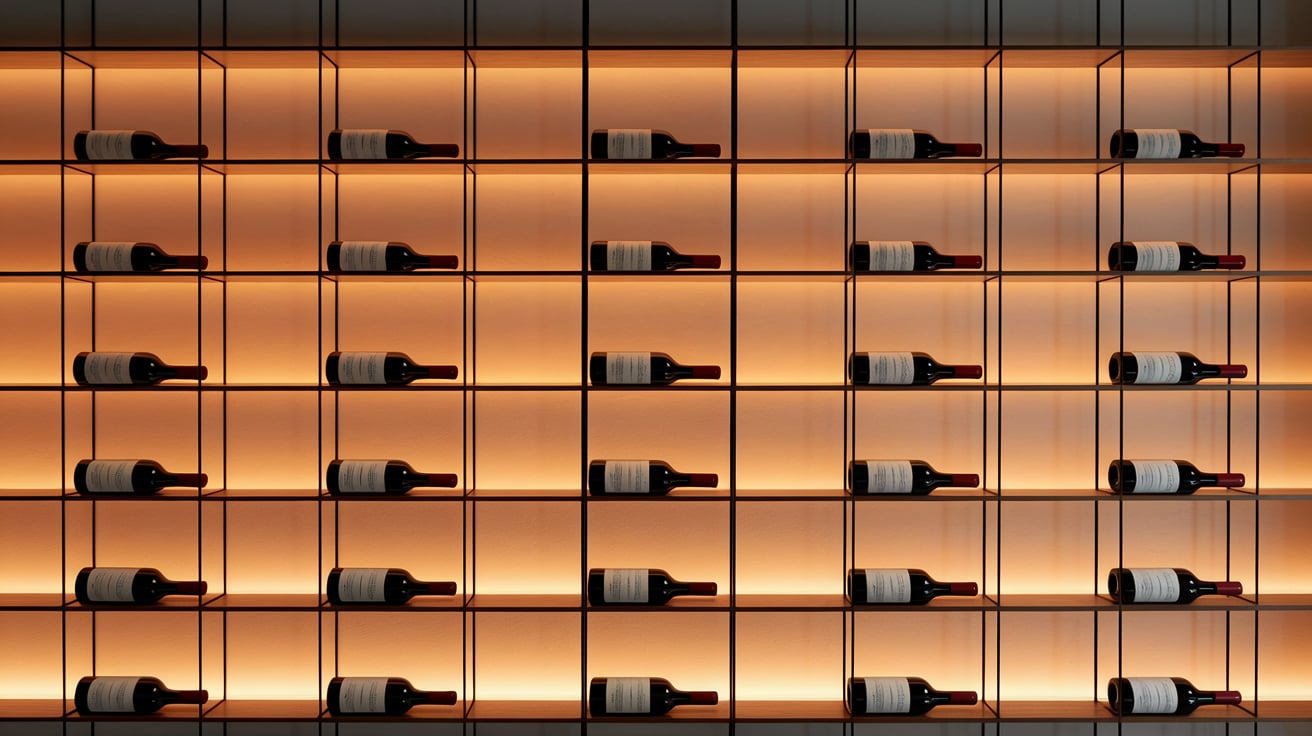
This clean, modern rack mounts to the wall with a simple grid pattern. Use thin strips of wood arranged in squares or rectangles to create bottle holders that seem to float on your wall.
The bottles become part of your wall art when displayed this way. The minimal materials make this an easy weekend project, and the finished rack takes up zero floor space while showing off your wine collection as functional art.
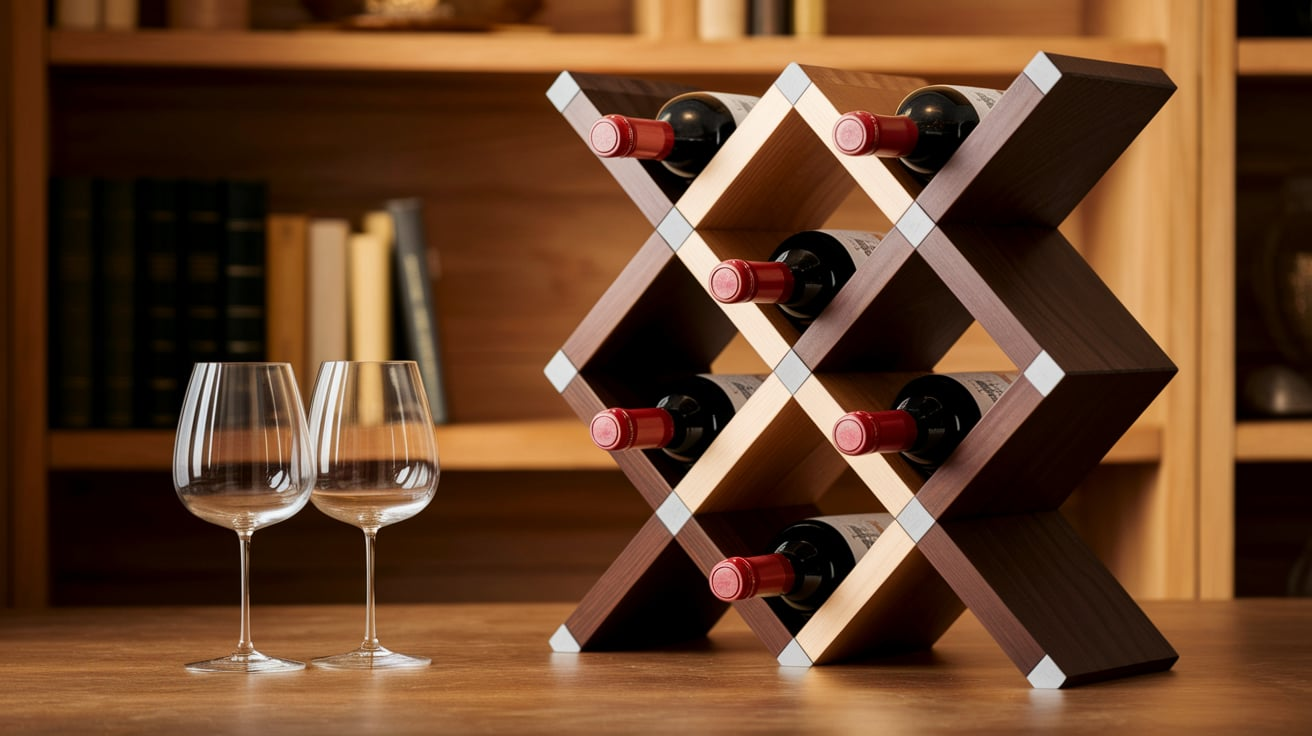
12. Crisscross Wooden Rack
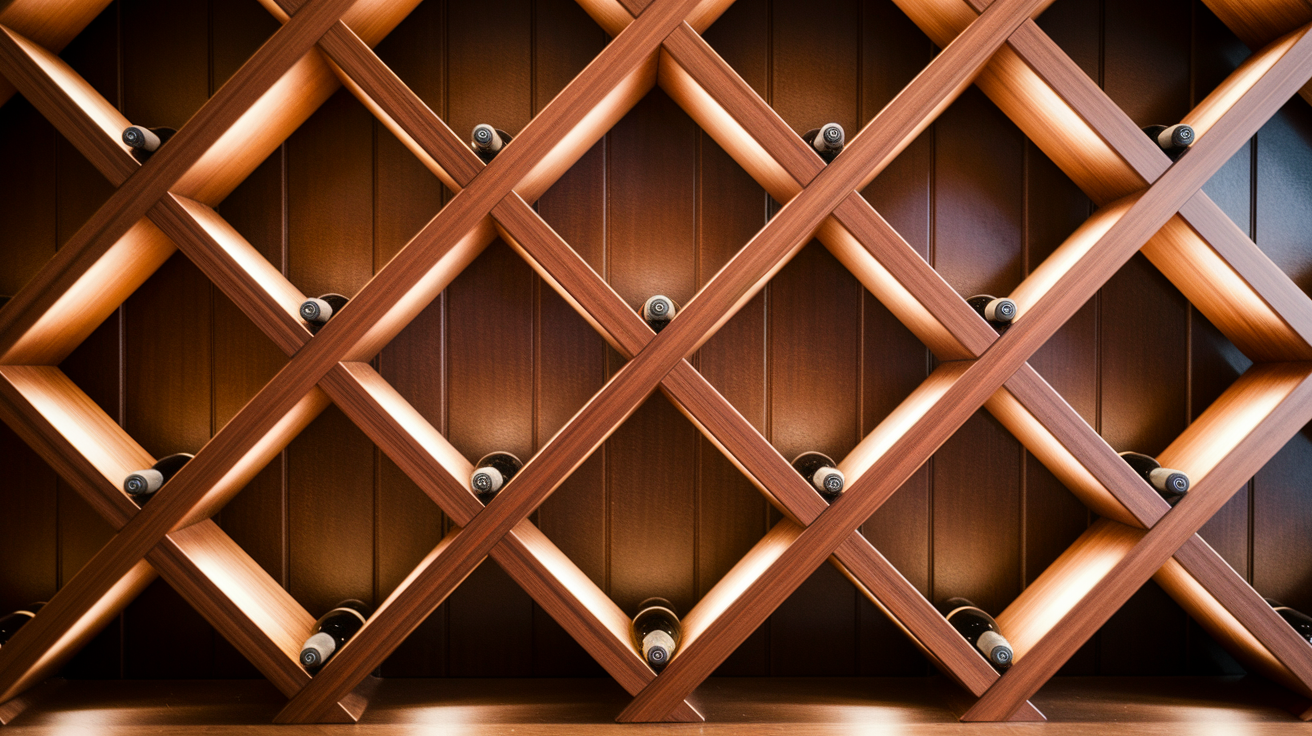
Build a decorative rack with crisscrossed wooden pieces that create diamond-shaped spaces for bottles. This design looks more complex than it is to build.
Cut wooden boards at matching angles, then connect them to form a series of X shapes. The design holds bottles securely while looking like a piece of art itself. This style works well on a sideboard in a dining room or as a focal point in a bar area.
13. Wooden Crate Wine Rack
Stack wooden crates for flexible, movable wine storage that grows with your collection. Find crates at craft stores or ask at grocery stores for fruit crates. Attach them for stability or leave them as separate units for easy rearranging.
Each crate can hold several bottles plus glasses or accessories. This option is perfect if you move often or like to change your space regularly, as it requires no permanent installation.
14. Statement Piece Wine Cabinet
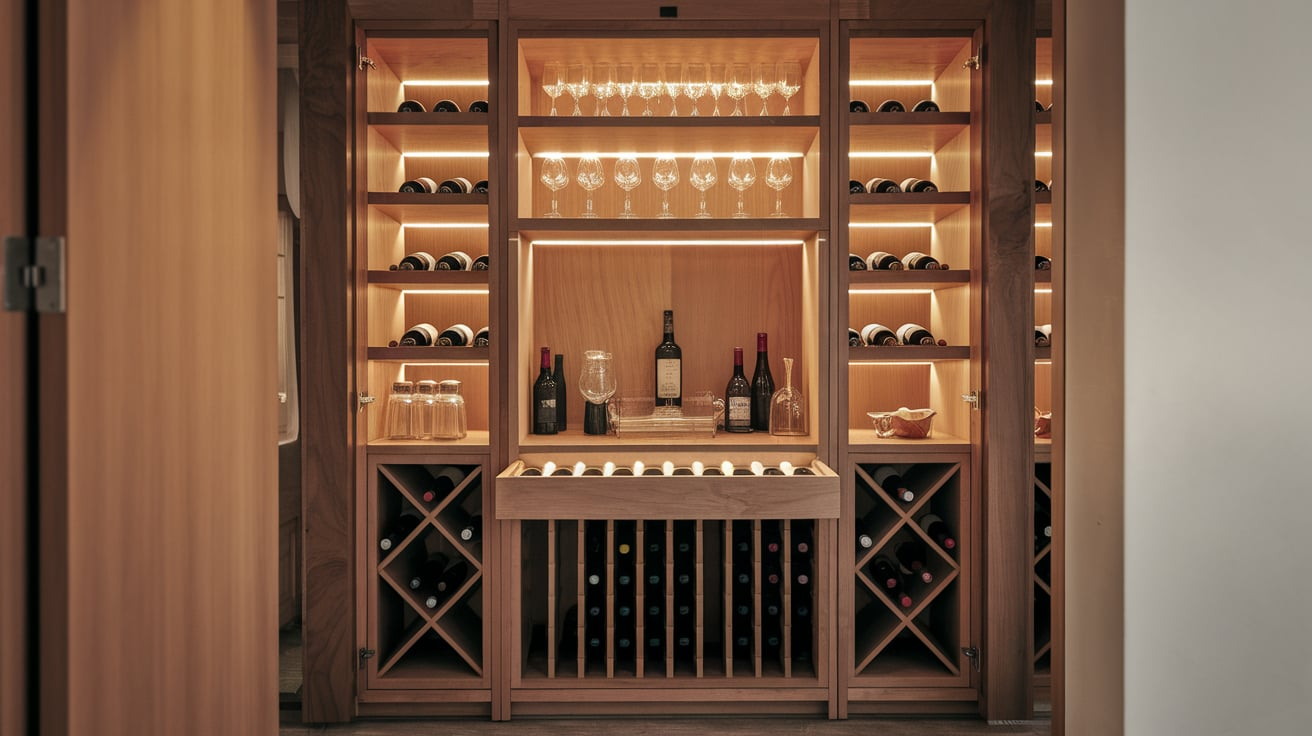
Create a full cabinet with built-in slots for wine bottles and space for glasses and tools. This larger project gives you complete control over size, style, and features. Include a drawer for openers and stoppers, glass storage above, and bottle slots in the middle.
Finish it to match your existing furniture. While this takes more time than simpler racks, the result is a statement piece that serves as both storage and furniture.
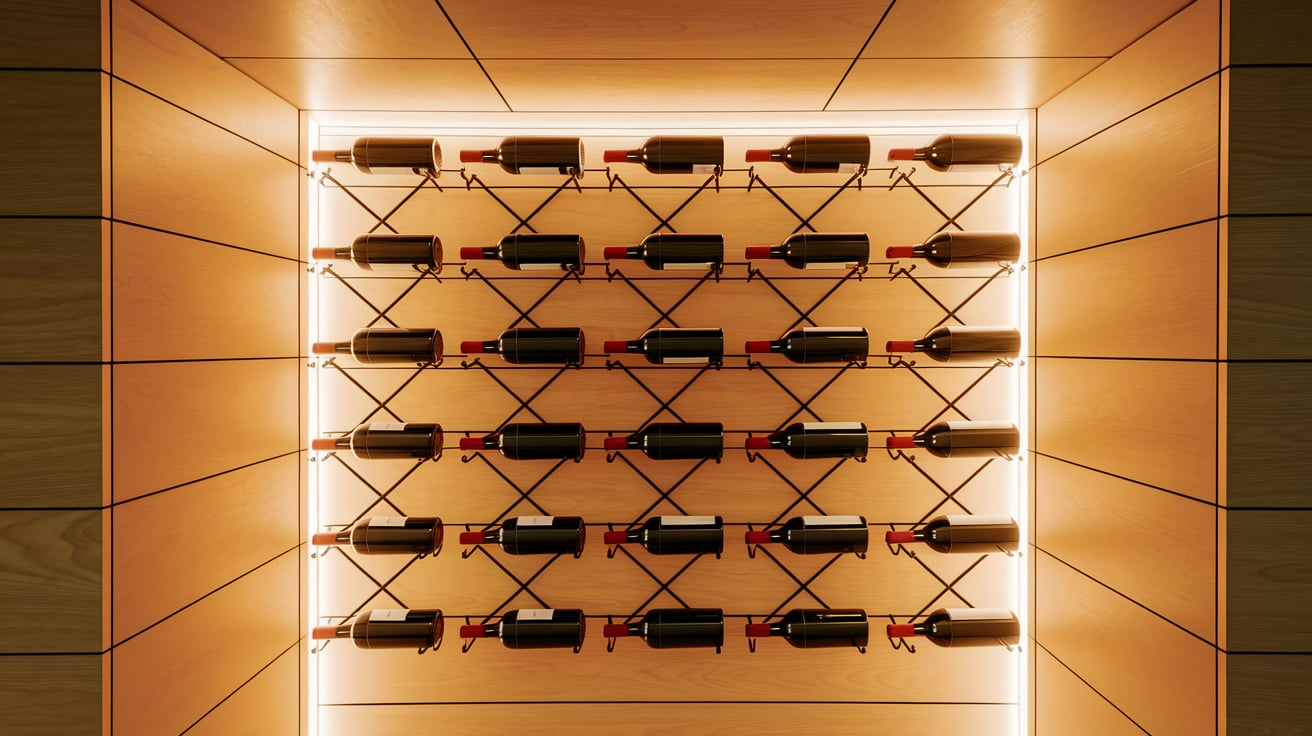
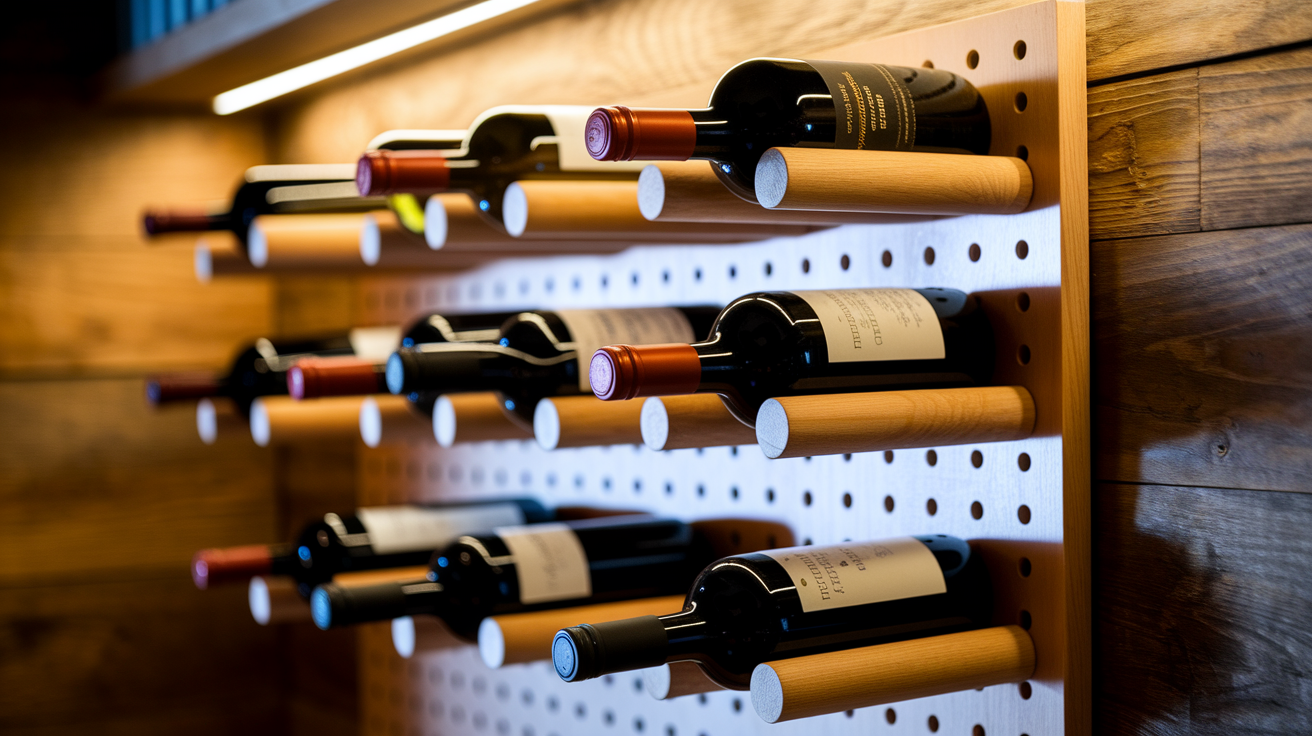
15. Vertical Hanging Wine Rack
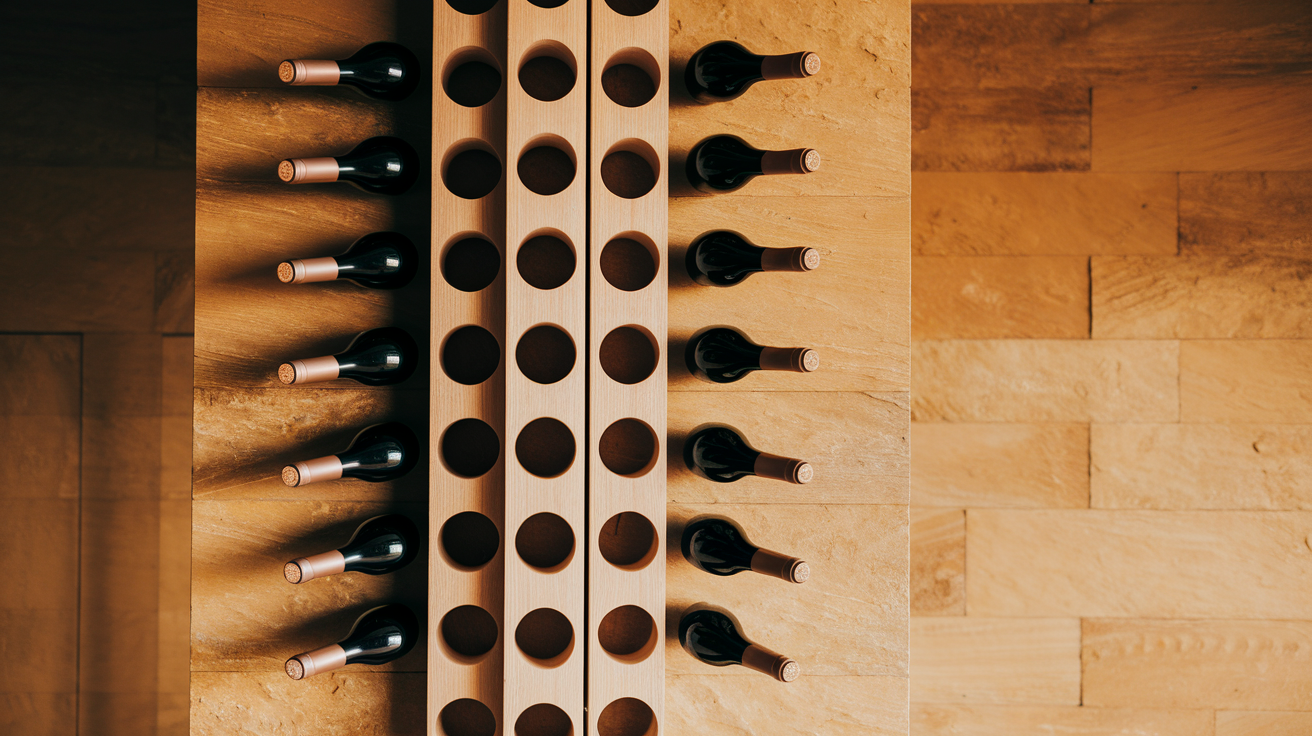
Save valuable floor space with a vertical wall-mounted rack that holds bottles securely. Using wooden boards with round holes cut out, this design allows bottles to rest horizontally (keeping corks moist) while taking up minimal wall space.
The bottles appear to float on your wall when viewed from the front. This clean design works well in modern homes and small spaces where floor space is limited.
16. Repurposed T-Molding Glass Rack
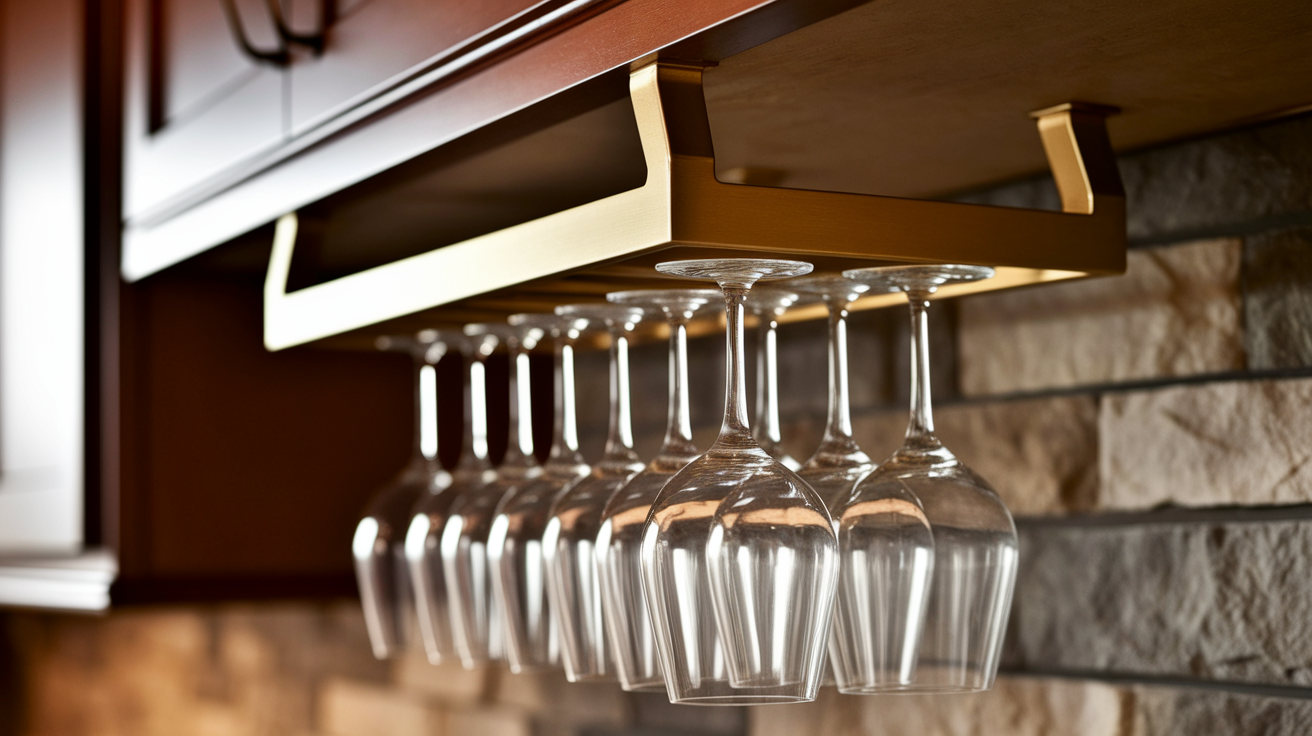
Use T-molding designed for floor transitions to create a perfect wine glass holder. This smart hack uses molding that’s shaped perfectly for hanging stemware. Cut the molding to length, drill holes, and attach it to the bottom of a shelf or cabinet.
The T-shape provides the perfect slot for wine glass stems to slide into. Finish with brass screws and washers for a clean, professional look that keeps glasses handy but safe.
17. Tabletop Display Rack

Show off special bottles with a small display rack for your dining table or bar. This conversation piece keeps a few select bottles within easy reach for meals or gatherings.
Build a small wooden base with angled slots that present bottles at the perfect serving angle. This works well for dinner parties when you want to feature specific wines with your meal or in smaller homes where a full rack isn’t needed.
18. Rope and Wood Wall Rack
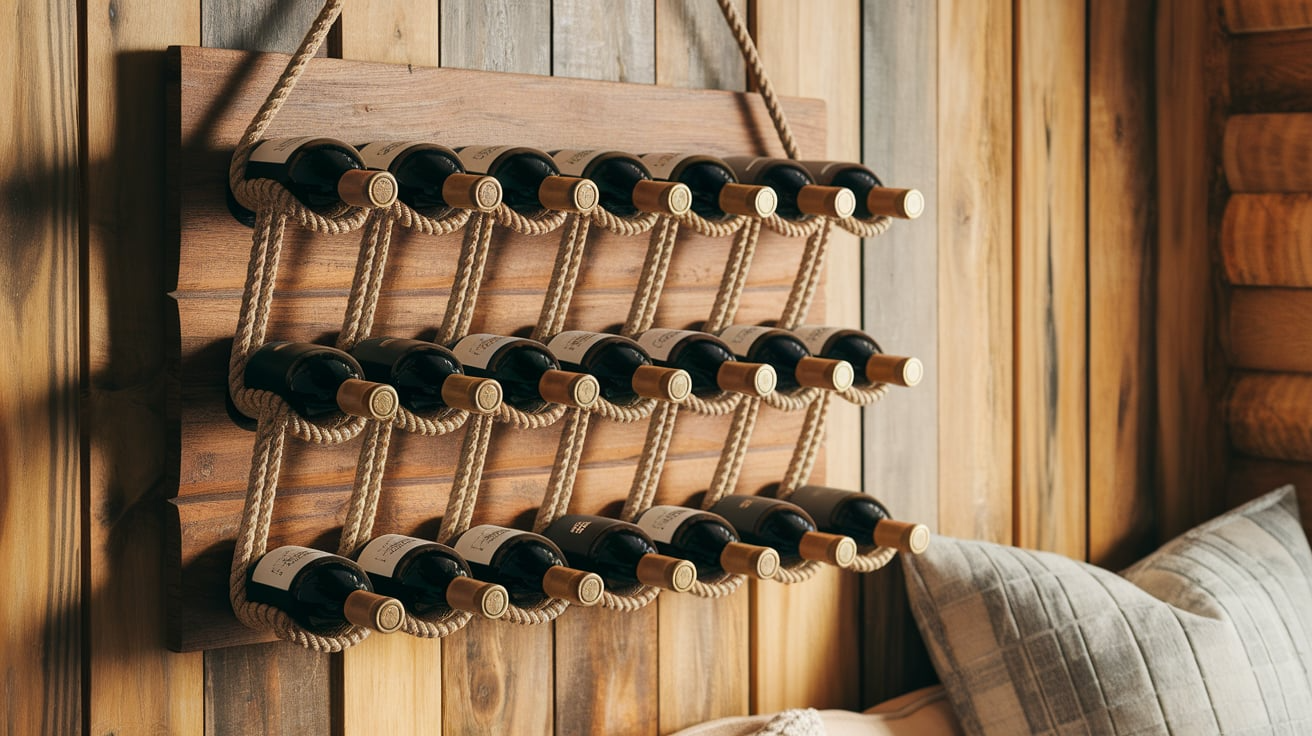
A rope and wood wall rack creates a nautical or rustic feel. Drill holes in a wooden board, then thread rope through to create loops that hold wine bottles securely.
The natural materials add warmth and texture to your space. This design is both simple to make and visually interesting. It works particularly well in beach houses, cabins, or rooms with natural themes.
19. DIY Wine Rack from IKEA Parts
Changes standard IKEA shelves or cubes into a custom wine rack that fits your exact needs. Buy basic shelving units, then add X-shaped inserts or drill holes sized for wine bottles.
This approach allows you to start with pre-made parts while still creating something unique. The result looks custom-built but costs much less than buying a specialized wine cabinet of similar quality.
20. Tree Branch Wine Rack
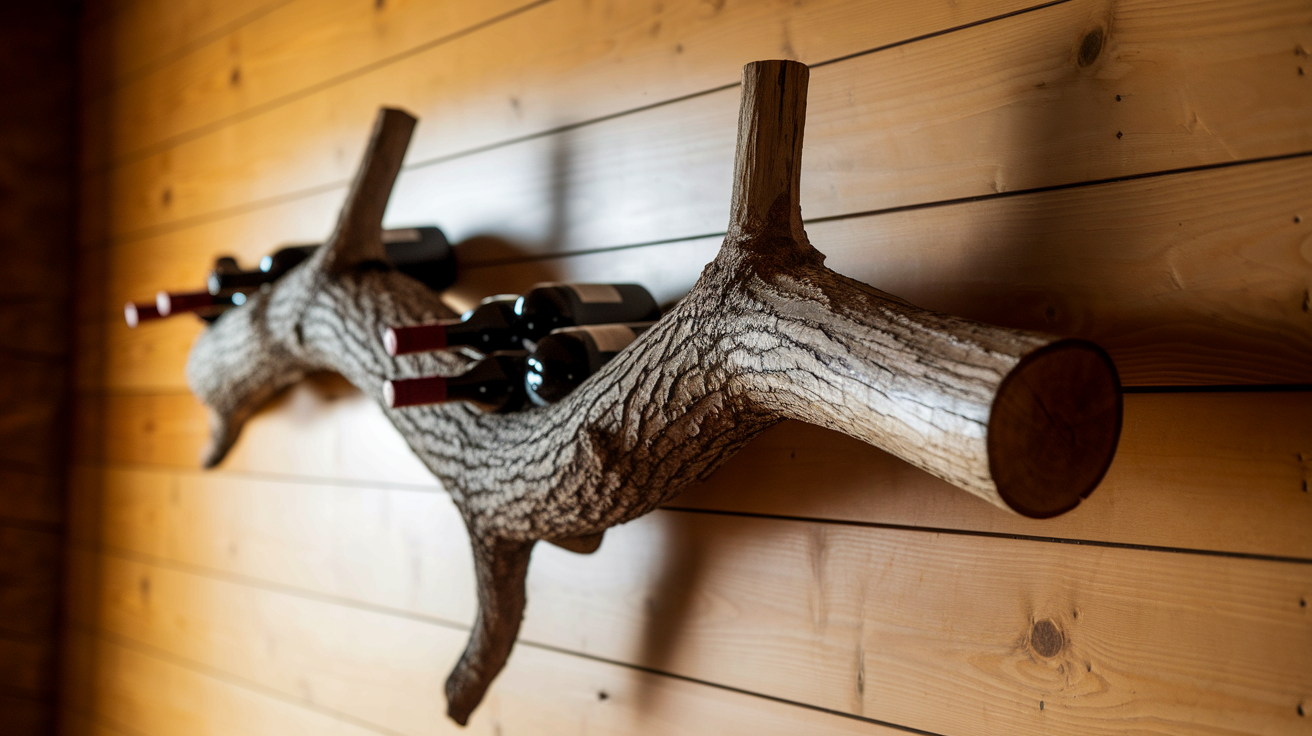
Bring natural elements inside with a wine rack made from a tree branch. Find a thick, sturdy branch with smaller offshoots that can serve as bottle holders. Clean it thoroughly, remove the bark if desired, and mount it securely to a wall.
The organic shape adds a one-of-a-kind element to your home while the bottles rest safely in the natural curves of the wood. This creates a truly unique conversation piece.
21. Above-Cabinet Wine Storage
Use the often-forgotten space above kitchen cabinets for wine storage. Build a simple rack that fits this usually wasted area. Since heat rises, this works best for wines you’ll drink soon rather than for long-term aging.
You can build a rack that sits on top of cabinets or modify cabinet doors with holes to slide bottles through, creating a built-in look that maximizes your kitchen storage.
22. Pegboard Wine Holder
Using a pegboard and pegs, you can create a flexible, adjustable wine rack. Mount a pegboard panel to your wall, then insert wooden dowels or special pegs in patterns that develop cradles for wine bottles.
The beauty of this system is that you can change the layout anytime by simply moving the pegs. This works well for growing collections or for changing your display regularly based on what wines you currently have.
23. Wine Rack Cart
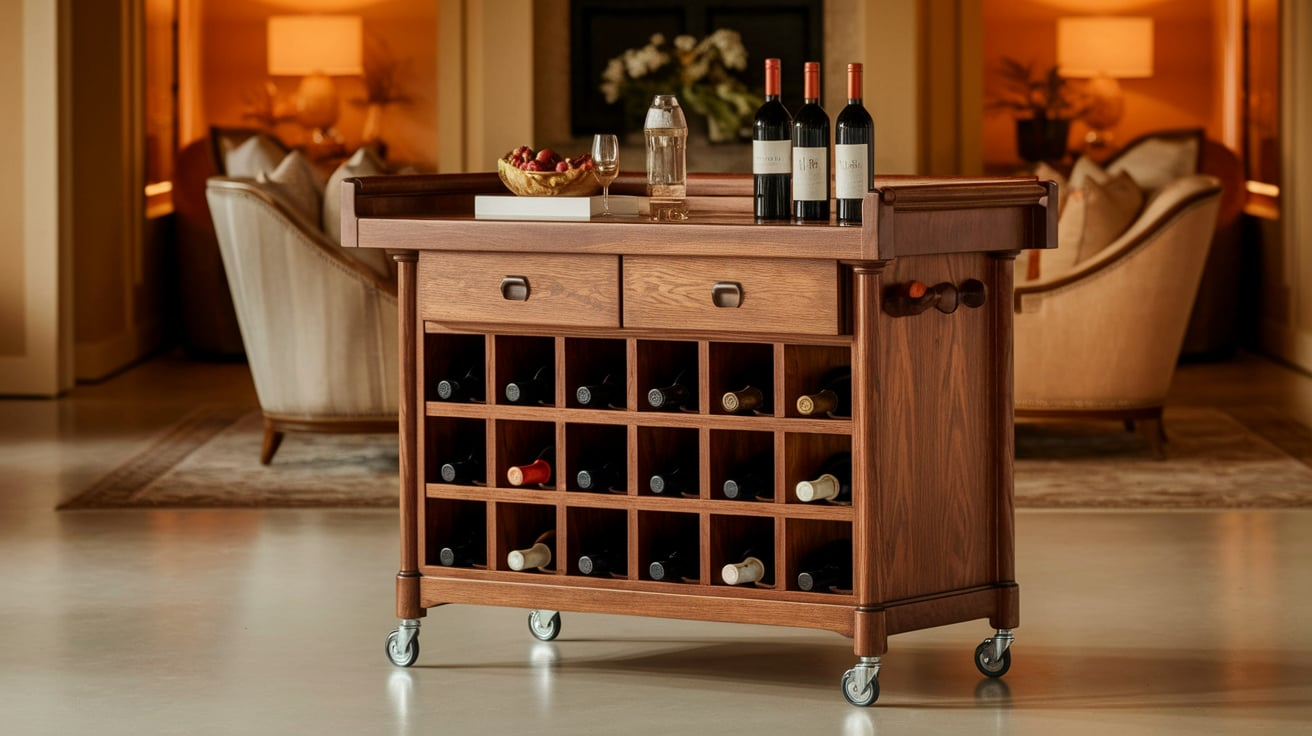
Add wheels to a wine rack design for a mobile bar cart that goes where you need it. Build a basic wine rack structure, then attach quality casters to the bottom.
Add a top surface for serving or opening bottles. This versatile piece can move from dining room to living room for parties, or roll aside when not needed. It’s perfect for entertainers who like to serve drinks in different areas of their homes.
Step-by-Step Guide to Make a DIY Wine Rack

Before starting your project, gather all the tools and materials. You’ll need a drill, jigsaw or circular saw, sandpaper, rubber mallet, and measuring tape for tools.
For materials, prepare plywood or pallet wood, edge banding, nails or wood glue, and wood stain or paint. Optional items include wine glass holders, metal pipes for an industrial style, or printable design plans.
Following these seven steps will help you create a beautiful, functional wine rack for your home.
Step 1: Plan Your Design
Begin by deciding what style of wine rack you want to build. Consider where it will go, how many bottles it needs to hold, and your skill level. Sketch your design on paper with measurements.
For a grid-style rack, plan the number of compartments you’ll need. Consider whether it will stand alone or fit into a cabinet. Check if you have enough materials before cutting anything.
Proper planning prevents wasted materials and time.
Step 2: Cut Your Plywood Pieces
Using your circular saw or table saw, cut the plywood according to your plan. For a basic grid rack, you’ll need a back piece, top and bottom pieces, sides, vertical boards, and horizontal shelves.
Measure carefully and mark your cutting lines with a pencil. Remember the carpenter’s rule: “measure twice, cut once.” Make straight, clean cuts for the best fit. Label each piece as you cut it to avoid confusion later.
Step 3: Apply Edge Banding
Edge banding gives plywood a finished look by covering the exposed layers on cut edges. Apply it to any edges that will be visible in your finished rack. Use an iron on medium heat to activate the adhesive backing.
Press the banding firmly onto the plywood edge, then trim any excess with a utility knife. Sand the edges lightly for a smooth finish. This step changes rough plywood into furniture-quality material.
Step 4: Mark and Cut the Notches
For a grid-style rack, mark where the horizontal and vertical pieces will connect. Measure carefully and mark with a pencil. Use a drill with a 3/4″ spade bit to make starter holes at the ends of each notch.
Then, use a jigsaw to cut out the notches. Cut straight and precise to ensure a snug fit. Test pieces together as you go to check the fit.
Step 5: Sand All Pieces
Sand all wood surfaces and edges until smooth. Start with 120-grit sandpaper for rough spots, then move to 180-grit, and finish with 220-grit for a silky surface. Pay special attention to cut edges and notches.
When finished, remove all dust with a damp cloth. Proper sanding prevents splinters and creates a professional-looking finished product. It also prepares the wood to accept stain or paint evenly.
Step 6: Stain or Paint
Apply your chosen finish before assembly when pieces are easier to work with. Brush on wood stain or paint in thin, even coats. Let each coat dry completely before adding another.
For a grid rack, finish all pieces separately since you won’t be able to reach inside corners after assembly. A pre-stained rack looks more professional than one finished after assembly. The extra time spent now creates better results.
Step 7: Assemble Your Wine Rack
Start by fitting the notched pieces together to form the grid. Use a rubber mallet to tap pieces into place if needed. For grid racks, no screws are required for the main structure. Add the sides, top, and bottom with wood glue and finish nails.
Attach the back last. Wipe away any excess glue immediately. Let the glue dry completely before using your rack. Your custom wine rack is now ready to display your collection!
Tips for Building the Perfect DIY Wine Rack
Before you start cutting wood, take the time to plan your project carefully. These simple tips will help you create a wine rack that looks great and lasts for years. A little preparation now saves headaches later.
Measure Twice, Cut Once
Always double-check your measurements before making any cuts. Small errors can quickly compound and make pieces not fit together properly. Use a sharp pencil for marking and a straight edge for drawing cut lines.
Test-fit pieces as you go to catch any problems early. Taking extra time with measurements will save you wood, money, and frustration.
Sand Smooth for Safety
Rough wood can cause splinters and snagged clothing. Sand all pieces thoroughly, starting with coarse sandpaper (120 grit) and working up to fine (220 grit). Pay special attention to cut edges and corners.
For plywood, sand lightly to avoid breaking through the veneer. Smooth surfaces not only look better but also make the finished rack safer to use and handle.
Pre-Stain Before Assembly
Apply stain or paint to your wood pieces before putting them together. This makes it much easier to reach all surfaces and corners, so you won’t have to worry about getting into tight spots after assembly.
Let everything dry completely before the final construction. This approach gives your completed wine rack a more professional, finished look.
Use Scrap Wood Creatively
Look around for leftover wood from other projects before buying new materials. Smaller pieces can be perfect for wine racks. Old pallets, crates, and unused shelving can all be repurposed.
This approach saves money and reduces waste. Using reclaimed wood can also add character and unique charm to your finished wine rack.
Common Mistakes to Avoid
Even experienced DIY fans make errors when building wine racks. Avoid these common mistakes to save time and materials. Your project will turn out better and last longer if you avoid these problems from the start.
- Ignoring Weight Capacity: Full wine bottles weigh about 3 pounds each. Use strong materials and proper anchors for wall-mounted racks, and test their strength before adding bottles.
- Wrong Bottle Angle: Store bottles horizontally to keep corks moist. Position the bottles flat or slightly tilted toward the cork to prevent drying and spoilage.
- Skipping the Test Fit: Always test how pieces fit together before final assembly. This simple step catches problems while they’re still easy to fix.
- Poor Ventilation Planning: Allow space for air flow around your wine rack. Good circulation prevents moisture problems and helps maintain consistent temperature for your bottles.
Conclusion
Creating your own wine rack has multiple benefits: you can save money, get exactly what you want, and enjoy a satisfying project.
The ideas shared here range from quick weekend builds to more complex designs, giving options for every skill level. For best results, remember to focus on proper bottle angle, weight support, and good airflow.
Test everything before the final assembly to catch problems early. With careful planning and the right approach, your DIY wine rack will provide years of practical storage while adding a personal touch to your home.
Cheers to your new handcrafted wine display!