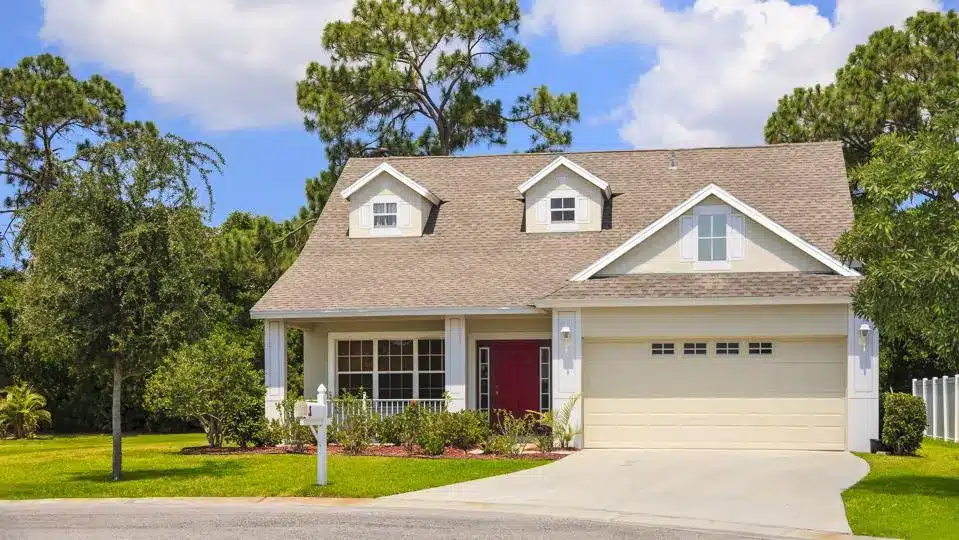
DIY Outdoor Sectional: A Complete Guide
Ever sit on your patio and think, “This would be perfect with a nice sectional”? You’re not alone.
The problem is, store-bought ones don’t always fit the space or the look you’re going for.
That’s why building your own can be such a good move. You get to shape it the way you like: size, color, layout, all of it. No more settling.
Plus, there’s something really nice about making it yourself. It’s hands-on and gives you something real to show for your effort.
In this guide, we’ll break down the process into simple steps so you can build a sectional that actually works for your space and feels like yours.
Why Choose a DIY Outdoor Sectional?
When you buy a ready-made sectional, it often comes with limits. You can’t adjust the length to fit a tight space or stretch it to seat more people.
By building it, you make each section match your layout. You can work around plants, walls, or small patios.
You also get to decide the design and finish. That means no settling for colors or styles that feel off.
Most of all, making something with your hands leaves you with more than a seat. It gives you a quiet sense of being part of your space.
What You’ll Need
Before you start building, it’s a good idea to gather all your tools and materials.
This will help things go a lot smoother. You’ll need some basic wood, screws, outdoor cushions, and a few common tools. Nothing fancy, just the stuff that helps you get the job done.
Tools
For this project, you’ll want tools that help with cutting, drilling, and sanding. A miter saw helps you make straight and angled cuts.
A power drill and impact driver are useful for putting pieces together. You’ll also need a sander, especially if you want a smooth finish.
These tools are common in most home garages, and each one plays a part in the building process.
| Item | Purpose / Tip |
|---|---|
| 2×4 Lumber | Main wood used for the frame and supports |
| Exterior Screws | Strong, weather-resistant fasteners for long-lasting joints |
| Wood Stain or Paint | Adds color and protects the wood from outdoor wear |
| Sandpaper | Smooths out rough edges and surfaces before finishing |
| Paint Brushes/Rollers | Used for even application of stain or paint |
| Wood Filler (Optional) | Fills small gaps, cracks, or dents in the wood |
| Outdoor Cushions | Adds comfort and style to the finished sectional |
| Extra Wood (if available) | Great for add-ons like armrests, tables, or storage space |
| Basic Tools (if needed) | Drill, saw, clamps, tape measure, and square for measuring |
| Secondhand Materials | Check local listings or leftover supplies to reduce expenses |
Materials
The main wood used is 2×4 lumber. These are strong enough to support weight and simple to work with.
You’ll also need deck screws to hold everything together. For the finish, you can use stain or paint made for outdoor wood.
If you plan to sit directly on the wood, stain might be more comfortable. For cushions, look for ones made for patios.
They hold up better in the sun and rain. When picking wood, think about where the sectional will sit.
Pressure-treated lumber lasts longer outdoors but needs time to dry before you paint or stain. Cedar is another good choice, especially if you like natural color and grain.
Choosing the Right Plans for an Outdoor Sectional
You’ll find plenty of free plans online. These plans give you the cuts, angles, and instructions you’ll need. Some call for pocket holes, which use a jig to hide screws inside the wood.
These look clean but need a bit more care. If you want something quicker, look for plans that skip pocket holes and use simpler joints.
You can also choose the shape. Some plans build L-shaped layouts, while others create U-shaped or straight bench-style seating. Pick one that fits how you want to use your space.
A good way to manage your build is by planning what you’ll need from the start. Write down the number of 2x4s and screws before heading to the store.
If you already own some tools, you won’t need to buy them again. You can also save by using extra wood from past projects. If you’re open to secondhand items, check local listings for unused materials.
Outdoor Sectional: Step-by-Step Guide
This part breaks things down into simple steps so you can build your outdoor sectional without stress.
No fancy tools or skills are needed—just basic stuff and a bit of time. Follow along, and you’ll see it come together piece by piece.
Step 1: Cut the Wood
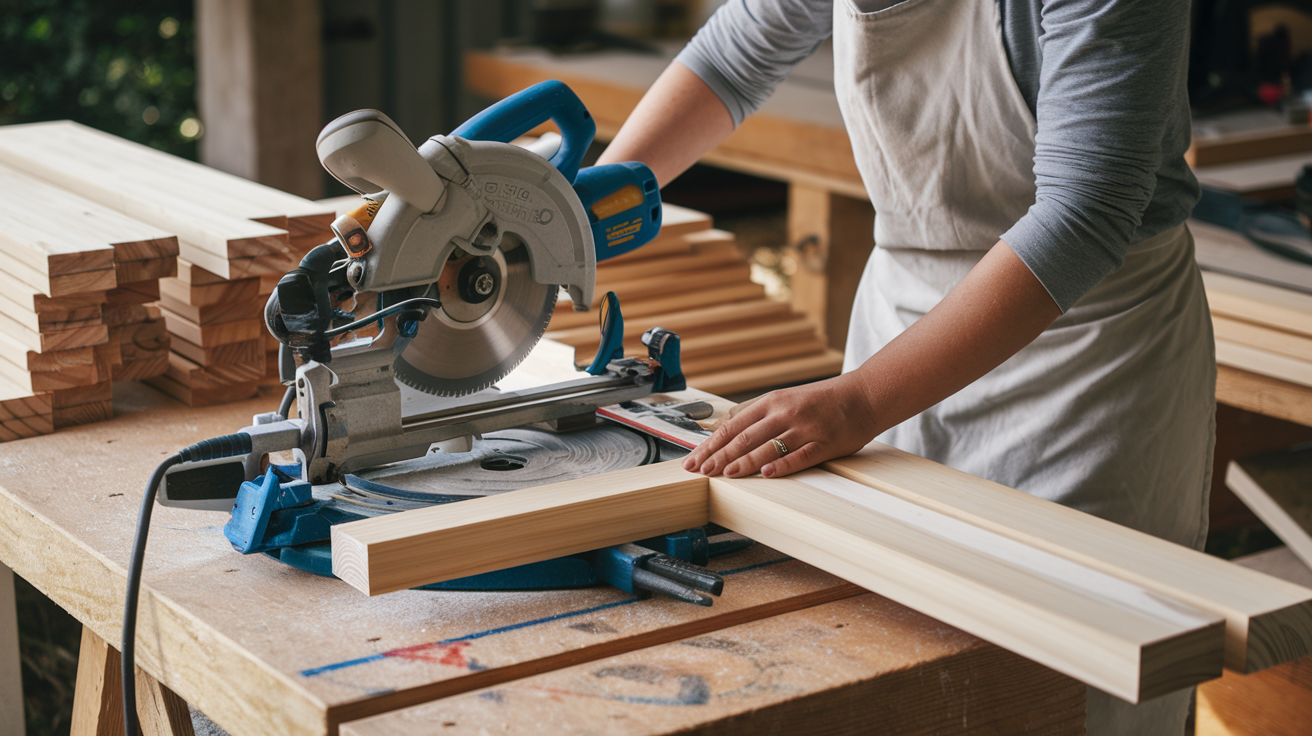
Begin by checking your plan and making sure all your measurements are accurate.
Write everything down on a sheet or mark the wood with chalk or a pencil. This helps you stay organized and avoid cutting the wrong size.
A miter saw works best for smooth, straight cuts and is great for angled pieces like armrests or seat frames.
If you don’t have one, a circular saw with a guide can also work. Cut all the pieces before you start building.
It’s easier to put things together when everything is ready to go. Group wood pieces by size or purpose so you’re not searching for parts later.
Step 2: Assemble Frame
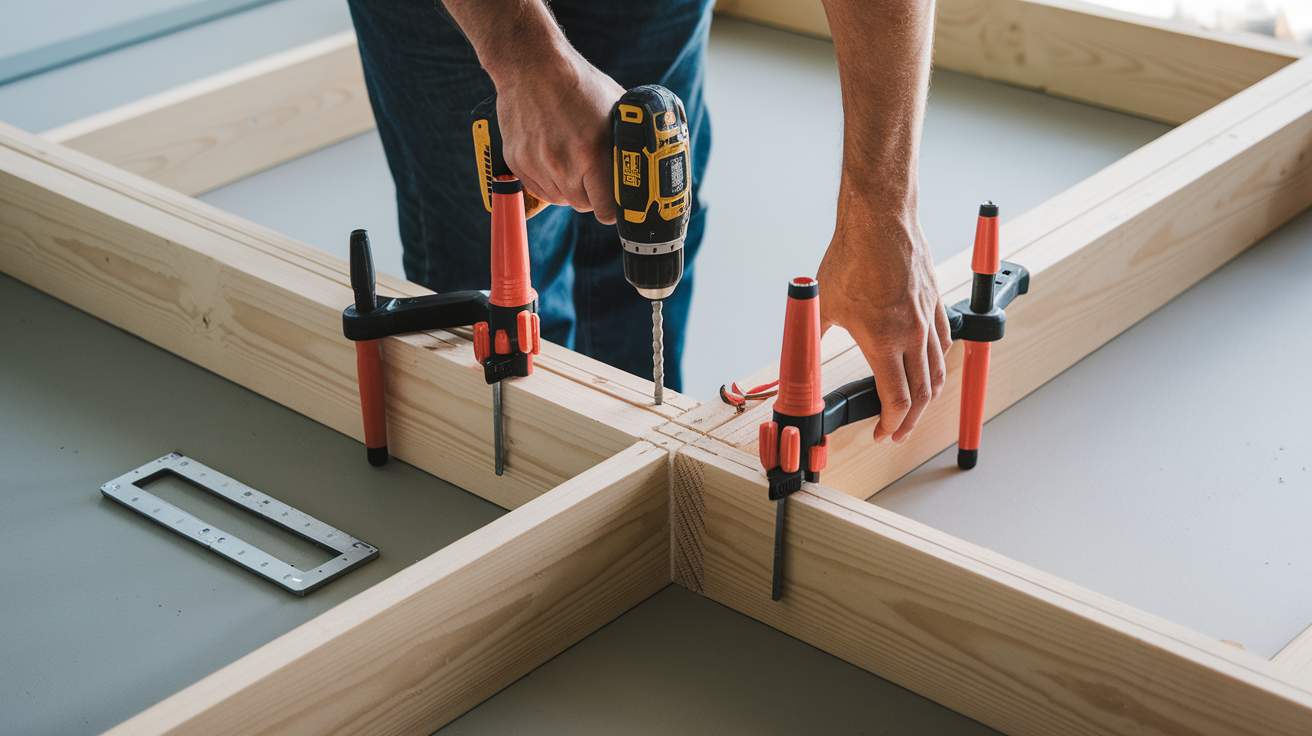
Start with the outer frame. Lay out the pieces on a flat surface and make sure they line up correctly.
Use clamps to hold the boards in place while you attach them with screws. Pre-drill holes to keep the wood from splitting.
A square or measuring tool helps make sure your corners are even, which keeps the whole frame level.
If anything seems off, don’t force it—adjust and double-check the alignment. You can build the sides first, then connect them with the front and back boards.
Once the frame is tight and secure, you’ve got a solid base to build on.
Step 3: Add Supports and Back
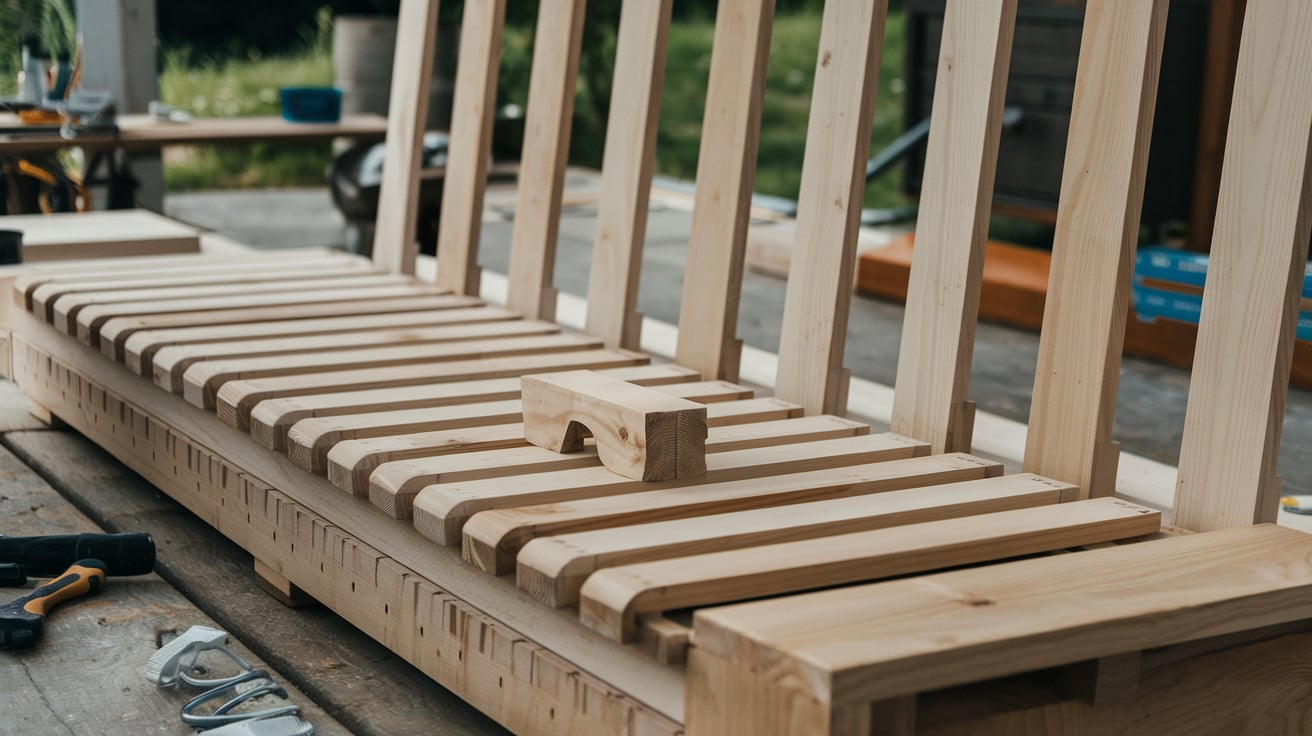
With the frame complete, it’s time to add support. Start by laying the seat slats across the top of the frame.
Make sure they are spaced evenly—about half an inch apart is a good rule. This spacing lets water drain and keeps the cushions from sinking.
Use a spacer block or scrap wood to keep gaps consistent. Next, attach the back support pieces.
These can be vertical or slightly tilted, depending on how you want your sectional to feel.
Make sure they’re straight, and use long screws for a strong hold. If the back wobbles, add brackets or corner braces for extra strength.
Step 4: Sand and Finish
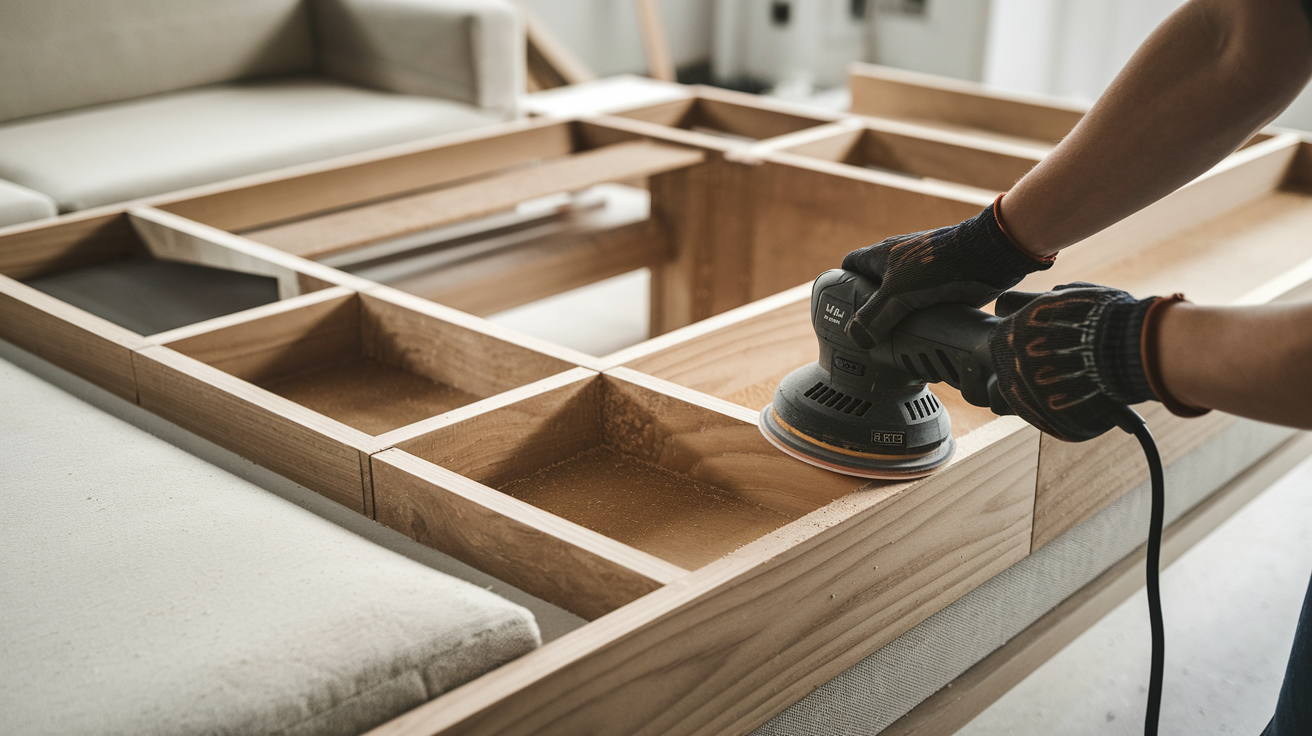
This part might take some time, but it’s worth it. Sanding makes the wood safer to sit on and gives it a better look in the end.
Start with rough sandpaper (around 80 grit) to smooth out sharp edges or splinters.
Then, switch to a finer grit (around 180 to 220) for a softer surface. Don’t forget to sand between slats and around corners.
Feel each piece as you go—your hands can catch spots your eyes might miss.
If you notice small holes, knots, or cracks, fill them in with wood filler if needed. Wipe away all dust before moving on.
Step 5: Stain or Paint
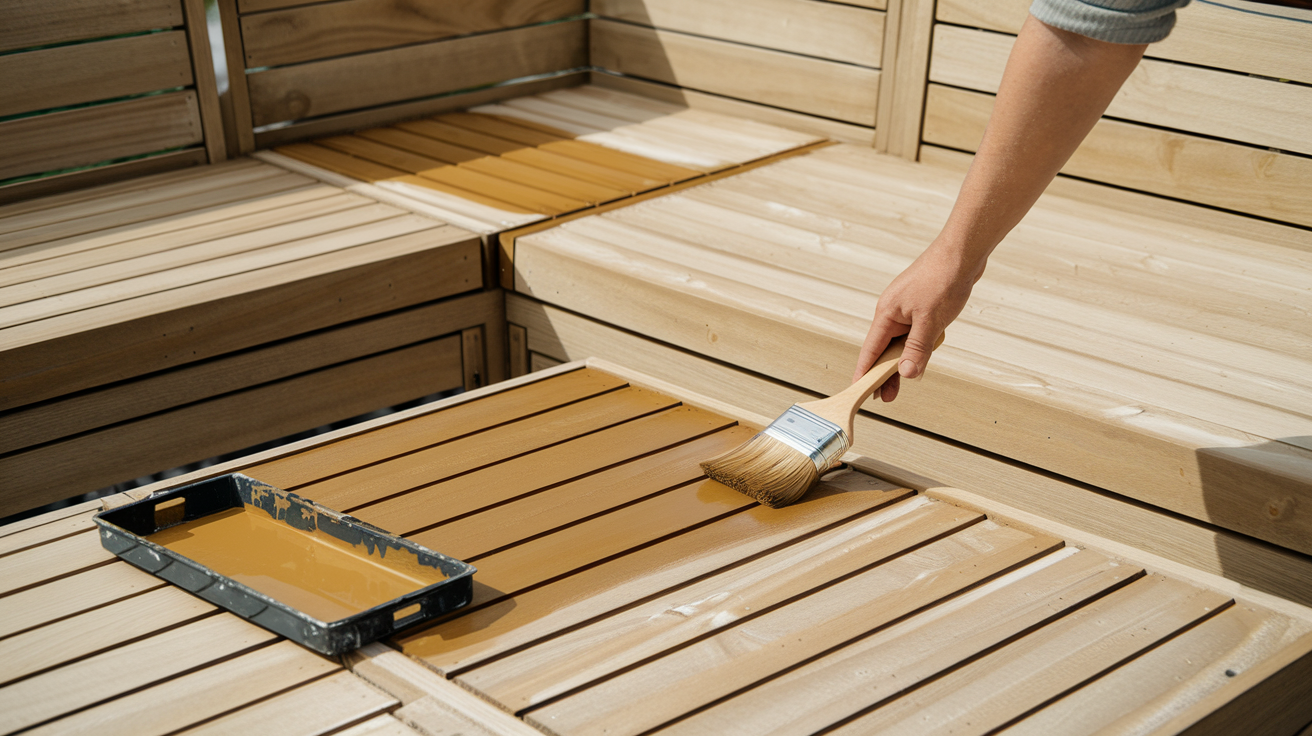
Now for the fun part: adding color or a protective coat. If you’re using stain, brush it on and let it soak into the wood, then wipe off the extra.
It shows more of the wood’s character and helps seal against moisture. Paint is a good option if you want full coverage or a bold color.
Use a primer first for best results, especially on softer woods like pine. Let each coat dry fully before adding another.
You might need two coats for full coverage. Wait at least 24 hours (or longer if it’s humid) before setting the sectional outside or adding cushions.
Step 6: Final Look
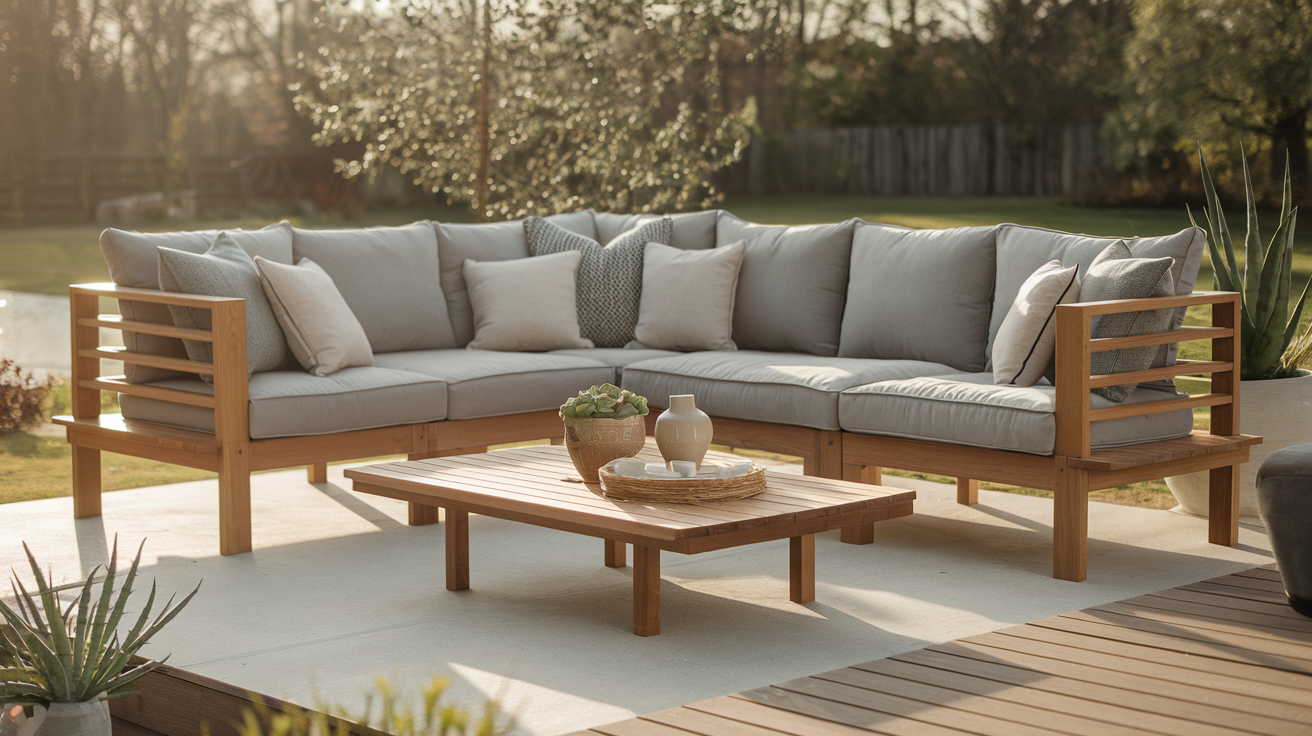
Once the stain or paint has dried and your cushions are in place, take a moment to step back and look at what you’ve built.
Your outdoor sectional is now ready to use, and it should feel like it truly fits your space. Check that everything is sturdy and level.
If anything feels loose, tighten the screws or adjust the placement. Wipe down any dust and make sure the cushions are secure and dry.
Add a small table, throw pillows, or even a blanket if you like a softer touch.
Now your patio has a cozy, handmade spot that’s ready for good weather and good company.
Optional Add-Ons and Customizations
Once the main frame is finished, you can add a few extras to make your sectional better fit your space.
These small touches not only boost comfort but can also provide more function without requiring much extra work.
Think about how you plan to use the space and what would make it more useful for you and your family. Even with leftover wood, you can create add-ons that blend in and give your build more purpose.
Here are a few simple ideas you can try:
- Armrests: These make the seating more comfortable and work great as a small spot to place a drink or a book.
- Built-in storage: Add a storage box under one of the seats for cushions, garden tools, or outdoor toys.
- Side table or bench: Use extra wood to build a matching side table or a short coffee bench. It keeps the look consistent and adds more surface space.
- Wheels or levelers: If you want to move the sectional around or keep it steady on uneven ground, these can help.
- Cushion ties or brackets: These hold your cushions in place so they don’t slide around when in use.
You don’t have to add everything. Just pick what works best for your setup and style. Even one or two small tweaks can make a big difference.
How to Weatherproof Your Outdoor Sectional
Weather can wear down outdoor furniture if it’s not sealed right. Use an outdoor stain or sealer to protect the wood from water and sun.
Even if the wood is treated, a sealant adds more safety. For cushions, pick fabric that’s made for the outdoors. These dry faster and resist fading.
If your sectional is exposed to direct sunlight or rain, consider covering it when not in use. That way, you can keep it looking good for longer.
Conclusion
You’ve seen how simple it can be to build a sectional from start to finish. We went over everything, from cutting the wood to putting the frame together, sanding it smooth, and giving it a finish that works outside.
You also have some add-on ideas to make it more useful. The best part is that you get to shape it around your needs instead of trying to fit store-bought pieces together.
It’s not just about saving money. It’s about building something real with your own hands. That kind of work feels good.
And once it’s done, it’s more than just a seat. It’s something you made, and that means a lot.
Want more projects like this? Check out our other DIY guides for practical builds you can tackle at home.