
Build Your Own Greenhouse Using Old Windows: A Simple Guide
Have you wanted a greenhouse but thought it was too expensive? Building one using old windows is the perfect solution!
This budget-friendly project lets you create a growing space without spending much money. With some basic tools and recycled materials, you can make a beautiful greenhouse that extends your growing season. I built mine last year and now enjoy fresh herbs and seedlings year-round.
This guide walks you through each step, from finding windows to adding the finishing touches. Let’s get started on creating your perfect greenhouse!
Why Build a Greenhouse Using Old Windows?
Building a greenhouse from old windows is an affordable, eco-friendly option that benefits both your wallet and the environment.
Repurposing materials like old windows reduces waste and eliminates the need for purchasing new, expensive greenhouse materials.
These windows provide excellent natural light, essential for healthy plant growth, and help maintain a consistent temperature inside your greenhouse. This DIY project allows you to customize the design to fit your space and gardening needs if you’re growing herbs or vegetables.
Additionally, using recycled windows adds a charming, unique aesthetic to your garden, making it both functional and beautiful.
How to Build Your Greenhouse Using Old Windows: Step-by-Step Guide
Building a greenhouse with old windows is a rewarding DIY project that combines creativity and sustainability. It involves selecting the right location, preparing the foundation, and assembling the frame to hold the windows securely.
With proper planning, this budget-friendly project can transform your garden into a thriving year-round growing space.
Step 1: Prepare the Site

Start by picking the right spot for your greenhouse. Choose an area that gets good sunlight and is easy to access.
Clear away any plants, rocks, or other items from the spot. Use a shovel or tractor to make the ground as flat as possible.
Once the area is clear, put down landscape fabric to block weeds from growing inside your greenhouse. This step isn’t required but makes a big difference in keeping your space weed-free.
Next, add a layer of gravel on top of the fabric. The gravel helps with drainage and creates a stable base. There’s no need for concrete – a simple gravel pad works well for most small greenhouses.
Step 2: Frame the Walls
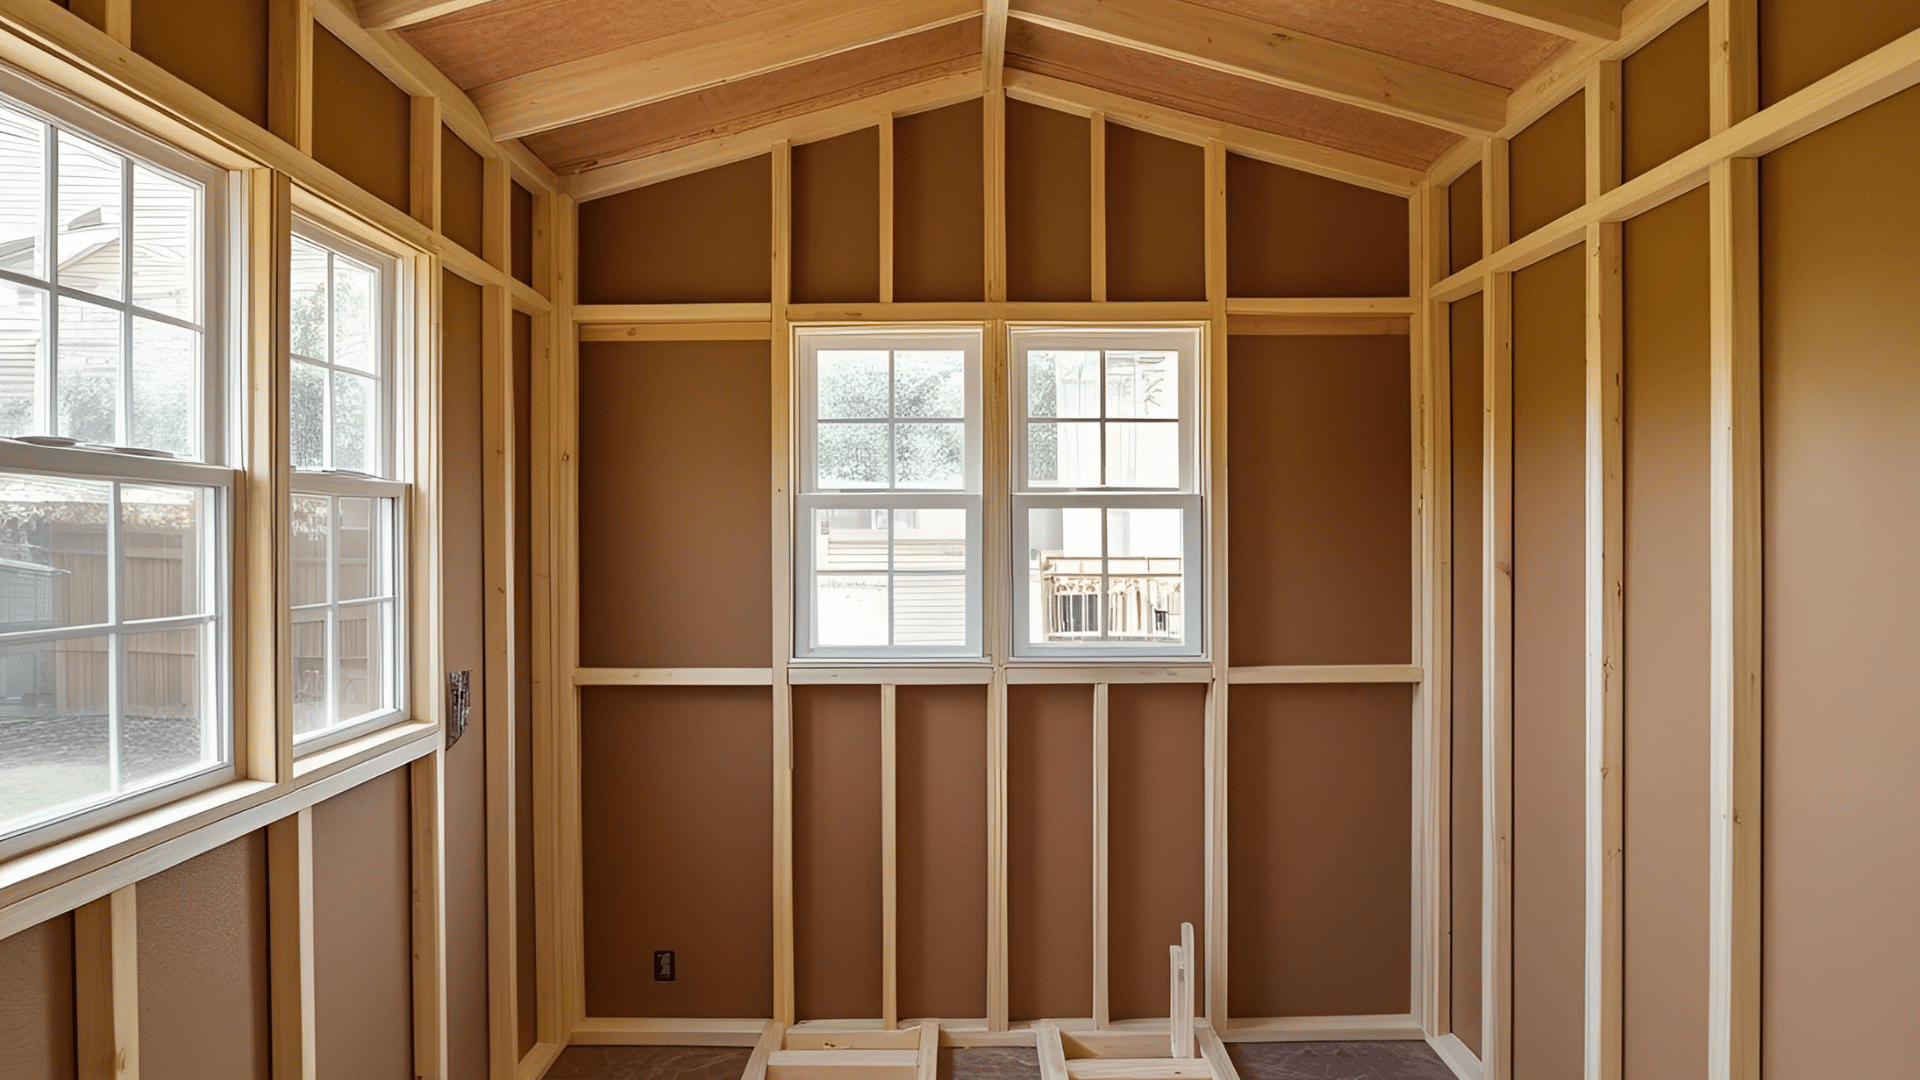
Start by building the frame for each wall separately. Use pressure-treated 2x4s for the bottom parts since they’ll be closest to the ground and most likely to get wet. Double up the 2x4s for corners to create strong joints when you connect the walls.
Measure your windows first and build the frame to fit them. If your windows are similar in size, you can create equal spaces in your frame. Include extra supports between windows.
Make a separate frame for each wall—front, back, and sides. The front wall should include space for a door. Once all four walls are built, add a second top plate to tie the corners together, strengthening the structure.
Step 3: Install the Windows
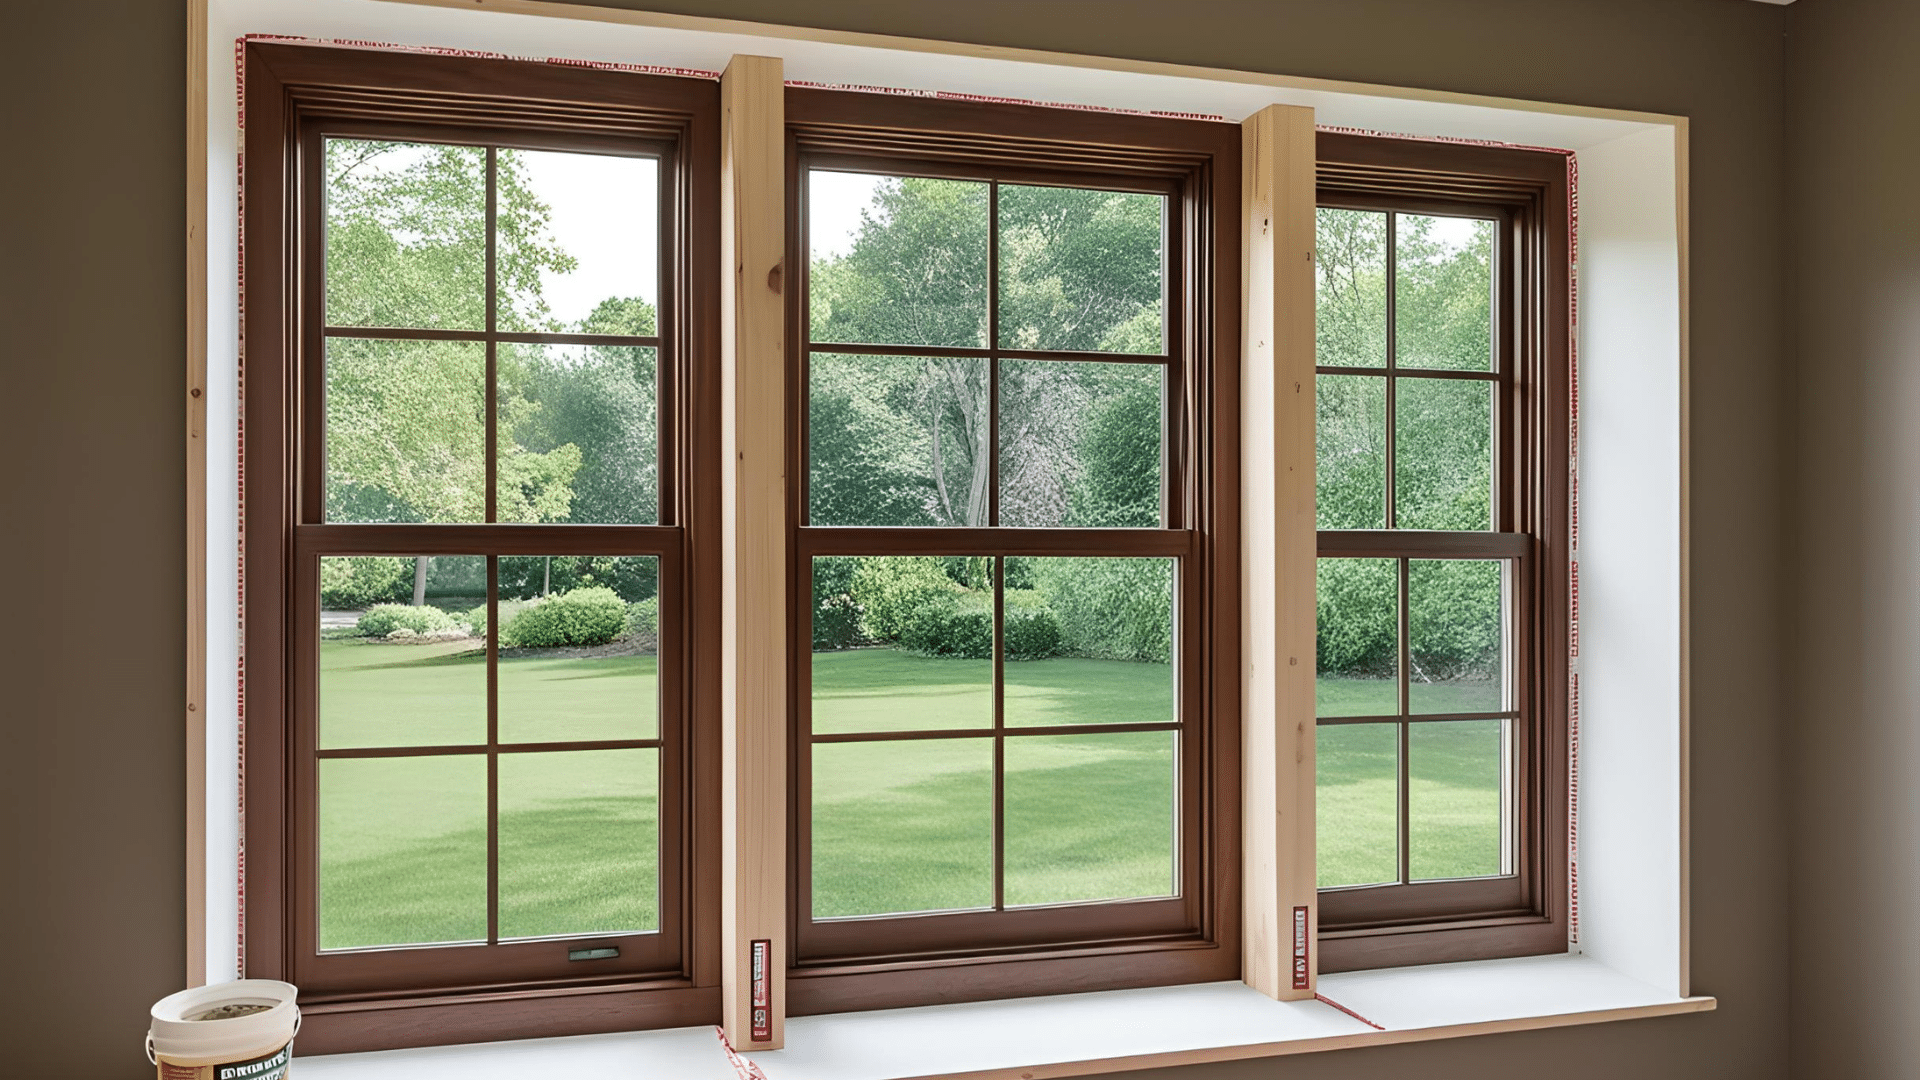
Measure the space between the framing boards and cut cross boards to hold each window in place. Even if your windows look similar, measure each space separately, as small differences can cause problems later.
Place each window in its spot and secure it with small wooden blocks on the inside of the frame. Screw through these blocks to hold the window firmly in place.
After all windows are installed, check for gaps between the windows and frame. Use caulking to seal these gaps – this prevents water leaks and keeps the temperature steady inside.
While some people use spray foam insulation, caulking is often easier to work with and gives clean results.
Step 4: Build the Roof
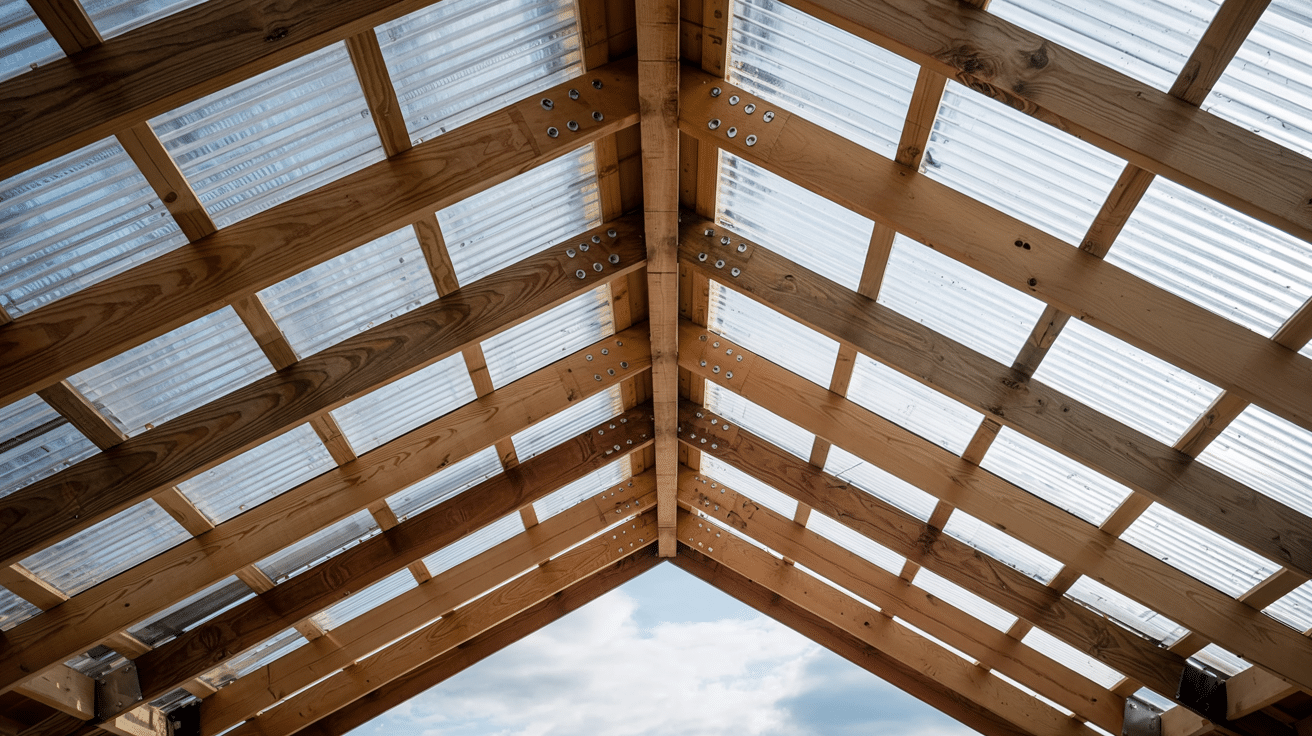
For the roof frame, create rafters that will support your roofing material. The angle of your roof depends on your local weather—steeper roofs are better for areas with snow.
You can use online calculators to help you figure out the right measurements and angles for your rafters.
Clear corrugated polycarbonate panels work well as roofing material. They let in light while being stronger than glass.
Before attaching these panels, install “wiggle board” strips that match the shape of the corrugated panels. Use special screws with rubber washers that won’t leak.
For the ridge at the top of the roof, aluminum flashing provides a waterproof seal that’s less expensive than specialty ridge caps.
Step 5: Add Doors and Ventilation
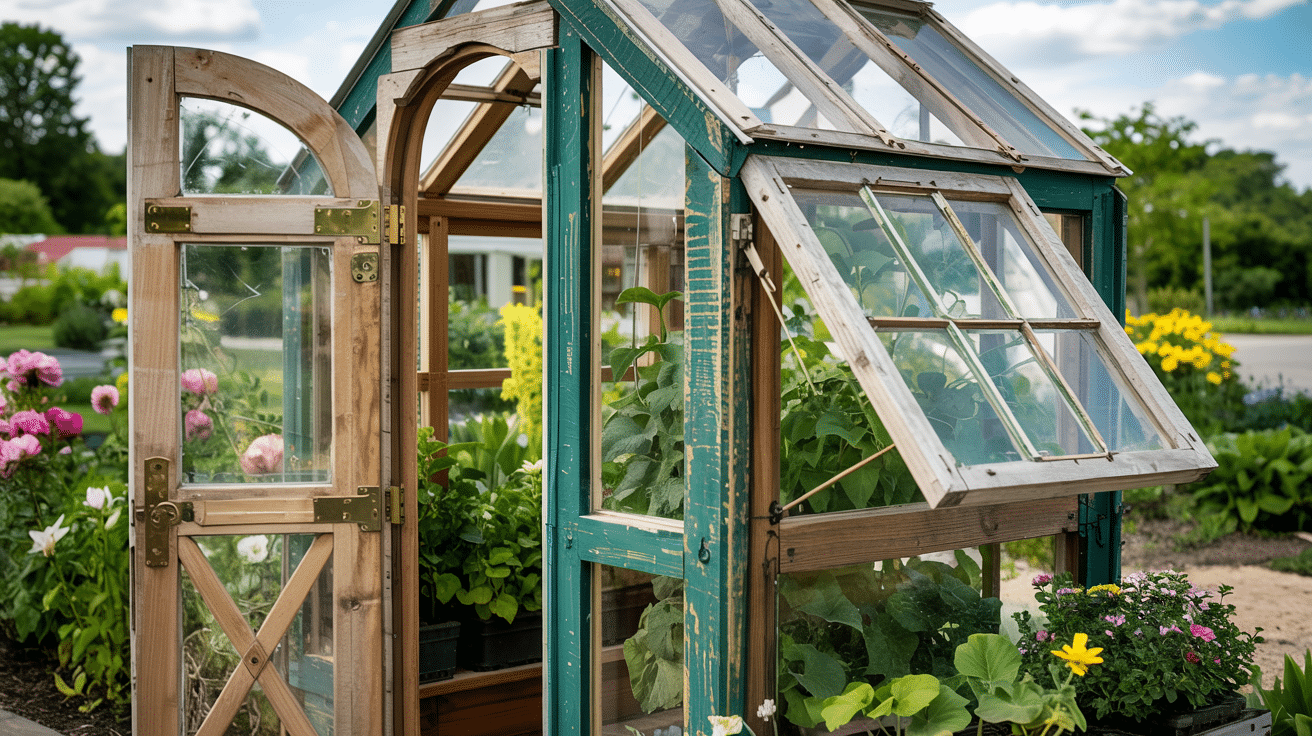
Find a door that fits your greenhouse style. Old exterior doors work great and add character to your structure. Install it with sturdy hinges, and make sure it opens and closes easily.
Good airflow is vital in a greenhouse. To create ventilation, install at least one window that can open. Place this window on the wall opposite your door to create cross-ventilation when both are open.
Attach the window with hinges along the top edge so it can swing open. On hot days, open both the hinged window and the door to keep your plants from overheating. This simple system works well for most small greenhouses without needing electric fans.
Creative Designs: Finding the Perfect Greenhouse Layout
Your greenhouse design should match your gardening needs and available space. While the basic structure follows similar building methods, the layout and shape can vary widely.
Looking at different designs can spark ideas for your project and help you create a space that works perfectly for your plants and gardening style. Let’s explore some creative options to consider.
A-Frame Greenhouse
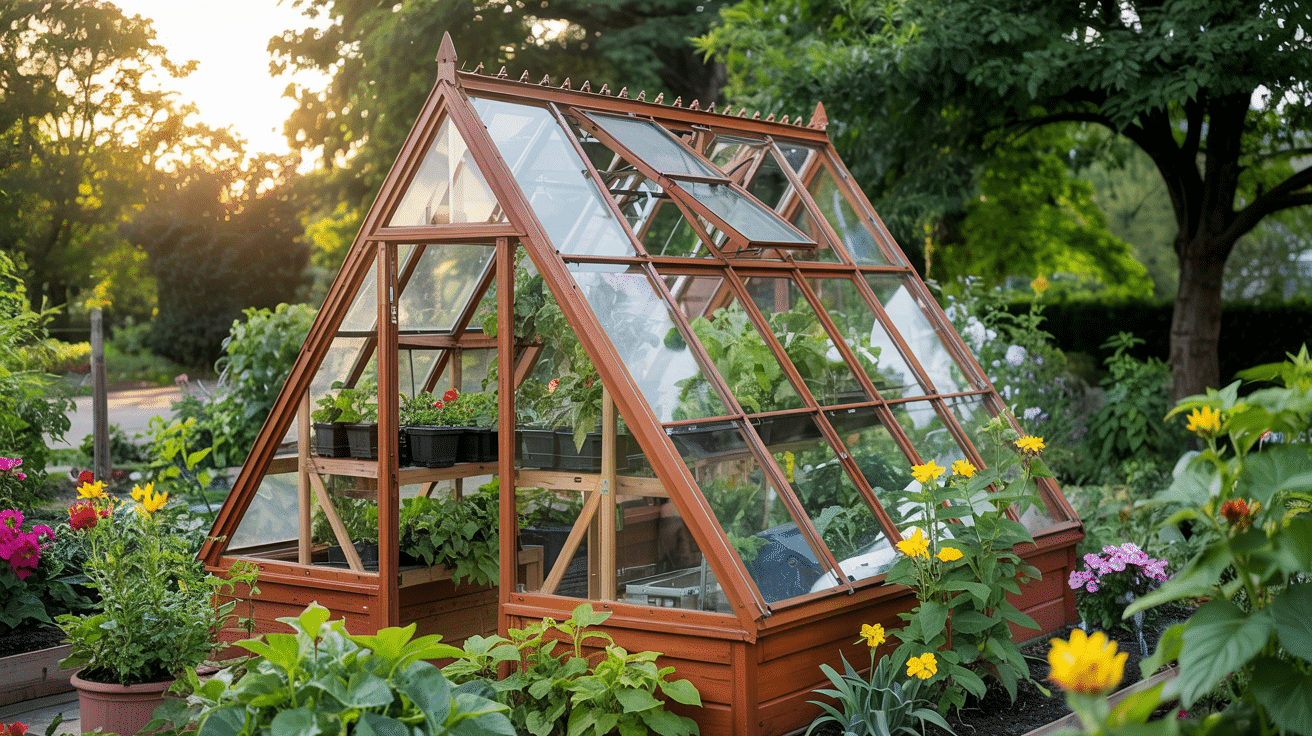
The A-frame greenhouse creates a tall, pointed roof that resembles the letter A. This design sheds snow easily, making it perfect for colder areas.
The steep sides allow rain to run off quickly and provide good headroom in the center.
While the sloping walls limit shelf space on the sides, the center area works well for taller plants. This design uses fewer materials for the roof compared to other styles and is fairly simple to build, even for beginners. An A-frame greenhouse looks charming in any garden setting.
Lean-To Greenhouse
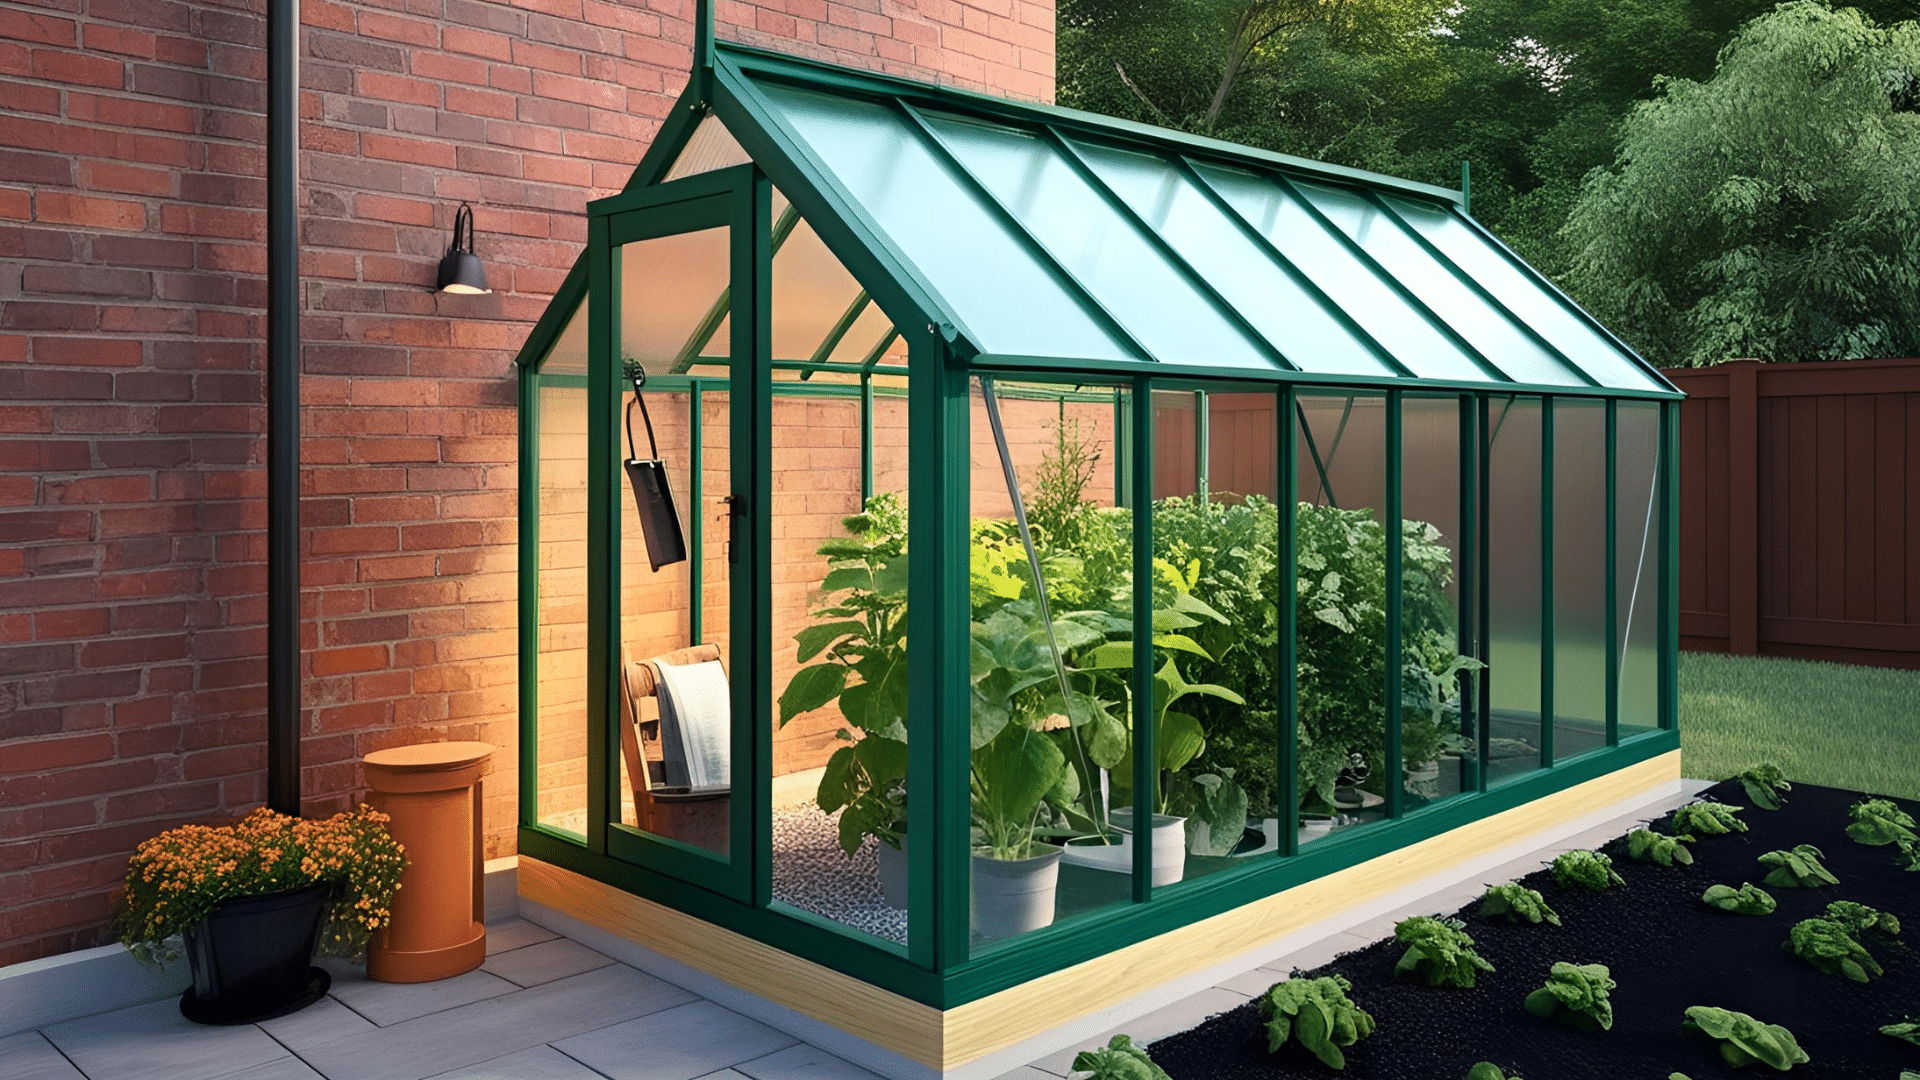
A lean-to greenhouse attaches to an existing wall of your home or another building. This design saves materials since only three walls instead of four are needed.
The shared wall with your house helps keep the greenhouse warmer in winter by sharing heat. Lean-to greenhouses work great in small yards where space is limited.
You can also connect the greenhouse more easily to your home’s water supply. This style blends well with your home’s look and provides easy access in bad weather.
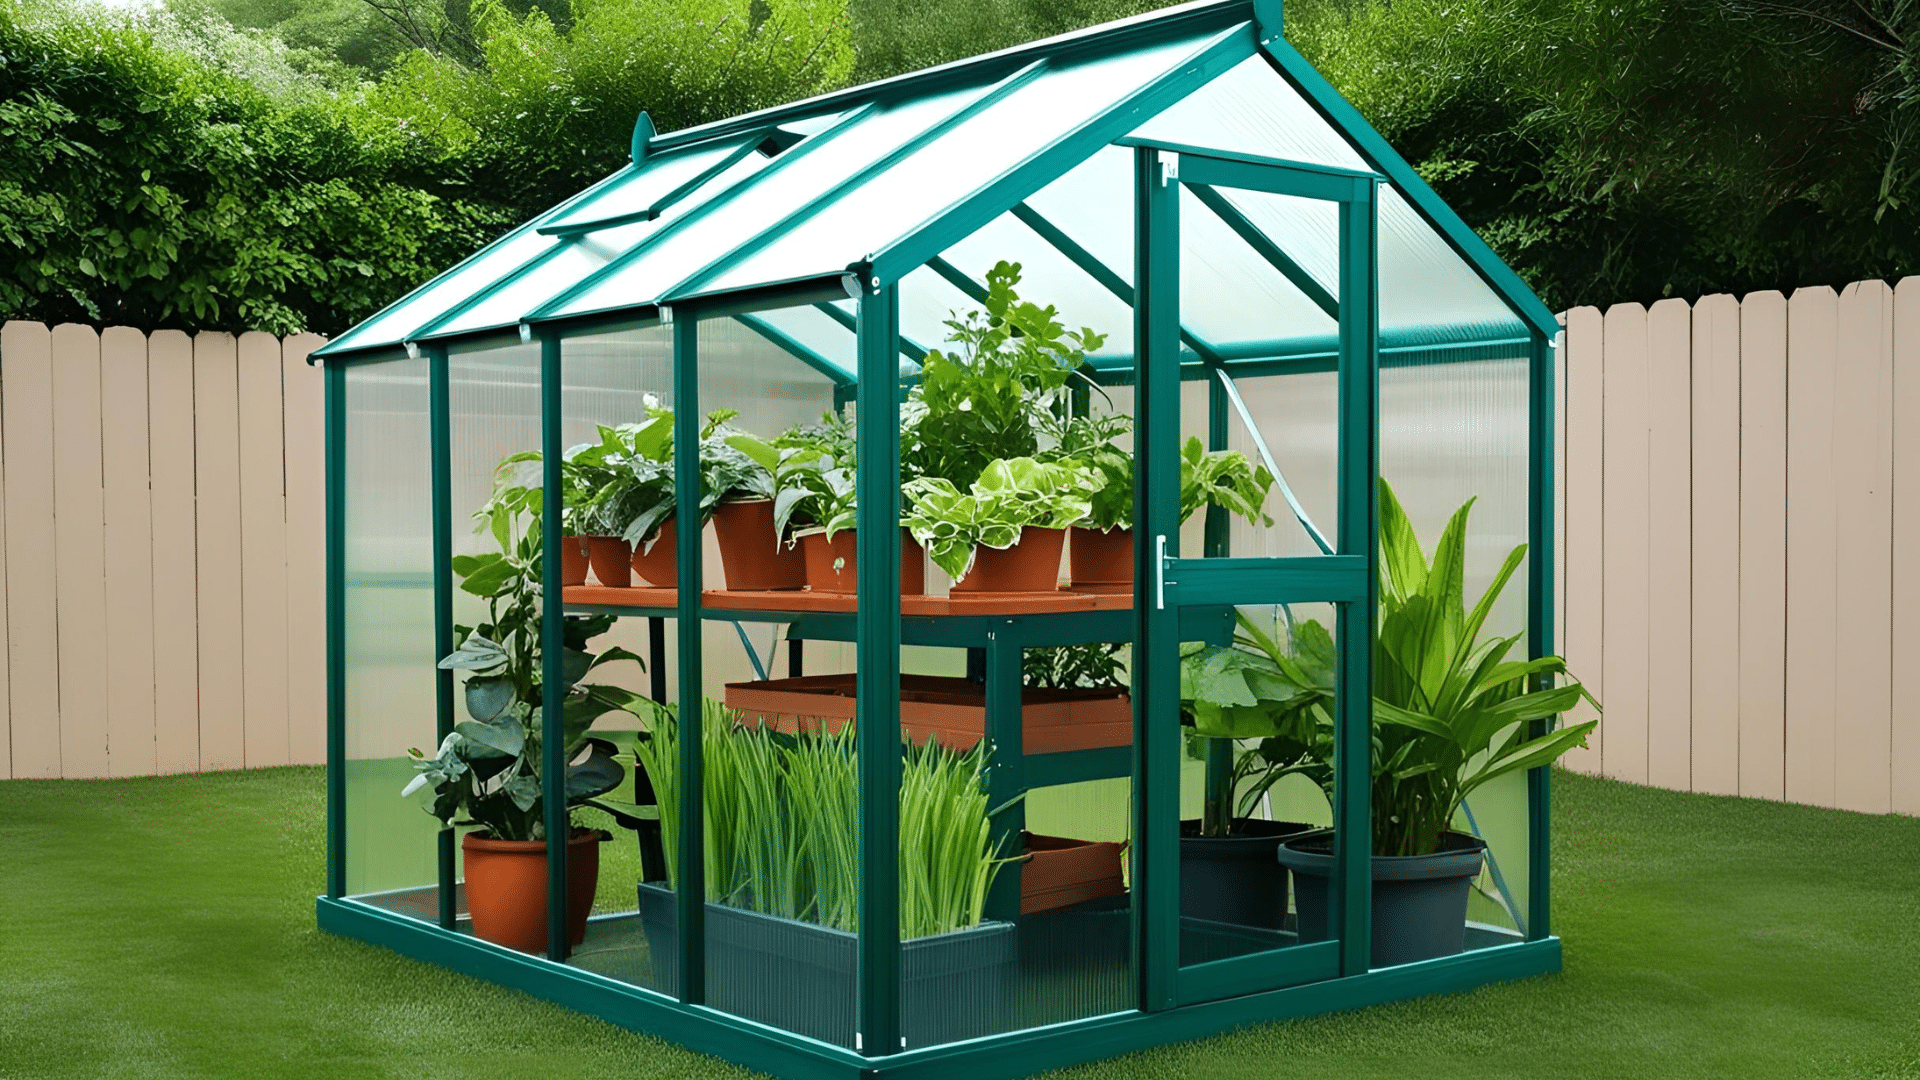
Classic Gable Greenhouse
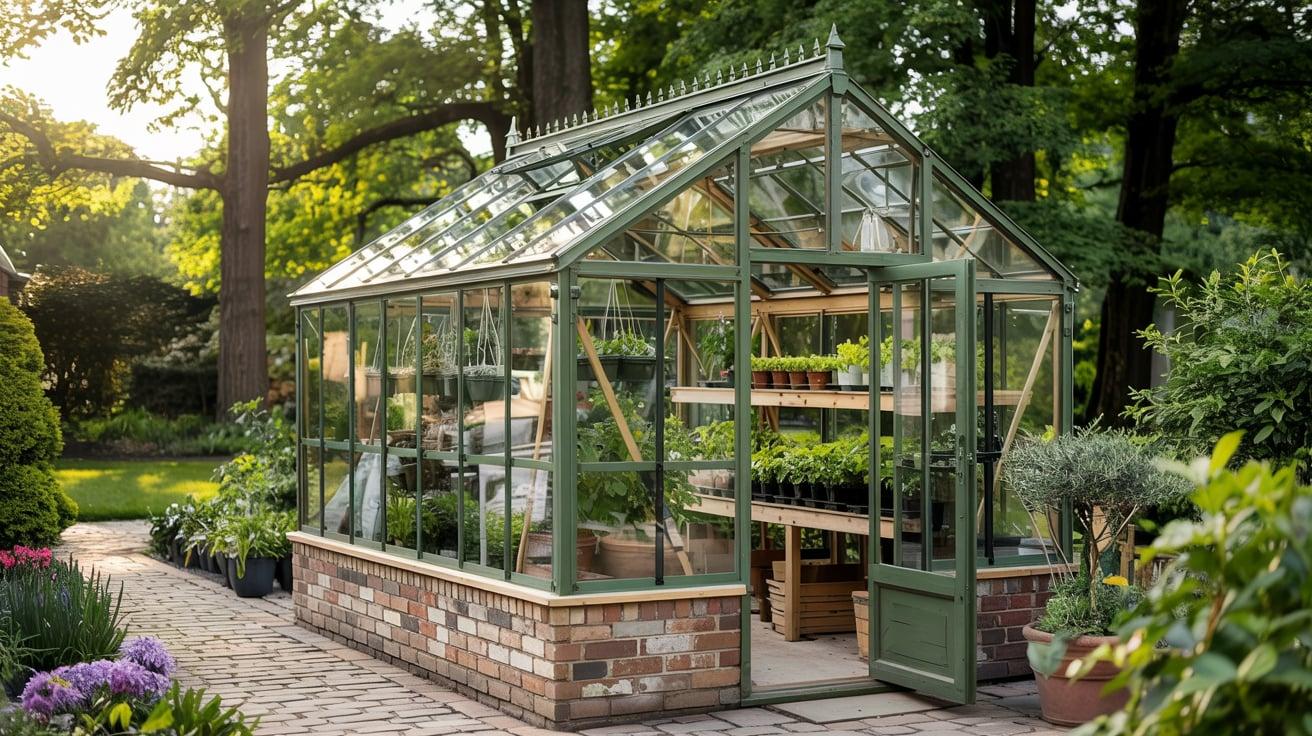
The gable greenhouse features straight walls with a peaked roof. This traditional design provides maximum usable space inside with consecutive walls that allow shelving all around.
The peaked roof lets snow slide off while providing good height for tall plants. This design feels roomy inside and allows for easy movement. The straight walls make it simple to install shelves and hanging baskets.
Gable greenhouses look neat and organized in garden settings and can be scaled to any size needed.
Barn-Style Greenhouse
The barn-style greenhouse features a roof that curves outward at the eaves before sloping up to the peak. This design gives extra headroom along the sides while maintaining good roof pitch for weather protection.
The shape allows for better air circulation compared to simpler designs. Inside, the additional wall height makes room for taller shelving units and hanging plants.
Barn-style greenhouses have a country charm that adds character to your garden while remaining highly functional for serious growing.
Dome Greenhouse
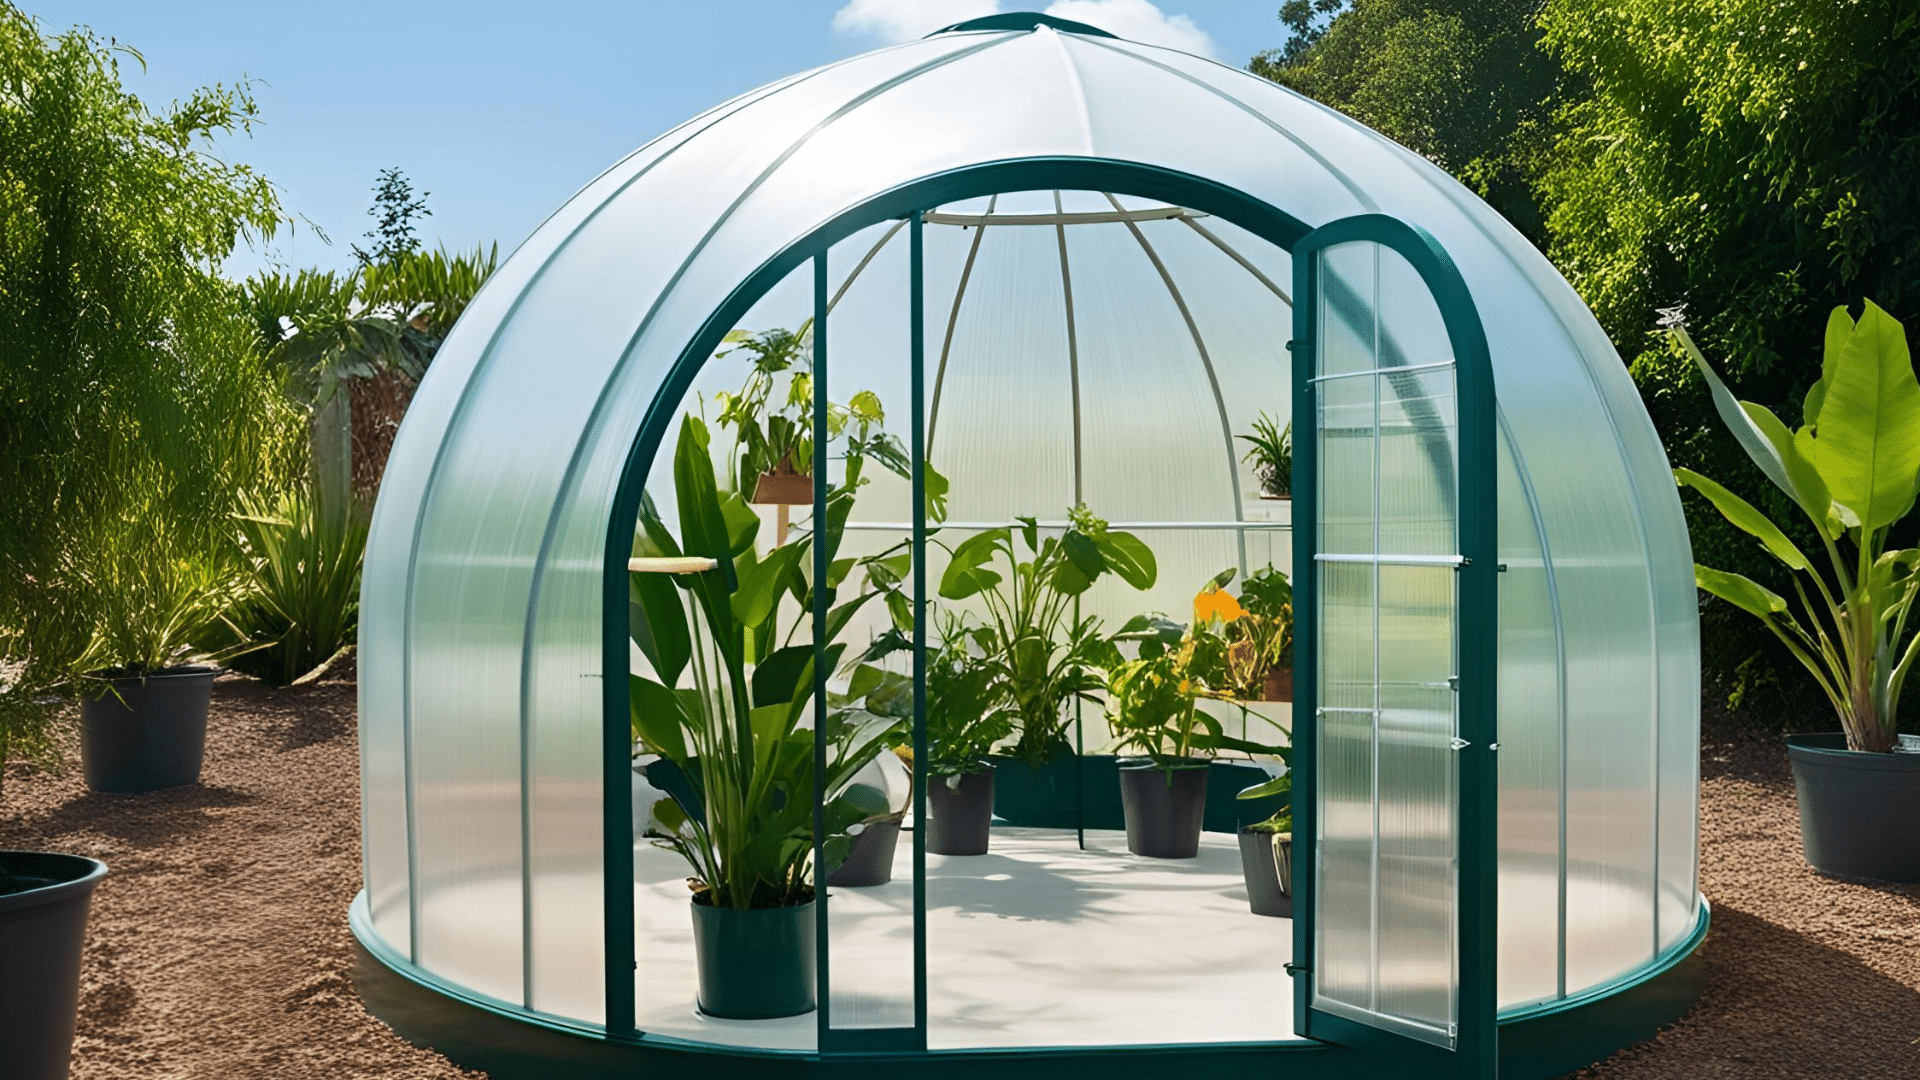
A dome greenhouse creates a rounded structure that handles wind exceptionally well. The curved shape allows light to enter from all angles throughout the day.
While more complex to build, dome greenhouses use materials efficiently and create a unique look in your garden. The rounded interior creates interesting planting zones with varying light conditions.
Due to efficient air circulation, dome greenhouses stay warmer with less heating needed. They make striking focal points in any garden and are well-suited for growing exotic plants.
Victorian-Style Greenhouse
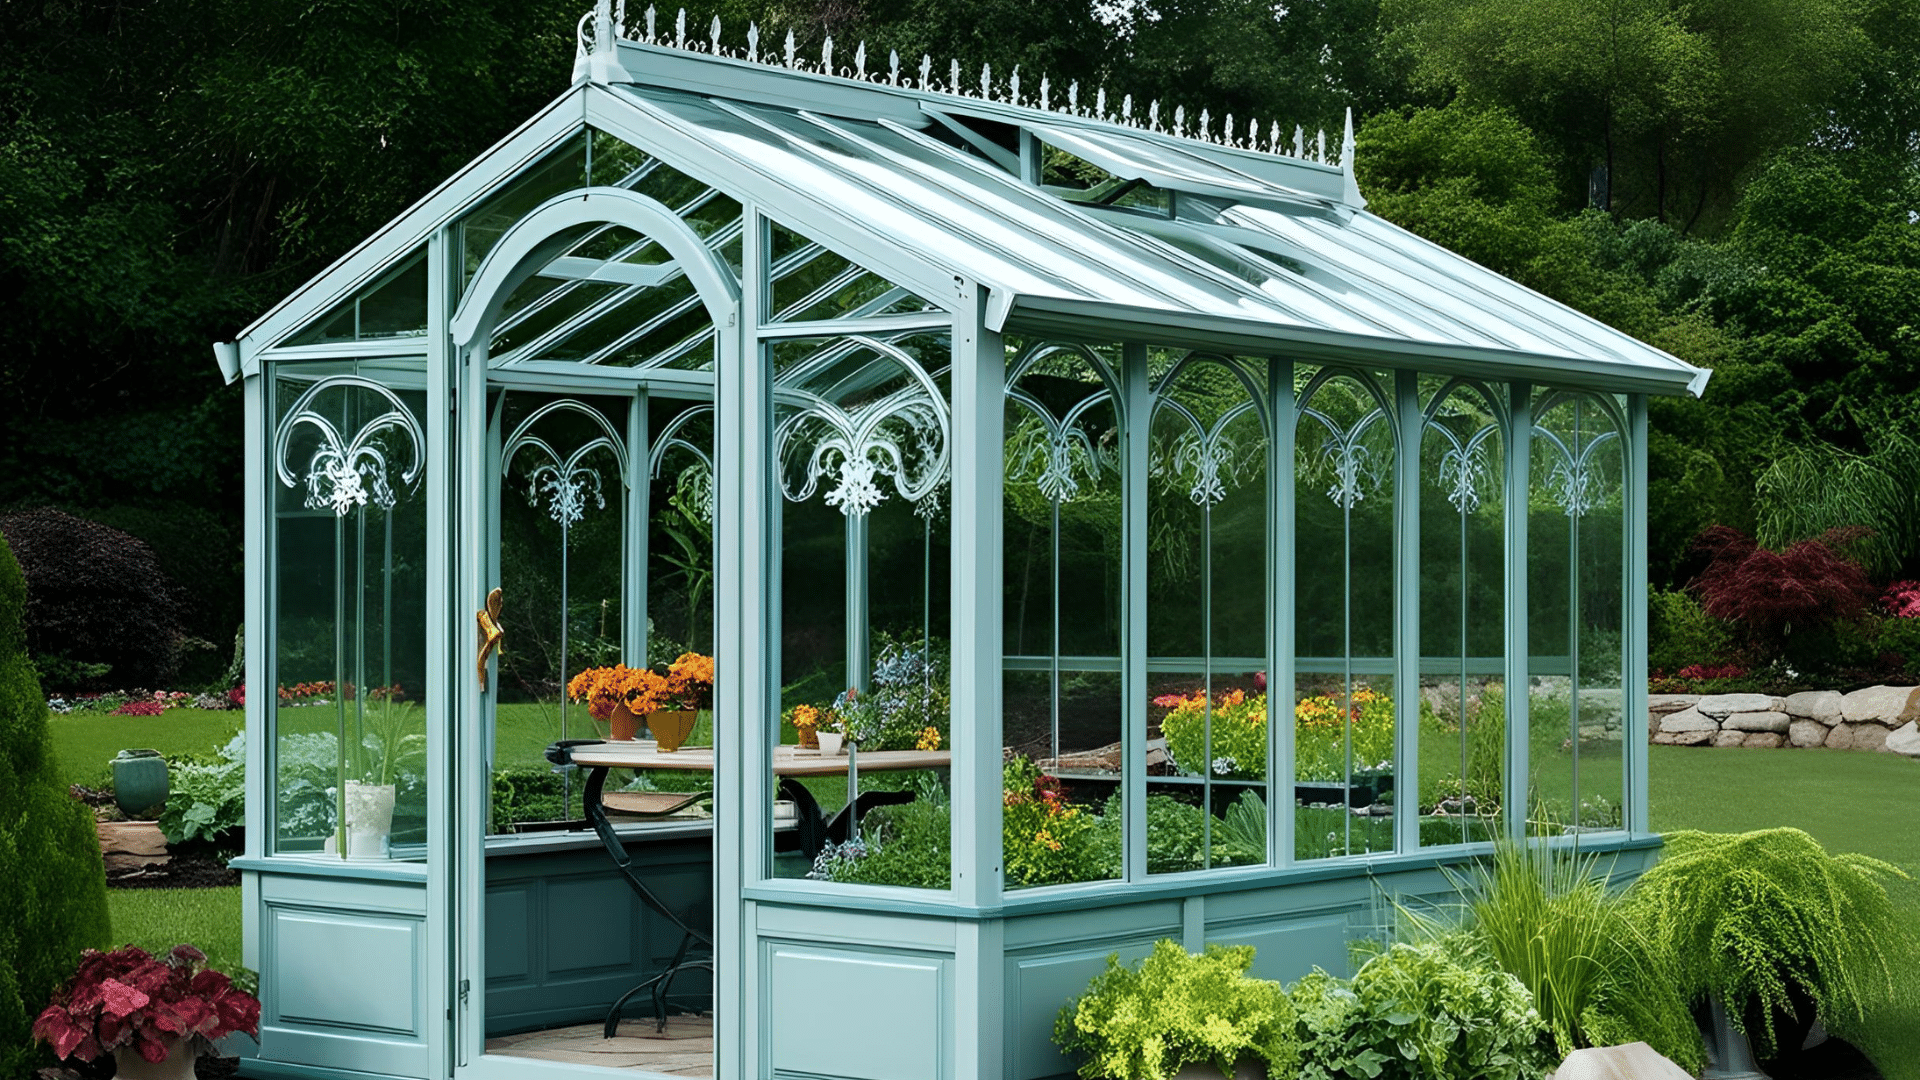
Victorian-style greenhouses feature ornate details and decorative elements that create a classic, elegant look. These designs often include special features like a center ridge line, decorative finials, and curved glass panels.
Inside, the space typically includes formal planting beds and pathways. While more complex to build, these greenhouses become garden showpieces.
Victorian designs work wonderfully for creating a peaceful retreat space that doubles as a growing area. They pair beautifully with formal garden designs and historic homes.
Underground Greenhouse
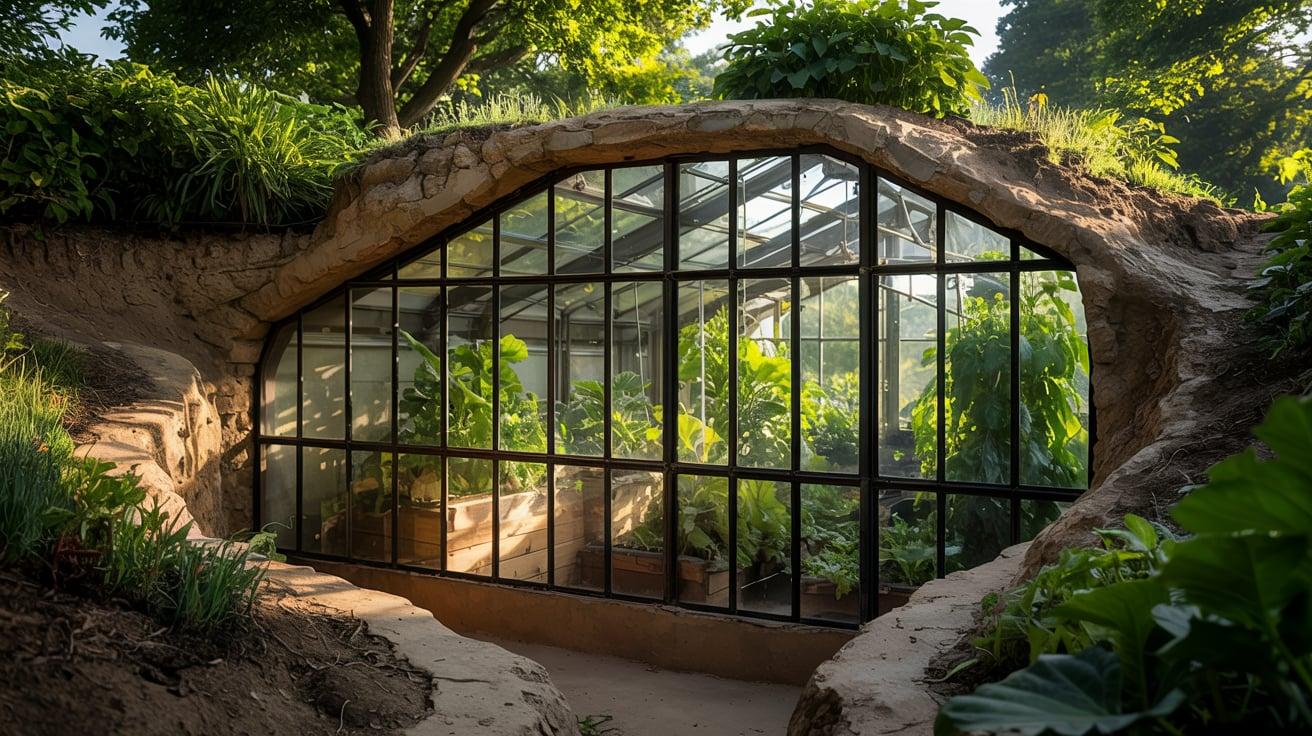
An underground or earth-sheltered greenhouse uses the ground’s natural insulation. By digging into a hillside or building partially below ground level, these greenhouses maintain steady temperatures year-round.
South-facing windows capture sunlight while earth surrounds the other sides. These designs use minimal heating in winter and stay cool in summer without extra cooling.
Underground greenhouses work well in extreme climates where regular greenhouses would need extensive heating or cooling. They blend naturally into the landscape while providing outstanding growing conditions.
Comfort Tips: Making Your Greenhouse a Growing Space
Creating the right environment in your greenhouse is key to plant health and comfort. Here are some tips to help you manage temperature, light, and moisture.
- Managing Heat with Proper Ventilation: To regulate temperature and reduce plant diseases, ensure good airflow by installing hinged windows and automatic vent openers.
- Winter Warmth Solutions: To maintain warmth during colder months, use thermal mass (dark containers of water), electric heaters, or compost bins. Small greenhouses can also use Christmas lights for gentle overnight warmth.
- Shade Management for Summer: Install shade cloth to block excess sunlight. Use 30-50% shade or plant tall crops for natural shading.
- Smart Watering Systems: Install a drip irrigation system with timers, use self-watering containers, and collect rainwater for efficient watering.
- Practical Storage Solutions: Organize tools with hooks, add a potting bench for workspace, and store supplies in labeled bins to maximize space.
- Creating Comfortable Working Conditions: Add a chair for resting, install solar lights for working at night, and use a small fan for air circulation, making the greenhouse a pleasant space for both plants and gardeners.
Personalizing Your Greenhouse
Your greenhouse doesn’t need to be just functional – it can also reflect your style and become a beautiful part of your garden.
A few thoughtful touches can transform a basic structure into a special place you’ll enjoy spending time in while your plants grow.
Decorative Exterior Elements
Simple exterior touches can add character to your greenhouse. Paint the wood frame a color that matches your garden theme or home.
Hang a custom sign with your greenhouse’s name above the door. Along the front, install window boxes filled with colorful flowers.
Solar-powered lanterns placed near the entrance create a welcoming glow in the evening. These small details make your greenhouse stand out as a garden feature rather than just a utility building.
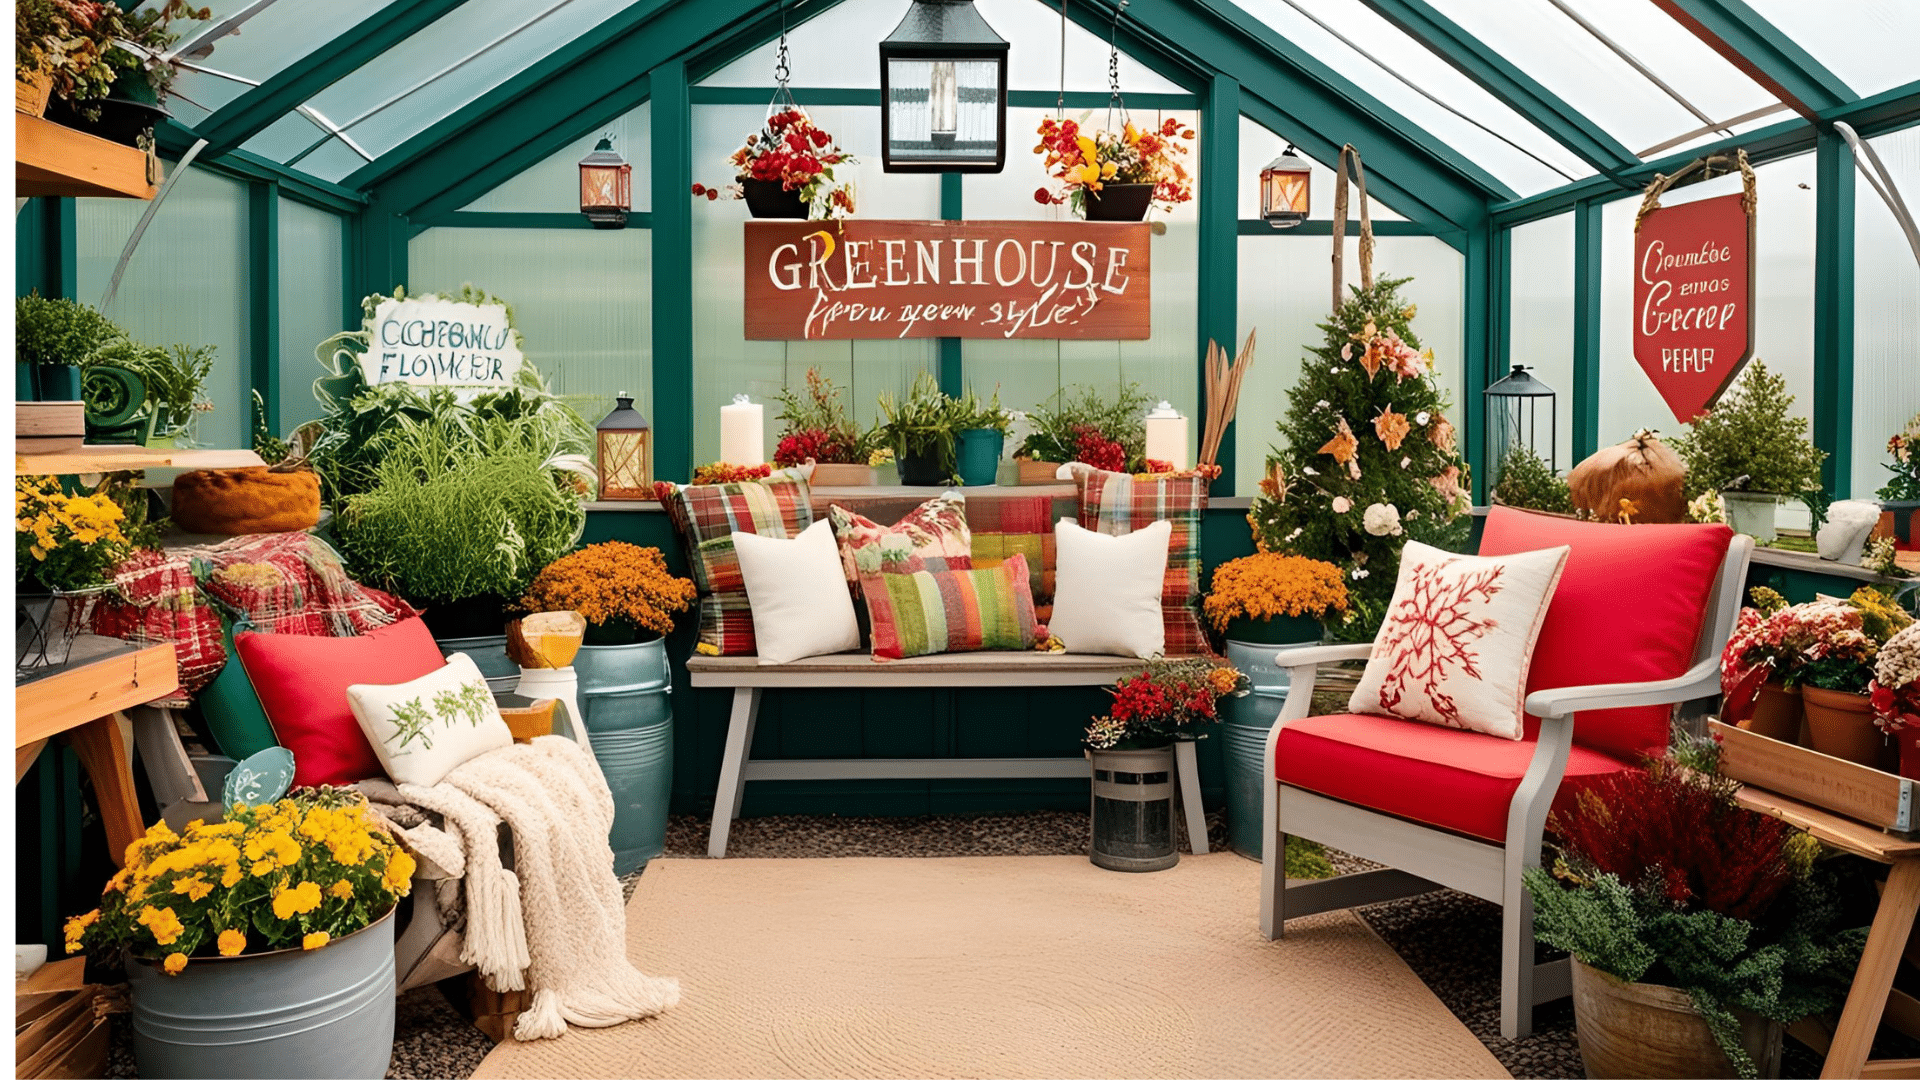
Creating a Welcoming Interior
Add comfort elements to make your greenhouse a pleasant place to work. A small table with gardening books creates a planning spot. Hang wind chimes for gentle sounds when doors are open.
Use pretty containers instead of plain plastic pots. Keep a special watering can that brings you joy. Add a weather-resistant rug for comfort underfoot. These touches make garden tasks more enjoyable and turn your greenhouse into a space you’ll want to visit daily.
Complementary Color Choices
Select colors that work with your garden setting. Light blues and greens blend with plants and the sky, while soft whites keep the space feeling bright and clean.
Consider painting interior wooden elements in cream or pale yellow to reflect more light onto plants. For a natural look, use clear seals on wood rather than paint.
Match door and trim colors to features on your home for a coordinated look. The right colors help your greenhouse feel like an intentional part of your landscape.
Practical Art Additions
Incorporate garden-themed art that can withstand greenhouse conditions. Weather-resistant metal sculptures work well between plant groupings, and mosaic stepping stones add color to floor areas.
Sun-catchers hung from ceiling rafters create dancing light patterns. Look for vintage garden tools to display on walls.
Garden-themed wall clocks help track time while working. These art pieces add personality while highlighting your love of plants and gardening.
Seasonal Decorative Changes
Refresh your greenhouse’s look with the seasons. Hang dried flowers from rafters in fall and winter, and add strings of solar fairy lights for dark winter days.
During the holiday seasons, place pinecones and evergreen branches in window corners. Change out door wreaths to match current blooms.
Change chair cushions or table covers with the seasons. These rotating decorations keep your greenhouse feeling current and connected to the natural cycles happening outside.
Maintenance Tips for a Long-Lasting Greenhouse
Follow these maintenance tips to keep your window greenhouse in top shape for years. They will prevent small issues from turning into bigger ones and keep your growing space efficient.
- Clean greenhouse windows twice a year with a vinegar-water solution to ensure maximum light and check for any window frame rot.
- Tighten loose screws in window frames and remove debris from tracks and sills.
- Apply wood preservative to exposed frames every two years, replacing cracked glass promptly for better temperature control.
- Check and tighten hardware once a year, look for insects like termites, and repaint or reseal exposed wood every 2-3 years.
- Keep foundation areas clear of weeds and debris to prevent moisture build-up against the wood.
- Check the caulking twice yearly and replace old caulk as needed to maintain a good seal.
- To avoid damage, remove snow promptly from the roof with a soft broom, and use wooden supports under shelves for added support.
Common Mistakes to Avoid
When building your window greenhouse, watching out for these common errors will save you time, money, and frustration. Many first-time greenhouse builders face similar challenges. Learning from others’ mistakes helps you create a better growing space from the start.
- Using too-small windows creates limited growing space and makes temperature control difficult. Larger windows provide better light and create a more usable interior.
- Mismatched windows with very different sizes complicate the framing process and often lead to more gaps and leaks in the finished greenhouse.
- Poor ventilation traps heat and humidity, creating ideal conditions for plant diseases and pests. Always include windows that open or vents in your design.
- Incorrect placement limits sunlight access. Study your yard through different seasons to find the spot with the most winter sun and some summer shade.
- Weak foundations allow shifting and settling that can crack glass and create structural problems. A level, stable base prevents many future issues.
- Inadequate sealing around windows allows heat to escape and pests to enter. Take time to caulk all gaps and joints properly.
Conclusion
Building a greenhouse from old windows brings many rewards – fresh plants year-round, a special place in your garden, and the satisfaction of creating something useful from recycled materials.
The project may take several weekends, but the results are worth the effort. Your plants will thrive in their new home, and you’ll enjoy many hours of gardening pleasure regardless of the weather outside.
Remember that regular maintenance keeps your greenhouse working well for years to come. With these tips and some creativity, your window greenhouse will become a favorite spot in your garden.


