
I’m so excited to be partnering* with True Value to share some DIY projects that we’ve been tackling around this old house to make it our own! I’m sharing how we dove right into the project of transforming the bright red (oddly faux-finished) fireplace in our living room! This post is the first of four, so there’s a lot to look forward to and I hope they’re helpful and inspiring for your own home projects! And if you’re looking for more DIY inspiration – check out True Value’s #DIYaDay Instagram challenge starting Monday! They’ll be sharing simple DIY ideas and giving out great prizes all month! All you have to do is follow and tag @TrueValue in a photo or video of your DIY project (there will be different themes each day) and use #DIYaDay. I’ll be participating in a few of the challenges so you can see more of my smaller projects on my Instagram too!
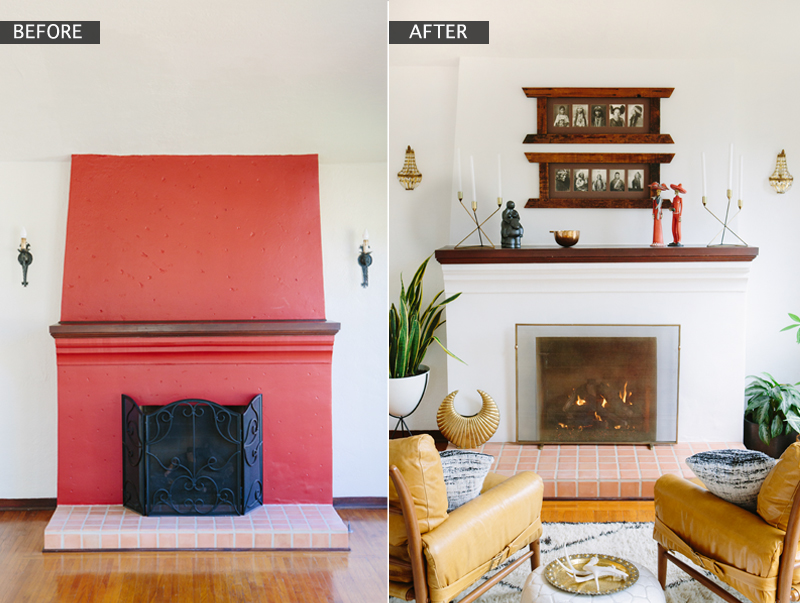
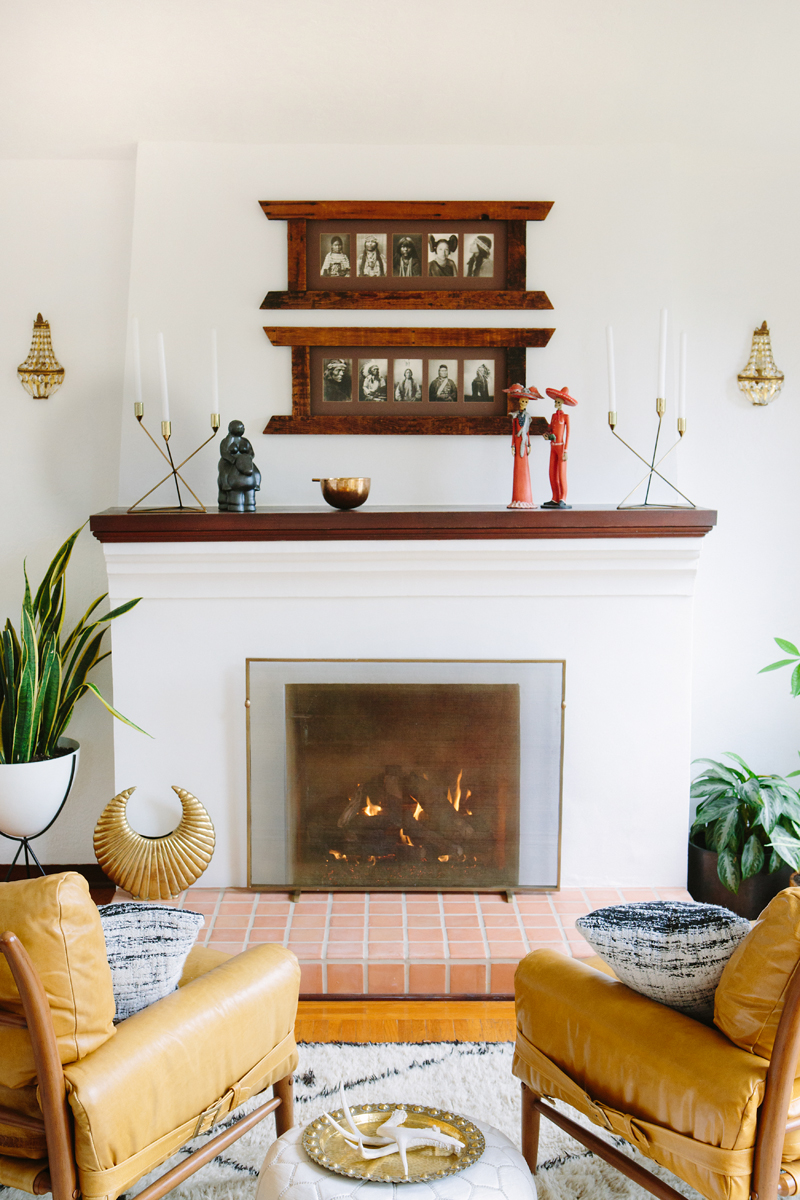
I’m a firm believer that paint is the easiest, most affordable way to make HUGE changes to a space. It’s my go-to if there’s need for improvement in a room. So, spoiler alert: these DIY’s will all involve paint! Ok, let’s dive right into it- this red fireplace with what appear to be faux bullet holes covering it from top to bottom- NOT our jam. Not our jam at all (see more of the empty room and red fireplace here). I was thrilled to discover that the previous owners had painted the rest of the room a creamy white. Meaning that at one point THE ENTIRE ROOM INCLUDING THE CEILING WAS THAT COLOR RED. {insert wide-eyed emoji face} Even though it was an easy project to complete, the impact on the space was HUGE. It felt like a whole new living room. That’s my favorite kind of DIY! See photos below for more of the transformation and then click through for instructions on how to tackle a project like this! xx- Sarah
Decor Sources: Chairs, Pillows, Pouf, Tripod Planter, Fireplace Screen, Candle Holders (all other items are vintage, were picked up in our travels or are unavailable for retail sale that I’m aware of)
FIREPLACE MAKEOVER
Step One: Clean the surface of the fireplace/mantle with a damp rag– remove any dust and residue. Area should be clean and dry.
Step Two: Place drop-cloths to protect the floor. Use a wire brush (or wire brush attachment) to rough up the insides of the faux finish holes- this will ensure that the filler will stick!
Step Three: Mix filler according to package instructions. Use a 3″ putty knife to fill holes, swiping back and forth to remove excess filler and make it as even with the surface as possible. Let dry (reference package instructions for drying times).
Step Four: Use a fine grit sand paper to go over any areas that are not smooth, filler should be flush with surface and smooth to the touch.
Step Five: Vacuum up any dust or particles and wipe surface down one last time to make sure it’s clean/dry.
Step Six: Use painters tape to mask off any areas that will not be painted. Take your time and make sure to apply tape to the very edge- this will ensure clean lines and can make ALL the difference!
Step Seven: Mix paint well, pour into a tray for painting (tray liners are very handy!)
Step Eight: Use an angled brush to paint along the edges to about 3″ out (start with a primer if you are switching from a gloss to a matte or a very dark color to a very light color!) Try to go right up to the edge of the tape, but not too heavy on the actual tape- this can cause it to peel up/chip when you remove the tape. Keep a rag on hand to wipe up any mishaps- they happen to the best of us!
Step Nine: Use a roller to apply the first layer of paint, going over the edges that you have cut in. Don’t worry- it’s not supposed to look perfect on the first coat, so don’t panic if some spots are lighter than others. Again- be sure to use a primer if applicable!
Step Ten: Once the first coat is dry, use a roller to apply 1-2 additional coats of paint.
Step Eleven: Once paint has dried, carefully remove tape and drop-cloths. Style away and enjoy the fruits of your labor!!!
*I was one of the bloggers selected by True Value to work on the DIY Squad. I have been compensated for my time commitment to the program as well as writing about my experience. I have also been compensated for the materials needed for my DIY project. However, my opinions are entirely my own and I have not been paid to publish positive comments.

thank you so much for sharing! your fireplace looks amazing and have a wonderful friday!
WOW! What a difference! Paint really is the answer. Getting ready for some paint projects ourselves – great reminder tips as it has been a while. Well done!
Oh my goodness I’m obsessed with this setup! The brick details, the rug, the chairs and pillows… such a cozy little corner!
x Sarah
http://www.bohochiccafe.com
What a fantastic transition! Seriously a complete 180 – looks gorg!
C’s Collection
http://chelseascollection.com
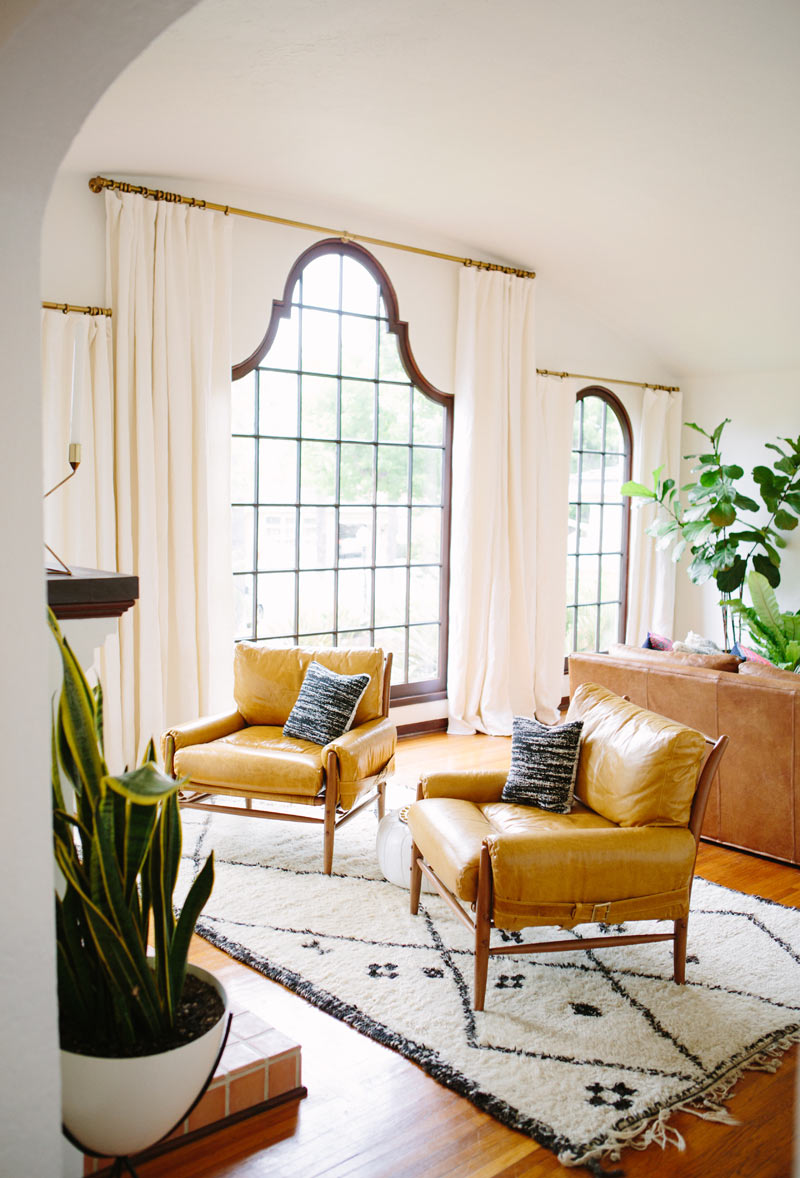
Pretty. But the chairs are distracting me. I looove the chairs. Love. You have great decorating skills!
It looks amazing! Perfect styling as well. I’m absolutely in love with the chairs–anthro has some of the coolest furniture and decor!
Beautiful living room! I was wondering what you think of your Anthro chairs? I’ve been eyeing them forever, but have never seen them in person. Is the comfort/quality what you expected? Thanks!
Thanks Tiffany! Yes, they are AMAZING! So comfortable and beautiful- I couldn’t possibly love them more! Ours did arrive with some scuffs, but customer service took care of us promptly! xx
I am thrilled by the red color, too. You did great job! I love that you explain every step of redecorating. Now the fireplace looks fantastic! Best regards!
hi, me again = }
also, what paint and shade did you use for your living room walls?
thank you, sarah!
wiki