How to Seal Wood: A Complete Guide
There’s something special about real wood. It brings warmth, character, and comfort into your space.
But raw wood also needs a little care to keep it looking its best. If you’ve ever noticed dry spots, water marks, or fading, you’re not alone.
Natural wood can wear down faster than you think, especially without protection. That’s where sealing makes a big difference.
This guide will walk you through the process in a simple and stress-free way. You’ll learn which products to use, how to prep your surface, and what steps to follow.
No fancy tools or expert skills are needed, just a bit of patience and care. Let’s get started together.
Why Sealing Wood Matters
Natural wood is strong, but it’s also sensitive to moisture, sunlight, and everyday use. Sealing creates a thin layer that shields the surface.
- It keeps out water and helps prevent warping or cracking.
- It makes the wood more durable, especially in busy spaces.
- It helps the wood hold on to its natural grain and color.
If you skip sealing, your wood might wear out faster or fade in color.
How to Seal Wood: Step-by-Step Guide
Sealing wood might seem tricky at first, but it’s a simple process when you take it step by step.
The goal is to protect the surface while keeping the wood’s look and feel. You’ll need a clean surface, the right product, and a little bit of time.
With care and patience, you can achieve lasting results. Let’s review what you need to do so you feel ready to start.
Step 1: Gather Your Materials
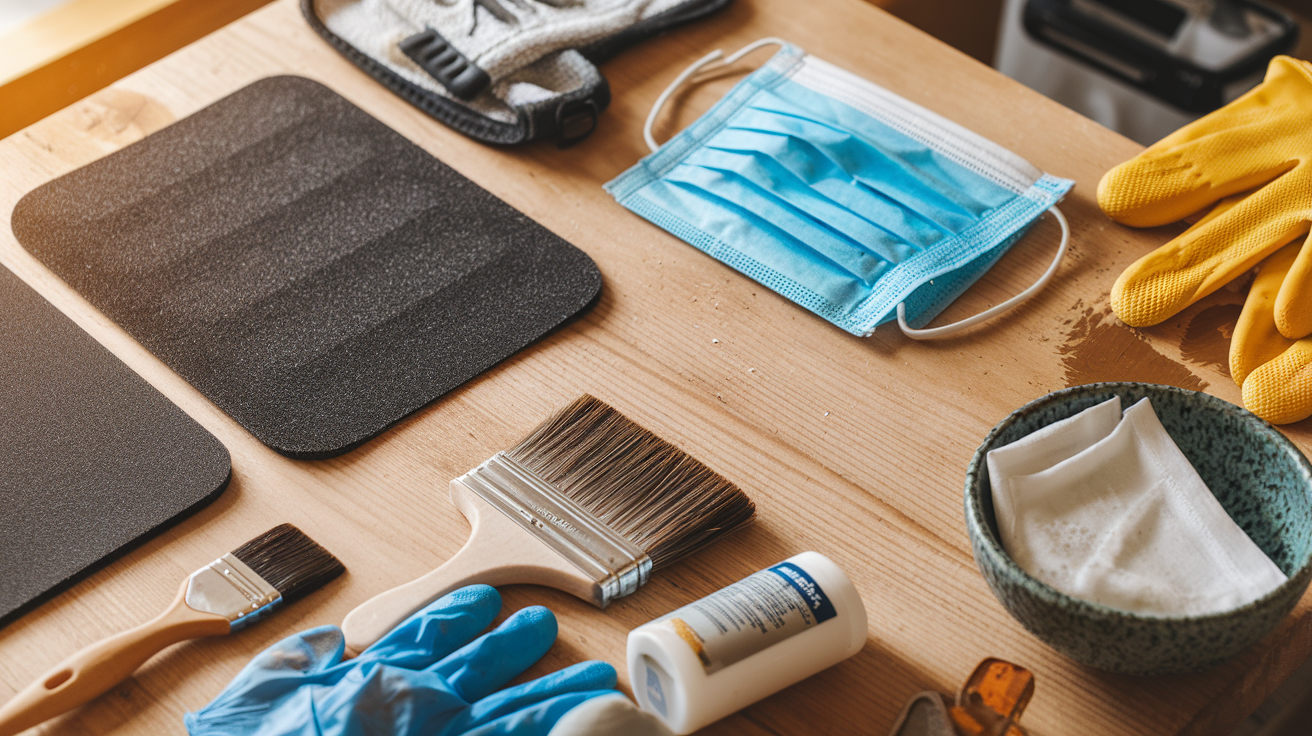
Before you get started, gather the tools you’ll need:
- Damp rag or cloth
- Mild soap (like dish soap)
- Foam sanding pads or fine-grit sandpaper
- Tack cloth or a clean, dry cloth
- Paintbrush or sprayer
- Your chosen sealant (polyurethane, wax, etc.)
- Gloves and a safety mask (especially for high-VOC products)
Step 2: Clean the Surface
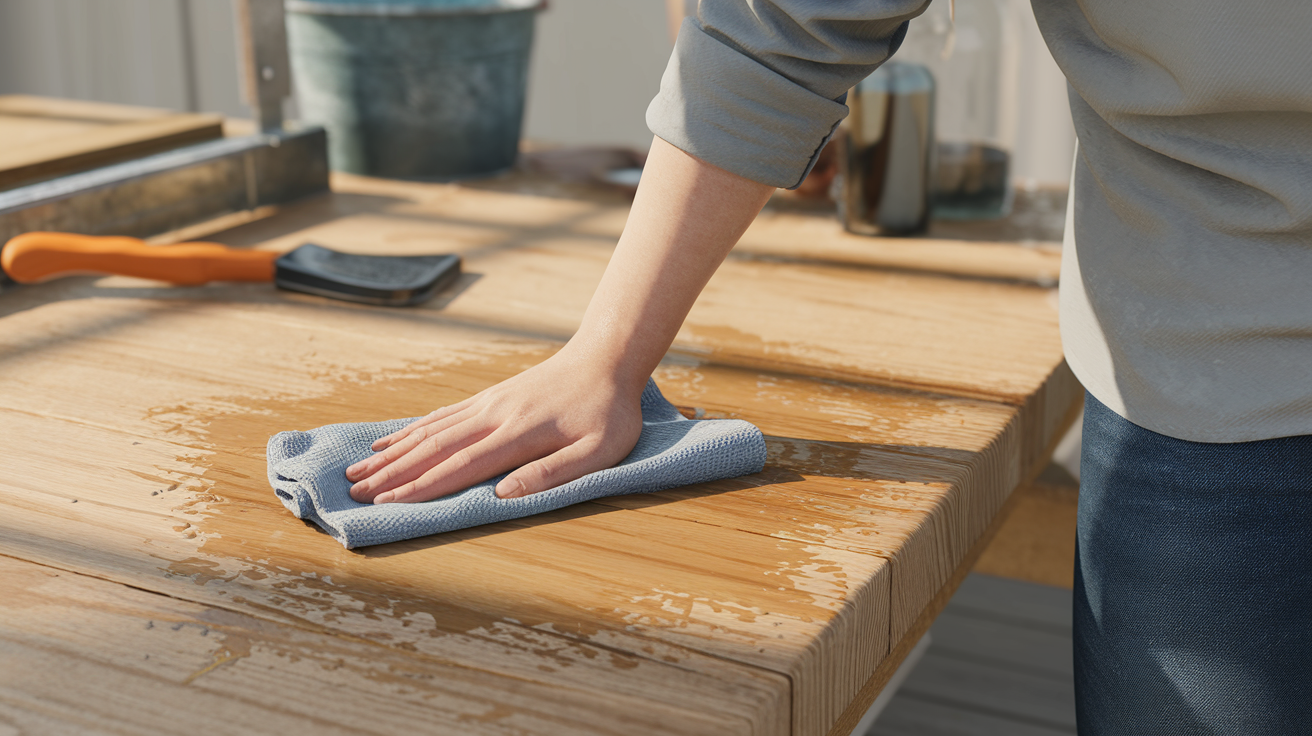
Start by wiping the wood with a soft, damp cloth. This helps remove surface dust, dirt, and old residue. If the wood feels sticky or looks oily, you can add a drop of gentle dish soap to the cloth.
Wipe carefully, and don’t forget the corners or edges. Let the wood dry naturally in a clean spot. Don’t rush this part. Wet wood can trap moisture under the sealant, which might lead to uneven results.
Step 3: Sand the Surface
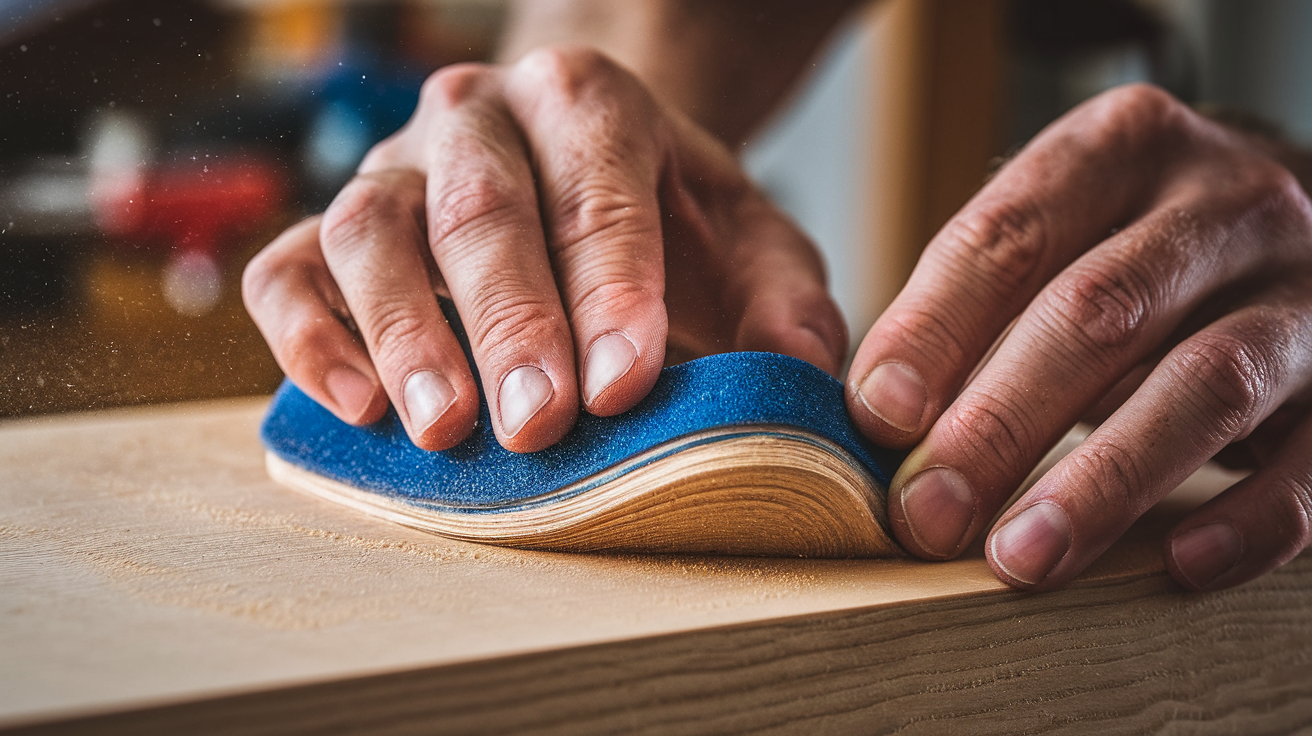
Once the wood is dry, sanding helps prepare it for sealing. Use a foam sanding pad or fine-grit sandpaper to rub the surface gently.
Always sand in the same direction as the wood grain. This keeps the wood’s natural lines intact and prevents rough patches.
Light sanding helps the sealant grip the surface better, making it last longer. Be careful not to sand too hard or too long, just enough to smooth it out.
Step 4: Wipe Away Dust
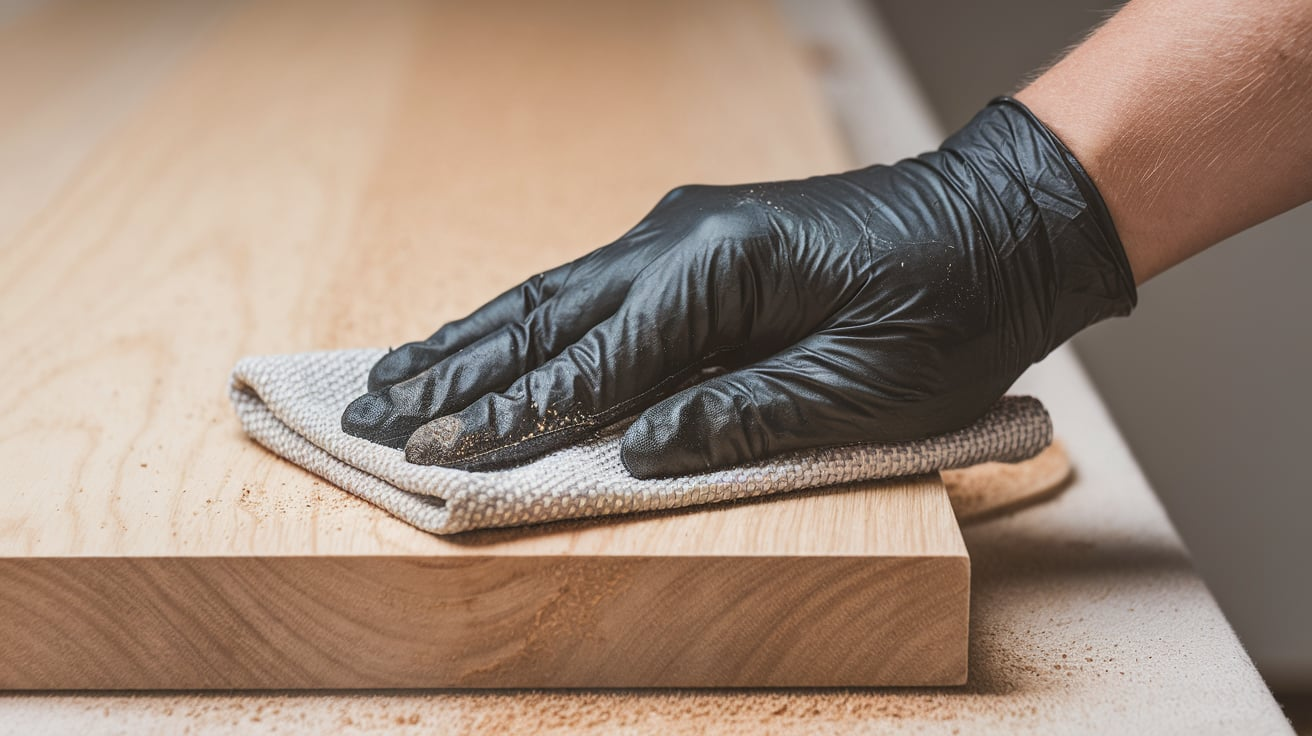
Sanding creates fine dust that needs to be cleaned up before you seal. Use a tack cloth or a dry, clean rag to wipe the surface.
Move gently across the wood to lift the dust rather than push it around. Don’t leave any behind, especially in corners or between cracks.
Even small bits of dust can make the sealant dry unevenly or leave behind rough spots.
Step 5: Apply Sealant in Thin Layers
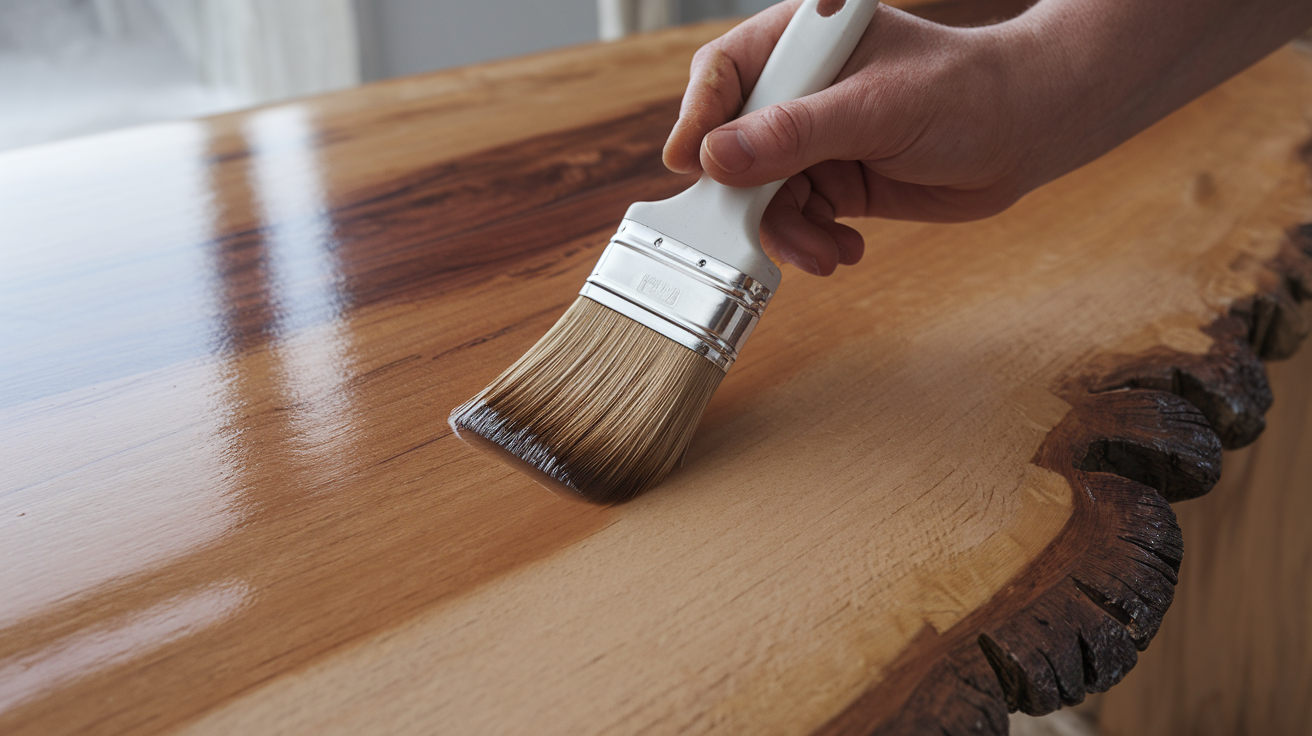
Start with a clean, dry surface. Use a brush for small areas or a sprayer for larger pieces.
Dip your brush lightly and spread a thin coat across the wood. Always follow the direction of the grain. This helps the sealant blend in better and avoid streaks.
Thinner layers dry faster and look more even. A heavy coat might seem faster, but it can leave bubbles or a sticky finish. Take your time here; it pays off in the end.
Step 6: Let It Dry Fully Between Coats
After applying the first coat, give it enough time to dry. Most products need a few hours, but check the label for the exact timing. The wood should feel dry to the touch before moving forward.
Once it’s dry, lightly sand the surface with a fine sanding pad. This smooths out any bumps and helps the next coat stick better. Wipe away all the dust with a clean cloth.
Then, apply the next coat the same way. Most indoor projects do well with two to three coats. For outdoor use, you might need one or two more for better protection.
Choose the Right Sealant for Your Project
Different sealants work better for different types of wood and use. Here’s how to pick one that fits your project.
| Sealant Type | Best For | Pros | Cons | Notes |
|---|---|---|---|---|
| Polyurethane | Dark wood, floors, and dining tables | Very durable, protects from wear and moisture | Strong smell, slow to dry, may yellow over time | Use in well-ventilated areas |
| Polycrylic | Light woods, furniture, and crafts | Low odor, easy to clean up, resists yellowing | Less durable than oil-based options | Good for indoor use |
| Wax Finish | Shelves, photo frames, light-use decor | Soft shine, low odor, easy to apply | Needs reapplication, offers limited protection | Best for looks, not long-term durability |
| Hemp Oil | Small projects, indoor use, eco-conscious homes | Safe around pets/kids, brings out wood grain, easy to apply | Needs frequent reapplication | Soaks into the wood instead of coating it |
| Spar Urethane | Decks, outdoor furniture, and garden planters | Strong protection against UV, water, and heat | Strong smell, multiple coats needed | Let each layer dry fully |
Fixing Common Mistakes
Mistakes happen, especially when you’re learning something new, and sealing wood is no different. If you use too much sealant, just let it dry, sand it gently, and try again with a thinner layer.
When bubbles or streaks appear, sanding the area lightly and applying a smoother coat can help. If you missed sanding at the start, go back and give the surface a proper prep before sealing again.
Taking your time with each step gives you better control and more even results. There’s no rush, it’s okay to slow down and get it right.
Project-Specific Sealing Tips
Different projects may need special care. Here are a few quick tips:
- Cutting boards: Use food-safe oils like mineral oil, not polyurethane
- Shelving: Choose a sealer that doesn’t get sticky or trap dust
- Wall planks: Lighter sealants like polycrylic keep the color true
- Vintage furniture: Test on a small area first, in case the wood reacts
Safety Tips
Working with wood sealers means dealing with strong smells and chemicals.
- Keep windows open or use a fan
- Wear gloves and a mask, especially with polyurethane
- Avoid using heat or open flames while sealing
- Read and follow the product label instructions
Even low-odor sealants can bother your lungs in a closed room.
Conclusion
You should now have a better idea of how sealing works, what to use, and why it matters.
We’ve covered the basics, discussed product choices, shared how to prep your wood, and pointed out ways to fix small mistakes. This information will help you take on your next project with more clarity and less stress.
If you’ve made it this far, you’re already on the right track. Keep learning, keep trying, and don’t be afraid to slow down.
If you found this helpful, check out some of our other blogs on our website. There’s always something simple and practical you can try next.