
How to Make Shaker Cabinet Doors: Easy DIY Guide
Are you tired of boring, costly cabinets? Learning how to make shaker cabinet doors can save you money and give your kitchen a fresh look.
These simple, clean-lined doors are popular because they fit with many home styles. In this blog, we’ll guide you through each step to build your shaker doors, from cutting the wood to applying the final coat of paint.
We’ll cover the tools you need, common mistakes to avoid, and tips to keep your new doors looking great for years.
By the end, you’ll have the know-how to make beautiful cabinet doors that match your exact style and budget.
Ready to modify your kitchen with your own hands? Let’s get started!
Why Choose DIY Shaker Cabinet Doors?
Creating your shaker cabinet doors has several advantages. You can create them exactly how you want them to look. This saves you money compared to buying ready-made doors.
There’s also a sense of satisfaction that comes from creating something with your own hands. When friends visit, you can proudly show them the cabinets you built yourself.
Your kitchen or bathroom will have a look that perfectly suits your style. The effort you put in shows in the final product.
Materials Required
Here is the list of materials you will need while building the shaker cabinet doors.
- 1×3 wood (Poplar recommended)
- 1/4″ plywood (Birch preferred)
- Table saw
- 10-inch saw blade (standard)
- Miter saw
- Drill and drill bits
- Clamps
- Wood glue
- Sandpaper (120 grit and 180 grit)
- 35mm Forstner bit (for European hinges)
- Measuring tape
Step-by-Step Guide to Making Shaker Cabinet Doors
In this section, we will outline each step you need to follow to create shaker cabinet doors. Gather your materials and tools, and let’s get started with the simple steps to create a beautiful, custom door for your cabinets.
Step 1: Cut the Styles and Rails
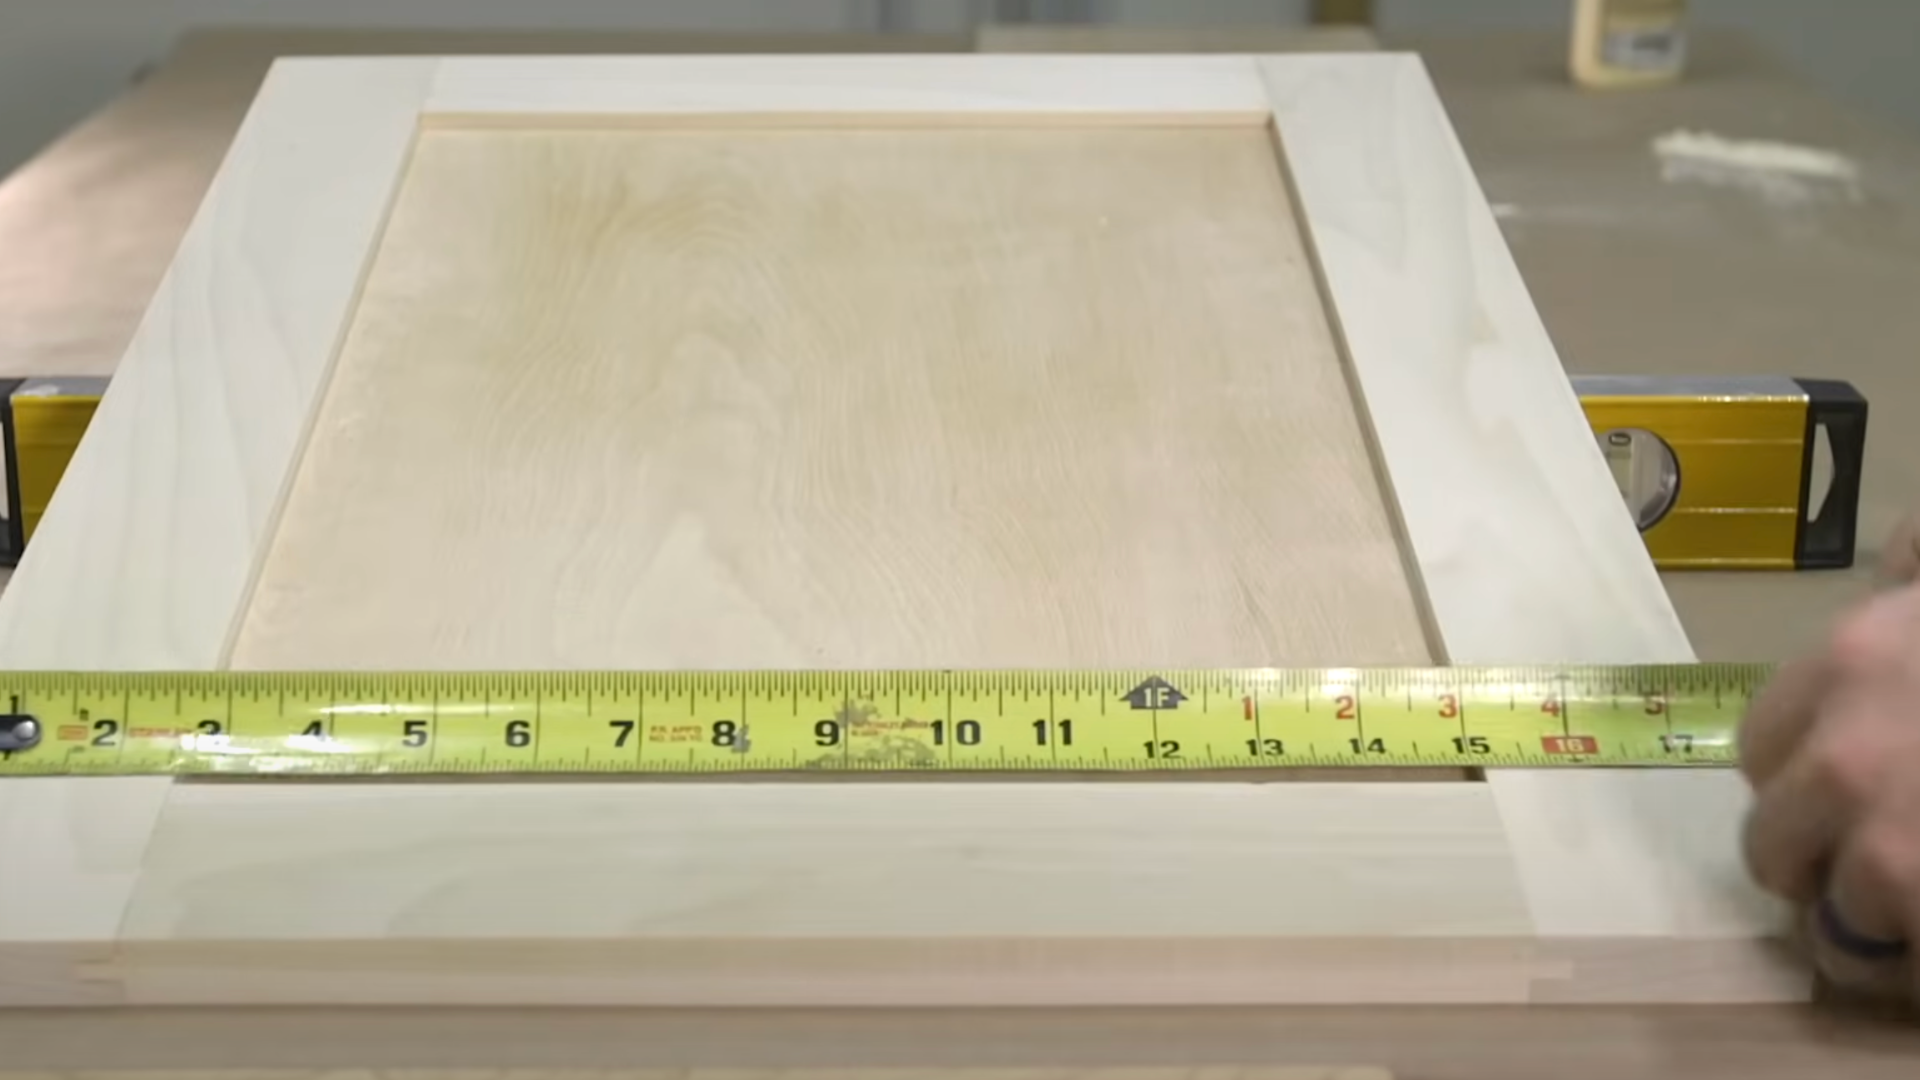
To make your shaker doors, start by cutting the main pieces. The styles are the long sides that run up and down. Cut two pieces to match your cabinet opening height, about 23.5 inches in most cases.
Next, cut the rails – these are the top and bottom pieces. Find your total door width (like 17.5 inches), then take away the width of both styles, and add 3/4 inch for the joining parts. This gives you a length of about 14.25 inches.
Most people make these pieces about 2.25 inches wide, but you can change this based on how big your cabinets are. Take your time with these cuts – they need to be exact for your door to look good.
Step 2: Cut the Groove for the Plywood Panel
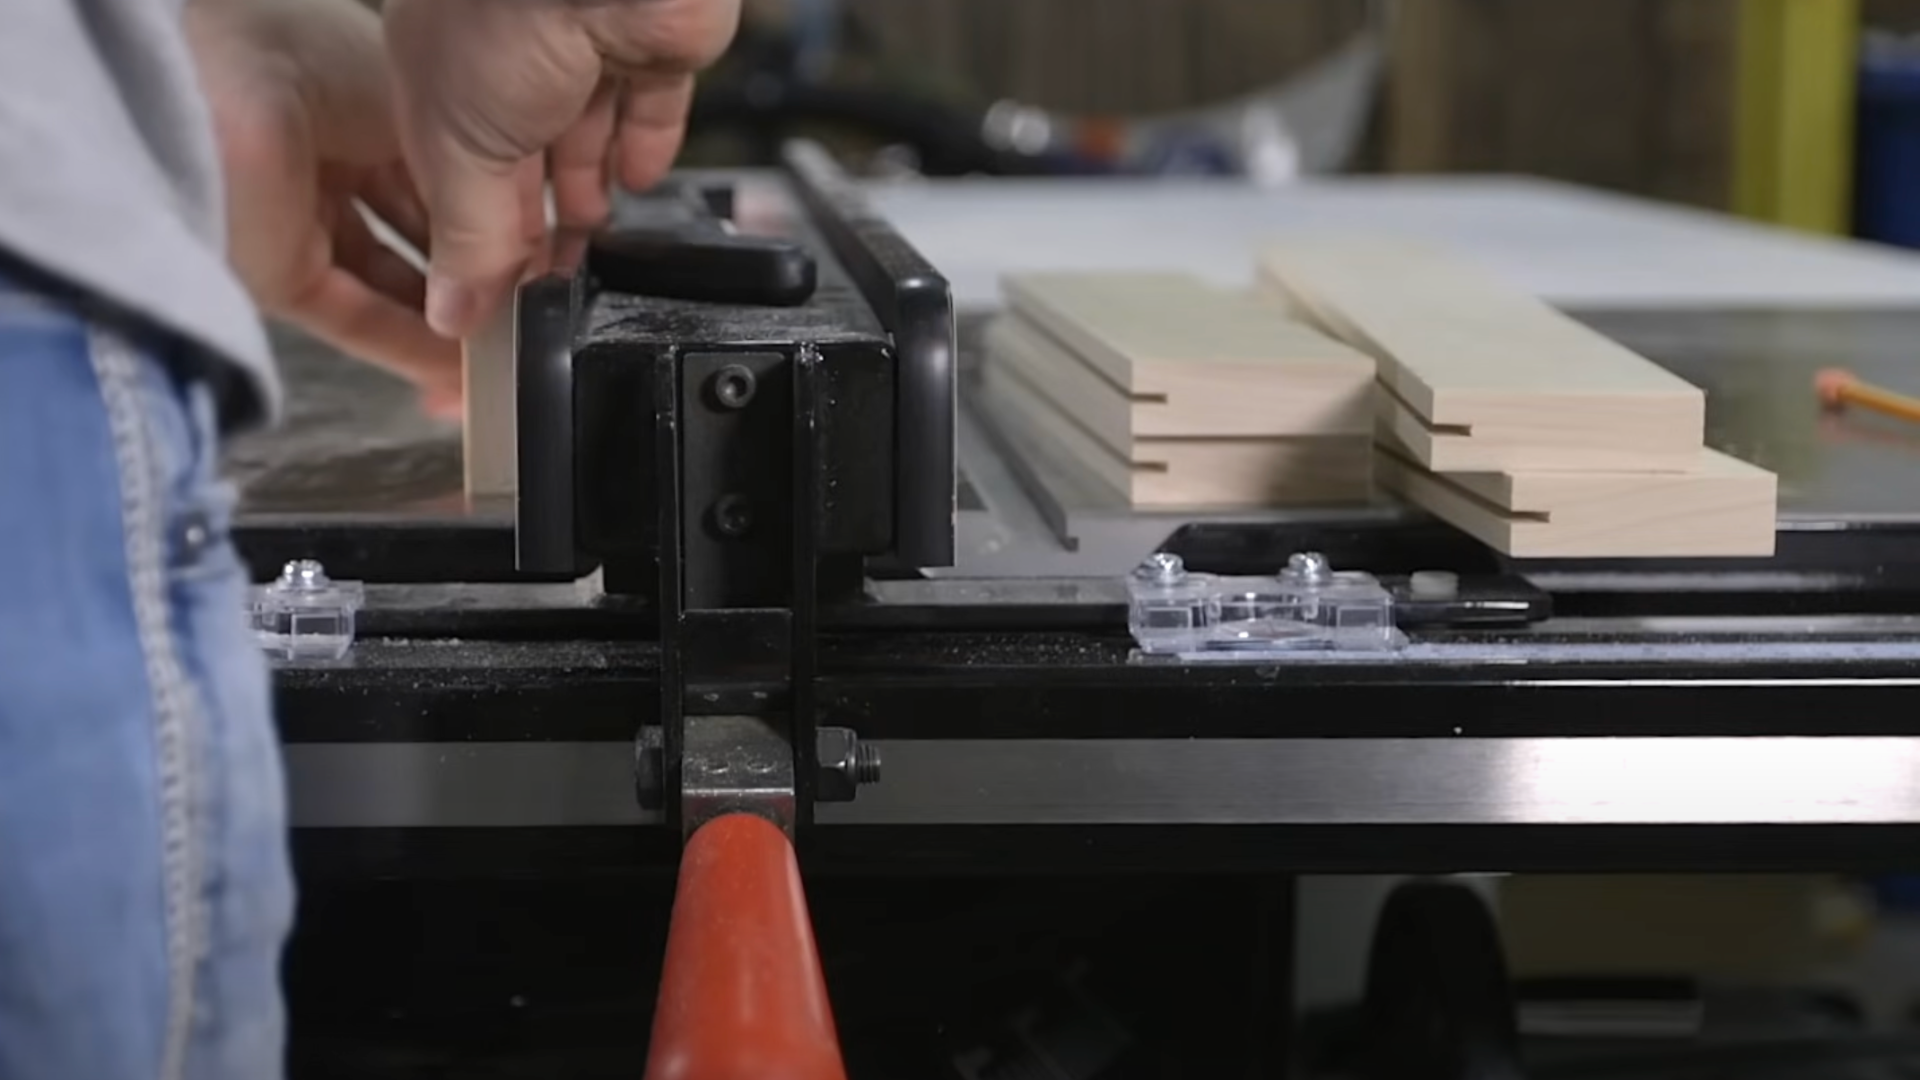
Now you need to make a groove in all your pieces. This will hold the center panel. Set your saw blade to stick up 3/8 inch. Put your fence in the middle of the board’s width.
Before cutting all your good wood, try this on a scrap piece first. The panel should fit in the groove without being too loose or too tight. If the fit isn’t right, move your fence a tiny bit and try again.
Once you get the perfect fit, cut grooves in all your styles and rails. This step takes some care, but getting it right means your door will last for years.
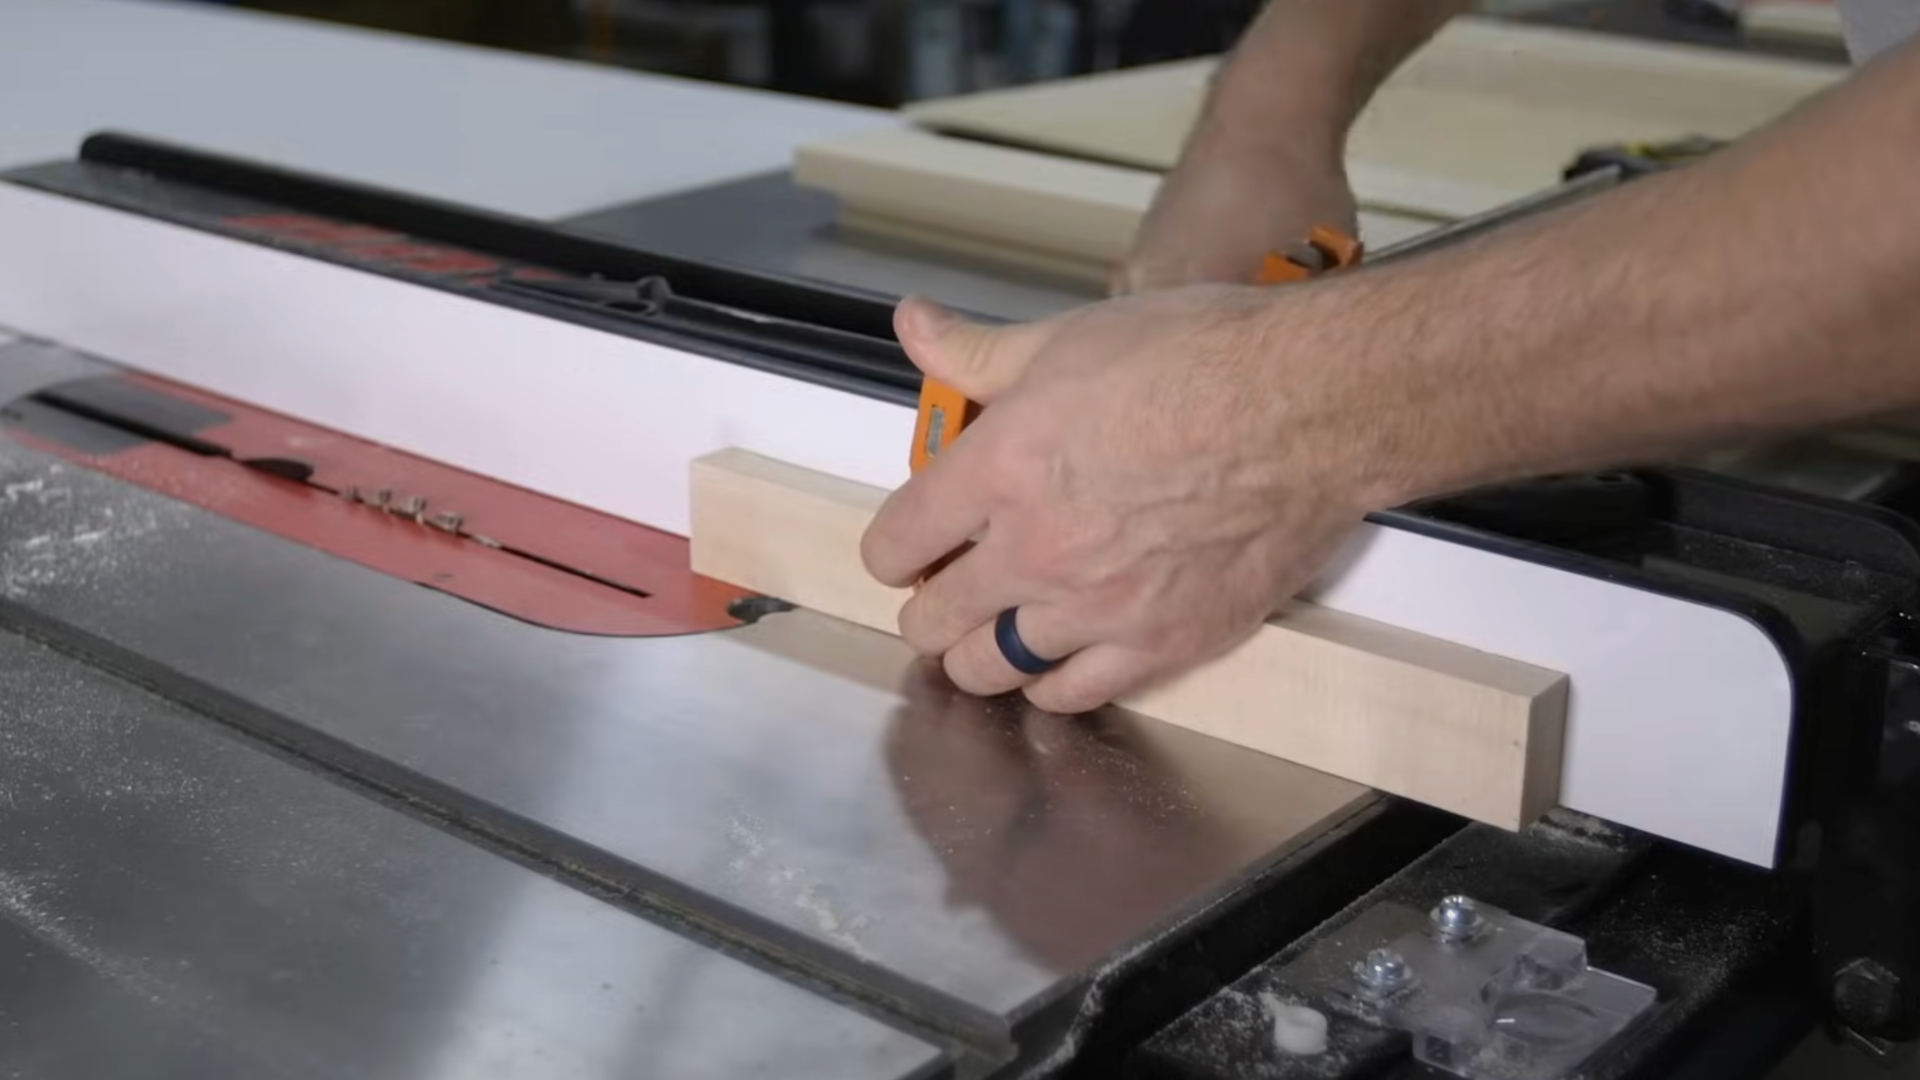
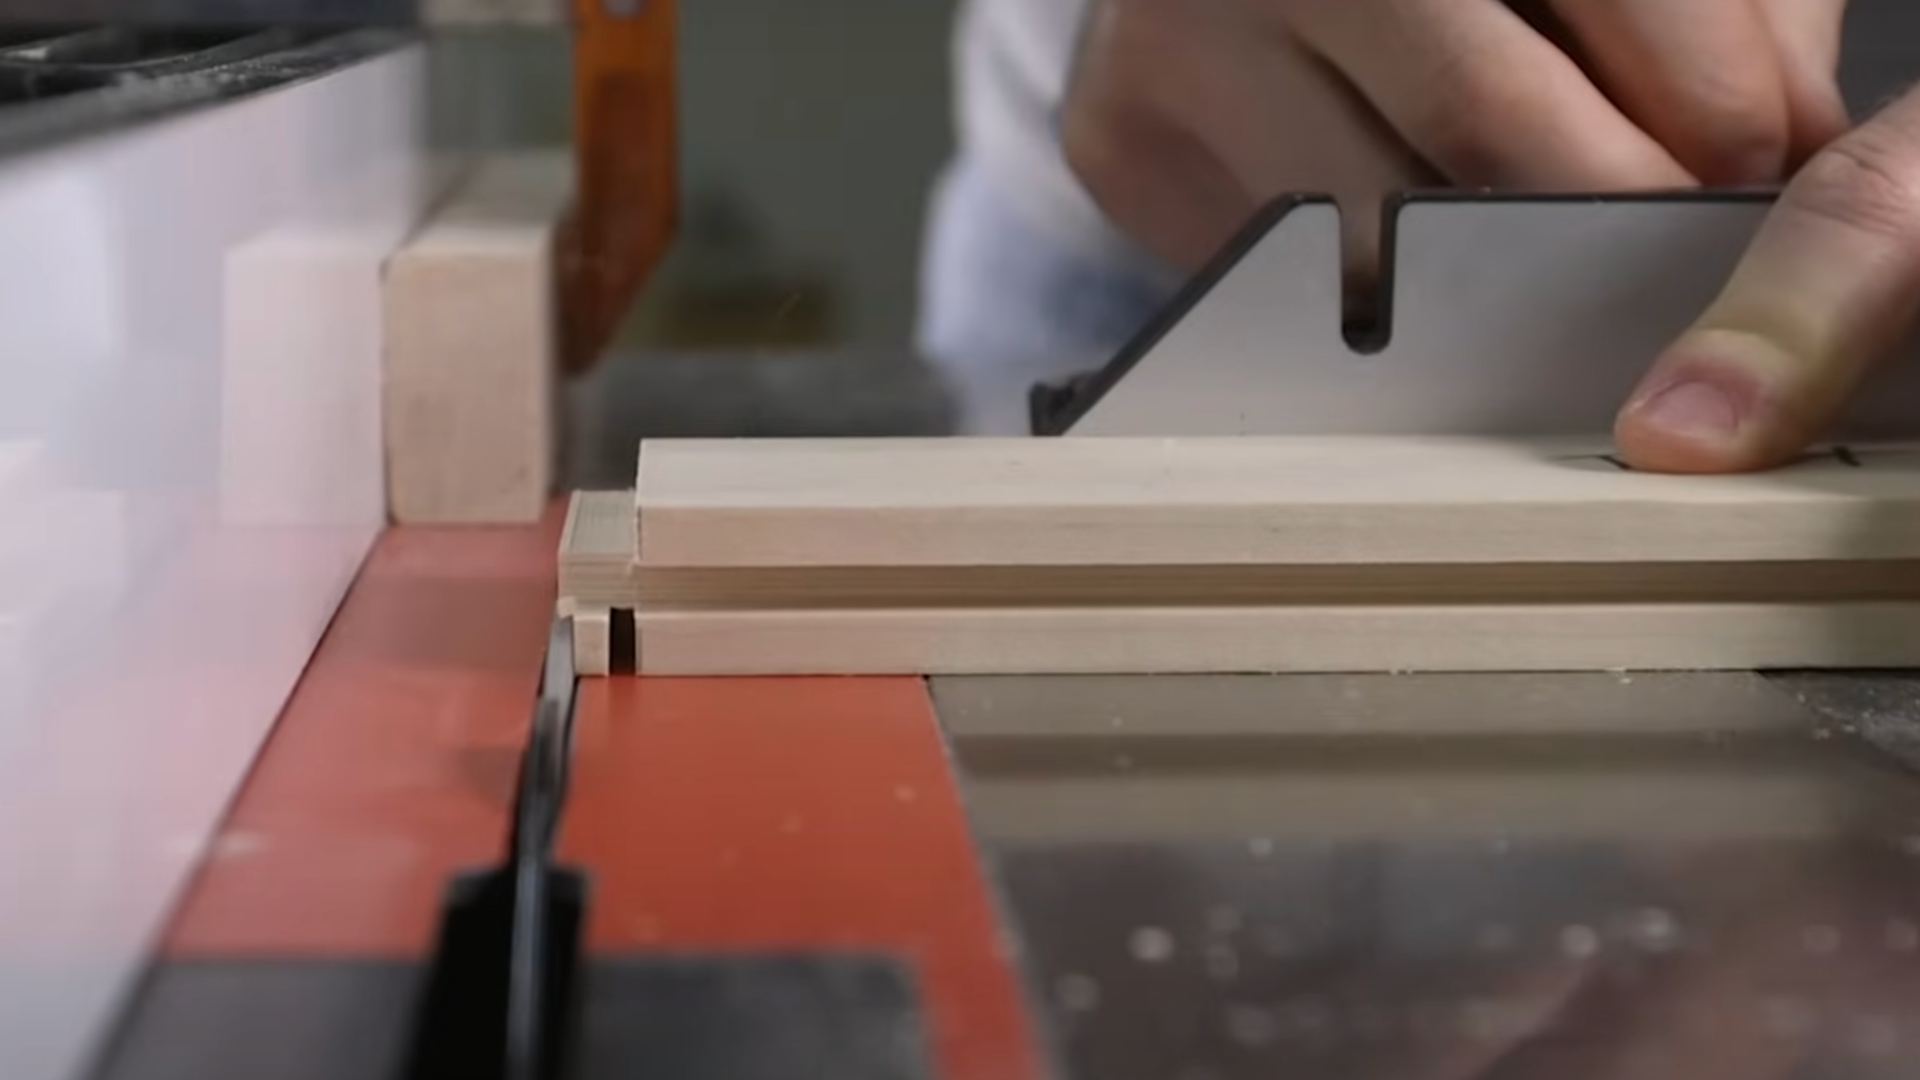
Step 3: Milling the Tenons
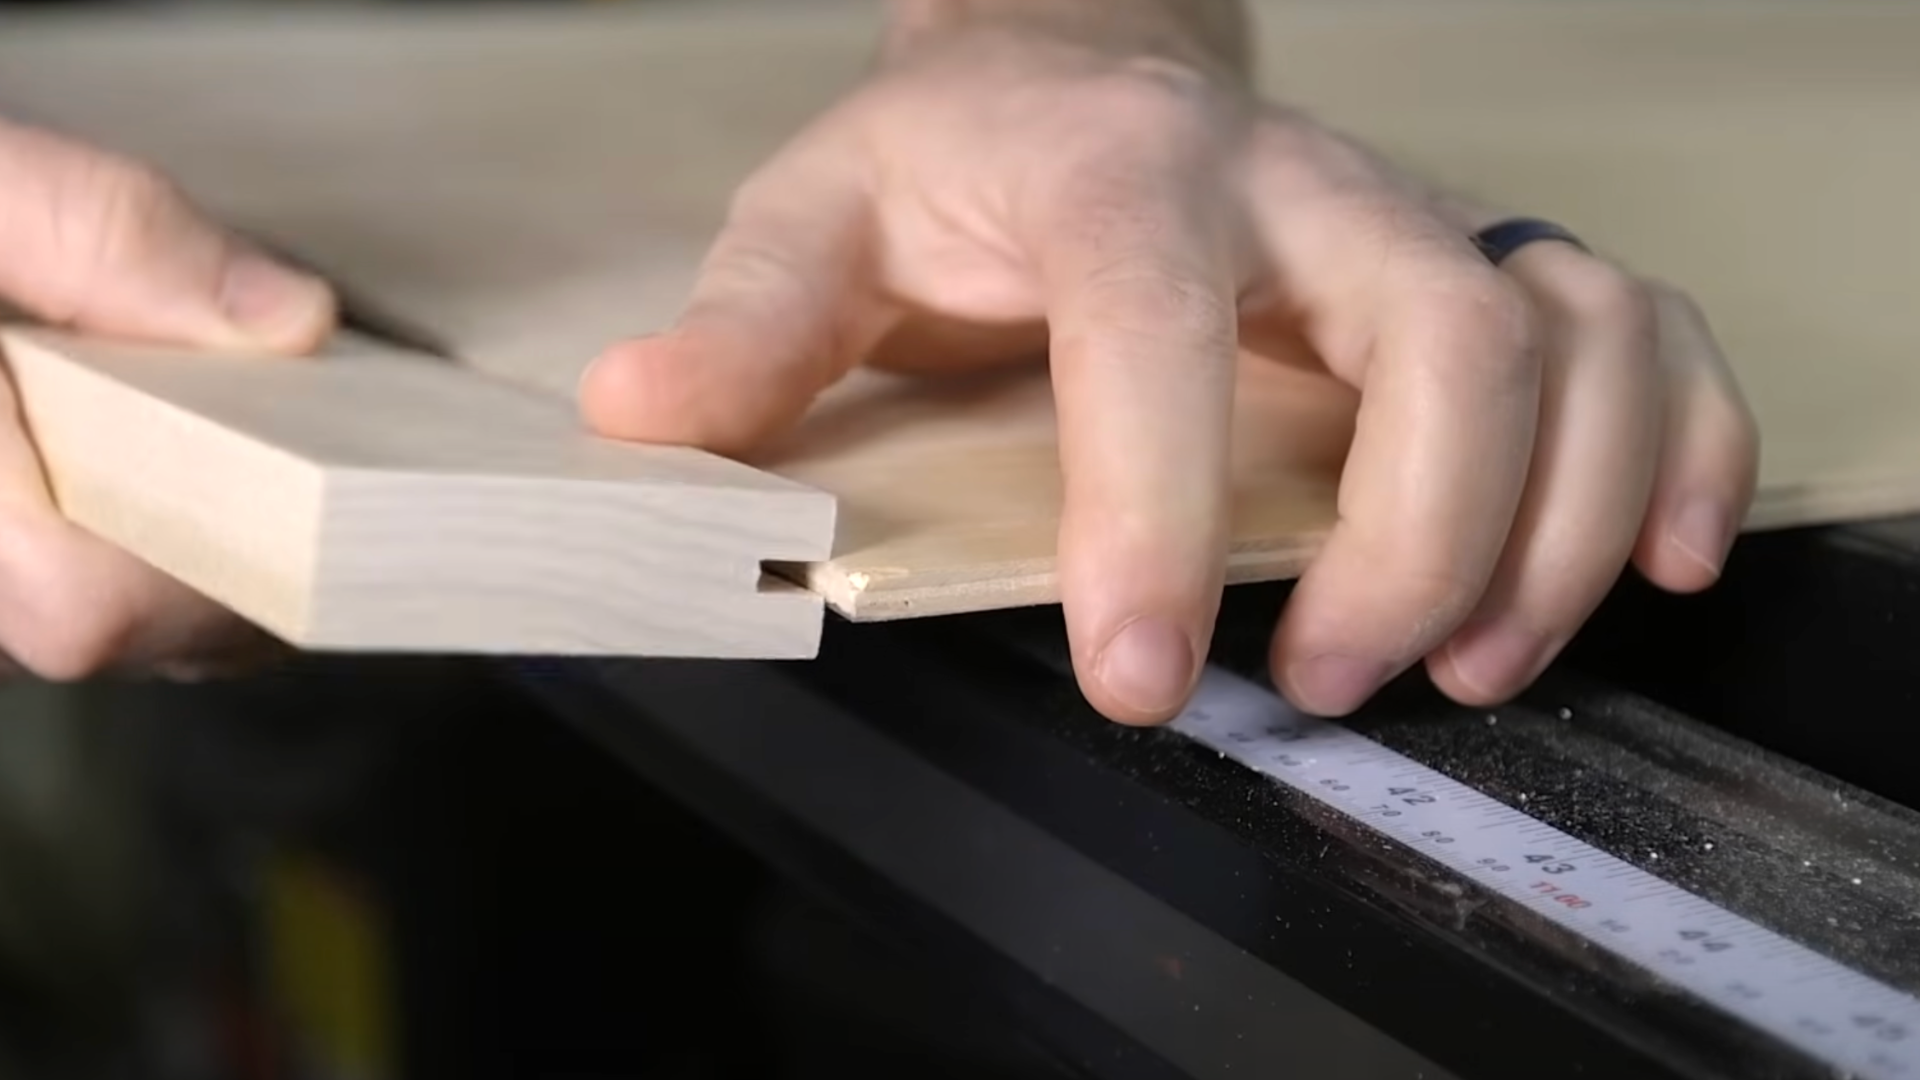
Tenons are the parts that stick out from the rails and fit into the stiles. To make them, place a scrap block on your saw fence to mark the cutting line. Lower your saw blade to the right height and set it to cut 3/8 inch deep.
Run each end of your rails through the saw. Check if they fit into the grooves you made earlier. They should go in with a little push, but not be so tight that you need to force them.
If they’re too tight, adjust your cuts and try again. Keep testing until they fit just right. Good tenons make for strong doors.
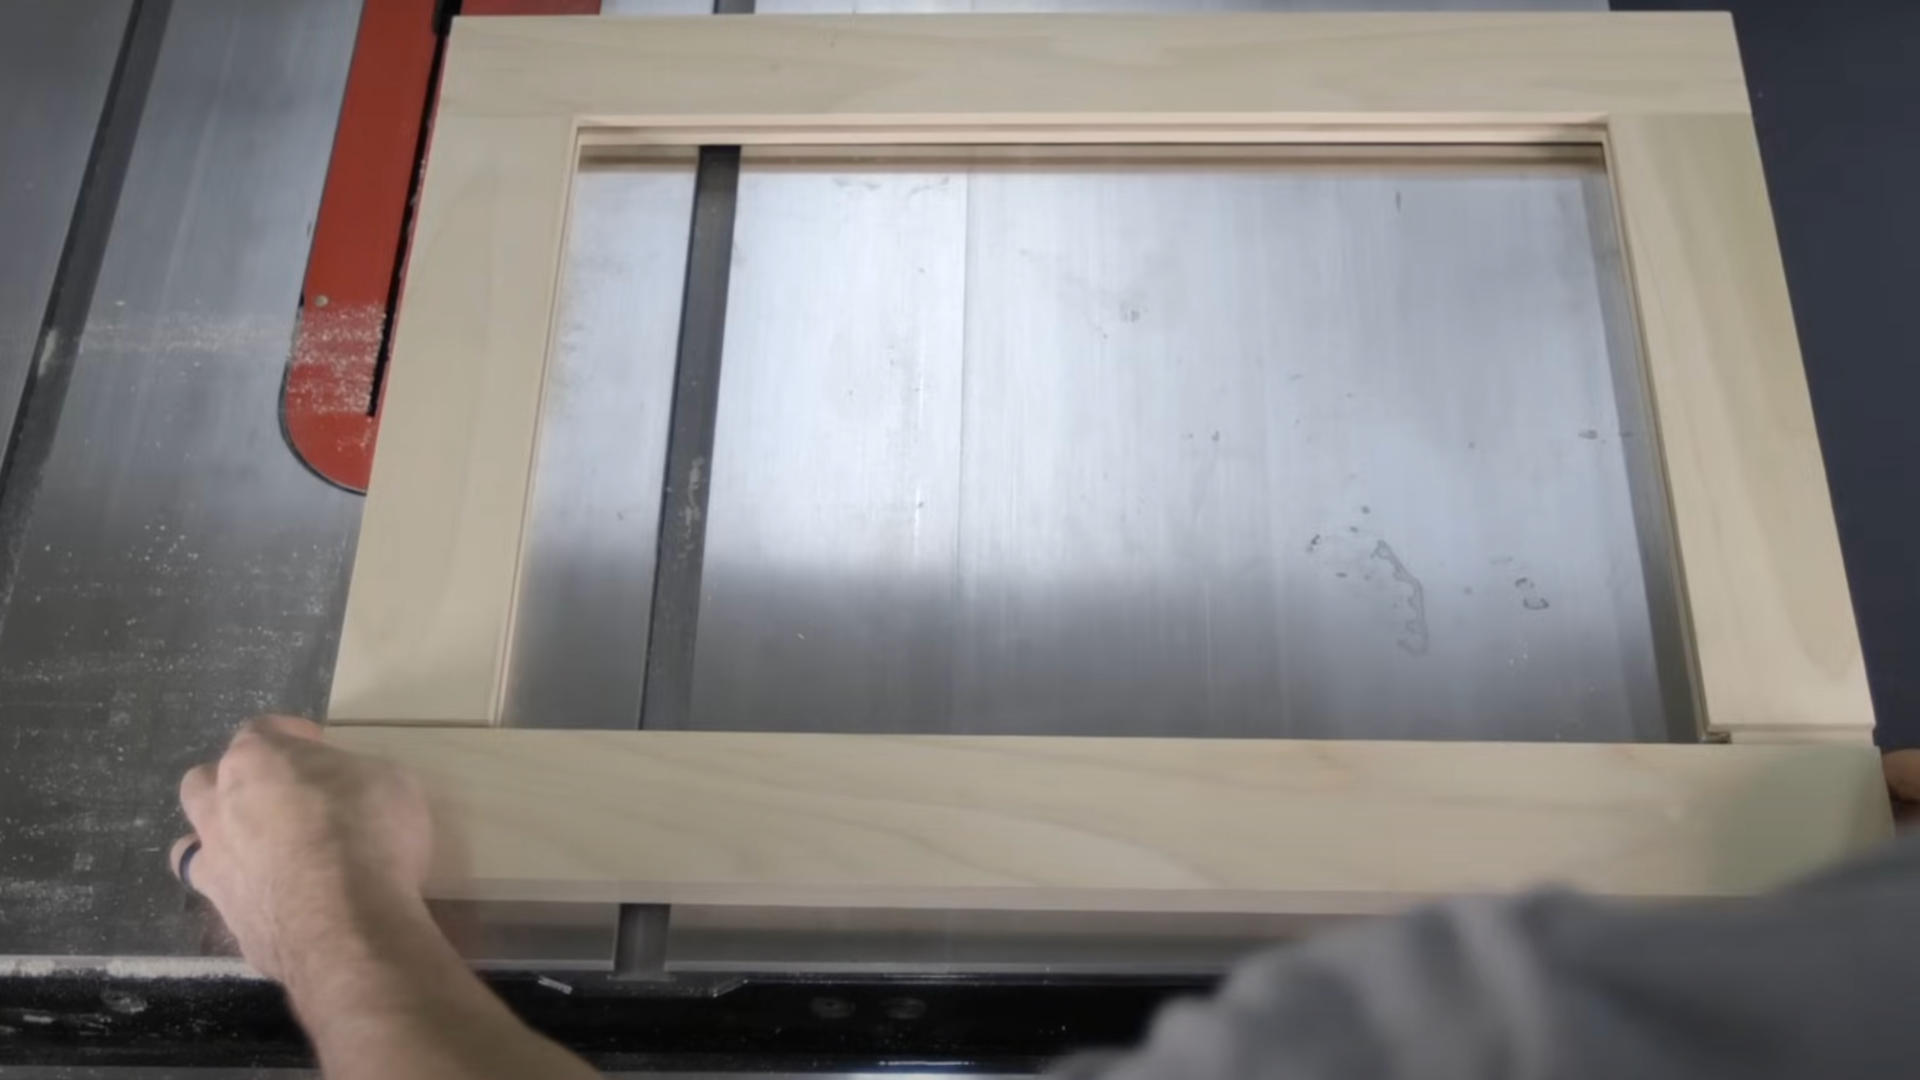
Step 4: Dry-Fit the Styles and Rails
Before using any glue, put everything together to check the fit. Push the tenons into the grooves of the styles. They should fit well but still be easy to take apart.
If they’re too tight, you might need to sand them down a bit or adjust your saw blade. If they’re too loose, you’ll need to cut new pieces. Take your time with this step – it’s better to fix problems now than after you’ve glued everything.
A good fit means your door won’t come apart over time. When all pieces fit well, you’re ready for the next step.
Step 5: Prepare the Panel
For the center panel, you’ll use plywood. Measure between the tenons and take off 1/8 inch so it fits well but has room to move. Cut your plywood to match this width and the height between the rails.
Test it by putting it into your dry-fit frame. It should slide in easily, but not be so loose that it rattles. If it’s too big, trim it down.
If it’s too small, you might need to cut a new piece. The panel is what people see most on your door, so make sure it looks good and fits right.
Step 6: Assemble the Door
Now it’s time to put everything together for good. Put wood glue on the tenons, then push them into the grooves of one style. Slide your plywood panel into the grooves.
Then add glue to the other tenons and attach the second style. Use clamps to hold everything tight while the glue dries. Check that your door is square by measuring from corner to corner – both ways should be the same length.
If not, adjust your clamps until they’re square. Make sure the clamps are tight but not so tight that they bend the wood. Let the glue dry based on what the bottle says.
Step 7: Sand, Finish, and Install Hardware
After the glue dries, take off the clamps and sand your door. Start with 120-grit sandpaper, then move to 180-grit for a smooth finish. Clean off all dust with a damp cloth.
Now, put on your paint or stain. You might need two or three coats for the best look. Let each coat dry fully. For hinges, most people use European-style ones. Drill holes using a 35mm bit, going in about 1/2 inch deep.
Put the hinges in these holes, then attach them to your cabinet. Check that the door opens and closes without trouble. Make any small changes needed so it works just right.
You can watch the YouTube video of Training Hands Academy for a more detailed explanation here:
Unique Finishing Ideas
Adding your own personal touch to your shaker cabinet doors makes them truly yours. Here are some ways to finish your doors that go beyond basic paint or stain.
Distressing
Adding some marks and signs of age to your cabinet doors gives them a cozy, lived-in look. Gently rub sandpaper on edges and corners to make them look worn down.
You can also hit the wood lightly with chains or hammers for small dents. After painting, sand off tiny spots to show the wood beneath. This style works great in country kitchens or homes with a warm, old-time feel.
Paint Techniques
There are a few paint techniques to give a unique look to your shaker cabinet doors.
Matte Finish: Matte paint has no shine but looks smooth. It hides marks well and is easy to fix. Colors look rich and deep with this modern, clean finish.
Two-tone: Use one color for frames and another for panels. This simple trick adds depth and helps match other colors in your kitchen without being too bold.
Ombre: Blend from light to dark colors down your cabinets. Use colors from the same family for best results. This creates a special look that stands out.
Eco-Friendly Finishes
Using earth-friendly paints keeps your home safer. Look for products marked “low-VOC” or “zero-VOC” to reduce indoor air pollution in your home. You can also try beeswax, tung oil, or linseed oil for a natural look.
These options might cost a bit more, but won’t fill your home with harsh fumes. They’re better for your family’s health and still make your cabinets look good.
Maintenance Tips for Newly Built Doors
Taking care of your new shaker cabinet doors helps them stay looking good and working well for many years. Small steps now save you big fixes later. Here are some maintenance tips for your newly built doors:
- Clean with gentle products – Use mild soap and water to wipe your doors. Strong cleaners can harm the finish.
- Check hinges twice a year – Tighten any loose screws. Put a drop of oil on moving parts if the doors squeak.
- Fix scratches right away – Small marks can be fixed with touch-up paint or a matching wood marker.
- Keep doors dry – Wipe up water spills fast, especially around sinks. Too much water can make wood swell.
- Adjust for seasons – Wood can shrink in winter and expand in summer. You might need to adjust hinges as the weather changes.
Common Mistakes to Avoid
When making DIY shaker cabinet doors, knowing what not to do is just as important as knowing what to do. These mistakes can cost you time, money, and cause lots of stress. Here are some common mistakes you should avoid:
- Skipping measurements – Always measure twice and cut once. Guessing sizes leads to doors that don’t fit right.
- Rushing the sanding – Not sanding enough makes your finish look rough and feel bumpy. Take time with this step.
- Using the wrong wood – Some woods warp or split easily. Pick ones made for cabinets like maple, oak, or birch.
- Forgetting about wood movement – Wood changes size with the weather. Make sure your panel has room to shrink and grow.
- Applying finish too thick – Thick layers of paint or stain can crack or peel. Several thin coats work much better.
Wrapping Up
Now you know how to make shaker cabinet doors that look great and fit your space perfectly. The steps might seem hard at first, but taking it slow will lead to doors you can be proud of.
Start with one door to get the hang of it before doing your whole kitchen. Keep this guide handy as you work.
Take photos of your project to see how far you’ve come. And don’t worry if you make a mistake – that’s part of learning! Try making a small test door first to build your skills.
With some practice and patience, you’ll soon have cabinet doors that appear to have come from a high-end store. Your new kitchen is just a few cuts and coats of paint away!


