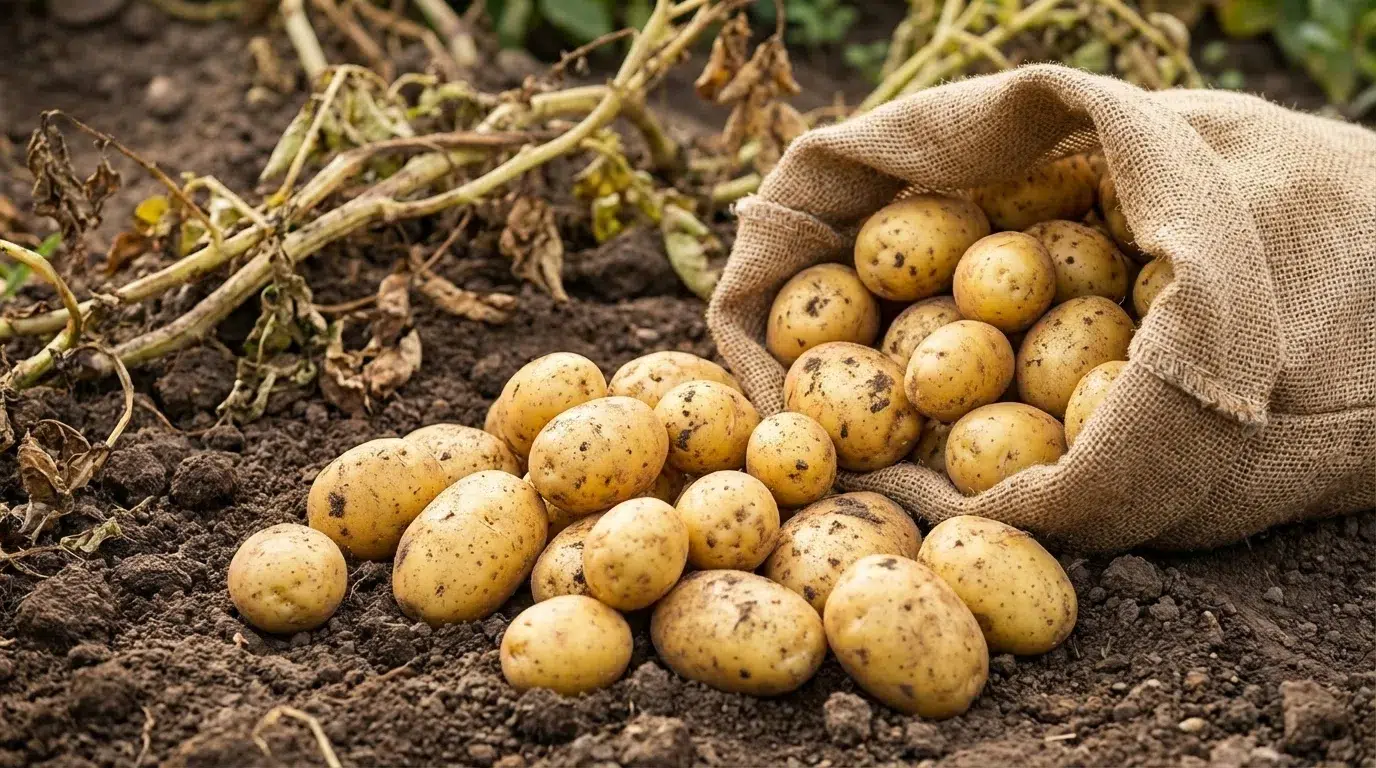
How to Grow Potatoes at Home in 7 Easy Steps
Growing your own potatoes is one of the most rewarding things you can do in a home garden.
They’re affordable, filling, and surprisingly easy to grow once you know the basics.
But most beginners make avoidable mistakes. Wrong soil, bad timing, or skipping a key step can wipe out an entire crop.
This post breaks down exactly how to grow potatoes at home, from picking the right seed potatoes to harvesting at the perfect time.
Every step is explained simply, with the reasoning behind it. You don’t need a large garden or any special equipment. Just the right process, applied consistently.
When to Plant Potatoes for the Best Results?
Potatoes grow best in cool weather, ideally when soil temperatures sit between 45–55°F.
The best time to plant is early spring, a few weeks before the last expected frost.
In warmer climates, a fall planting works well, too. Avoid planting during peak summer heat, as temperatures above 80°F significantly slow tuber development.
Step-by-Step Process to Grow Potatoes at Home
Growing potatoes at home is simpler than most people think. Follow these steps carefully, and you’ll have a healthy harvest ready in just a few months:
Step 1: Choose the Right Seed Potatoes
Start with certified seed potatoes from a garden store or nursery. These are tested and free of disease, giving your crop a clean, healthy start.
Regular grocery store potatoes may seem like an easy option. But they often carry hidden pathogens that spread into the soil and rot before they even sprout.
Certified seed potatoes also tend to sprout faster and more evenly. This means a stronger, more reliable harvest from the very beginning.
Step 2: Cut and Sprout Your Potatoes
Each potato has small indentations called “eyes.” Every eye can grow into its own stem and root system, so cutting one potato into pieces can multiply your yield.
Cut each potato into chunks with at least one or two eyes each. Make sure each piece is roughly the size of a golf ball; if it’s too small, it won’t have enough energy to sprout.
Let them sit in a dry, airy spot for 1–2 days so the cut surface dries out. Planting too soon causes the pieces to rot in the ground.
Step 3: Prepare the Soil
Potatoes grow underground, so the quality of your soil matters a lot. It needs to be loose, well-drained, and full of organic matter.
Compact or heavy soil blocks tuber growth. The developing potatoes can’t expand properly, resulting in small, misshapen tubers.
Dig the soil at least 10–12 inches deep before planting. Mix in compost or aged manure to improve texture and feed the plants naturally. A slightly acidic pH between 5.0 and 6.0 works best.
Step 4: Plant at the Right Depth and Spacing
Place each seed potato piece about 3–5 inches deep in the soil, with the eye facing up. This depth protects the tuber while still allowing easy sprouting.
Space each piece 10–12 inches apart in the row. Rows themselves should be about 2–3 feet apart.
Crowding your plants forces them to compete for water and nutrients. This reduces the size and number of potatoes you’ll harvest. Proper spacing gives every plant room to thrive.
Step 5: Water Consistently
Potatoes need steady, even moisture to develop properly. Tubers form during a critical window, and inconsistent watering disrupts that process.
Aim for about 1–2 inches of water per week. Water deeply, but avoid overwatering so much that the soil stays waterlogged.
Irregular watering, too dry, then too wet, causes potatoes to crack or develop hollow centers. A simple mulch layer on top helps the soil hold moisture between waterings.
Step 6: Hill the Plants as They Grow
Hilling means mounding soil up around the base of the plant as it grows taller. This is one of the most important steps many beginners skip.
When potato tubers get exposed to sunlight, they turn green. Green potatoes produce solanine, a natural toxin that makes them unsafe to eat.
Start hilling when the plant reaches about 6–8 inches tall. Pull up loose soil around the stems, leaving only the top leaves exposed. Repeat this every few weeks as the plant continues to grow.
Step 7: Harvest at the Right Time
Wait for the plant’s foliage to turn yellow and die back before digging. For new potatoes, harvest 2–3 weeks after flowering.
For mature potatoes, wait another 1–2 weeks after dieback so the skins firm up properly.
Each step builds on the last. Follow them consistently, and a full, healthy harvest is well within reach.
How Potato Growth Works (What Happens Underground)
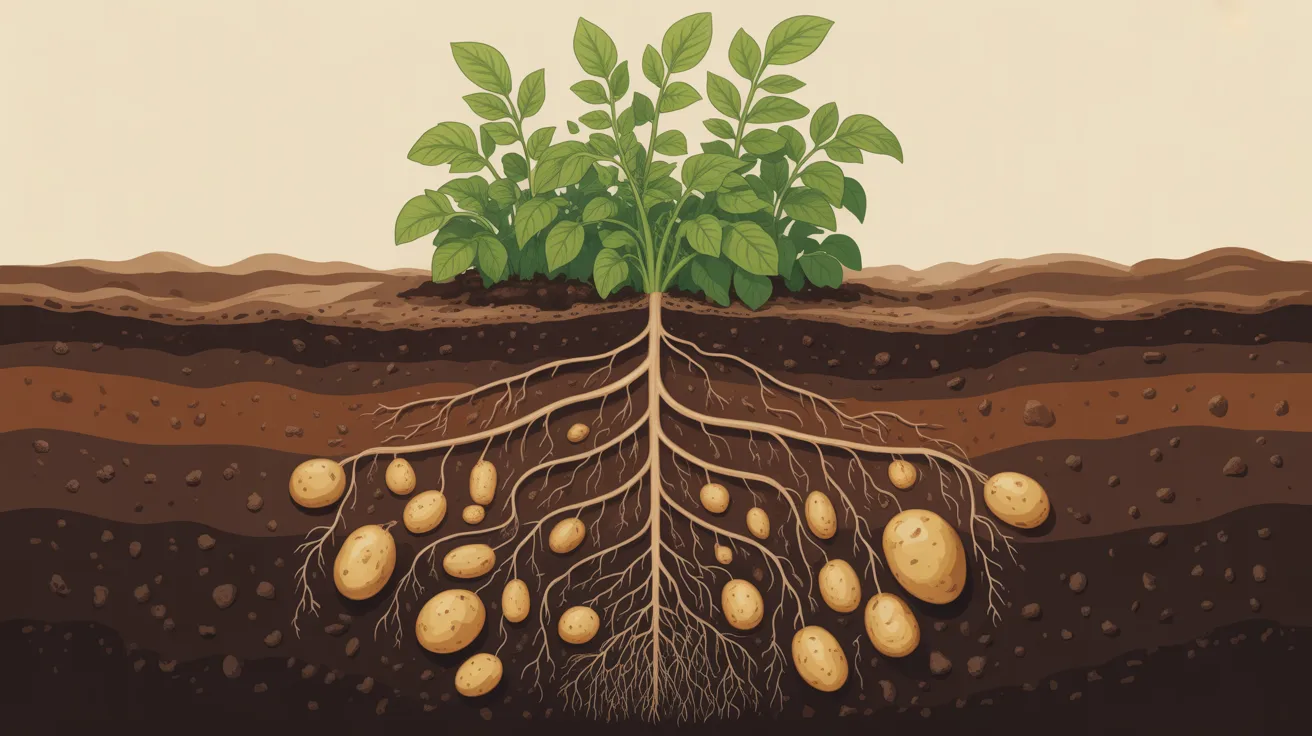
Most people assume potatoes grow like carrots, one root pushing straight down. That’s not how it works. Understanding what actually happens underground helps you make smarter decisions at every step.
- Stems, Not Roots: Potatoes grow from underground stems called stolons, not from roots.
- Eyes Lead the Way: Each eye sprouts into a shoot, which becomes a stem that forms tubers along it.
- Darkness Is Essential: Light triggers chlorophyll production in tubers, making them green and toxic to eat.
- Depth and Hilling Matter: More soil coverage means longer stems, which lead to more tuber growth.
- Not Like Carrots: Unlike root vegetables, potatoes multiply sideways along stems, not downward as a single unit.
Once you understand this underground process, the reasons behind hilling, soil depth, and darkness all start to make sense.
Choosing the Right Growing Method
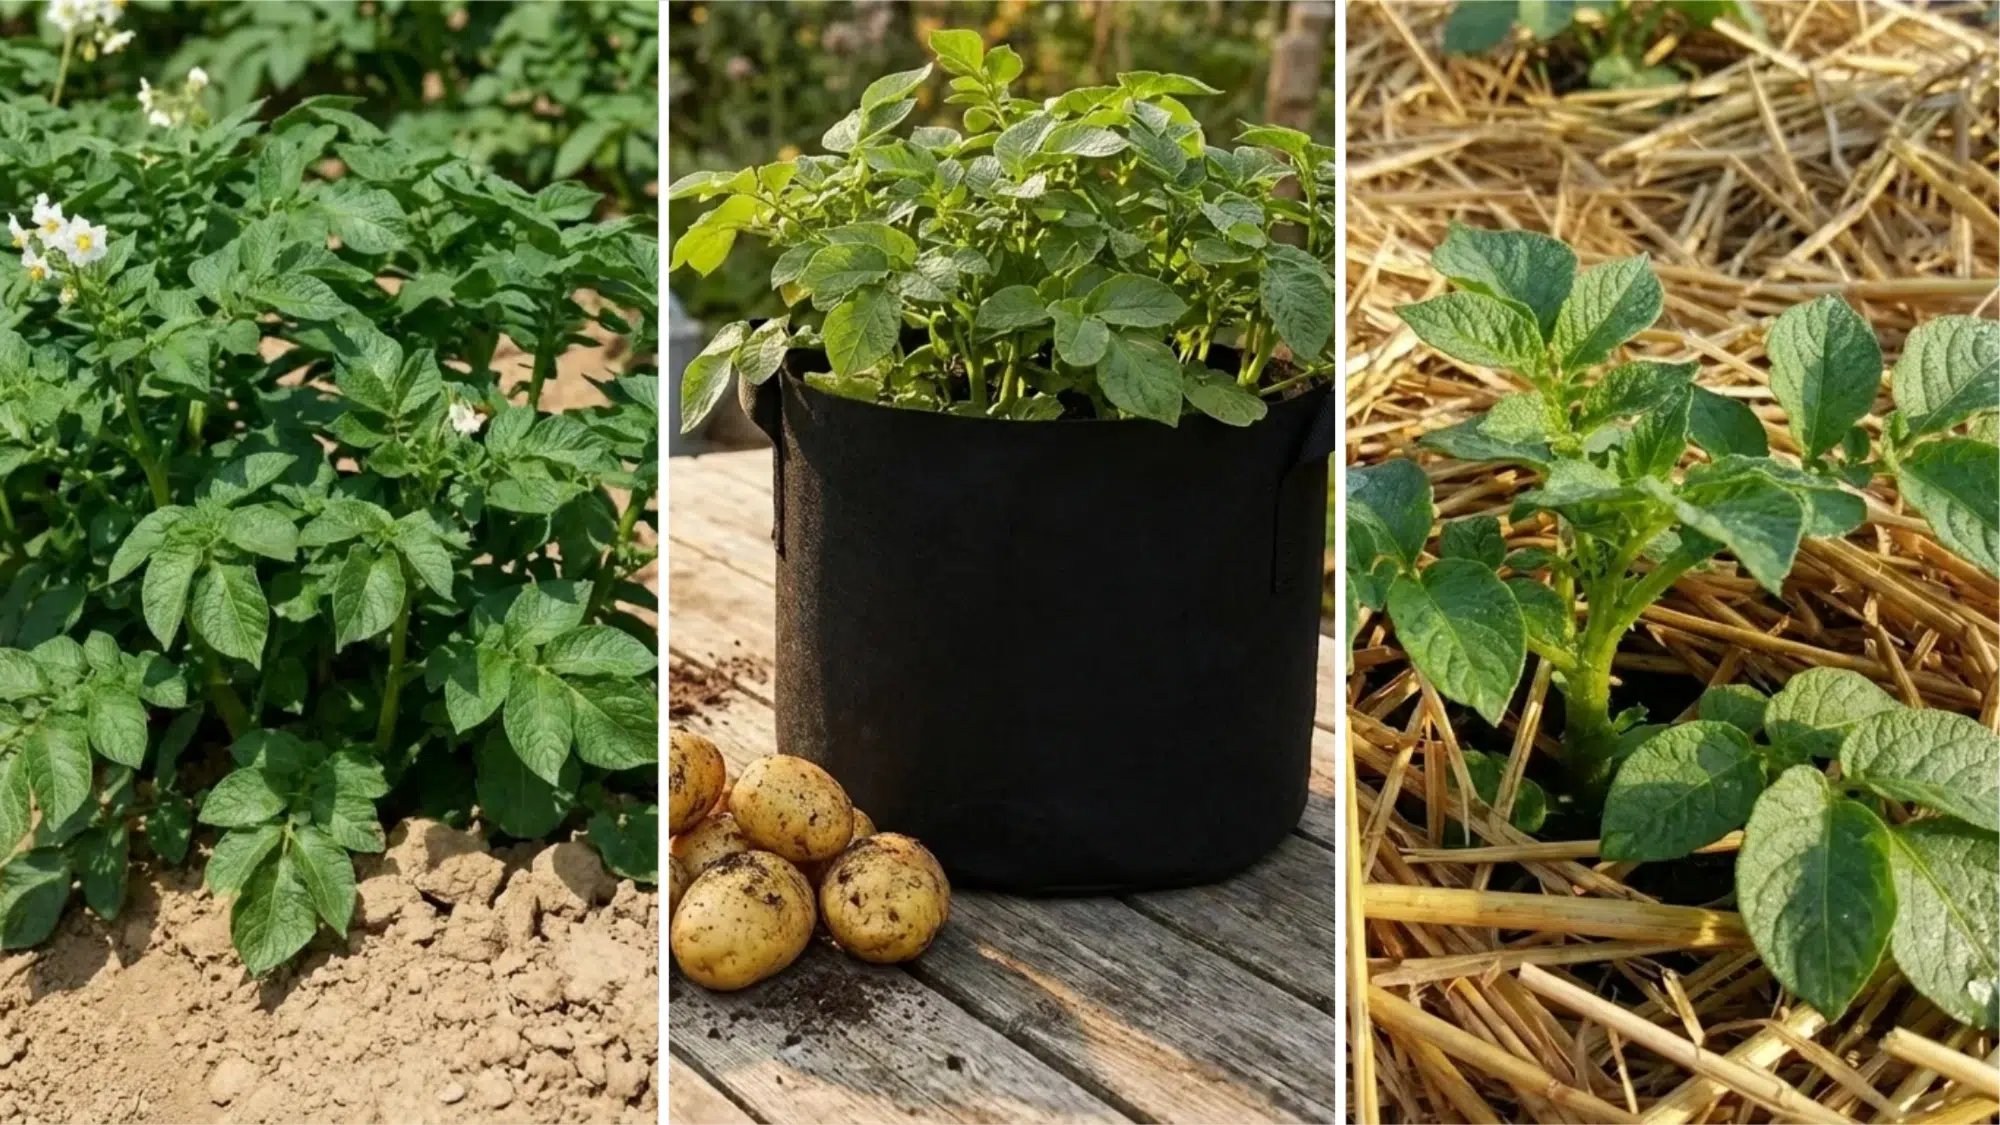
Not every garden looks the same, and neither does every growing setup.
Choosing the right method based on your space and soil conditions can make or break your harvest.
| Growing Method | Best For | How It Works | Key Benefit | Common Failure |
|---|---|---|---|---|
| In-Ground Planting | Large gardens with open space | Potatoes grow in trenches dug directly into the earth | Supports the largest yields of all three methods | Poor soil drainage leads to rot and stunted growth |
| Container or Grow Bags | Balconies, patios, or small spaces | The soil environment is fully controlled inside the container | Easy to manage moisture and soil quality | Limited space restricts tuber spread, reducing overall yield |
| Straw Method | Gardeners who want easier harvesting | Potatoes are placed under a thick layer of straw instead of soil | Tubers are easy to pull out without digging | Straw dries out fast and needs frequent moisture checks |
Critical Growing Conditions That Affect Yield
Getting your growing conditions right is just as important as the planting process itself.
Small environmental mistakes can quietly reduce your harvest without any obvious warning signs.
- Sunlight Requirement: Potatoes need 6–8 hours of direct sunlight daily to fuel tuber development.
- Photosynthesis Connection: Sunlight drives photosynthesis, which directly powers the formation of underground tubers.
- Low Light Risk: Insufficient sunlight results in weak, leggy plants with significantly lower potato yields.
- Soil pH Range: A slightly acidic pH between 5.0 and 6.0 works best.
These conditions work together to create the ideal environment for a strong harvest. Missing even one of them can affect your entire crop, so monitor each factor throughout the growing season.
When and How to Harvest Potatoes Properly

Harvesting at the right time is what turns months of effort into a rewarding yield. Rush it, and you risk losing the crop entirely.
Wait for the foliage to yellow and die back completely. For new potatoes, harvest 2–3 weeks after flowering. For storage potatoes, wait an extra 1–2 weeks after dieback so the skins firm up.
Use a garden fork, insert it a few inches away from the plant, and lift gently. Even small cuts or punctures can cause rapid rotting in storage.
Patience at this final stage protects everything you’ve built through the growing process.
Common Mistakes That Ruin Potato Growth
Even small oversights can quietly derail an otherwise healthy crop. Knowing these common beginner mistakes ahead of time saves you from a frustrating, low-yield harvest.
- Compact or Wet Soil: Planting in poorly drained soil traps moisture, which can cause tubers to rot underground.
- Skipping Hilling: Exposed tubers turn green from sunlight, producing toxins that make them unsafe to eat.
- Overwatering: Excess moisture creates the perfect environment for fungal disease to spread through roots.
- Grocery Store Potatoes: Untreated, store-bought potatoes carry hidden pathogens that can quickly infect your soil.
- Late Planting: Planting too late exposes developing tubers to summer heat, which can lead to premature cessation of growth.
Most of these mistakes are easy to avoid with a little planning and the right setup. Getting these basics right from the start gives your crop the strongest possible foundation.
Conclusion
Growing potatoes at home comes down to a few key decisions: the right seed, the right soil, and the right timing. Get those right, and the rest follows naturally.
Every step in this blog connects to the next. Skipping even one can quietly cost you yield, quality, or both.
The good news is that once you understand how to grow potatoes from the ground up, the process becomes second nature. Your second crop will always be better than your first.
Start small if you need to. A single grow bag or a short garden row is enough to build real experience.
Ready to dig in? Drop your questions or share your first harvest in the comments below, your experience might help a fellow gardener get started.
Frequently Asked Questions
Can You Grow Potatoes Year-Round in a Home Garden?
Potatoes grow best in cool weather and need a defined growing season. In most climates, year-round growing isn’t possible outdoors. However, containers kept indoors or in greenhouses can extend your growing window significantly beyond the standard spring and fall seasons.
How Long Do Homegrown Potatoes Last After Harvest?
Properly cured homegrown potatoes can last 2–5 months in storage. Keep them in a cool, dark, and well-ventilated space. Avoid refrigerating them, as cold temperatures convert starch into sugar, affecting both taste and texture over time.
Do Potatoes Grow Back Every Year on Their Own?
Potatoes are not true perennials. Any small tubers left in the soil after harvest may sprout the following season. However, these volunteer plants often produce inconsistent yields and are more prone to disease than freshly planted certified seed potatoes.