How to Fix a Broken Window: 7 Easy Steps for Quick Repair
For many people, a broken window means an expensive call to a glazier.
But that is not the case; knowing how to fix a broken window is a skill most homeowners can pick up in an afternoon with basic tools and a little patience.
The catch is that the repair looks different depending on the window type; what works on an older single-pane wood frame will not work on a modern double-pane unit, and skipping that distinction is where most DIY attempts go wrong.
Get the window type right first, follow the steps in order, and the rest falls into place.
Tools & Materials Required
Everything you need for this repair is available at most hardware stores, making it easy to gather all the tools and materials you’ll need for a smooth and successful window fix.
| Item | Purpose | Budget Estimate |
|---|---|---|
| Gloves & Safety Glasses | Protect hands and eyes from glass shards throughout the repair | $5–$15 |
| Masking Tape or Painter’s Tape | Secure broken glass before removal | $3–$8 |
| Glass Scorer | Score the pane along the frame edge for clean, controlled removal | $10–$20 |
| Putty Knife or Chisel | Pry out broken glass pieces and clean the frame channel | $5–$15 |
| Silicone Caulk or Glazing Compound | Seal and cushion the new pane in the frame | $3–$10 |
| Replacement Glass Pane | The new pane, pre-cut to the size of your window opening | $20–$50 |
| Glazing Beads | The trim strips that lock the glass into the frame | $5–$15 |
Keep in mind that the budget estimates provided may vary depending on the quality of materials you choose.
How to Fix a Broken Window: Step-by-Step Guide
A broken window is easier to fix than most people think. The right tools and the right order make all the difference.
Follow these seven steps to remove the damaged pane safely and install a clean, secure replacement:
Step 1: Tape Off the Broken Glass

Cover the broken pane completely with masking tape, pressing it firmly into the glass on both sides if you can safely reach them.
This holds loose shards together and stops them from falling inward as you work. It also makes the removal process far more controlled, reducing the risk of unexpected breakage and keeping you protected throughout the step.
Step 2: Identify the Glazing Beads
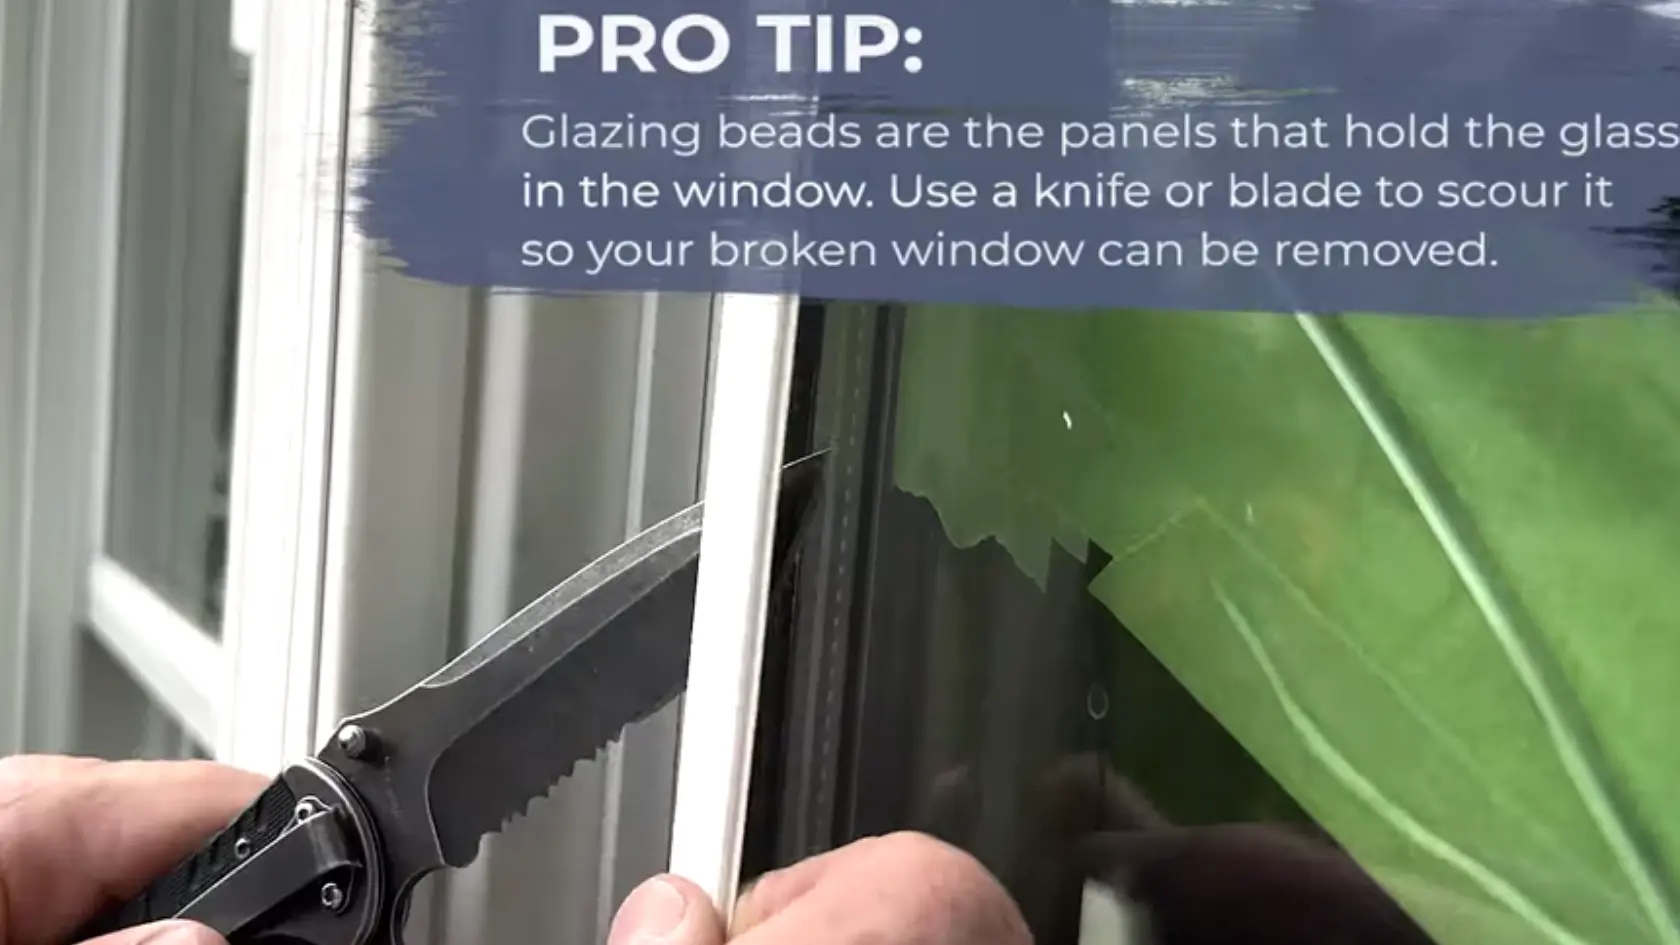
Look around the inner edge of the frame for the thin trim strips that hold the glass in place. Take a close look at how they fit and in what order they are installed.
These strips will need to go back in exactly the same way at the end, so taking a quick photo before you remove anything is a smart move that saves time later.
Step 3: Score the Glass

Run a glass scorer firmly along all four edges where the pane meets the frame. This creates a clean break line along the edge of the glass before you attempt removal.
Without this step, the glass can snap off in unpredictable and jagged pieces, making removal harder and significantly more dangerous. A single firm pass along each edge is all it takes to keep things controlled.
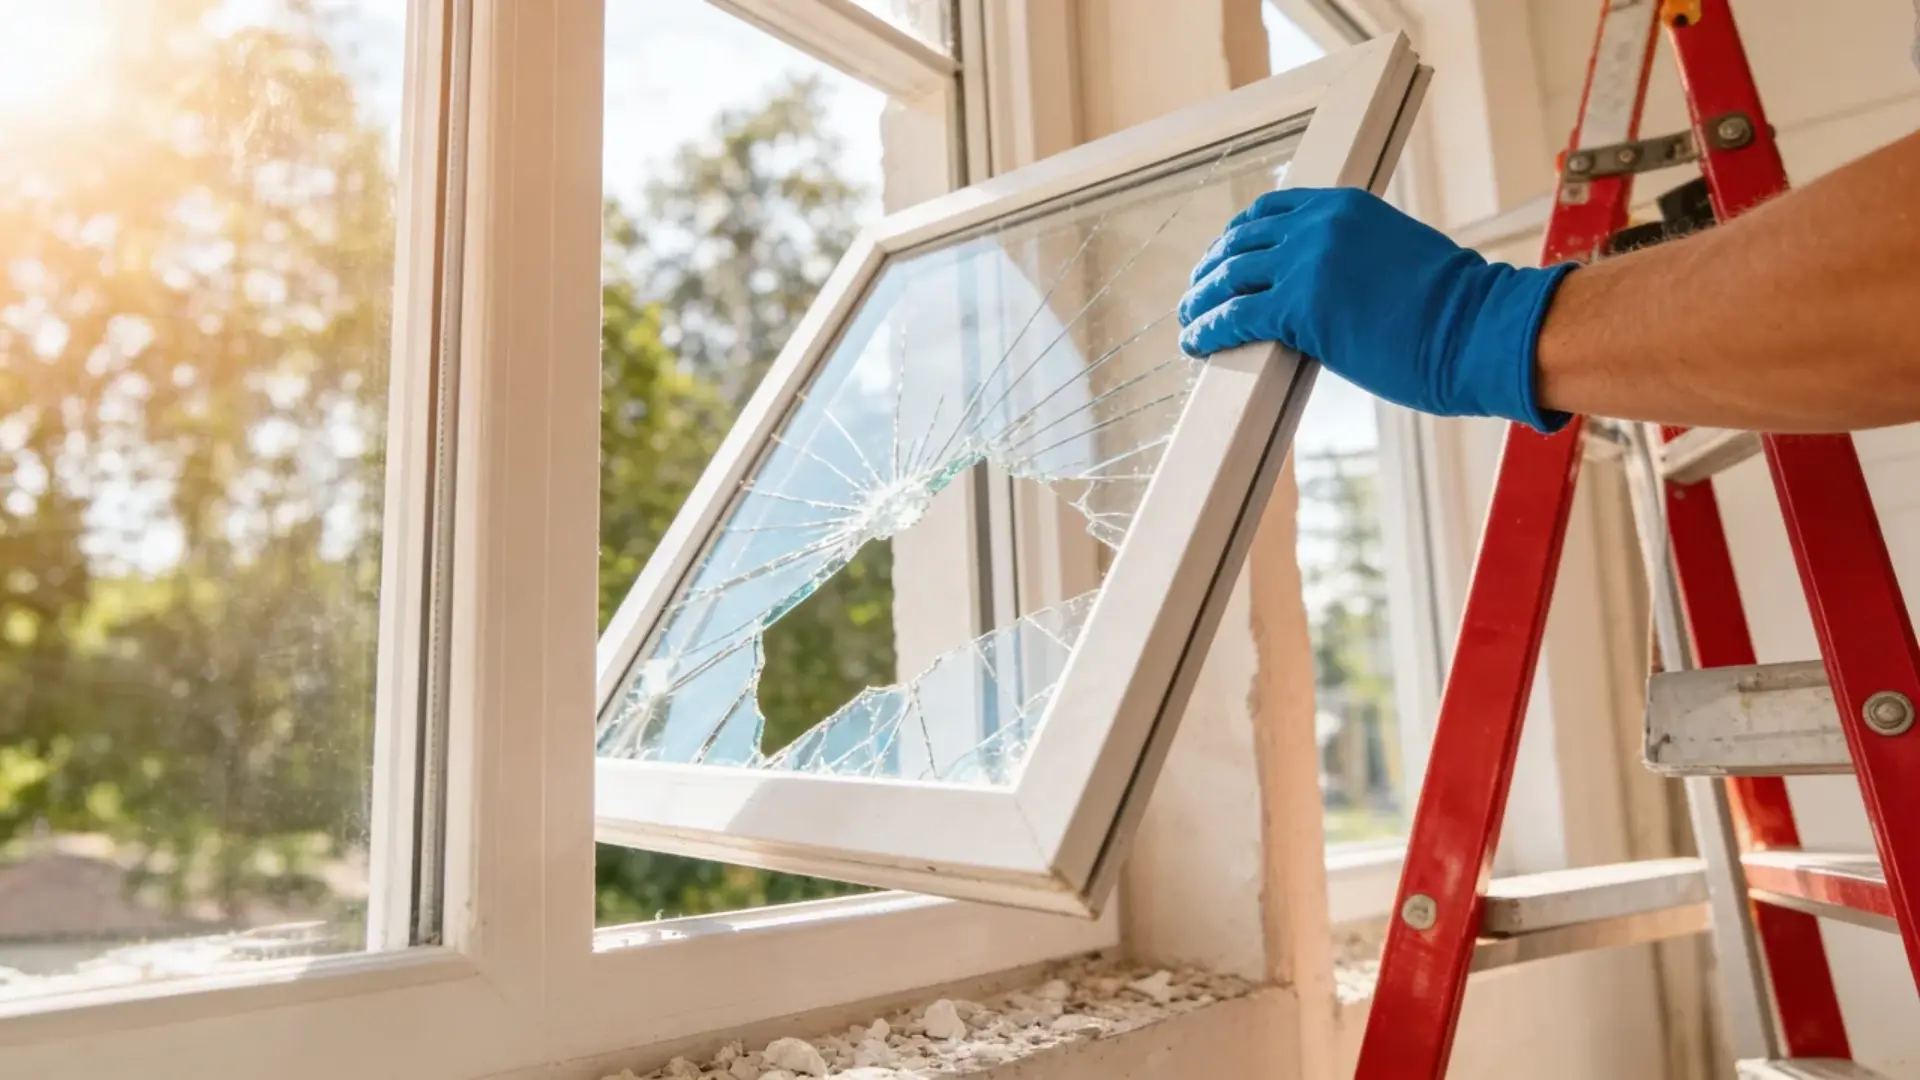
Step 4: Remove the Broken Glass

Using a putty knife or chisel, carefully pry out the glass pieces, starting from one corner and working your way around the frame.
Let the tools do the work and keep your hands clear of any exposed edges at all times. Once all the pieces are out, dispose of them safely by wrapping the shards in newspaper or sealing them in a bag before placing them in the bin.
Step 5: Apply the Sealant

Run a continuous bead of silicone caulk or glazing compound along the inside of the frame channel where the new glass will sit. This layer serves two purposes at once.
It acts as a cushion that protects the new pane from direct contact with the hard frame, and it forms a weather seal that keeps out moisture and drafts. Take your time here and make sure there are no gaps in the bead before you move on to setting the glass.
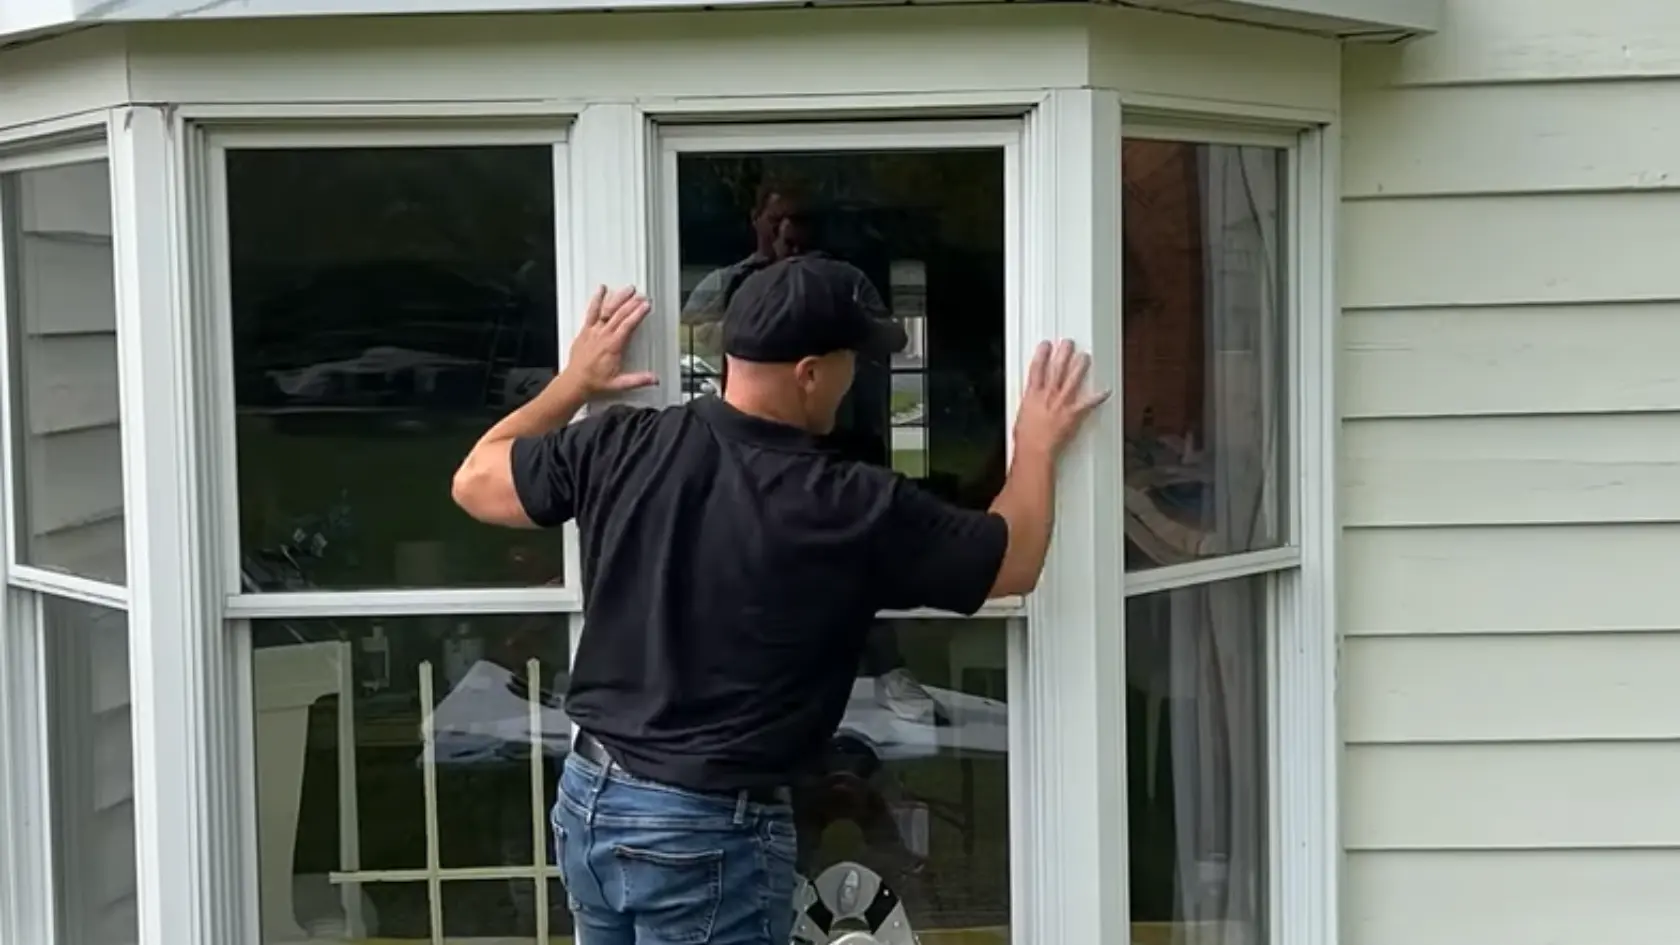
Step 6: Attach the Replacement Glass

Lower the new pane carefully into the frame, pressing it gently but firmly into the sealant bead you just applied. Take a moment to check that the glass sits flush and even on all four sides before moving on.
If it is even slightly off at this stage, the glazing beads will not seat properly in the final step. Small adjustments now save you from having to redo the work at the very end.
Step 7: Reattach the Glazing Beads
Press the glazing bead strips back into position around the perimeter of the glass in the same order you removed them. Push each strip firmly until it clicks or seats flush against the frame, locking the new pane securely in place.
Work your way around all four sides without rushing, as an unevenly fitted bead can leave small gaps that allow moisture to creep in over time.
For an in-depth walkthrough of the whole process, check out the complete video tutorial below by MegMade:
How to Tell If Your Window Needs a Full Replacement?
Not every broken window can be fixed with a new pane. If the frame feels soft, warped, or shows visible signs of rot, new glass will not seal properly, and the same problem will return within weeks.
Double-pane windows are another case entirely. Unlike single-pane windows, they use factory-sealed insulated glass units that cannot be reglazed at home.
If you notice fogging or condensation between the panes, a visible spacer bar running along the glass edge, or a vinyl or aluminum frame, you are almost certainly dealing with a double-pane window.
In that case, the entire sealed unit needs to be replaced, not just the glass. When in doubt, a quick visit from a local glass specialist will confirm which repair route makes sense for your specific window.
Common Mistakes to Avoid When Replacing a Window Pane
Even a straightforward repair can go wrong if a few key details are overlooked. Here are the most common mistakes and how to avoid them:
- Skipping the bedding layer: Apply glazing compound in the frame channel before setting the glass to prevent stress points and cracking.
- Not priming bare wood: Bare wood pulls oils from the glazing compound, causing it to crack. Prime the frame with linseed oil or exterior primer first.
- Cutting the glass too large: Leave a 1/8-inch gap on all sides for natural expansion and contraction to avoid cracking.
- Painting over uncured compound: Wait 3–7 days for the glazing compound to cure before painting to prevent trapping solvents.
Avoiding these common mistakes will ensure a more durable and successful window repair.
Conclusion
Fixing a broken window is one of those home repairs that looks intimidating but becomes straightforward once you know the right order of steps.
If you’re wondering how to fix a broken window, it’s all about taking your time and following the correct process.
With the right approach, proper materials, and a little patience, the repair will not only be manageable but also provide long-lasting results.
If you hit a snag along the way or your window turns out to need a full replacement, don’t stress. It’s completely normal.