How to Build an Outdoor Table: An Easy Guide
Have you ever sat at a wobbly restaurant table and thought, “I could make something better than this”? Well, you can!
Building your own outdoor table doesn’t require fancy woodworking skills or expensive tools. The satisfaction of eating dinner at a table you create with your own hands is incredible.
In this guide, I’ll walk you through everything from picking the perfect design to adding cool features like built-in coolers. You’ll learn which woods stand up to weather, common mistakes to avoid, and maintenance tips that’ll keep your table looking great for years.
By the end, you’ll have the confidence to create a sturdy, beautiful outdoor table that fits your space perfectly.
Let’s get building!
Choosing the Right Table Design
Finding the best table design for your outdoor space can make a big difference in how much you enjoy your backyard. The right table fits your needs, looks good in your space, and matches your building skills.
When you sit at a table you made yourself, you’ll feel happy and proud each time you use it.
Popular Styles to Consider
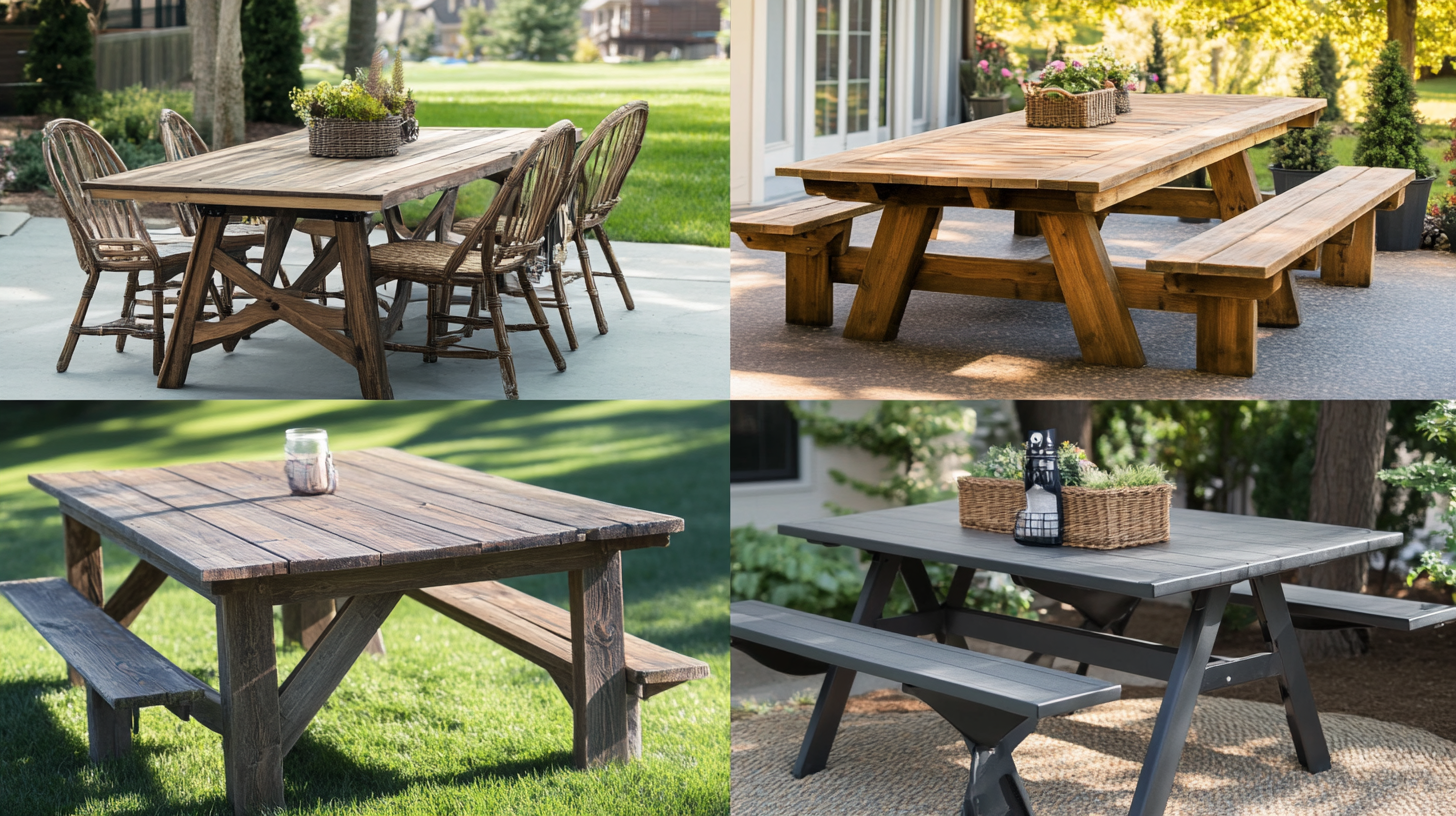
1. Dining tables: These tables are perfect for family meals and gatherings. They’re usually higher than other outdoor tables and pair well with regular chairs. A simple wooden dining table can be the center of many happy family BBQs and summer dinners under the stars.
2. Picnic tables: These classics combine seating and table in one piece. They’re great for casual meals and can fit many people. Kids love them, and they bring back those fun summer feelings from childhood parks and camping trips.
3. Farmhouse tables: These sturdy, wide tables have a homey, country feel. They’re built to last and can handle lots of use. A farmhouse table gives your yard a warm, welcoming look that makes guests feel at home right away.
4. Foldable or small patio tables: Perfect for tiny spaces like balconies or small yards. These space-saving options can be tucked away when not in use. They’re also good starter projects if you’re new to building things.
Things to Consider Before You Start
Size and space: Measure your outdoor area carefully. Make sure you have room for the table and for people to walk around it comfortably. Remember, a table that’s too big will make your space feel cramped.
Seating needs: Think about how many people you usually need to seat. Do you have big family gatherings or just small dinners? This will help you decide on table size and shape.
Budget and tools: Be honest about what you can spend on materials. Make a list of the tools you’ll need and what you already have. Sometimes, borrowing tools from friends can save you money.
Skill level: Choose a design that matches your building skills. If this is your first project, start with something simple. You can always build a more complex table later as your skills grow.
Step-by-Step: How to Build an Outdoor Table
Now that you’ve chosen your design, let’s get our hands dirty! Building your own table might feel scary at first, but I’ll walk you through each step. Take your time and enjoy the process.
Tools and Materials You’ll Need
- Cedar
- Pressure-treated wood
- Pine with sealant
- Composite or Trew
- Saw
- Drill
- Pocket hole jig
- Measuring tape
- Clamps
Step 1 – Plan Your Cuts and Layout
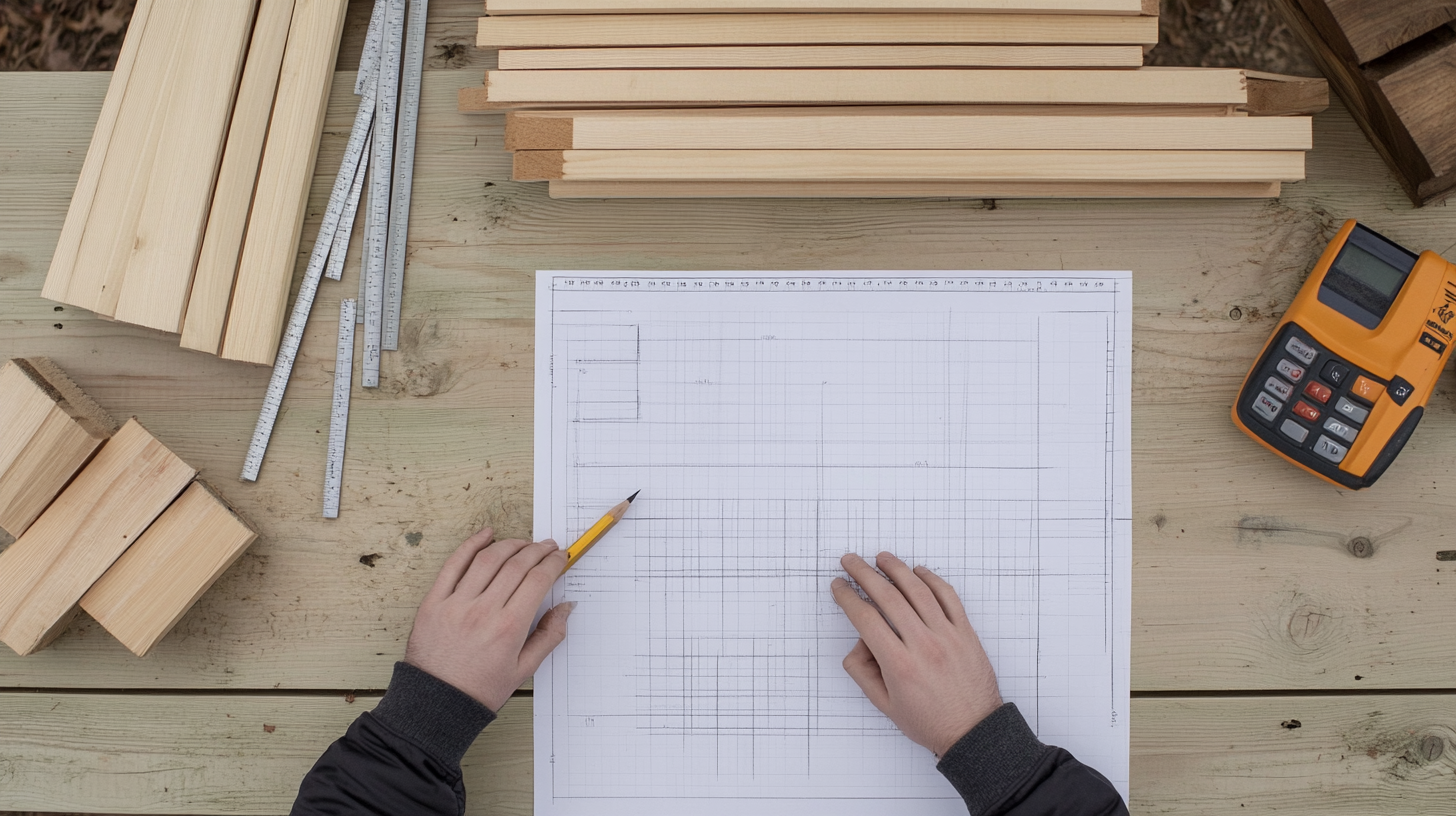
Before making any cuts, draw your table on paper. Mark all measurements clearly. Use these as starting points and then adjust them to fit your needs. They take the guesswork out of planning.
Wood is expensive, so plan your cuts to waste as little as possible. Lay out all my cuts on paper first, like a puzzle. This can save you money and trips to the store for more lumber.
You can use free online calculators to figure out exactly how much wood you’ll need. These tools will help you stay on budget and avoid ending up with piles of scrap wood.
Step 2 – Build the Frame and Legs

Start with the table frame—it’s the backbone of your project. Make sure it’s square by measuring diagonally from corner to corner. Both measurements should match.
For the legs, cut all the pieces at once to ensure they’re exactly the same length. Even small differences can make your table wobble and drive you crazy at dinner time.Add cross braces between the legs to stop the table from swaying.
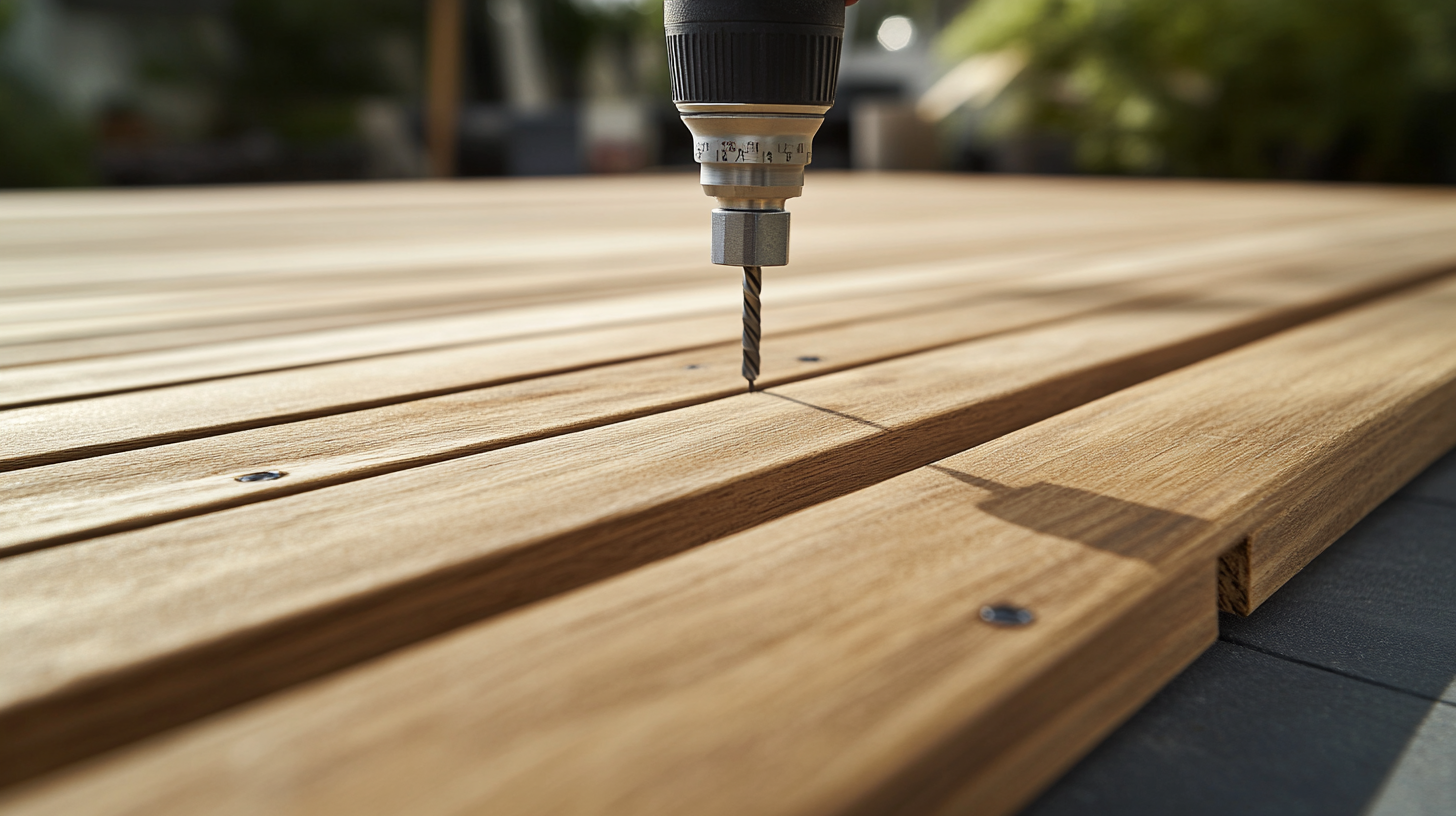
Use screws rather than nails for stronger joints. I pre-drill holes to prevent the wood from splitting. This small step takes extra time but makes your table last much longer.
Step 3 – Add the Tabletop (Solid vs Slatted)
A solid tabletop looks sleek but can trap water and warp over time. If you go this route, angle the top slightly or drill small drainage holes to let rainwater escape.
Slatted tops are my favorite for outdoor use. The small gaps between boards allow rain to drain through. They look great, too, giving your table that classic outdoor feel we all love.
When attaching the top, use screws that won’t rust. Stainless steel costs more but saves headaches later.
Leave a small gap between boards for wood that will expand and contract with weather changes. About the width of a nickel works well in most climates without letting small items fall through.
Step 4 – Sanding and Finishing
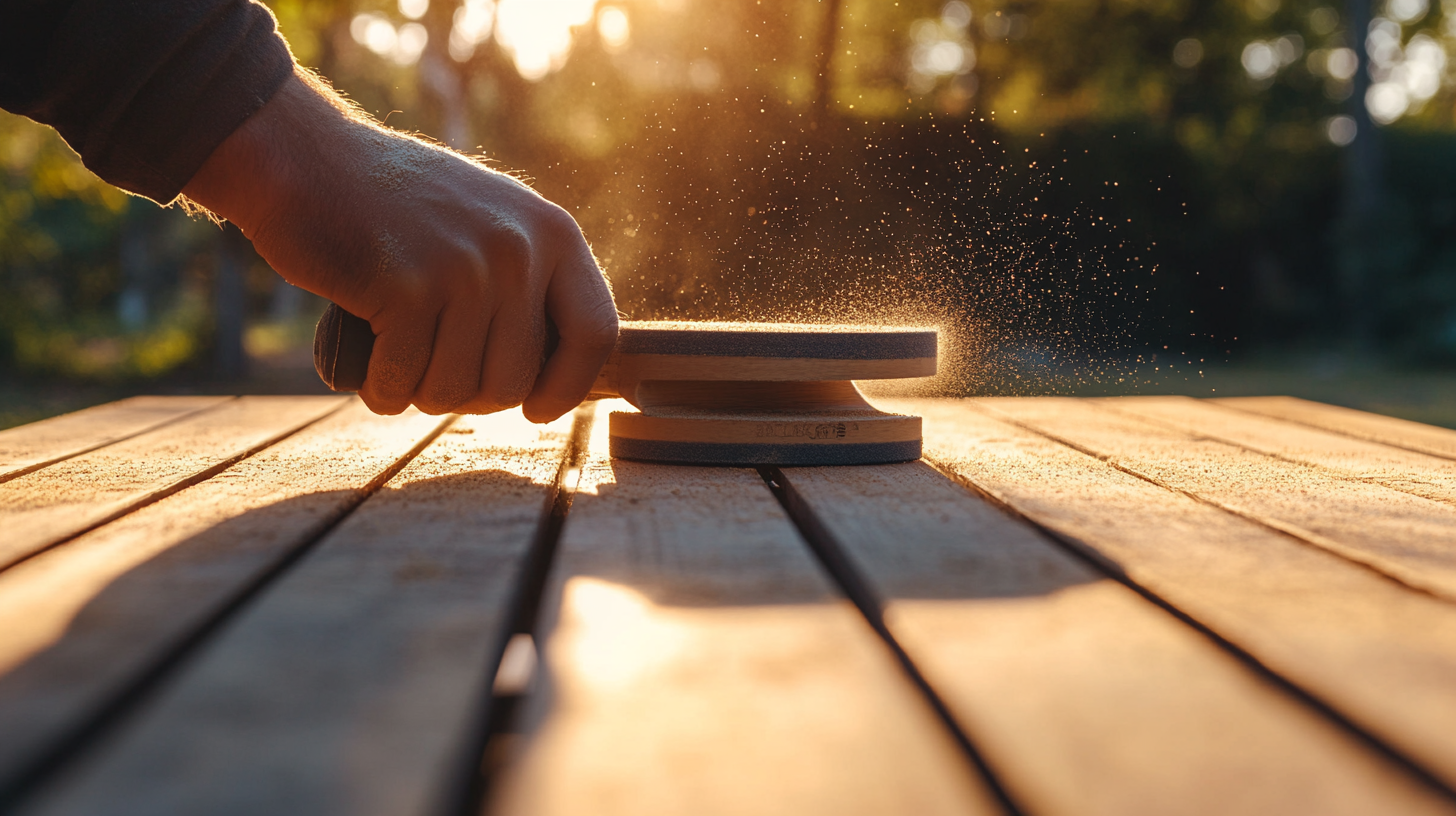
Start with rough sandpaper (60-80 grit) to smooth major rough spots. This first pass removes mill marks and splinters that could hurt fingers later.
Move to medium sandpaper (120 grit) next to smooth the surface more. Finish with fine sandpaper (220 grit) for a silky-smooth feel. I like to run my hand over the wood—if I find any rough spots, I know I need to sand more.
Round all edges and corners slightly. This not only looks better but prevents painful encounters with sharp edges when you’re moving around the table with family and friends.
Step 5 – Sealing and Weatherproofing
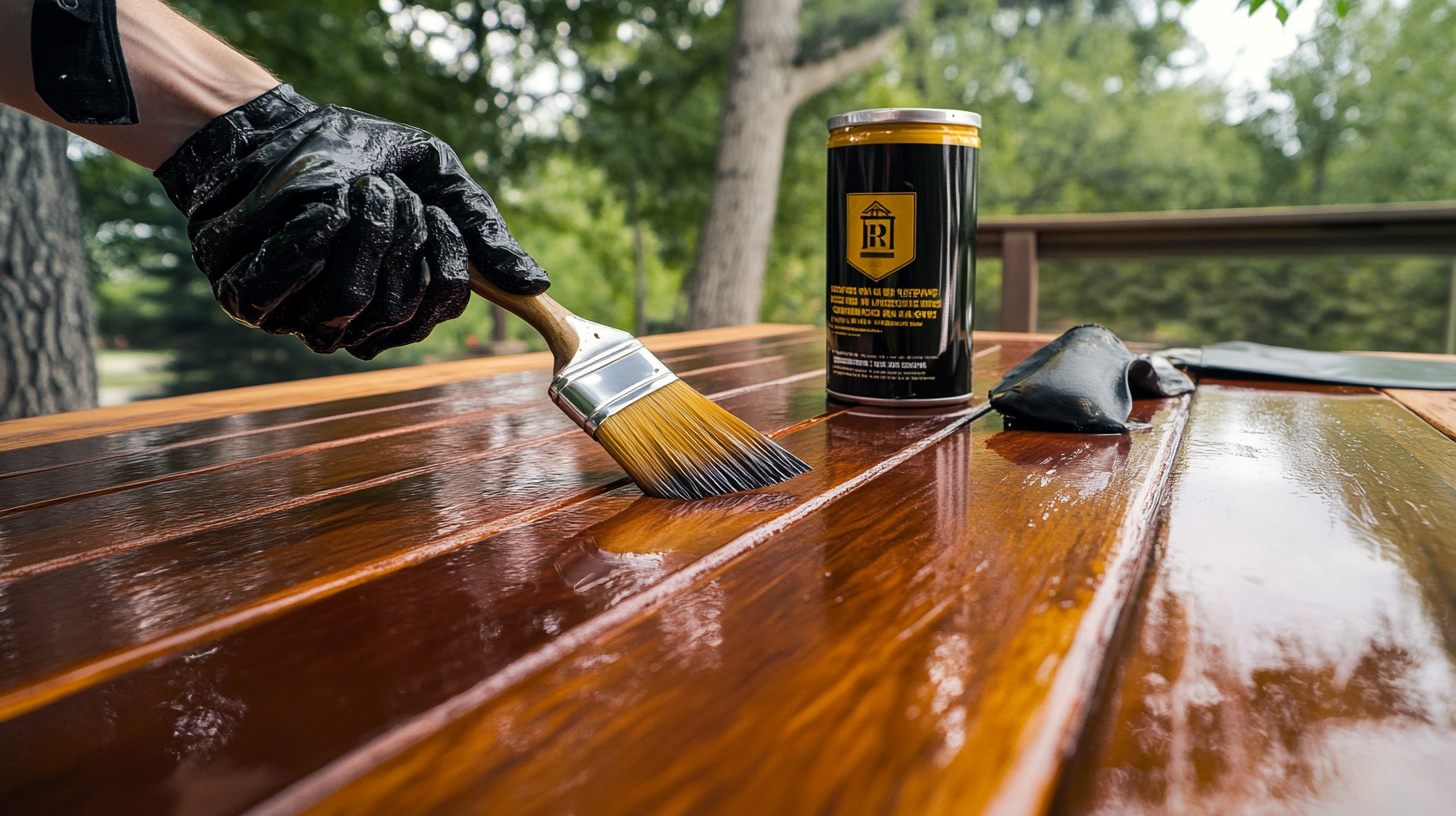
Apply at least three coats of exterior sealer, waiting for each to dry fully. Cutting corners here leads to a table that doesn’t last through the seasons.
Consider using marine-grade sealers if your table will face harsh weather. They cost more but provide much better protection from sun, rain, and snow.
Reapply sealer every year to keep your table looking fresh. For colored finishes, both exterior paint and stain work well.
Add-Ons and Custom Features for an Outdoor Table
Do you want to make your outdoor table extra special? You can add some fun features that will make your table stand out. These small touches can turn a basic table into something that fits your needs perfectly.
Built-In Cooler Box
Adding a cooler box to your table might be the best decision you’ll ever make! Imagine not having to get up for cold drinks during a hot summer BBQ. Your friends will be amazed when you lift a panel to reveal ice-cold drinks right in the middle of the table.
To build one, create a recessed area in your tabletop that fits a metal or plastic tub. Make sure the tub has drainage so melted ice can flow out. I use a simple plastic planter box that cost less than $10.
The key is making a fitted lid that sits flush with the rest of the tabletop when closed. This way, you can still use the full table when you don’t need the cooler. Use the same wood as your tabletop for a seamless look.
If you’re worried about water damage, line the area with plastic sheeting or paint it with waterproof paint. This small step will help your table last for many summers of cold drinks and good times.
Matching Benches
Benches are much easier to build than chairs and can seat more people in less space. Plus, kids love squeezing together on benches during family gatherings: it’s part of the fun of eating outside.
Benches should sit about 18 inches high for your standard 30-inch table. Allow 24 inches of bench length per person. Build them using the same wood and finish as your table for a matching set. They’re easier to make than the table and save space too!
Umbrella Hole and Shade Ideas
In the heat of summer, shade isn’t just nice, it’s necessary! An umbrella hole is one of the simplest and most useful additions you can make to your outdoor table.
Add a 2-inch hole in the center of your table for an umbrella. Use a metal ring insert to protect the wood edges. No umbrella? Try a pergola above your table or string lights for an evening charm. Both options add style while keeping you cool in the sun.
Common Mistakes to Avoid
Learning from others can save you time, money, and a whole lot of frustration. Here are the biggest mistakes I see people make (and that I’ve made myself). Avoid these common pitfalls, and your table will look better and last longer.
- Forgetting to account for warping: Wood moves and changes shape outdoors. Leave small gaps between boards so they can swell when it’s humid without pushing against each other.
- Not pre-drilling screw holes: Driving screws straight into wood often causes splitting. Take an extra minute to drill pilot holes first—your table will be stronger and look better.
- Using indoor screws or glue: Regular screws rust and indoor glue falls apart in rain. Spend a bit more on outdoor-rated screws and waterproof glue. Your future self will thank you!
- Skipping weatherproofing: Rain, sun, and snow will destroy unprotected wood. Apply good sealer to every surface—even the hidden parts—to make your table last years longer.
- Poor leg bracing: Wobbly tables ruin dinners. Add diagonal braces between legs or an H-frame under the tabletop. This simple step makes your table rock-solid.
Weatherproofing & Maintenance Tips
Your outdoor table faces rain, sun, snow, and everything nature throws at it. With a little care, it can look great for years to come. A bit of maintenance goes a long way in keeping your handmade table beautiful season after season.
Protect Your Table from Moisture
Water is your table’s worst enemy. Apply marine-grade sealant each spring when the weather warms up. It only takes an hour but adds years of life to my table.
Raise your table with rubber feet or stones under the legs. This simple trick keeps the legs from sitting in puddles and rotting.
Pick the Right Wood
I built my first table with cheap pine and watched it rot within a year. Now, I use cedar for everything outdoors.
Cedar and redwood naturally fight off bugs and moisture. They cost more upfront but save money over time since they last so much longer.
Keep it Looking Good
I give my table a light sanding and a fresh coat of sealer each year. This quick tune-up keeps it looking fresh and prevents bigger problems.
Cover your table or store it in a shed during winter storms or when you won’t use it for months. My neighbor’s covered table still looks new after five years.
Wrapping Up
Building your own outdoor table takes some work, but I promise it’s worth every minute. There’s nothing quite like watching friends gather around something you made with your own two hands.
Now you have all the steps, from choosing wood that won’t rot to adding fun features like cooler boxes. You know which mistakes to avoid and how to keep your table looking good year after year. The skills you’ve gained here will help with other projects, too.
Remember, your first project doesn’t have to be perfect—each table you build will be better than the last. So grab those tools, get some wood, and start creating the outdoor space of your dreams!