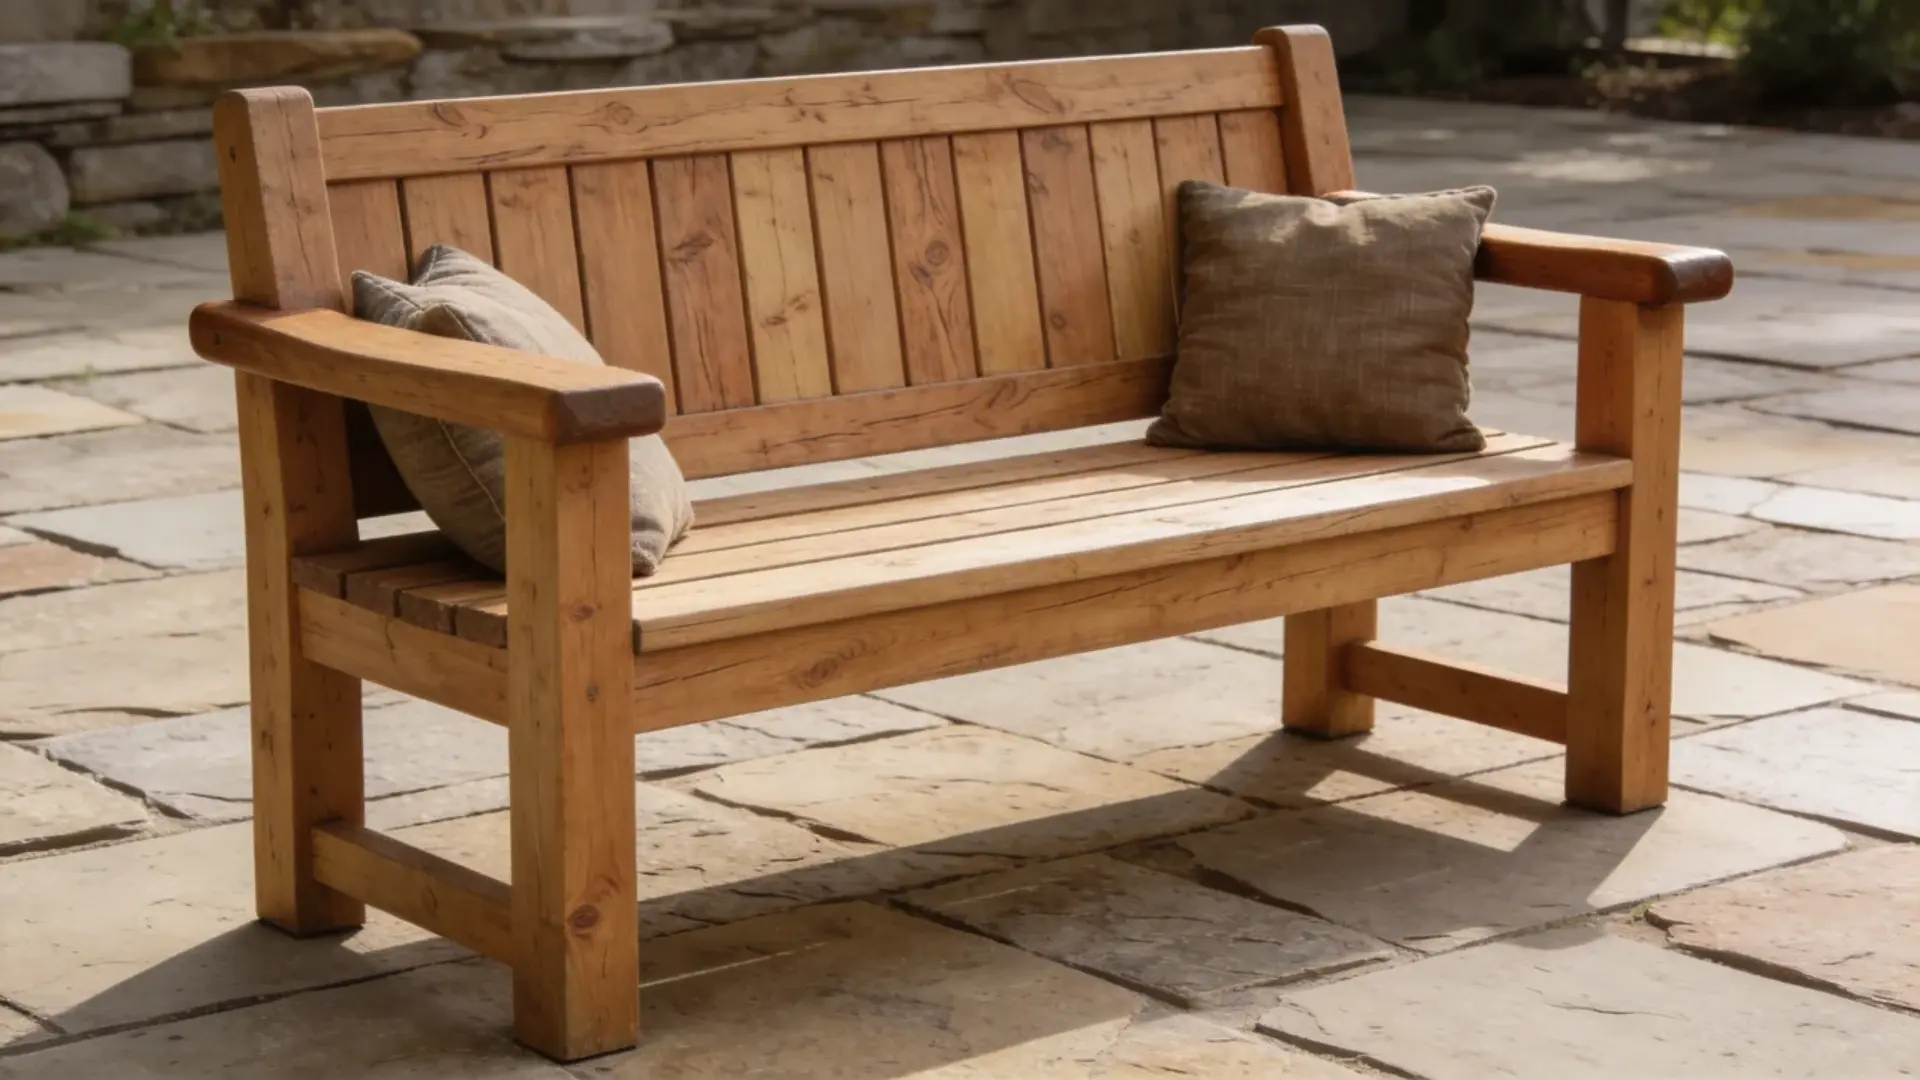
How to Build a Bench: Step-by-Step DIY Guide
Building a sturdy bench is often seen as complicated, but the real challenge lies in selecting the right wood and putting it together properly.
A bench that isn’t measured, supported, or fastened correctly can wobble or wear out quickly, especially outdoors, where exposure affects untreated wood.
Choosing rot-resistant materials like cedar or pine and spacing the seat and backrest boards carefully make a big difference.
Custom adjustments may be needed for different spaces, but basic assembly principles can create a reliable and long-lasting bench. Here’s how to build a bench that lasts.
Tools & Materials Required
To build this bench, you’ll need a few essential tools and materials. Grouping similar items makes it easier to prepare everything before starting.
| Category | Items Included | Purpose |
|---|---|---|
| Wood | 2×4 boards (9 pieces) | Used for the frame, seat, and backrest slats |
| Fasteners | 2-in wood screws, 2½-in pocket hole screws | Used to secure the frame, supports, and slats |
| Tools | Miter saw, drill or screwdriver, pocket hole jig, clamps, measuring tape, pencil | Used for cutting, measuring, holding, and assembling the bench |
| Finishing Supplies | Outdoor deck stain, clear coat, or paint | Protects the bench from weather and outdoor exposure |
With these materials and tools ready, you can move on to the step-by-step building process.
How to Build a Bench: A Step-by-Step Guide
Learn to make a simple outdoor bench using basic tools and minimal materials. Follow these clear steps to cut, assemble, and finish your bench efficiently.
Step 1: Cut and Prepare Wood
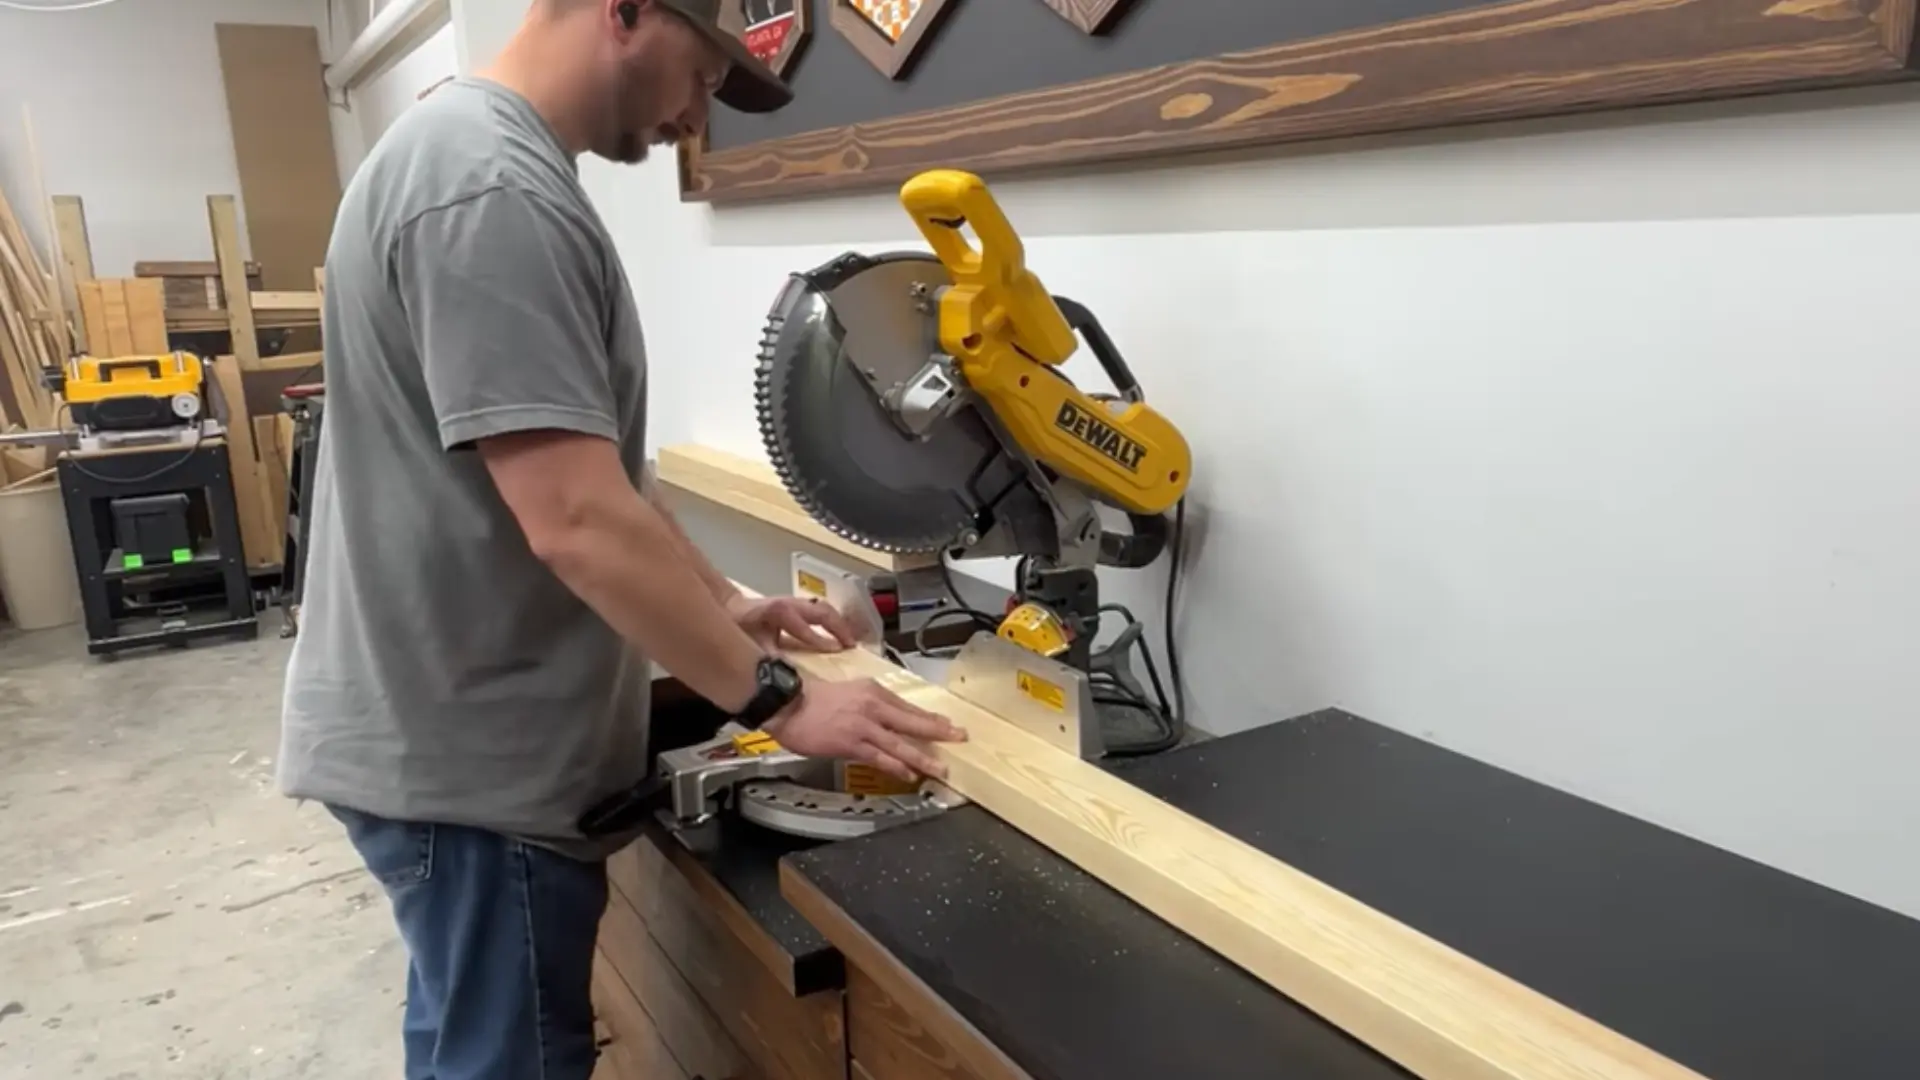
Measure and cut nine 2×4 boards using a miter saw. Make straight 90° cuts for most pieces and 15° angled cuts for the backrest supports.
Organize boards into two mirrored side frames and mark pocket hole locations on legs, seat, and backrest supports for accurate assembly.
Step 2: Drill Pocket Holes
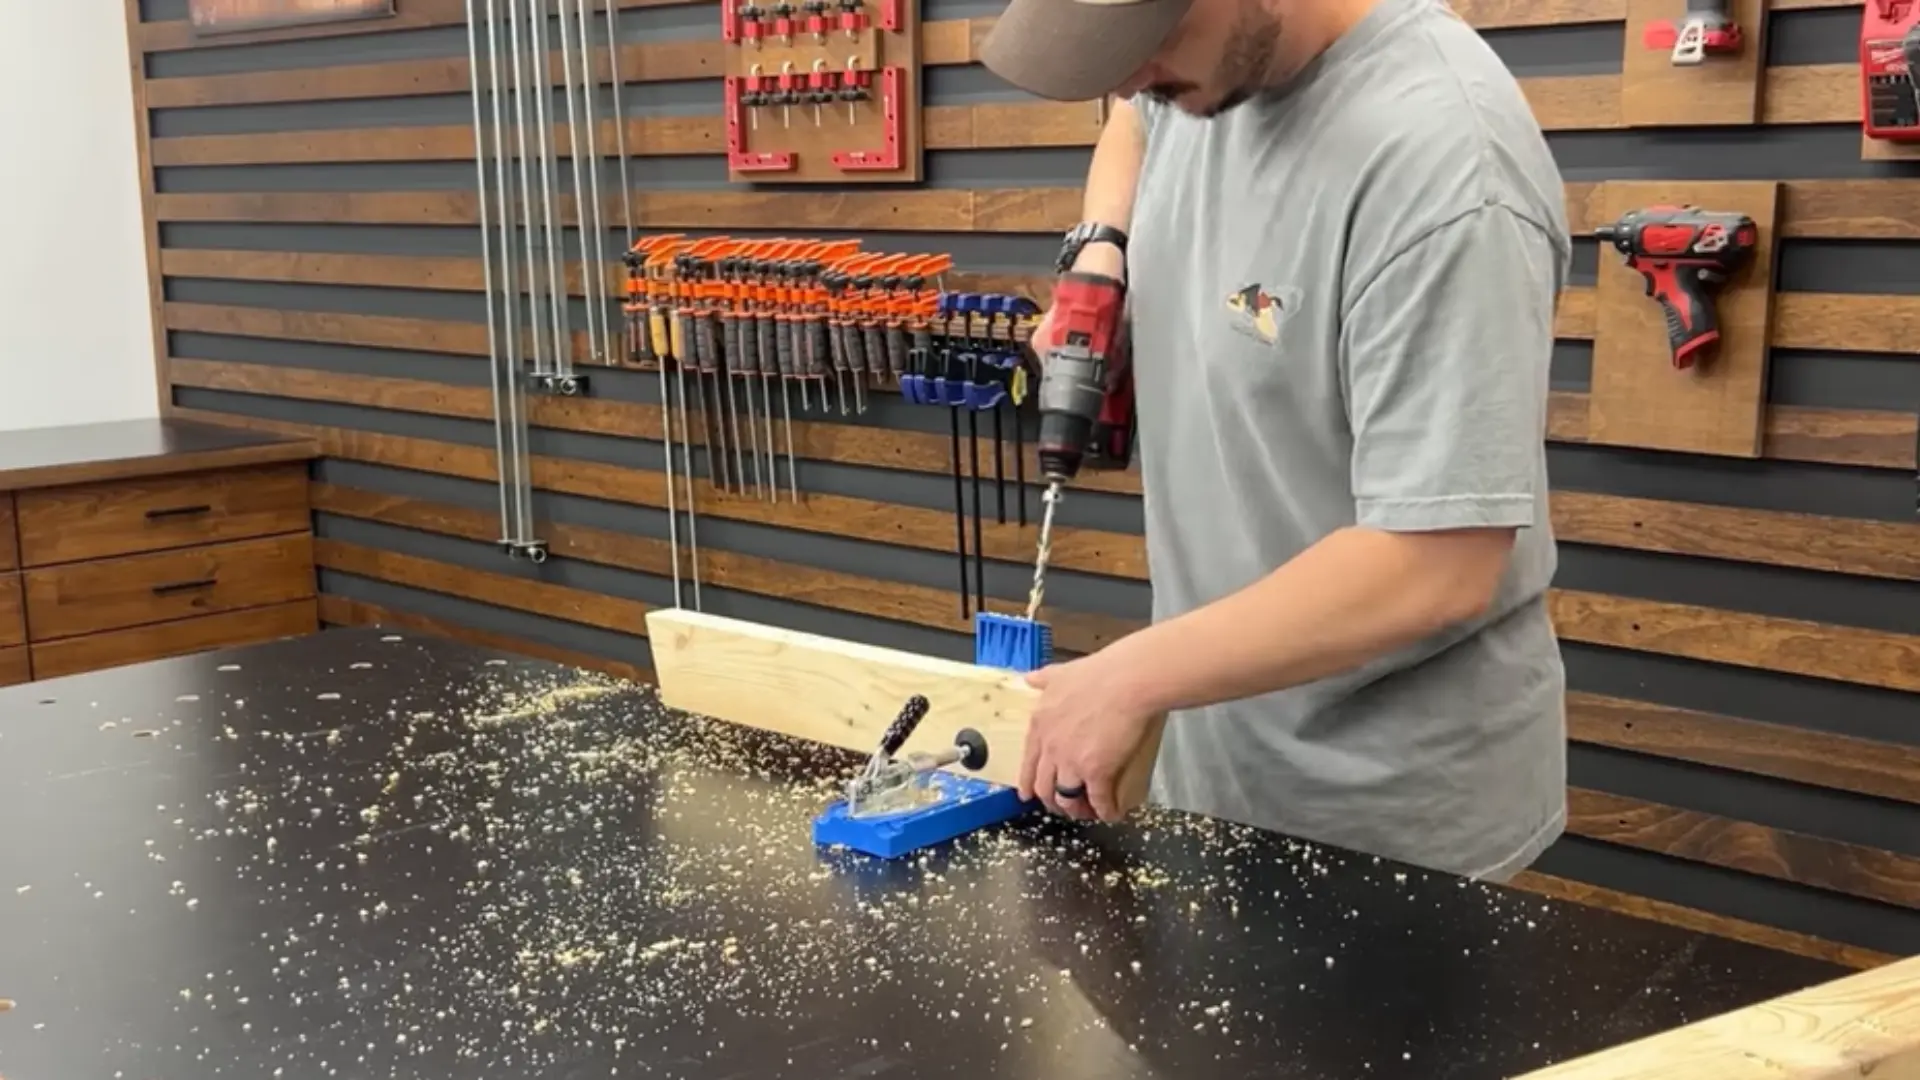
Drill pocket holes at all marked locations using a pocket hole jig. If unavailable, plan to fasten pieces with 2-in screws instead. Ensure each side frame mirrors the other exactly to avoid errors.
Properly drilled holes make assembly easier and help align the seat and backrest supports correctly.
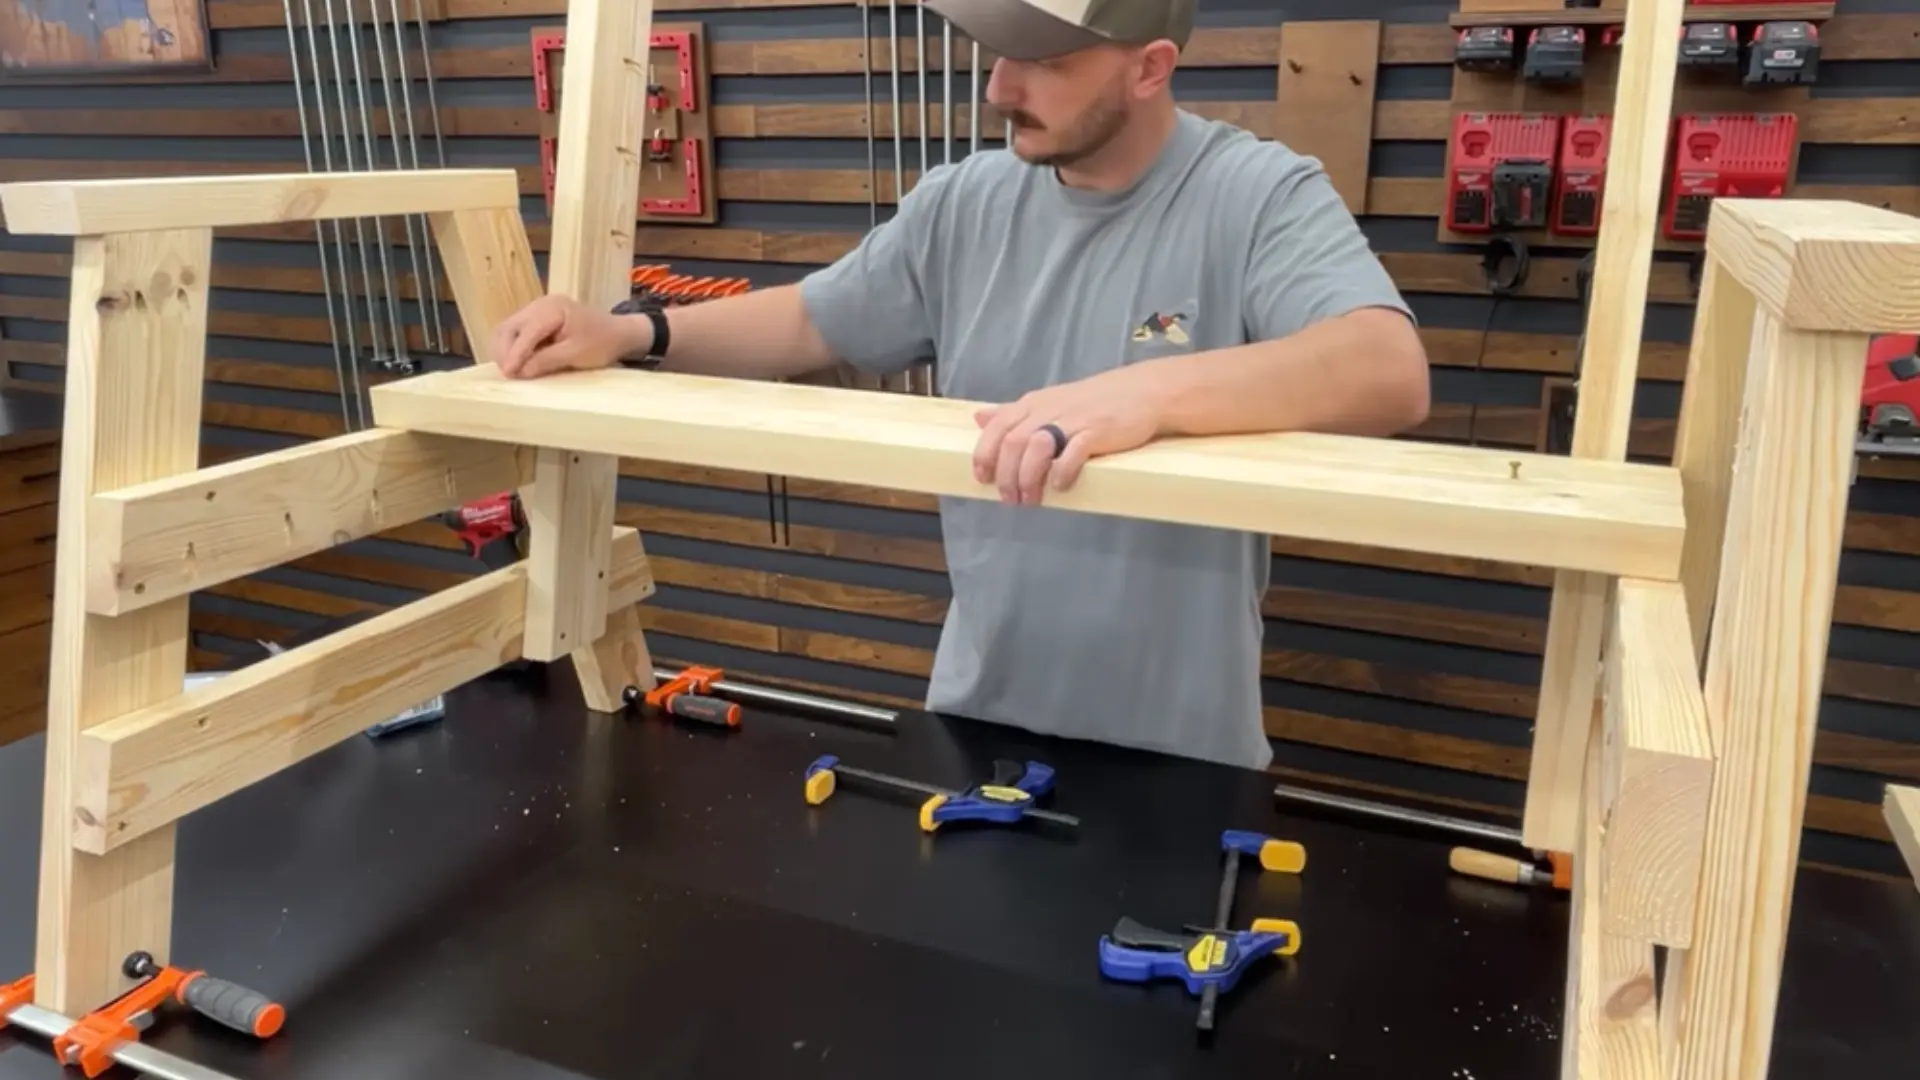
Step 3: Assemble Side Frames

Attach the top and bottom seat supports to the legs with 2-in screws. Clamp armrests in place, ensuring edges are flush, and fasten securely. Attach angled backrest supports to the top corner of the seat.
Repeat for the second frame, making sure both side assemblies are identical and stable for bench construction.
Step 4: Attach Seat Slats
Position the first seat slat flush with the frame and backrest supports. Clamp it, then fasten using 2½-in screws. Continue adding the remaining slats, spacing them evenly with screws as guides.
Clamp each slat before securing to maintain straight alignment and a uniform, sturdy seat surface for the bench.
Step 5: Install Backrest Boards
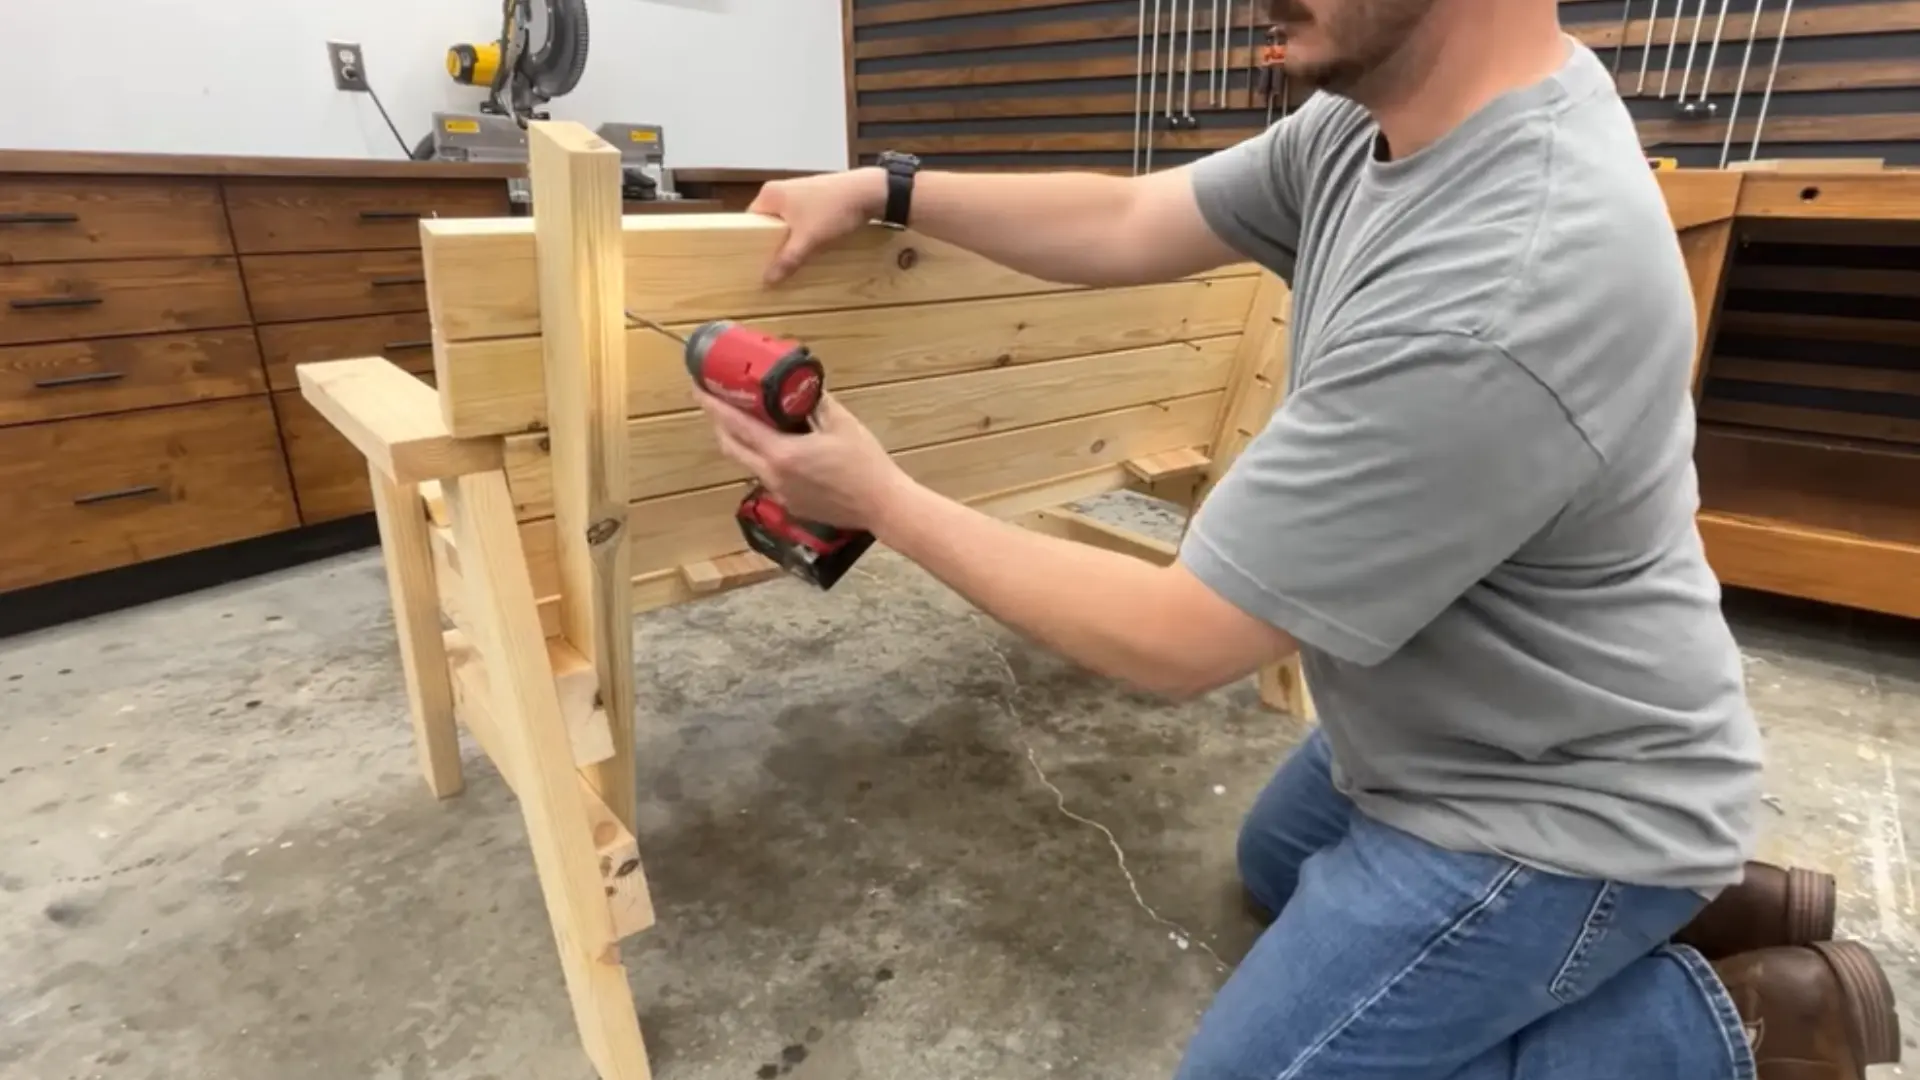
Place the first backrest board about 5/8 inch above the seat using a scrap spacer, and fasten with pocket hole screws. Continue attaching remaining boards, spacing consistently.
Ensure top boards slightly overhang the armrests. Attach a stretcher under the seat for stability to prevent wobbling and strengthen the bench frame.
Step 6: Finish and Protect
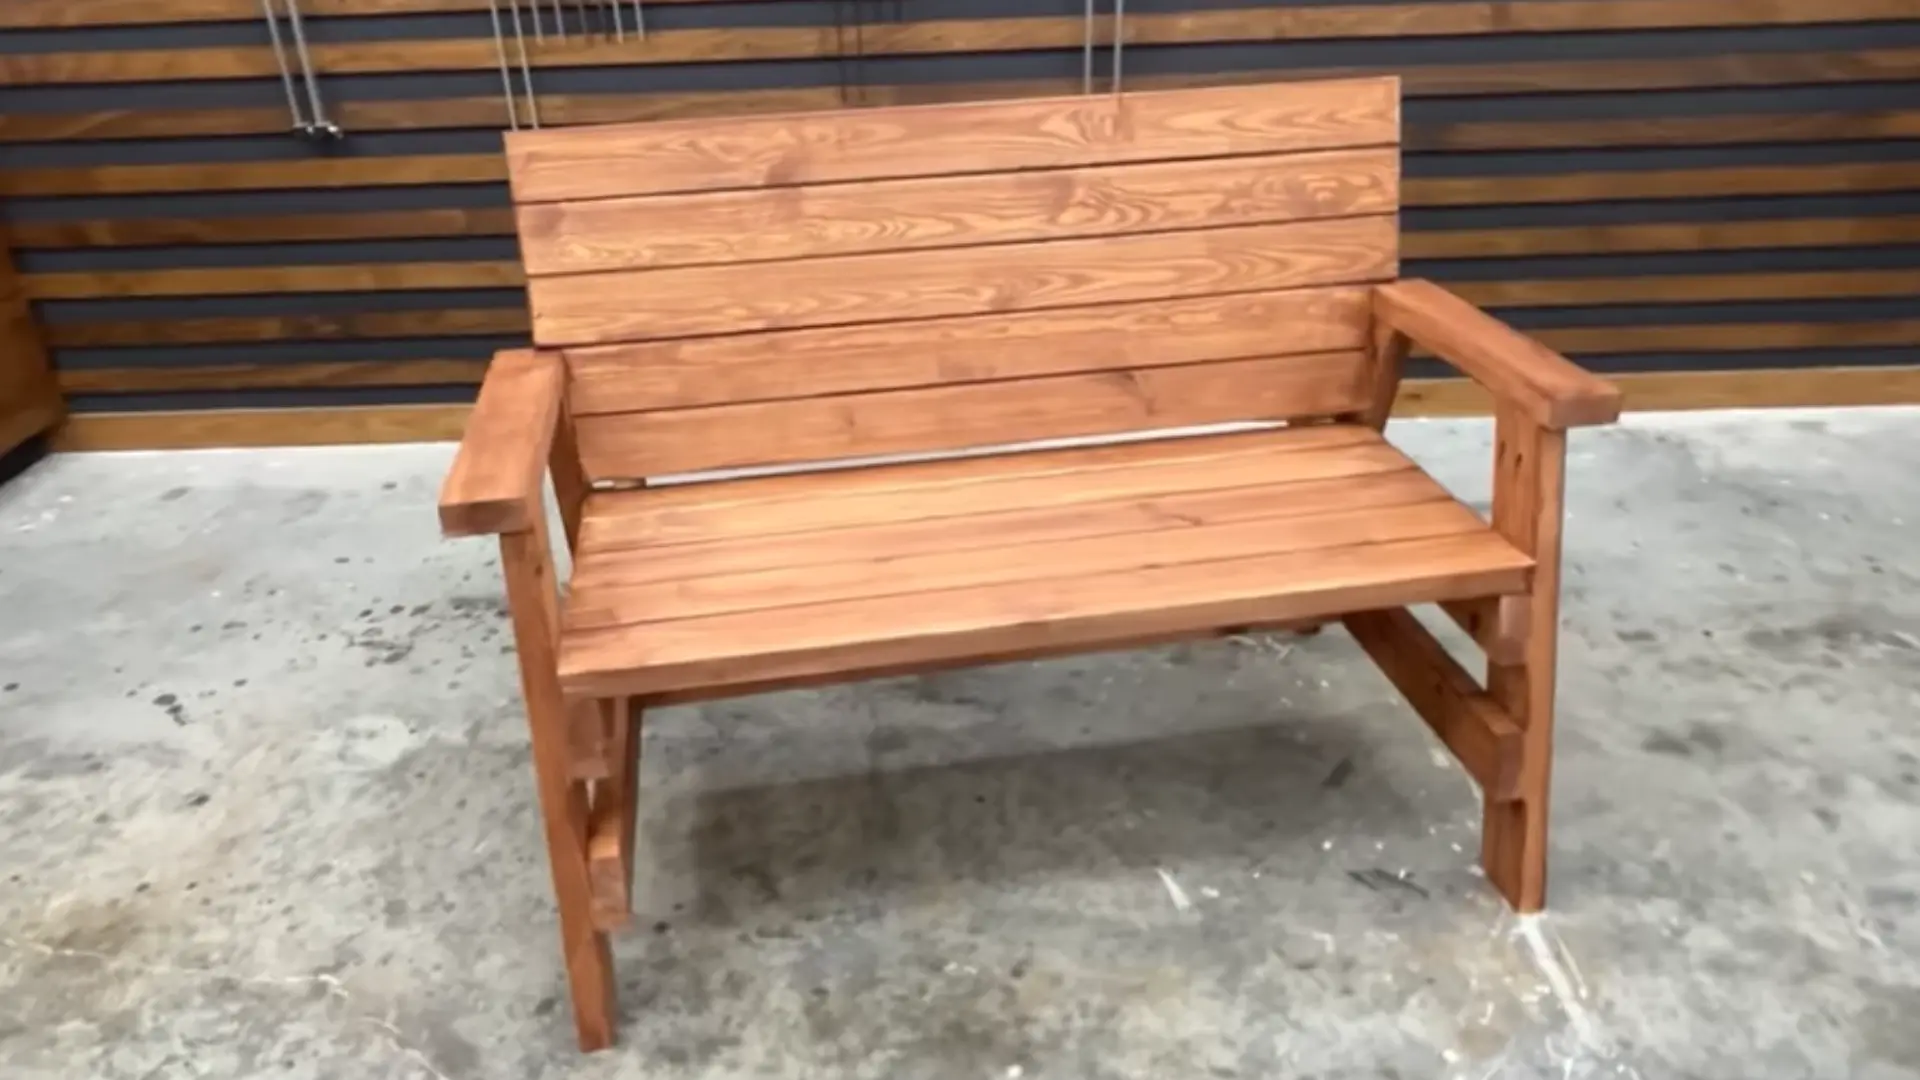
Apply an outdoor-grade finish, such as deck stain, clear coat, or paint, across all surfaces. Cover edges and corners evenly. Let dry completely before using the bench.
This protective coating ensures durability against weather, prolongs the bench’s lifespan, and keeps the wood looking fresh and well-maintained.
For an in-depth walkthrough of the whole process, check out the complete video tutorial below:
Best Wood Types for a Durable Bench
Choosing the right wood ensures your bench stays strong, stable, and long-lasting, whether indoors or outdoors.
- Cedar: Naturally resistant to rot and insects, lightweight, ideal for outdoor benches.
- Redwood: Strong, weather-resistant, and holds up well outdoors.
- Pressure-Treated Lumber: Affordable, durable, and suitable for outdoor exposure.
- Pine: Easy to work with, good for indoor benches, and affordable.
- Oak: Very strong and long-lasting, ideal for indoor benches that see heavy use.
- Maple: Hard, durable, and smooth finish for indoor benches.
Selecting any of these woods will help your bench stay sturdy and reliable for years.
Optional Variations and Upgrades
Simple upgrades can make a basic bench more useful, comfortable, and better suited to your outdoor space. These additions improve storage, appearance, and everyday comfort without changing the core structure of the bench.
| Customization Idea | What It Adds | Best For |
|---|---|---|
| Under-Seat Storage | Adds space for cushions, tools, or outdoor supplies | Keeping outdoor areas organized |
| Outdoor Paint or Stain | Improves appearance and weather protection | Extending bench lifespan outdoors |
| Clear Protective Coat | Seals the wood while keeping the natural wood look visible | Moisture and UV protection |
| Seat Cushions | Makes the bench softer and more comfortable | Longer seating comfort |
| Backrest Angle Adjustment | Creates better back support | More relaxed seating |
| Armrests | Adds support and improves usability | Comfort and accessibility |
Common Mistakes When Building a Bench
Beginners often run into simple errors that can affect stability, comfort, and finish. Being aware of these can save time and frustration.
- Mismeasuring boards: Cutting pieces too short or long can throw off alignment and cause gaps.
- Skipping clamps: Not clamping boards while fastening can lead to uneven or wobbly assembly.
- Incorrect screw placement: Using the wrong length or placing screws improperly can split wood or reduce stability.
- Ignoring angles: Failing to cut and align angled supports correctly weakens the bench structure.
- Poor sanding or finishing: Skipping sanding or protective coating can leave rough surfaces and make the bench vulnerable to weather.
Avoiding these mistakes ensures your bench is safe, strong, and looks great.
Conclusion
Building a bench doesn’t have to be complicated. You’ve seen how to pick the right wood, cut and assemble the pieces, attach seat and backrest slats, and finish it so it lasts.
Optional upgrades like storage, cushions, or a fresh coat of paint can make your bench even more functional and comfortable. Knowing common mistakes to avoid also helps ensure your build is sturdy and smooth.
Now it’s your turn: grab your tools, start building, and share your results. Have anything to say? Comment below.
Frequently Asked Questions
How Much Weight Can a DIY Wooden Bench Hold?
A properly built bench with solid framing and quality screws can usually support several adults comfortably. The exact weight depends on the wood type, screw placement, and overall design.
How Long Does It Take to Build a Simple Bench?
Most beginner-friendly benches can be completed in a few hours, while staining or painting may require extra drying time.
How Often Should an Outdoor Bench Be Refinished?
Most outdoor benches benefit from resealing or restaining every 1–3 years, depending on weather exposure and wood type.