DIY Entry Table: Easy Guide for Beginners
The entry area makes a crucial first impression when entering a home. A stylish, functional entry table anchors this space perfectly, but quality options often come with hefty price tags.
The solution? Build one yourself! This guide walks you through creating a beautiful, custom entry table.
You’ll find out everything from selecting the right wood and tools to following step-by-step assembly instructions and adding personalized finishing touches.
If you prefer modern minimalism, rustic farmhouse charm, or industrial edge, you’ll learn how to craft a piece that perfectly fits your space and style.
Beyond the practical savings, you’ll experience the unique satisfaction that comes from greeting guests with a piece you built yourself.
Why Build Your DIY Entry Table?
Making your entry table gives you three big wins.
- First, you save money—many people build quality tables, while store versions cost hundreds.
- Second, you can make it fit your exact space and style needs.
- Third, there’s nothing like walking past something you built with your own hands every day.
Building an entry table yourself costs much less than buying one from a furniture store. Many DIY builders report making beautiful tables for under sixty dollars in materials, while similar store models often sell for hundreds.
The money you save can go toward other home projects or needs. When you build your table, you control every aspect – the height, width, depth, color, and style.
This means you can create a piece that fits perfectly in your space and matches your existing decor rather than settling for what’s available in stores.
Finishing a DIY table gives you a sense of accomplishment that bought furniture can’t match. The skills you gain also help with future home projects.
Materials and Tools You’ll Need
Before starting your entry table project, gather all necessary supplies. Having everything ready will make the building process smoother and help you finish your project without interruptions.
Wood
Pine is an excellent starting point for beginners due to its low cost and easy workability.
Oak provides greater durability and a distinct grain pattern but costs more.
Reclaimed wood brings character and history to your project while being an earth-friendly choice.
When selecting wood, consider your skill level, budget, and desired look.
Tools
- You’ll need a saw (circular, miter, or hand saw) for cutting wood to size
- A drill with various bits for making holes and driving screws.
- Measuring tools like a tape measure and square, sandpaper, or an electric sander.
- And clamps to hold pieces while working.
- Basic safety gear, including eye protection and work gloves, is also essential.
Other Materials
Wood screws in various lengths will secure your pieces together. Wood glue adds strength to joints.
Choose a finish that suits your style – clear polyurethane protects while showing natural wood grain, while paint offers endless color options.
Consider adding metal brackets for reinforcement or decorative hardware like handles or knobs to complete your look.
DIY Entry Table: Step-by-Step Guide
Building your entry table is easier than you might think. This guide walks you through creating a sturdy, beautiful table.
Step 1: Design and Planning
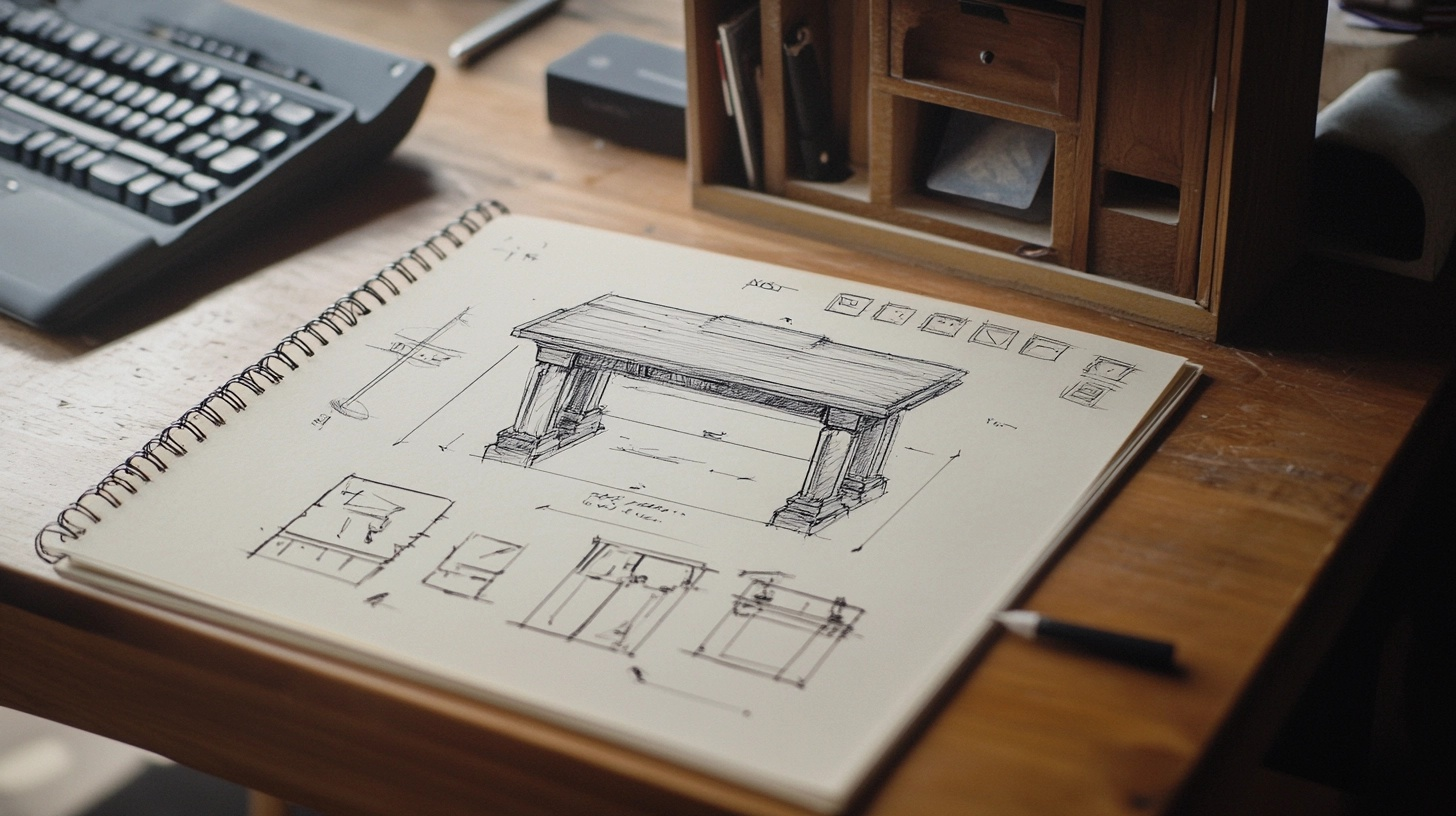
Before buying any materials, take the time to plan your project carefully. Measure your space to determine the ideal height (typically 30-36 inches), width, and depth for your entry area.
Choose a style that matches your home décor, if modern, rustic, or farmhouse. Gather inspiration from websites like Kreg Tool or Pinterest for ideas and free plans.
Create a detailed materials list based on your design, including all wood pieces, hardware, and tools you’ll need. Price out materials at your local store to ensure you stay within budget.
Step 2: Cutting and Preparing the Wood
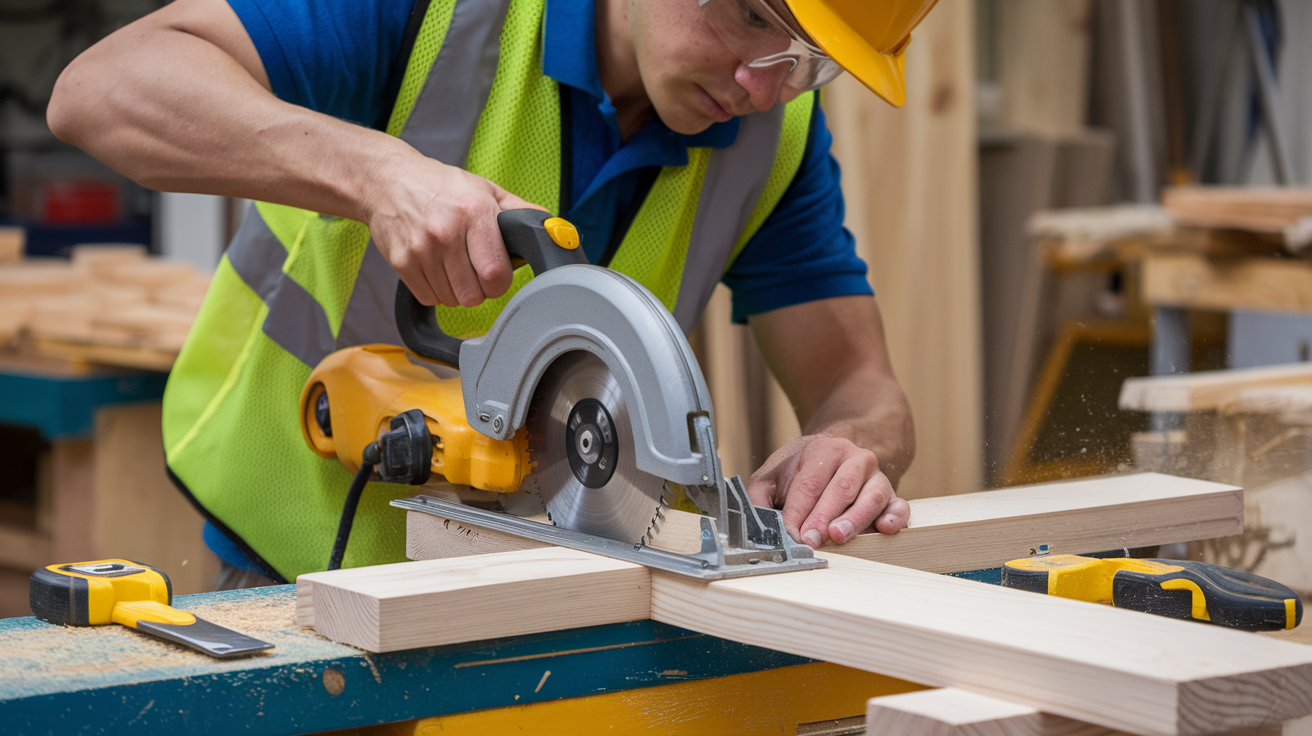
For this console table design, you’ll need several lumber pieces. To create beefy supports, prepare your legs by cutting 2×8 boards and ripping them down to 7 inches wide.
Cut spacers that will be attached to the legs, allowing for side panels to be added later. For each side panel, cut 2×6 and 2×2 boards to your desired length, drill 1¼-inch pocket holes along the center board, and join the pieces using pocket hole screws and wood glue.
Use clamps to ensure the boards stay flush while joining. Cut a 2×12 ripped to 10 inches wide for the table top, and prepare apron pieces from 2×8 boards ripped to 7 inches wide.
Sand all pieces with medium-grit sandpaper first, then finish with fine-grit sandpaper for a smooth surface.
Step 3: Assembling the Table
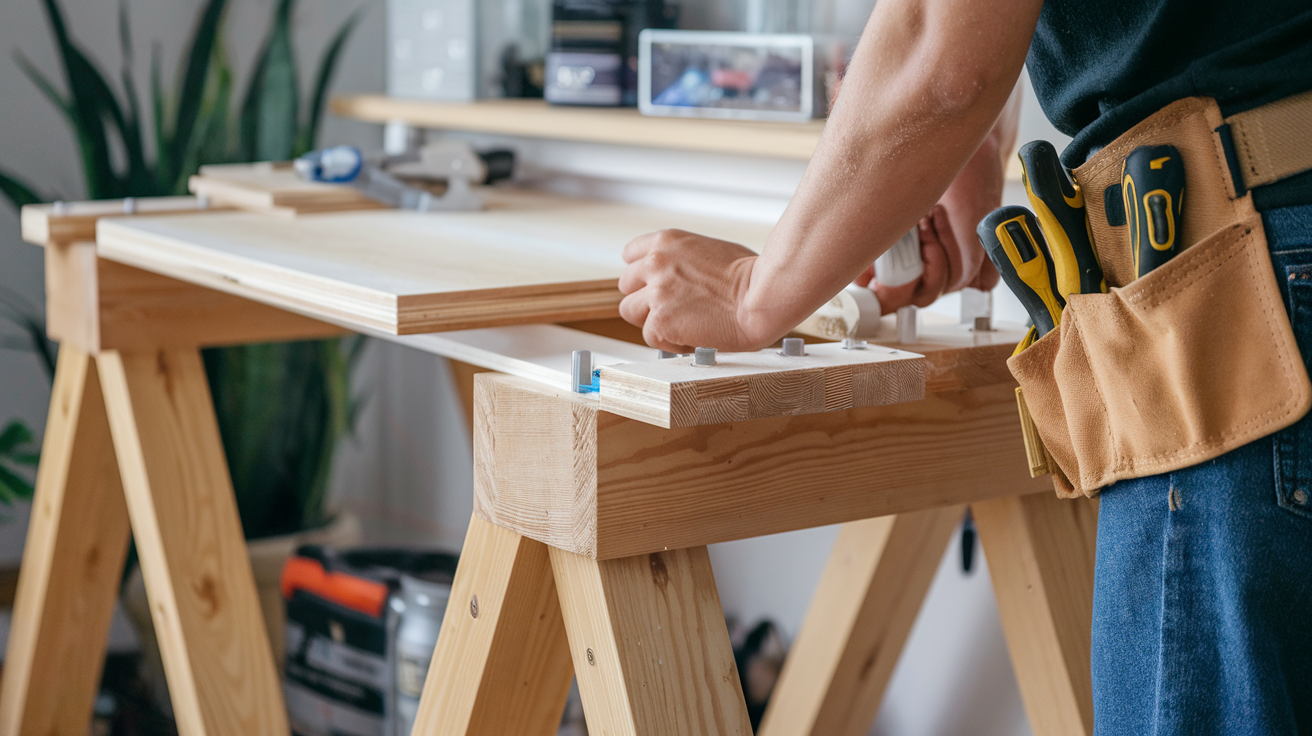
Putting together your entry table follows a logical sequence that builds the structure piece by piece.
The assembly process creates a sturdy framework while maintaining the design’s appealing elements, like the illusion of a beam running through the middle.
Follow these steps in order:
- Attach spacers to the legs: Apply wood glue and secure spacers to the inside of each leg with 2-inch nails at your marked locations.
- Join side panels: Connect end pieces to outside panels using 2½-inch pocket hole screws, aligning them to create the beam illusion effect.
- Connect top plank: Attach the long center plank to outside panels with 2½-inch pocket hole screws through pre-drilled holes, checking for square and level.
- Add legs to the structure: Slide the legs with spacers against the side panels, apply glue to the spacers, and secure them with 2-inch nails.
- Insert inside panels: Slide inside panels between legs, apply glue to spacers, and fasten with 2-inch nails.
- Attach trim pieces: Connect 2×2 trim to the middle plank using wood glue and 2-inch screws.
- Install aprons: Drill 1½-inch pocket holes at both ends of each apron, then attach with 2½-inch pocket hole screws and wood glue.
Step 4: Adding Decorative Touches
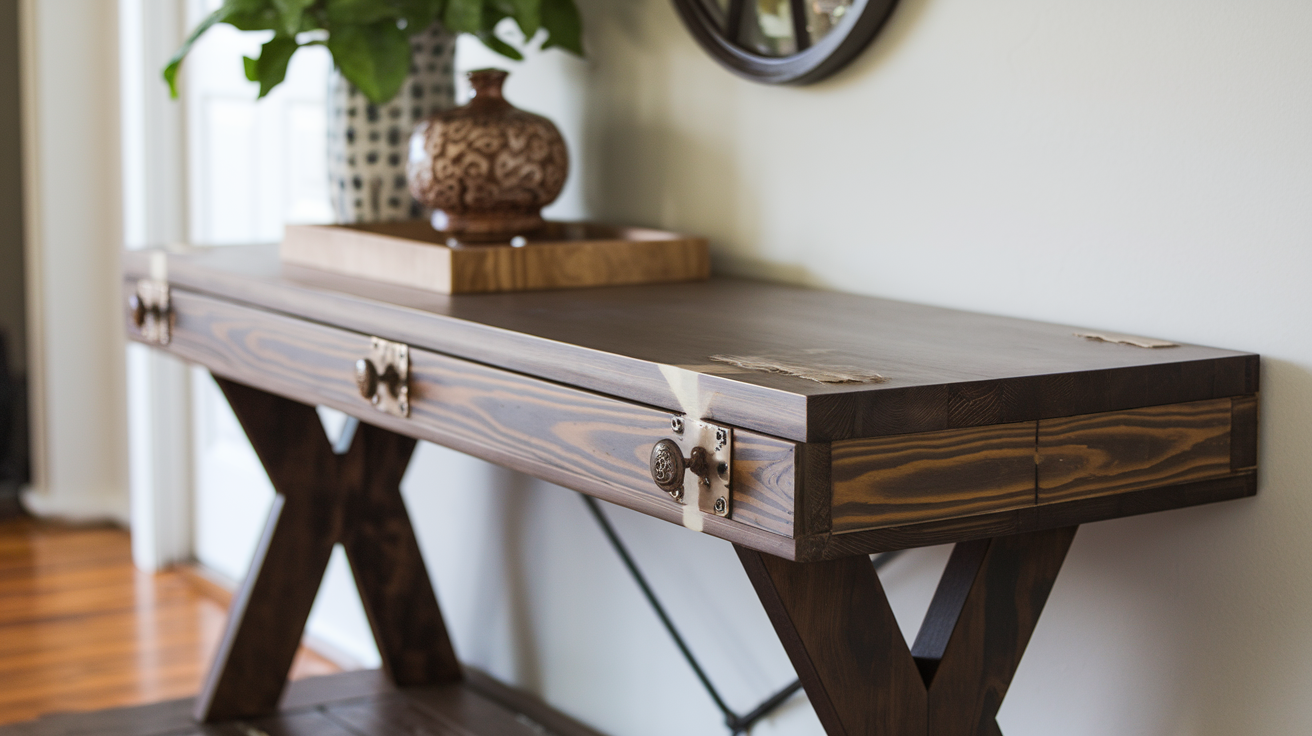
Once the structure is complete, personalize your table. Use wood filler to cover any visible screws or nail holes. Once the filler dries, sand the entire piece one more time.
Apply your chosen finish: if paint (prime and apply 2-3 coats of your chosen color), stain (apply wood conditioner followed by your desired stain color), or creating an aged look using distressing techniques.
If desired, attach decorative hardware like metal brackets at the corners or decorative knobs if you’ve included drawers.
Step 5: Finishing Touches
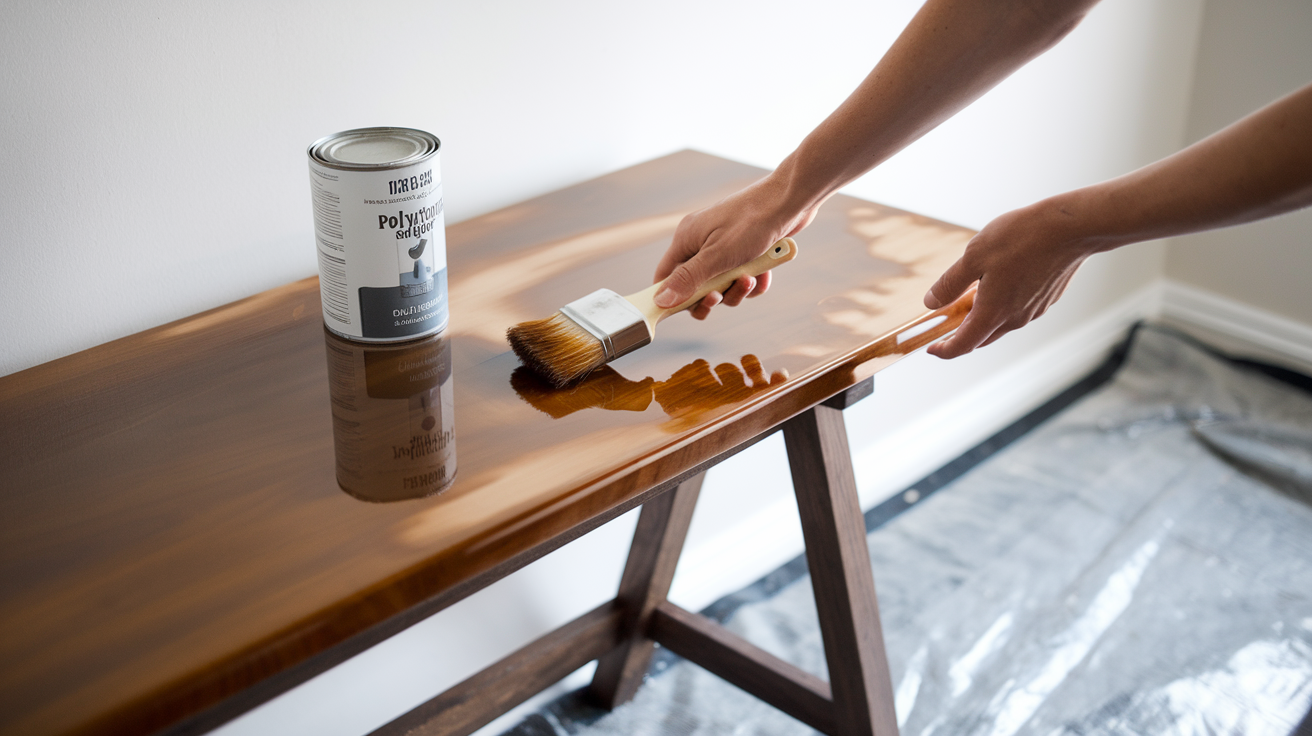
Complete your project with these final steps. To protect the wood, apply a protective coating like polyurethane, wax, or another sealer.
For stained wood, apply 2-3 coats of polyurethane, sanding lightly between coats; for painted wood, consider a clear topcoat for extra durability.
Allow the finish to dry and harden for 24-72 hours. To protect your floors, add felt pads to the bottom of the legs. Check for any rough spots or areas needing touch-ups.
Move the table to its final location in your entryway, and style it with a lamp, a decorative bowl for keys, framed photos, or plants to complete the look.
Remember that woodworking projects often require adjustments. Don’t worry if you need to problem-solve during the build—that’s part of the DIY experience.
For a more detailed walkthrough of the whole process, watch the video below:
Style Options for Your DIY Entry Table
The style of your entry table sets the tone for your entire home. By choosing the right design approach, you create a welcome that reflects your taste while complementing your existing decor.
Here are three popular styles to consider for your DIY project:
1. Modern Designs
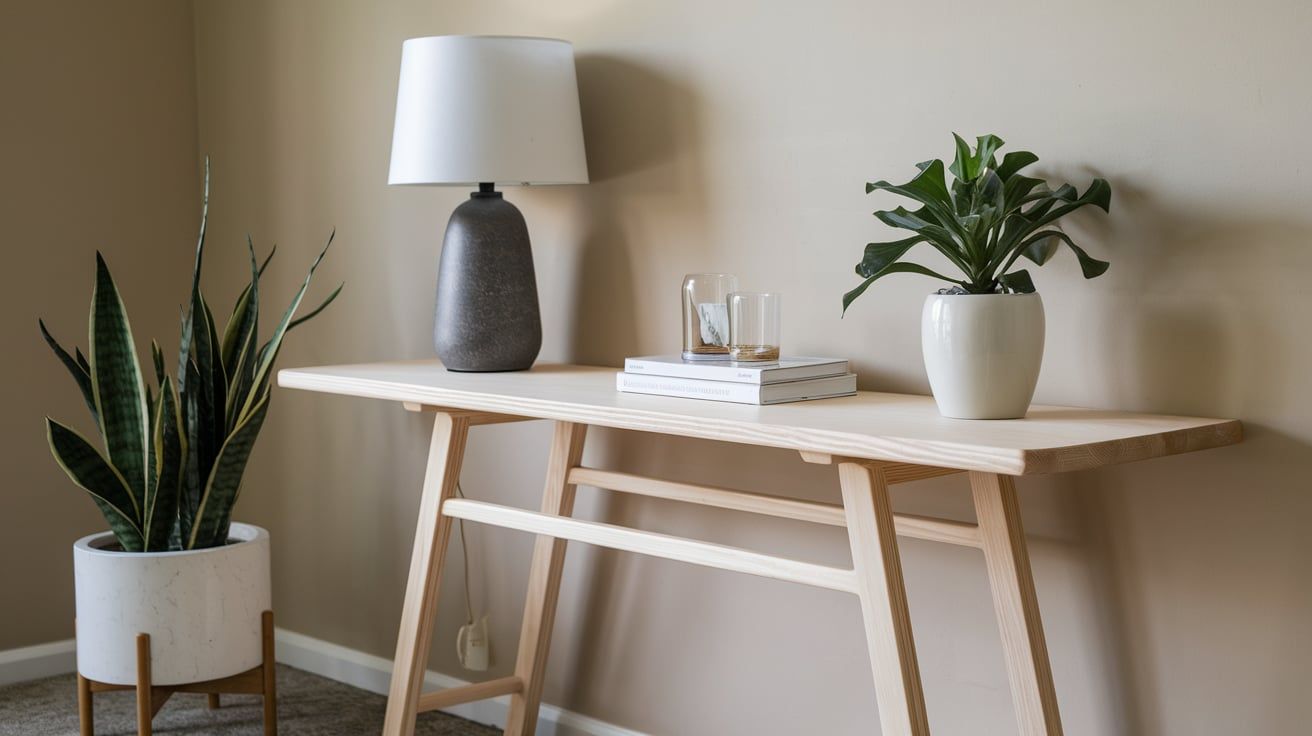
Choose smooth, straight-cut lumber and sand it to a flawless finish. Opt for light woods like maple or birch, or paint your table in solid neutral colors such as white, black, or gray.
The design is simple, with thin, straight legs and a clean, flat top. For extra shine, add glass elements or high-gloss finishes.
2. Rustic & Farmhouse
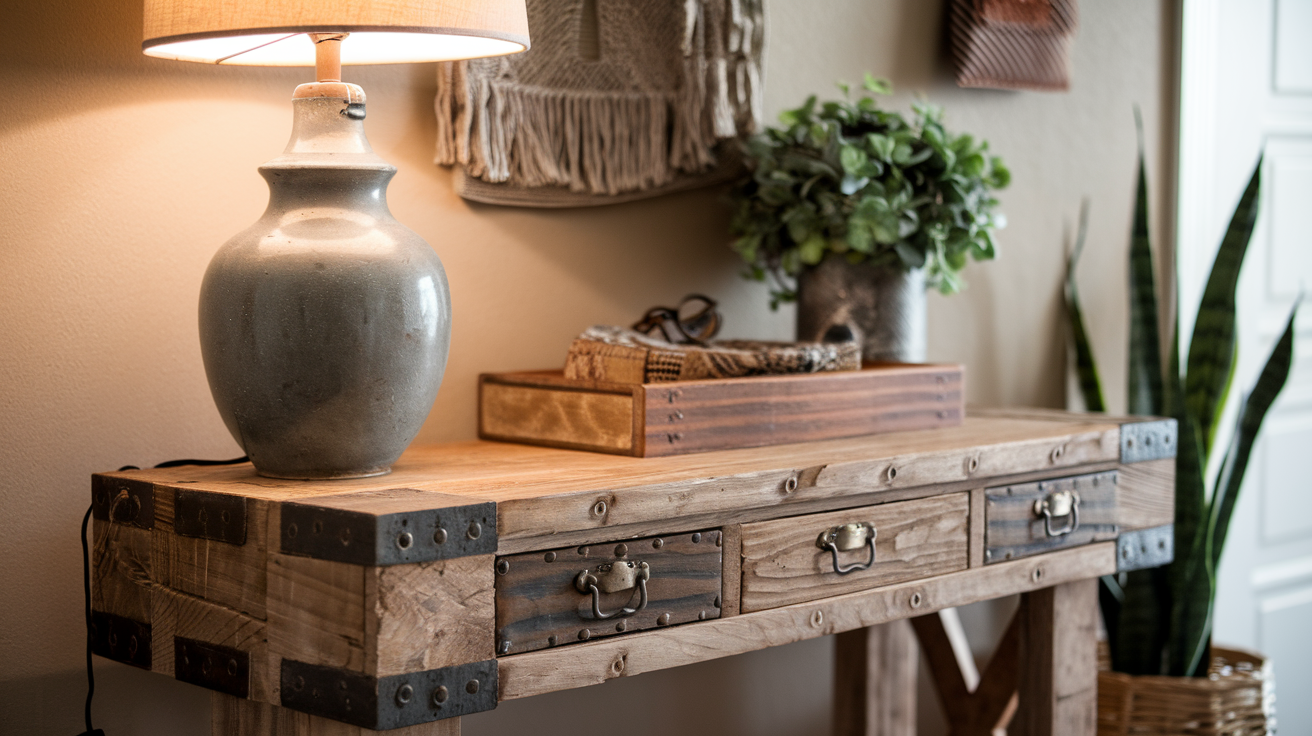
Use pine, oak, or reclaimed barn wood with visible knots and grain patterns. Leave edges slightly rough or rounded rather than perfectly straight.
Consider techniques like whitewashing, milk paint, or chalk paint for an aged look—distress the wood by sanding edges unevenly or adding small dents with a hammer and chain. Complete the look with black iron hardware or woven baskets underneath.
3. Industrial
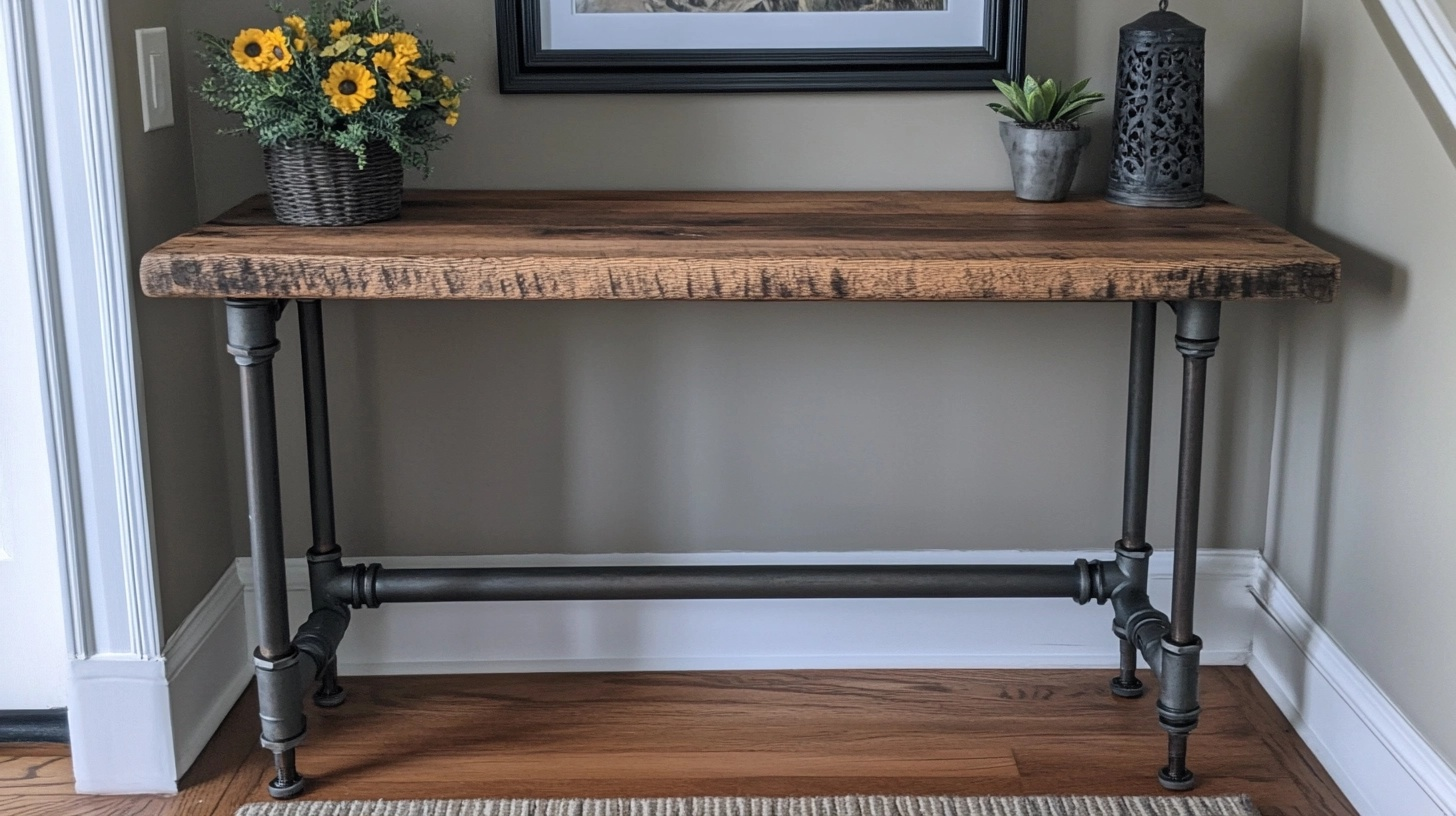
Mix warm wood tones with black, silver, or copper metal elements. Consider using metal pipes as table legs or adding metal corner brackets and exposed hardware. Darker stains like walnut or espresso complement the metal elements.
Keep the wood top thick and substantial for a sturdy appearance. This style works particularly well in lofts, urban apartments, or homes with brick walls.
Advanced DIY Entry Table Projects
Once you’ve mastered the basics of building an entry table, you might want to challenge yourself with more complex projects.
These advanced techniques allow you to create truly unique pieces that showcase your growing woodworking skills and personal style.
Incorporating Complex Design Features
Try adding cabriole legs by using a bandsaw to cut curved shapes from thick stock and refining them with rasps and sandpaper.
Create decorative inlays by cutting shallow recesses in your tabletop and gluing in contrasting wood or materials. Laminate thin strips of wood over a form to build a curved apron.
Use a router with a beading bit to add beadboard panels to the sides. For a traditional look, incorporate dentil molding along the top edge.
Upcycling Furniture for a Custom Look
Salvage ornate legs from an old dining table by carefully removing them and cleaning up the cut edges.
Upgrade a vintage drawer into a hidden storage compartment. Secure glass and add a wooden frame beneath an old window to repurpose it as a display top.
Convert antique corbels into decorative brackets that support your tabletop. Use salvaged trim pieces to add instant character to plain surfaces.
Adding Custom Details
Create a woodburning design using a woodburning tool to add patterns or your family name. Apply a crackle finish for an aged appearance.
Try color washing by applying paint and wiping most of it off, allowing the wood grain to show through. Add hand-painted details using artist’s acrylic paints and seal with a clear coat.
Experiment with resin river techniques by creating a channel in your tabletop and filling it with colored epoxy.
Conclusion
Building your own entry table gives you three valuable rewards: you’ll save money compared to store-bought options, create a piece perfectly matched to your space and style, and feel genuine pride in your craftsmanship.
If you go for a simple design or tackle something more complex, start by gathering inspiration, measuring your space, and selecting quality materials; the process is deeply satisfying.
Don’t worry about perfection; each small flaw adds character and tells the story of your creation. So, pick up those tools and begin; your entryway is waiting for your personal touch.