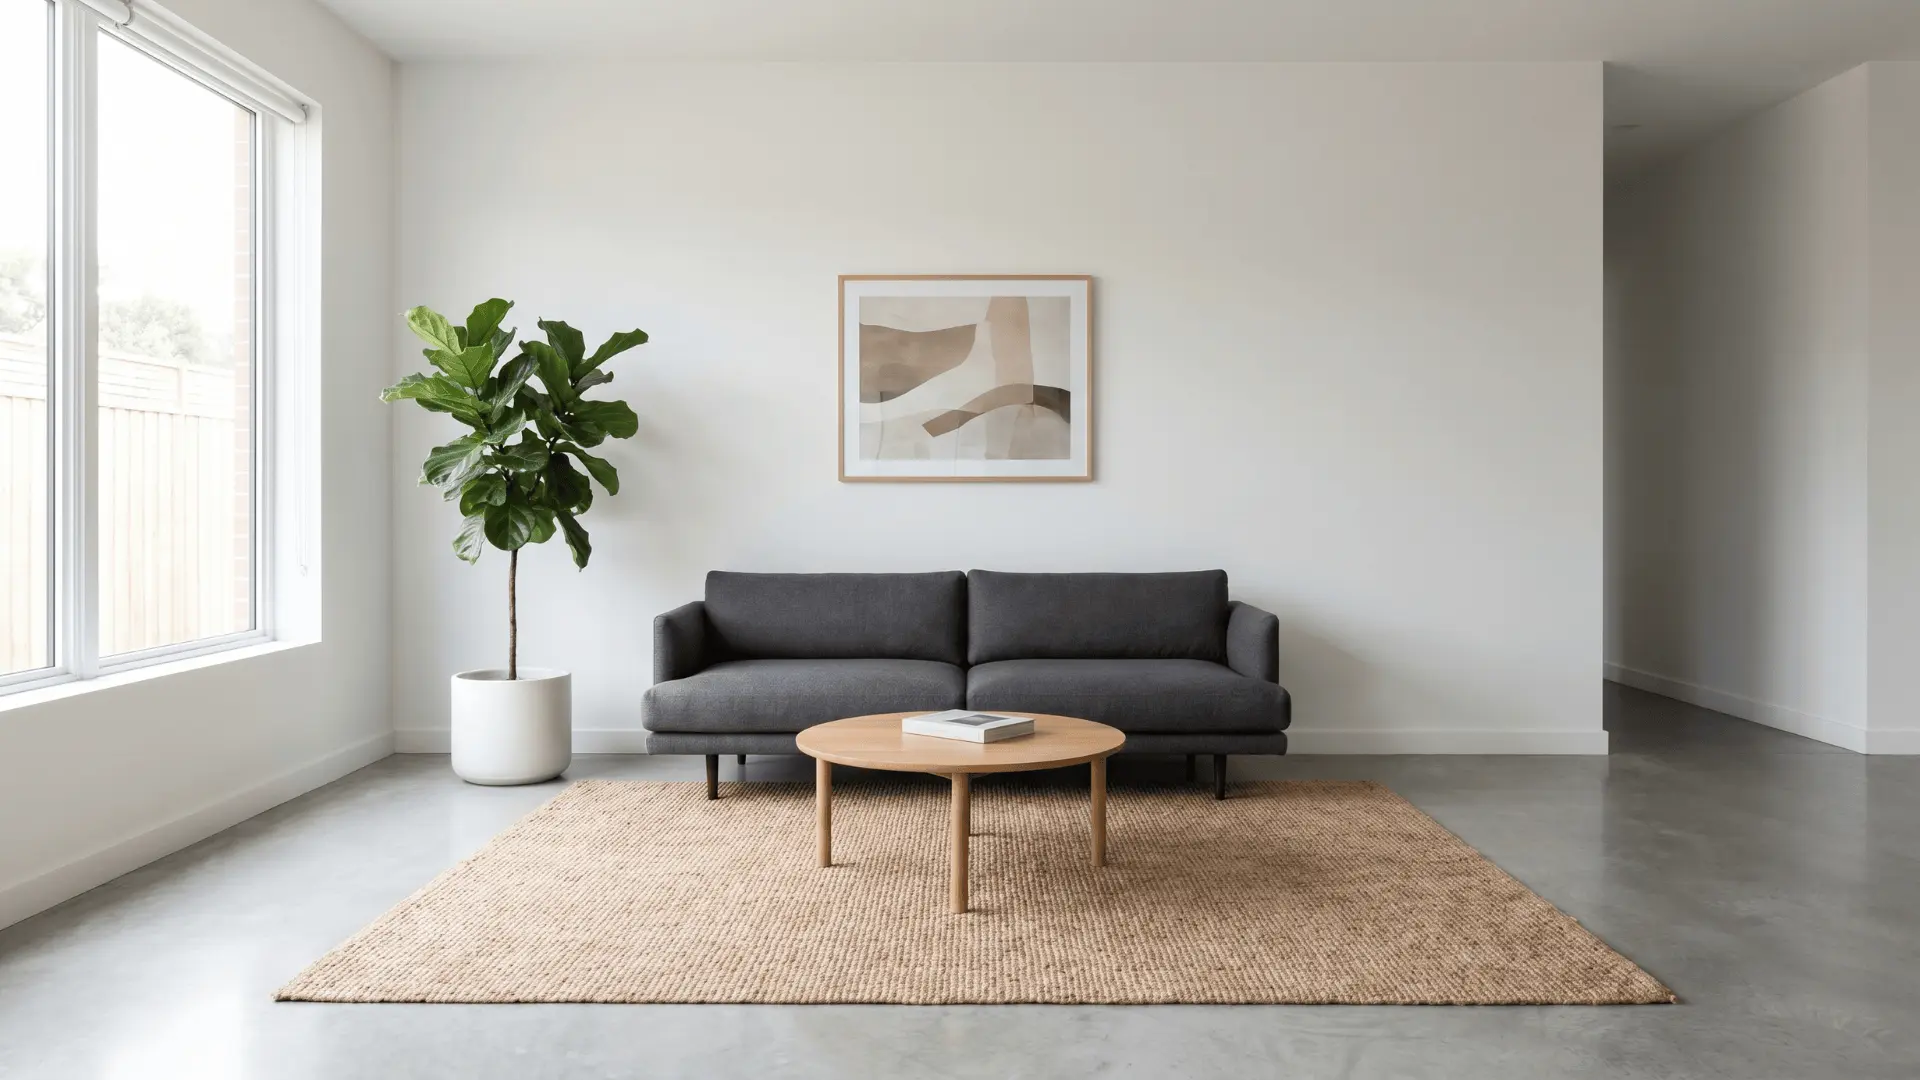
Creative Rustic Exposed Basement Ceiling Ideas to DIY
Rustic exposed basement ceilings bring a raw, natural charm to any space. By leaving beams, ducts, and pipes visible, you can create a bold, industrial look.
This design choice not only adds character but also increases the visual height of your basement, making it feel more open.
It’s a cost-effective option that requires minimal finishing, perfect for DIY enthusiasts.
The rustic vibe embraces warmth with materials like wood, aged textures, and natural finishes. Whether you want a cozy or modern feel, it’s a versatile style for any home.
What Does a Rustic Exposed Basement Ceiling Actually Mean?
An exposed basement ceiling keeps joists, ducts, and pipes visible instead of hiding them behind drywall. The rustic part adds warmth, think raw wood, aged textures, or natural finishes.
People choose this look for a few good reasons:
- It adds visual height to the space
- It makes plumbing and wiring easier to access later
- It costs less than a finished ceiling
One thing to clear up: exposed doesn’t mean unfinished. A well-done exposed ceiling looks planned, not neglected. That said, it doesn’t work in every situation. Very low ceilings or messy pipe layouts can make it hard to pull off cleanly.
How to Build a Rustic Exposed Basement Ceiling: Step-by-Step
Getting a rustic exposed basement ceiling right starts with a clear process. Follow these steps in order, and you’ll avoid the most common mistakes before they happen.
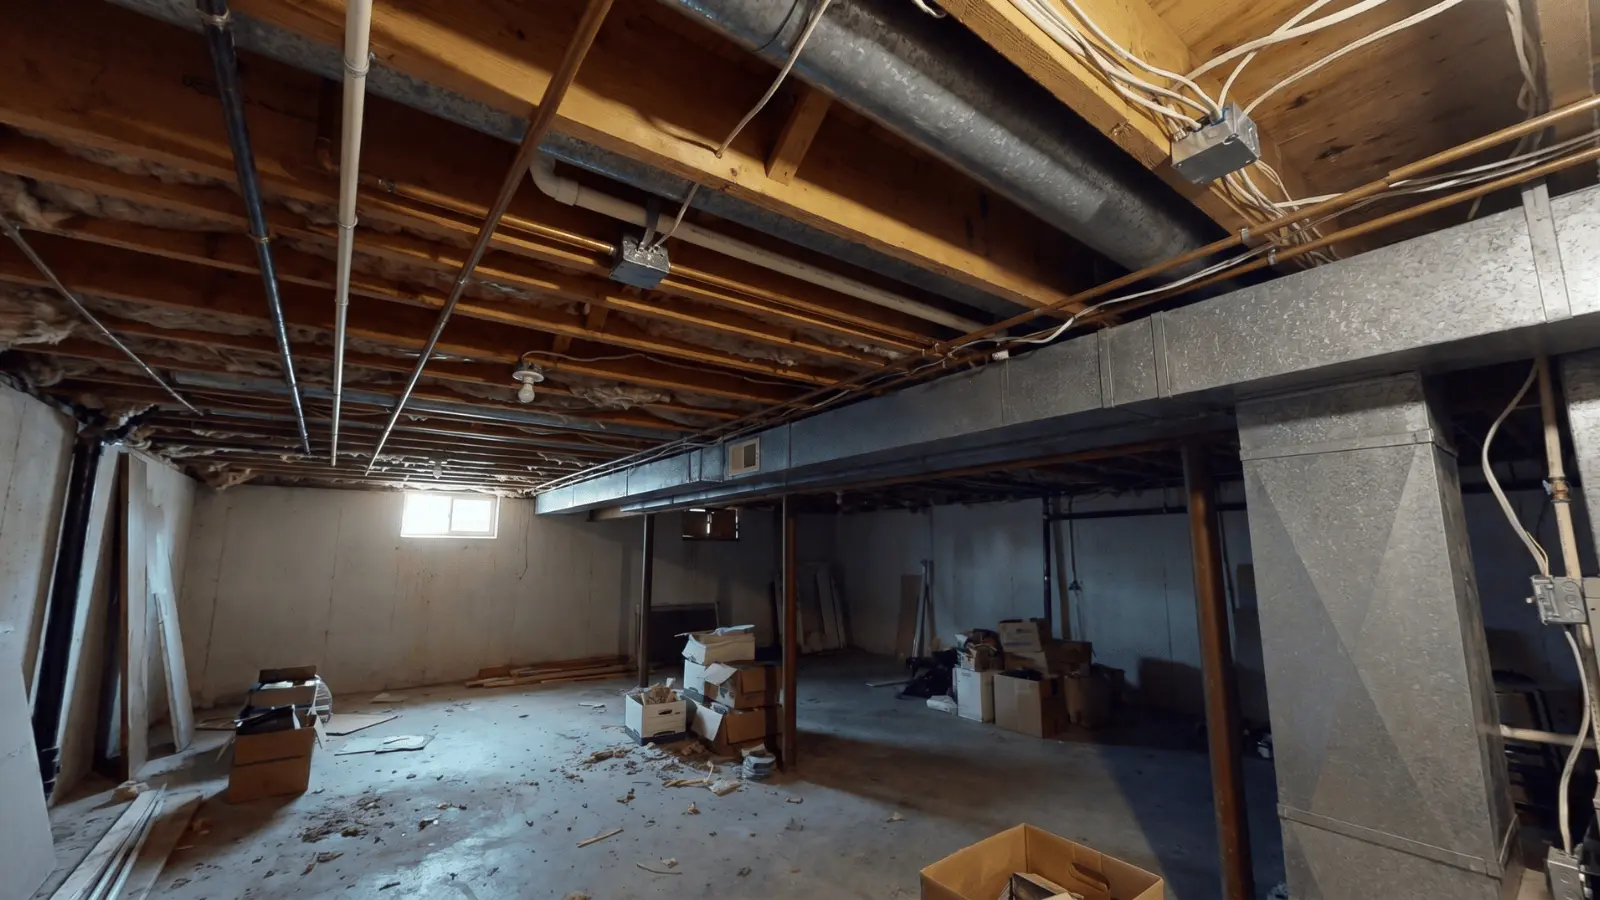
Step 1: Assess Your Basement Structure Before Starting
Before you touch anything, take a close look at what’s up there. Rushing past this step is where most DIY projects go sideways.
Here’s what to check:
- Duct and pipe placement: Identify where they run and how visible they’ll be
- Wiring paths: Note any exposed wires that need to be secured or rerouted
- Ceiling height zones: Some spots may be lower due to beams or ductwork
Once you know what’s there, decide what to hide and what to highlight. A large duct can become a design feature with the right treatment.
A tangle of wires usually needs to be cleaned up first. Skipping this step leads to a cluttered look that no amount of paint can fix.
Step 2: Clean and Prepare the Ceiling Surface
A clean surface is the foundation of a good finish. Paint and stain show everything, dirt, dust, and damage included.
Work through this before you apply anything:
- Sweep away cobwebs and dust from every joist and pipe.
- Sand wood surfaces if you’re keeping them natural.
- Tighten or reroute any loose wires.
- Apply a protective coating to bare wood if moisture is a concern.
This step matters more than most people expect. Painting over a dirty or rough surface makes imperfections stand out even more once the light hits it.
Take the time here. It pays off in the final result.
Step 3: Choose Your Rustic Style Direction
This is where most people get stuck or make a choice they later regret. Pick one direction and commit to it.
| Rustic Ceiling Style | Best For | What to Know |
|---|---|---|
| Natural Wood Rustic | Clean framing and joists in good shape | Light sanding and warm stain can bring out the wood grain for a rich, earthy look. |
| Painted Rustic Black | Basements with visible pipes, wires, or uneven ceiling lines | Black helps the ceiling fade back visually and makes messy pipe runs blend in. |
| Painted Rustic White | Low basements or rooms with limited natural light | White reflects light and can make the basement feel taller, brighter, and more open. |
| Mixed Rustic Wood + Panels | A more planned rustic-modern ceiling style | Exposed beams with shiplap or panel infill can look structured when the materials are chosen carefully. |
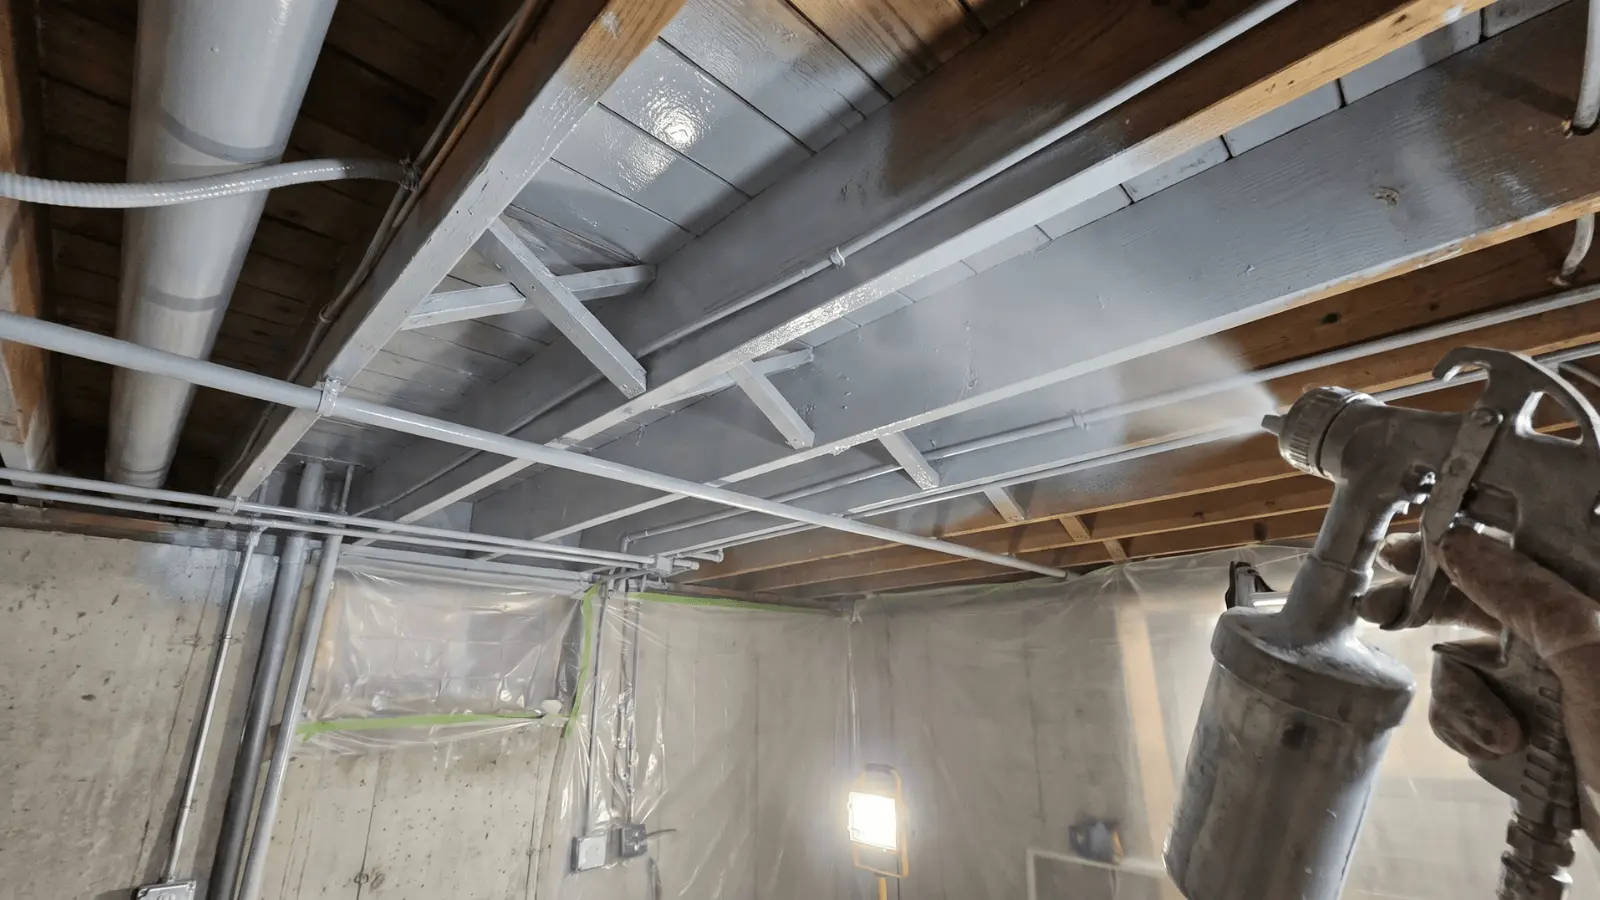
Step 4: Execute the Ceiling Finish
This is the hands-on part, so the method matters. Start by masking walls, floors, lights, vents, and anything else you do not want coated. If the wood is raw or unfinished, apply primer first so the paint or stain bonds evenly.
Once dry, use a paint sprayer. It reaches joists, pipes, and tight angles better than a brush or roller. Work in small sections with thin, even coats. Let each coat dry fully before adding the next.
Avoid rushing. Thick coats can drip, tight corners can get missed, and rollers often skip uneven exposed ceiling surfaces.
Step 5: Add Rustic Design Elements that Complete the Look
The ceiling structure is the base. These additions turn it into a finished space.
- Wood Accents: Reclaimed beams or rough-cut planks add depth and character. Even a few placed strategically across the ceiling create a lot of visual interest.
- Lighting: Lighting changes how the whole ceiling reads. Warm-toned bulbs bring out wood tones. String lights draped across joists add a relaxed, cozy feel. Pendant lights work well when ceilings are high enough.
- Ductwork Treatment: Don’t ignore the ducts. You can paint them to match the ceiling so they blend in, or clean them up and treat them as an industrial-style feature.
| One thing to avoid: adding too many elements at once. Over-decorating makes the ceiling feel chaotic instead of intentional. |
Rustic Exposed Basement Ceiling Ideas You Can Actually Use
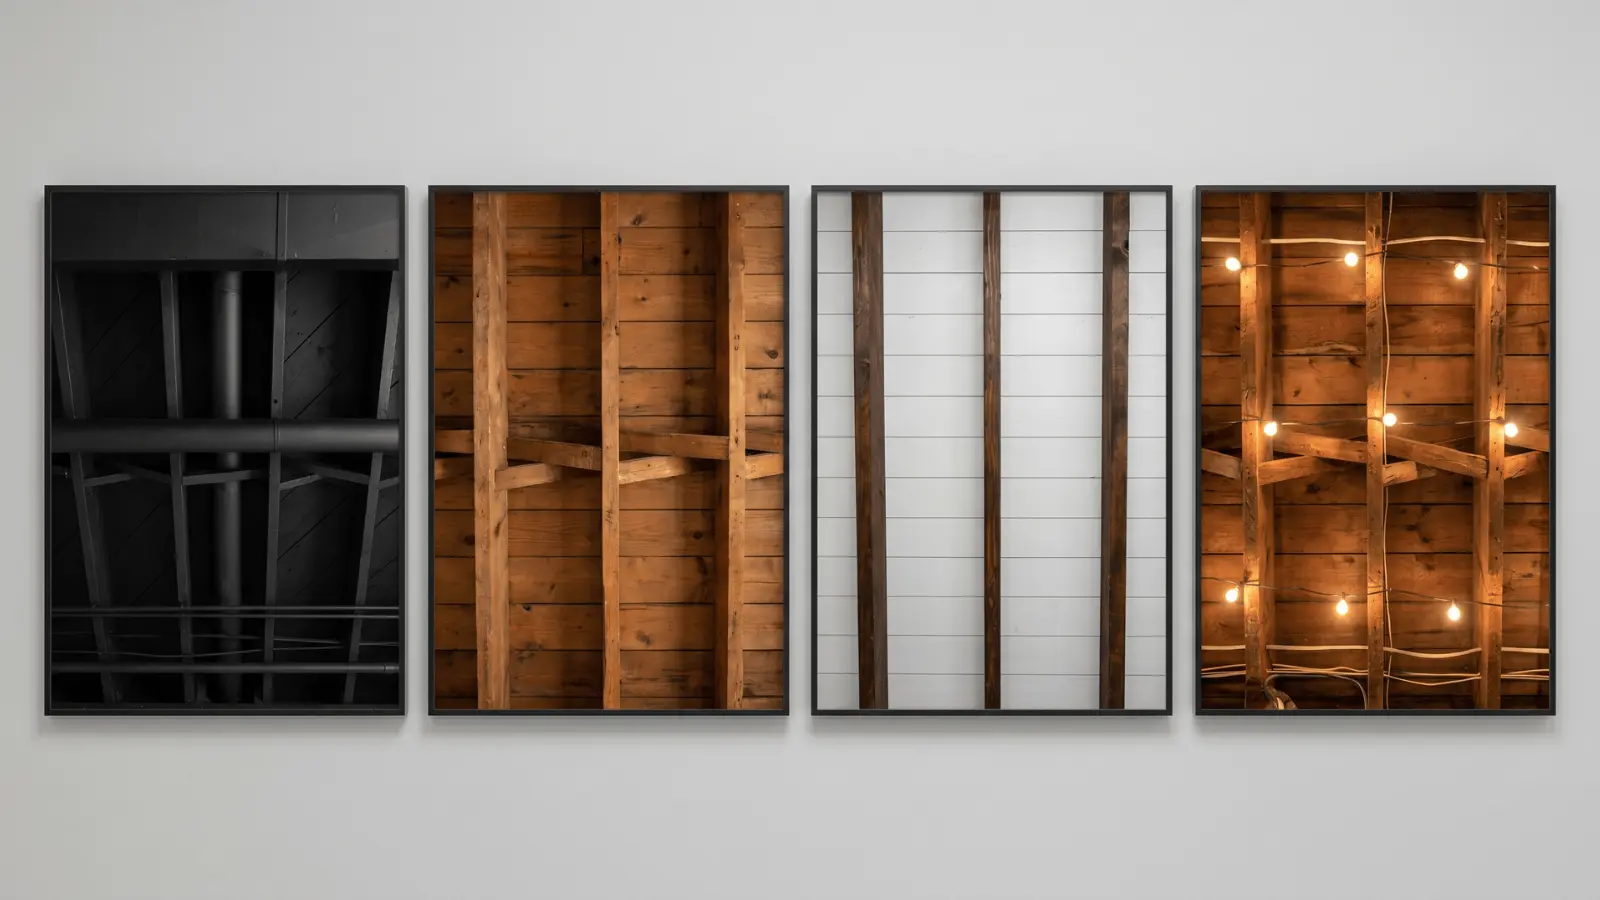
There are plenty of ways to style an exposed basement ceiling. Here are five ideas that actually work in real spaces and are worth considering:
1. Matte Black Open Ceiling
Paint every surface matte black, joists, pipes, ducts, all of it. The dark color pulls everything back visually, so the clutter disappears.
What’s left looks intentional and sharp. It works especially well in basements with busy pipe layouts.
2. Natural Wood Stained Joists
Sand the joists smooth and apply a warm wood stain to bring out the natural grain. The result is a rich, earthy ceiling that feels cozy and well-crafted.
It works best when the framing is clean and in good condition.
3. Shiplap Between Joists
Install shiplap panels in the open gaps between joists. It adds texture and structure without covering the beams completely.
The combination of flat panels and exposed wood gives the ceiling a finished rustic look that feels both clean and characterful.
4. Reclaimed Barn Wood Accents
Add aged barn wood pieces across select sections of the ceiling. The worn texture and natural color variation bring instant vintage character to the space.
Even a few well-placed pieces make a noticeable difference without requiring a full ceiling overhaul.
5. String Light Layout
Run warm-toned string lights along the joists from one end to the other. It’s one of the simplest additions you can make, but it completely changes the mood.
The soft glow adds a cozy, relaxed atmosphere that pairs well with any rustic finish.
These five ideas cover a range of styles, from bold and dark to warm and textured. Pick the one that fits your space and build from there.
Common Mistakes that Ruin the Final Look
Even a good plan falls apart without attention to detail. These are the mistakes that come up most often.
- Skipping prep: Paint over a dirty surface, and every flaw shows under the light
- Poor lighting choices: Cool white bulbs kill the rustic feel; warm tones are almost always the right call
- Mixing too many styles: Industrial, farmhouse, and raw wood don’t naturally blend without a clear plan
- Ignoring structure: Working around a messy pipe layout without planning leads to a cluttered result
- Ignoring safety codes: Wiring and structural elements need to meet local code requirements before you paint over them
Most of these are avoidable. They just require slowing down before you start.
Quick Checklist Before You Start
Run through everything in this table before you pick up a brush or sprayer. If something isn’t done, handle it first.
| # | Task | What To Do |
|---|---|---|
| 1 | Structure Assessed | Map out ducts, pipes, and wiring across the full ceiling |
| 2 | Surface Cleaned | Remove all dust, cobwebs, and debris from joists and pipes |
| 3 | Style Locked In | Choose one clear design direction before buying materials |
| 4 | Tools Ready | Have your sprayer, primer, and paint or stain on hand |
| 5 | Lighting Planned | Decide on bulb type and where fixtures or string lights will go |
| 6 | Safety Verified | Secure all wiring and confirm everything meets local code |
A little extra time on this list before you start saves a lot of fixing later.
Conclusion
A rustic exposed basement ceiling can completely transform your space, creating a unique and inviting atmosphere. With the right steps, you’ll achieve a polished, intentional look.
Now that you know how to pull off this style, you can enjoy both practicality and visual appeal. It’s a budget-friendly way to make your basement feel open and stylish.
Feel free to mix and match rustic elements to personalize your ceiling. This is your chance to get creative and experiment with different materials and finishes.
Ready to take the next step? Start your basement project today and bring your vision to life!
Frequently Asked Questions
Does an Exposed Basement Ceiling Affect Noise Levels in The Home?
Yes. Without drywall, sound travels more freely between floors. Adding rugs, curtains, or acoustic foam between joists helps reduce echo without closing up the ceiling.
What is the cheapest way to finish a rustic exposed basement ceiling?
Painting is the most budget-friendly option. A single color applied with a sprayer covers everything quickly and costs far less than installing drywall or panels.
Can I Add Insulation to An Exposed Basement Ceiling without Covering It Up?
Yes. Rigid foam boards or stone wool batts fit neatly between joist cavities without requiring a finished surface.