
A Complete Guide to Master Bathrooms
A master bathroom might not seem like much, but it makes a big impact on your day. If it feels dark, cramped, or doesn’t work anymore, it wears on you.
That’s often how these spaces feel outdated, tight, and hard to enjoy. You probably want more light, more function, and a better setup that doesn’t break the bank.
With some time, basic tools, and a little effort, you can create something fresh and useful.
This guide shows that even the most forgotten corners of your home can come back to life. It’s not about perfection; it’s about making it feel right for you and your family.
Planning for Master Bathrooms
Before doing anything, take a moment to study your space and set clear goals. If your room feels dark, crowded, or disconnected from the rest of the house, you’re not alone.
Keep the plan simple: brighten it up, make it more functional, and stay within budget. That means choosing your materials and tools with care from the beginning.
Evaluating the Space
Does your bathroom feel heavy and closed in? If your walls are covered in dark tones or the layout feels awkward, it may not work for you.
Over time, it becomes a pass-through instead of a place to get ready or unwind.
Your goal is to create a space that feels clean, calm, and part of your home, without going over the top. You don’t need anything fancy; just something that feels easy and natural.
Step-by-Step Master Bathroom Makeover
Updating your master bathroom takes time, but when you break it into clear steps, it gets easier.
You don’t need fancy tools or a big budget—just a plan that fits your needs. This process keeps things simple and helps you work with what you already have.
Step 1: Look at the Space
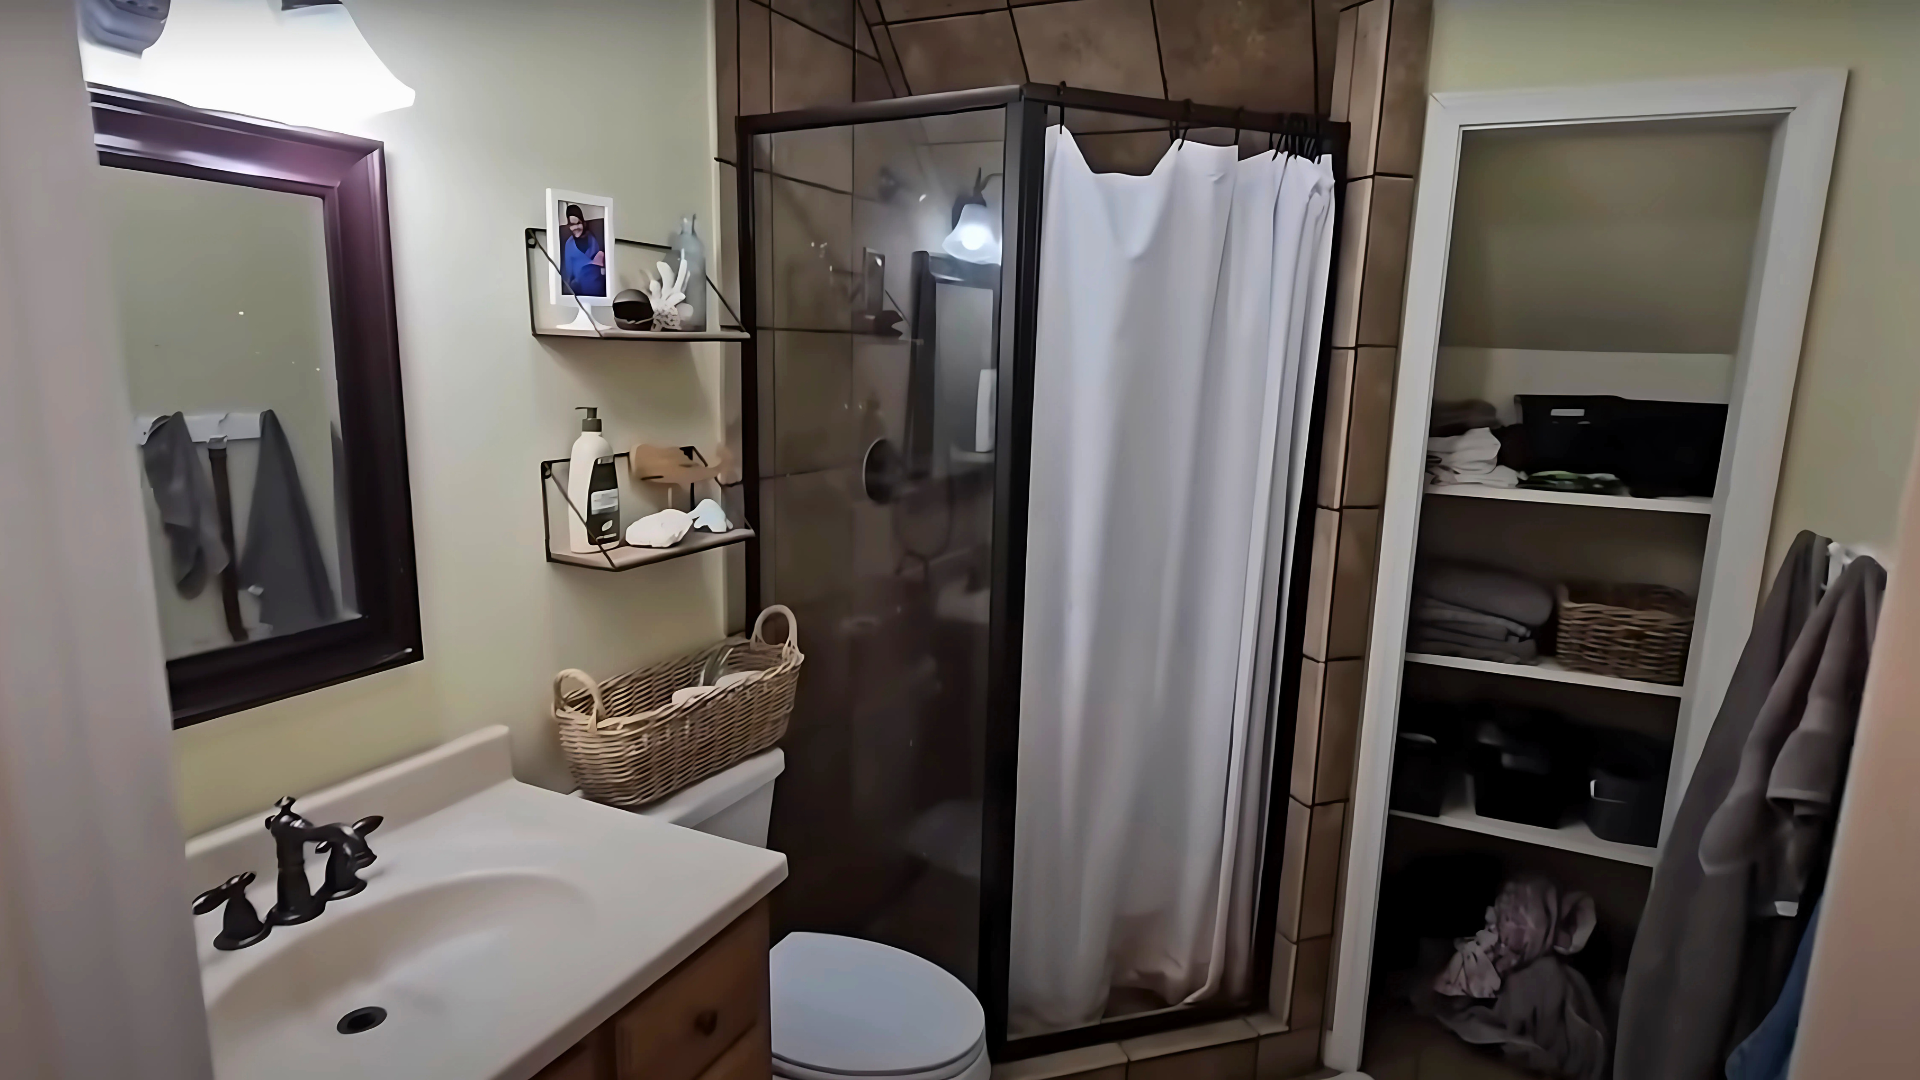
Start by examining the bathroom. Ask yourself what feels off. Maybe the layout is too tight or the lighting feels dim.
Check how the space connects with the rest of your home. Do the colors feel out of place or too dark?
Once you notice those things, write down a few clear goals. Focus on making it brighter, cleaner, and more useful for everyday routines.
Step 2: Gather What You Need
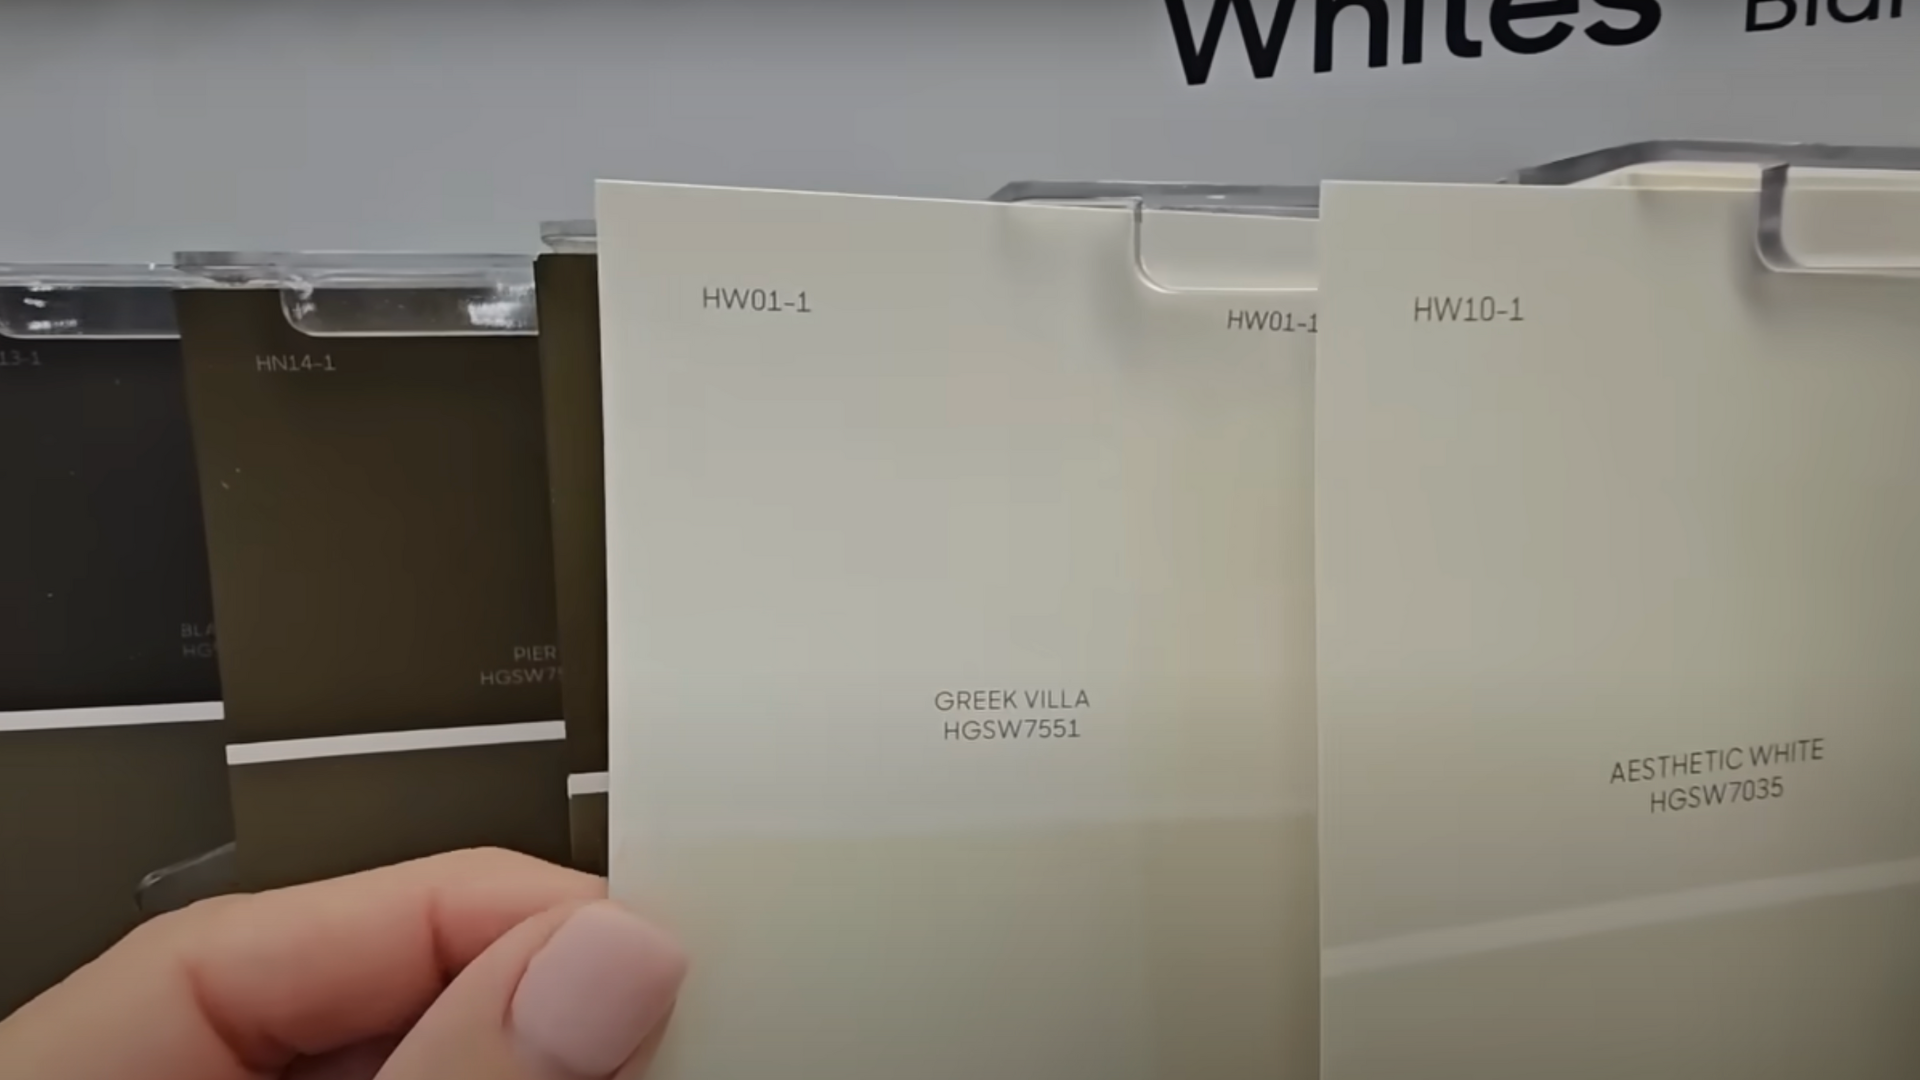
Now that you have a plan, it’s time to grab the right materials. Choose soft, neutral paint shades and basic tools.
To save money and customize the look, you can even make your own shiplap (a type of wooden board used as wall paneling).
Here’s a sample supply list to help you get started:
- Paints: Sherwin-Williams White Duck and Greek Villa
- Shiplap boards: 5mm underlayment sheets
- Cutting tools: Table saw, utility knife
- Prep tools: Sandpaper or sanding blocks
- Sealers: Caulk and caulking gun
- Cleaning: Baby wipes
- Painting: Paintbrushes and painter’s tape
- Mounting: Wall anchors and screws
- Measuring: Level and tape measure
- Safety gear: Gloves and safety glasses
Keeping it simple makes each step more manageable.
Step 3: Build and Install Shiplap
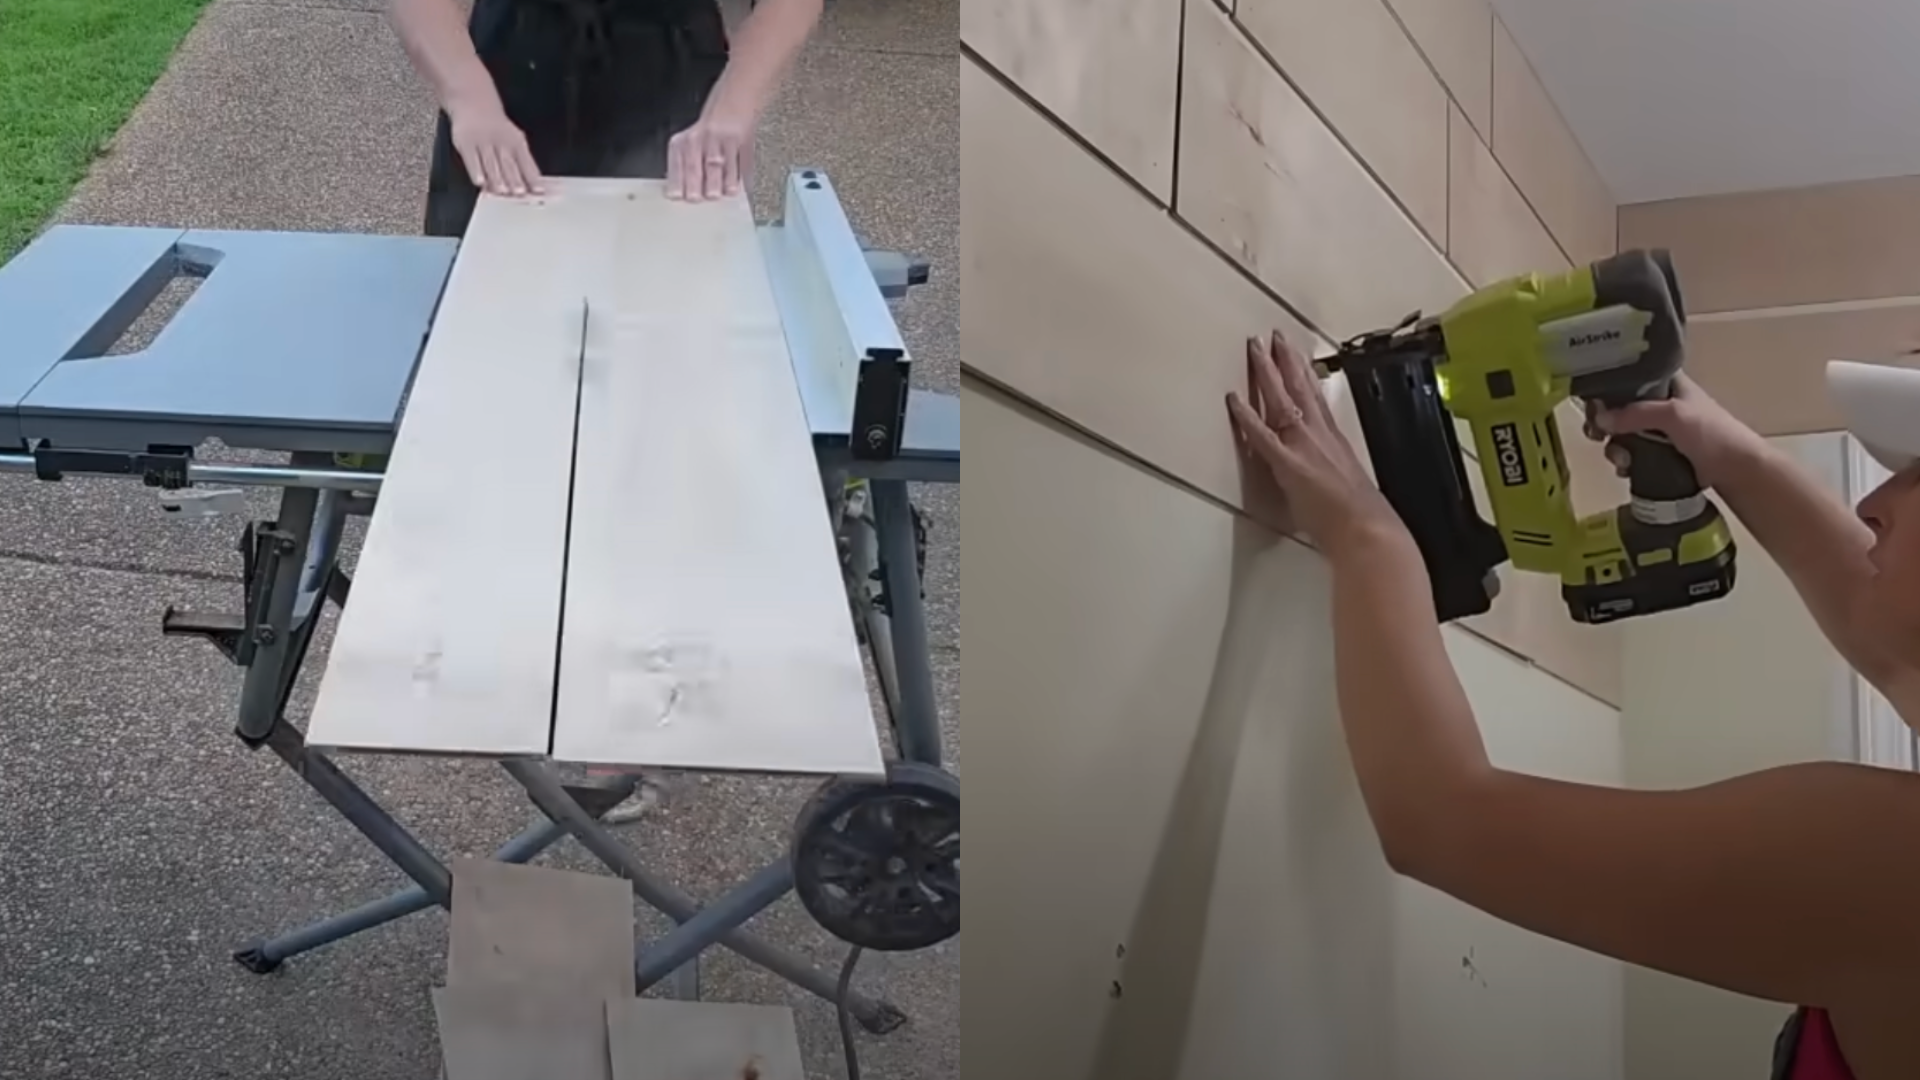
Cut your underlayment into 8-inch-wide planks. This gives you control over the look and saves money.
Sand all the edges so they’re smooth and easy to handle.
Mark your wall and use a level to keep your rows straight. Nail each plank into studs or use wall anchors where needed.
Use spacers like coins to keep gaps even and cut carefully around outlets and corners.
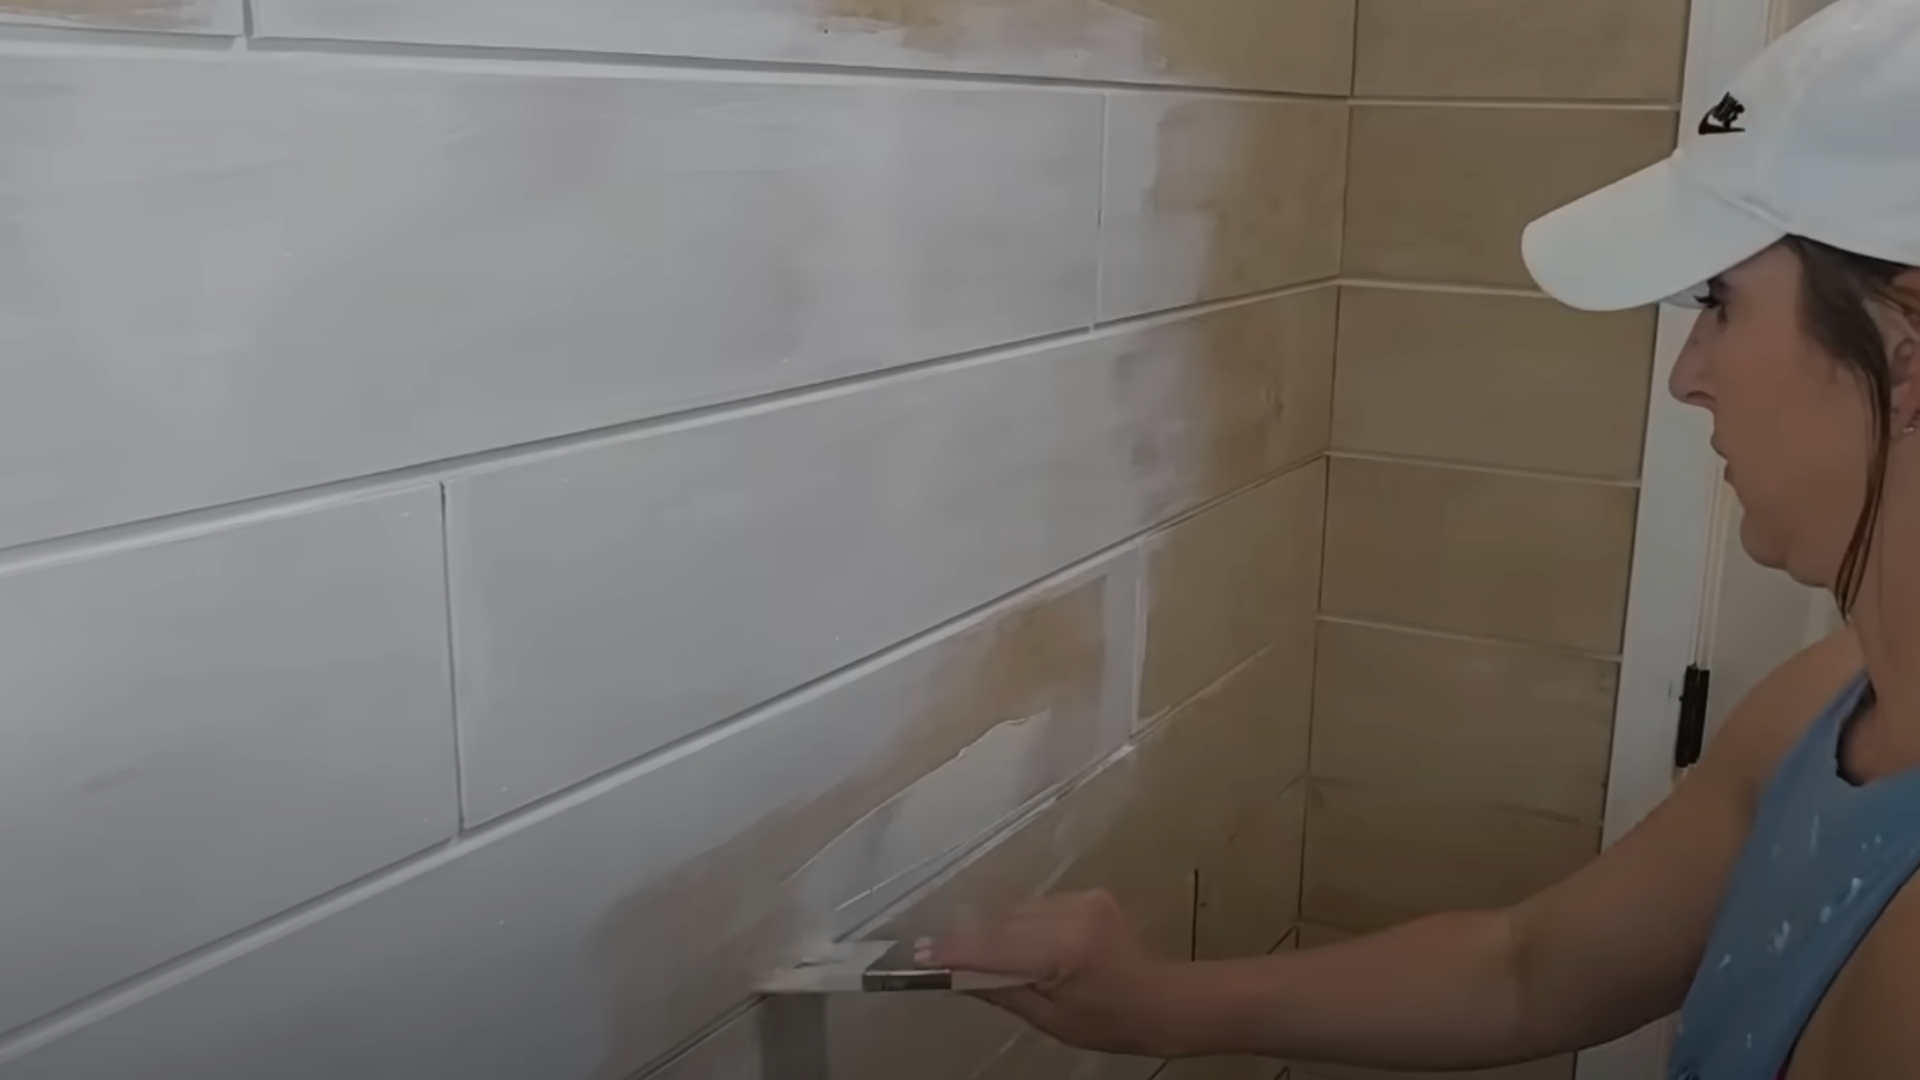
Step 4: Seal and Prep the Walls
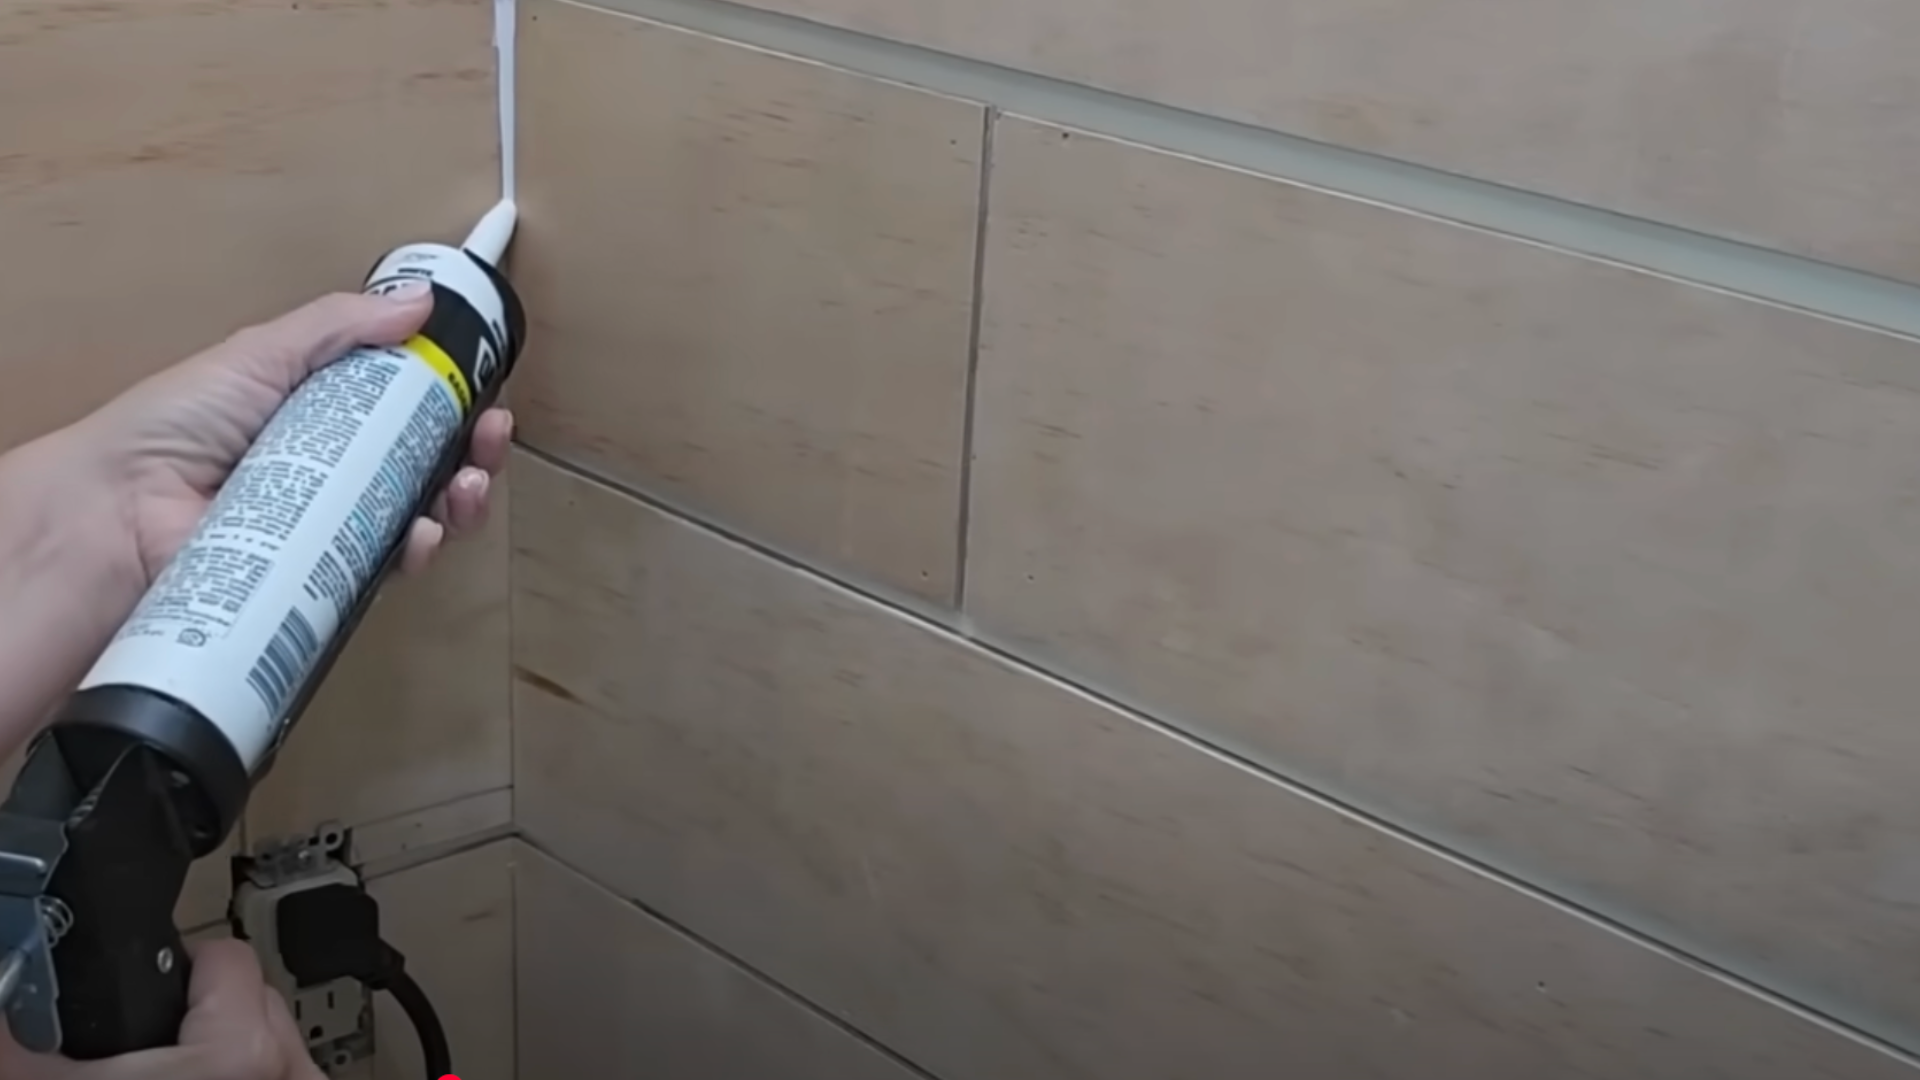
Once the shiplap is up, seal the gaps with caulk. Smooth it out using baby wipes or a putty knife.
This gives your wall a polished look. Once dry, it’s ready for paint.
Step 5: Paint the Room
Use satin finish for the walls and semi-gloss for the trim—both in White Duck. Satin is soft and easy to clean, while semi-gloss adds a slight shine.
Paint the grooves in the shiplap first. Then use smooth strokes to finish the boards.
You can also paint the vanity and add shiplap to any damaged cabinet sides. This makes everything blend together.
Step 6: Update Lighting and Mirror
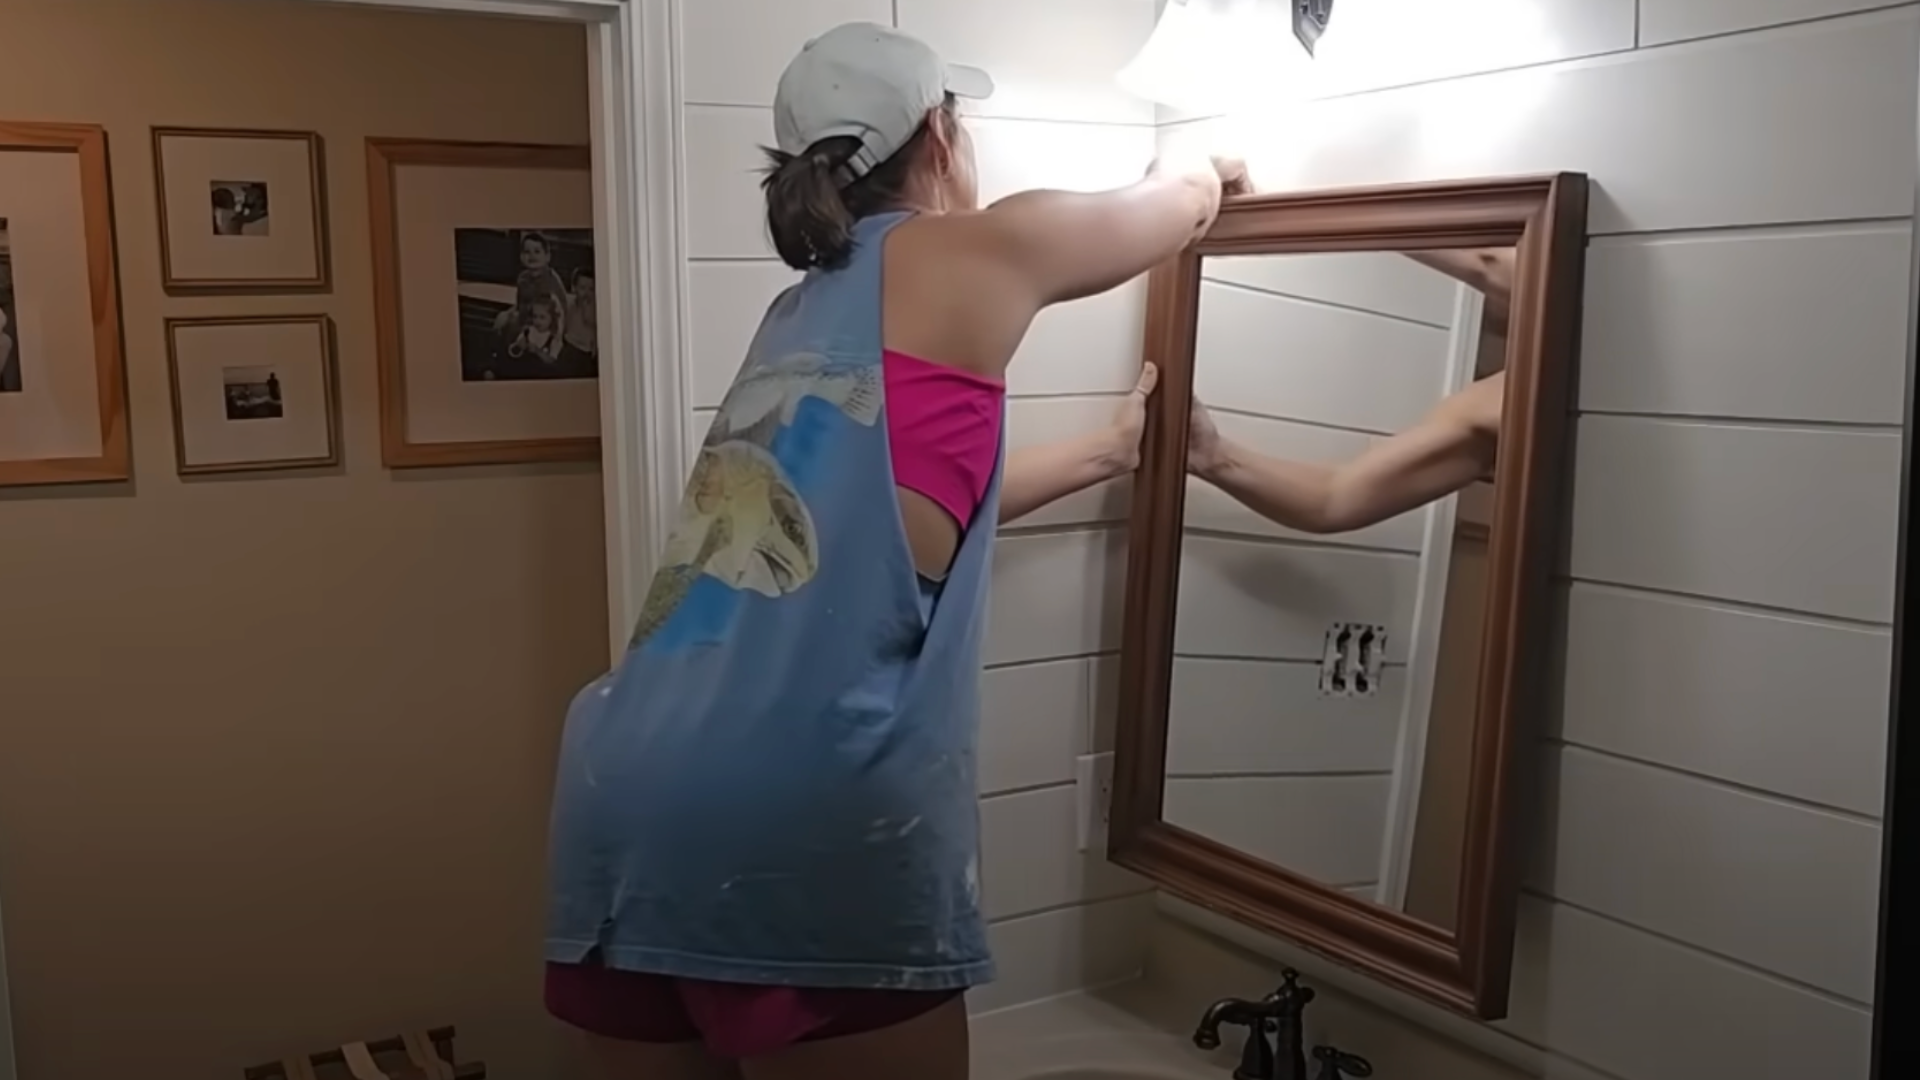
To fit a larger mirror, move your light fixture up a few inches. Always turn off the power first. Patch the old fixture hole using leftover shiplap instead of drywall.
A thrifted mirror with a wood frame adds warmth and keeps the white from feeling too stark.
Step 7: Add Storage and Extras
Try color-coded towel hooks or bins, so each family member gets their own space.
Use wall shelves from stores like Hobby Lobby for baskets or decorative items. Add cast iron hooks for more hanging space.
Label everything using apothecary-style tags. This makes it easy for everyone to know where things go.
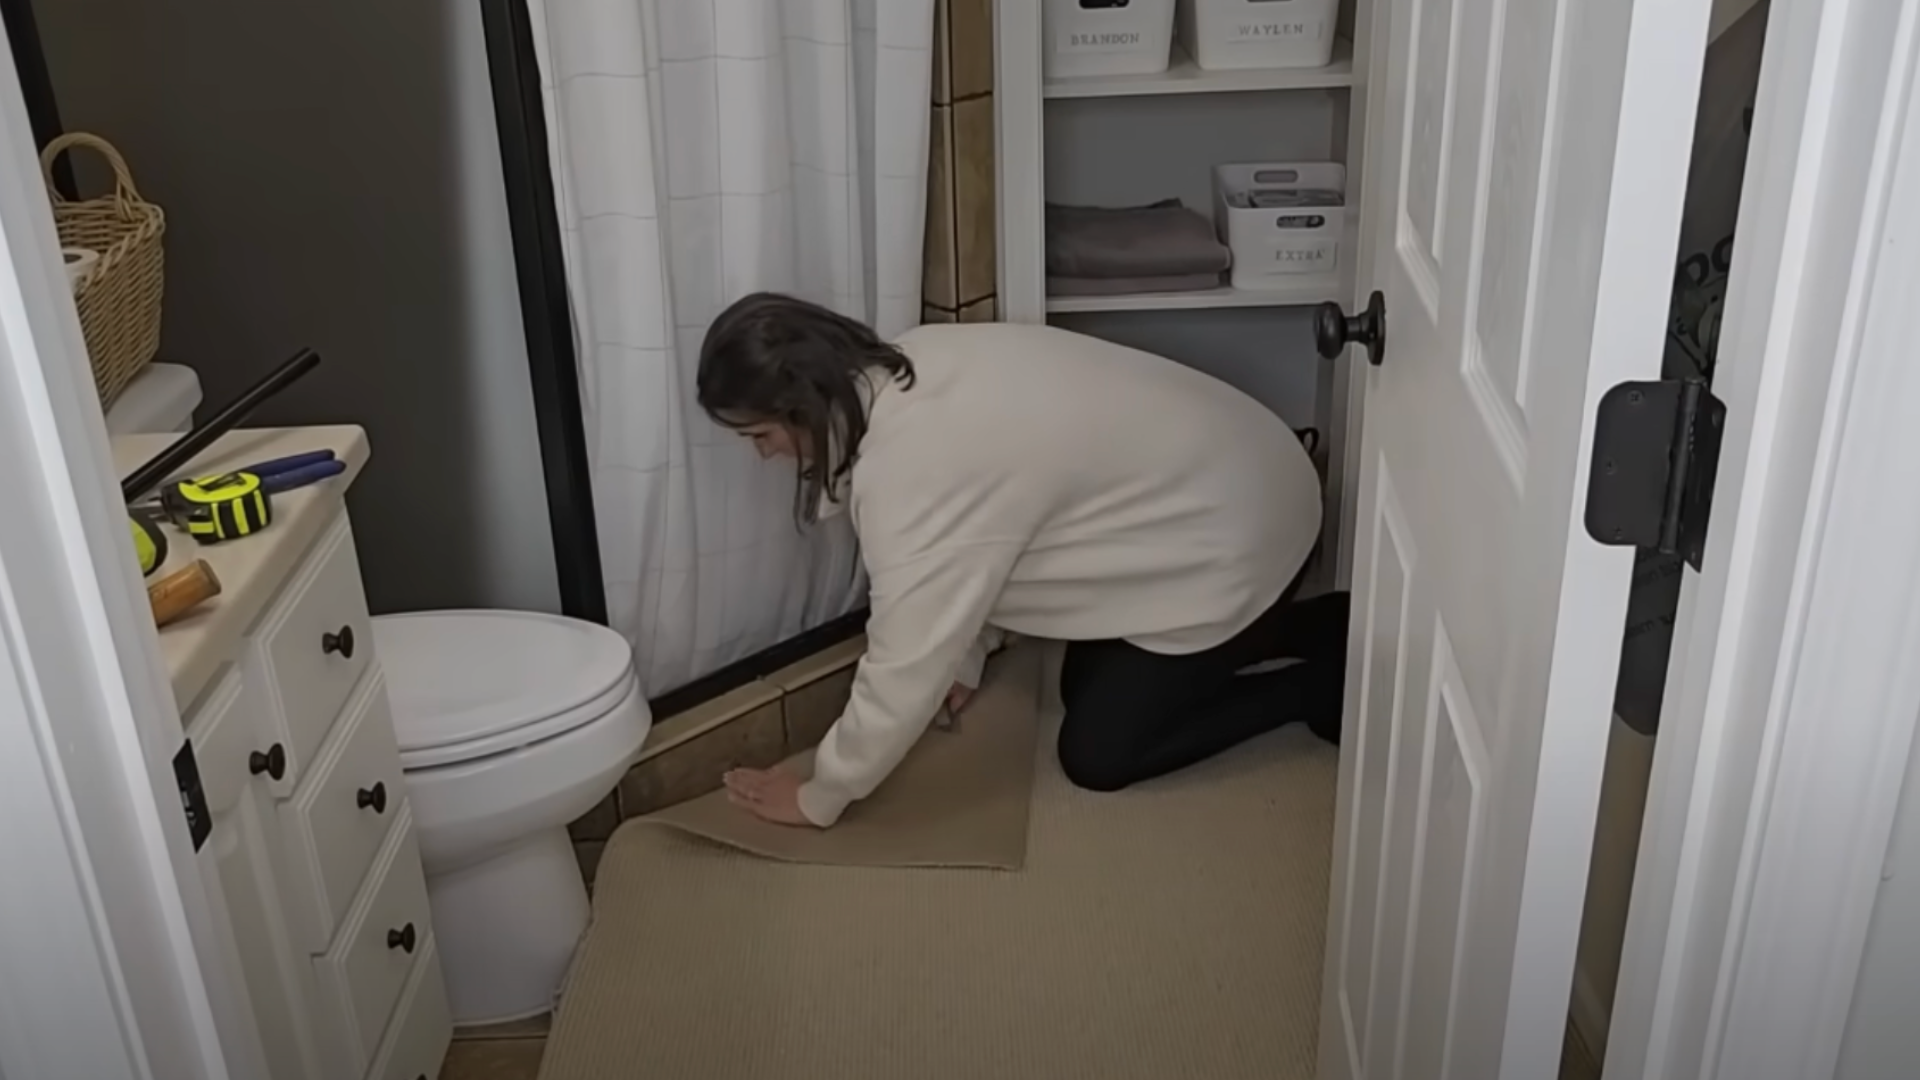
Step 8: Soften the Look and Cover the Floor
Apply privacy film to the window to let in more light while still keeping things private.
If you have awkward ceiling angles, build a ceiling-mounted curtain rod. It helps the shower curtain hang straight and look tidy.
Finish the area with a custom-cut carpet remnant for comfort underfoot.
Step 9: Finish with a Few Simple Touches
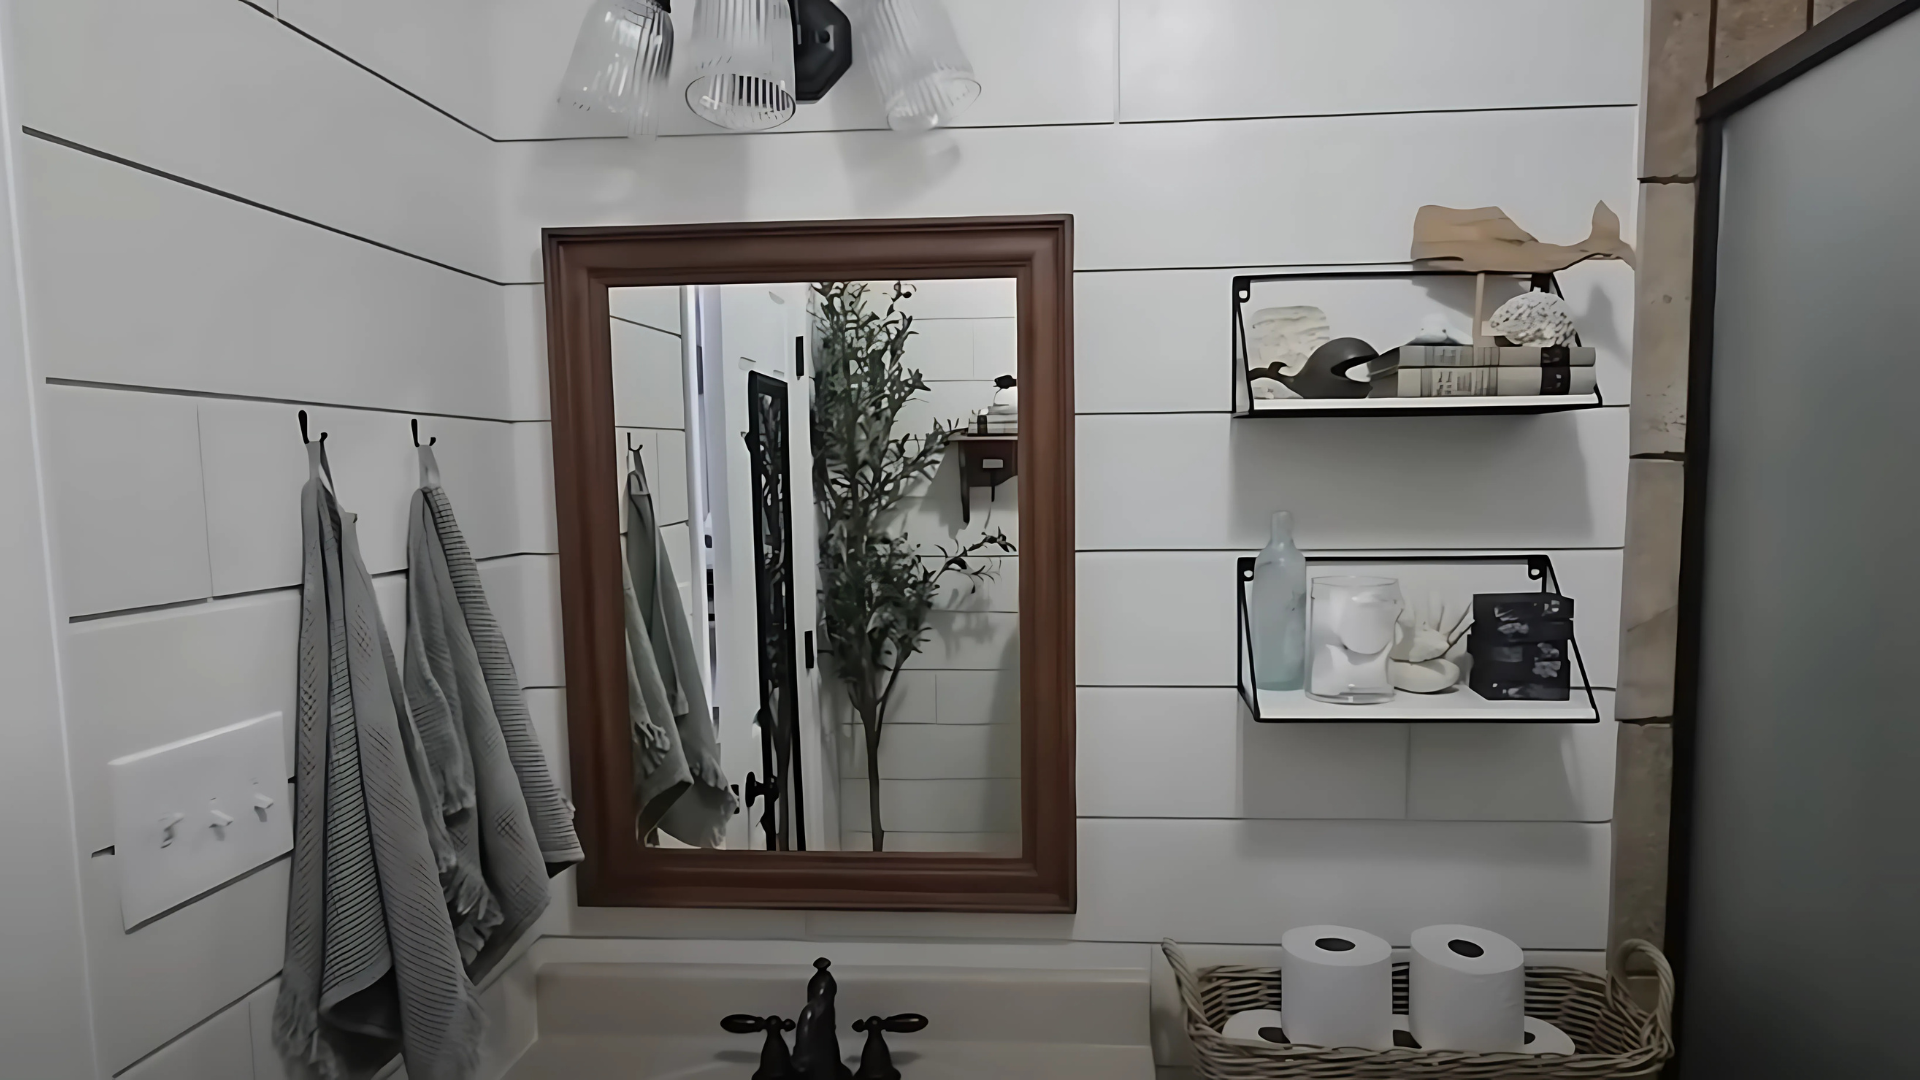
Bring in a small faux olive tree or a low-maintenance plant from a store like Walmart.
Finish with a few well-chosen items that are both pretty and practical. Take before-and-after photos to see the full transformation.
The Transformation
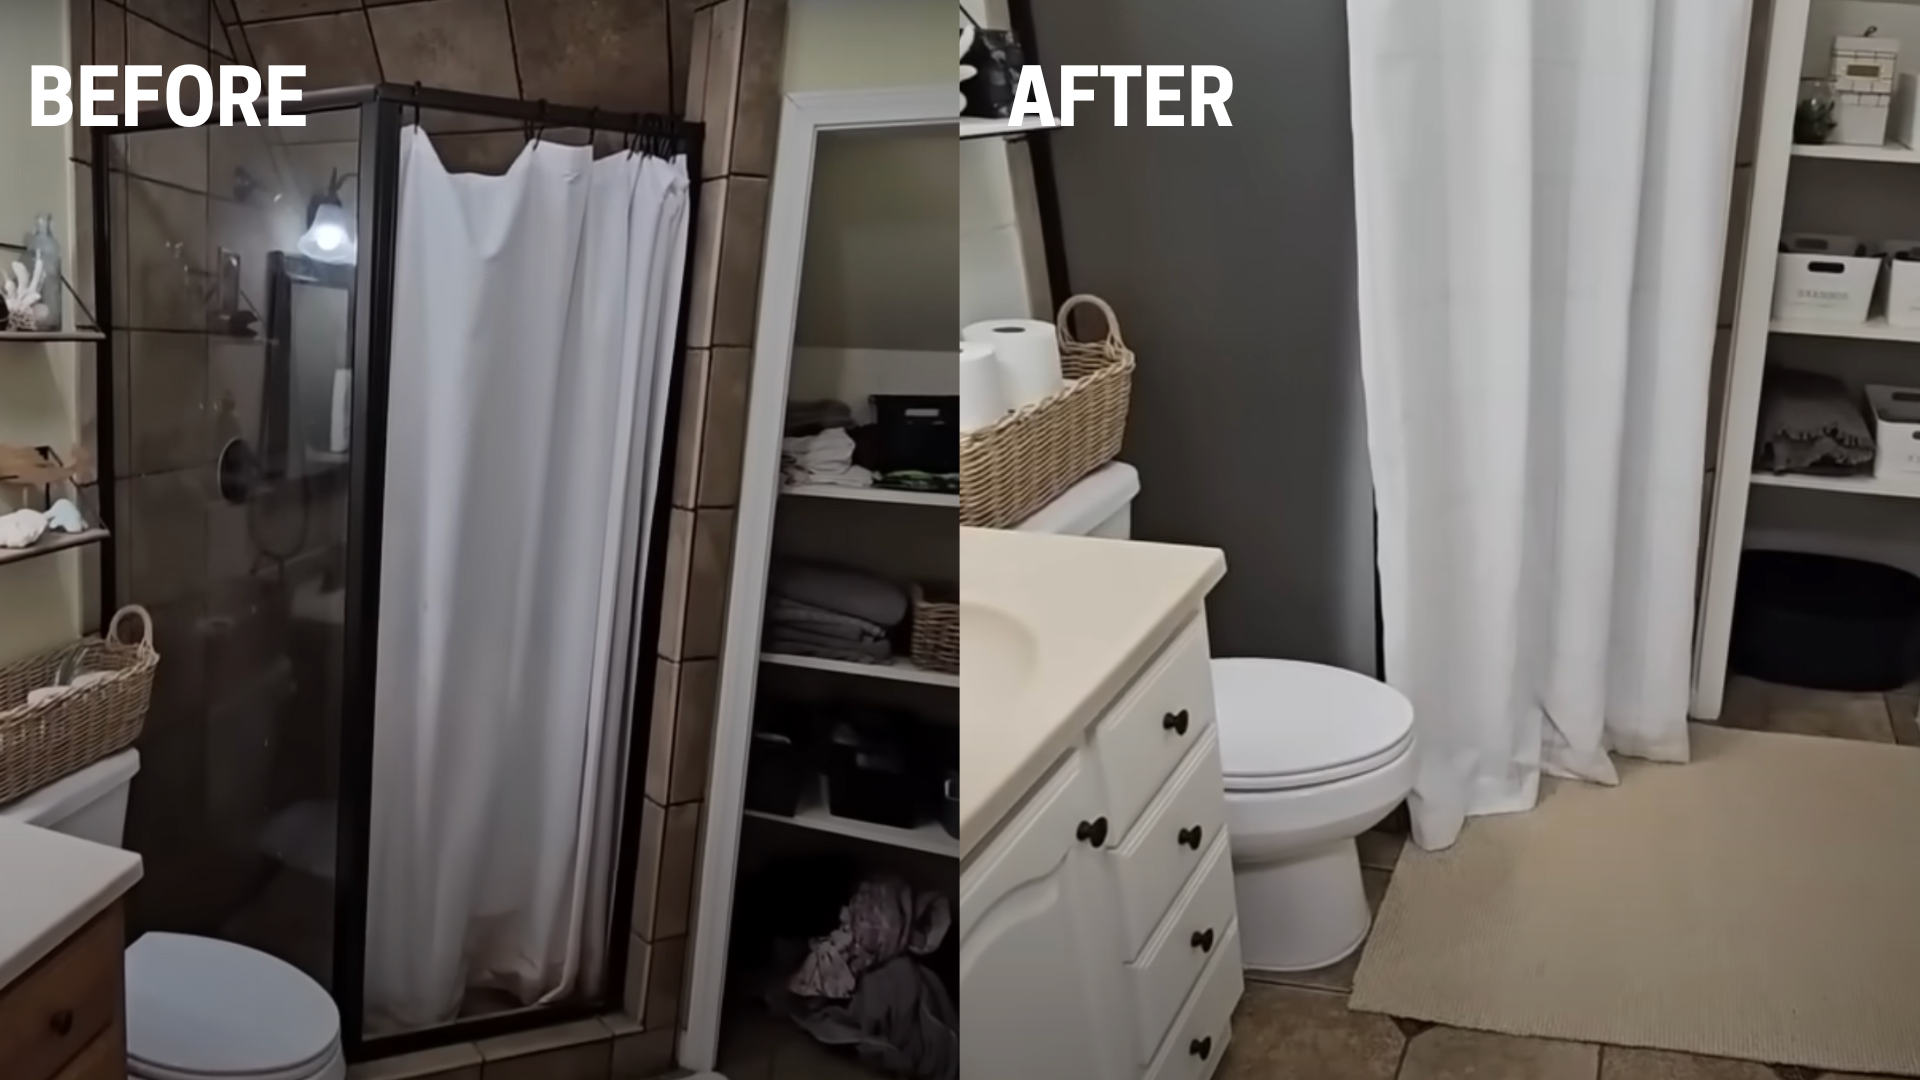
Once all the updates are complete, your master bathroom will feel brand new. You’ll notice how much brighter and cleaner it looks. The comparison is clear—it’s not just a quick fix.
Dark tones and clutter give way to soft walls, clean lines, and easy storage. The shiplap adds interest without crowding the room. A painted vanity and cozy rug pull it all together.
With a mix of reuse and simple updates, you now have a space that finally fits the rest of your home.
Lessons Learned
Working on a small master bathroom teaches you to think through every step. You learn quickly that every inch matters. Even easy tasks take more time than expected.
Installing shiplap can be tricky with uneven walls, but once it’s done, it really ties the room together.
Sometimes it’s best to skip certain updates (like keeping the original closet door) to stay on track and on budget.
The key takeaway? Be flexible. Projects don’t always go as planned, and that’s okay. What matters is creating a space that works for your daily life.
Simple Decorating Tips That Work
After the main updates, a few thoughtful choices can help the room feel finished. These ideas are easy to try and make the space more comfortable and neat.
| Tip | Why It Works |
|---|---|
| Use neutral tones with color pops | Keeps the space calm while adding interest without overwhelming the room |
| Add wood accents | Brings in warmth and breaks up too much white |
| Stick to one metal type | Makes the space look more pulled together and less chaotic |
| Bring in texture | Adds variety and balance—think baskets, soft towels, or a patterned rug |
| Layer light | Improves mood and function by combining overhead lights with smaller fixtures |
Maintenance Tips to Keep It Looking Good
Once the bathroom is redone, you’ll want to keep it in good shape. A few small habits can make a big difference.
- Wipe surfaces weekly: Use gentle cleaners to keep the shiplap, mirror, and fixtures clean.
- Touch-up paint: Keep a small container of your wall paint on hand for scuffs or chips.
- Clear out clutter often: Go through bins and baskets monthly to remove extras.
- Check caulk lines: Over time, water can loosen caulk—inspect and reapply where needed.
- Use a bathroom fan or crack a window: This helps prevent moisture build-up that can damage surfaces.
You don’t need to do it all at once. Just staying consistent will keep the space fresh longer.
Mistakes to Avoid During a Makeover
Even a simple makeover can go sideways if you don’t plan ahead. These common slip-ups are easy to avoid:
- Skipping surface prep: Sanding, cleaning, and priming make all the difference.
- Overloading with too many ideas: Stick to a clear style or color palette.
- Buying everything upfront: Test a few choices (like paint or lighting) before committing.
- Ignoring lighting and ventilation: Poor airflow or dim spaces can cancel out all your upgrades.
- Forgetting function: A pretty space that doesn’t work for your routine won’t stay tidy for long.
Focus on purpose as much as appearance, and the results will last longer.
Conclusion
You can completely transform a master bathroom by focusing on what matters most. From fresh paint to functional storage, every step helps make your room feel more usable.
You don’t need expensive tools or a huge budget—just time, effort, and a solid plan. When you handle it this way, the process stays realistic and the results feel truly yours.
Thinking about tackling your own space? Use this guide as a benchmark and start today!
Check out more guides on our site for step-by-step makeovers, simple upgrades, and stress-free ways to improve your home.


