Old Camper Remodel: Simple Steps to Make It Yours
Do you have an old camper just sitting there unused? It’s easy for it to collect dust and feel like a wasted space.
But instead of leaving it behind, why not turn it into a space that feels comfortable and fits your everyday needs? With a bit of planning, your old camper remodel can be simple, budget-friendly, and even fun.
In this guide, I’ll show you how to clean, paint, power up, and bring a new life to your camper. So, let’s get started.
Is Remodeling an Old Camper Worth It?
Remodeling an old camper isn’t just about looks; it’s about making the space work for your needs. You gain control, flexibility, and the opportunity to create something that truly feels like your own.
Remodeling gives you total control over how your camper looks and feels. You get to personalize every corner to match your taste. It’s also much cheaper than buying a new RV, saving thousands of dollars.
Additionally, reusing an old camper is a sustainable choice that helps reduce waste. For DIYers and budget-focused travelers, it’s a fun, rewarding project with lasting value.
Common Issues With Old Campers
Old campers often hide surprises like rot, mold, or electrical problems, which can take time and money to fix. Remodeling also requires a real-time investment; some projects may stretch over weeks.
If you’re new to DIY work, tasks like plumbing or wiring can be tough without help. Knowing these challenges early helps you plan better and avoid frustration as your project moves forward.
Planning Your Old Camper Remodel
A solid plan makes the remodeling process smoother, more affordable, and less stressful. From budgeting smartly to knowing when to hire help, thoughtful preparation saves time, reduces mistakes, and keeps your project on track.
Set a Realistic Budget
Start by listing the main parts of your remodel, like paint, flooring, solar setup, and furniture. Assign a reasonable amount to each category, leaving room for unexpected expenses.
Old campers often have hidden issues that pop up during renovations. Having a financial cushion will help you stay calm and avoid overspending.
Even if your budget is small, careful planning ensures you’ll get the most value out of every dollar you spend.
Tools and Materials Checklist
Before starting your remodel, gather these essentials to avoid mid-project delays:
- Paint, brushes, and rollers
- Vinyl flooring or peel-and-stick tiles
- Cleaning supplies (scrub brushes, cleaners, vacuum)
- Sealants (clear and white silicone)
- Basic tools: drill, screwdriver, hammer
- Safety gear: gloves, goggles, masks
Having everything ready helps you stay organized and finish each task efficiently.
DIY vs. Professional Help
Decide early on which parts of the remodel you’re comfortable handling yourself. Painting, cleaning, and installing flooring are great for beginners.
However, tasks such as electrical work, plumbing, or structural repairs can be hazardous without proper experience. These areas often require licensed professionals for safety and code compliance.
Knowing your limits helps avoid mistakes and keeps your camper safe and functional. Sometimes hiring help upfront saves more money in the long run.
DIY Camper Remodel: A Step-by-Step Guide
Clean, paint, upgrade, and power your camper with this simple process. Change an old RV into a refreshed, functional space ready for off-grid adventures.
Step 1: Deep Clean the Exterior

Begin by spraying the camper with 30-Second Outdoor Cleaner to break down years of mildew, algae, and grime.
Use a pressure washer to rinse off the loosened dirt, focusing on heavily soiled areas. Stubborn spots may need scrubbing with a deck brush.
Repeat the process as needed until the entire exterior looks refreshed and bright.
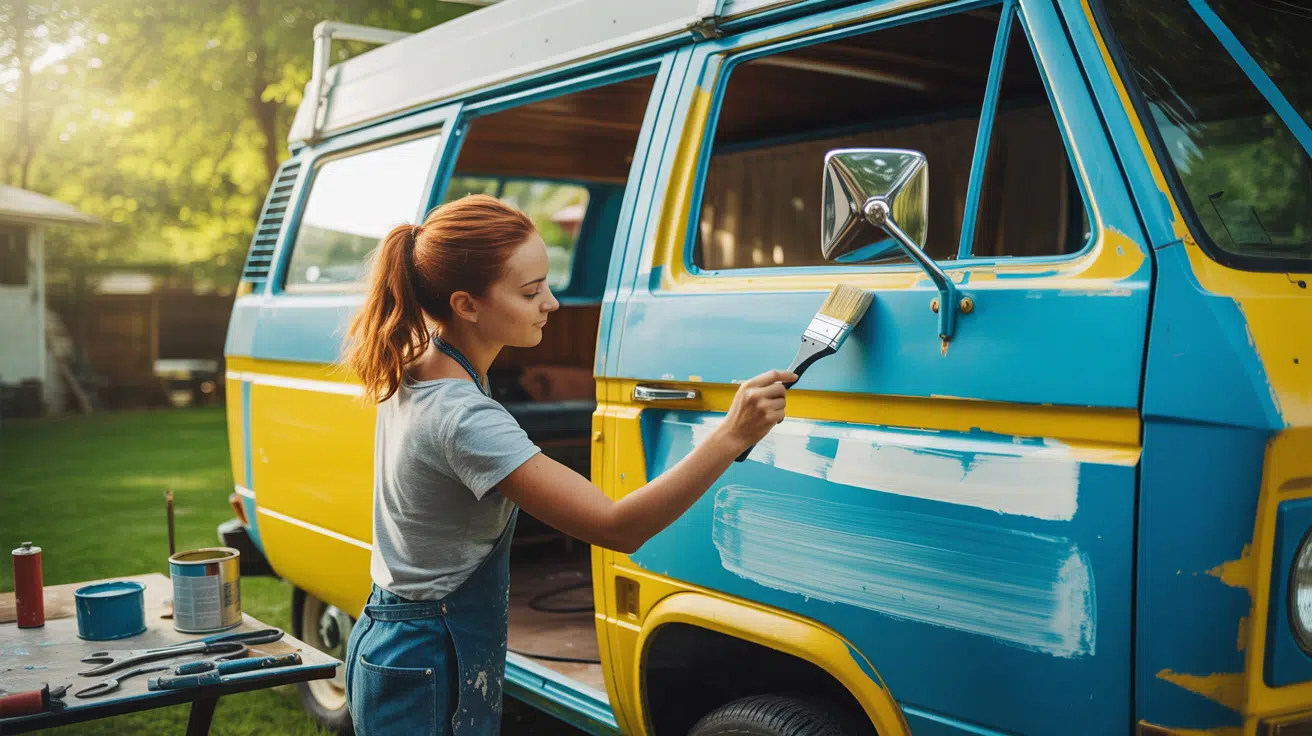
Step 2: Paint & Refresh the Camper Trim

Mask off all trim areas and apply a coat of primer to ensure the paint sticks well.
Once dry, use gloss black spray paint to cover trim and accessories like the propane tank cover. Apply even layers for a clean finish.
After drying completely, peel away the masking tape to reveal a polished, updated exterior look.
Step 3: Clean and Sanitize the Interior

Thoroughly vacuum the camper’s interior, especially in tight spaces like drawers and corners where rodents may have nested.
Scrub all surfaces with a cleaner to remove built-up dirt and odors. Flip or replace the mattress if needed. Clean all windows to allow light in, making the space feel fresh and ready for use after years of neglect.
Step 4: Install Off-Grid Electrical System

Buy a solar kit with a panel, battery, inverter, and controller. Pick a secure interior spot for the battery. Mount everything and wire according to the instructions, using fuses for safety. This will supply power for off-grid needs.
Step 5: Mount and Wire the Solar Panel

Use brackets and pipes to build a rack for the panel. Drill a hole and run wires through a solar gland. Seal it well to avoid leaks. Connect the system to the controller and battery.
For a more detailed walkthrough of the process, check out the video below:
Room-by-Room Camper Remodel Ideas
Upgrading your old camper room by room helps you stay organized and make wise design choices. These practical updates for each space focus on innovative design, easy use, and style, without wasting space or spending too much.
Kitchenette
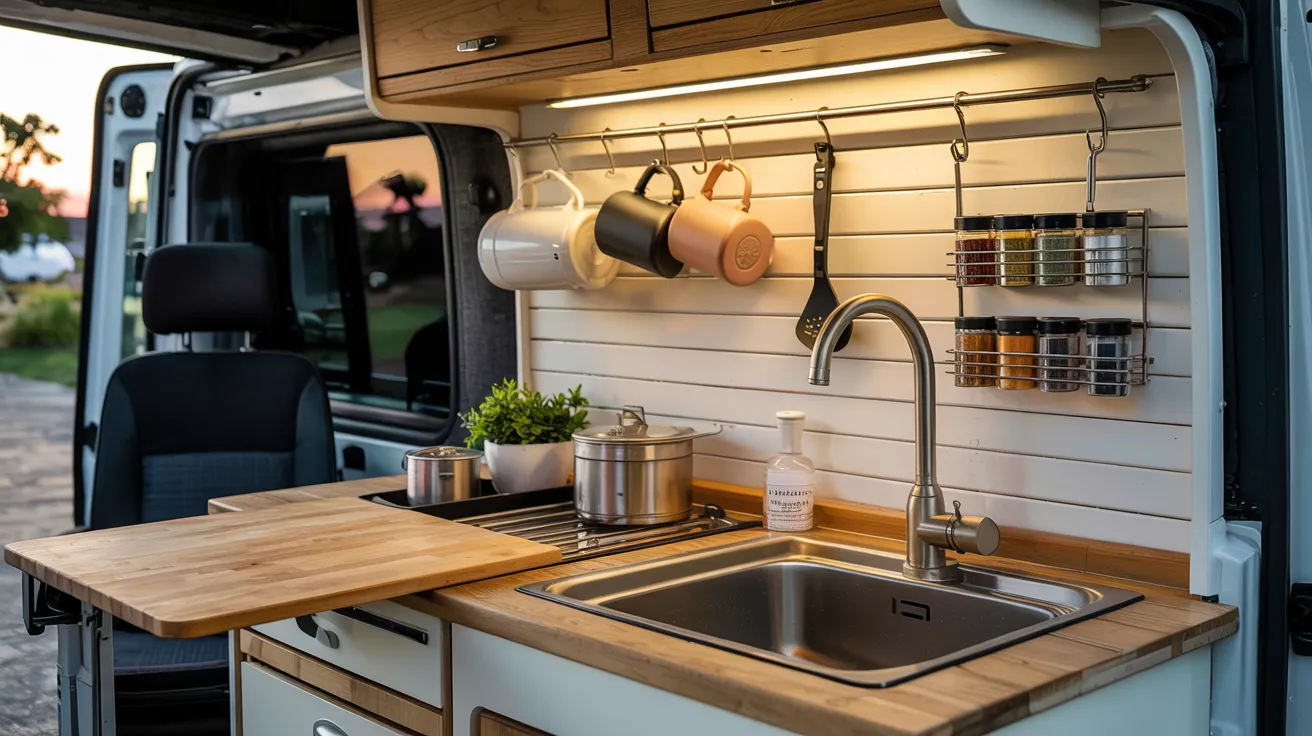
Maximize your camper’s kitchen by using a peel-and-stick backsplash for easy cleanup and a modern touch. Install a compact sink to save counter space while still handling basic cooking needs.
Add hanging storage for utensils and hooks for mugs or pots. Small changes like magnetic spice racks or fold-down prep tables can boost function in tight quarters.
Keeping it simple and efficient makes your kitchenette more enjoyable and easier to use daily.
Bathroom
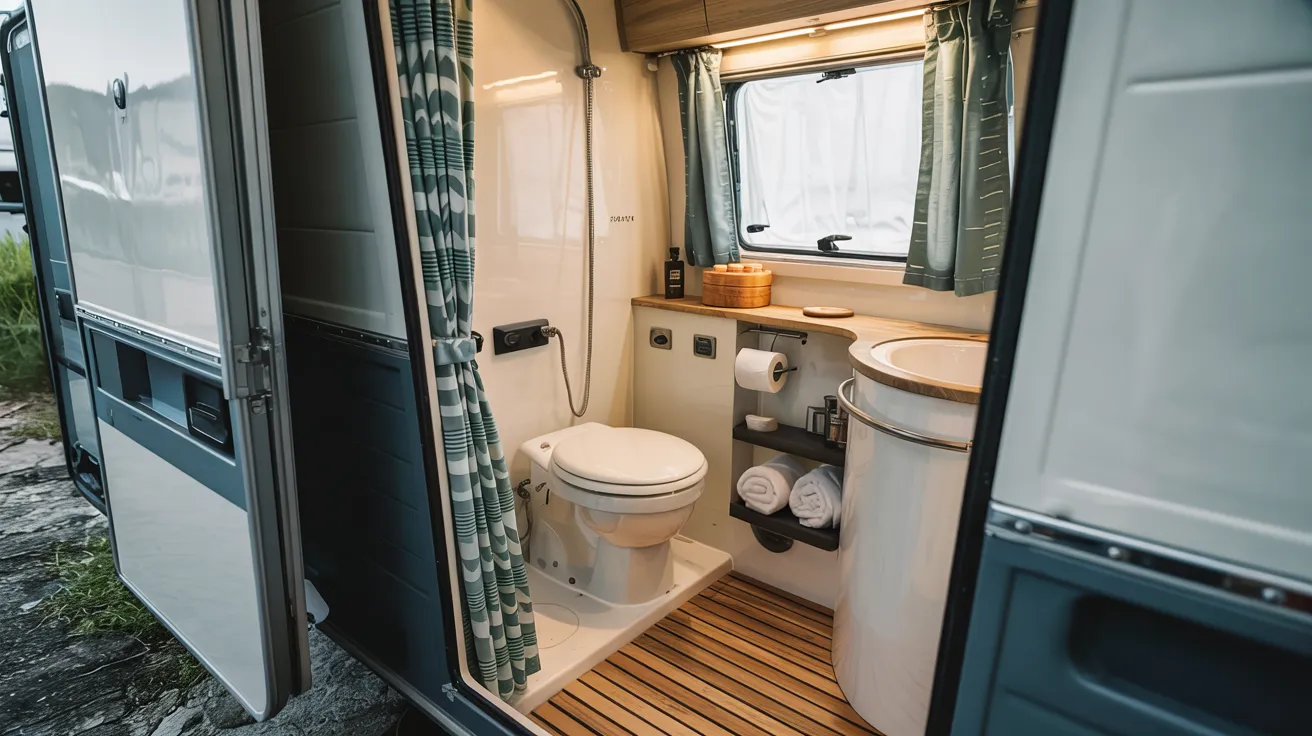
Upgrade your bathroom with a composting toilet that doesn’t require plumbing or holding tanks. It’s perfect for off-grid use and low maintenance. Add waterproof flooring like vinyl to resist water damage and make cleaning easy.
Wall-mounted storage can hold toiletries without using valuable floor space. Even a small shower stall can feel more comfortable with the right curtains and ventilation. Focus on moisture resistance and smart use of vertical space to improve comfort.
Sleeping Area
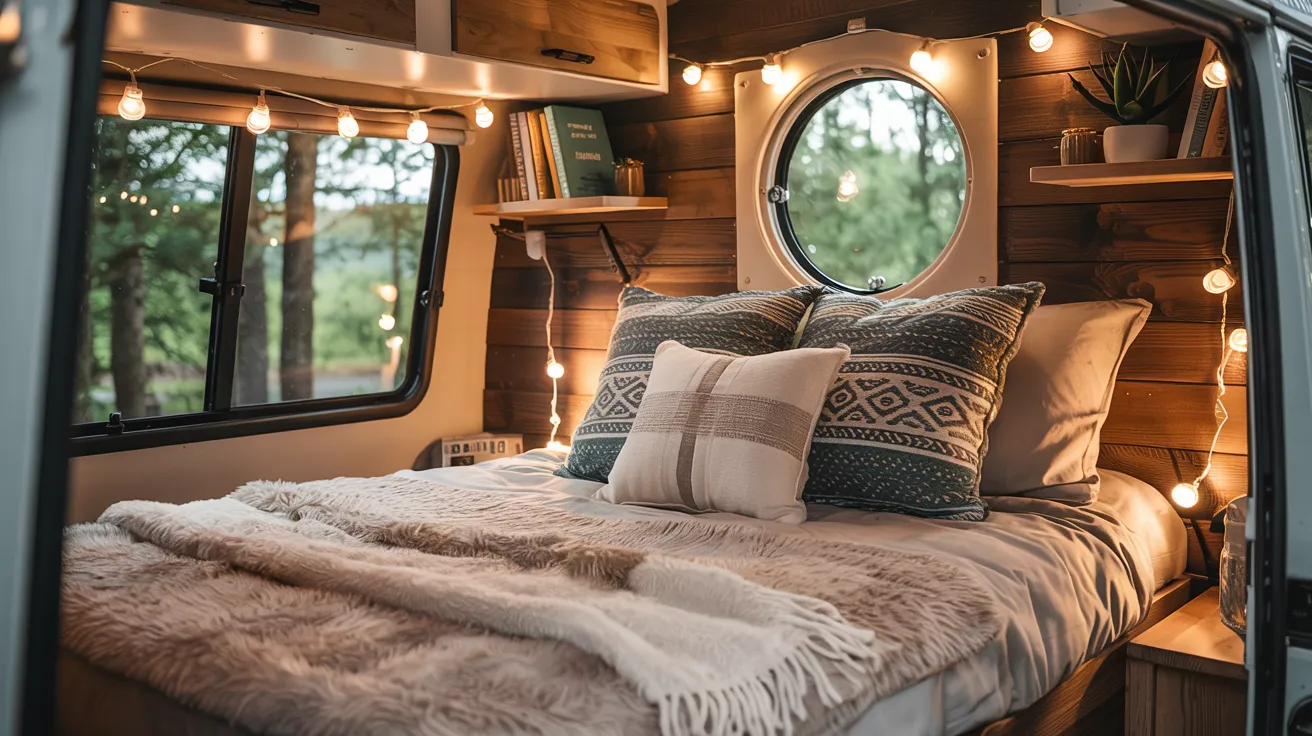
Give your sleeping space a refresh by upgrading cushions with new foam or covers for better comfort and cleaner aesthetics. Consider space-saving bed options like a pull-out couch, Murphy bed, or fold-down bunks.
Add wall-mounted shelves or under-bed storage for personal items, keeping the area clutter-free. Good bedding and soft lighting also help this part of your camper feel cozy and restful after a long day on the road or outdoors.
Dining or Lounge
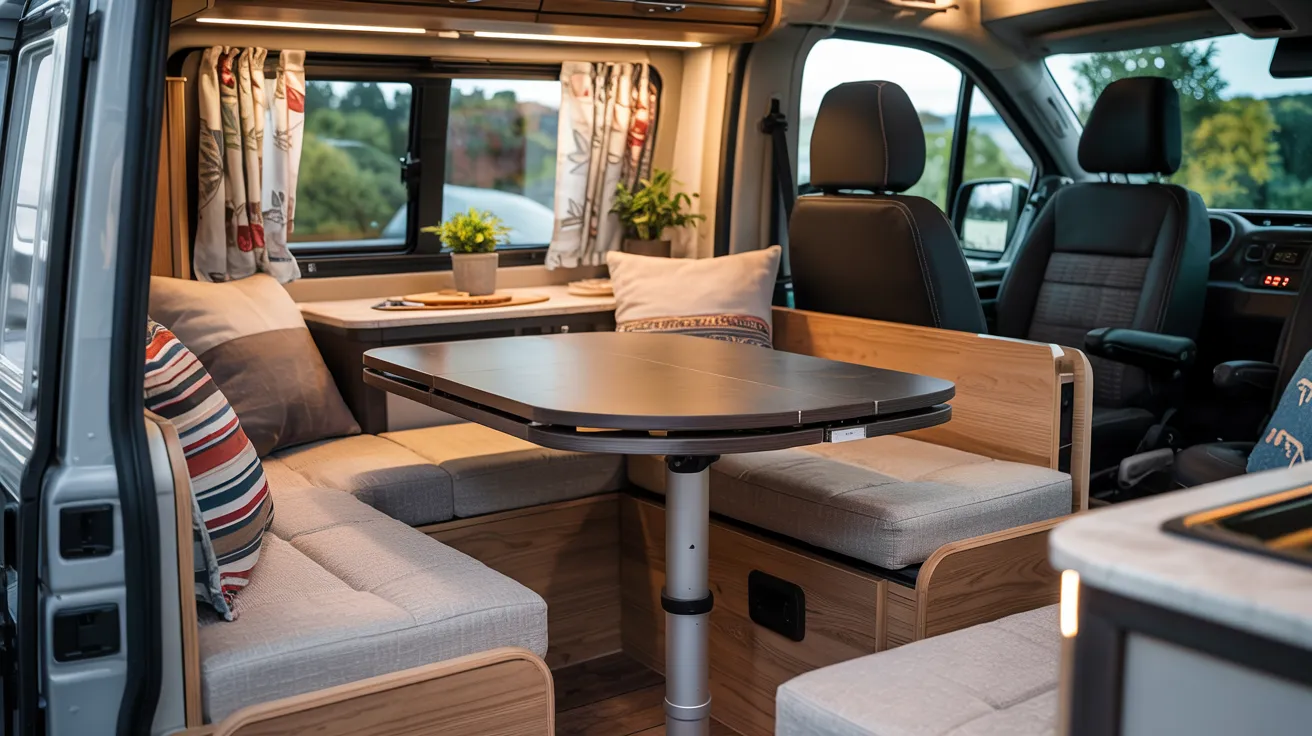
Use a swivel table that rotates or folds down to serve both dining and lounging needs. Pair it with foldable chairs or benches that double as storage to keep things tidy.
Soft cushions and compact furniture create a flexible space for meals, reading, or relaxing. Add curtains or throw pillows to make the area feel more like home. Multi-functional furniture is key when every inch of space needs to work harder.
Upgrades That Add Comfort and Value
A few thoughtful upgrades can make your camper feel more like home and work better for daily travel or downtime. These improvements also help if you decide to sell later, increasing its value.
Solar Power
Adding solar power gives you freedom from campground hookups and lets you run essentials like lights, fans, and small appliances while parked anywhere.
It’s a quiet, low-maintenance upgrade that makes your camper more self-sufficient. Even a basic setup can improve your off-grid experience.
With the right equipment and careful installation, you’ll have reliable power without the noise and hassle of a generator.
Composting Toilet
A composting toilet needs no sewer or water hookup. It turns waste into compost with little or no water. This upgrade allows you to camp off-grid for longer periods and often produces less odor than traditional toilets.
Luxury Finishes
Simple touches can make a big difference. Soft LED lighting creates a warm atmosphere. A high-quality mattress or topper can significantly improve sleep comfort.
Upgrading your kitchen with a real sink, backsplash, or better countertops makes cooking easier and more enjoyable. Nice flooring options, such as peel-and-stick vinyl or waterproof laminate, also add style and function.
Extra Smart Add-Ons
Consider space-saving and convenience features like a swivel table that moves where you need it, a roof vent with a fan to improve airflow, or magnetic storage for knives, tools, and spices on walls.
These minor upgrades help keep your camper organized and pleasant to use.
Budget Remodel Tips Using Salvage Parts
Stretch your camper remodel budget by using secondhand parts from salvage yards and online marketplaces. Reclaimed materials not only save money but also reduce waste and give character to your space.
Where to Find Used RV Parts
Check local RV salvage yards for a wide range of items, including doors, windows, cabinets, and hardware. Many parts can also be found on Facebook Marketplace, Craigslist, and RV-specific forums.
Some salvage companies even list inventory online or ship parts nationwide. Search for “RV salvage yards near me” or use online directories to locate vendors.
Always call ahead to check availability and compare prices. These sources are excellent for discovering unique and affordable pieces.
What to Look For and What to Avoid
Safe bets include sinks, lights, shelves, and solid cabinets that can be cleaned or refinished. Doors, hardware, and table legs are also helpful.
Avoid moldy cushions, broken electronics, or anything with exposed wiring or signs of water damage.
Electrical parts should only be reused if they’re in excellent condition. Always scrutinize items before purchasing, and clean everything thoroughly before installation to ensure it’s safe and ready for use.
Sample Budgets for Every Remodel Size
If you’re working with a tight budget or planning a full transformation, these sample plans help guide your remodel based on how much work you want to take on and what updates matter most.
Remodel Under $500
Start with the basics—clean the camper inside and out, apply a fresh coat of paint, and replace worn cushion covers with fabric you already have or can get cheaply.
Swap out old lighting for energy-efficient LED options to brighten the space. This level focuses on surface-level updates that refresh the camper’s appearance and comfort without major changes.
Perfect for those starting small or flipping an RV with minimal investment.
Remodel Under $2,000
This budget gives you room to update flooring, reupholster cushions, and make minor plumbing improvements. You can also focus on upgrades that enhance the camper’s functionality for everyday use.
Stick with peel-and-stick materials, secondhand parts, and DIY tools to make meaningful changes.
Remodel Under $5,000
With a larger budget, you can refresh the entire interior and add long-term features for comfort. Update each room with better materials, install storage solutions, and improve finishes.
Add full off-grid features like solar and composting options for more independence. This level works well for those turning the camper into a vacation unit, rental, or tiny home alternative.
New RV vs. DIY Camper Remodel: Comparison
This side-by-side table highlights the key differences between buying a new RV and remodeling an old camper, helping you weigh time, customization, and flexibility before making your decision.
|
Category |
New RV |
DIY Remodel |
|
Initial Setup |
Ready to use out of the box |
Requires time and effort to build out |
|
Customization |
Fixed layouts and finishes |
Fully customizable to your style |
|
Time Investment |
Minimal |
Requires personal labor and planning |
|
Resale Flexibility |
Moderate resale options |
High resale potential if well remodeled |
|
Electrical Setup |
May need add-ons for upgrades |
Solar and power systems built to fit |
Common Mistakes to Avoid
Avoiding these common errors can save time, prevent costly repairs, and help you enjoy a smoother, safer remodeling experience.
- Ignoring floor or frame damage: Overlooking structural problems can lead to serious issues later, including water damage, sagging floors, or unsafe conditions.
- Poor insulation choices: Thin or inappropriate insulation makes it hard to control temperature, leading to discomfort in both hot and cold climates.
- Inadequate sealing: Leaving gaps around windows or doors can cause leaks, mold, and long-term damage from moisture buildup.
- No storage planning: Forgetting to include enough organized storage can result in cluttered spaces that are hard to live in or travel in.
Wrapping Up
Now that you’ve gone through this old camper remodel guide, I hope you’re feeling ready to take on your own project.
You don’t need to spend a fortune or be an expert. You just need a plan, a few tools, and the motivation to get started. Take it easy, start with the basic stuff, and see your old camper come to life.
If I could do it, you definitely can too. And when you’re ready for more tips or ideas, check out my other blogs; I’ve got plenty to share!


