How to Create Giant Paper Flowers
Paper flowers are a game-changer for home decor and events. They’re big, beautiful, and won’t wilt like real blooms.
Making giant paper flowers is easier than you might think, and they can change any space from ordinary to eye-catching.
If you’re planning a wedding, birthday party or want to brighten up your living room, these flowers add color and charm without breaking the bank.
The best part? You can customize them to match any color scheme or style. With a few hours and some basic materials, you can create beautiful paper blooms that will have everyone asking where you bought them.
Why Giant Paper Flowers are a Game-Changer for Your Decor
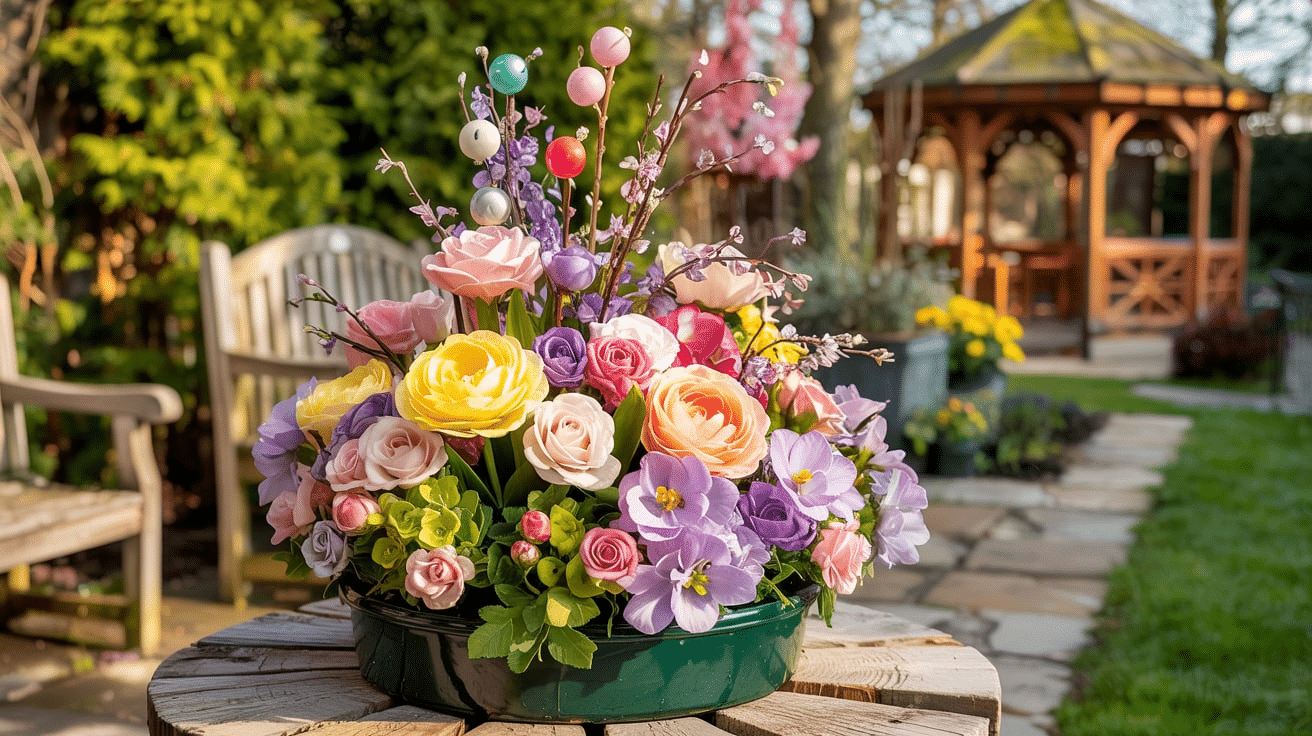
Giant paper flowers are a creative and affordable way to uplift your home decor or event design. Unlike real flowers, these paper creations won’t wilt or require constant maintenance, making them a practical and long-lasting solution for decoration.
They can brighten up living rooms, add a vibrant touch to wedding venues, or make a bold statement at parties. The best part is their versatility. You can customize them to match any color scheme, style, or theme.
Either you opt for a refined look with neutral tones or go all out with bold, bright colors, paper flowers are an excellent way to add personality and charm to any space.
Additionally, they are easy to create and can be reused, making them both a budget-friendly and environmentally conscious option for your decor needs.
Step-by-Step Guide: How to Make Giant Paper Flowers
Creating paper flowers involves preparing your paper, cutting petals in different sizes, shaping them for a natural look, assembling from the center outward, and attaching them to a stem or base for display.
Essential Materials
To make giant paper flowers, you’ll need cardstock or crepe paper, scissors, a hot glue gun, and a dowel for shaping petals. Optional items include a cutting machine, ruler, and pencil for tracing patterns.
- Cardstock or crepe paper in your chosen colors
- Scissors or paper cutter for precise cuts
- Hot glue gun with extra glue sticks
- Dowel or marker for curling petal edges
- Cutting machine (like Cricut) for faster cutting (optional)
- Ruler or measuring tape
- Pencil for tracing patterns
- PVC pipes or wooden dowels for stems
- Most items are available at craft stores or online
- Complete paper flower kits available for beginners
Step 1: Preparing Your Paper

Start by getting your paper ready. If using crepe paper rolls, unroll them carefully to avoid tears. Measure the paper according to your pattern – typically 8 inches wide for smaller petals and 12 inches for larger ones.
For cardstock flowers, print or trace your pattern onto the paper. Make sure your work surface is clean and flat. To save time, have all measurements marked before cutting.
If using a cutting machine, load your design and test it on scrap paper first. The key is to be exact with measurements, as this affects how your final flower looks. Take your time with this step to ensure smooth progress later.
Step 2: Cutting the Petals
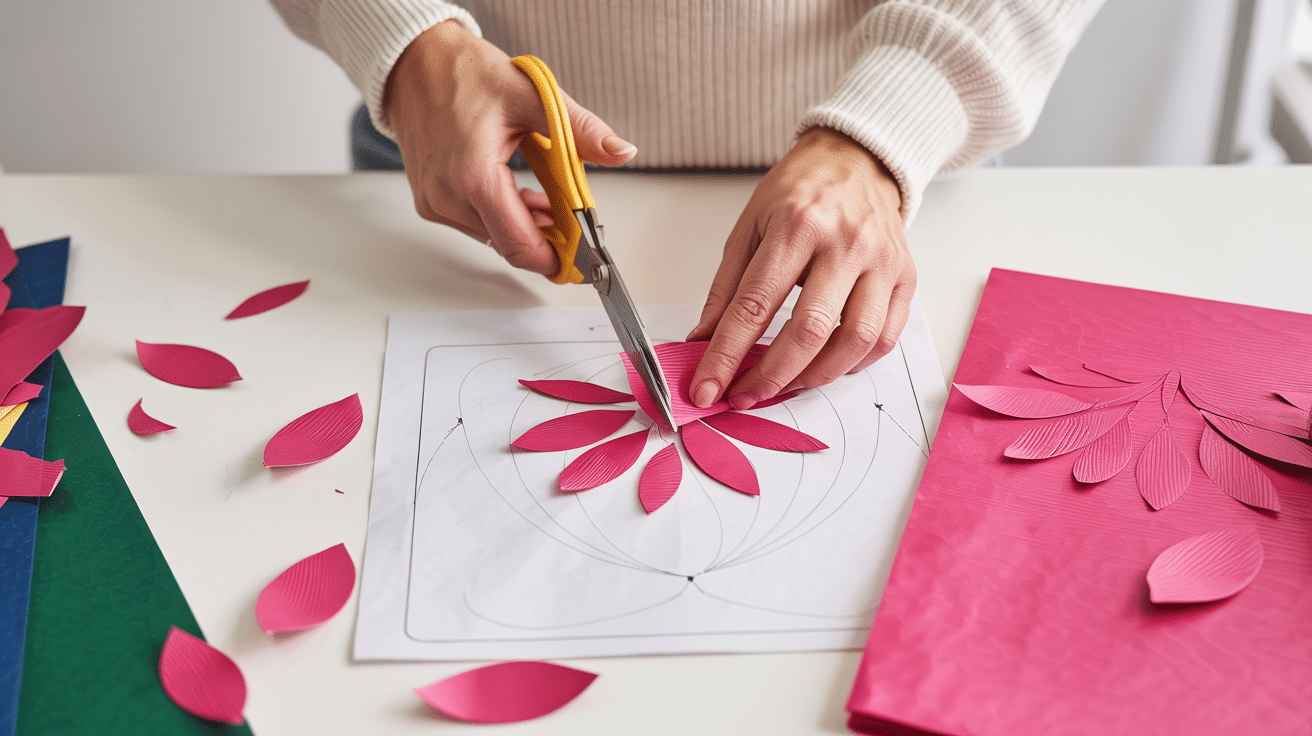
Cut your paper following your pattern or measurements. For crepe paper roses, cut strips about 8 inches wide for small petals and 12 inches for larger ones.
For cardstock flowers, cut out the petal groups—usually sets of four connected petals. If cutting by hand, use sharp scissors and follow your pattern lines closely. A cutting machine works wonderfully for faster results.
Make sure to cut enough petals – you’ll need about 12 small and 12 large for a full-sized flower. Keep your cuts clean and precise. Save any scraps, as they can be useful for the flower center or for making leaves later.
Step 3: Shaping the Petals
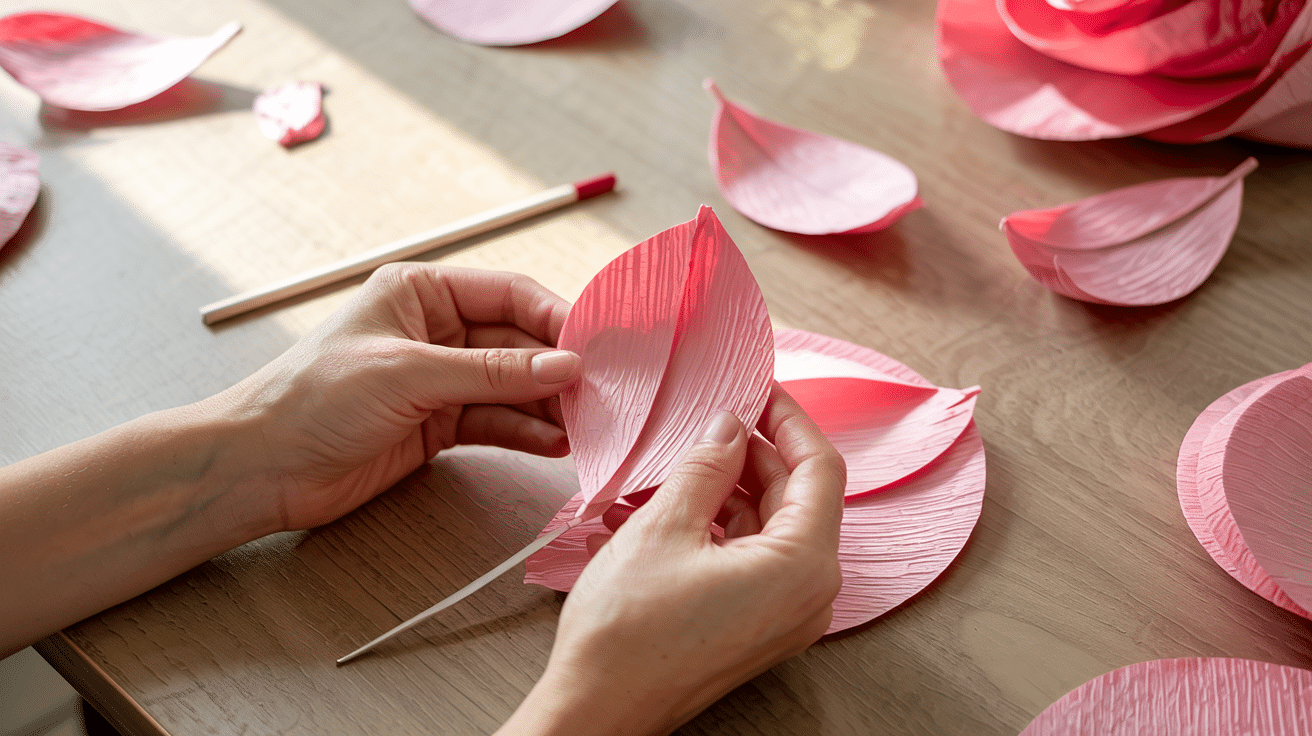
After cutting, shape each petal to create a realistic flower. For crepe paper, gently pull the edges between your fingers to create a natural curve. Be careful not to pull too hard, or you’ll tear the paper.
Roll the edges with a dowel or marker to give them that authentic curl. For cardstock petals, add dimension by gluing along the cut line at the base, bringing the sides together to create a cup shape.
Curl the edges outward for larger petals and inward for smaller ones. This step changes flat paper into lifelike flower parts. Take time with each petal—the more care you give to shaping, the better your flower will look.
Step 4: Assembling the Flower
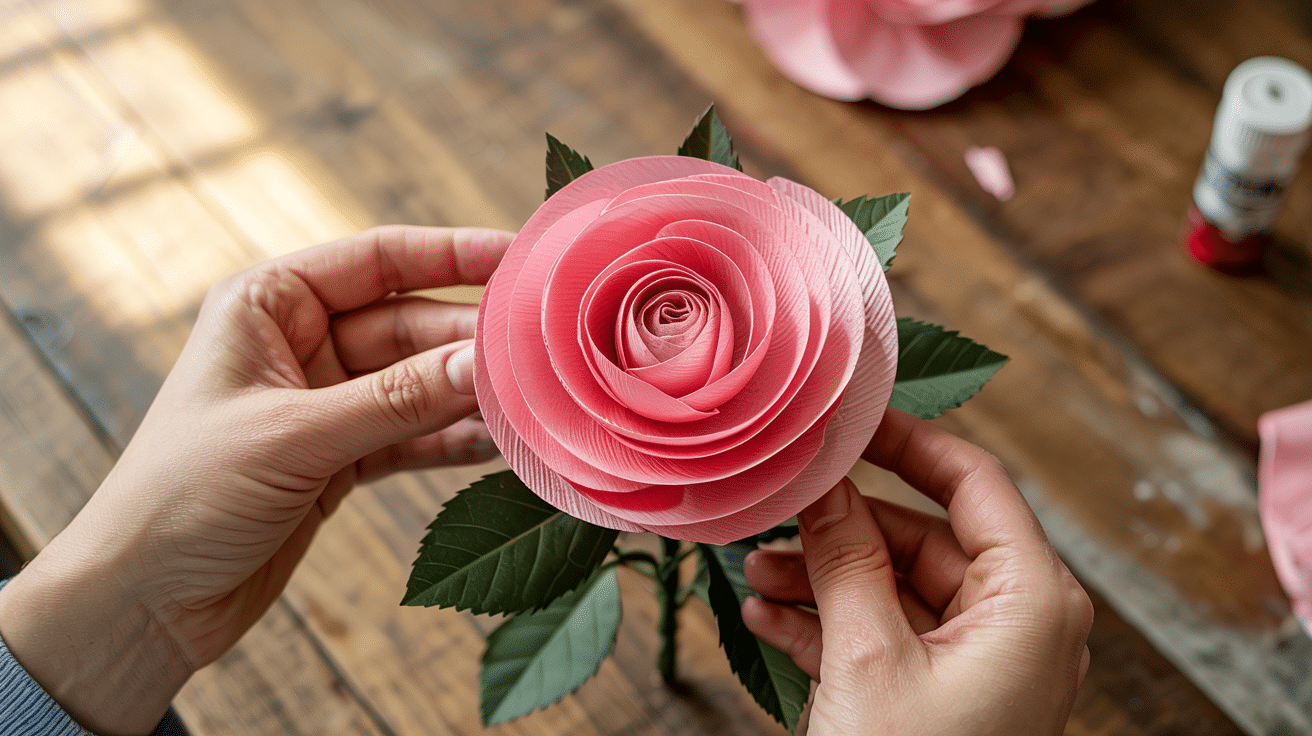
Start assembly with the center of your flower. For crepe paper roses, create a ball-shaped center using scraps. For cardstock flowers, begin with your smallest petal group.
Add the next layer, offsetting the petals so they fill gaps between the previous layer. Continue adding layers from smallest to largest.
Use hot glue at the base of each petal or petal group. Make sure to place the glue strategically—more glue higher up creates tighter, closed flowers, while glue just at the base allows petals to fan out.
Work in a circle, keeping the arrangement balanced. To avoid shifting, let each layer set before adding the next.
Step 5: Attaching the Stem

You have several options for the stem. Use a PVC pipe, wooden dowel, or wire wrapped in green tape. You can also create a base for your flower using paper scraps formed into a ball or by cutting a circular base from cardstock.
Attach this to the top of your stem with hot glue, securing it well. Then, glue the assembled flower onto this base. For extra security, add tape around the connection point.
If making a wall flower without a stem, attach a paper circle to the back as a base, then add a hook or adhesive strip for hanging.
Make sure everything is firmly attached so your flower stays secure whether on display or carried in an event.
When to Use Larger Petals and How to Make Them
Larger petals work best when you want a more dramatic flower or need flowers visible from a distance, like for stage backdrops or large venues. To make larger petals, increase your measurements by 20-30%.
For crepe paper, cut wider strips – about 16 inches instead of 12. For cardstock, resize your pattern on a copier or in design software.
Remember that larger petals need stronger bases, so use heavier paper or double-layer your petals. When shaping larger petals, add extra curves and folds to prevent them from looking flat.
Position these bigger petals as the outer layers of your flower for a natural look.
Improving the Look of Your Paper Flower
Take your paper flowers to the next level with simple enhancements. Use small, tightly curled petals or pom-poms to add a different-colored center.
Create leaves from green paper and attach them to the stem or base of the flower. For more depth, use paper in various shades of the same color throughout your flower – darker for inner petals, lighter for outer ones.
Add subtle color with chalk or paint along petal edges. Gently crinkle some petals before shaping them to create texture.
For sparkle, brush petal edges with glue and dip in fine glitter. These small touches make your flowers look more realistic and professional.
DIY Tips for Displaying Giant Paper Flowers
With your flowers, create wall displays, photo backdrops, table centerpieces, or hanging decorations. Use proper attachment methods and consider weather protection for outdoor use. Rotate colors seasonally for a fresh look.
Tip 1: Wall Displays
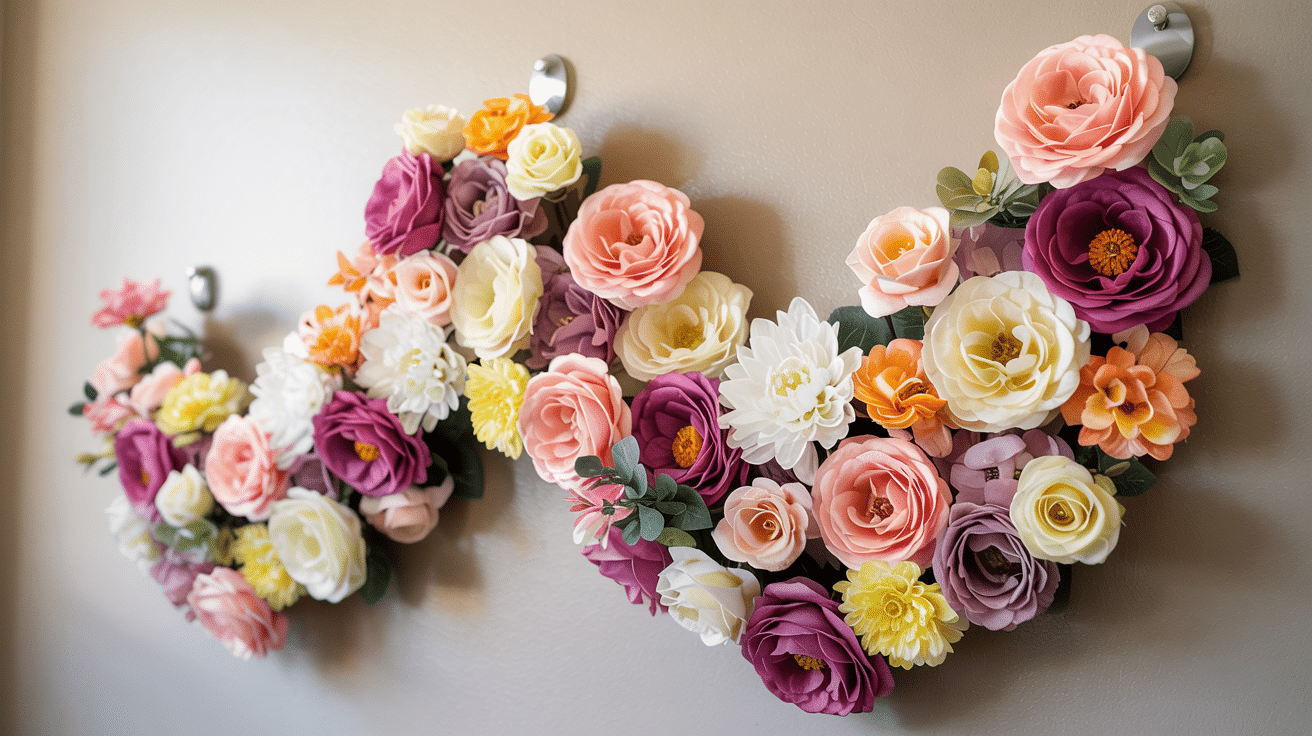
For eye-catching wall decor, create a flowing pattern using flowers of various sizes and colors. Arrange them in a cascading design or cluster them for impact.
Use removable hooks or strong mounting tape to attach them securely without damaging your walls. Consider creating an ombré effect by arranging flowers from light to dark shades, or mix complementary colors for contrast.
Command strips work well for rental spaces and leave no marks. Place larger flowers as focal points and fill in with smaller blooms around them.
Tip 2: Photo Backdrops
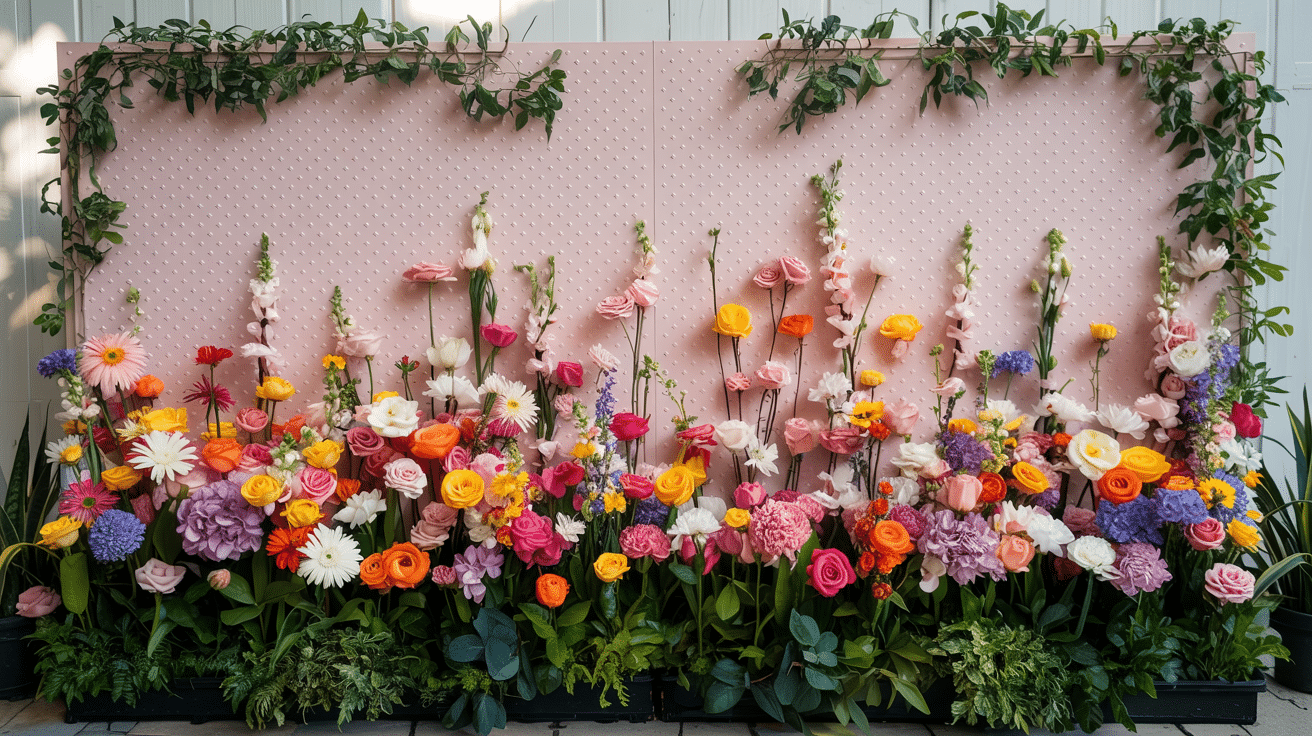
Securing flowers to a PVC frame or pegboard makes a beautiful photo backdrop. This professional-looking setup is perfect for weddings, baby showers, or birthday parties.
The structure allows for easy transport and setup at different venues. Position flowers densely in the center, gradually spacing them out toward the edges for a natural look.
Add greenery between flowers for extra dimension. Consider height variations to create depth. Ensure the frame is stable with proper support bases, especially for outdoor events.
Tip 3: Table Centerpieces
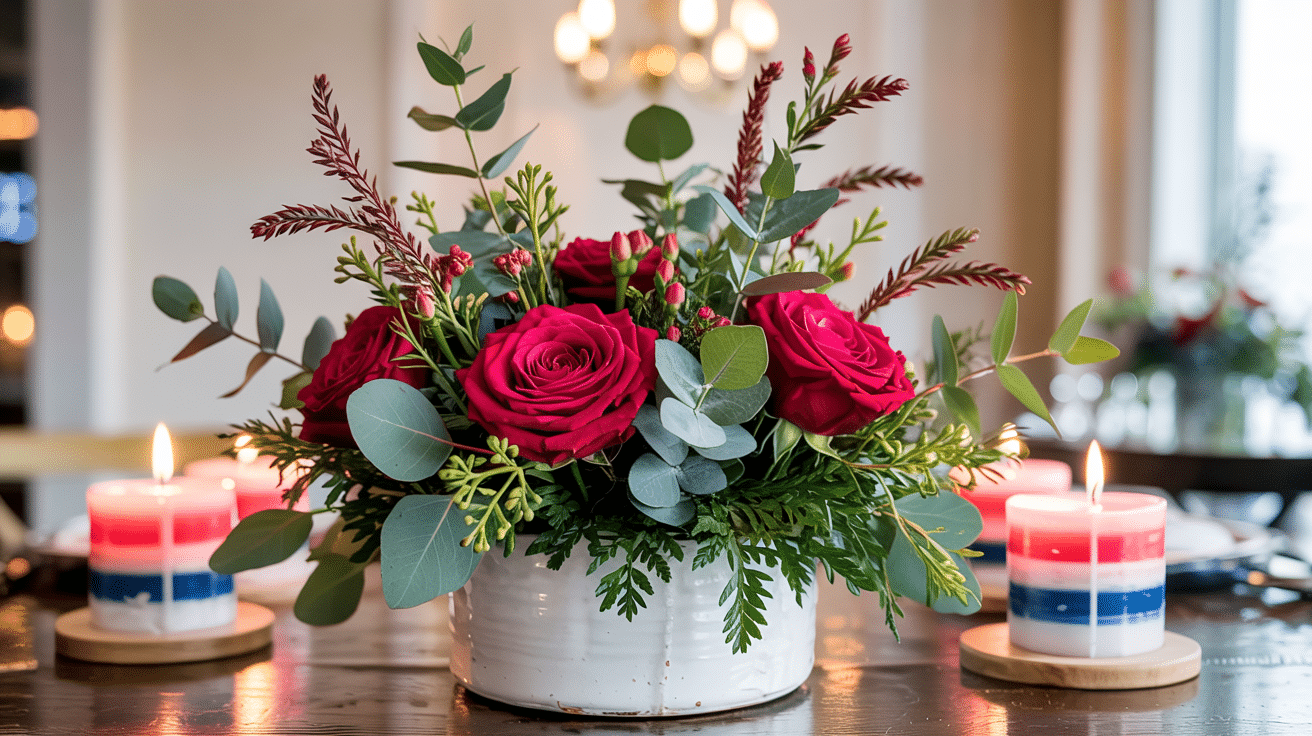
For impressive table centerpieces, insert flower stems into floral foam inside decorative pots or vases. This keeps them perfectly positioned and allows for height adjustments—group odd numbers of flowers (three or five) for the most pleasing look.
Match the container colors to your theme, or use clear glass for versatility. For evening events, add small LED lights among the flowers.
Keep centerpieces at appropriate heights so guests can see each other across the table. These make wonderful keepsakes for guests after events.
Tip 4: Hanging Decorations
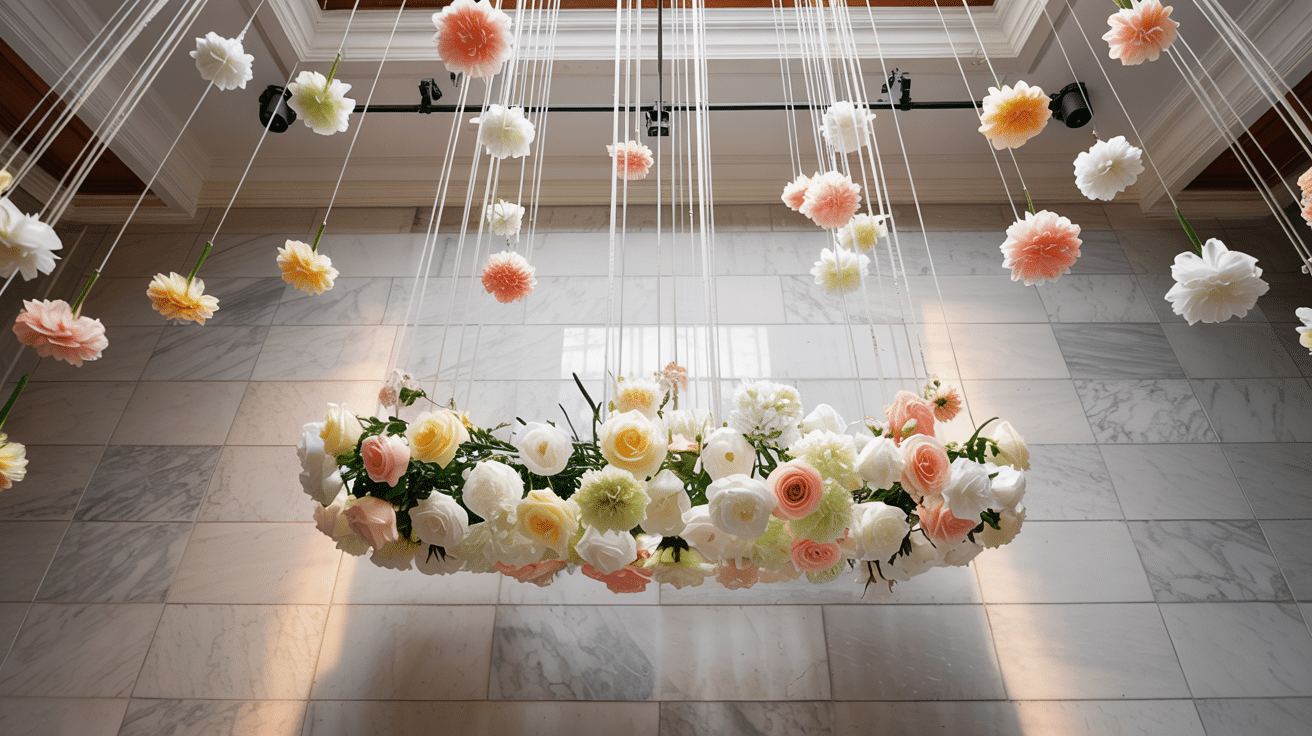
If hanging from ceilings, use clear fishing line for an air-suspended look that creates the illusion of floating flowers. Hang at varying heights for dynamic visual interest.
For heavier flowers, use secure ceiling hooks rated for the appropriate weight. Hang flowers over doorways or along hallways to create a dramatic entrance.
For outdoor pavilions or tents, attach flowers to the existing support beams. Consider using motorized rotating hooks for slowly spinning displays that catch light from all angles. These work beautifully above dance floors or dining areas.
Tip 5: Outdoor Displays
Rotate your flower displays seasonally with different colored blooms for a fresh look year-round. Use pastel colors for spring, bright hues for summer, rich oranges and reds for fall, and whites or blues for winter themes.
For holidays, incorporate themed elements like small ornaments or sparkly stems. This keeps your decor feeling current without requiring completely new decorations.
Store unused flowers in boxes with tissue paper to prevent crushing. Label boxes by color or season for easy retrieval when it’s time to swap them out.
Alternative Methods for Making Giant Paper Flowers
Beyond crepe paper and cardstock, try other materials for unique flowers. When dyed and shaped, coffee filters create soft, ruffled petals.
Tissue paper works for budget-friendly projects with a light, airy look. For outdoor events, try plastic tablecloths cut into petal shapes – they’re waterproof and wind-resistant.
If you have a cutting machine, cover pre-made flower templates to make cutting faster and more exact. If you don’t have a machine, use free printable templates online.
Another method involves folding techniques similar to origami to create geometric flowers. Each material brings different textures and benefits, so experiment to find what works best for your specific project and skill level.
Common Mistakes to Avoid When Making Giant Paper Flowers
When creating your paper flowers, watch for these potential problems that can affect your final result. Being aware of these common issues will help you generate more professional-looking flowers on your first try.
Here are the main mistakes to avoid:
- Rushing the cutting process, resulting in uneven petals
- Using excessive glue that creates visible globs
- Pulling/Not pulling crepe paper too hard, causing tears
- Placing petals side by side instead of overlapping them
- Failing to secure the base properly, making flowers wobbly
- Crowding too many same-sized petals in one area
- Ignoring proper drying time between steps
Conclusion
Making giant paper flowers is a rewarding project that has a big visual impact for relatively little cost. With the steps we’ve covered, you can create beautiful blooms for any occasion – from simple wall art to grand event backdrops.
What makes these flowers special is their flexibility. They fit any color scheme, size requirement, or style you need. We hope this guide has given you the confidence to start creating your paper masterpieces.
Remember, practice makes perfect, and even your first attempts will be beautiful. So gather your materials, clear some crafting space, and start making paper flowers that will amaze everyone who sees them!