

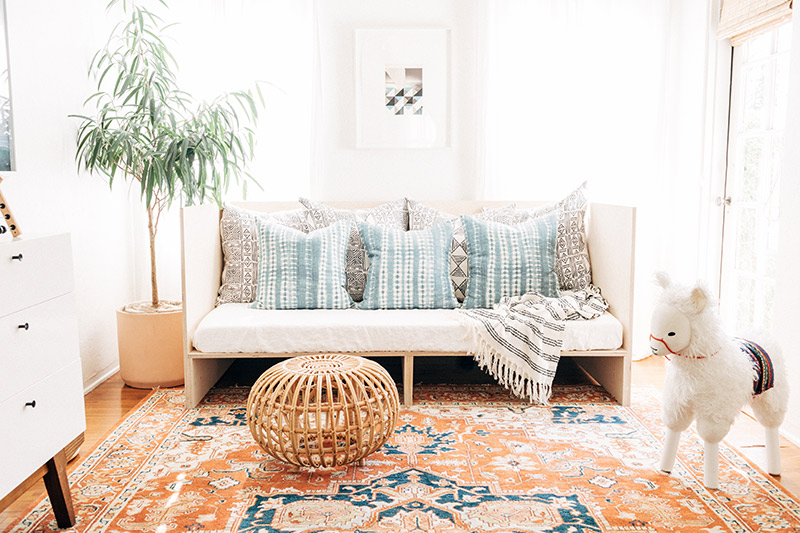
Hi friends! I’m excited to pop in and share a little DIY with you today for the daybed we built for Teo’s room! This was born out of need and budget restrictions, as many of the best things are! We wanted a place for all of us to hang out in Teo’s room, which has become our favorite room in the house, and we wanted something that would eventually be able to transition to being his bed. We also didn’t want to spend a ton of money on it because….well, we didn’t have a ton of money to spend on it. HA!
We built this easily in a few hours for under $300, which in my humble opinion is not bad for a piece of furniture that could very well last for the rest of our lives! And we’ve been loving it ever since. It’s perfect for snuggling up and reading books, Teo loves monkeying around on it, and we’ve all had a few cozy naps right there. I am going to do my best with these instructions, but a DIY queen I am not. That speaks to how easy this was to create but also, I sat there for ten minutes asking myself “How do I say screw in the screws” without sounding like a kook?! So I did my best, but if you decide to tackle it please read through and make sure you understand beforehand. And I’m happy to answer any questions you have if they come up, so hit me up in the comments if they do. Instructions after the jump. Happy DIY’ing!!!! xx- Sarah

Supplies and Materials:
orbital sander with 150 grit and 220 grit sandpaper
(3) 4’X 8′ sheets of 3/4″ Baltic birch plywood cut into the following sizes:
(1) 39″ X 76″
(1) 35″ X 77 1/2″
(2) 39″ X 35″
(4) 39 X 9″ (these will become the base)
Drill with Phillip tip head
Step One: Using an orbital sander with 150 grit paper, sand down all sides and edges. Switch paper to 220 grit and repeat.
Step Two: Hold up the back piece (39″ X 77 1/2″” ) and side piece (39″ X 35″) to create an L shape. Use the drill to pre-drill and countersink four holes along the back edge where the the two pieces of wood meet. Replace the countersink with a Phillip tip head on the drill and fasten the wood together using 4 combo screws in the predrilled holes. Screws should be flush with the surface of the wood. Have a friend hold the pieces together to stabilize while drilling. See below for example. Repeat on opposite end.

Step Three: Place a towel or drop cloth under one side of the daybed. Take one of the 39″X 9″ pieces of plywood and spread glue on one side. Place along bottom edge of the side of the daybed (see below for example). Make sure that that two pieces of wood are flush. Use the dril to countersink and pre-drill four holes. Change to Phillip tip head and fasten wood together with four combo screws. Repeat on opposite side.

Step Four: Take the two remaining 39″ x 9″ pieces of wood and glue them together to create a support for the middle. Make sure that all edges are flush. Slide the base of the bed (the 39″ X 76″ piece) over the two ledges. Measure to find the center and lightly mark the center in three spots- front, center and back. Slide the support piece into the center under the base. Countersink and pre-drill 1/4″ on either side of the center mark to attach the base to the support on each side. Use the measurements to avoid drilling directly between the support base. Repeat on 2 remaining marks.
Step Five: Countersink and pre-drill three holes into the base and support ledge on one side of the daybed- front, center and back. Fasten with screws. Repeat on opposite side.
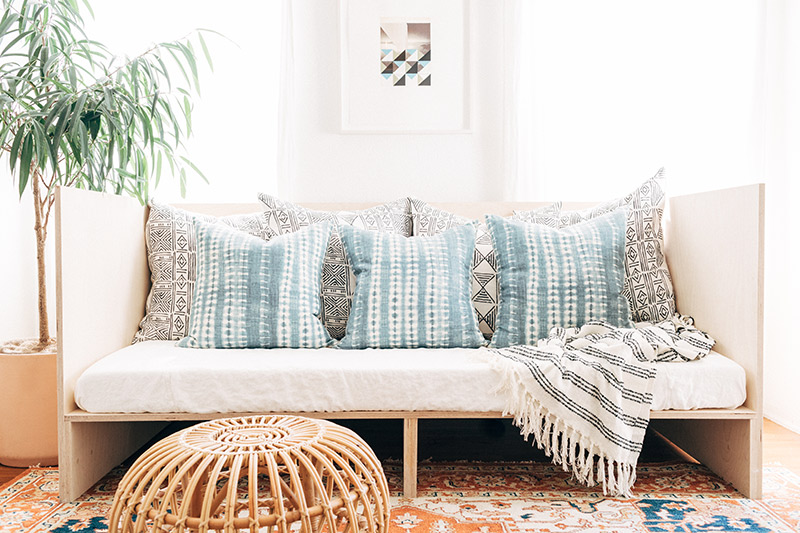
Step Six: Cover all screw holes with fastcaps. Plop on a mattress, some throw pillows and kick back to enjoy!


Sarah this is stunning!!