
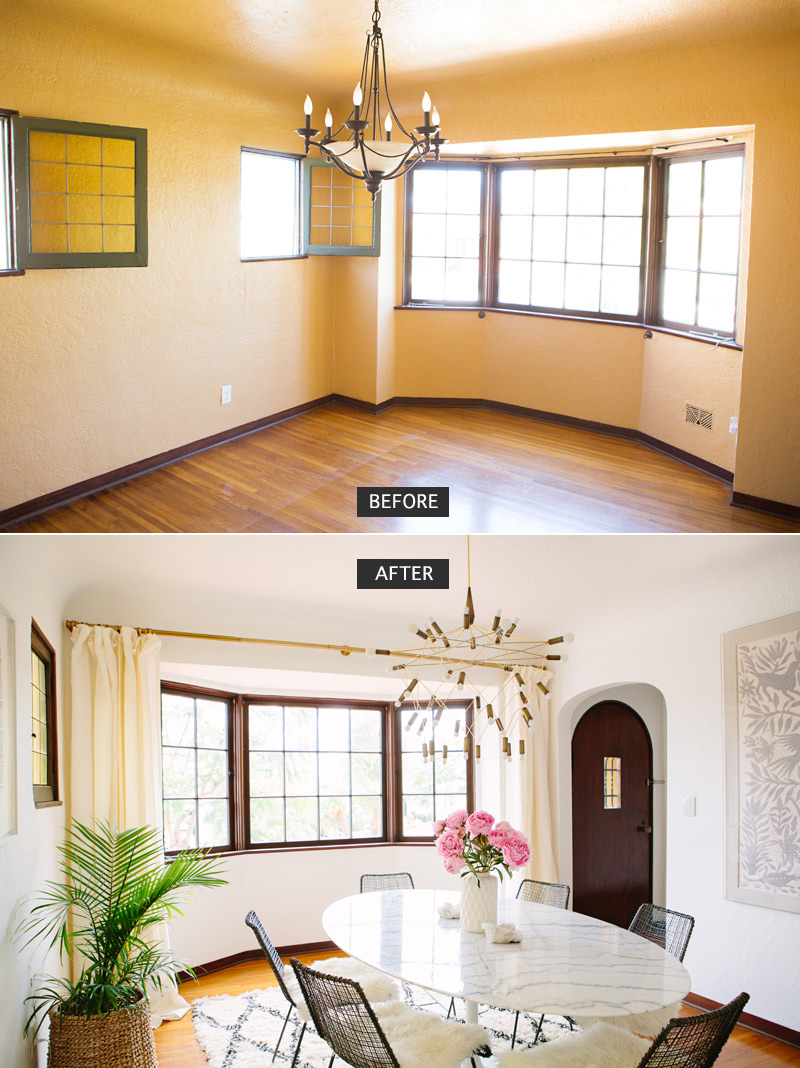
Hello my friends! I’m back with another house update in partnership with True Value! Today I’m sharing our dining room before and after. I couldn’t wait to get this space updated- it felt so drab, small and dated when we moved in. But a coat of white paint and a new chandelier changes EVERYTHING, doesn’t it?!! Now the space feels bright, airy and inviting! And truly, the amount of work it takes to paint a space in just so minimal for the impact it can have. Details on what we did after the jump! And don’t forget to follow True Value on Instagram for inspiration! And share your own #DIYaDay projects for a chance to win- they’re giving out prizes throughout June! Happy DIY’ing! xx- Sarah
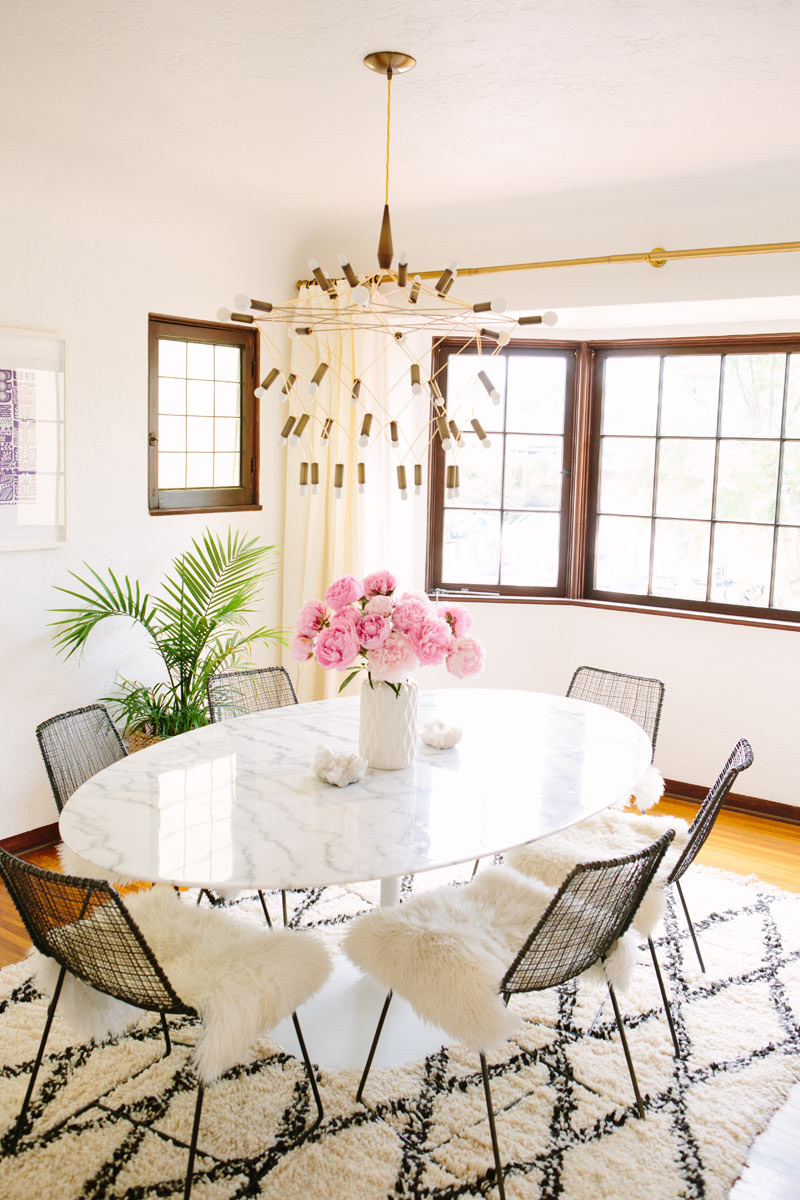
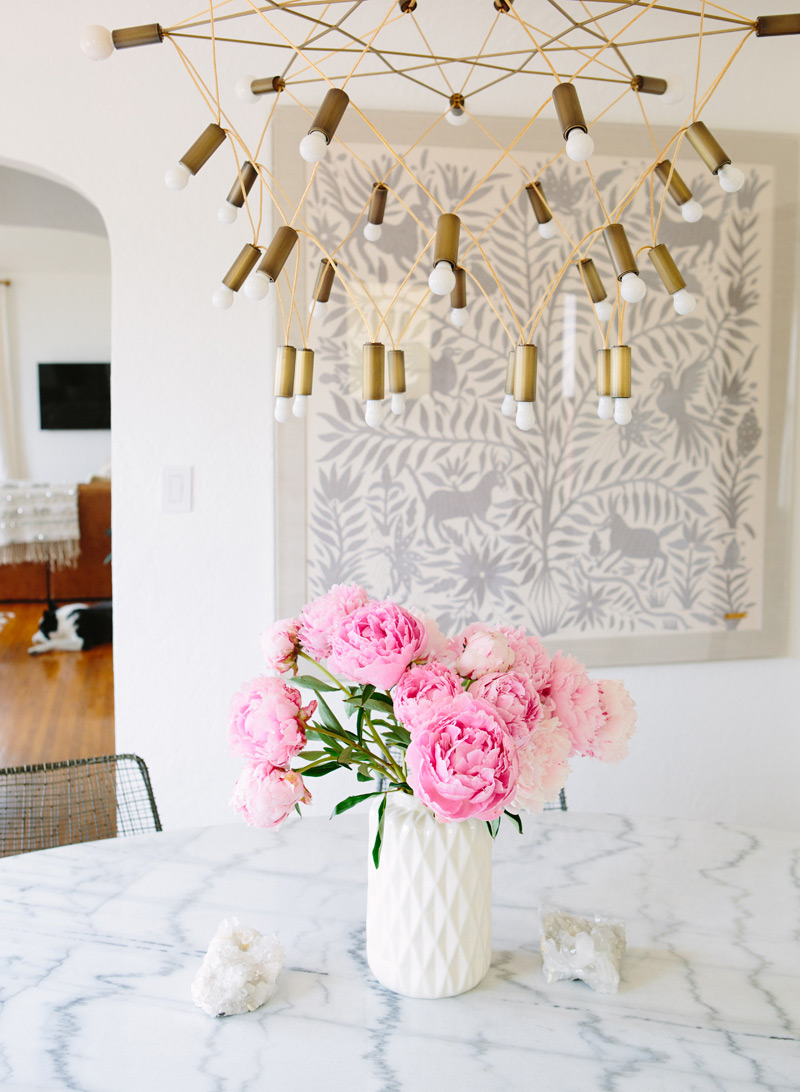
Decor Sources: Table, Chandelier, Rug, Chairs, Otomi artwork, Sanna Annukka print, basket
Step One: Move all furniture to the center of the room and cover with drop cloths.
Step Two: Shut off circuit breakers to the room and remove light fixture (if you are not replacing it, you can leave it). Remove outlet, light and vent covers. Set aside. Place painters tape over outlets.
Step Three: Use a putty knife to fill any holes or cracks with spackle (there are different kinds of spackle required depending on the material your walls are made of, we used this kind). Spread it with the putty knife, trying to get it as flat with the wall as possible. Let it dry and then sand the surface with a fine grit sandpaper until it feels smooth to the touch and you can’t feel a difference from the wall to the repair.
Step Four: Vacuum up any dust and residue, vacuum baseboards and windowsills. Wipe down walls and ceiling with a damp cloth. Let dry.
Step Five: Tape edges of baseboards and windowsills with said painter’s tape. Take your time with this, the time you invest will pay off with clean lines and a professional looking paint job! Place dropcloths on the floor to protect.
Step Six: Use a 2″ paint brush to paint along the edges that have been taped off, lightly covering the very edge of the tape that meets the wall and painting 3″ out. This is called “cutting in” the edges. Finish all edges.
Step Seven: Pour paint into a paint tray, use a roller (with extension) and a roller cover. Roll into paint and then use the tray to remove excess paint.
Step Eight: Roll paint onto walls and ceiling, getting as close to the edge as possible. Continue until all of the walls and ceiling are painted, and let dry. Apply an additional coat of paint if needed.
Step Nine: Gently remove tape (use a razor blade on the tape if you notice any of the paint that’s meant for the wall lifting while you are removing!)
Step Ten: Replace light switch, outlet and vent covers. Hang lighting and turn power back on via the circuit breaker. Enjoy your new space!!!

gorgeous! absolutely love that otomi piece.
Looks fabulous and I can’t wait to see the rest of the house! I’m curious if you’ve tried clear lightbulbs in the chandelier – wondering if it adds to the beauty and elegance?
I love this room! What a beautiful space to entertain and dine in! So well done.
This is simply GORGEOUS!
Xx Taylor
http://www.lightscameracatwalk.com
What paint color did you use? Sorry if I missed it but I didn’t see a link!
Olá Sarah! I loved it. Silvana / Minas Gerais – Brasil
Wow! So light and airy! I love what you did! I’m especially loving that marble dining table…the perfect combo of stylish and functional!
Taffeta & Tulips
Beautiful room Sarah! I love every last detail!
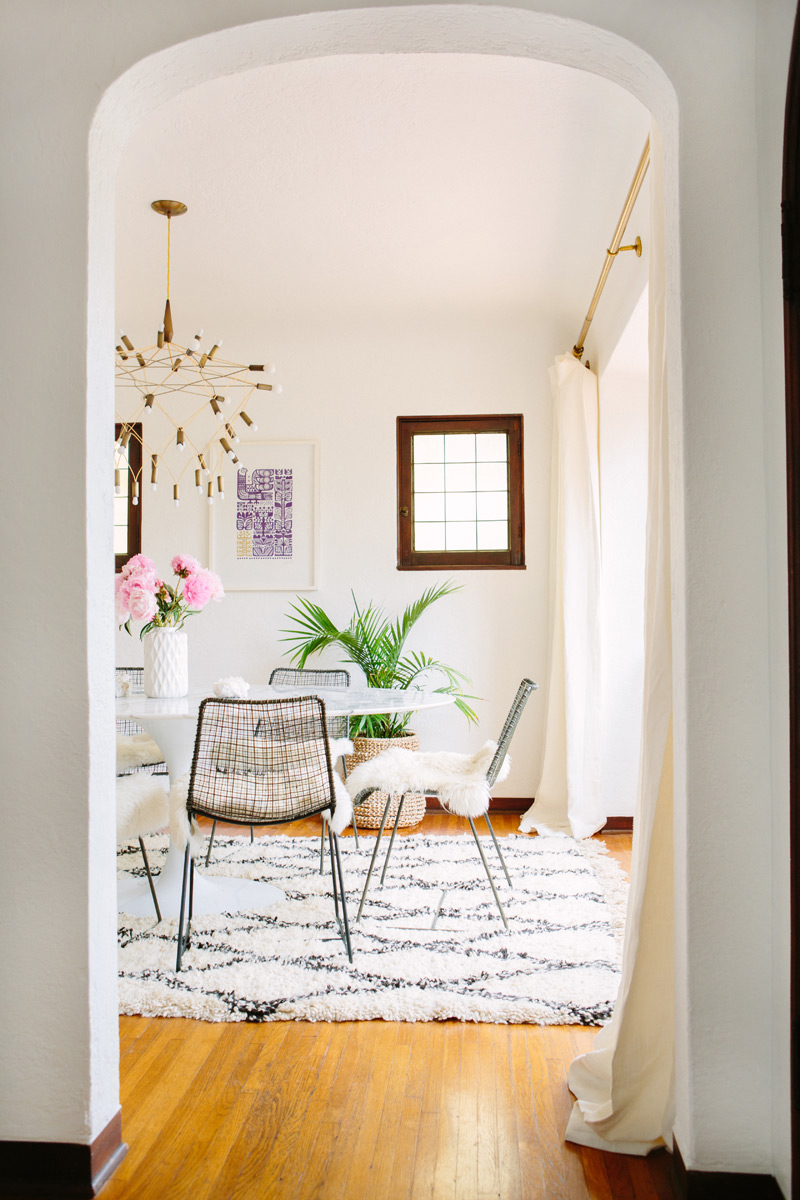
Truly gorgeous! Love it SO much!! Also have to thank you in advance for the idea for curtains in a bay window! Were about to move into a new house that has several bay windows and I was wracking my brain trying to think of an attractive solution!! Love the look!
Simply GORGEOUS!!
It’s really interesting how you used the curtains to block off an area rather than just have curtains on the windows! -Audrey | Brunch at Audrey’s
Where is your curtain rail from? It’s so lovely and timeless
Looks SO AWESOME–incredible what white paint can do (and obviously your beautiful furniture and styling 😉 Great work, Sarah!
beautiful renovation! Love the color!
Hi Sarah! Love your blog so hard. Question – where did you get the sheepskin throws for the chairs?
Beautiful room! What paint color did you use?
Nice chandelier, where is it from? And do you know if it’s available for EU?
Would also love to know the paint color and sheen you used. It looks like a great white, not too cold.
What a lovely dining room! What a serenity and style! I am in love with that room. I loved the windows as well as carpet. I know that white is a color that needs regular cleaning but it is worth it 🙂