Toe Kick Cabinets: What They Are and Why You Need Them
A kitchen’s beauty lies in its details; toe kicks play a key role. These small spaces at the bottom of your cabinets do more than fill a gap – they make your time in the kitchen better and safer.
Many people overlook toe kicks when planning their kitchens. Yet, these simple additions help you stand comfortably at counters, protect your cabinets, and give your space a finished look.
This guide covers everything about toe kicks. You’ll learn what they are, why they matter, and how to pick the right ones. We’ll also share tips for installing them, keeping them clean, and fixing common issues.
Whether you’re updating your kitchen or just curious, understanding toe kicks helps you make smart choices for your home.
What Exactly is a Toe Kick and Why is it Essential?
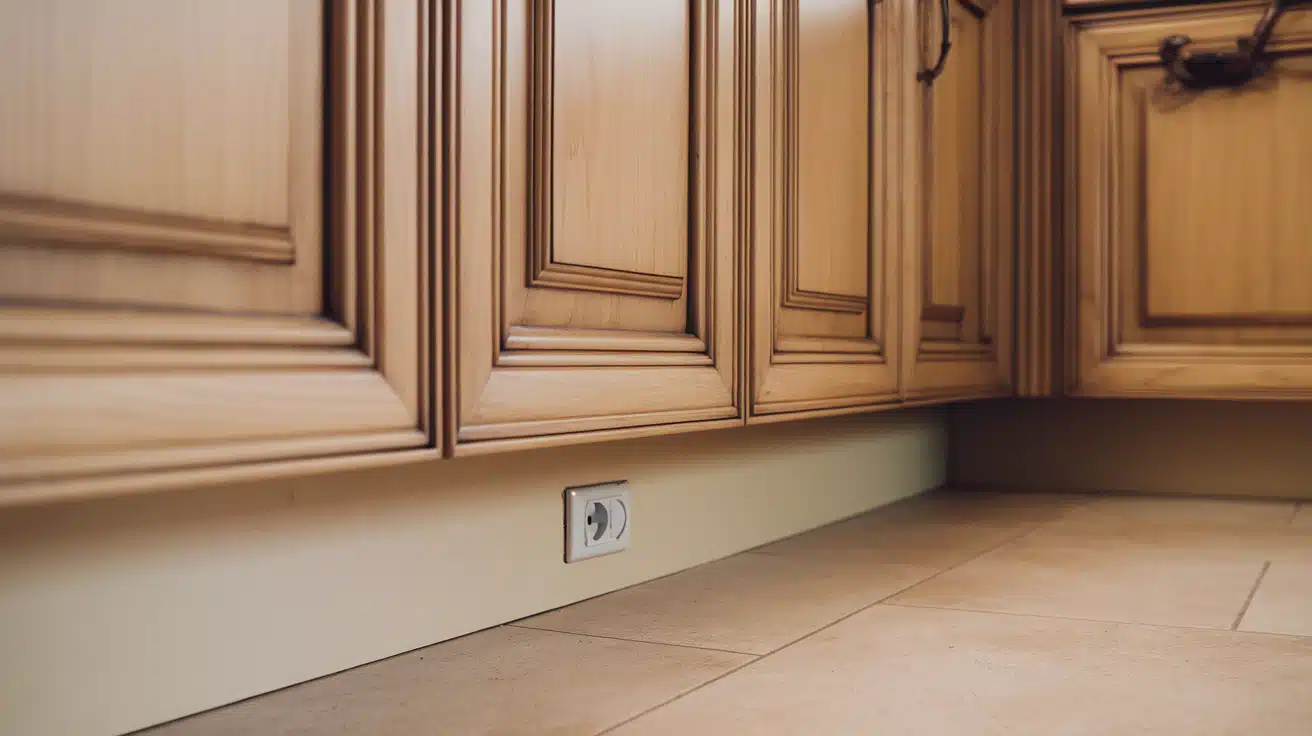
A toe kick is the small space at the bottom of your kitchen cabinets. Think of it as a small step-back area where your feet rest while you work at the counter. This simple feature greatly affects how you use your kitchen daily.
The toe kick lets you get closer without stretching when you stand at your kitchen counter. It’s like having a comfortable footrest built right into your cabinets. Without it, you’d need to lean forward to reach the counter, which could hurt your back.
This small detail does more than help your feet feel good. A toe kick makes your cabinets look better on your kitchen floor. The small indent creates a nice shadow line that makes your cabinets appear to float slightly above the floor.
The space also keeps your cabinet doors and drawers safe. When you stand close to a cabinet, your toes have a place to go. This means less scuffing and fewer marks on your cabinet fronts.
Understanding Toe Kick Dimensions: What’s Standard?
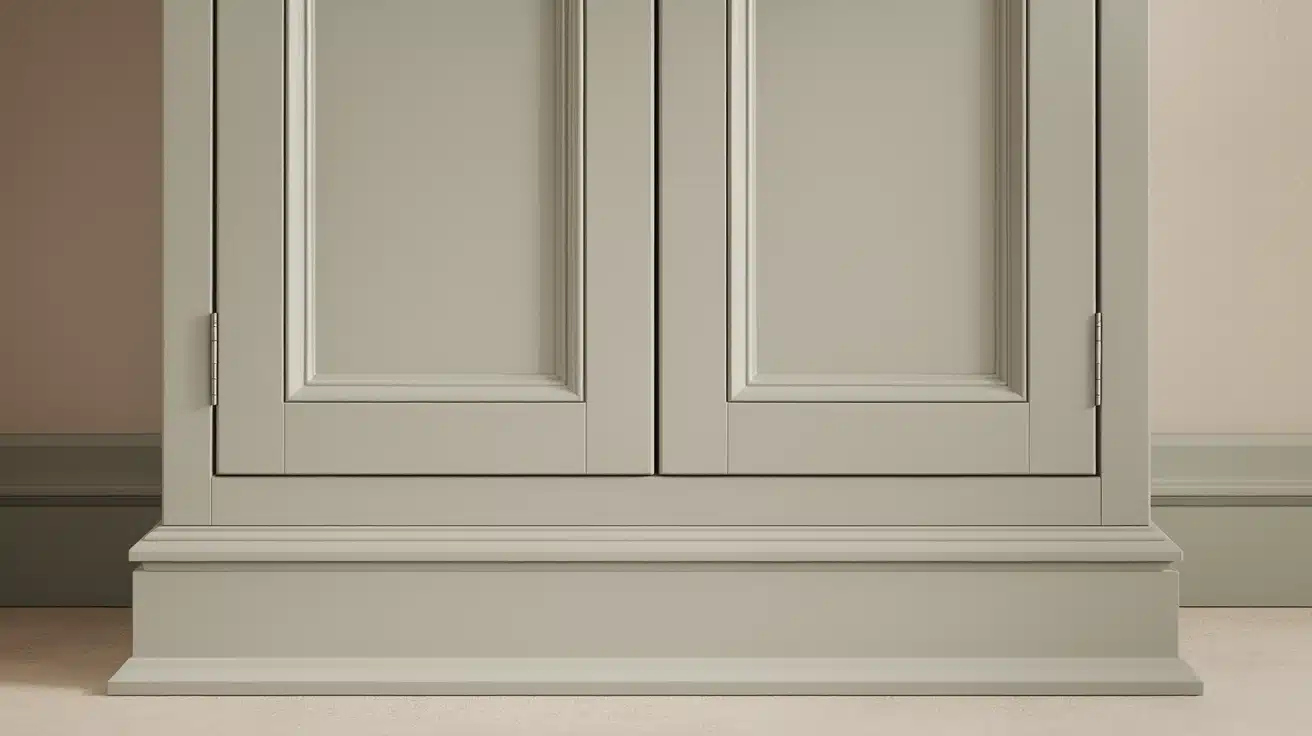
Most toe kicks follow tried-and-true measurements that work well in most kitchens. The typical height ranges from 3 to 4 inches, while the depth usually stays around 3 inches. These numbers come from years of testing what works best for most people.
Does Size Matter?
Yes, these measurements matter more than you might think. The height needs to fit most shoes comfortably, and the depth must give enough room for your toes when you stand at the counter.
Some kitchens might need different sizes. For example, you might want to adjust these measurements if you’re taller or shorter than average. The key is finding the right balance between comfort and looks.
DIY Toe Kick Installation: A Step-by-Step Guide
Tools and Material
| Tool/Material | Description |
|---|---|
| Measuring Tape | Used to measure the toe kick area to ensure accurate fitting. |
| Circular Saw | Needed for cutting the toe kick panels to the correct dimensions. |
| Drill | Used to pre-drill holes for screws or nails to secure the toe kick. |
| Screws or Nails | Fasteners to attach the toe kick securely to the base of the cabinets. |
| Wood Glue | Optional for additional bonding strength between surfaces. |
| Sandpaper | Used to smooth out the edges of the cut panels for a clean finish. |
| Paint or Stain | For finishing the toe kick to match or complement the cabinetry. |
| Paintbrush or Roller | Used to apply paint or stain evenly. |
| Safety Glasses | Essential for protecting eyes during cutting and drilling operations. |
| Knee Pads | Recommended for comfort while working on lower cabinet areas. |
Making your toe kicks can save money and give better results. Here’s how to do it right.
Step 1: Choose Your Material
Store-bought toe kicks often use MDF laminate, which costs about $24 per piece. A wood board costs roughly $12 and offers better quality. Wood stands up better to water and won’t warp over time.
Step 2: Measure and Cut the Wood
Start by taking exact measurements of your cabinet base. Cut the wood to match your needed height. Our project used a 4.5-inch height to cover the floor edges. Make sure the thickness works with your floor type.
Step 3: Match the Floor
Contour Floors aren’t always level. Cut your board slightly bigger than needed. Place it against the floor to find gaps. Sand down areas that don’t fit until you match the floor’s shape well.
Step 4: Select the Joint Type
For hidden corners behind cabinets, simple butt joints work well. Use miter cuts (45-degree angles) for visible corners. This gives a clean look where two pieces meet.
Step 5: Stain and Color Match
Take a piece of your cabinet to the paint store. They can mix a matching stain color for your wood. Put the stain on quickly and wipe for lighter color. Leave it longer for darker shades. Wait between coats to check the color match.
Step 6: Apply Protective Finish
Let the stain dry fully. To protect your toe kicks, add a coat of polyurethane. This extra layer helps guard against water splashes and daily wear. One coat usually works well for kitchen use.
Step 7: Install the Toe Kicks
Mix methods for the best hold. Put glue where cabinets meet. Add small nails near the top edge. Using nails only at the top means fewer holes to fill. Keep the bottom clean for a better look.
Step 8: Address Floor Gaps
Check the space between your toe kick and the floor. Small gaps often look fine. For bigger spaces, add a small piece of quarter-round trim. This covers uneven spots and makes everything look finished.
Step 9: Work Around Vents
For floor vents, flip the toe kick upside down. Mark the vent space carefully. Make your cuts with a circular saw for long lines. Use a hand saw for corners. Clean up rough edges with sandpaper.
Step 10: Finish the Job
Last, put on the vent covers. Mount them right to the toe kick. Make sure they sit flat and look even. Step back and check that all the pieces line up well.
Money-Saving Tip: Making your toe kicks often cost half as much as buying pre-made ones. Plus, you get better quality and a perfect match for your kitchen.
Time-saving tip: Cut all pieces at once, stain them together to match the color, and let everything dry while you work on other projects.
Video Tutorial
Watch a full video on DIY Cabinets Toe Kick by Practical Home Projects.
Keeping Your Toe Kicks Pristine: Maintenance and Care Tips
Your toe kicks face daily challenges, from water spills to shoe scuffs. Good care helps them last longer and look better. Let’s look at how to keep them in top shape.
Take a few minutes each month to examine your toe kicks closely. Check for loose spots or watermarks, and listen for any loose areas when you tap them. Small issues are easier to fix when you catch them early.
Look for signs of peeling finish or worn spots. Pay special attention to areas near the dishwasher or sink. Water often shows up here first. Quick action can stop small problems from growing bigger.
Cleaning Your Toe Kick: Material-Specific Advice
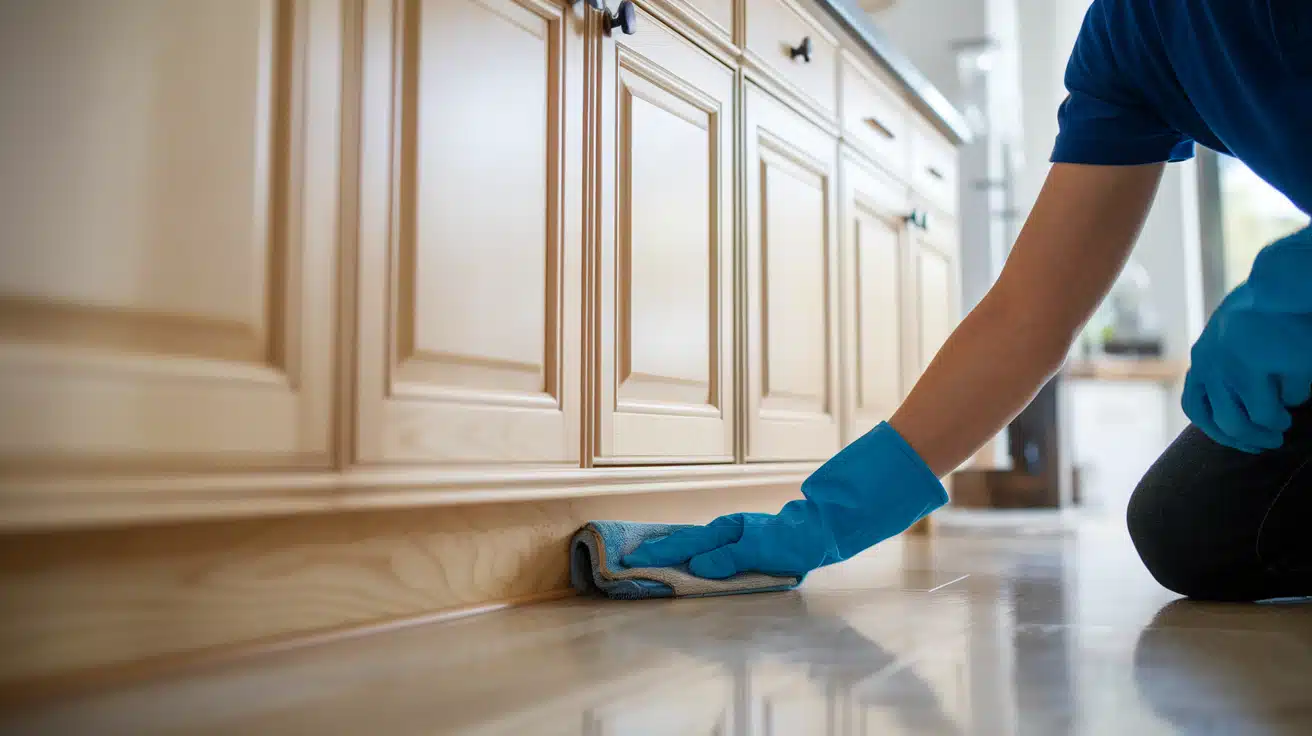
Different materials require different cleaning methods. Wood toe kicks need gentle care, MDF needs protection from water, and metal ones can handle stronger cleaners.
For wood: Use a soft, barely damp cloth. Wipe in the direction of the grain. Dry right away with a clean cloth.
For MDF: Keep water away. First, use a dry microfiber cloth. If needed, spray cleaning spray on your cloth, not directly on the toe kick.
For metal: A mix of mild soap and water works well. Dry thoroughly to stop water spots.
Addressing and Preventing Damage to Your Toe Kick
Most toe kicks get scuffs from shoes, water spots near sinks, or scratches from vacuum cleaners. These marks don’t mean you need new toe kicks.
Quick Fixes for Common Problems
For scuffs: Try a magic eraser with light pressure. Test in a hidden spot first.
For scratches: Wood markers in matching colors can hide small marks. Sand deeper scratches gently before touching up.
For loose spots: Add some wood glue and press firmly. Place weight on the area until dry.
Preventative Measures
Put mats in front of wet areas like sinks. Teach family members to avoid kicking the base of cabinets. Consider stick-on furniture pads where vacuum cleaners often hit.
Sealants and Protectors
A clear coat of protection makes cleaning easier. Water-based polyurethane works well on wood. Look for products made for kitchen use. In busy areas, apply new coats yearly.
Conclusion
A well-made toe kick does more than complete your kitchen’s look—it improves your daily cooking tasks. From proper measurements to picking materials, each choice affects how your cabinets work and last.
Think about it: this small detail at the bottom of your cabinets helps you cook without back pain, keeps your cabinets safe from water damage, and makes your kitchen look well-built.
Whether you choose store-bought options or make your own, the right toe kick turns good cabinets into great ones.
Remember, toe kicks need care, just like any other part of your kitchen. They’ll keep working well for years with proper cleaning and quick fixes for small issues.
Good toe kicks might go unnoticed, but that makes them perfect – they do their job quietly and well.

