The Best Vegan Oatmeal Chocolate Chip Cookies Ever
Do you want to learn how to make vegan oatmeal chocolate chip cookies?
This blog has just what you want, and these are moist, chewy, and tasty.
You’ll love how they combine the nutty flavor of oats with rich chocolate chips in every bite.
They fit many dietary needs and are made without dairy or eggs and easy to make gluten-free with a simple flour swap.
The best part? You only need one bowl to mix everything; the dough doesn’t need to chill.
From start to finish, you can have warm cookies ready to enjoy in about 30 minutes.
Perfect for both planned baking days and sudden sweet cravings when you want something homemade fast.
Key Ingredients for Cookies
- Flour
- Oats
- Vegan Butter
- Sugar
- Chocolate Chips
- Almond Milk
- Baking Soda, Cinnamon, Nutmeg
- Vanilla Extract
- Salt
Steps for Making Vegan Oatmeal Chocolate Chip Cookies
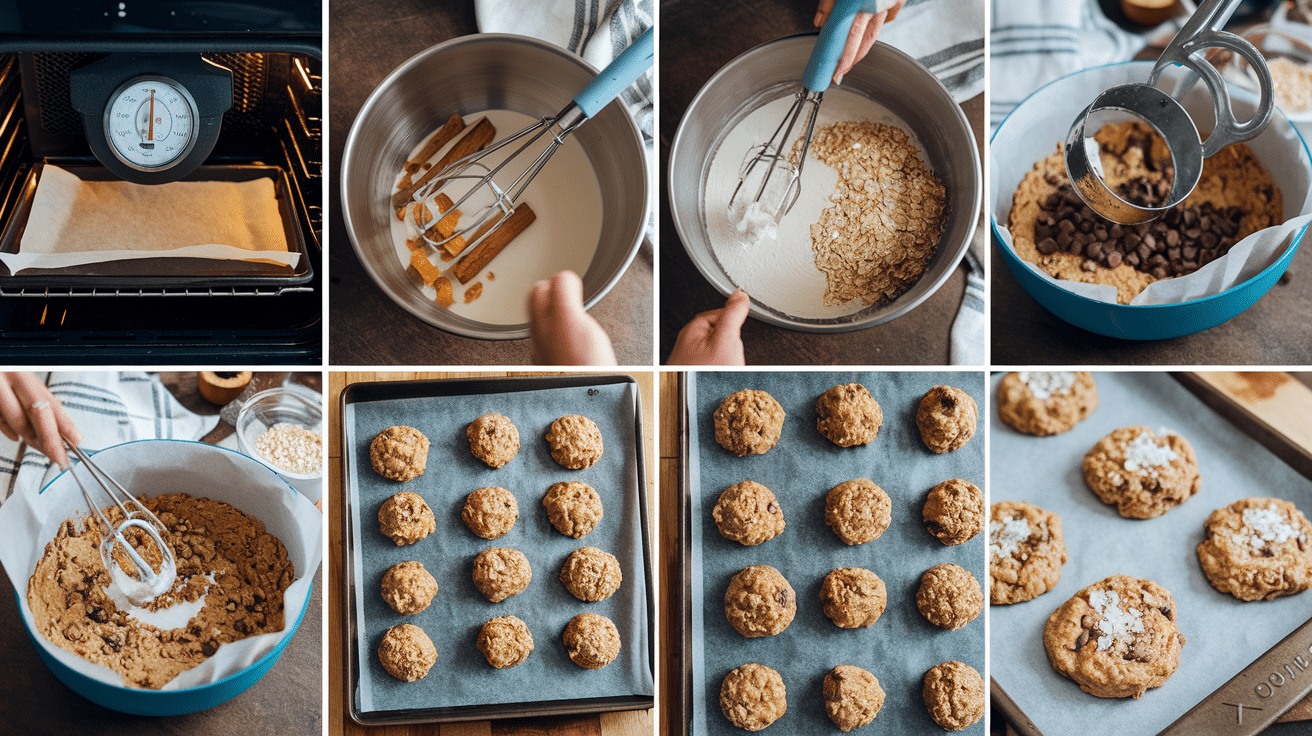
Step 1: Preheat the oven
Start by heating your oven to 350°F. Line your baking sheets with parchment paper to prevent sticking and make cleanup easier.
Step 2: Mix Wet Ingredients
In a large bowl, cream together the vegan butter, brown sugar, and granulated sugar until light and fluffy (about 2-3 minutes). Add the almond milk and vanilla extract, then mix until smooth.
Step 3: Combine Dry Ingredients
Add the flour, oats, baking soda, cinnamon, nutmeg, and salt to the same bowl. Stir gently until just combined. Be careful not to overmix, which can make your cookies tough.
Step 4: Add Chocolate Chips
Fold in the chocolate chips, making sure they’re spread evenly throughout the dough.
Step 5: Form Dough
Use a cookie scoop or tablespoon to form balls of dough (about 2 tablespoons each). Place them on your prepared baking sheets, leaving about 2 inches between each cookie for spreading.
Step 6: Bake
Place the cookies in the oven and bake for 12 minutes. Look for golden brown edges while the centers still look slightly soft. This gives you that perfect texture contrast.
Step 7: Cool
Let the cookies cool on the baking sheet for 5-10 minutes. This important step allows them to firm up enough to handle without breaking.
Step 8: Optional Finishing Touch
While the cookies are still warm (but not hot), sprinkle a tiny bit of flaky sea salt on top for a flavor boost that makes the chocolate taste even better.
Tips for Getting the Best Cookies
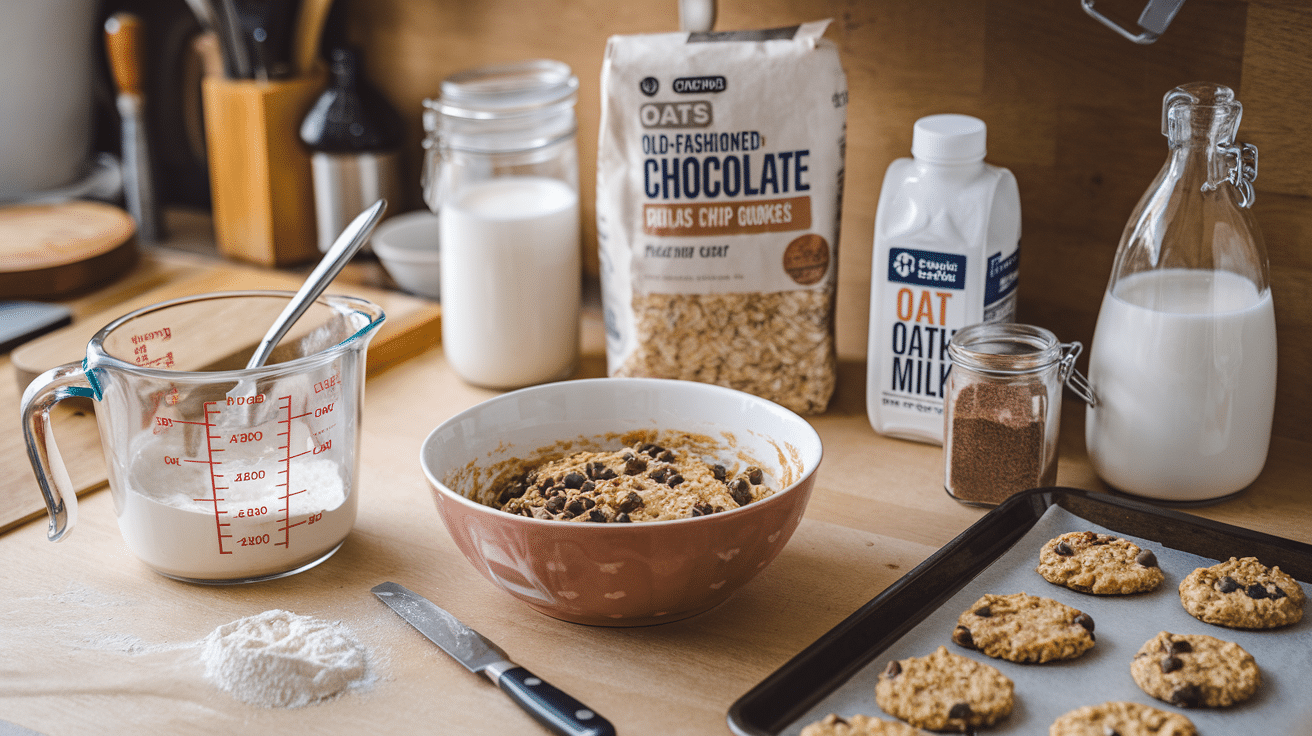
Measuring Flour Correctly
Before baking, it’s important to measure your flour correctly.
First, fluff up the flour in its container using a spoon to loosen it.
Next, take that same spoon to fill your measuring cup with flour, being careful not to scoop directly with the measuring cup itself.
Finally, level off the top of the flour with a straight edge, such as a knife, to ensure you have the exact amount needed for your recipe.
This method stops you from packing too much flour, which can make dry cookies.
Use Rolled Oats
Ensure you’re using old-fashioned rolled oats rather than quick oats or steel-cut.
Rolled oats give these cookies the perfect chewy texture and help them spread right during baking.
Chill the Dough (Optional)
While this recipe doesn’t need chilling, you can put the dough in the fridge for 30 minutes if you want thicker cookies that spread less.
This step is great when you want a more puffy cookie shape.
Gluten-Free Option
Swap the all-purpose flour with a 1:1 gluten-free flour blend to make these cookies gluten-free.
Make sure your blend contains xanthan gum for the right texture.
Also, check that your oats are certified gluten-free, as many regular oats can have cross-contact.
Nut-Free Alternative
For a completely nut-free cookie, simply replace the almond milk with oat milk, soy milk, or any other plant milk you like.
The small amount used won’t change the flavor much, making this an easy switch.
Storing and Freezing Tips for Cookies
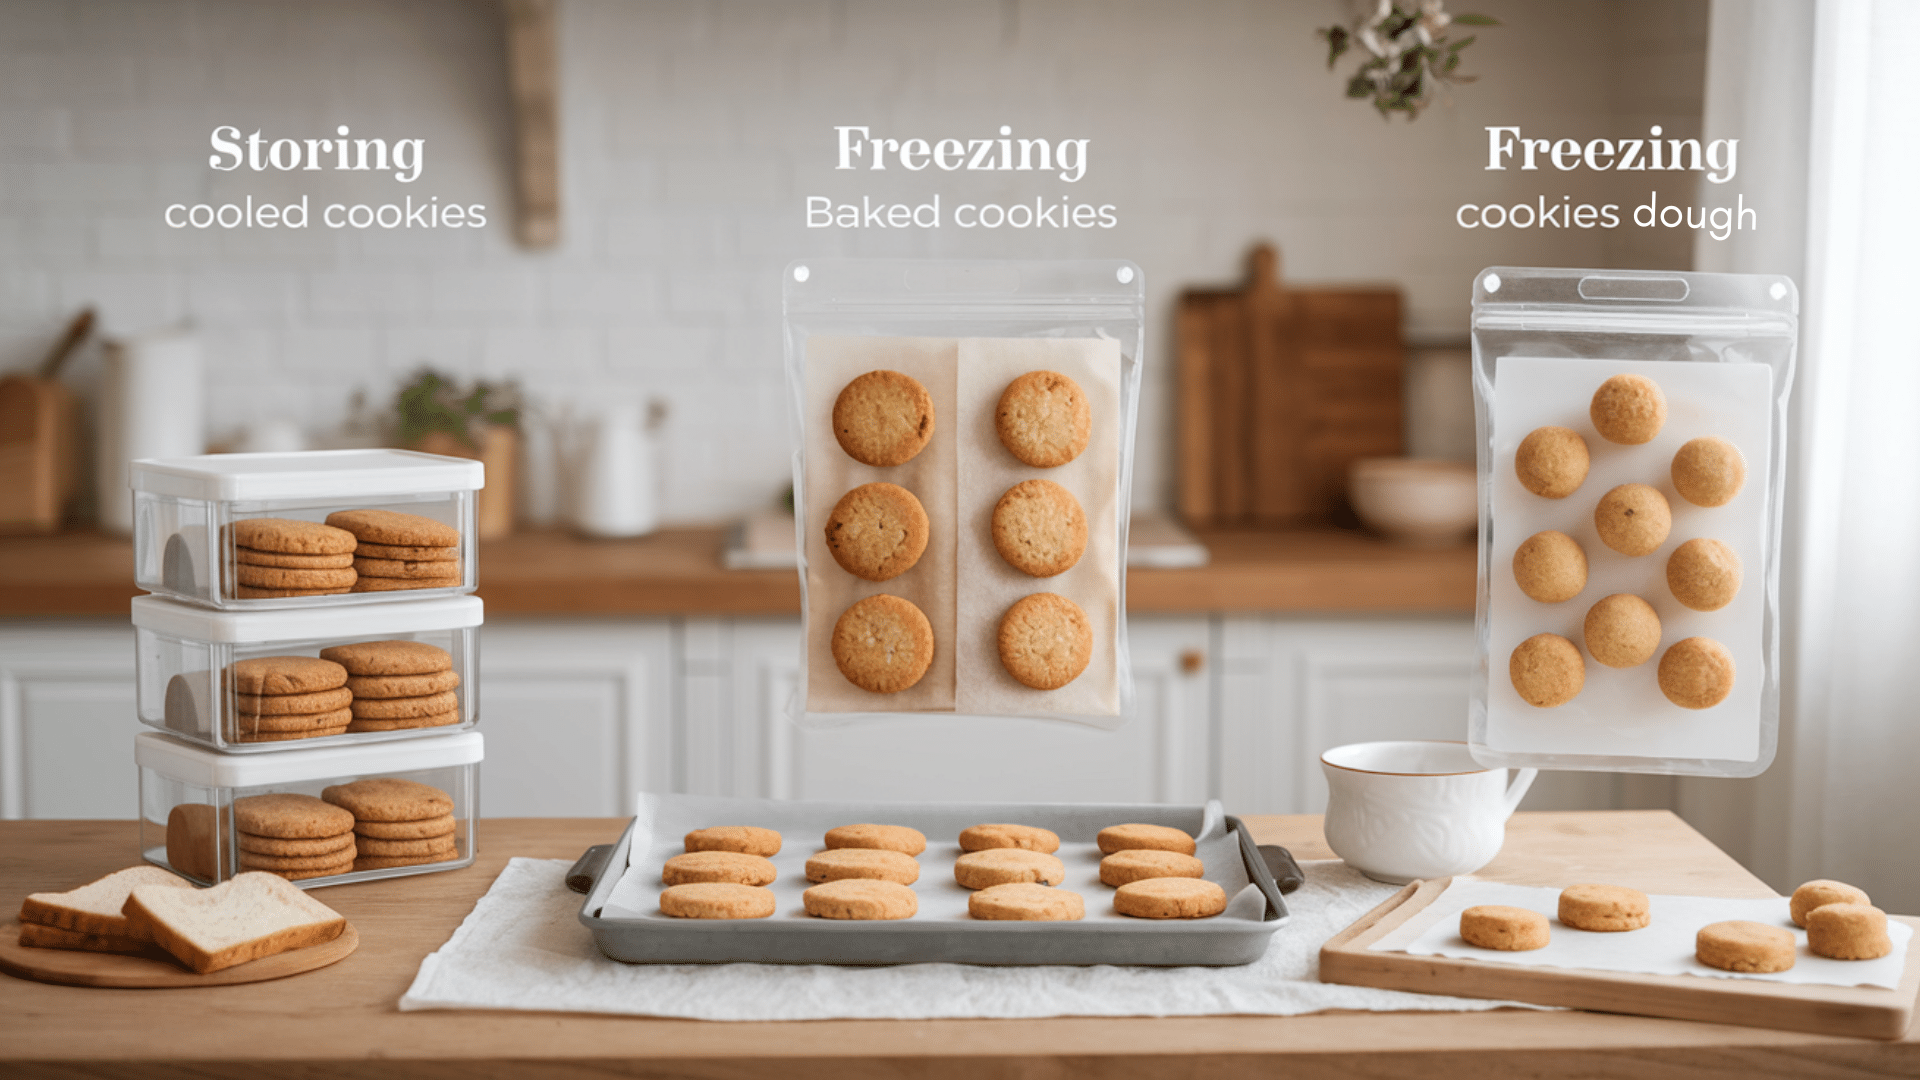
How to Store
Step 1: Make sure cookies are completely cool before storing.
Step 2: Place them in an airtight container with layers separated by parchment paper to prevent sticking.
Step 3: Store at room temperature for 3-5 days. To keep cookies soft, add a slice of bread to the container—the cookies will pull moisture from the bread, staying fresh longer.
Freezing Instructions
A simple method to store baked cookies or raw dough balls for up to 3 months by freezing properly in layers.
For Baked Cookies
Step 1: Cool the cookies completely.
Step 2: Place in a single layer on a baking sheet and freeze for 1 hour until solid.
Step 3: Transfer to a freezer bag or container, placing parchment paper between layers.
Step 4: Label with the date and freeze for up to 3 months.
For Cookie Dough
Step 1: Form the dough into balls as if you were about to bake them.
Step 2: Place dough balls on a parchment-lined baking sheet and freeze until solid (about 1-2 hours).
Step 3: Transfer the frozen dough balls to a freezer bag, removing as much air as possible.
Step 4: Label with the date and freeze for up to 3 months.
Baking from Frozen Dough
Step 1: Preheat your oven to 350°F.
Step 2: Place frozen dough balls on a parchment-lined baking sheet (no need to thaw).
Step 3: Add 2-3 minutes to the normal baking time (about 14-15 minutes total).
Step 4: Look for golden edges with slightly soft centers to know when they’re done.
Conclusion
With their perfect chewy centers and crisp edges, they satisfy sweet cravings without compromising dietary needs.
The one-bowl method makes them quick to prepare, and the storage tips help you enjoy them anytime.
My non-vegan friends always ask for the recipe after trying them!
I hope you’ll try these cookies and let me know what you think in the comments below.
Did you add your own special mix-ins?
Share your cookie photos on social media so we can all get inspired by your baking skills!