
DIY Nesting Boxes: Simple Plans for Your Chicken Coop
Nesting boxes are an important part of any chicken coop. They provide a safe, comfortable spot for your hens to lay eggs.
Building your own nesting boxes is a great way to save money and create something that fits your coop just right.
You have the satisfaction of making something with your own hands, but you’ll also ensure the boxes meet your hens’ needs.
This guide walks you through each step of the process, making it simple for anyone with basic woodworking skills.
By following these instructions, you’ll build strong, functional boxes that will last for years and keep your chickens happy and comfortable.
Materials & Tools You’ll Need for Nesting Boxes
You’ll need basic materials like pine boards, furring strips, screws, and hinges to build your nesting boxes.
Gather tools such as a saw, drill, screwdriver, and measuring tape to complete the project.
Materials List
- 1″ x 12″ pine boards (about 16 feet total)
- 1″ x 2″ furring strips (about 8 feet)
- 1 5/8″ deck screws
- 3/4″ wood screws
- Cabinet hinges (2 per nesting box)
- Simple latches
- Wood glue
- Sandpaper (medium and fine grit)
- Optional: Non-toxic paint or sealer
Tools Needed
- Circular saw or hand saw
- Drill with bits
- Screwdriver
- Measuring tape
- Square
- Pencil
- Kreg Jig (helpful but not required)
- Sander or sanding block
Step-by-Step Instructions for DIY Nesting Boxes
Step 1: Frame Construction
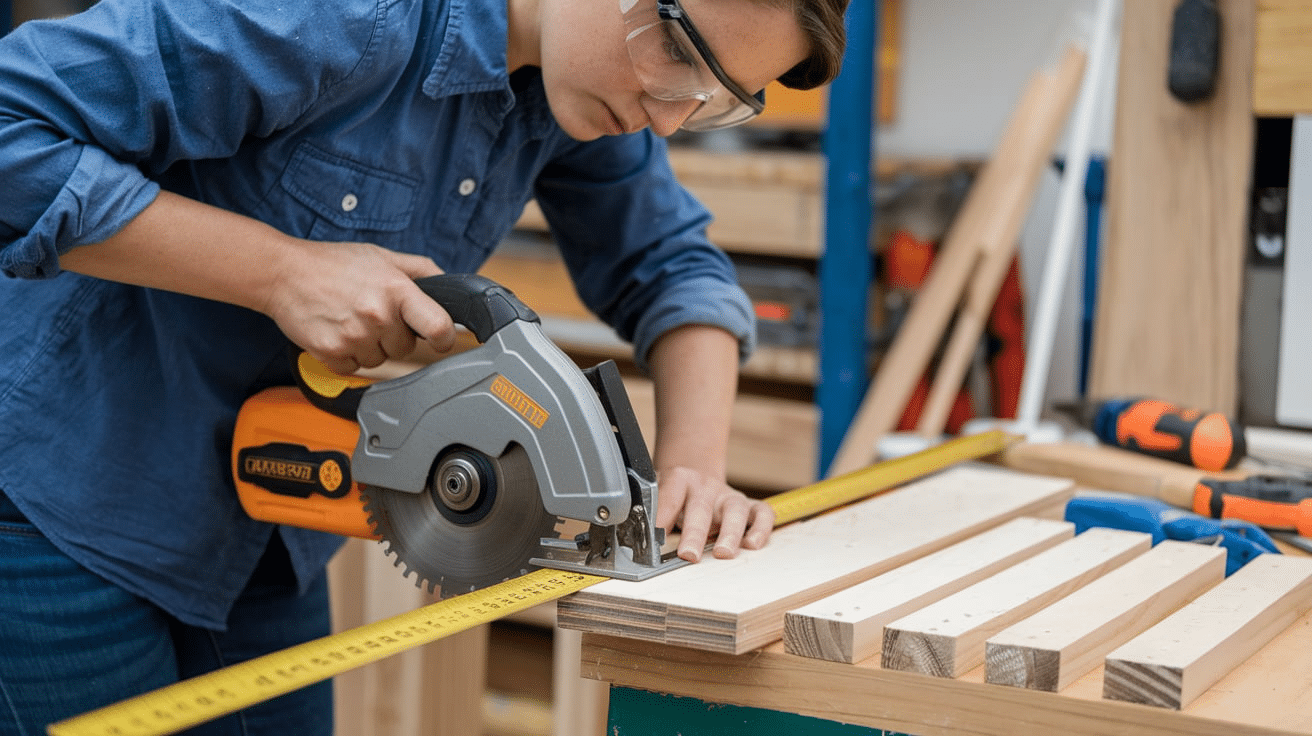
- Measure and cut the base piece at 12″ x 36″ for a three-box setup
- Cut side pieces at 12″ x 12″ (you’ll need 4 total)
- Cut divider pieces at 11″ x 12″ (you’ll need 2 for three boxes)
- Cut the back piece at 12″ x 36″
- Cut the roof piece at 14″ x 38″ (allowing for overhang)
Tip: Double-check all measurements before cutting. Many beginners cut too quickly and waste materials.
Step 2: Assembling the Sides and Dividers
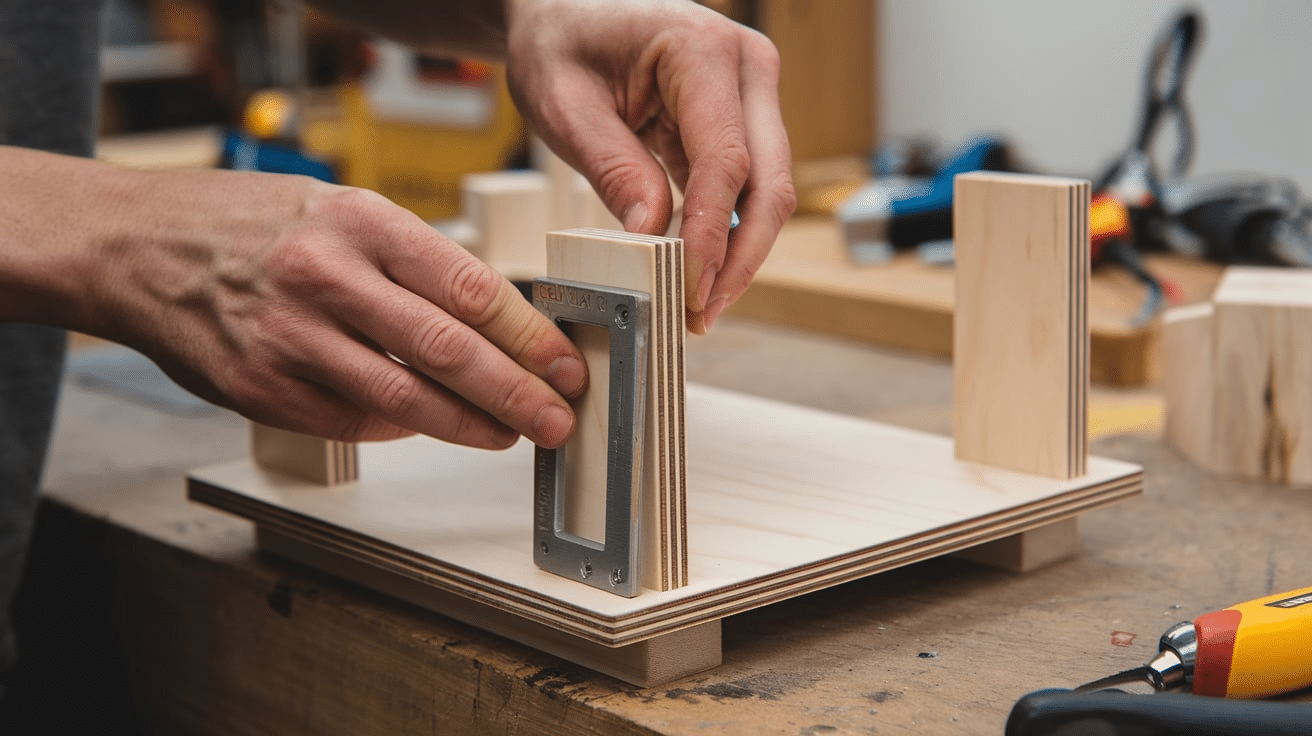
- Attach the side pieces to the base using wood glue and screws
- Make sure corners are at 90° angles using your square
- Place dividers equidistant (about 12″ apart) and secure with screws
- Check that the structure is square by measuring diagonally from corner to corner
Tip: Pre-drill holes to avoid splitting the wood, especially near the edges.
Step 3: Installing the Back and Front
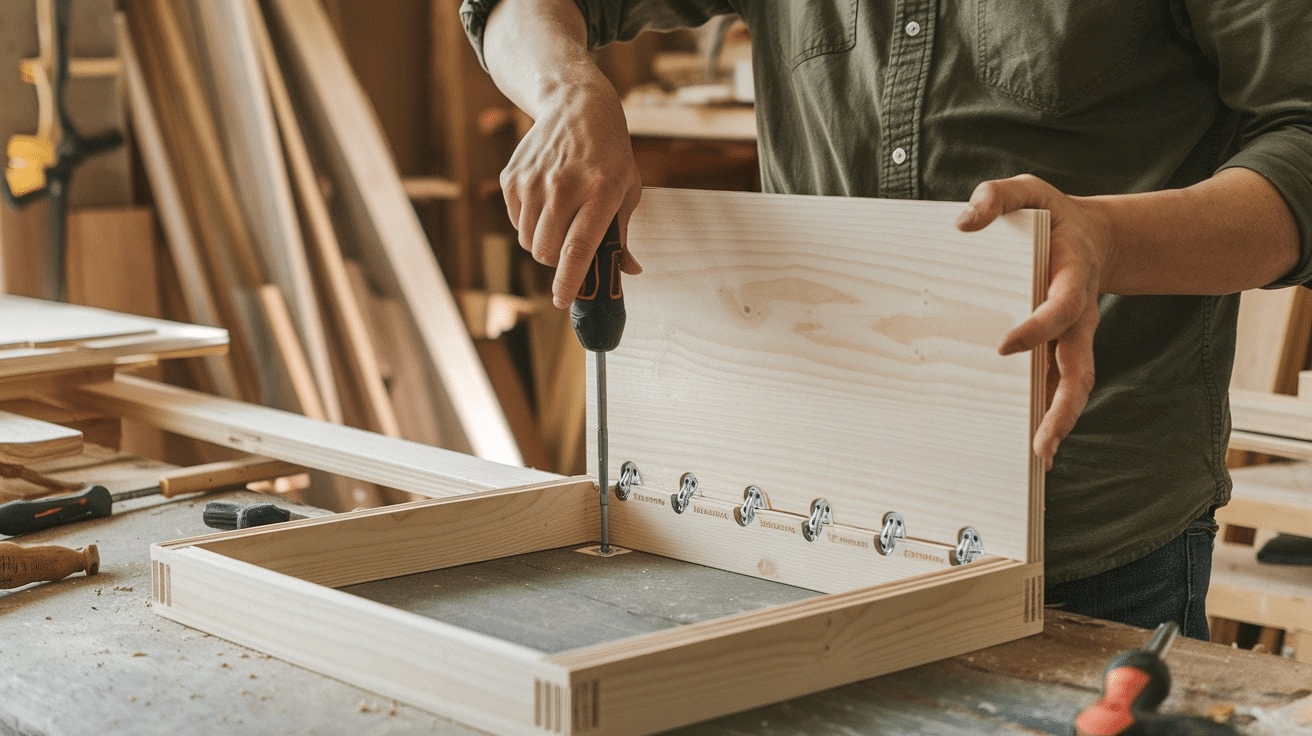
- Attach the back piece flush with the rear edges of the structure
- Use wood glue and screws every 4-6 inches for proper support
- Measure and cut a 4″ strip of wood for the front lip of each box
- Attach the front lip pieces 4″ up from the bottom of each box opening
Tip: The front lip should be high enough to keep bedding in but low enough for hens to step over easily.
Step 4: Installing the Roof and Latches
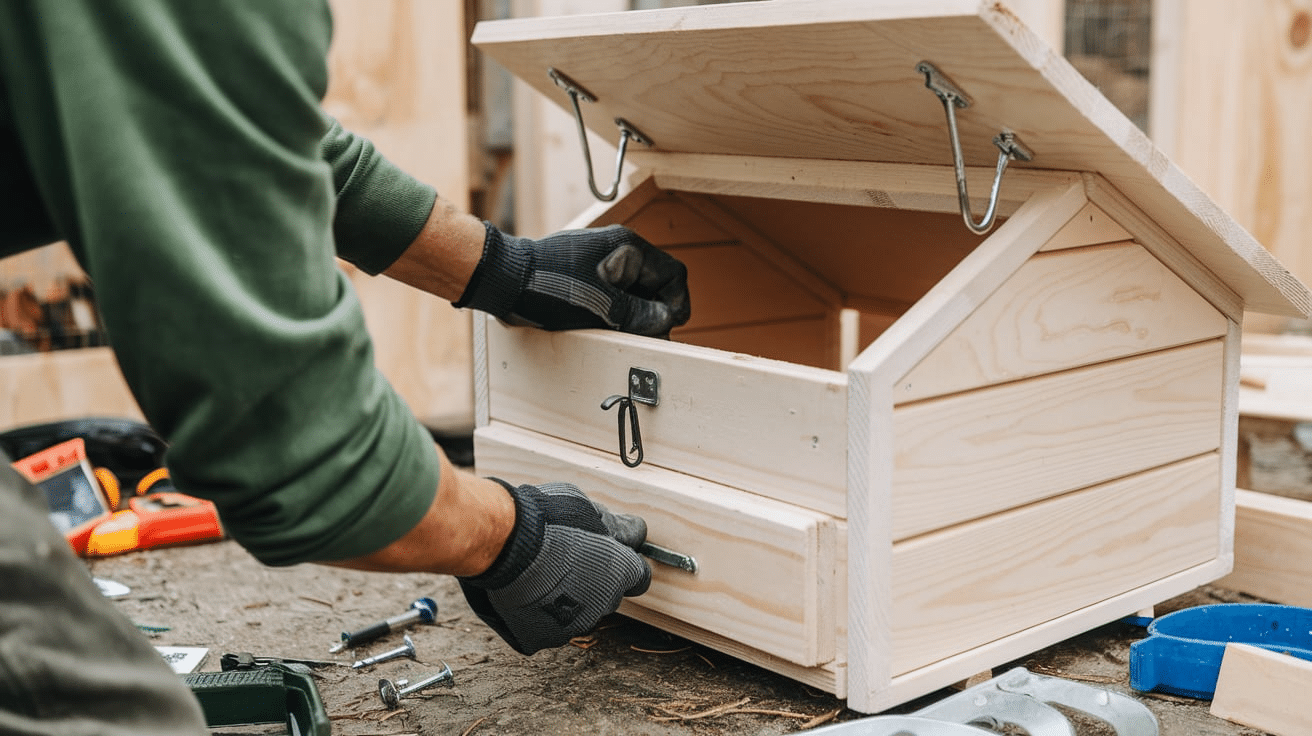
- Attach hinges to the back edge of the roof piece
- Secure the hinges to the back of the nesting box structure
- Install a simple latch at the front for easy access
- Sand all edges smooth to prevent chicken injuries
Tip: If your boxes are exposed to moisture, apply a thin bead of silicone caulk along the roof seam to prevent water leakage.
How to Customize Your Nesting Boxes
You can adjust the size of your nesting boxes to fit your space, creating a more compact or larger unit.
For easy cleaning and better water runoff, consider adding features like removable trays or sloped roofs.
Size Adaptations
You can create a more compact unit for smaller coops by building a 24″ wide setup with two boxes.
This allows you to save space while still giving your chickens a comfortable area to lay eggs.
Consider building multiple units or a longer unit with additional sections for larger coops.
This approach allows you to expand as needed while maintaining an efficient and functional design for your flock.
Functional Additions
You can customize your nesting boxes in a few simple ways to make them even more functional.
A sloped roof design helps with water runoff, keeping the boxes dry.
Adding removable bottom trays makes cleaning easier, as you can quickly remove and replace bedding.
For added privacy, you can use curtain rods with small fabric pieces to create a more secluded space for your hens.
External egg collection access doors can make it more convenient to gather eggs without entering the coop.
These adjustments can help improve your chickens’ comfort and ease of maintaining the nesting boxes.
Common Mistakes to Avoid While Making Nesting Boxes
Some common mistakes to avoid when building nesting boxes include making them too large, as 12″ x 12″ is the ideal size; larger boxes may encourage multiple hens to use the same space.
It’s also important not to build the boxes too low to the ground; they should be at least 18″ off the floor for easy access.
Another mistake is forgetting to add ventilation holes in the back or sides of the boxes, which can lead to poor air circulation.
Additionally, it’s best not to use treated lumber, as it may contain chemicals that could harm your chickens.
Finally, be sure the front lip of the box isn’t too high, as hens need to easily step over it when entering.
Maintenance Tips for Your Nesting Boxes
- Clean boxes weekly by removing soiled bedding
- Check for loose screws or weakening joints monthly
- Apply fresh bedding (straw or pine shavings work well)
- Inspect for signs of pests or parasites regularly
- Treat wood annually with food-safe mineral oil to extend life
Conclusion
Building your own nesting boxes is a straightforward way to improve your chicken coop.
These boxes not only make egg collection easier but also provide your hens with a comfortable and clean space to lay eggs.
This project allows you to create something that works for your specific setup, giving you a sense of accomplishment.
A secure and peaceful place for your chickens to lay can improve their egg production.
By making your own nesting boxes, you’re taking an easy step toward improving your flock’s overall health and well-being.
Frequently Asked Questions
What are the Best Materials for DIY Nesting Boxes?
Pine boards are best for cost and workability. Cedar is great but pricier.
How High should Nesting Boxes be in a Chicken Coop?
18-24 inches off the ground is ideal.
How Many Nesting Boxes Do I Need For 10 Chickens?
3-4 boxes are sufficient for 10 chickens.
Can I Use Recycled Materials to Build Nesting Boxes?
Yes, clean pallet wood or old cabinets work well if untreated.
What is the Best Location for Placing Nesting Boxes in a Chicken Coop?
A quiet, darker corner away from roosting areas is best.


