
Stylish and Affordable: How to Revamp Your Half Bath on a Budget
Have you ever walked into your half bath and wished for a magic wand to make it look better without emptying your wallet? You’re not alone.
Many homeowners feel stuck with an outdated small bathroom, thinking a makeover is too costly.
But here’s the good news: you can create a stylish half bath without spending a fortune.
This article will show you how to transform your small bathroom on a budget.
We’ll cover smart ways to refresh your space, from simple DIY projects to clever design tricks.
You’ll learn about affordable materials that look pricey, easy updates that make a big impact, and money-saving tips for fixtures and decor.
Get ready to turn your half bath from drab to fab without breaking the bank.
Evaluating and Budgeting for Your Half Bath Makeover
Before jumping into your half bath renovation, it’s important to assess your current space and plan your budget carefully. This step will help you make smart choices and get the most value from your makeover.
Analyze the Current Layout and Features
Start by taking a good look at your half bath. Notice the overall layout, how light comes in, and what’s already there.
Small things like changing a faucet or putting up a new mirror can make a big difference.
It’s helpful to have a clear idea of what you want before you start making changes.
To begin:
- Make a list of what you like and don’t like about your current half bath.
- Take measurements of the room and key fixtures.
- Check the condition of important items like the toilet, sink, and flooring.
- Think about how you use the space and what could make it work better for you.
Craft a Smart, Affordable Budget
Creating a budget that works for you is key to a successful makeover. Here’s how to do it:
- Decide how much you can spend overall.
- List the items you need to buy or replace.
- Research prices for these items.
- Set aside some extra money for unexpected costs.
- Look for ways to save, like doing some work yourself or focusing on changes that make the biggest impact first.
Remember, you don’t have to do everything at once. You can spread out your updates over time to make it easier on your wallet.
Simple, Quick and Budget-Friendly Changes
Making your half bath look better doesn’t have to cost a lot or take much time.
This section will show you quick and easy changes that can give your bathroom a fresh look without spending too much money.
We’ll cover everything from painting to small decorations that can make a big difference.
Paint for a Fresh Look
Painting is an easy way to change how your bathroom looks. Light colors can make the room feel bigger and brighter. Here’s how to do it:
- Choose soft, light colors like pale blue or light gray.
- Buy washable paint made for bathrooms to handle moisture.
- Clean and dry the walls before painting.
- Use painter’s tape to protect areas you don’t want to paint.
- Apply two thin coats for the best look.
If painting seems too much, try peel-and-stick wallpaper. It’s easy to put up and take down, and can add fun patterns to one wall.
Update Fixtures and Hardware
Changing small things can make your bathroom look new:
- Replace old faucets with new, shiny ones.
- Put in new towel holders or toilet paper holders.
- Change cabinet handles for a fresh look.
Look for good deals at big box stores or online sales. Sometimes, you can find nice-looking items that don’t cost much.
Change or Improve the Mirror
A new mirror can change how your bathroom looks:
- Add a frame to your old mirror using wood or stick-on frame kits.
- Or buy a new, stylish mirror that fits your budget.
Thrift stores often have cheap mirrors you can paint to match your bathroom.
Better Lighting
Good lighting makes a big difference:
- Replace old light fixtures with new, bright ones.
- Use LED bulbs to save money on electricity.
- Add a small lamp on a shelf for extra light.
Look for sales on light fixtures, and watch online videos to learn how to install them yourself.
Add Simple Decorations
Small touches can add style:
- Get a new soap dispenser and toothbrush holder.
- Hang some nice towels in colors that match your bathroom.
- Put up small shelves for plants or pretty bottles.
Check discount stores or yard sales for unique items that don’t cost much. Remember, a few well-chosen pieces can make your bathroom look great without spending a lot.
Budget-Friendly DIY Ideas to Elevate Your Half Bath
DIY projects can give your half bath a unique look without spending too much. This section will show you some hands-on ideas to make your bathroom special. These projects range from easy to more complex, so you can choose what fits your skills and time.
1. Floating Shelves
Step-by-Step Guide to Installing Floating Shelves in Your Half Bath
Materials Needed:
- Floating shelf brackets
- Wooden shelves (cut to size)
- Wall anchors (if mounting into drywall)
- Drill and screws
- Level
- Measuring tape
- Pencil
- Stud finder
Step 1: Measure and Plan
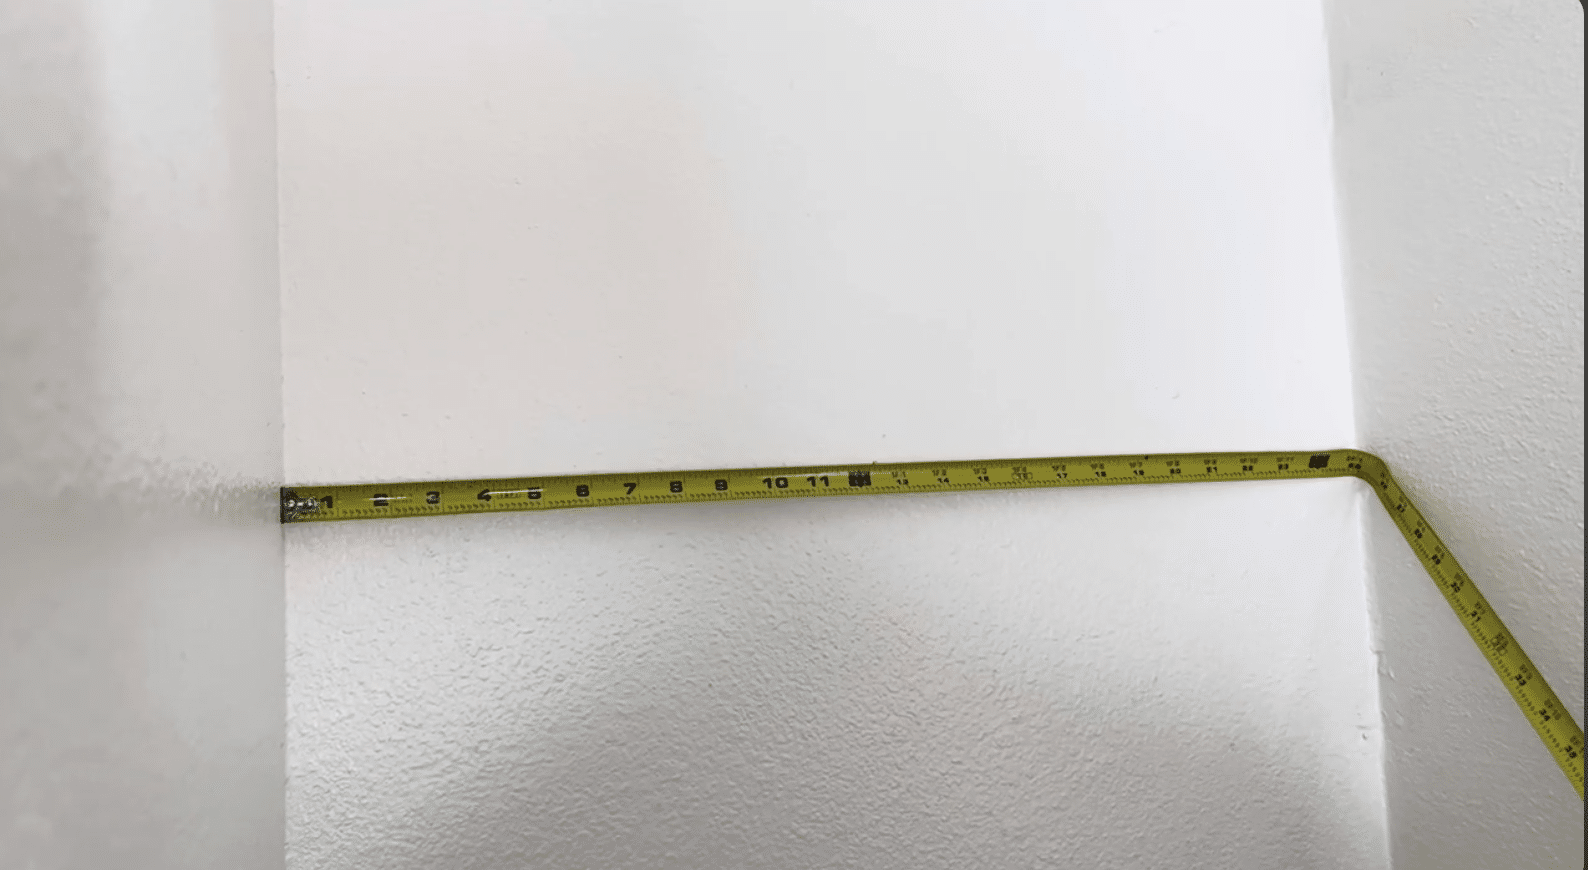
- Decide where you want your shelves.
- Measure the wall space carefully.
- Mark the spots for your shelves with a pencil.
- Use a level to make sure your marks are straight.
Step 2: Locate the Studs
- Use a stud finder to find wall studs.
- Mark stud locations with a pencil.
- If no studs are available, you’ll need to use wall anchors.
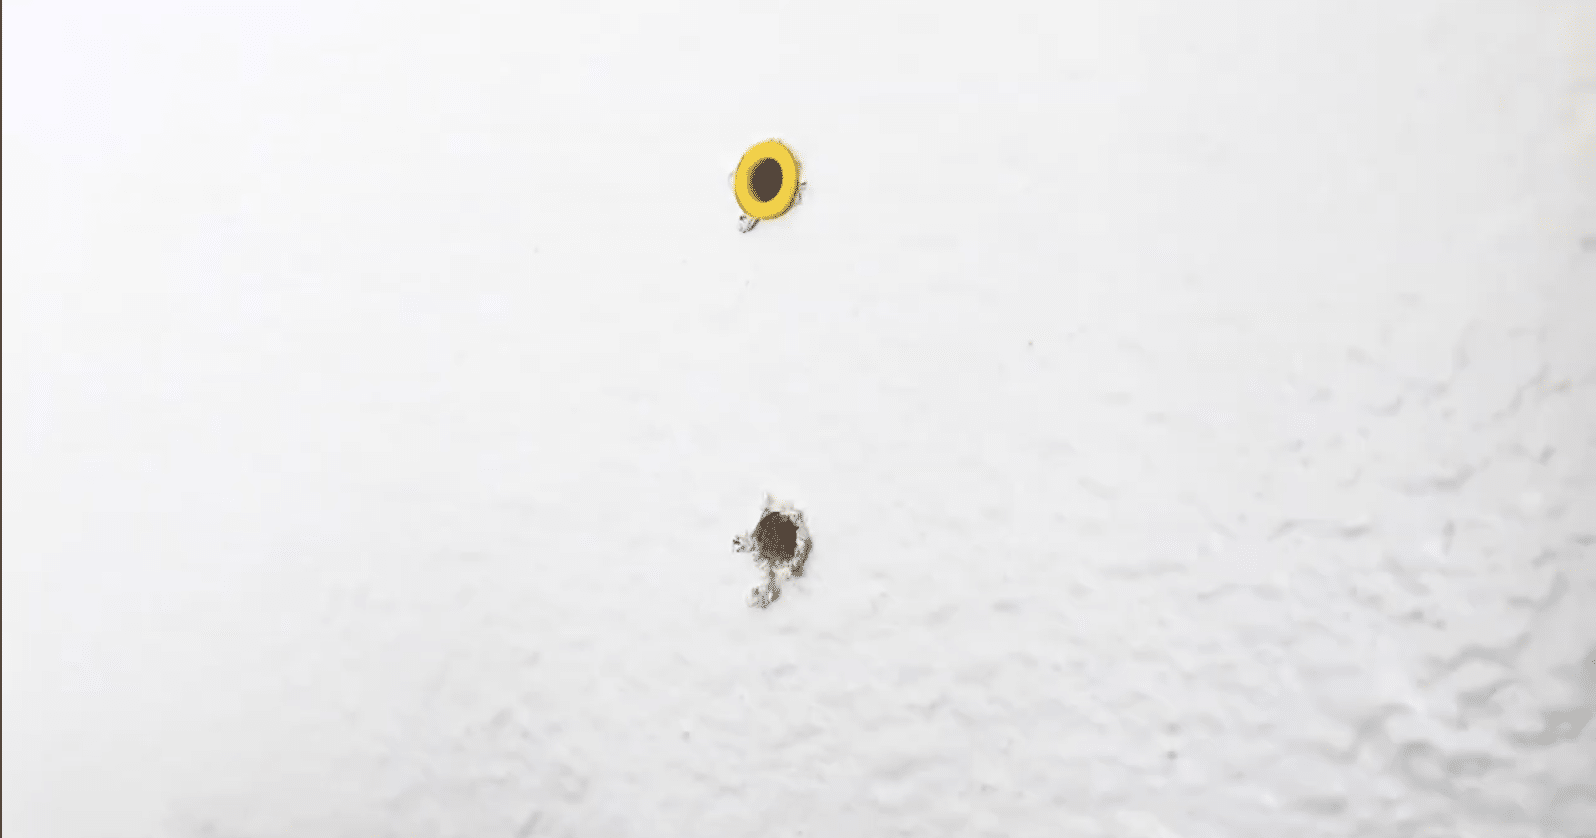
Step 3: Install the Brackets
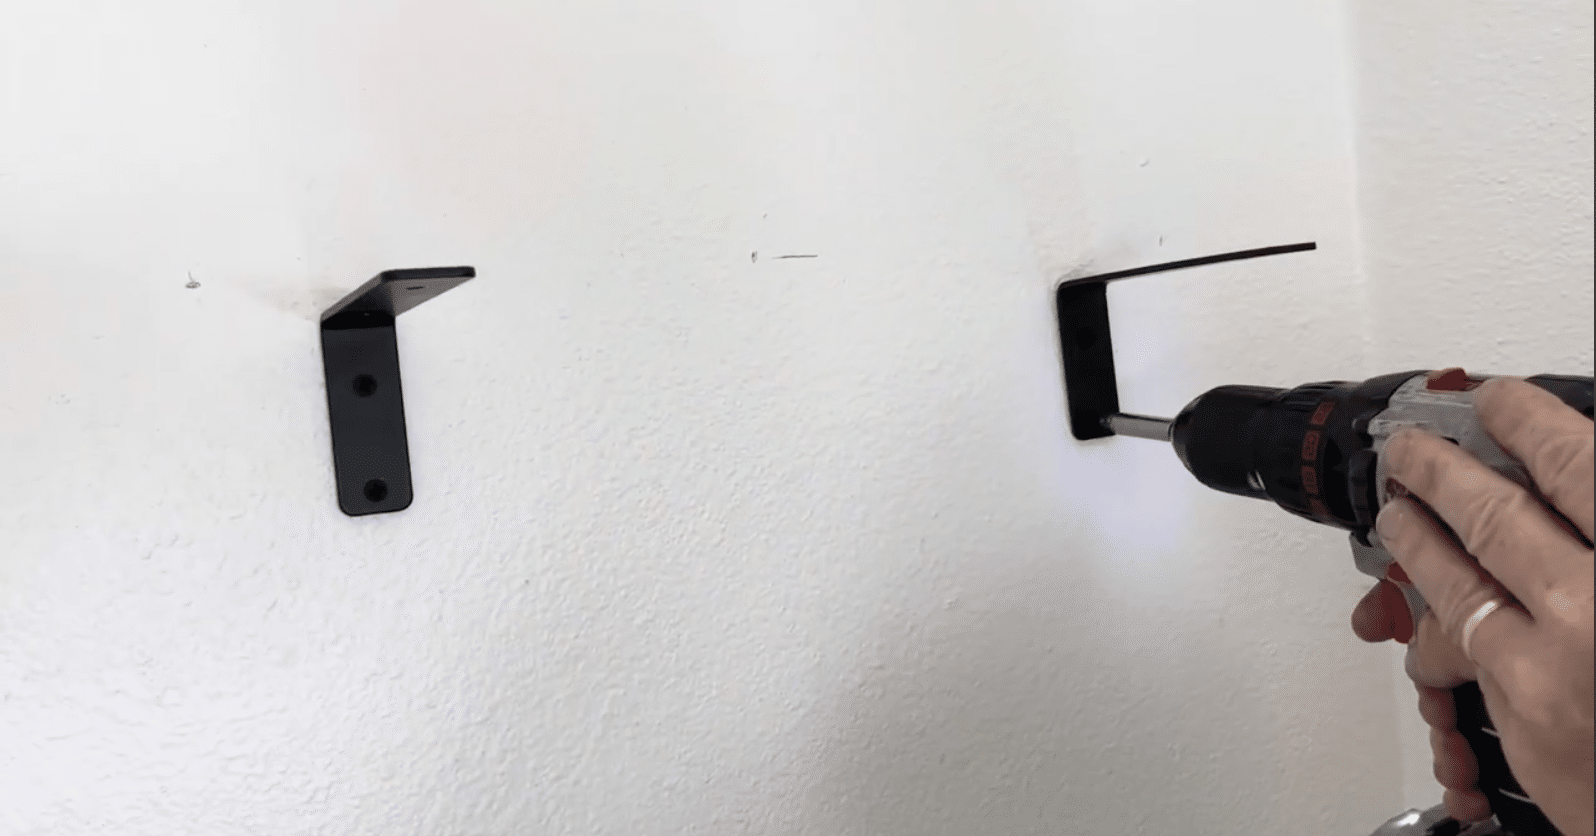
- Hold the bracket against the wall where you made your marks.
- Use a pencil to mark where the screws will go.
- If using studs, drill small pilot holes.
- If using anchors, drill holes and insert the anchors.
- Screw the brackets into place.
Step 4: Mount the Shelves
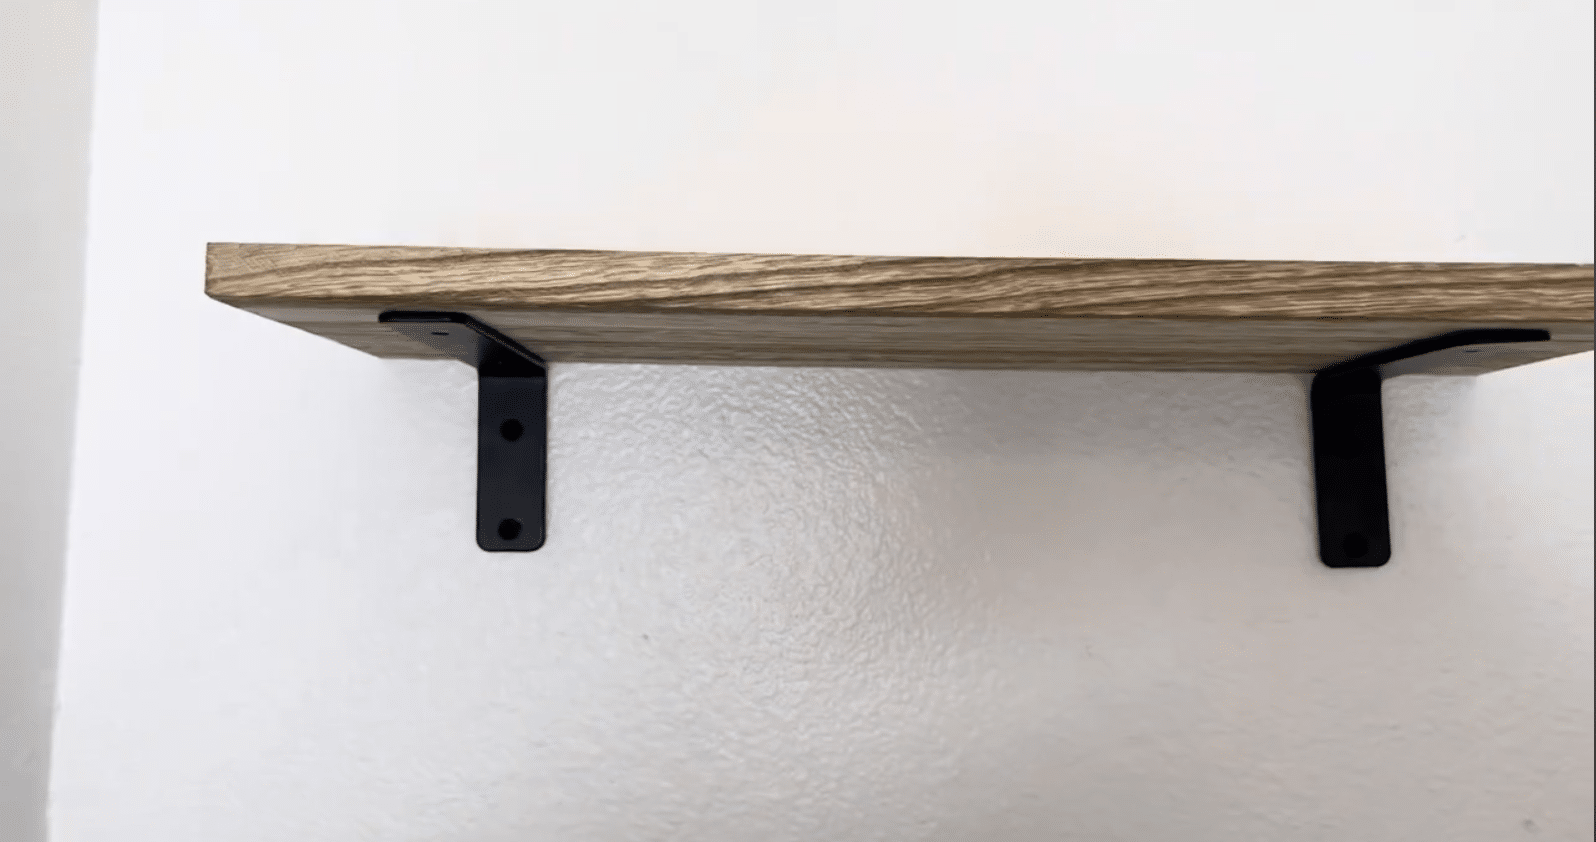
- Slide the shelf onto the mounted brackets.
- Check that the shelf is level.
Step 5: Secure the Shelves
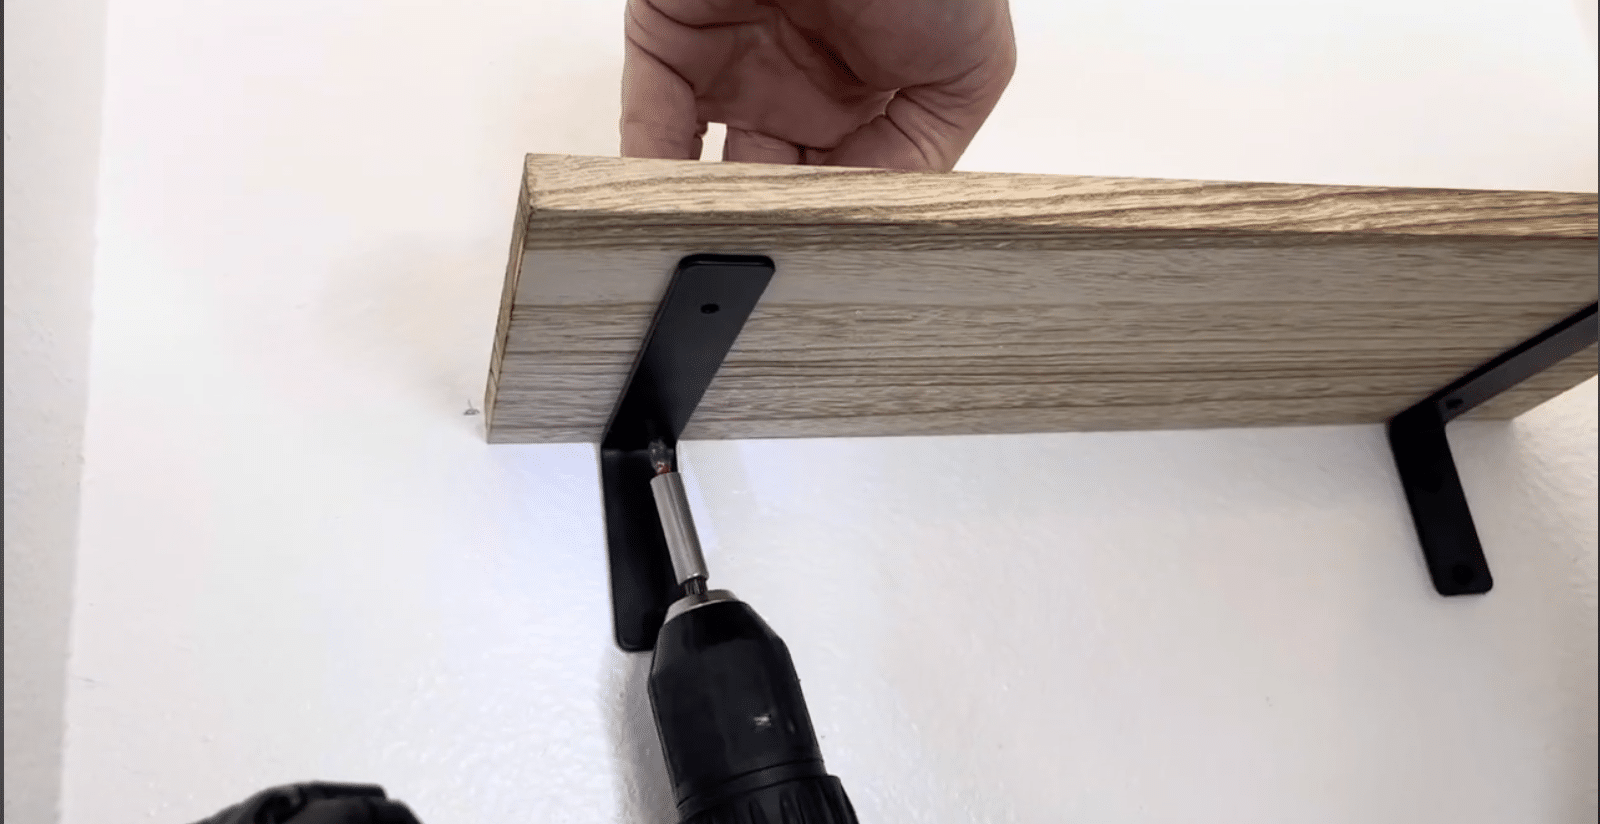
- Some brackets may have top screws to secure the shelf.
- If so, drill small pilot holes through the bracket into the shelf.
- Screw the shelf to the bracket.
Remember to work carefully and check your measurements often. With patience, you can create beautiful, useful shelves for your half bath.
For more detailed information on how to install a Floating Shelf Click Here.
2. DIY Towel Ladder
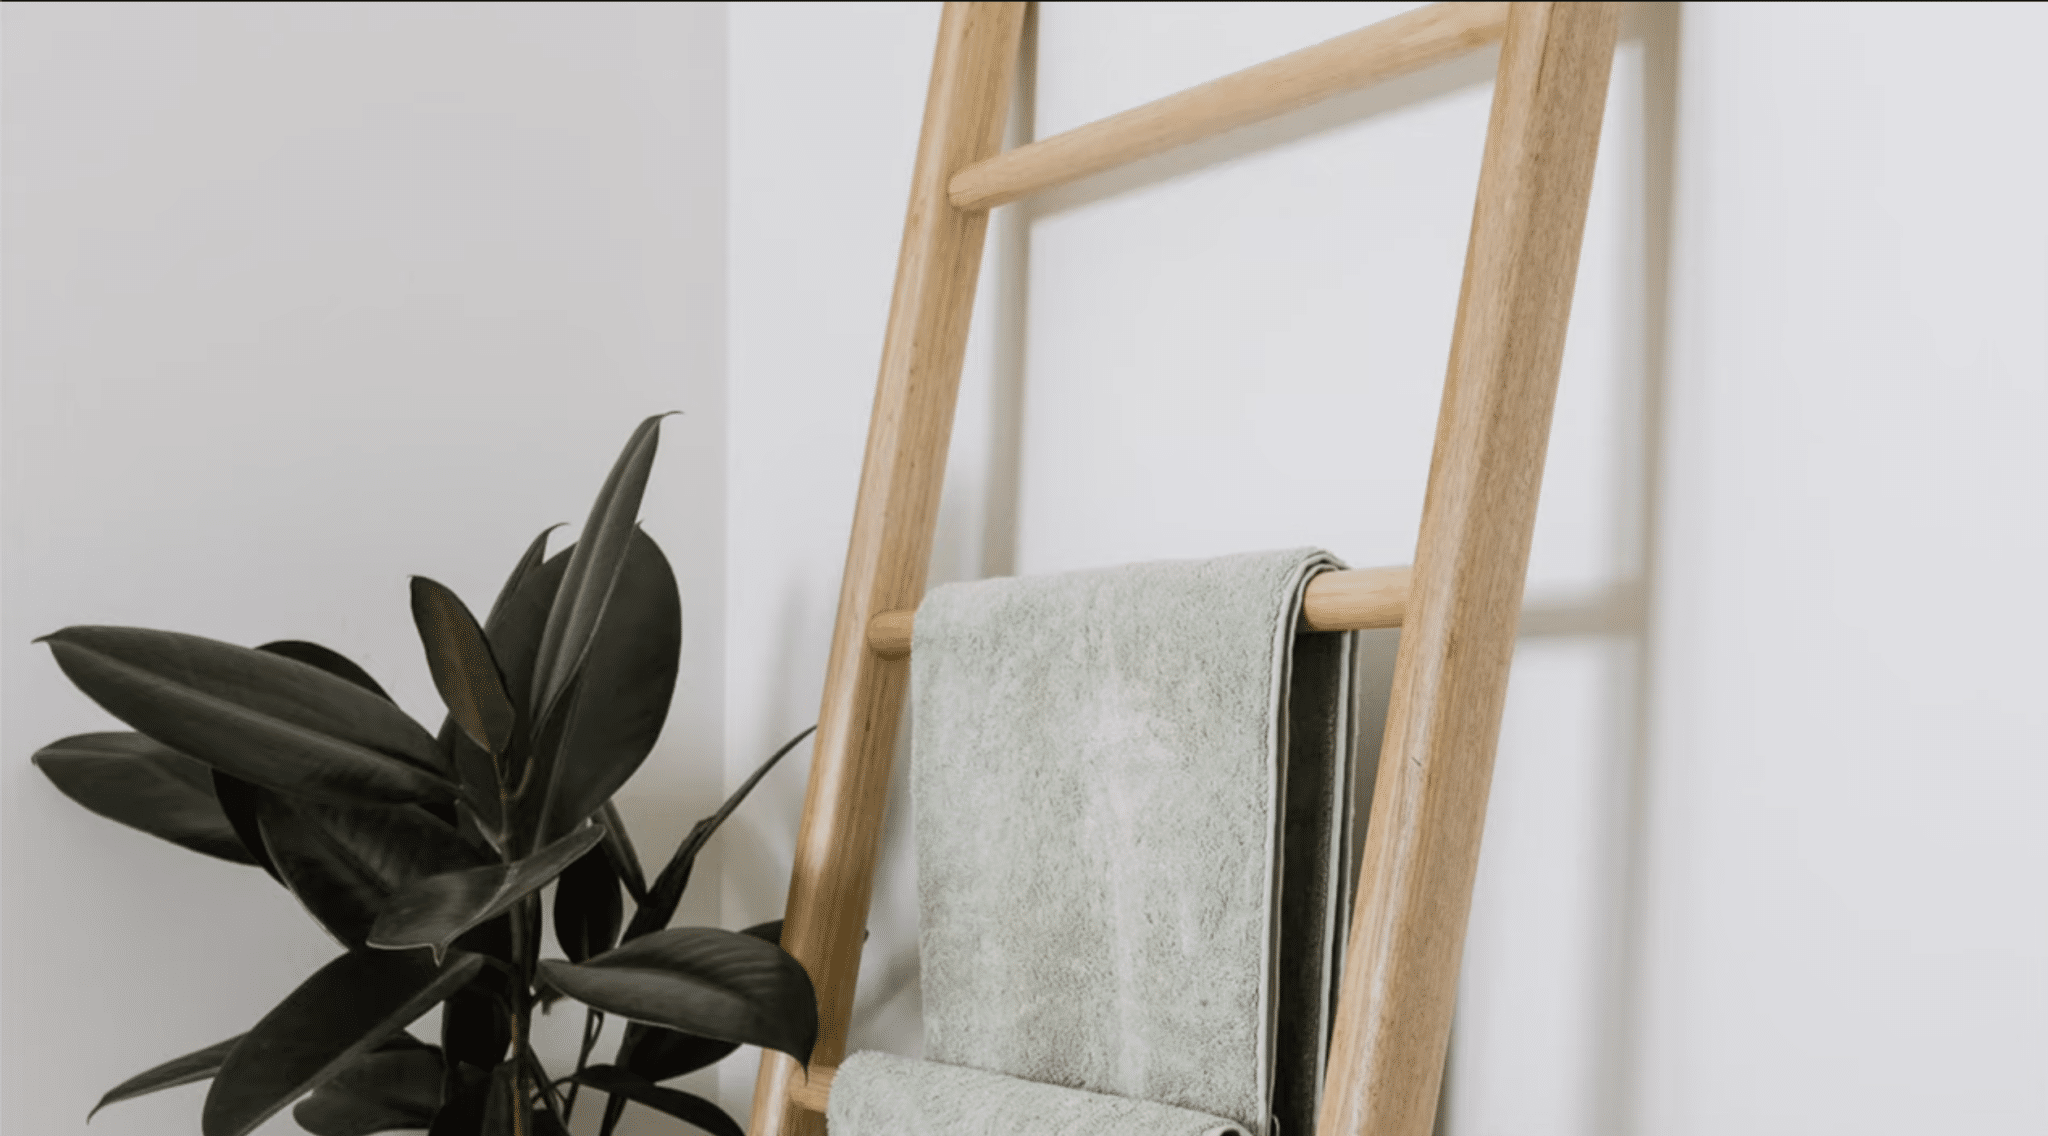
Step-by-Step Guide to Make DIY Towel Ladder For Your Half Bath
Materials Needed:
- Reclaimed hardwood (for the side rails)
- Hardwood dowels (for the rungs)
- Waterproof wood glue
- Sandpaper (120-grit and hand sandpaper)
- Wood finish (e.g., hard wax oil)
- Tools: Router with a bullnose bit, saw, drill with 3mm and 9.5mm drill bits, rubber mallet, clamps, chisel
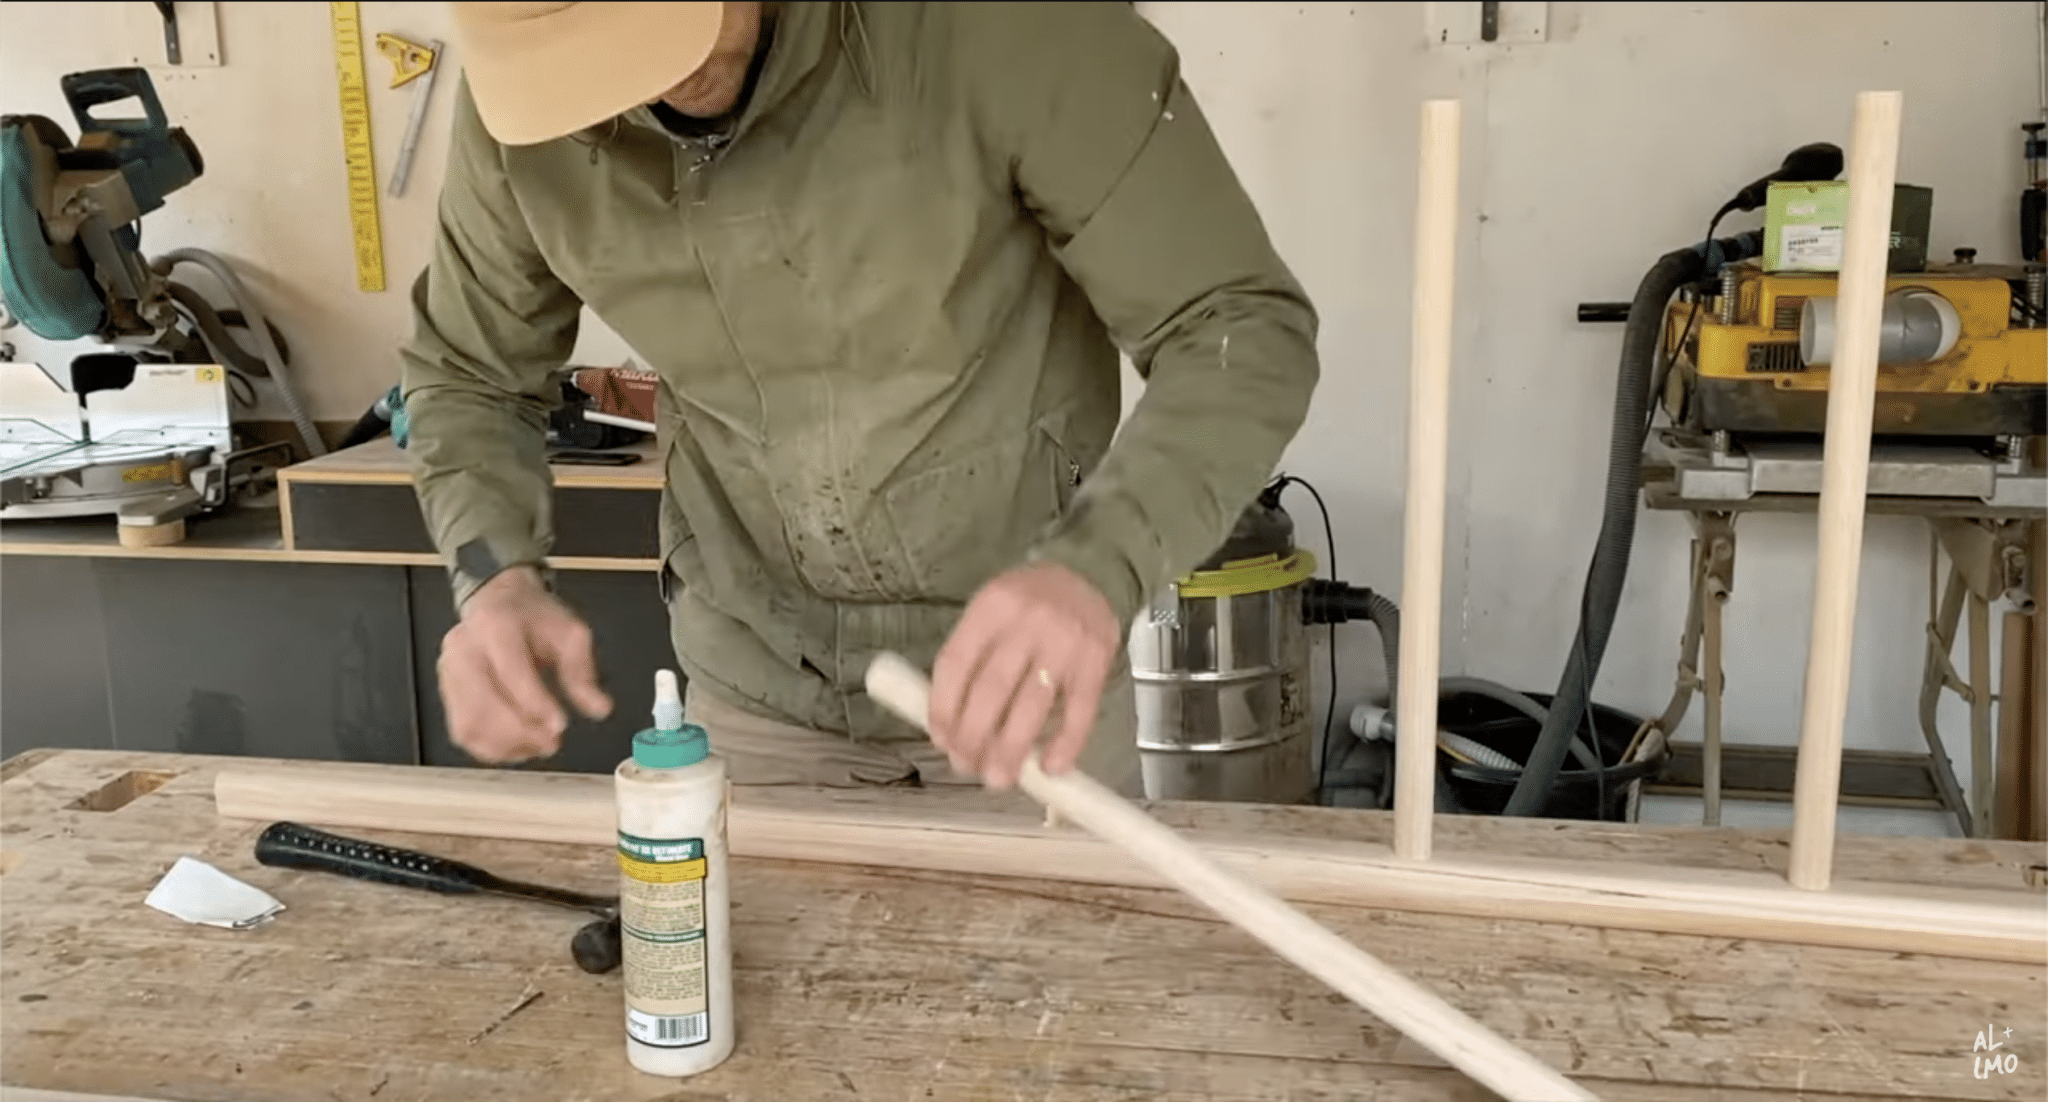
Step 1: Preparing the Wood
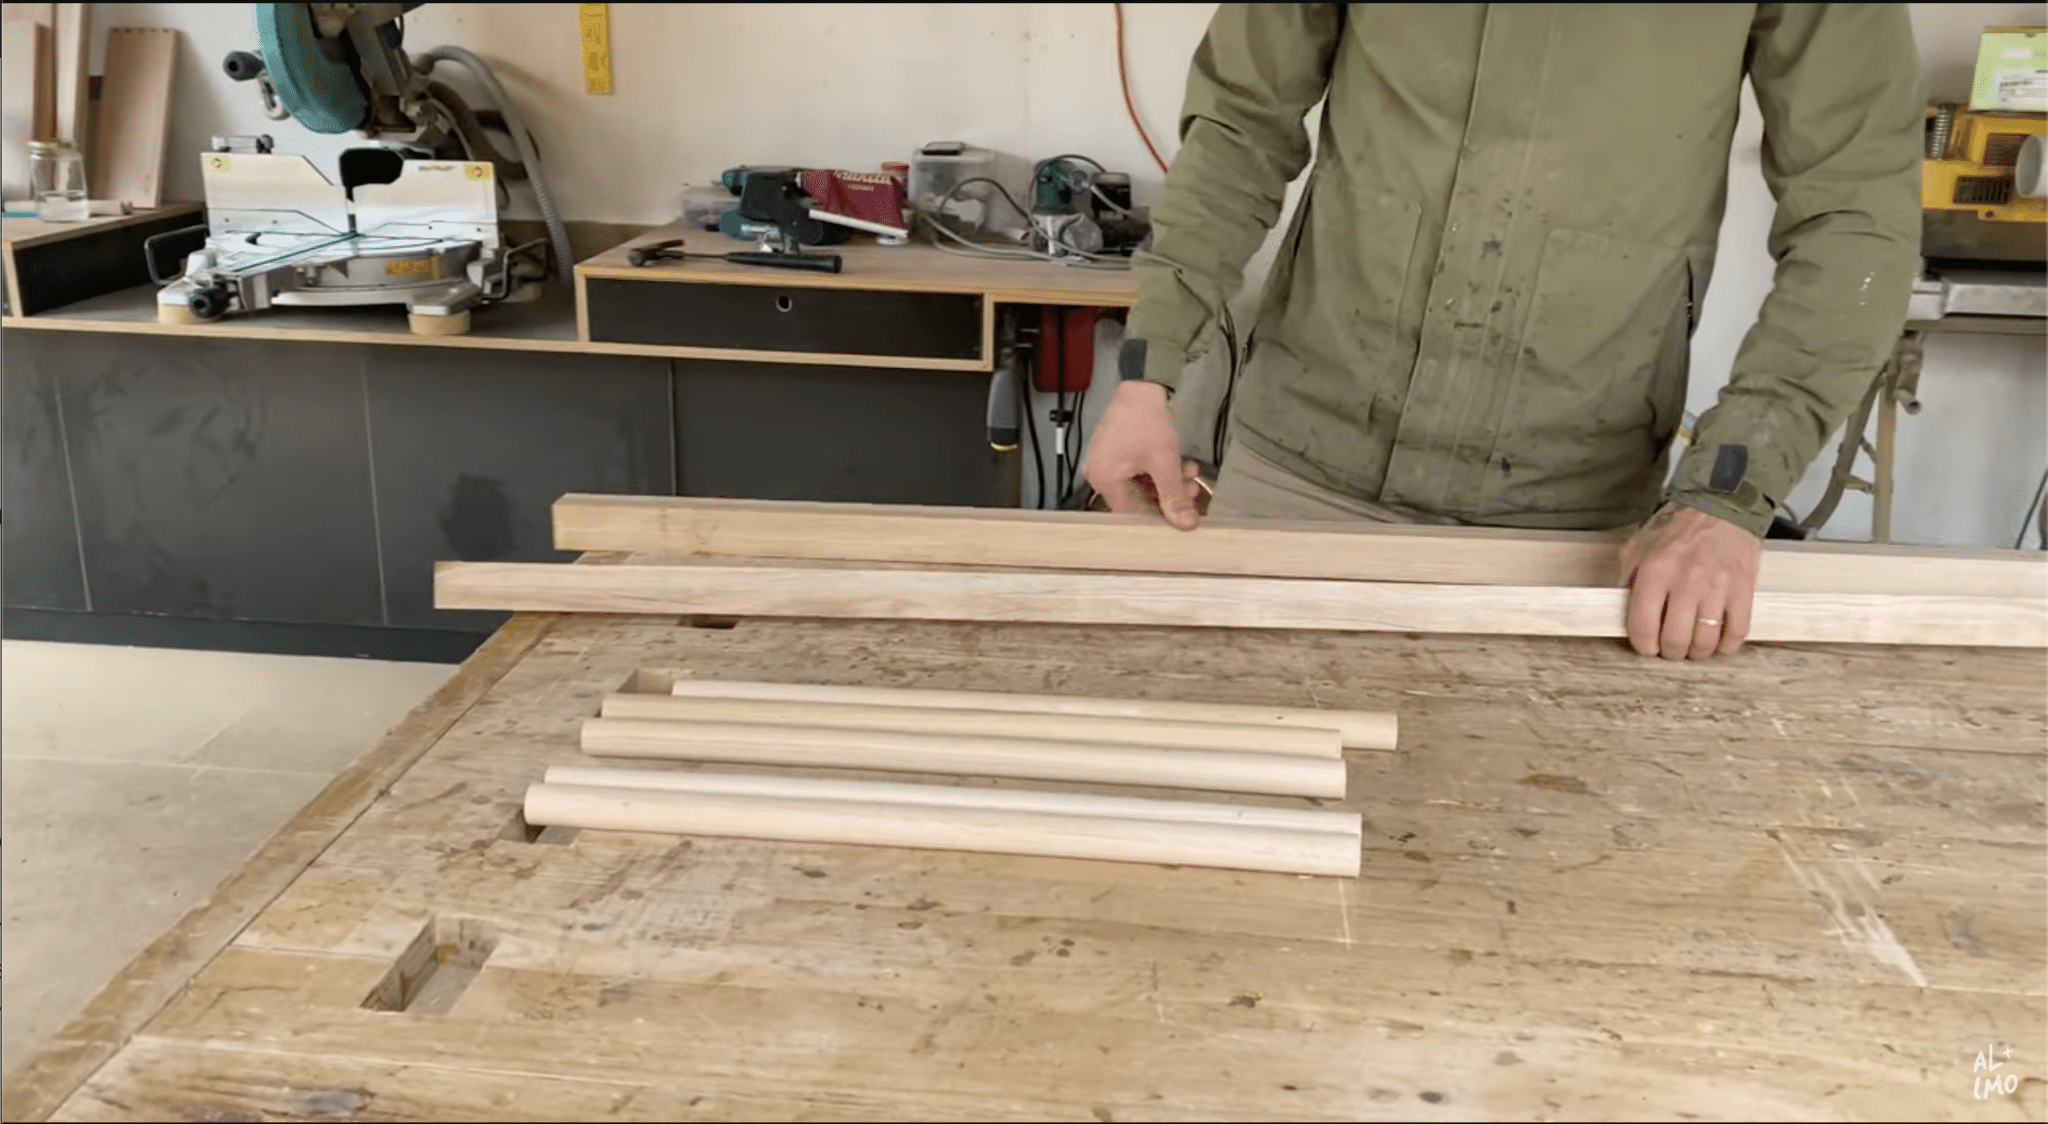
- Select your wood: Use reclaimed hardwood for the side rails and hardwood dowels for the rungs. This will give the ladder its rustic, natural look.
- Test routing: Before starting on your main pieces, do a test run on a scrap piece of timber using a bullnose bit to ensure you’re happy with the finish.
- Route the edges: Once satisfied, clamp the side rails to your workbench and use the bullnose bit to route all four edges of each side rail.
Step 2: Cutting the Side Rails
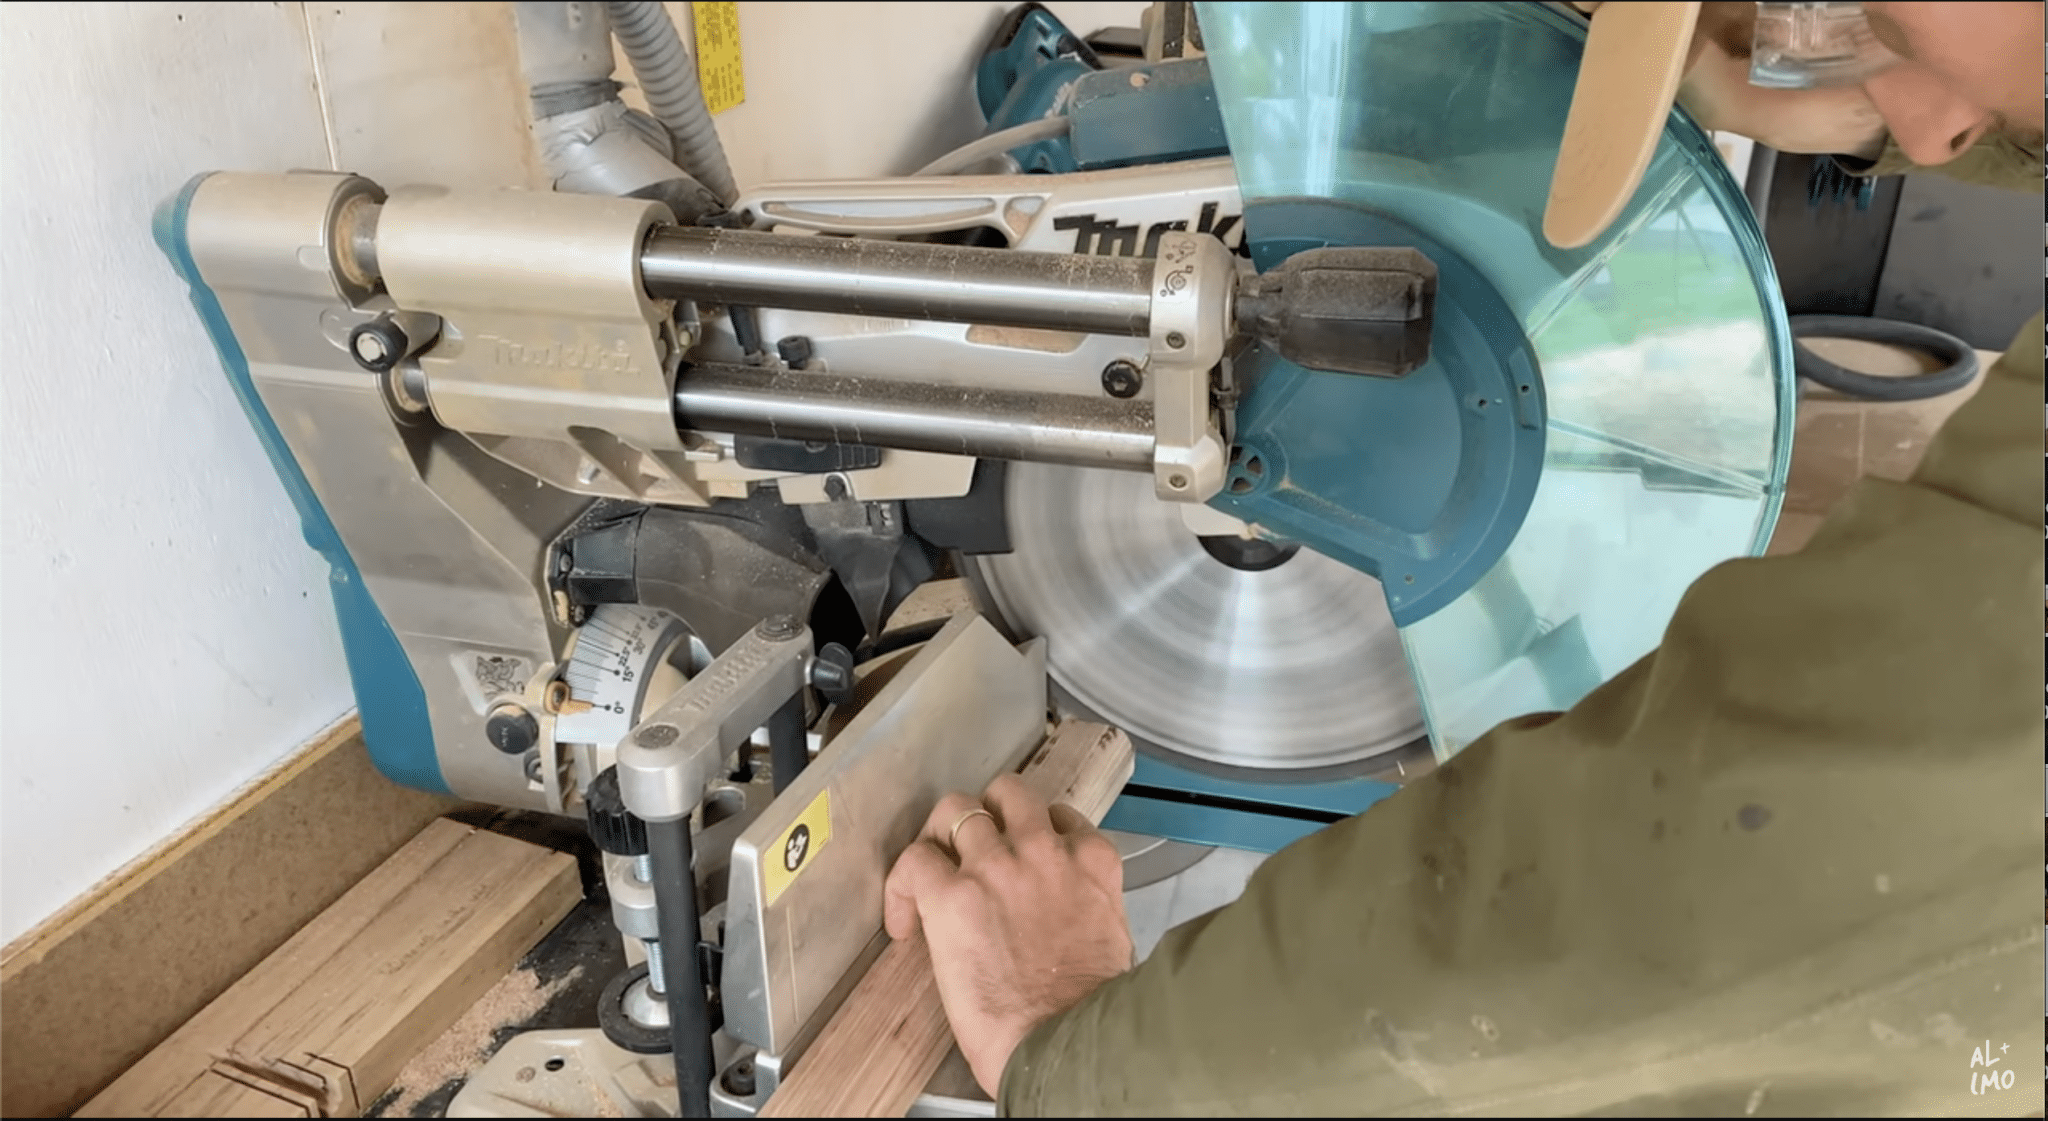
- Cut to length: Measure and cut your side rails to the desired length. For added stability, cut a 10-degree angle at the bottom of each rail and a square cut at the top.
- Smooth the top edges: Use your bullnose bit again to rout the top edges of the side rails.
Step 3: Cutting the Rungs
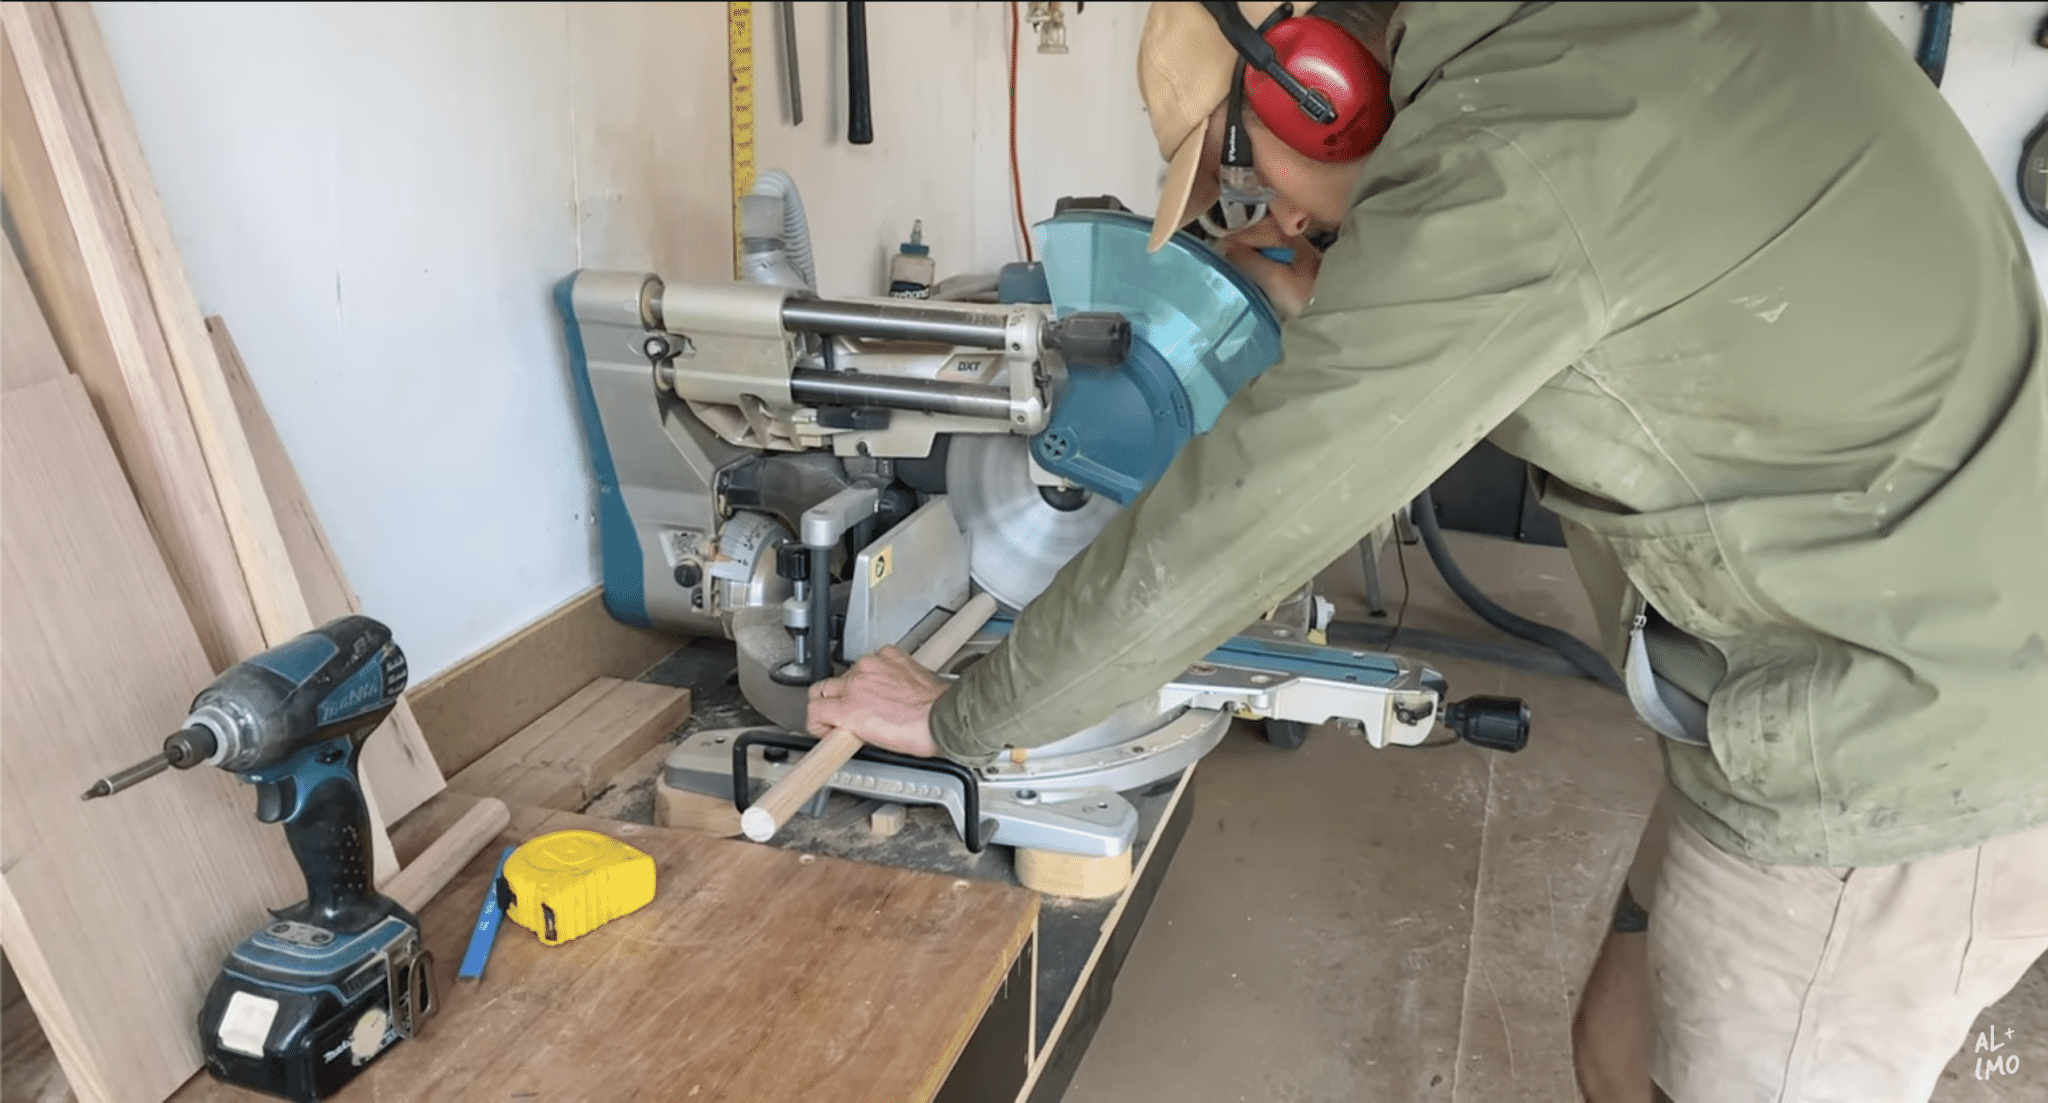
- Cut the dowels: Measure and cut your dowels to the appropriate length for the ladder rungs. You can access the specific measurements at alanimo.com if needed.
Step 4: Sanding the Pieces
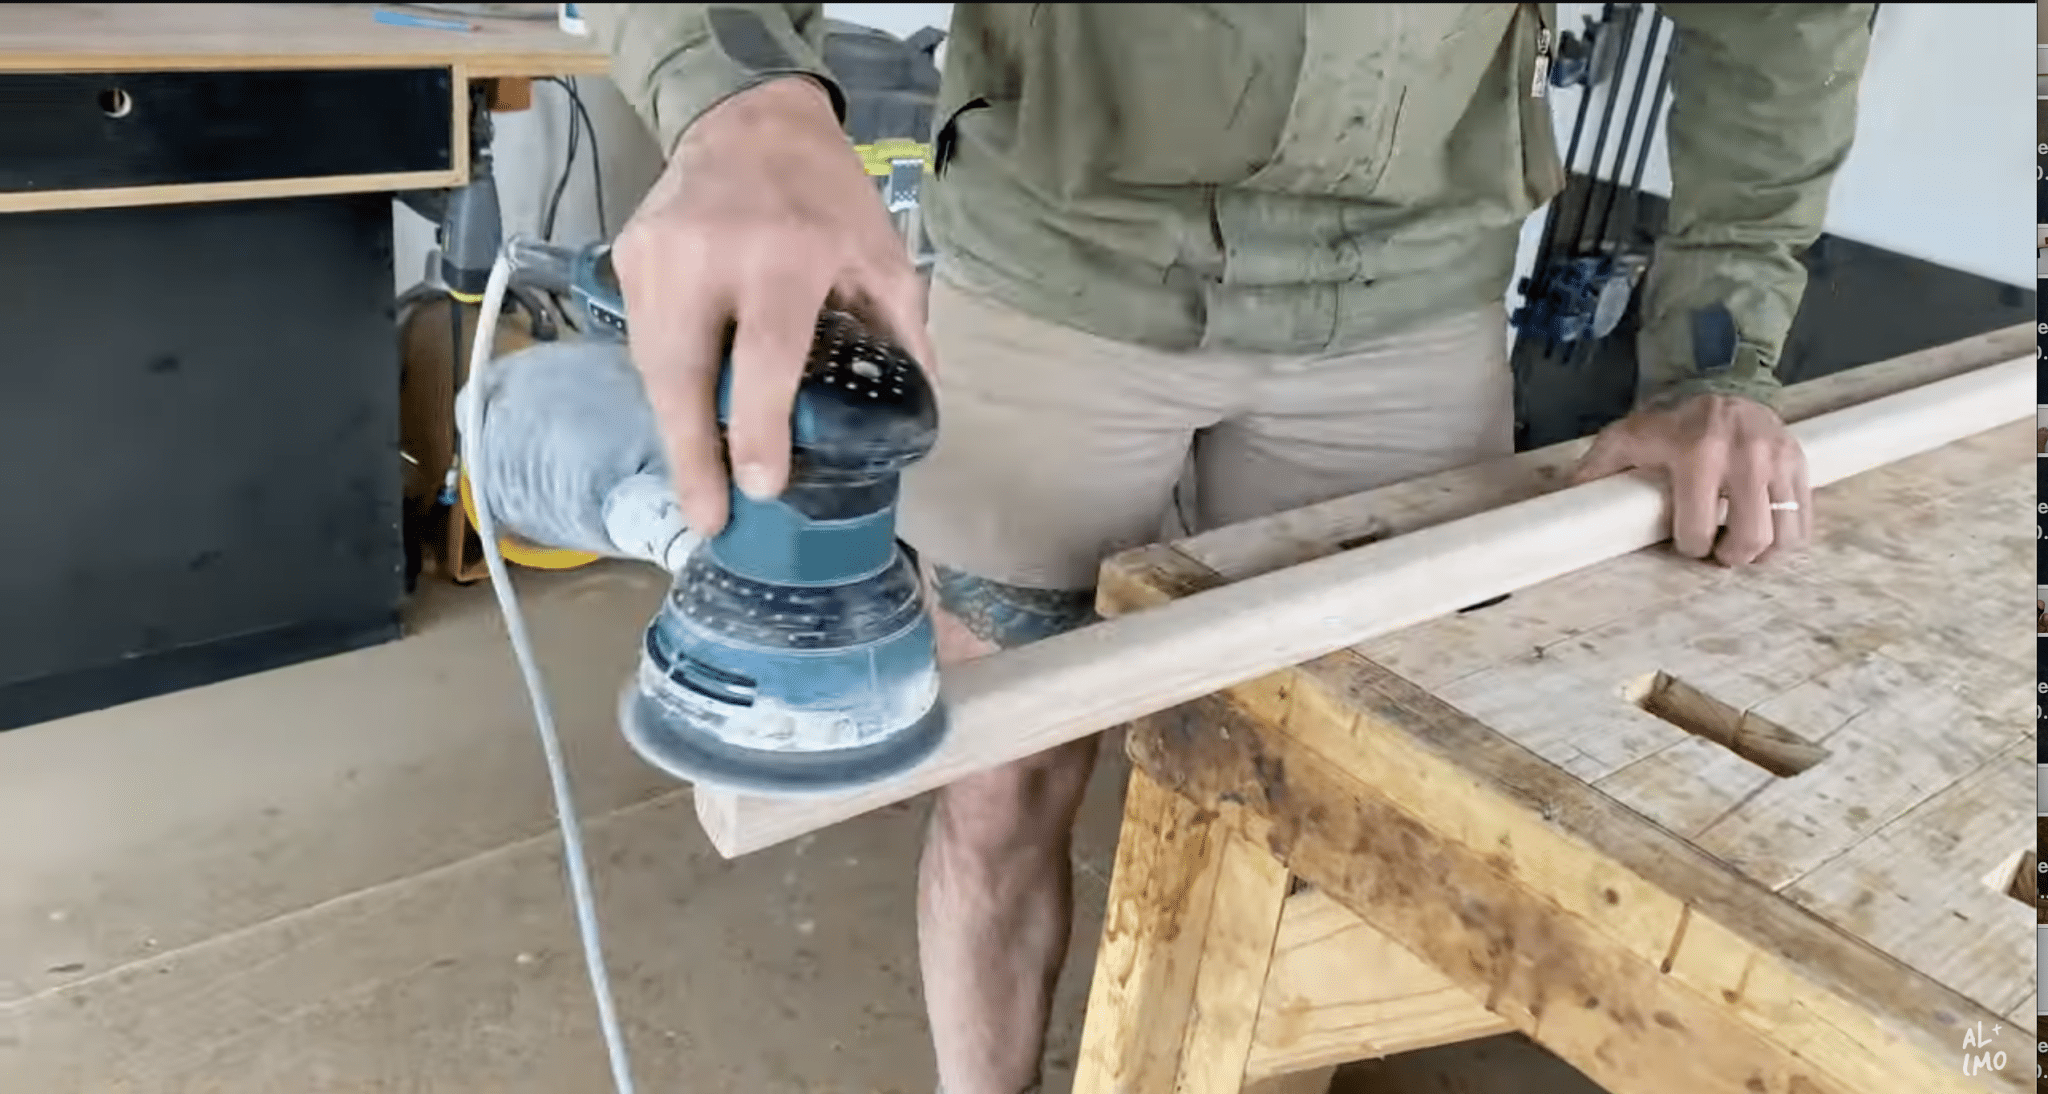
- Sand the rails and rungs: Use an orbital sander with 120-grit sandpaper to smooth the side rails. For the rungs, use hand sandpaper to reach all areas and achieve a smooth finish.
Step 5: Mark and Drill Holes
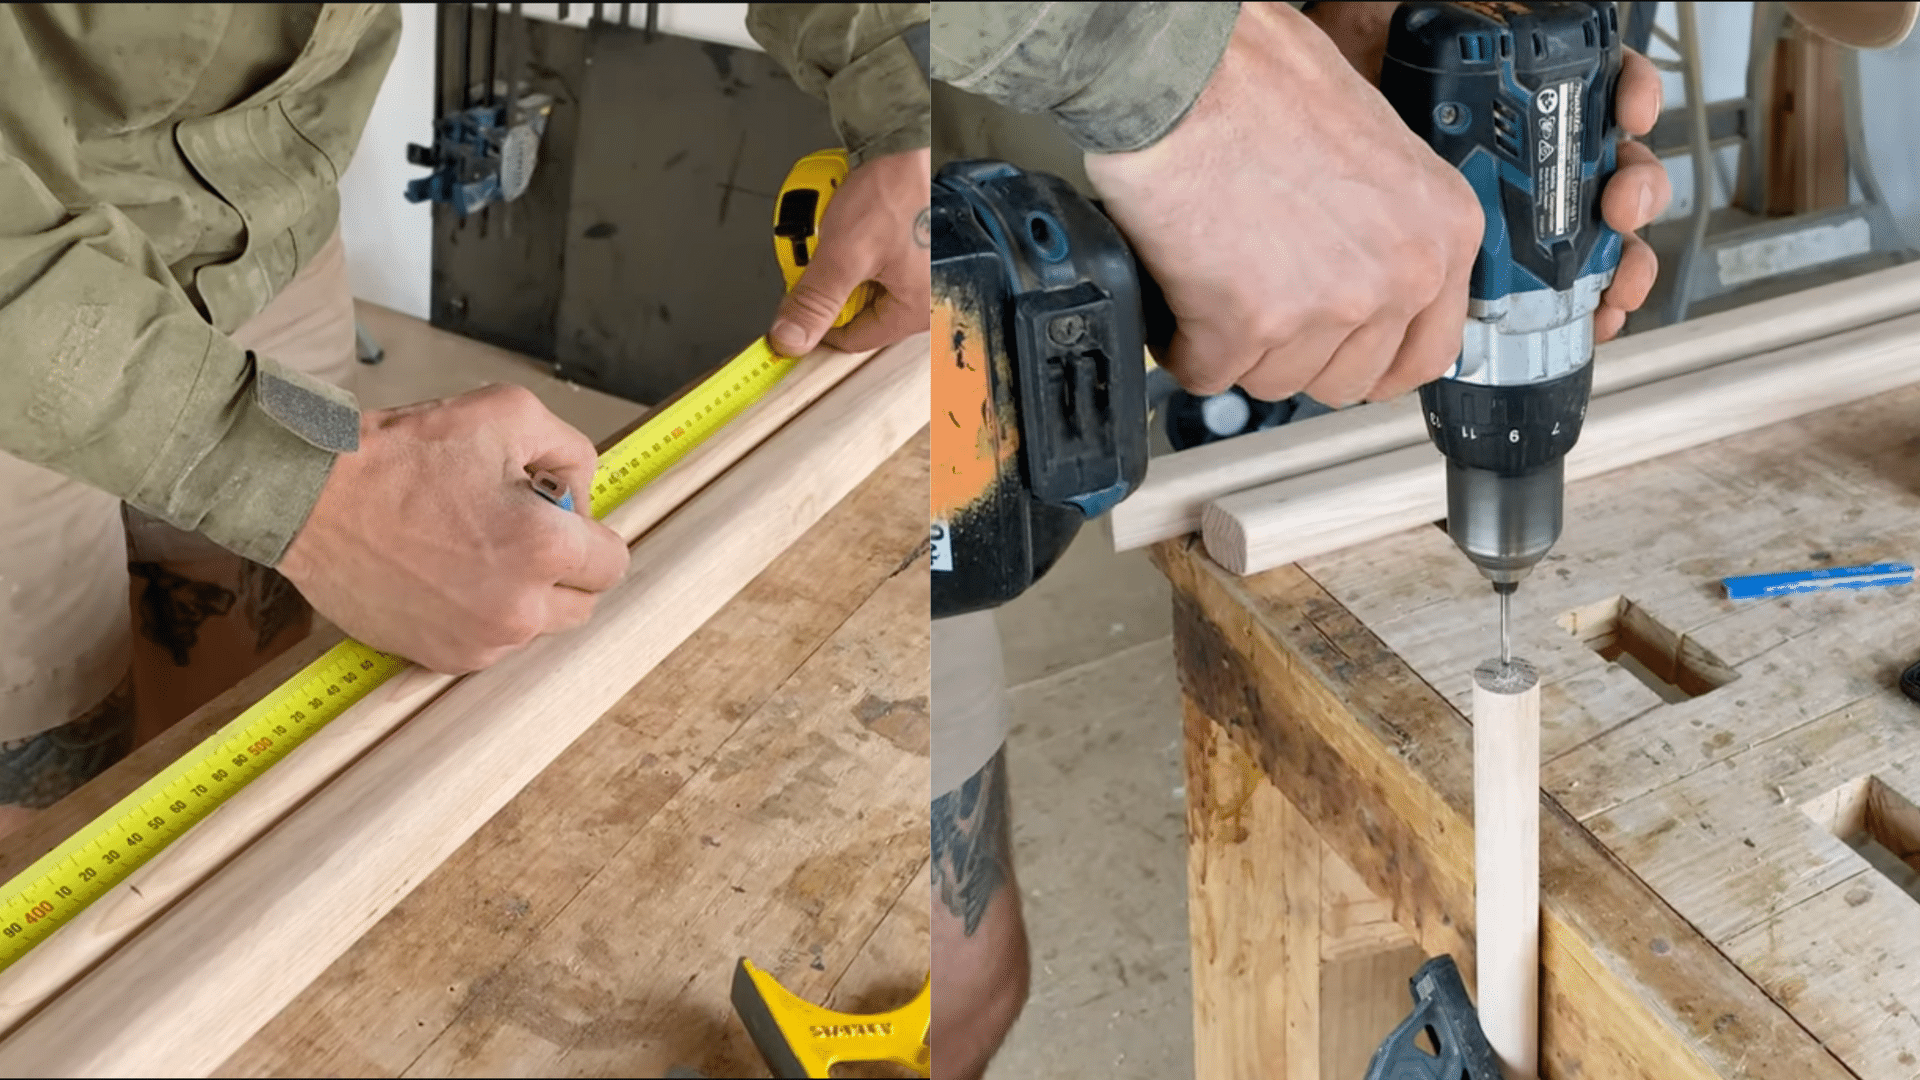
- Mark your centers: Mark the center points on the side rails where the rungs will attach. Also, mark the centers on the ends of each rung.
- Pre-drill holes: Using a 3mm drill bit, mark the depth to ensure it will sink two-thirds of the dowel length. Pre-drill holes in both the side rails and the rungs.
- Drill larger holes: Switch to a 9.5mm drill bit, mark the depth, and carefully drill the larger holes. Clean up the holes with sandpaper afterward.
Step 6: Assembly
- Attach the rungs: Apply waterproof wood glue to the holes, then hammer the dowels into one side rail. Make sure the dowels fit tightly using a rubber mallet.
- Fit the other side: Once all dowels are attached to one rail, glue and fit the other side rail, securing it with the rungs. Use a mallet to ensure a snug fit.
Step 7: Clamping and Drying
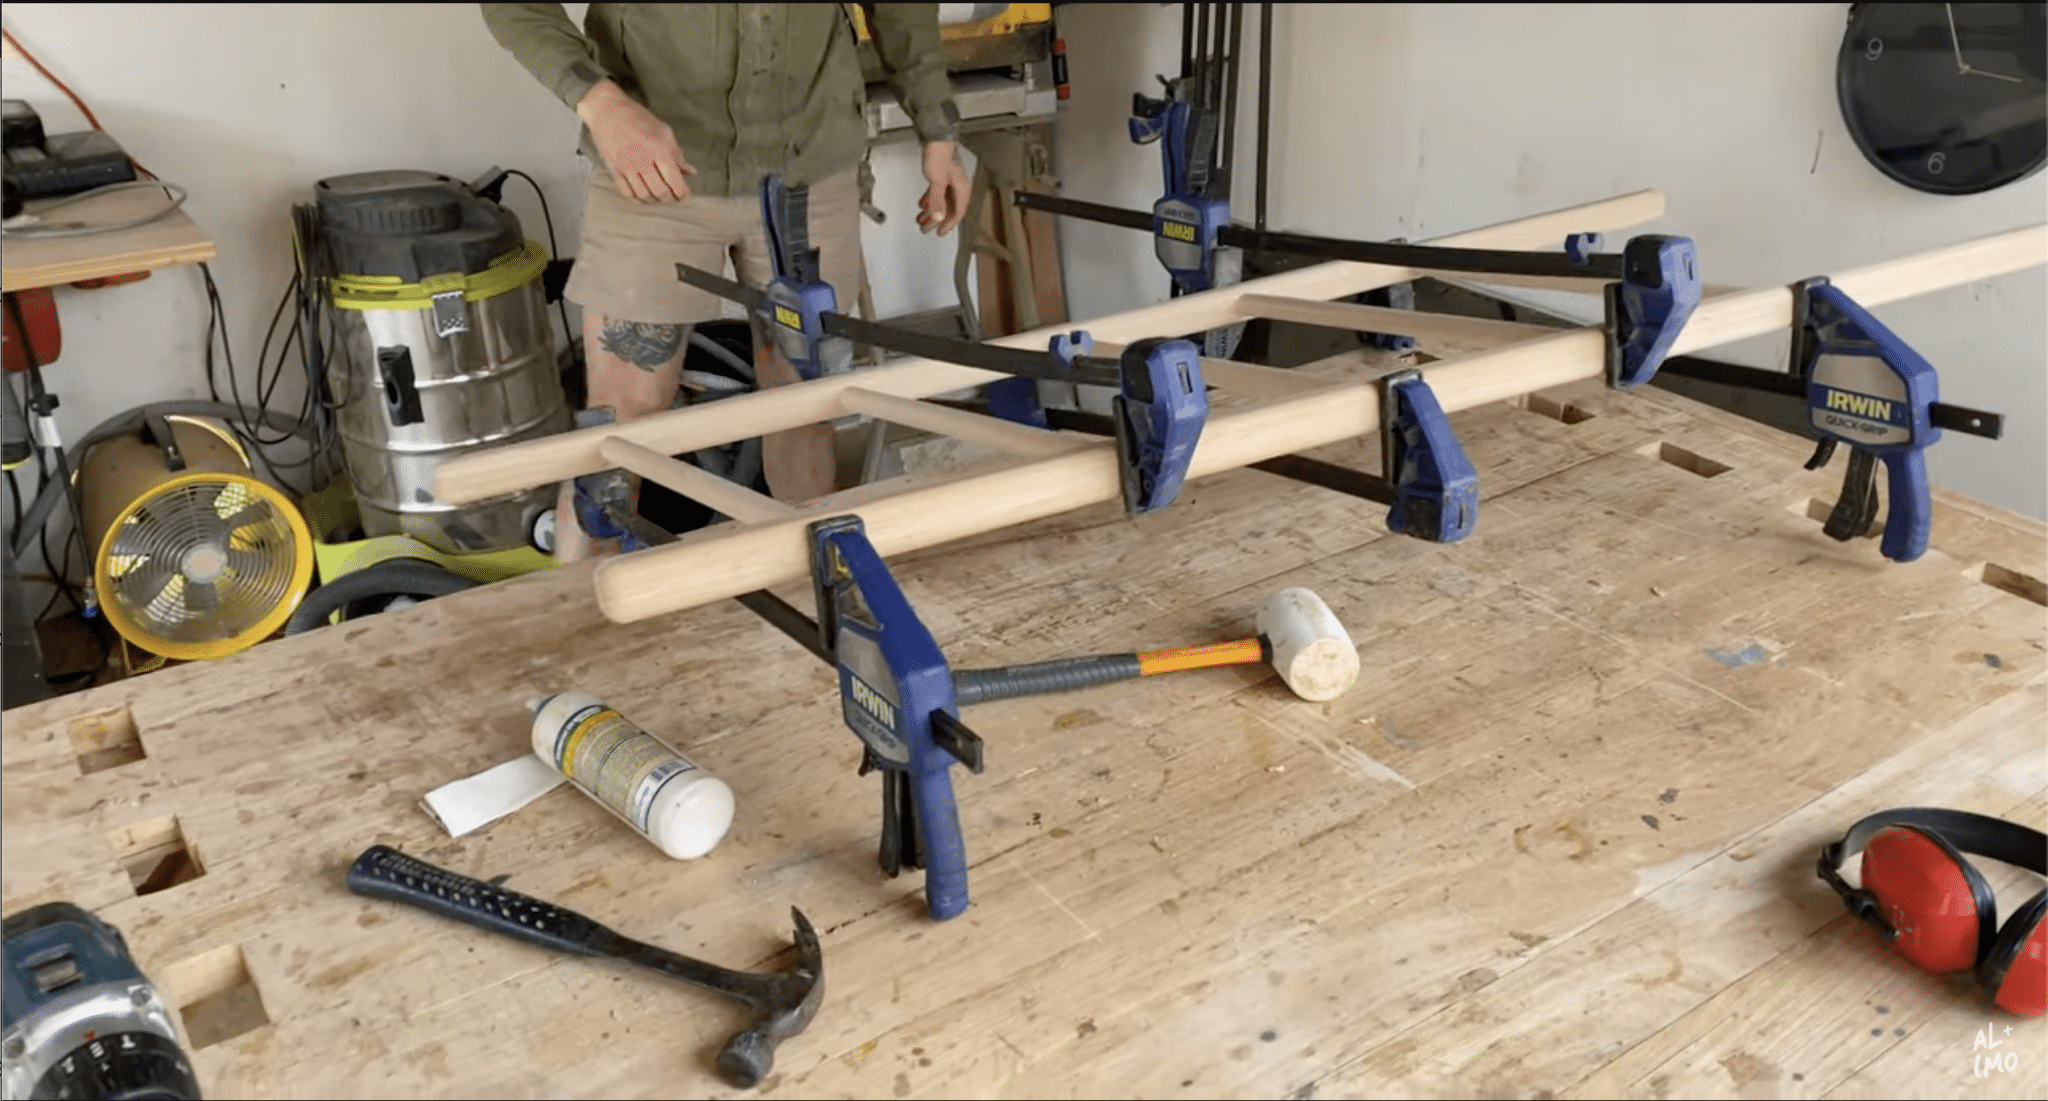
- Clamp the ladder: Clamp each rung, alternating the clamps on both sides to prevent twisting during drying.
- Let it dry: Allow the glue to dry thoroughly according to the glue manufacturer’s instructions.
Step 8: Finishing Touches
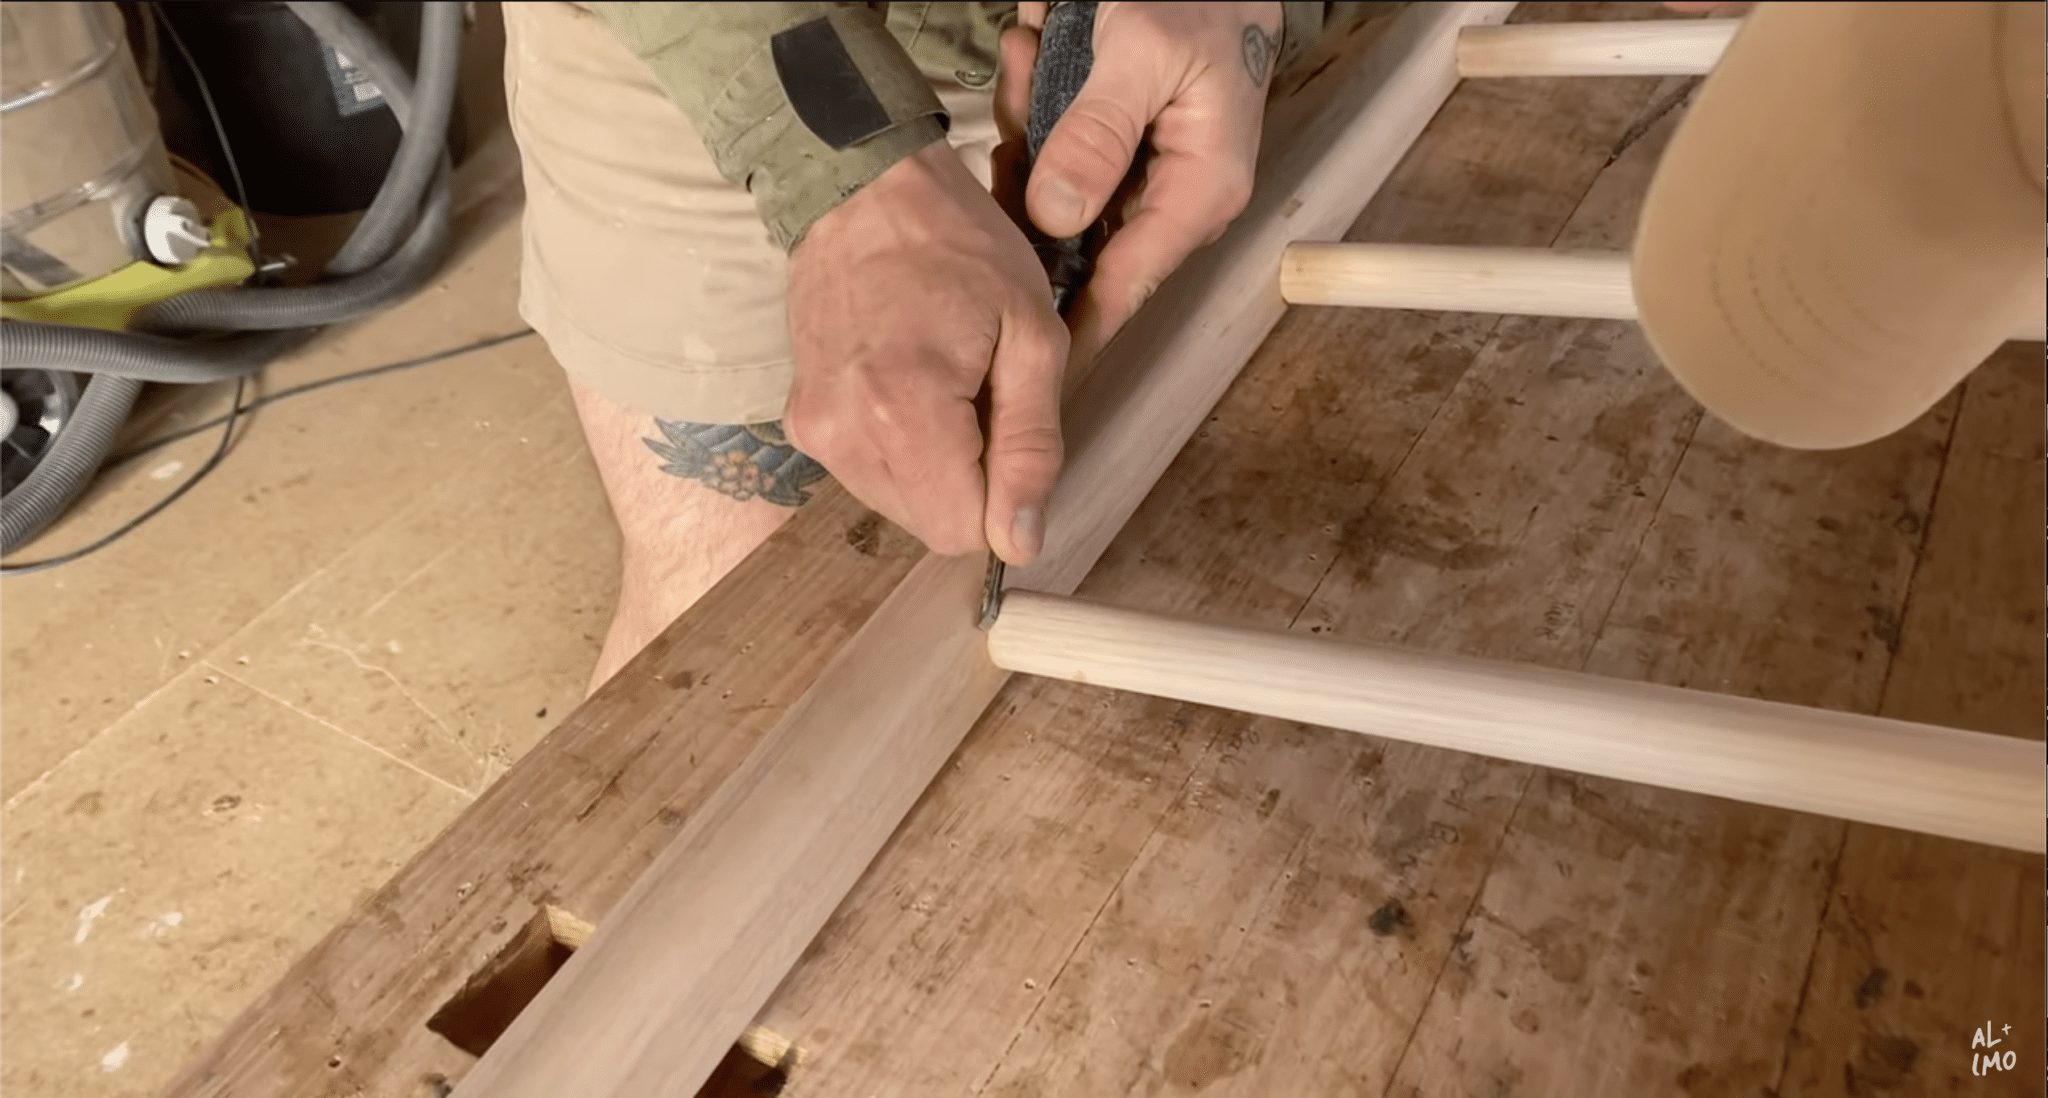
- Clean up glue residue: Once the glue is dry, use a chisel and hand sandpaper to remove any excess glue and smooth the joints.
- Apply finish: Apply a hard wax oil or another wood finish of your choice. This will protect the timber and bring out the wood’s natural features.
For more detailed information on how to make DIY Towel Ladder, Click Here.
3. Repurposing Furniture
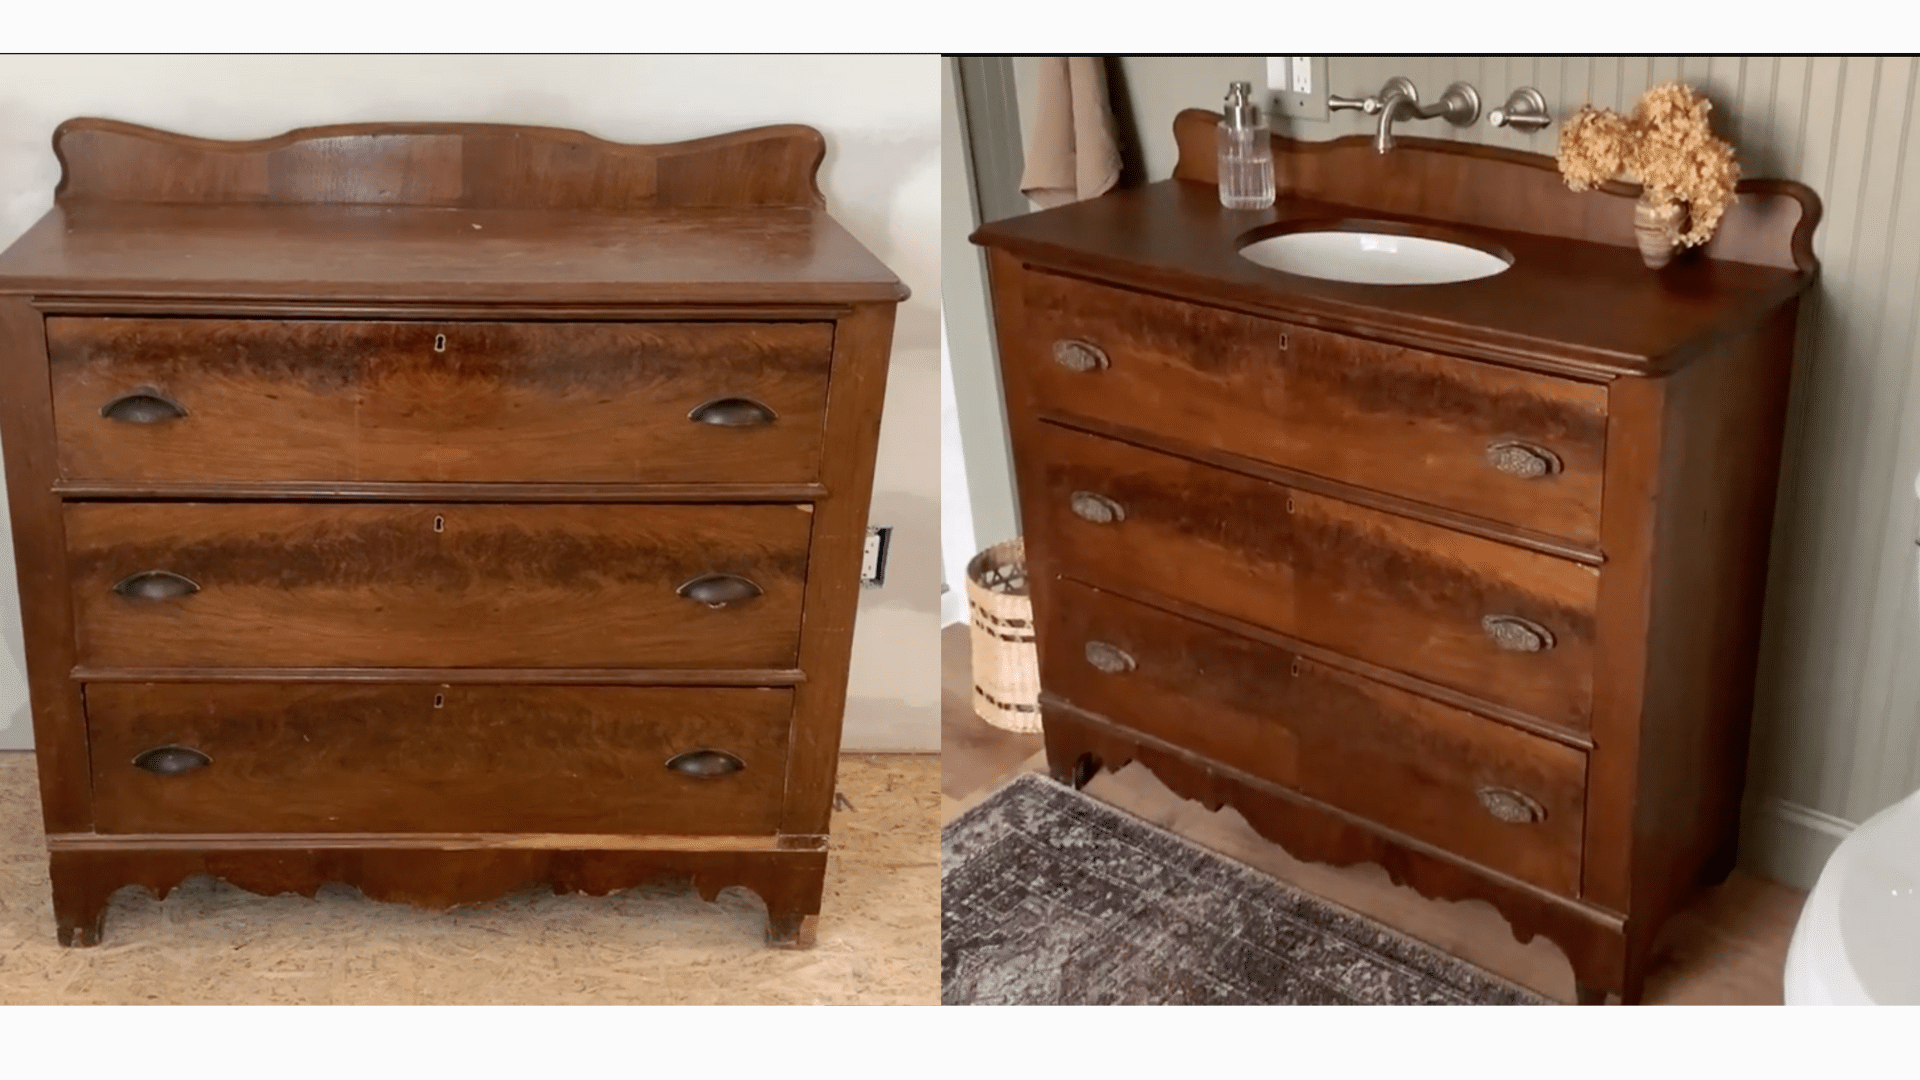
Step-by-Step Guide to Repurpose Any Furniture for Your Half Bath
Materials Needed:
- Old dresser
- Sink with a template (or create your own by measuring the sink)
- Pine boards (¾ inch for drawer adjustments)
- Silicone sealant
- Stain or paint (optional)
- Polyurethane or urethane for waterproofing
- Clamps, screws, drawer hardware
- Tools: Drill, jigsaw, router, sandpaper, screwdriver, pry bar
Step 1: Prepare the Dresser
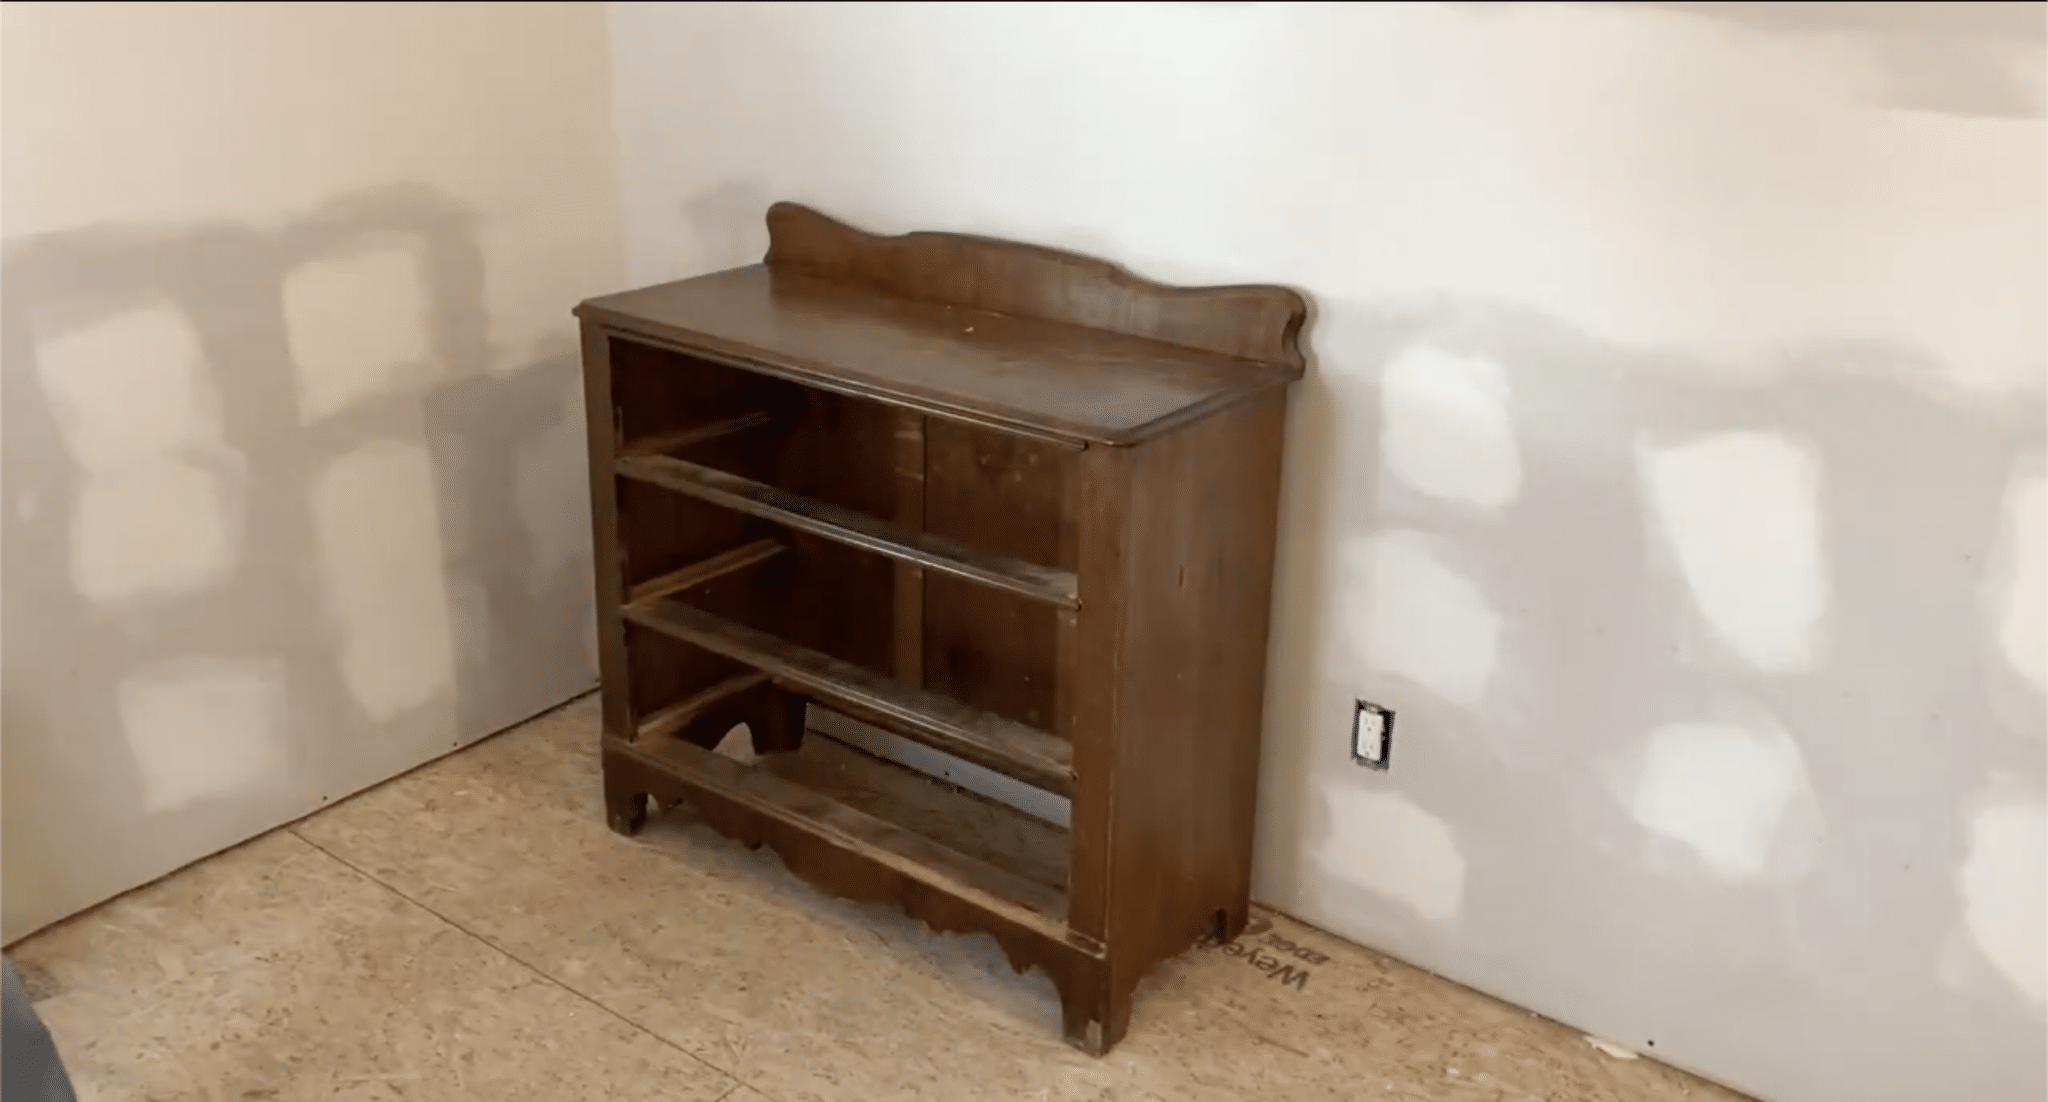
- Remove the backsplash: If your dresser has a backsplash, carefully remove it using a pry bar. Set it aside for reinstallation later.
- Remove the top: Detach the top of the dresser, which is usually secured with nails. Use the pry bar to lift it off.
Step 2: Cut the Sink Hole
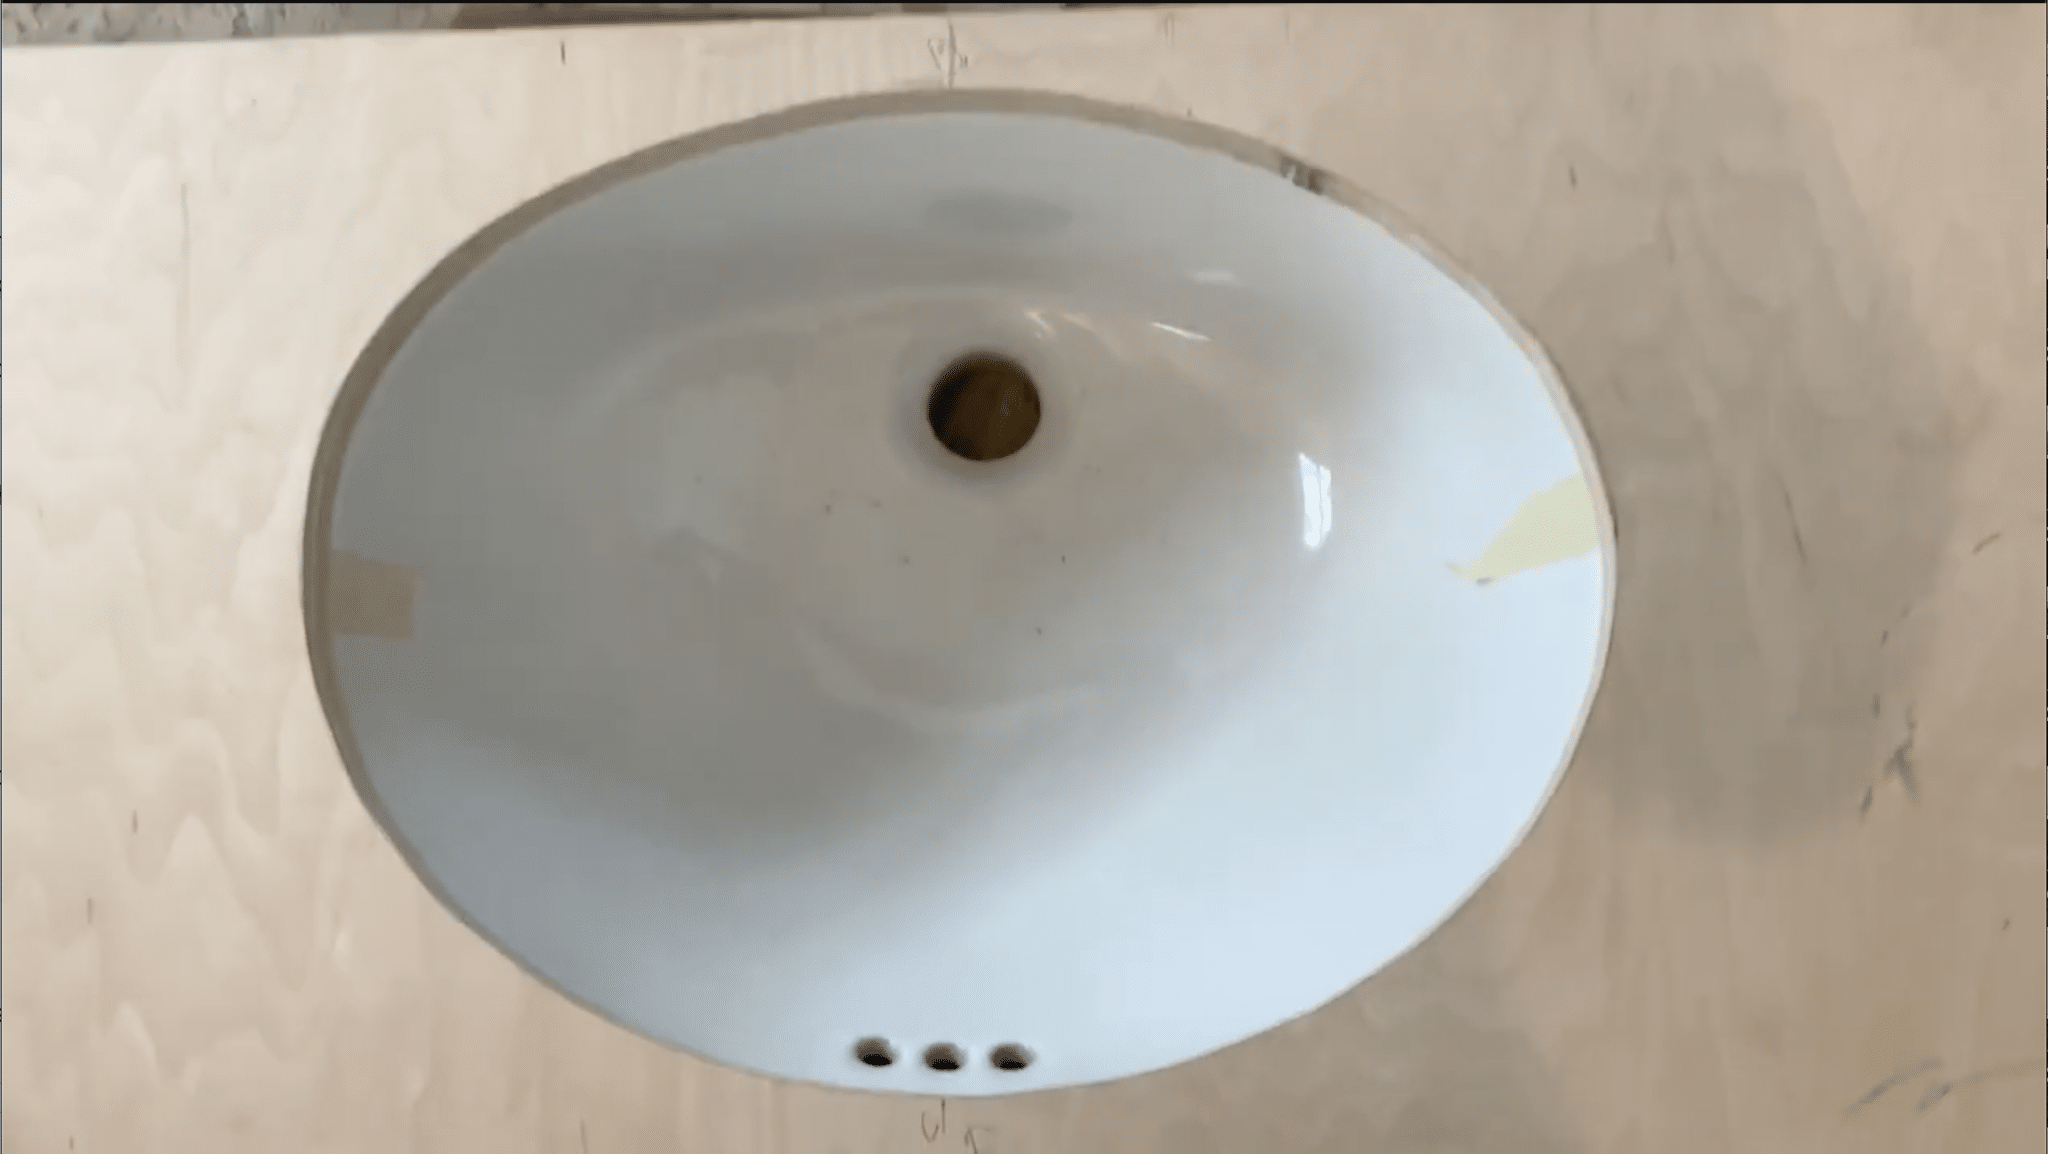
- Use the sink template: Place the sink template on the dresser top to mark where the sink hole needs to be cut. If your sink didn’t come with a template, trace the outline of the sink onto the dresser top.
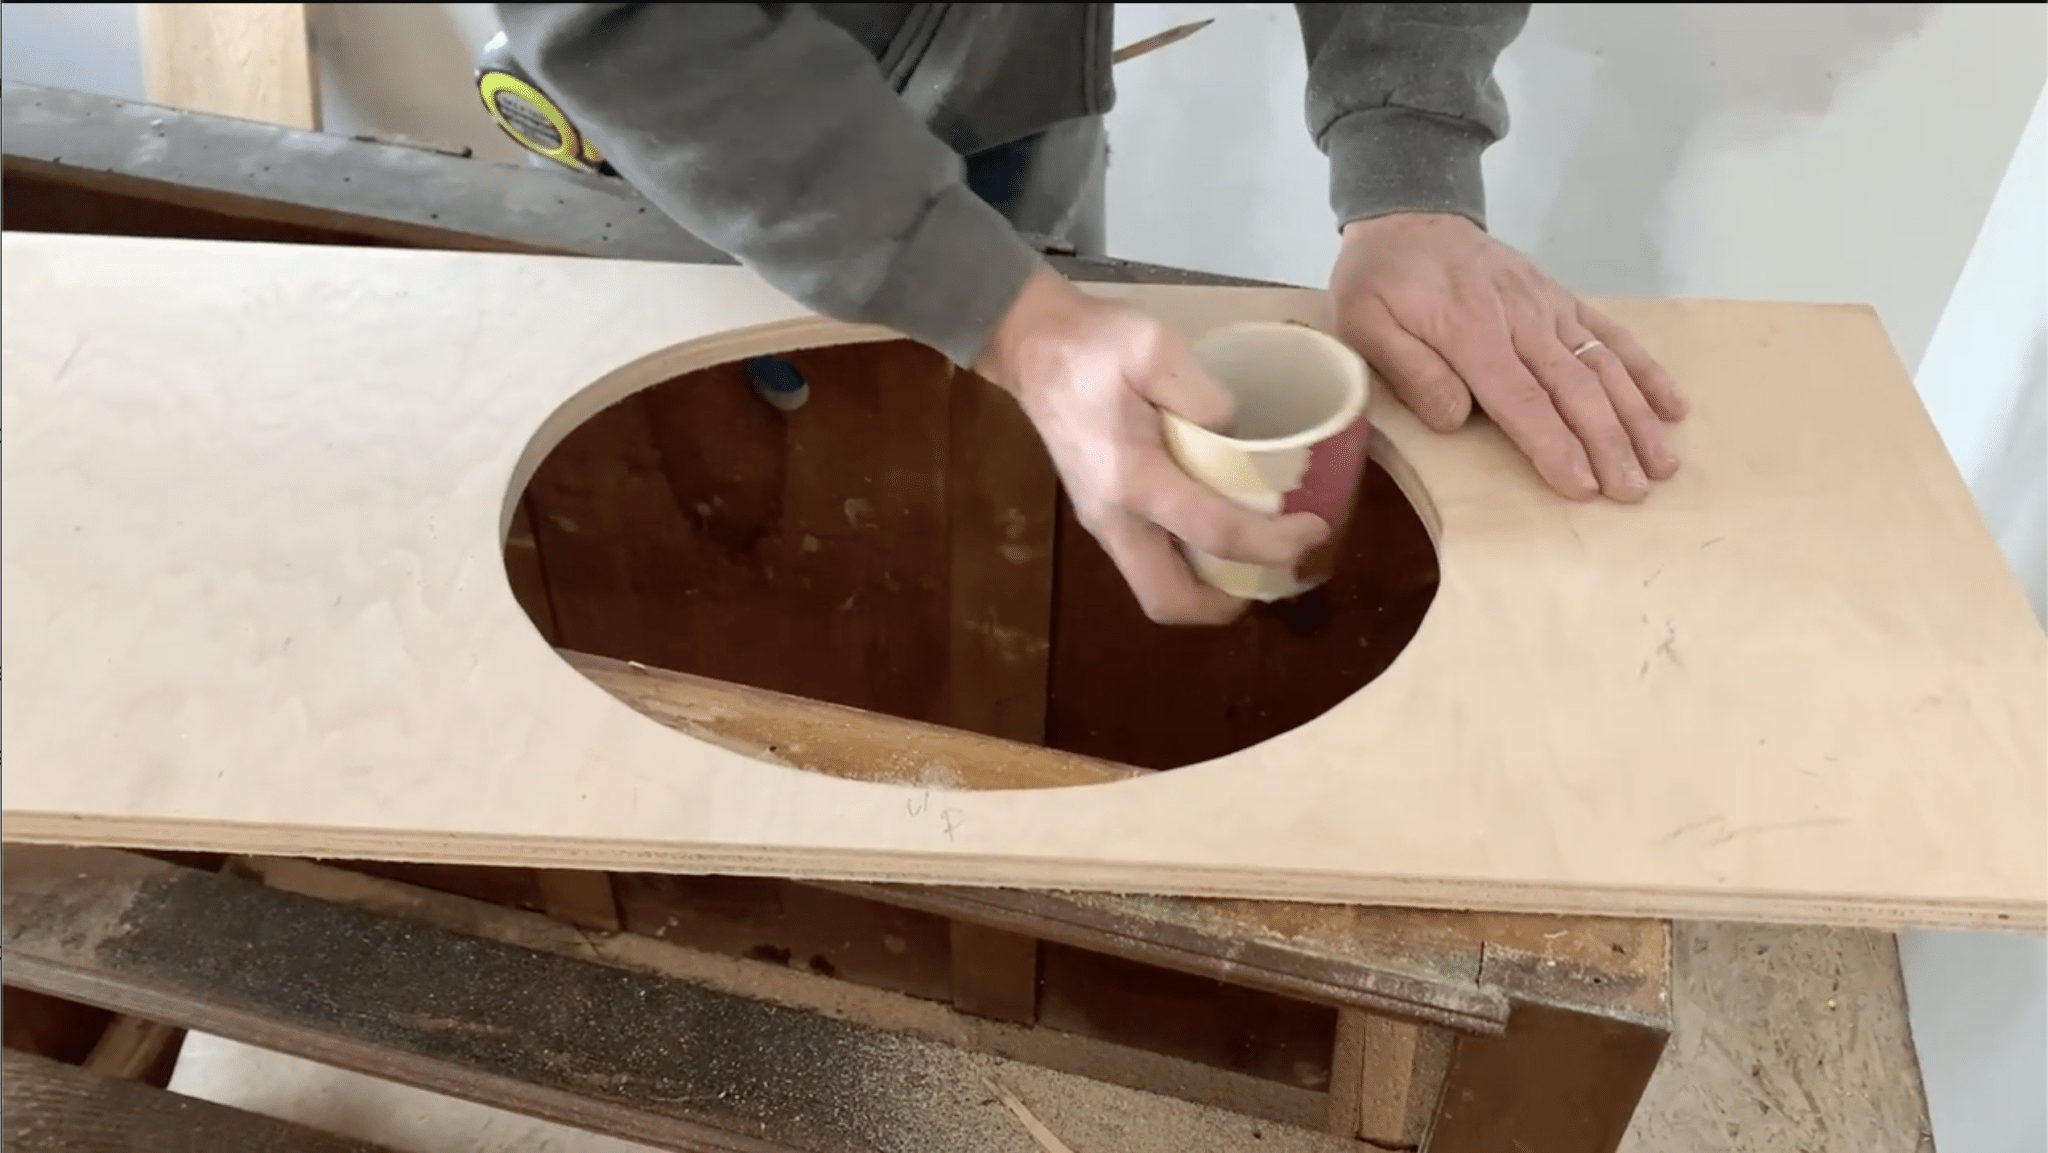
- Create a plywood template: For more precision, trace the sink shape onto a scrap piece of plywood and cut out the shape using a jigsaw. This will act as your guide for cutting.
- Position the template: Set the template on the dresser top, ensuring the placement of the sink is aligned correctly with the dresser’s frame.
- Mark and cut the sink hole: Mark the sink cutout area on the dresser, and use a jigsaw to cut out the hole for the sink.
Step 3: Smooth the Edges
- Use a router: After cutting the sink hole, use a router with a flush trim bit to smooth the edges. This ensures a neat finish and better fit for the sink.
Step 4: Modify the Dresser for Plumbing
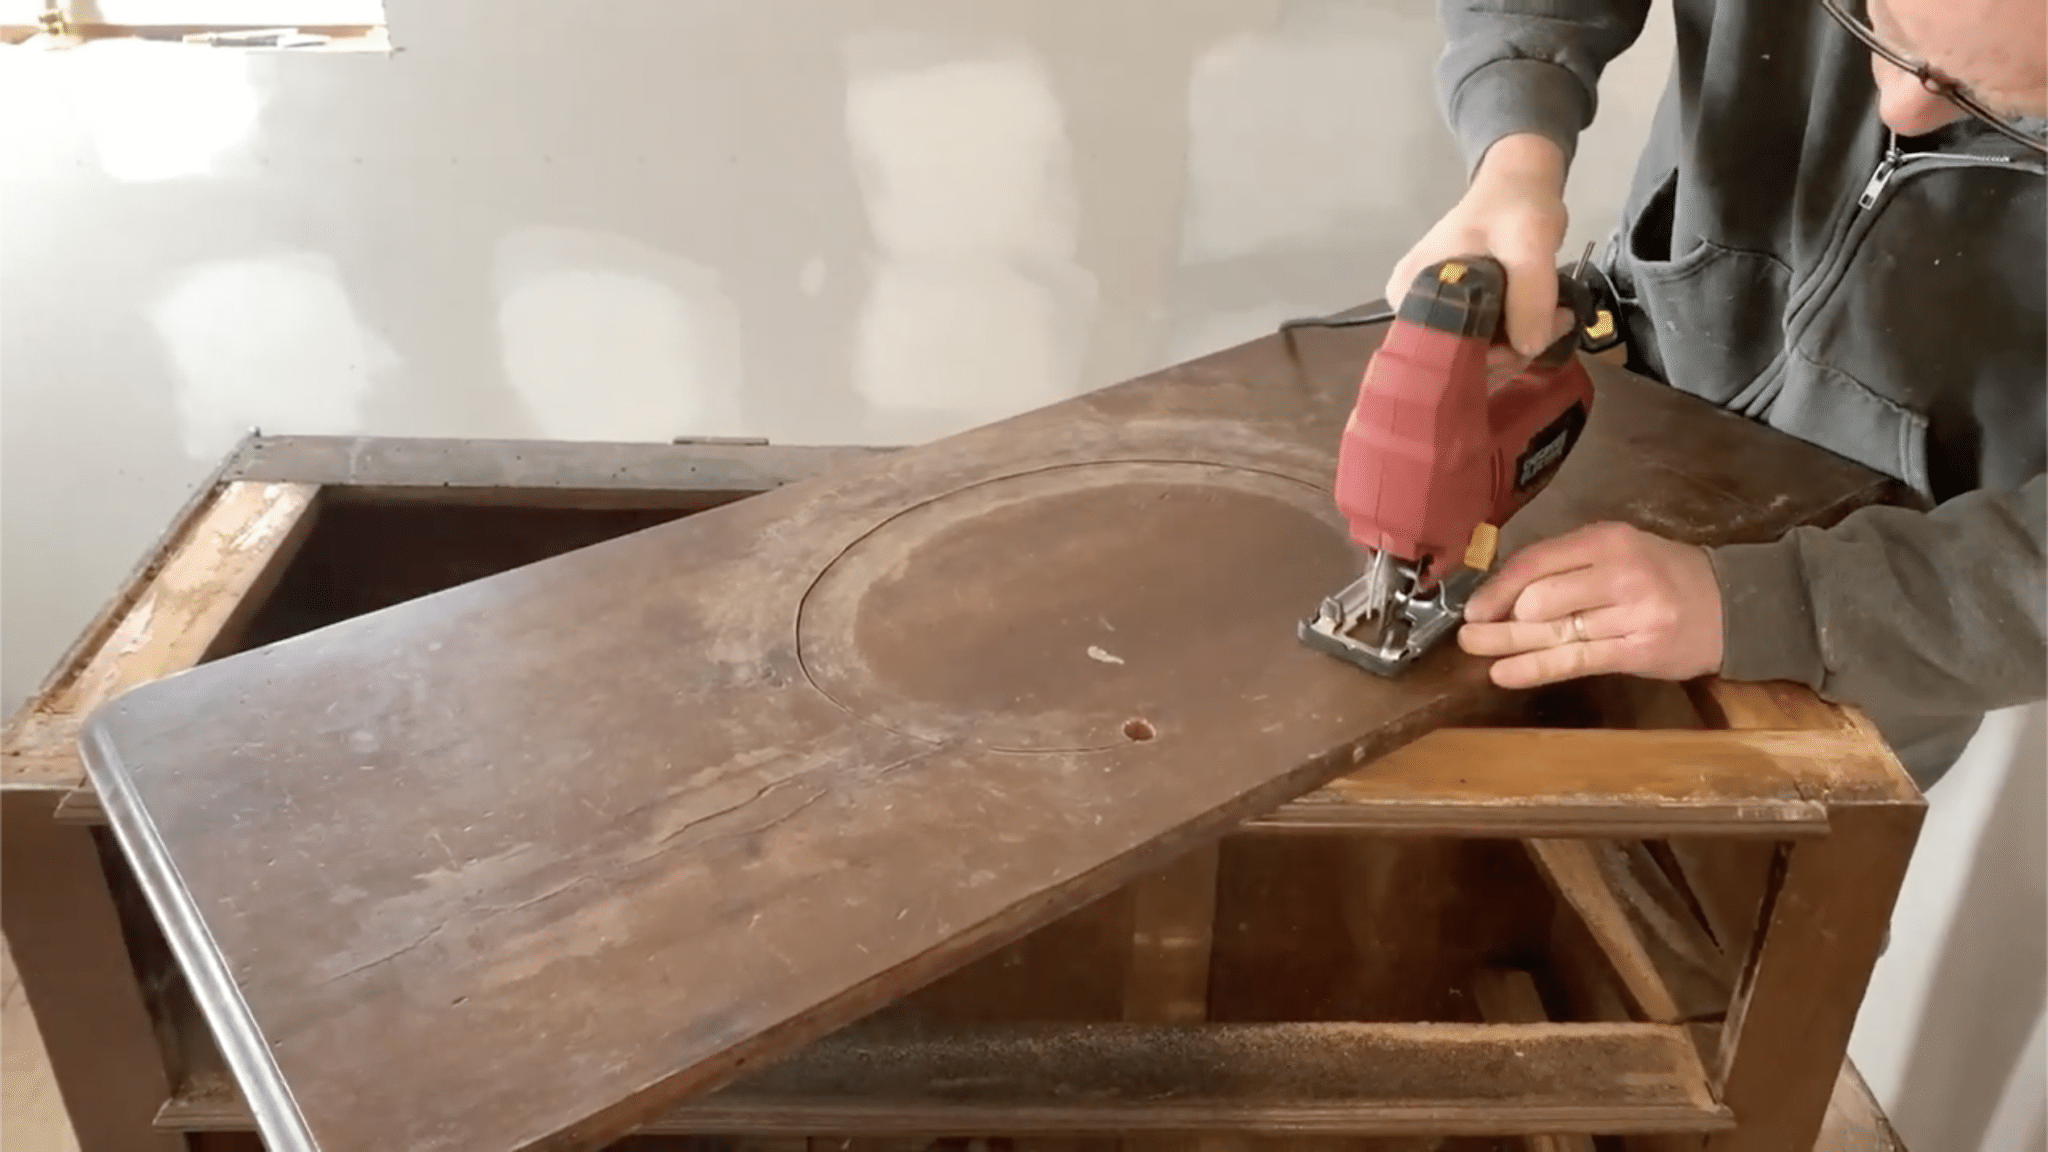
- Check the frame: With the sink hole cut, place the dresser top back on and assess the inner frame of the dresser. You may need to remove some parts of the frame to allow space for plumbing.
- Cut out frame sections: Use a jigsaw to remove the necessary portions of the inside frame to fit the sink and plumbing components.
Step 5: Sand and Stain the Dresser

- Sand the top: Use sandpaper to smooth out any rough spots or stains on the dresser top.
- Stain or paint: Apply wood stain or paint if desired. This step helps enhance the look of the dresser, giving it a refreshed appearance.
- Waterproof the top: Apply three coats of urethane or polyurethane to the dresser top to protect it from water damage. If the finish is too glossy, lightly sand it and apply a coat of flat polyurethane for a softer look.
Step 6: Install the Sink

- Place the sink: Set the sink into the cutout hole on the dresser top. Mark the outline of the sink and alignment points to ensure it is centered.
- Apply silicone sealant: Tape off the inside edge of the sink and dresser top for clean lines, then add a bead of silicone around the top edge of the sink. Place the sink into position and secure it with sink hardware.
- Smooth and finish: Smooth the silicone around the edges and remove the tape for a clean finish.
Step 7: Modify the Drawers
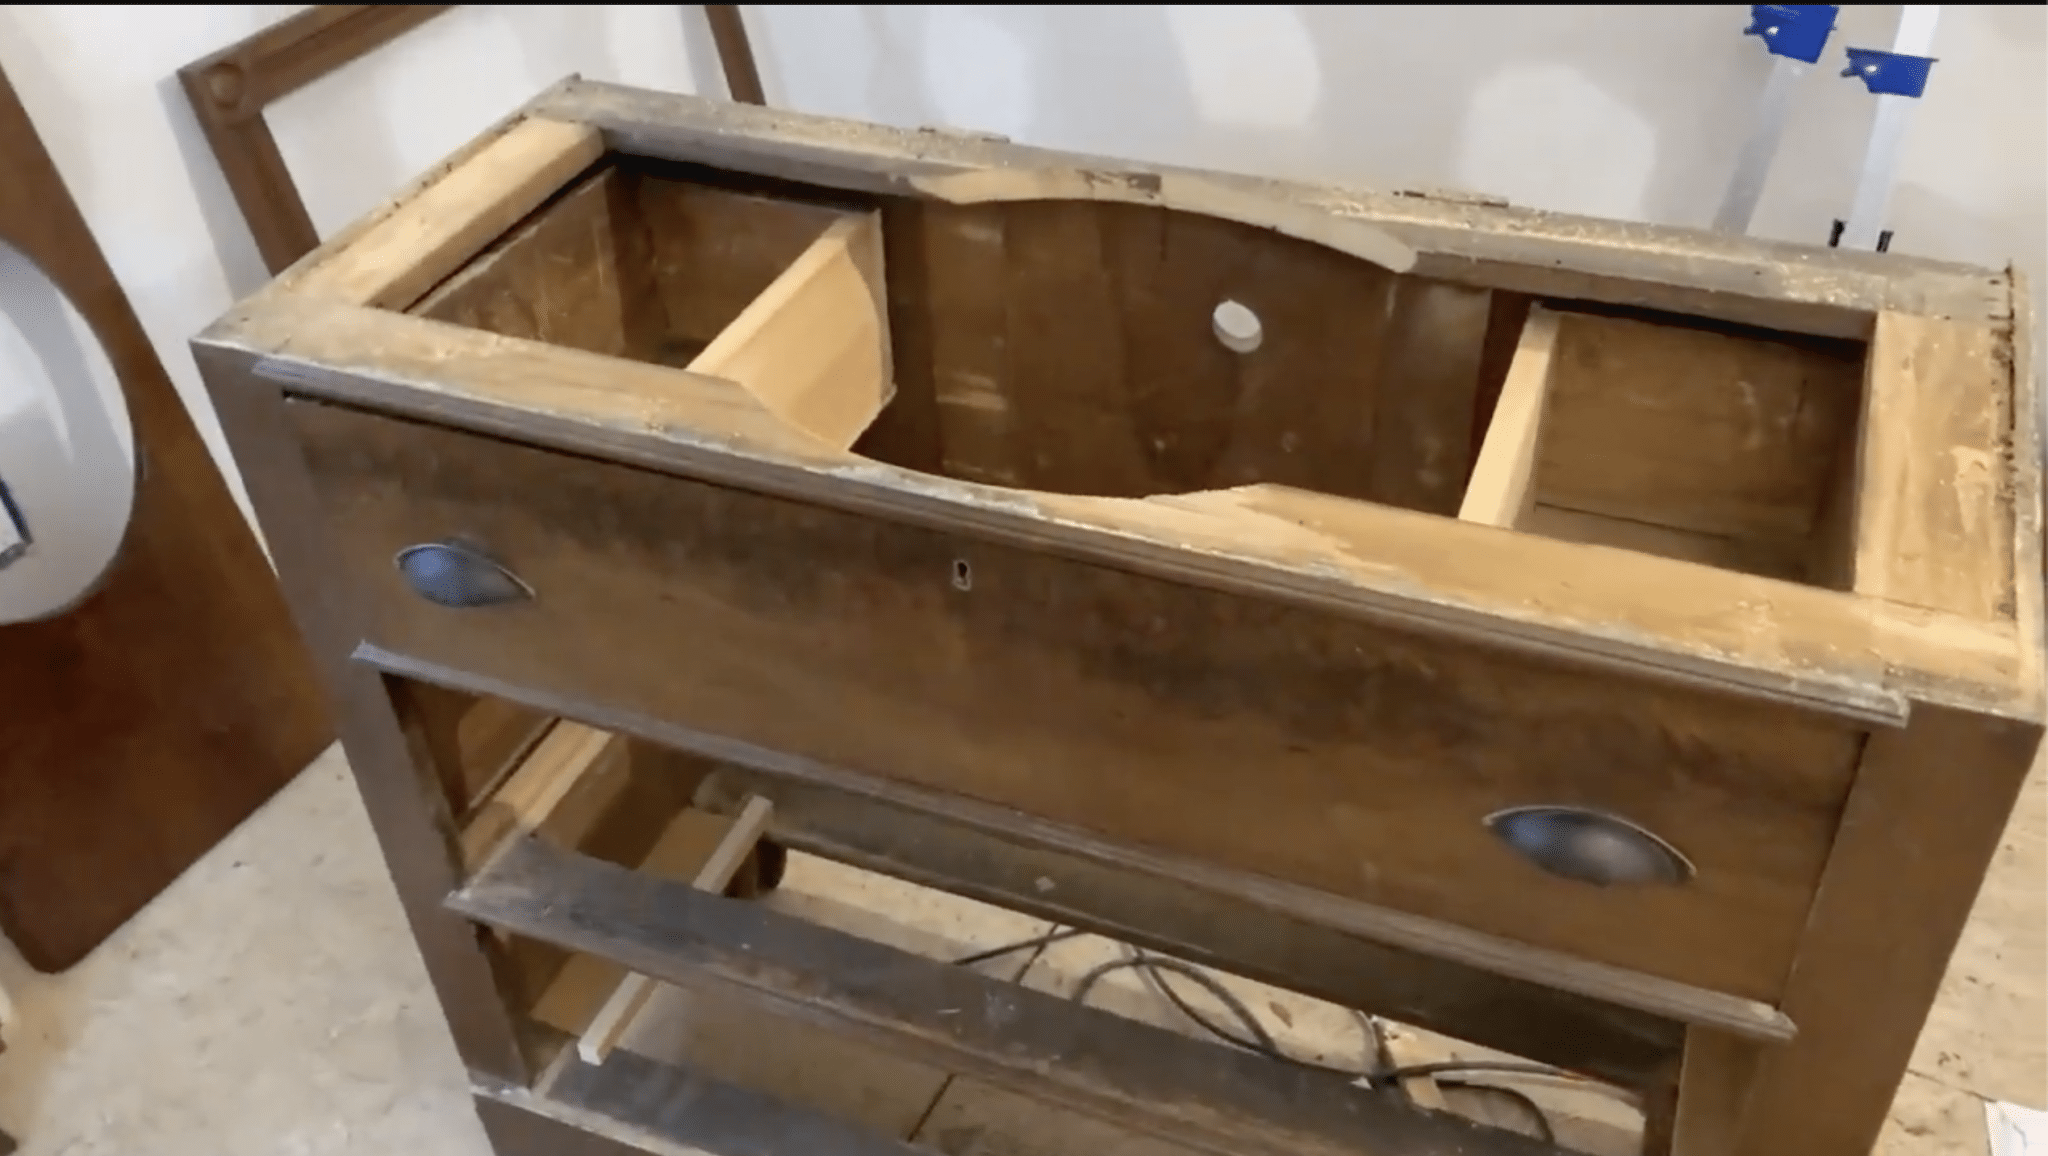
- Rebuild the drawers: Modify the dresser drawers to make space for the sink and plumbing. Use ¾ inch pine boards to build new sides and front pieces around the sink cutout.
- Attach new pieces: Screw the new drawer pieces together, making sure to leave enough room for the plumbing to fit behind them. Secure the drawer components to the frame.
Step 8: Install the Vanity
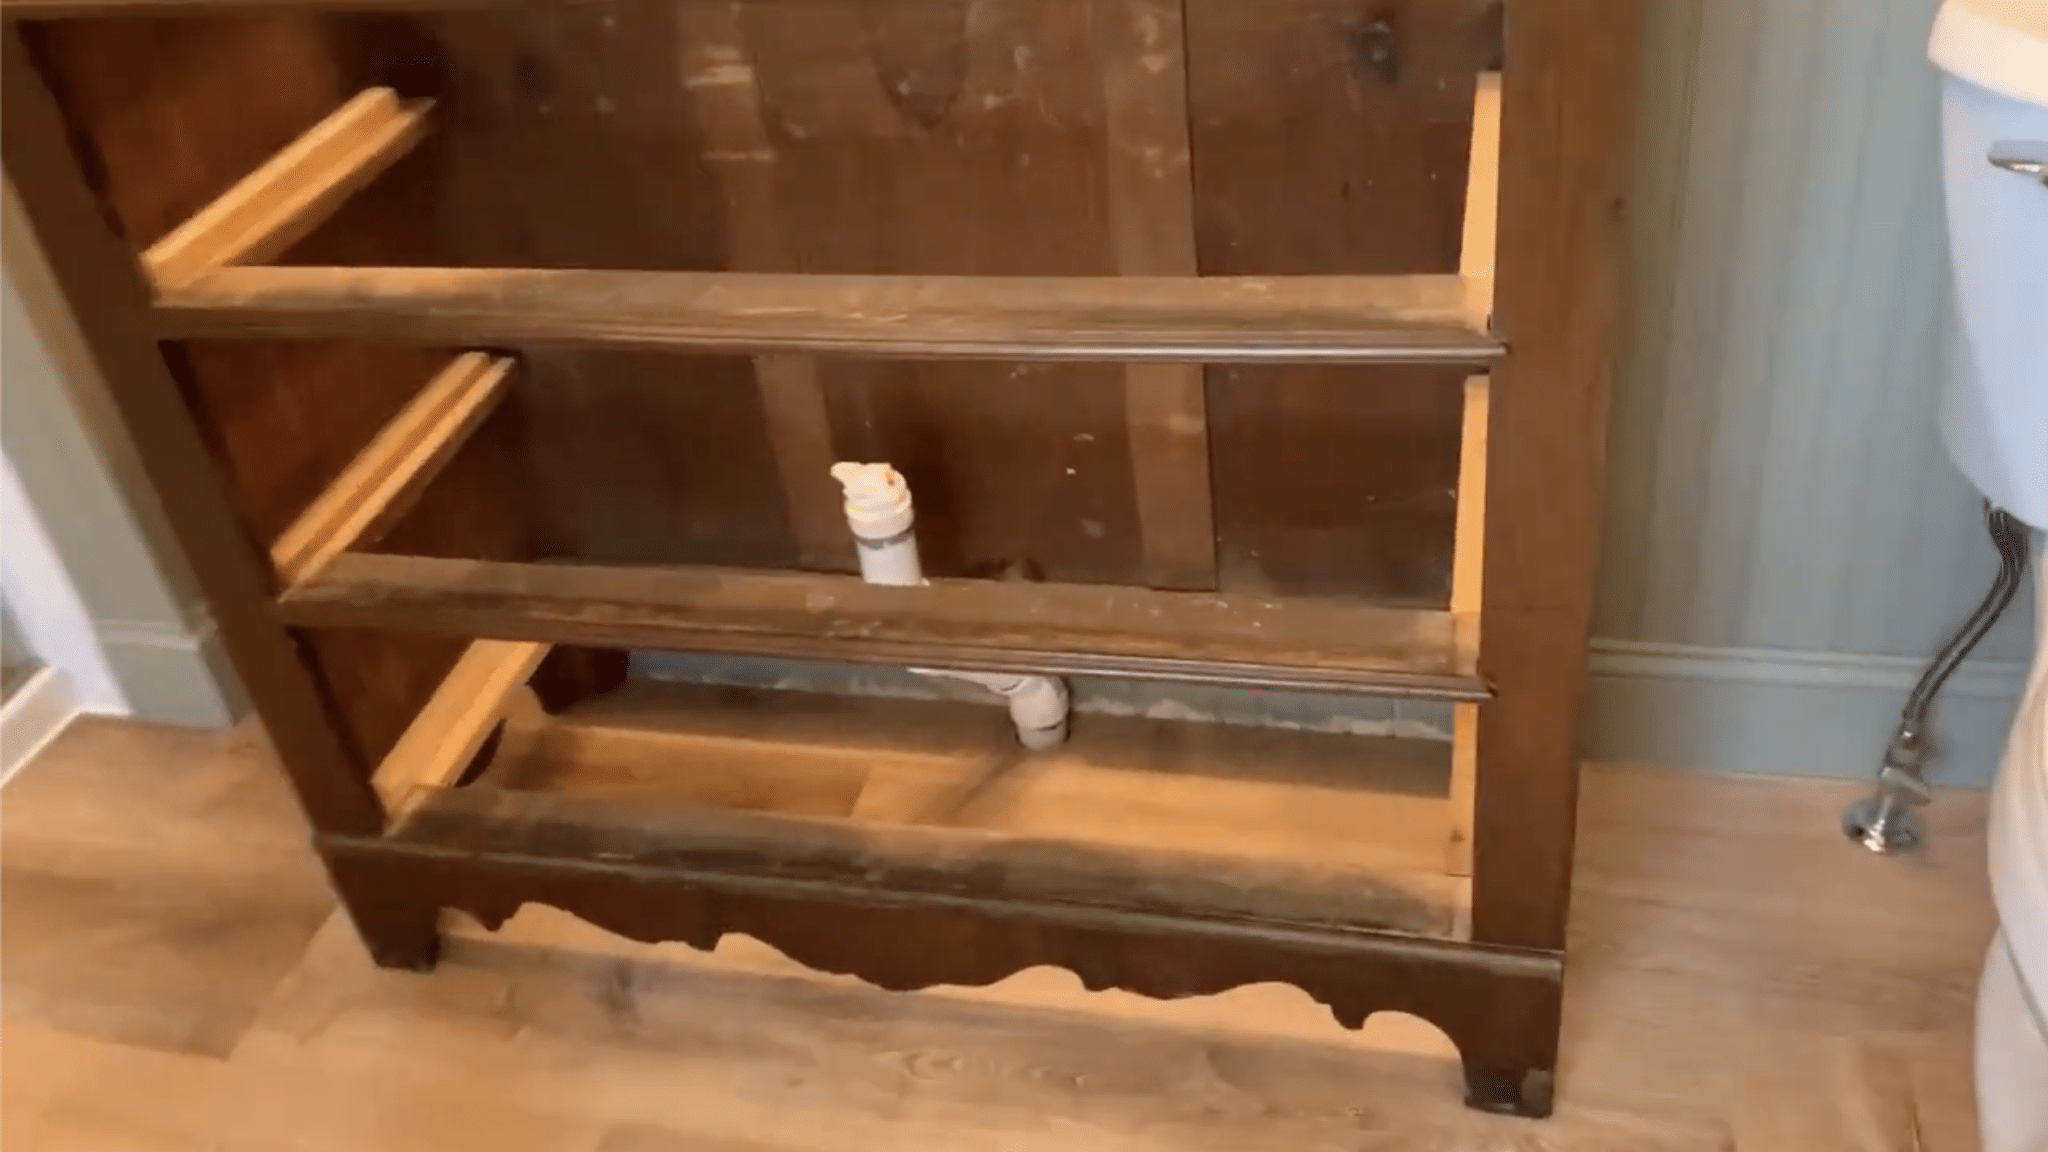
- Notch the dresser base: If needed, cut out part of the dresser’s bottom to fit around the plumbing. This will allow the dresser to sit properly in the bathroom.
- Attach the dresser to the wall: Secure the dresser to the bathroom wall with screws to ensure it stays in place.
Step 9: Add the Finishing Touches
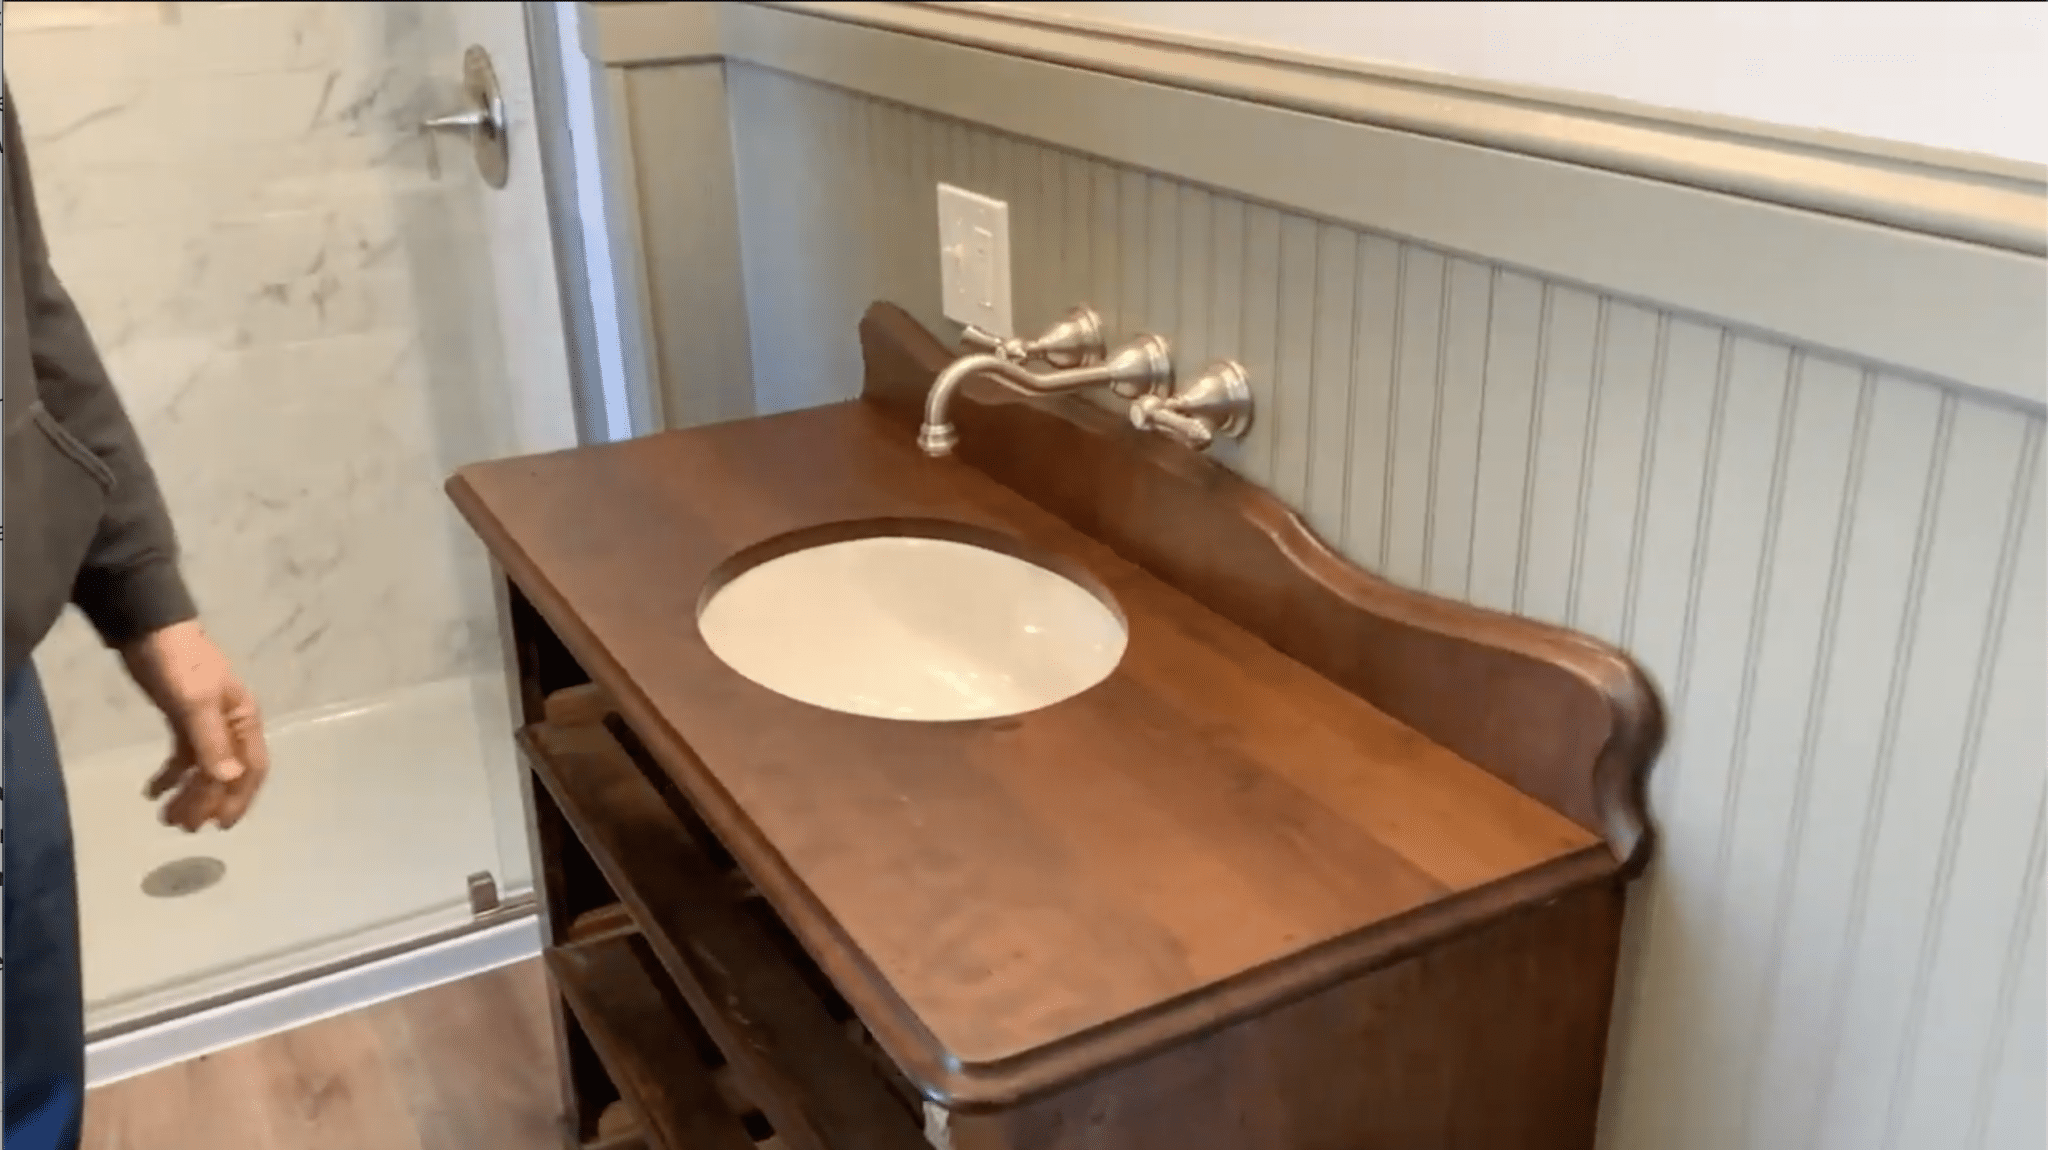
- Reattach the backsplash: Reinstall the backsplash, using silicone sealant along the back edge to ensure the dresser top and backsplash are watertight.
- Insert the drawers: Slide the modified drawers back into the dresser and check for fit. Ensure they open and close smoothly.
- Install new hardware: Add updated drawer pulls or knobs to complete the look.
For more detailed information on how to turn a dresser into a bathroom vanity, Click Here.
Accessorizing on a Budget
Adding small touches to your half bath can make a big difference without spending much. This section will show you how to pick out nice things for your bathroom that look good but don’t cost a lot. I’ll cover everything from towels to wall art, helping you make your bathroom look great on a budget.
| Project | Steps |
|---|---|
| Decorative Towels and Rugs |
|
| Stylish Soap Dispensers and Accessories |
|
| Add Greenery |
|
| Incorporating Wall Art |
|
| Decorative Baskets |
|
| Candles or Diffusers |
|
| Upgraded Toilet Paper Holder |
|
| Hand Soap and Lotion Set |
|
| Towel Hooks or Racks |
|
| Bathroom Tray or Dish |
|
Tips for Maintaining Your Updated Half Bath
Once you’ve improved your half bath, keeping it nice is important. Here are some easy ways to keep your bathroom clean and tidy:
Daily Quick Clean
- Wipe down the sink and faucet each day.
- Use a squeegee on mirrors to prevent water spots.
Weekly Deep Clean
- Clean the toilet inside and out.
- Mop the floor and wipe down all surfaces.
- Wash any rugs or towels.
Organize Regularly
- Put things back where they belong after use.
- Go through items monthly and remove what you don’t need.
Prevent Mold
- Use the fan or open a window after showers to reduce moisture.
- Check for leaks under the sink and around the toilet.
Touch Up As Needed
- Fix any chips in paint or tiles quickly.
- Replace worn out items like soap dispensers or toothbrush holders.
Keep It Smelling Fresh
- Use air fresheners or essential oils.
- Place an open box of baking soda in a corner to absorb odors.
Declutter Often
- Don’t let items pile up on counters or shelves.
- Use baskets or containers to keep things neat.
Maintain Grout
- Clean grout lines with a brush and cleaner every few months.
- Reseal grout yearly to prevent staining.
Care For Fixtures
- Use the right cleaners for your sink and faucet materials.
- Dry metal fixtures after cleaning to prevent water spots.
Update Decor Seasonally
- Switch out small items like hand towels or candles to keep the look fresh.
Check Plumbing
- Look for signs of leaks or clogs regularly.
- Fix small issues before they become big problems.
Keep Cleaning Supplies Handy
- Store a few basic cleaning items in the bathroom for quick touch-ups.
By following these tips, you can keep your updated half bath looking good for a long time. Regular care means you won’t need to do big updates as often, saving you time and money in the long run.
Conclusion
Giving your half bath a fresh look doesn’t have to break the bank.
With the tips and tricks i’ve shared, you can turn a dull space into a stylish retreat.
From simple paint updates to clever DIY projects, there are many ways to make a big impact on a small budget.
Remember, it’s the little things that often make the biggest difference – a new mirror, some greenery, or updated fixtures can completely change the feel of your bathroom.
The key is to plan carefully, shop smartly, and focus on high-impact changes.
So, what’s next? Start by making a list of the updates you want to tackle first.
Take it one step at a time, and soon you’ll have a half bath that looks great and fits your budget.
Ready to get started on your bathroom transformation?
Frequently Asked Questions
What is the average cost of a half bathroom remodel on a budget?
A budget half bathroom remodel typically costs $2,500 to $5,000. This includes basic fixtures, paint, and minor updates.
What should be included in a half bathroom?
A half bathroom usually has a toilet, sink, mirror, and some storage. Good lighting and simple decorative touches are also common.
Can I build a small half bath myself?
Yes, you can build a small half bath if you have basic DIY skills. However, plumbing and electrical work may need professional help.
How can I convert a half bath to a full bath affordably?
To change a half bath to a full bath cheaply: Check space and plumbing needs. Add a shower instead of a tub. Use low-cost fixtures. Look at prefab shower units. Do some work yourself to save money.


