How to Tile a Bathroom Floor for Beginners: Step by Step
The tile that cracks six months after installation was already doomed before it was laid.
Most bathroom floor failures trace back to what happened underneath, not what was placed on top.
A subfloor that flexes, a layout that was never dry-fitted, or a cure stage that got skipped to save a weekend.
Learning how to tile a bathroom floor is not complicated, but the steps that seem minor on paper are usually the ones that separate a floor lasting five years from one lasting twenty.
The difference between a professional-looking result and a costly redo often comes down to preparation, patience, and knowing exactly where most people go wrong.
Tools and Materials Required
Tiling a bathroom floor requires the right tools and materials before you begin, as missing even one can stall the job mid-install.
Tools Required:
- Tape measure, chalk line, pencil
- Notched trowel, margin trowel
- Drill, mixing paddle, bucket
- Wet saw, tile cutter
- Rubber mallet, level
- Grout float, grout sponge
- Knee pads, safety glasses
Materials Required:
- Cement board or Schluter Ditra
- Polymer-modified thinset
- Tiles (10–15% extra for waste and cuts)
- Tile spacers
- Sanded or unsanded grout
- Penetrating grout sealer
- Baseboards, transition strips
How to Tile a Bathroom Floor?
Proper planning and careful installation are key to getting a tile floor that lasts for years. Follow the steps below in order to avoid uneven tiles, cracked grout, and moisture-related damage.
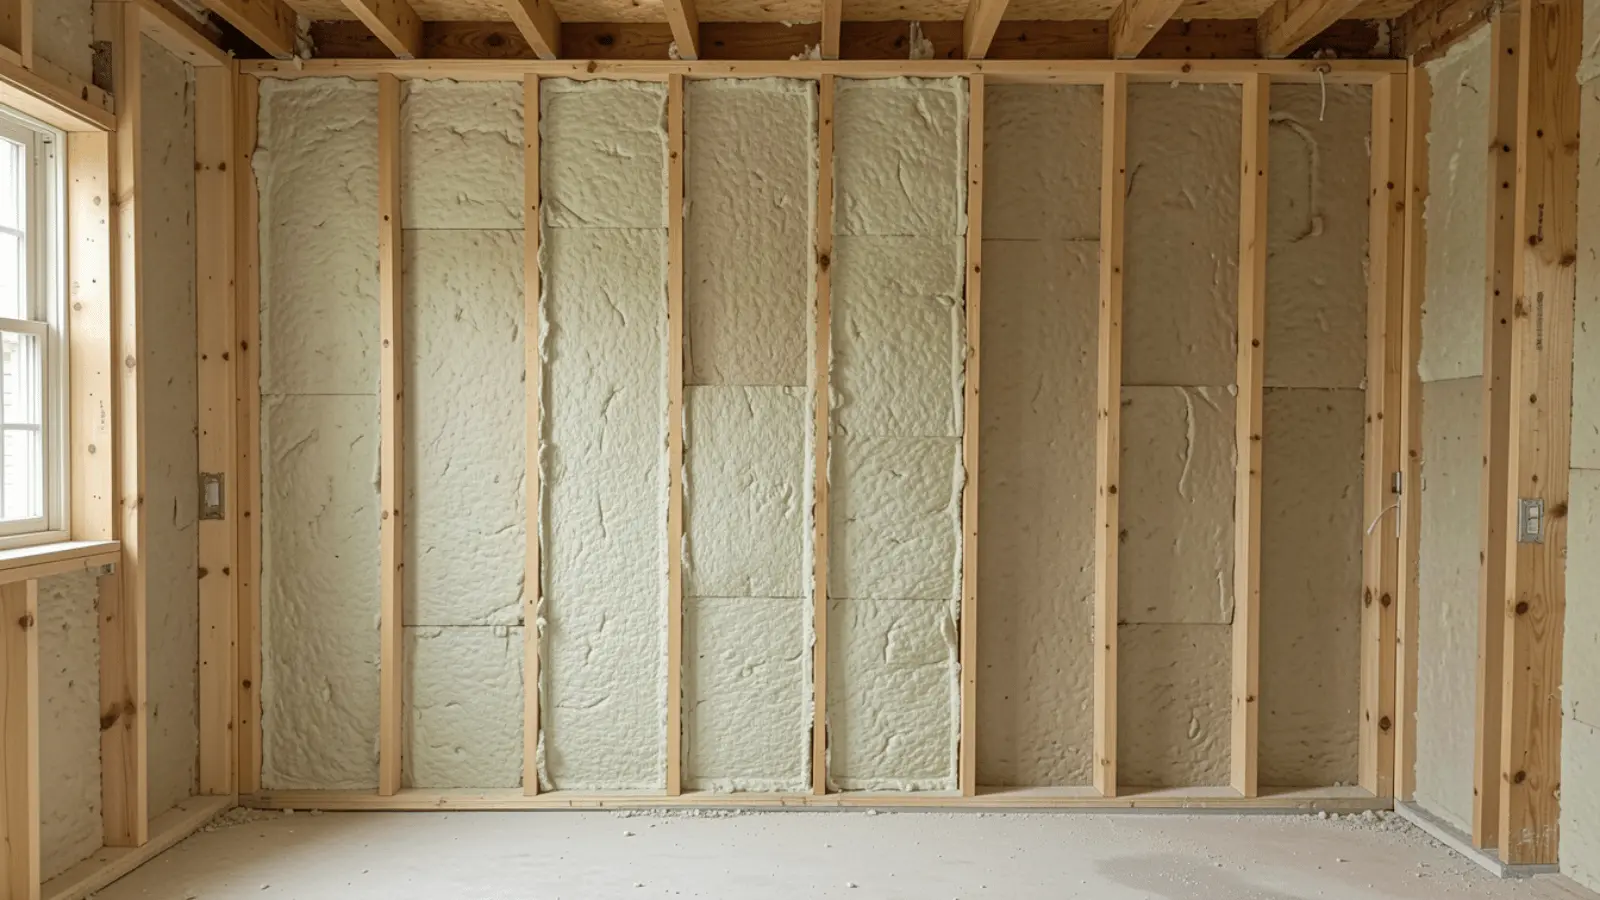
Step 1: Prepare the Subfloor

Remove all existing flooring down to the subfloor. Check for soft spots, cracks, and flex, any movement here will crack tiles within months. Fill low spots with leveling compound and let it cure.
Lay cement board or uncoupling membrane over the subfloor, bedded in thinset, screwed every 6 inches along edges and 8 inches across the field.
Step 2: Measure and Calculate

Measure the length × width to get your square footage, then add 10–15% for cuts and breakage. Order everything from the same batch lot.
Running short mid-project and switching lots introduces visible color variation across the finished floor.
Step 3: Mark Reference Lines and Dry-Fit
Snap chalk lines across both axes to find the room’s center. From that point, dry-fit tiles outward in both directions to see exactly where edge cuts will land.
Adjust the layout so cuts fall behind the toilet and vanity, not at the doorway. Position it so that two to four tiles meet at the toilet flange, with no tile sitting entirely over it.
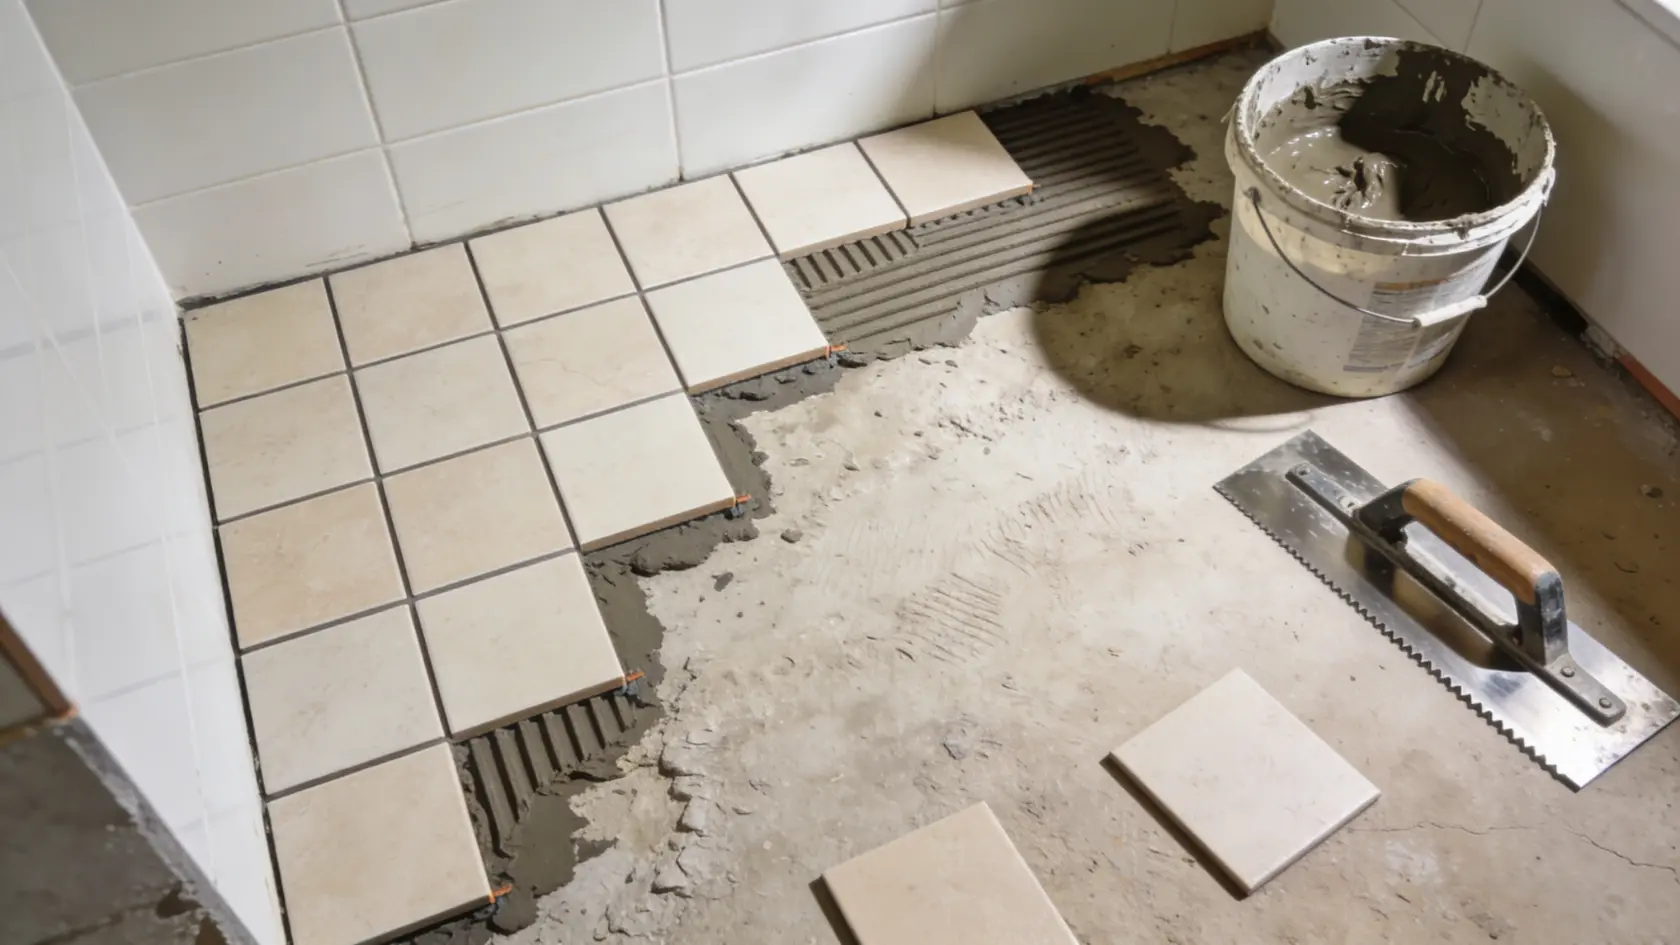
Step 4: Mix Thinset and Install Tiles

Mix thinset to a peanut butter consistency, let it slake for 5 minutes, then remix. Apply with the notched trowel at 45 degrees, combing in one direction only.
Back-butter every tile before setting it. Thinset on the floor alone leaves voids where water collects, breaking the bond over time. Press each tile firmly, use spacers, and check the level as you go.
Every 10–15 tiles, pull one up and check the back. You need 95% coverage. Bare spots indicate you need to adjust your trowel angle or notch size before continuing.
Step 5: Cut Tiles to Fit

Once all full tiles are set, let the thinset cure for 24 hours before cutting edge tiles. Measure and mark each one individually. Rooms are rarely perfectly square, so don’t assume cuts will repeat.
Use a wet saw for straight cuts and tile nippers for curves around pipes. Around the toilet flange, cut straight lines to the perimeter rather than trying to cut a circle; the toilet base covers it completely anyway.
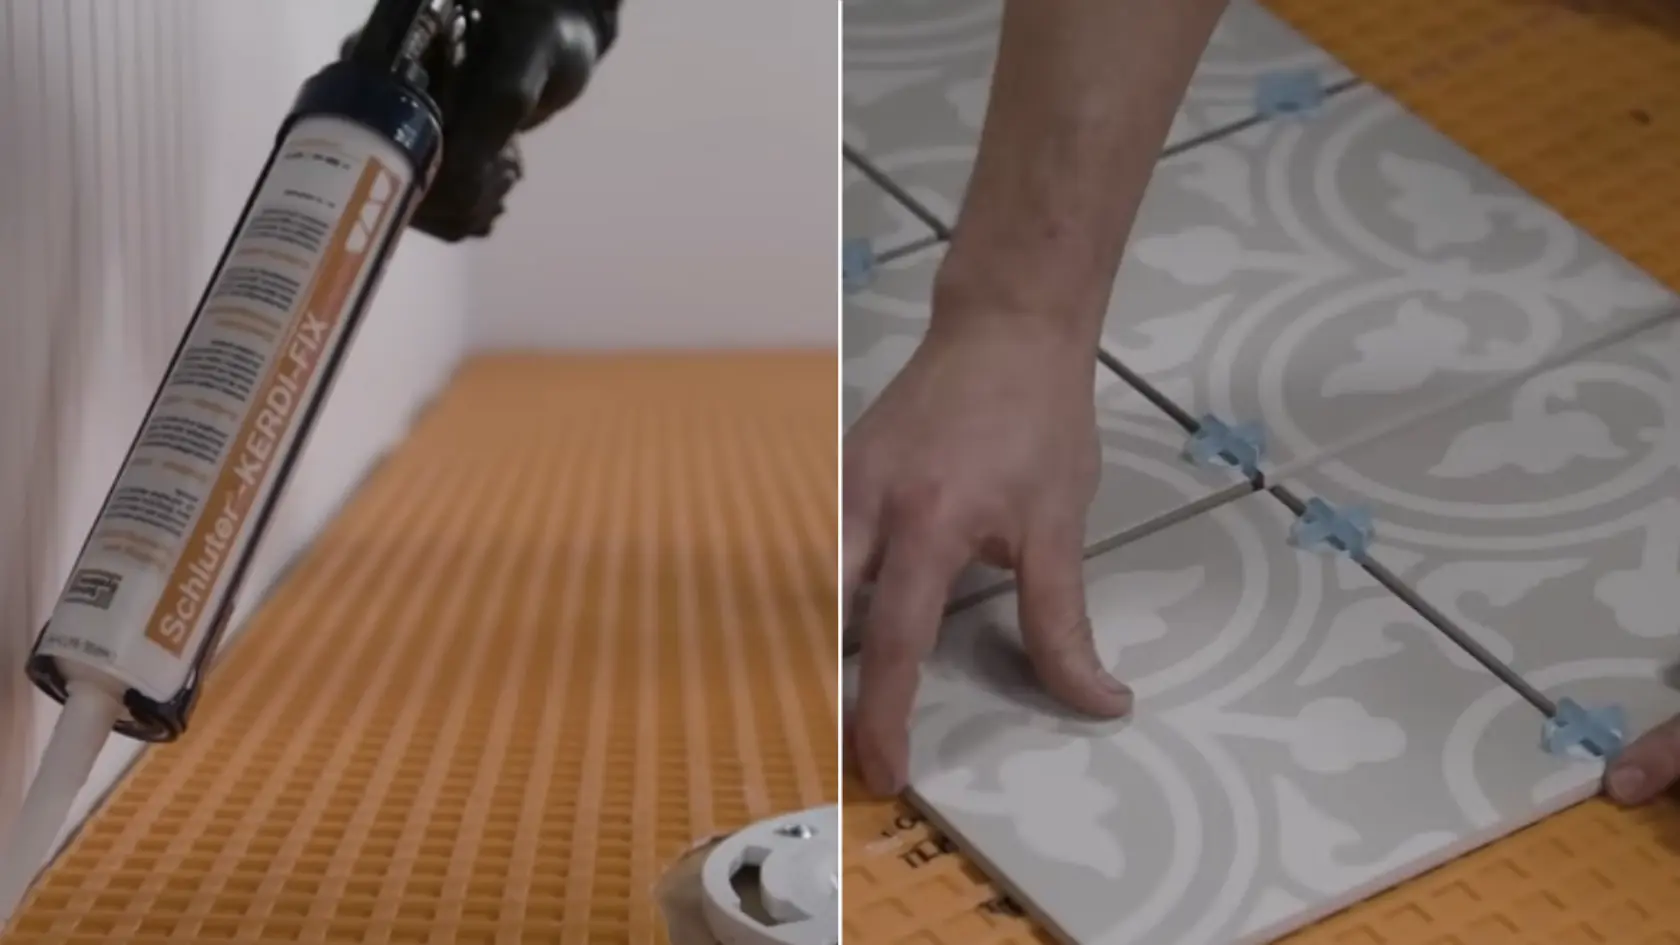
Step 6: Grout, Seal, and Finish

Remove spacers and apply grout with a rubber float at a 45-degree angle. After 15–30 minutes, wipe with a lightly damp sponge, avoiding excess water.
At floor-wall corners, use silicone caulk instead of grout. Those two planes move independently, and the grout will crack there within months.
After 3 days, apply penetrating sealer along all grout joints. Reinstall baseboards and transition strips to finish.
For an in-depth walkthrough of the whole process, check out the complete video tutorial by Lowe’s Home Improvement below:
Best Tile Types for Bathroom Floors
Bathroom floor tiles vary in durability, water resistance, maintenance, and overall appearance.
Choosing the right tile depends on your budget, bathroom use, and long-term maintenance needs.
| Tile Type | Best For | Trade-Off |
|---|---|---|
| Ceramic | Budget-friendly, low-traffic bathrooms | Chips and scratches more easily |
| Porcelain | High-moisture areas, long-term durability | Harder to cut and more expensive |
| Natural Stone | Premium and natural-looking finishes | Requires regular sealing |
| Vinyl Tile | Budget and high-traffic bathrooms | Lower long-term value |
| Mosaic | Shower floors and uneven surfaces | More grout cleaning and sealing |
How to Choose a Tile Pattern for Your Bathroom Floor?

Tile pattern affects more than aesthetics. It influences how much waste you generate, how long the install takes, and how forgiving the layout is for a first-time tiler.
- Straight Grid: Tiles laid in straight rows. Easy to install and beginner-friendly. Best for simple and clean layouts.
- Offset / Brick: Staggered rows like brickwork. Adds detail with moderate difficulty. Works well in modern bathrooms.
- Herringbone: V-shaped rectangular tile pattern. Requires precise cuts and extra waste. Creates a bold and detailed floor design.
- Diagonal / Diamond: Tiles set at 45 degrees. Makes rooms feel wider but increases cuts. Good for smaller bathrooms.
- Basketweave: Alternating rectangular tile pairs. Classic look with careful layout planning needed. Common in traditional-style spaces.
Choose a pattern that matches your skill level, bathroom size, and overall design style. A well-planned layout helps reduce waste and gives the floor a cleaner finished look.
Tips for Making Bathroom Floor Tiling Easier
A few smart habits before and during installation can save a lot of time, effort, and wasted material:
- Work in small sections to keep thinset from drying out before tiles are set
- Label cut tiles with their position before removing them after a dry-fit
- Keep a damp cloth nearby to wipe tile faces before thinset hardens on the surface
- Start from the most visible area so the best cuts land where they are seen most
- Use a marked guide board to keep rows straight without constantly measuring
- Kneel on a board over set tiles to distribute weight and avoid bond damage
- Clean grout haze early before it fully hardens and becomes difficult to remove
Conclusion
Knowing how to tile a bathroom floor comes down to respecting every stage of the process, not just the visible ones.
A solid subfloor, a well-planned layout, properly mixed thinset, and back-buttered tiles are what separate floors that last decades from ones that crack within months.
The tile type and pattern you choose shape both the look and the difficulty of the install, while smart habits like labeling cuts and cleaning grout haze early save real time and frustration.
Rushing any cure stage is where most DIY projects quietly fall apart. Patience during preparation pays off every single time you walk across that finished floor.
Already tiled a bathroom or planning your first project? Share your experience or best tip in the comments below!
Frequently Asked Questions
What Is The Best Tile For Bathroom Floors?
Porcelain tile is one of the best choices for bathroom floors because it is water-resistant, durable, and suitable for high-moisture areas. Ceramic tile is a more budget-friendly option for lighter bathroom use.
Do You Need Cement Board Under Bathroom Floor Tile?
Yes, cement board or an uncoupling membrane helps create a stable surface for tile installation. It reduces movement in the subfloor and helps prevent cracked tiles and grout lines.
Can You Tile Over Existing Bathroom Flooring?
Tiling over existing flooring is possible in some cases, but the surface must be stable, level, and moisture-free. Removing old flooring usually creates a stronger and longer-lasting tile installation.