How to Remove Polyurethane Safely
Got old polyurethane that just won’t come off? You’re not alone. It’s a common problem, and it can feel overwhelming when you don’t know where to begin.
Maybe you’re trying to bring life back to a scratched floor or prep a piece of furniture for a fresh look.
Whatever the reason, you probably just want a clear, safe way to get it done without making a mess or harming your health.
This guide is written for real people like you who need simple steps and honest tips.
You’ll find helpful options that actually work, plus advice to keep things as smooth and safe as possible. Let’s get you through this with confidence and care.
What is Polyurethane?
Polyurethane is a strong finish used to protect wood and floors. It keeps surfaces from getting scratched, wet, or stained.
There are two main types:
- Oil-based polyurethane dries slowly and adds a warm, amber color. It lasts longer but smells more.
- Water-based polyurethane dries fast and keeps the wood’s original color. It’s easier to clean up.
The reason it’s hard to remove is that it’s made to stick tight and hold up for years. That’s great for protection but makes it harder to take off when you want a fresh start.
When Should You Remove Polyurethane?
There are certain times when removing polyurethane makes good sense. If the finish is cracked, peeling, or starting to wear down, taking it off can help restore the surface.
You might also need to remove it before starting a refinishing job so that any new coating sticks properly.
When painting or staining wood, old polyurethane can get in the way, making it hard for the new color to take hold.
Over time, the finish can also lose its shine or no longer match your taste. In any of these cases, removing it gives you a clean surface to work with.
Safety Tips
It’s smart to think ahead before starting any removal work. Some of the products used in this process can be strong, and taking early steps can help you avoid health risks or damage to your space.
Taking just a little time to set things up right can make the entire task smoother and safer.
- Wear PPE: Gloves, safety glasses, and a mask are a must. Some products give off strong fumes.
- Work in a ventilated area: Open windows and use a fan if you’re inside.
- Plan for safe cleanup: Don’t pour leftover chemicals down the drain. Check your local rules for safe disposal.
Product Comparison Table
Different methods work better depending on your space, time, and comfort level. Some options are quicker but give off strong fumes, while others are slower but safer to use indoors.
This table provides a simple way to compare each method so you can choose what is best for your needs.
| Method | Time Needed | Effort Level | Safe for Indoors | Eco-Friendly |
|---|---|---|---|---|
| Chemical Strippers | Medium | Medium | No | No |
| Acetone/Alcohol/Thinner | Medium | Medium | No | No |
| Sanding & Scraping | High | High | Yes | Yes |
| Biosolvents/Soy-Based | High | Low-Medium | Yes | Yes |
Best Ways to Remove Polyurethane
There is no one-size-fits-all method for removing polyurethane. Some methods use chemicals, while others rely on tools like sanders or scrapers.
You can also find options made from safer materials that are easier to use indoors.
Each method has its advantages and disadvantages; some take more time, some require more effort, and others are gentler on your space.
The key is choosing what works best for your surface, your comfort level, and how much cleanup you’re okay with.
1. Chemical Strippers
How to use them safely:
Apply with a brush in even strokes, making sure the surface is fully covered. Let the product sit for the amount of time listed on the label, usually between 15 and 45 minutes.
As it sits, the coating will begin to bubble or soften. Then, use a putty knife or scraper to lift the finish gently.
Always wear gloves, safety glasses, and a long-sleeved shirt to prevent skin contact.
Ideal use cases:
This method works best on carved wood, moldings, or furniture with curves where sanding may be tricky.
It’s also helpful when dealing with multiple old layers that can’t be easily sanded off.
Disposal tips:
After stripping, collect the softened residue with paper towels or cloths and dispose of it in a sealable bag.
Check with your city’s waste program for the correct way to dispose of chemical waste. Many places have drop-off sites for solvents and stripping agents.
2. Acetone, Alcohol & Lacquer Thinner
How they work:
These solvents break down the chemical bonds in polyurethane, softening the top layer so it can be wiped or scraped away.
You usually soak a rag or sponge with the liquid, apply it to the surface, and let it sit for 5 to 10 minutes before scrubbing.
Safety issues:
These chemicals release fumes that can affect breathing and irritate skin or eyes.
Always wear a mask rated for chemical vapors, and keep your workspace well-ventilated.
Never use these solvents near heat, flames, or while smoking—they are highly flammable.
Effectiveness on different surfaces:
Acetone and lacquer thinner are best for solid wood and metal surfaces.
On plastic or laminate, these solvents may cause discoloration or damage. Always test in a small spot before full use.
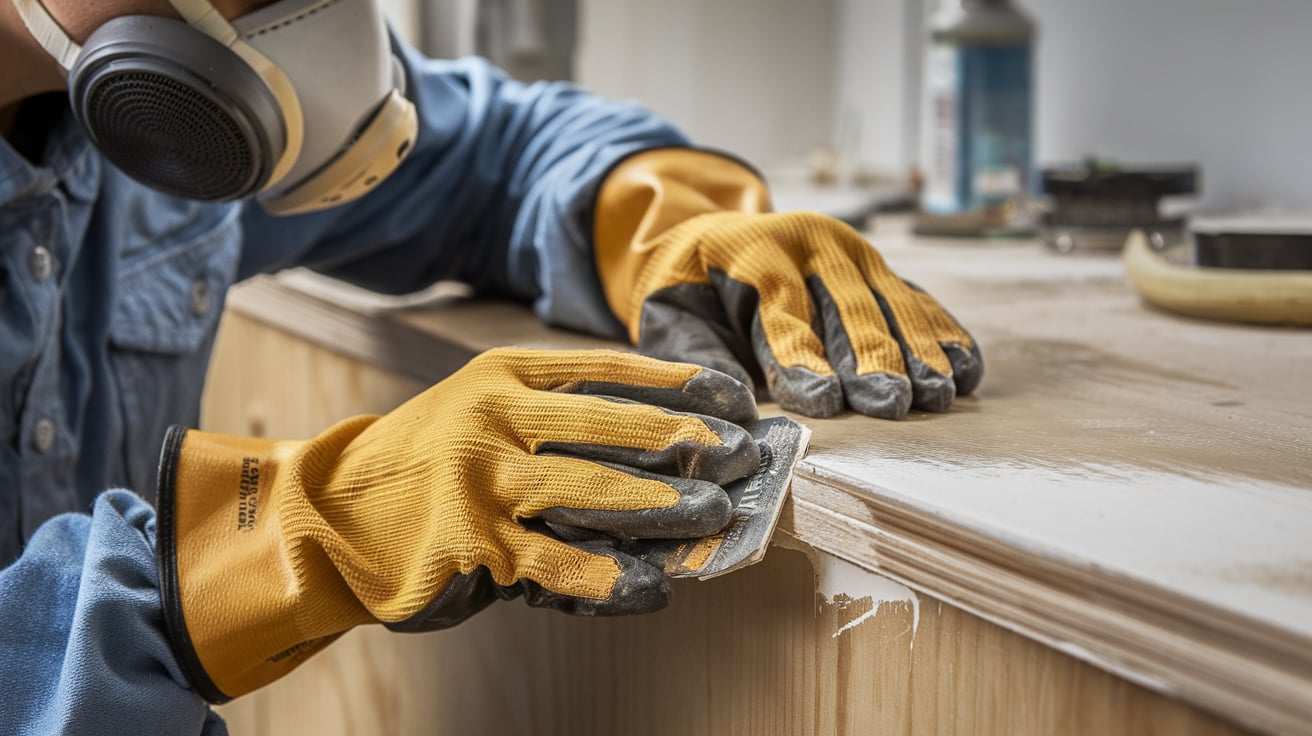
3. Mechanical Methods: Sanding & Scraping
Best for thick/stubborn coatings:
When polyurethane is heavily built up or cracking in layers, sanding cuts through faster than chemicals.
It’s especially useful for floors and large panels where time is a factor.
Tools required:
Use an orbital sander for large flat areas. For corners and edges, switch to a sanding block or detail sander.
Begin with 60–80 grit sandpaper to break through the top layer, then follow with 120 grit to smooth it out. A metal or plastic scraper helps remove any leftover spots.
Surface care tips:
Always sand along the wood grain to avoid scratches. Don’t stay in one spot too long, or you might wear down the surface unevenly.
Wipe away dust often to keep your sanding consistent and prevent clogging the sandpaper.
4. Eco-Friendly Methods (Biosolvents & Soy-Based)
Examples and brands:
VertecBio 5516 and VertecBio Citrus are two common biosolvents. For soy-based products, options like Blue Bear Paint & Urethane Remover (formerly known as Soy Gel) are widely used.
How they work:
These products break down the polyurethane slowly using ingredients made from renewable sources.
You apply a thick coat, cover it, if needed, to keep it moist, and wait for up to an hour. After that, the finish softens and can be scraped or wiped away with a cloth.
Benefits and limitations:
These removers are low in fumes, biodegradable, and safer for indoor use. They’re a good choice for homes with kids or pets.
However, they may need a longer dwell time and might not work as quickly on very old or layered coatings. Also, they tend to be more expensive than basic chemical strippers.
How to Remove Polyurethane by Surface Type
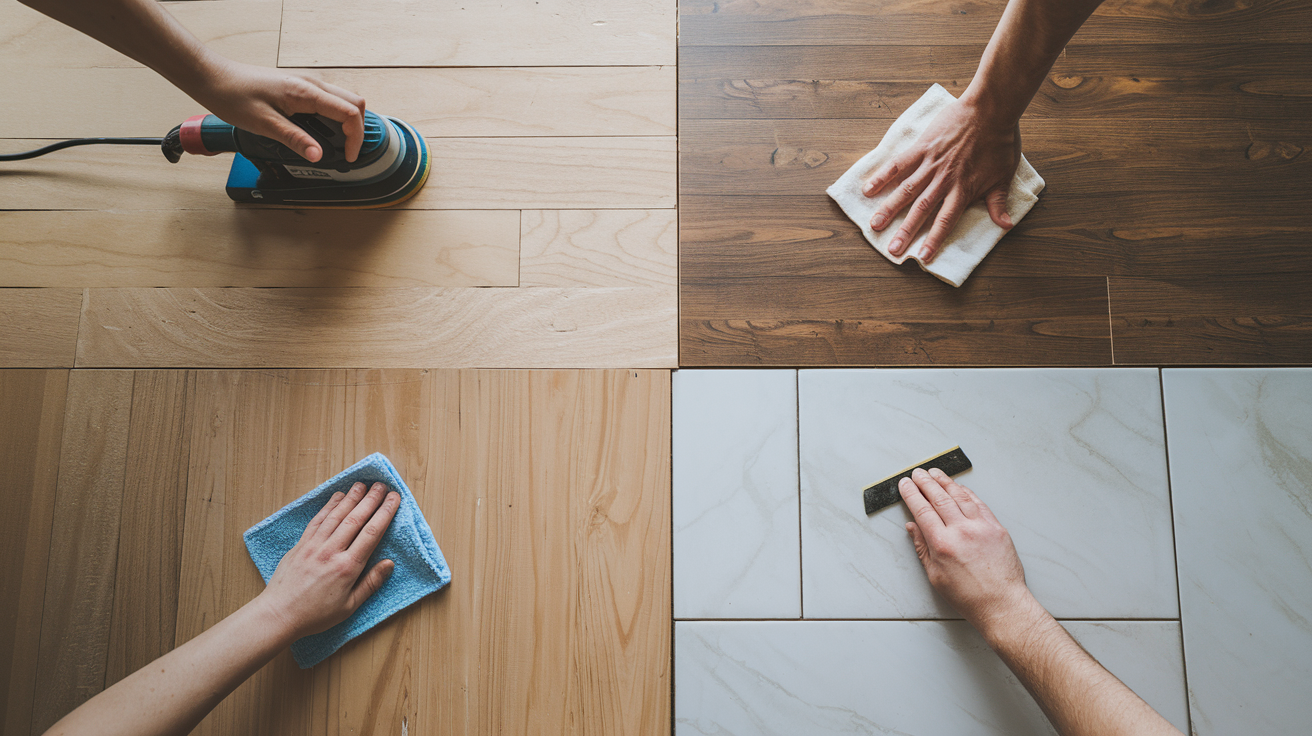
Not all surfaces handle polyurethane removal the same way. What works well on hardwood might cause damage to laminate or engineered wood.
That’s why it’s important to match your method to the material. Some surfaces can take sanding, while others need a softer touch or a gentle product.
Knowing the right approach helps you avoid damage and get better results with less stress.
1. Hardwood Floors
Use chemical strippers or sanding when working on hardwood. These floors can usually handle both methods, but older boards may be softer or worn.
If you’re sanding, use medium grit at first and finish with a finer grit to smooth it out.
If using a chemical stripper, follow the product’s instructions closely and work in small sections.
Take care not to leave the product on too long, especially on softer woods. Always test in an out-of-sight area first.
2. Engineered Wood
Engineered wood has a thin top layer of real wood, so sanding it too much can damage the surface.
Avoid deep sanding or using coarse grit. A safer option is a mild chemical stripper designed for delicate finishes.
Apply it with a soft cloth or brush, let it sit, and then gently remove the coating. Be sure to wipe away any extra product and clean the area fully afterward.
3. Laminate
Laminate has a printed top layer that can’t be sanded. Instead, use denatured alcohol or a cleaner meant for laminate or plastic surfaces.
Apply the solvent with a soft cloth and let it sit briefly before wiping. Always keep the surface as dry as possible and avoid heavy scrubbing, which could damage the printed layer.
4. Tile & Non-Porous Surfaces
For tile, glass, or other smooth surfaces, polyurethane can be removed with chemical strippers or acetone.
Use a product that’s safe for hard materials and apply it in a well-ventilated space.
Let it sit, then scrub with a soft pad or cloth; avoid metal tools that might scratch the tile. Once finished, rinse the area with clean water and dry it thoroughly.
What to Do After Removing Polyurethane
After the polyurethane is off, you’ll want to get the surface ready for whatever comes next.
Cleaning, fixing, and preparing the surface makes a big difference. It helps your new finish last longer and look more even. This step is just as important as the removal itself.
- Neutralize chemicals if the product calls for it. This helps avoid problems when refinishing.
- Clean the surface with a damp cloth or cleaner made for wood.
- Repair or prep for refinishing: Fill in scratches or sand lightly to smooth the area.
- Apply a new finish or sealant that fits your project and protects the surface.
Mistakes to Avoid
Before you start, it helps to keep a few simple habits in mind. These steps might feel small, but they go a long way in keeping your project safe and clean.
Many people forget about testing or safety until something goes wrong. Taking a few extra minutes early on can save hours of repair later. Think of these as your safety net before you dive into the work.
- Don’t skip PPE. It’s there for a reason.
- Always test a small spot first.
- Don’t mix chemical products unless a label says it’s okay.
- Avoid sanding engineered wood too deep.
- Be patient. Rushing can cause damage.
Conclusion
You’ve gone through the basics; you need to feel more ready. Now you know what polyurethane is, why it sticks so well, and which ways you can safely get it off.
You’ve also seen how different surfaces need different care and how to clean up after.
That kind of clarity helps make a tough task feel more doable. If you’re feeling nervous, try starting with a small section first. There’s no rush. Taking your time helps avoid mistakes and stress.
Every surface is a little different, but the steps stay the same. Keep things safe, be gentle when needed, and don’t worry if it’s not perfect.
Want more simple guides like this? Check out our other blogs for tips that make tricky tasks easier.