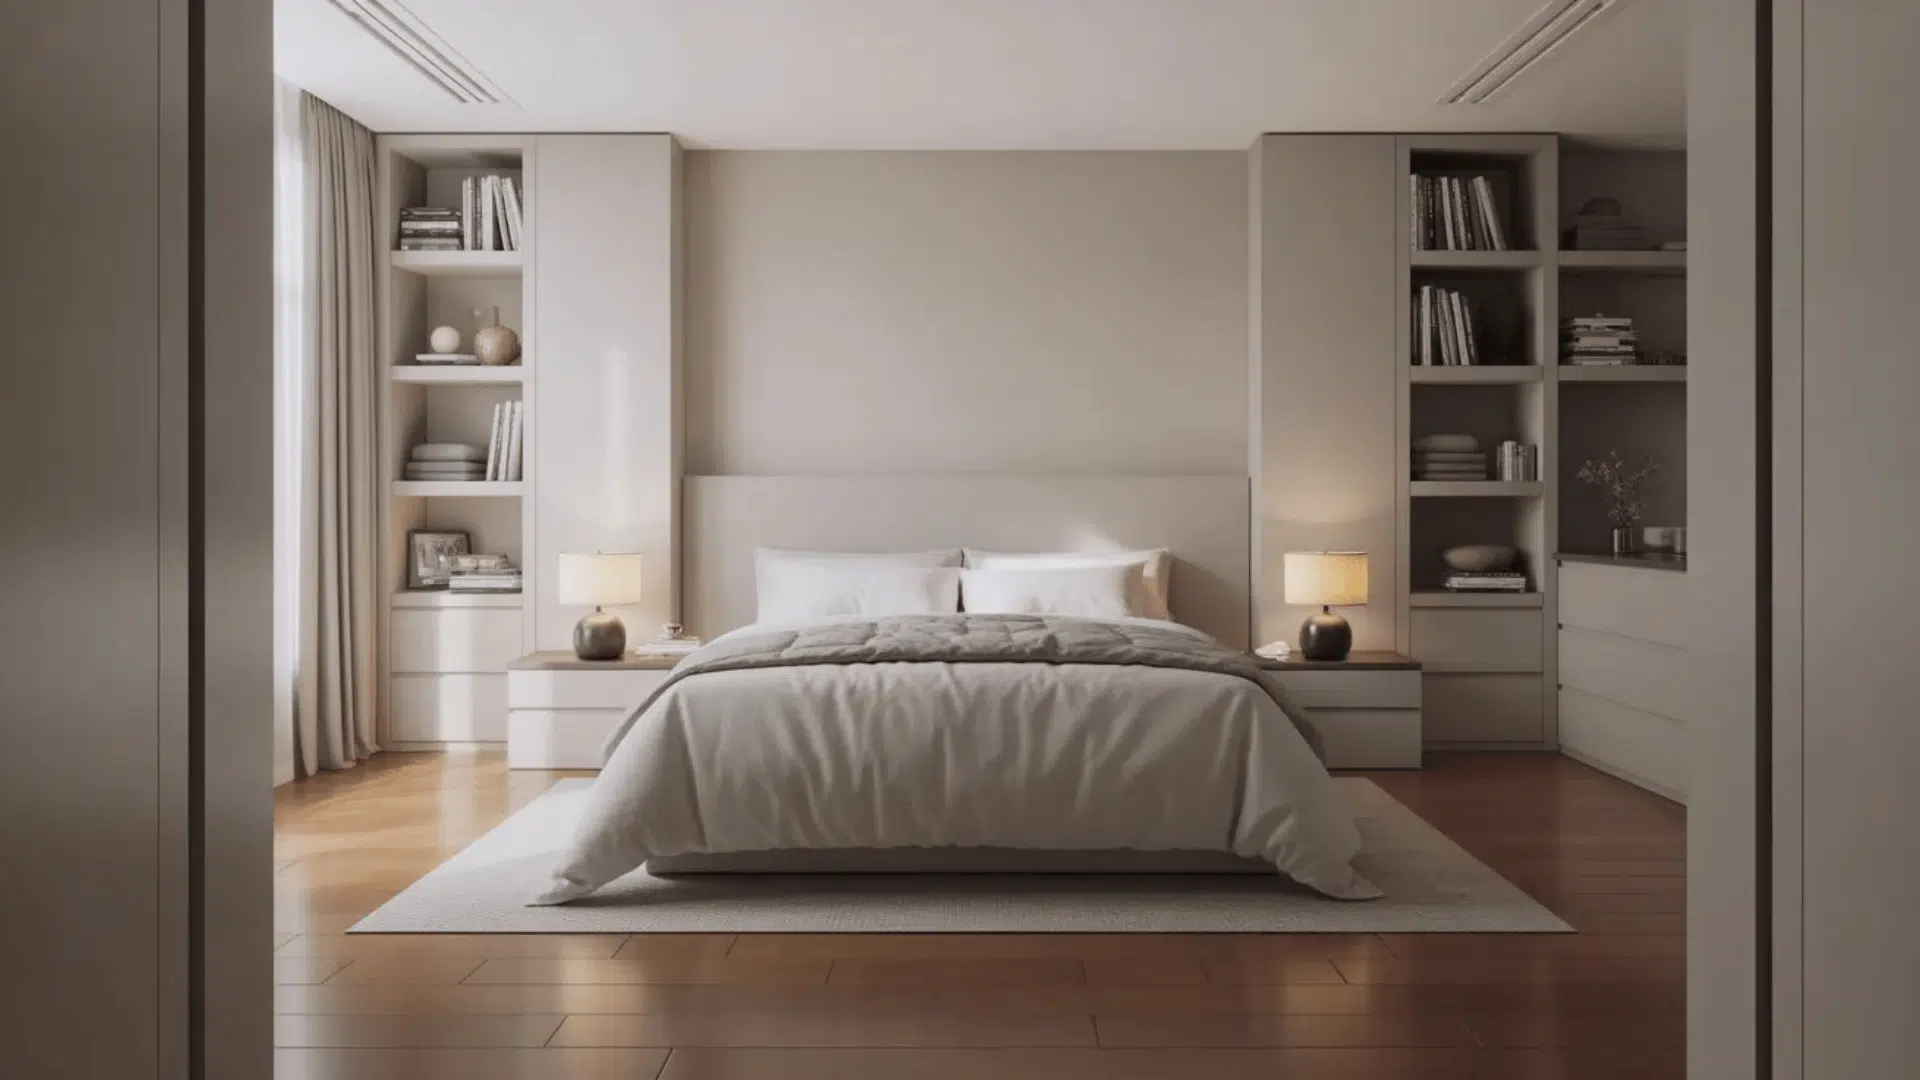
How to Organize Your Room: Simple System that Works
Walking into your room should feel calm, not stressful. But when clothes pile up, drawers overflow, and random items sit everywhere, it becomes hard to relax or focus.
The problem isn’t effort; it’s the lack of a simple system.
Most people clean their room again and again, but the mess always comes back. That’s because cleaning and organizing are not the same thing.
I will show you a step-by-step system that actually works. Once you follow it, keeping your room organized becomes easier and faster every day.
Quick Answer: How to Organize Your Room Fast
If you want to clean and organize your room quickly, follow this simple system:
- Declutter everything: Remove items you no longer use, need, or like.
- Sort into categories: Group similar items together, such as clothes, books, and daily items.
- Assign a fixed place for each item: Every item should have a clear “home,” so it is easy to put back.
- Use vertical + hidden storage: Make use of shelves, wall space, and under-bed storage to save space.
- Build daily reset habits: Spend 5–10 minutes each day putting things back in place to avoid mess piling up again.
Stick to this system, and your room will stay clean without taking up much of your time.
Why Most People Fail to Organize Their Room
Many people clean their room repeatedly, but the mess keeps returning. The issue isn’t motivation. It’s the lack of a repeatable system.
- No Fixed Home for Items: When things don’t have a set place, they end up scattered.
- Organizing Without Decluttering: Rearranging clutter only hides the problem.
- No Maintenance Habit: Without a short daily reset, mess builds up again.
Once these three issues are fixed, keeping your room organized becomes much easier.
Step-by-Step Guide to Organize Your Room
Follow these steps in order. Eachstep leads to the next, so do not skip ahead. This is what turns a one-time clean into a system that actually works.
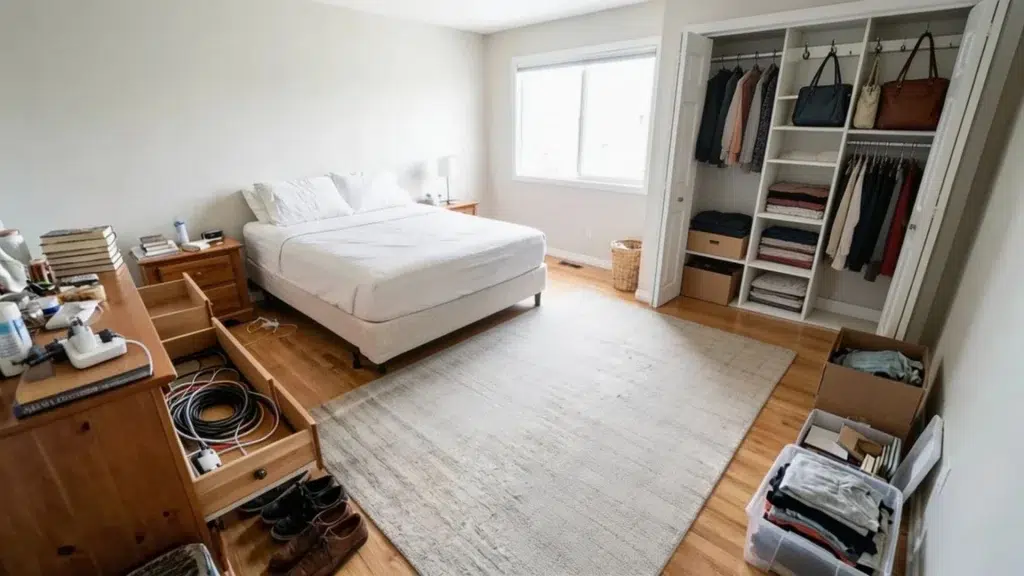
Step 1. Clear Everything out (Start with a Blank Space)
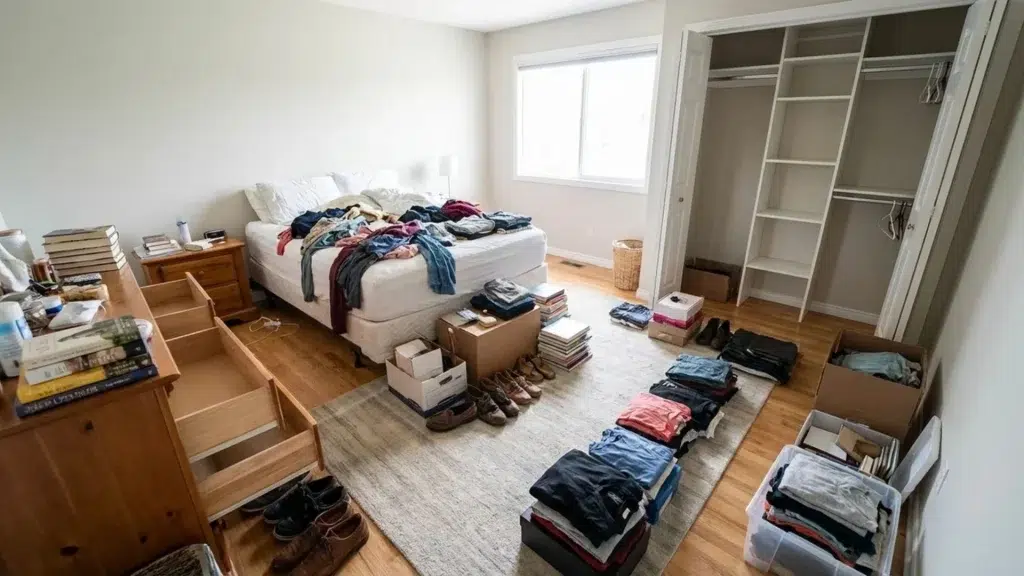
Starting fresh helps you see what you are dealing with. When everything is out in the open, it becomes easier to make decisions and avoid missing hidden clutter.
Remove Items from Surfaces, Drawers, Closet
Take everything out of visible areas and storage spaces so you can see exactly what you own. This step removes hidden clutter and gives you a clear starting point.
When items stay inside drawers or closets, it is easy to ignore how much you have. Pulling everything out helps you make better decisions while organizing.
Work Section-by-Section (If Overwhelmed)
If the room feels too much, break it into smaller sections like the desk, bed area, and closet. This keeps the process simple and less stressful.
Finishing one section at a time gives you quick progress and keeps you motivated. It also prevents you from leaving the job halfway done.
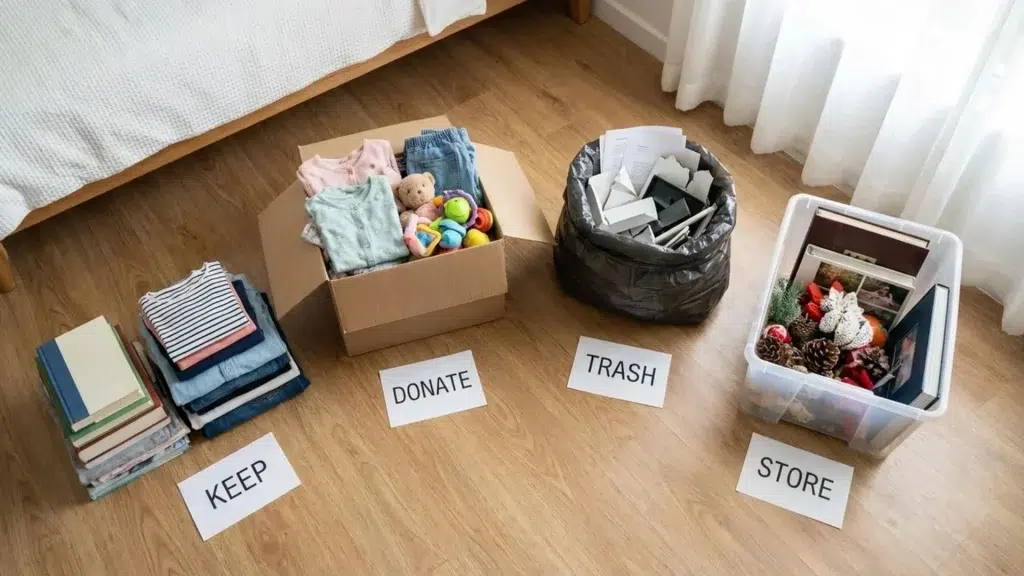
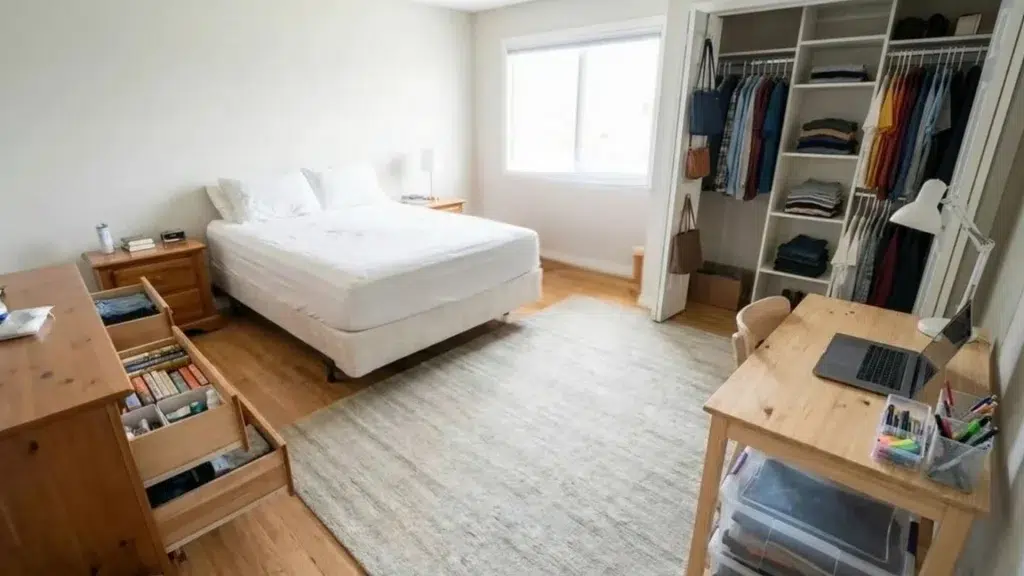
Step 2. Declutter Ruthlessly (Keep, Donate, Trash, Store)
This is where most of the real progress happens. The less you keep, the easier everything becomes later.
Use the 4-Box Method
Sort everything into four groups:
- Keep: Items you use regularly and truly need
- Donate: Items in good condition that you no longer use
- Trash: Broken, damaged, or unusable items
- Store: Items you do not use often but still want to keep
This keeps decisions simple and fast.
The 6-Month Rule (Easy Decision Trick)
If you have not used something in the last 6 months, it is usually safe to remove it. This rule helps you make quick decisions without second-guessing.
It also prevents you from holding on to items “just in case.” Over time, this keeps your space lighter and easier to manage.
Remove Duplicates
Duplicates slowly accumulate, taking up unnecessary space. Keeping only what you actually use makes organizing much easier.
This is common with clothes, stationery, and small items. Reducing extras instantly cuts down clutter.
Step 3. Group Similar Items Together
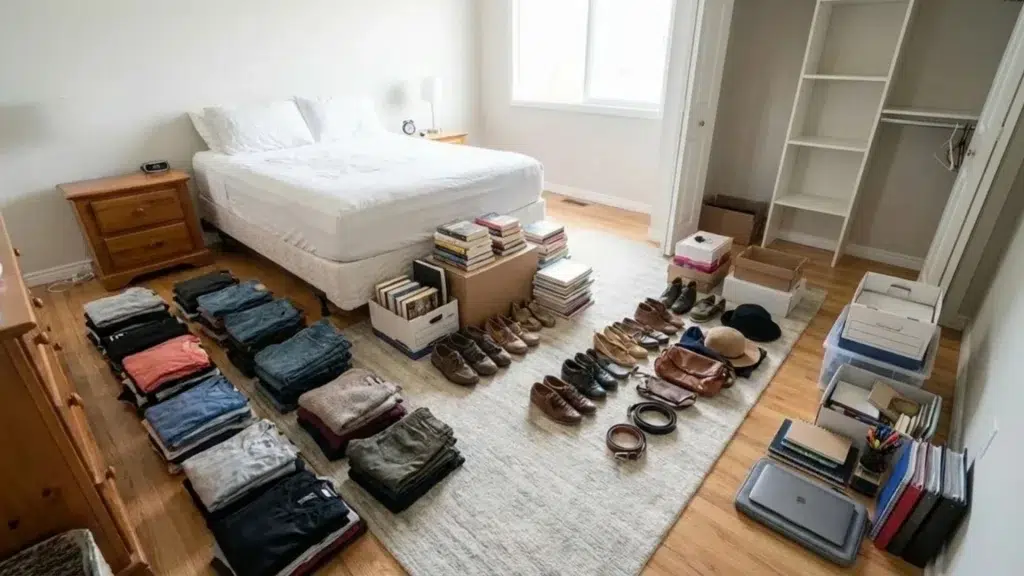
Once you declutter, grouping items makes organizing more structured and logical. It helps you see exactly how much you have in each category.
This also prepares you for assigning proper storage later. Without grouping, things tend to get mixed again.
Create Categories
Start simple:
- Clothes: Keep all clothing items together in one category.
- Books: Group books, notebooks, and reading materials.
- Accessories: Include watches, belts, and small personal items.
- Study or work items: Keep all work-related items in one place.
You can add more categories as needed.
Why Grouping Reduces Mess Long-Term
When similar items stay together, it becomes easier to find what you need. You do not waste time searching in different places.
It also makes putting things back simple and automatic. This is what keeps your room organized over time.
Step 4. Assign a “Home” to Every Item
This is the step that keeps your room organized even after cleaning. When every item has a fixed place, a mess has no chance to build up again.
It also makes daily use easier because you always know where things belong. This removes confusion and saves time every day.
Store Items Where You Use Them
Place items close to where you actually use them. This makes it easier to put things back without extra effort.
When storage feels natural, you are more likely to stay consistent. This is what turns organizing into a habit.
Examples
- Bags → Wall Hooks: Easy to grab and hang without taking up floor space.
- Daily Clothes → Front Section of the Closet: Keeps everyday items accessible.
- Chargers → One Dedicated Drawer: Keeps cables untangled and easy to find.
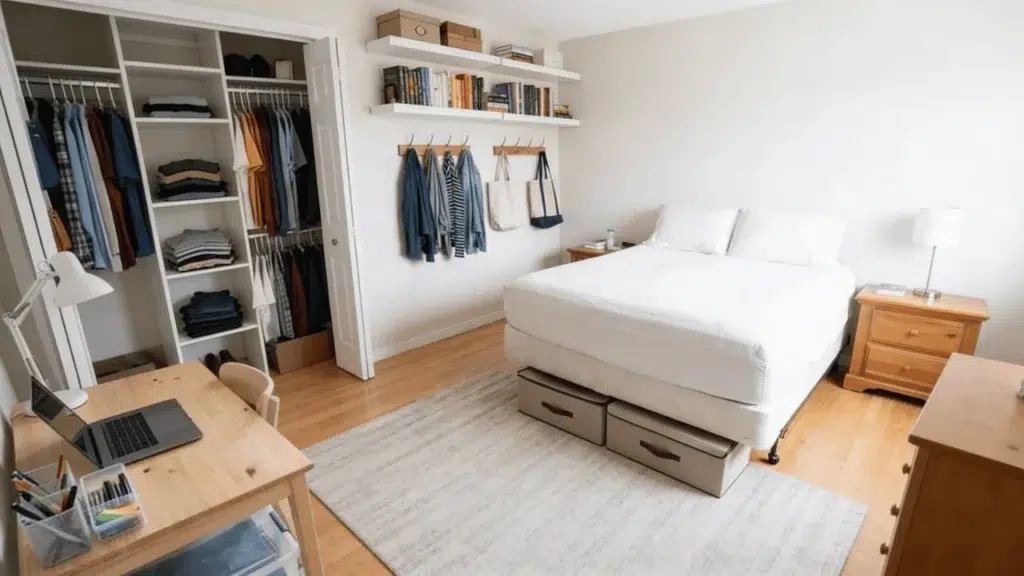
Step 5. Organize Key Areas in Your Room
Now that everything is sorted and assigned, it is time to organize each area with a clear setup. This helps your room stay functional and easy to maintain every day.
How to Organize Your Closet
- Arrange by type, season, or color: Group similar clothes together. Keep daily wear in easy reach. Move seasonal items to the back or higher shelves.
- Use both shelves and hanging space: Hang items that wrinkle easily, like shirts and dresses. Use shelves for folded clothes, such as jeans, t-shirts, or sweaters.
- Keep frequently used items accessible: The less effort it takes to grab something, the more likely you are to keep things organized.
How to Organize Your Dresser
- Use drawer dividers: Split drawers into sections to prevent items from mixing. This works well for socks, undergarments, and small clothing.
- Give each drawer a clear purpose: Use the top drawers for daily wear, the middle for sleepwear, and the bottom ones for extra or seasonal items.
- Avoid overfilling drawers: If drawers are too full, things get messy again very easily.
How to Organize Your Desk
- Keep only essentials on top: Leave space for work. Only keep items you use daily, like a laptop, notebook, or lamp.
- Use trays or organizers for small items: Store pens, cables, and stationery in one place so they do not spread across the desk.
- Hide visual clutter: Use drawers or small containers to keep the surface clean and simple.
How to Organize Small Items
- Use bins, jars, or boxes: Assign containers for accessories, chargers, and other random items.
- Label if needed: If you forget where things go, simple labels can make a big difference.
Step 6. Maximize Storage Space (Smart Layout Tricks)

You do not need more space. You just need to use the space you already have more effectively. Small layout changes can free up a lot of space.
Use Vertical Space
Most rooms waste wall space. Using it well can instantly reduce clutter.
- Shelves: Add wall shelves to store books, decor, or daily items without using floor space.
- Hooks: Use hooks for bags, jackets, or even accessories. They are simple but very effective.
- Wall organizers: Great for small items like stationery, cables, and personal items that tend to get scattered.
Use Under-Bed Storage
The space under your bed is often ignored, but very useful. It can be used for:
- Seasonal clothes: Store off-season clothes here so your closet stays light and easy to manage.
- Extra bedding: Keep spare sheets, blankets, or pillows neatly stored and out of sight.
- Use storage boxes or containers: This keeps everything clean and easy to pull out when needed.
Using this hidden space smartly helps you reduce clutter and keep your room more organized without adding extra furniture.
Choose Multi-Functional Furniture
Furniture that does more than one job helps save space without adding clutter.
- Storage Beds: Beds with built-in drawers give you extra storage without taking up extra room.
- Ottomans: Can be used for seating and hidden storage at the same time.
- Desks with drawers: Keep your work area clean by storing items inside instead of on top.
When you combine these simple layout changes, your room feels more open, organized, and easier to maintain every day.
Step 7. Clean the Room After Organizing
Once everything is in place, take a few minutes to clean the room. This step pulls everything together and makes the space feel truly finished.
- Dust surfaces: Clear dust from shelves, tables, and corners where it tends to accumulate.
- Vacuum or sweep the floor: Pick up dirt, hair, and small debris left behind during organizing.
- Wipe down tables and shelves: Use a damp cloth to remove stains, marks, or sticky spots.
This final clean is what turns your room from “organized” into a space that actually feels fresh, calm, and ready to use.
Common Mistakes to Avoid
Even with the right steps, a few common mistakes can undo your progress. Avoid these so your room stays organized long-term.
- Keeping Too Many Items: Holding on to too much makes it harder to stay organized. The more you keep, the more effort it takes to manage everything.
- Buying Storage Before Decluttering: Purchasing boxes or organizers too early often creates more clutter. Reduce what you own first, then choose storage based on what remains.
- Not Labeling Containers: Without labels, it’s easy to forget where things belong. This slowly breaks the system.
- Ignoring Vertical Space: Leaving walls unused limits storage potential. Shelves and hooks free up valuable floor space.
- No Routine: Without small daily habits, clutter returns quickly. A short reset each day keeps everything under control.
Pro Tips to Organize Your Room Faster
Cleaning your room feels much easier when you follow a few simple and smart habits.
- Start with the easiest area first: This builds quick momentum and makes the rest of the room feel easier to tackle.
- Set a timer (30–60 mins): A fixed time keeps you focused and prevents burnout while cleaning.
- Do not aim for perfection: Getting things done matters more than making everything look perfect.
- Play music to stay consistent: Music makes the process feel lighter and helps you stay in the flow.
Small steps like these help you clean faster without stress and keep your room under control.
Quick Room Organization Checklist
Use this as a simple reset guide anytime your room starts feeling messy:
- Clear surfaces and visible clutter
- Declutter using Keep / Donate / Trash / Store
- Group similar items together
- Assign a fixed place to every item
- Use vertical and hidden storage
- Do a 5–10 minute daily reset
If all boxes are checked, your room will stay under control without extra effort.
Wrapping Up
Organizing your room is less about perfection and more about having a system that works day to day. When everything has a place, your space stays clean without constant effort.
Focus on the basics that actually make a difference. Declutter first, group similar items, and use smart storage to keep things easy to access and maintain.
Start small and take action today. Pick one area, organize it properly, and build simple habits that keep your room clean over time.
Frequently Asked Questions
How Long Does It Take to Organize a Room?
Most rooms take 2–4 hours if done in one go, or a few days if you organize section by section.
How Often Should I Organize My Room?
Do a quick reset daily and a deeper organization once a month or during seasonal changes.
How Do I Organize My Room when I Have Too Much Stuff?
Start by decluttering first. Remove unused items, then organize what remains. Storage alone won’t fix overcrowding.


