How to Get Rid of Spider Mites on Indoor Plants?
Spider mites can ruin your indoor plants before you even spot them. Leaves lose color, fine webs form, and growth slows. If your plants look tired and weak, this could be the reason.
The good part is that learning how to get rid of spider mites on indoor plants is easier than it seems. You don’t need fancy tools or expert knowledge. Simple, clear steps can stop the spread and help your plants recover.
In this blog, you’ll learn how to spot early signs, treat the problem, and keep your plants safe.
What Do Spider Mites Look Like?
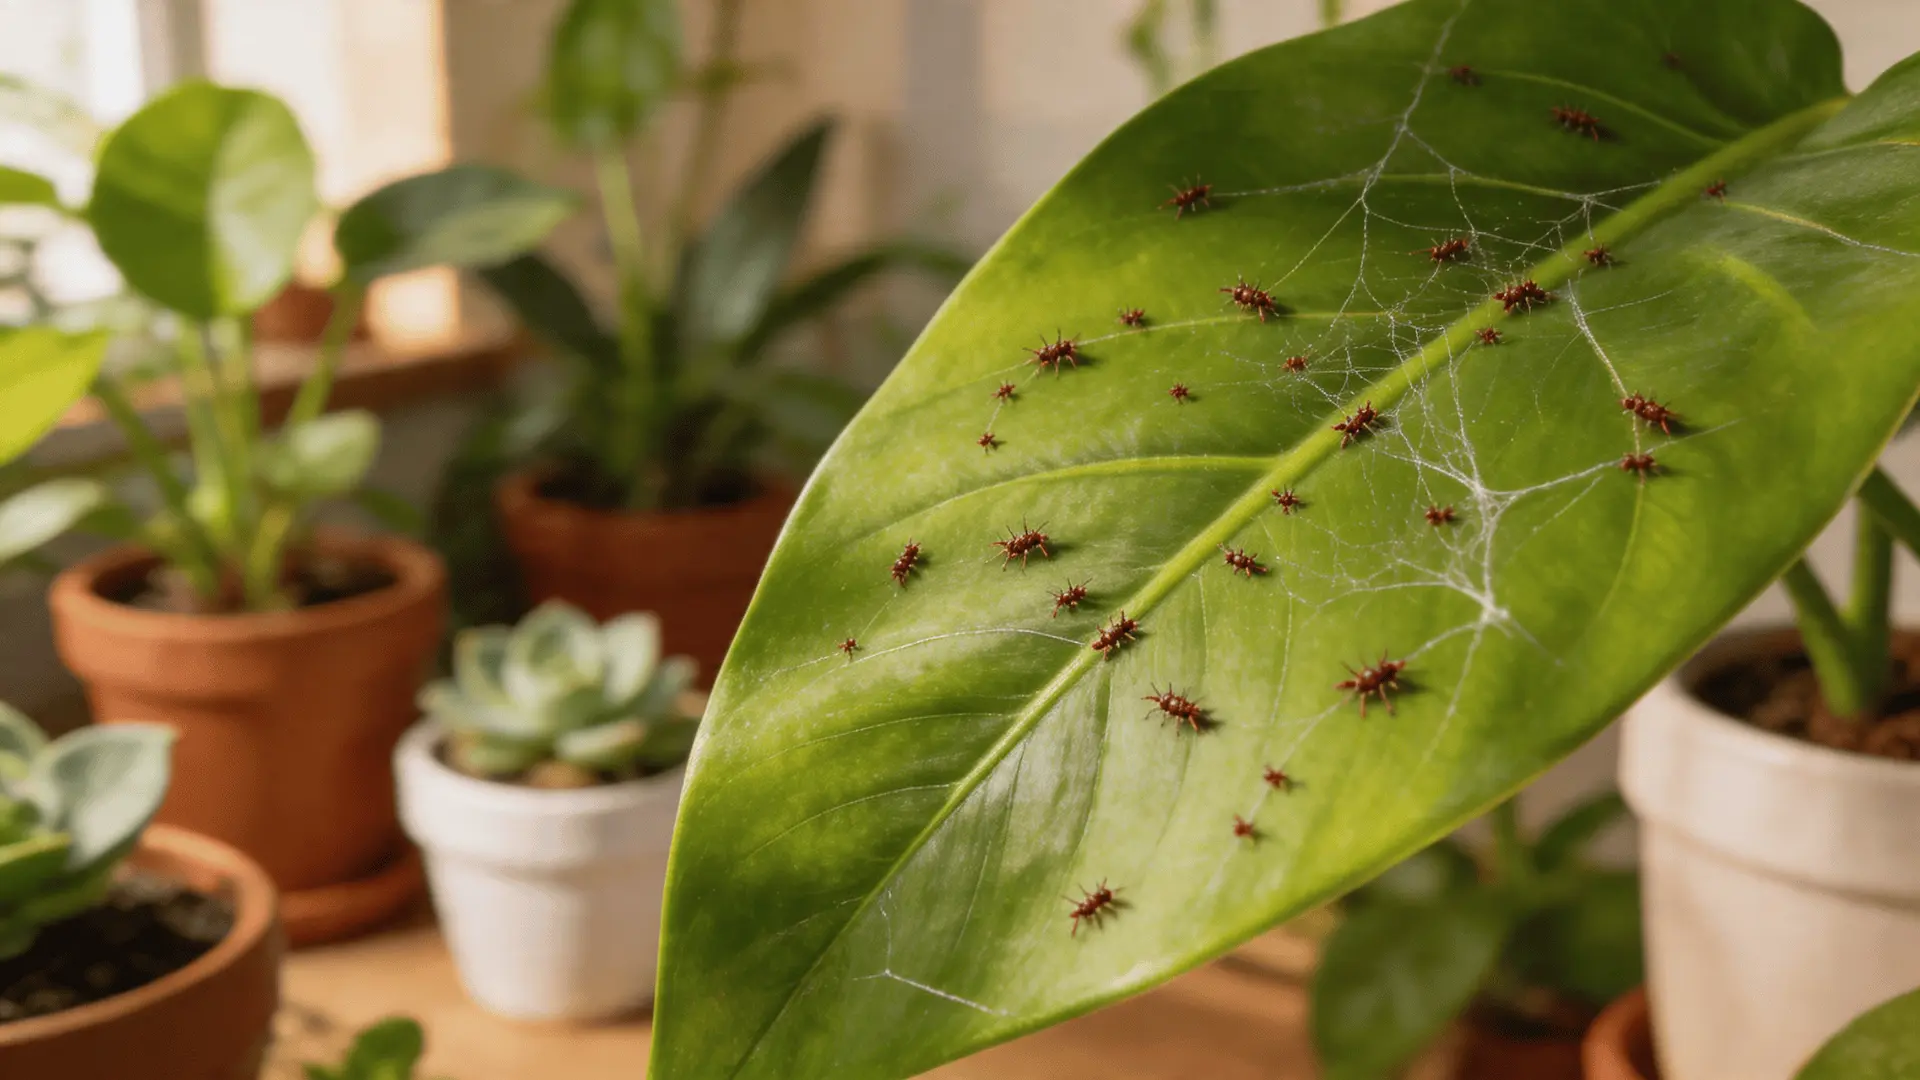
Spider mites are tiny pests that are easy to miss at first. They are not insects. They belong to the arachnid family, the same group as spiders and ticks.
Most spider mites are about 1/50 of an inch, so you won’t see them clearly without looking closely. They often appear as tiny moving dots on the underside of leaves. Depending on the type, they can look red, brown, yellow, or even green.
In most cases, you won’t notice the mites first. You’ll see the signs they leave behind:
- Fine, silky webbing on leaves and stems
- Small pale or yellow dots (stippling) on the leaf surface
- A dusty or dull look on the plant
If you look closely at the webbing, you may see tiny dots moving slowly inside it. They don’t jump or fly. They crawl and stay hidden under leaves.
A quick way to check is the paper test:
- Hold a white sheet of paper under a leaf
- Tap the leaf gently
- If small specks fall and start moving, mites are present
You can also crush one of the specks with your finger. If it leaves a rust-red or brown streak, that’s a strong sign of spider mites.
Catching them at this stage makes a big difference. The earlier you spot them, the easier they are to control.
What Attracts Spider Mites

Spider mites show up when the conditions are right for them to grow and spread. Once they find a plant they like, they settle on the underside of leaves and start feeding.
They are most attracted to:
- Warm temperatures: Spider mites grow faster in warm spaces. Indoor plants placed near windows, heaters, or in direct sunlight are more at risk.
- Dry air (low humidity): Dry conditions help mites reproduce quickly. This is common indoors, especially during winter when the air gets dry.
- Stressed or weak plants: Plants that are not getting proper water, light, or care become easy targets. Mites tend to attack plants that are already struggling.
- Still air and crowded plants: When plants are placed too close together, mites can move from one plant to another easily. Poor airflow also helps them stay undetected.
- New or recently moved plants: Spider mites often come in on new plants or plants brought indoors from outside. If not checked early, they spread quickly.
They don’t need to fly to spread. They move by crawling, through plant-to-plant contact, or even through air currents using their fine webbing.
Keeping humidity balanced, spacing plants properly, and checking plants often can help reduce the chances of an infestation.
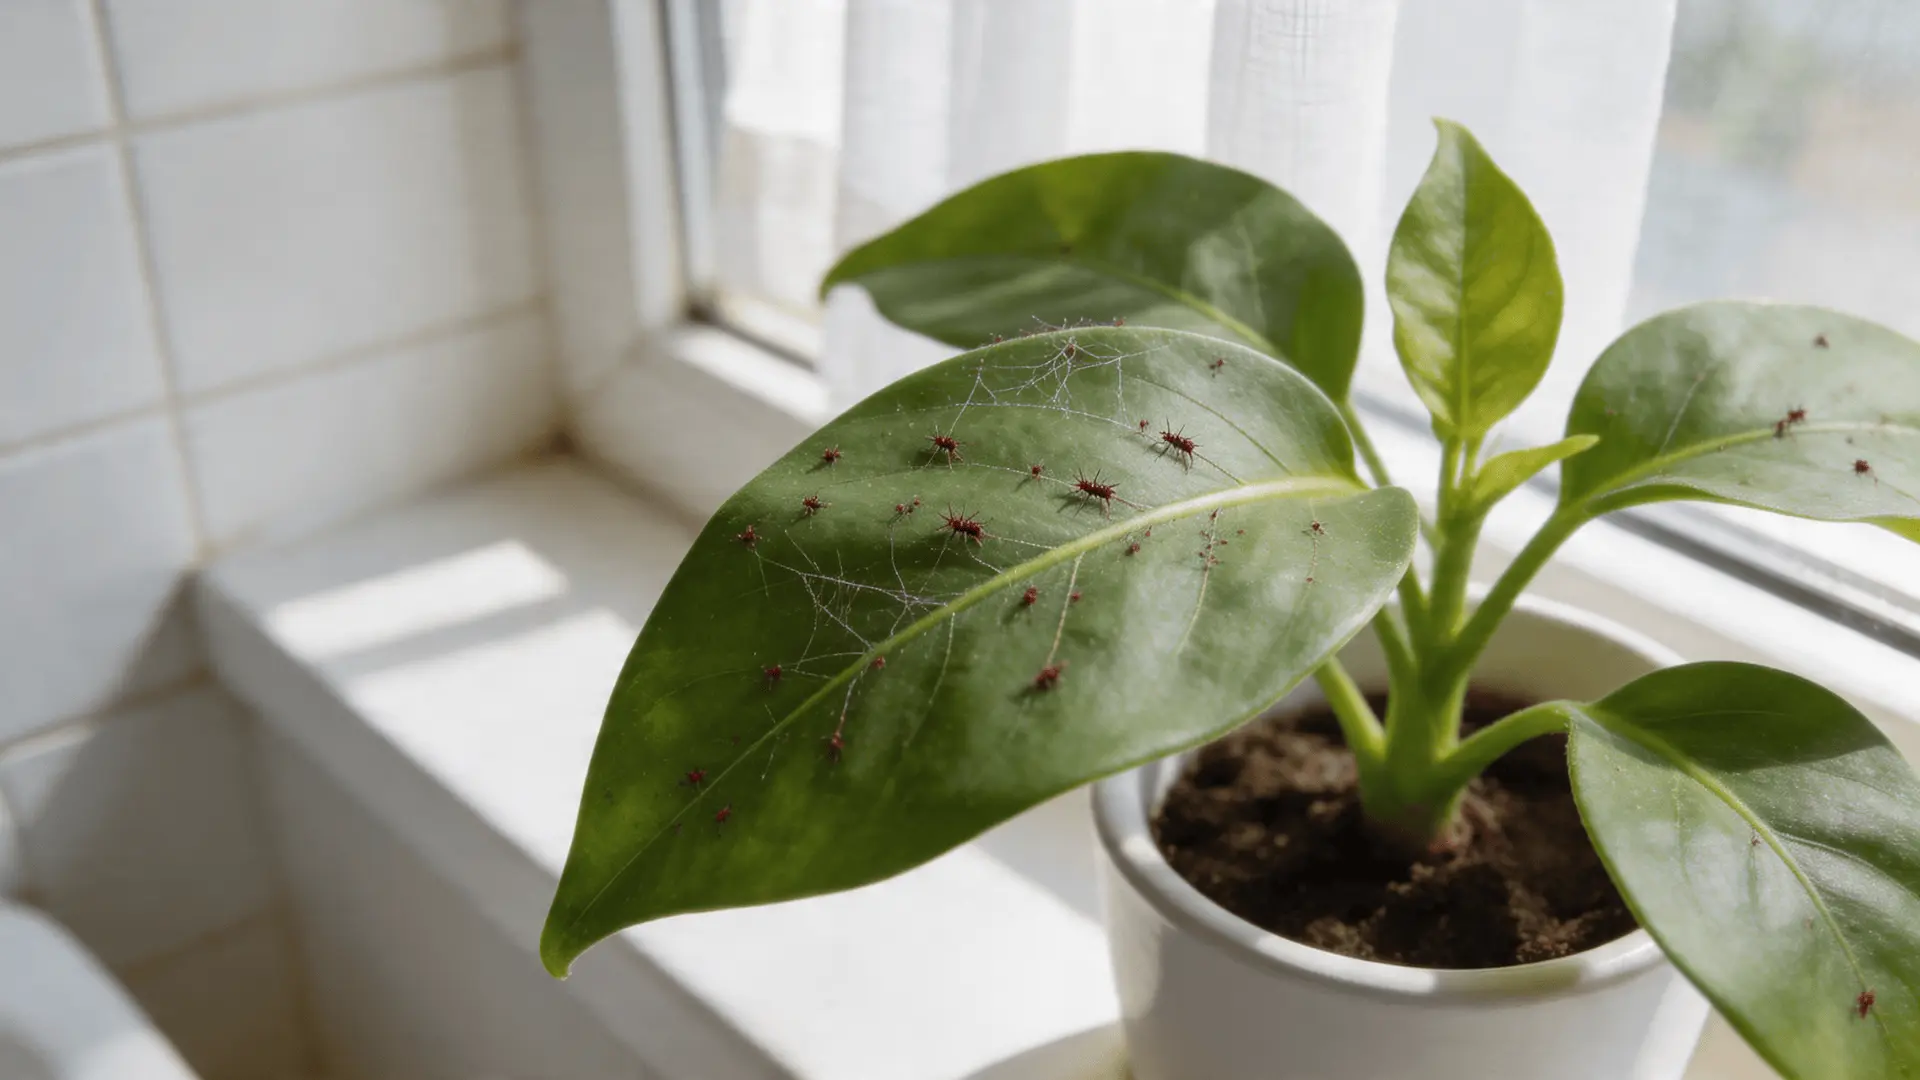
How to Identify Spider Mite Damage
Spider mite damage usually starts small, so it’s easy to overlook in the beginning. You might notice tiny pale dots on the leaves, which can make the plant look dusty or faded. These spots appear because mites feed by piercing plant cells and draining their contents.
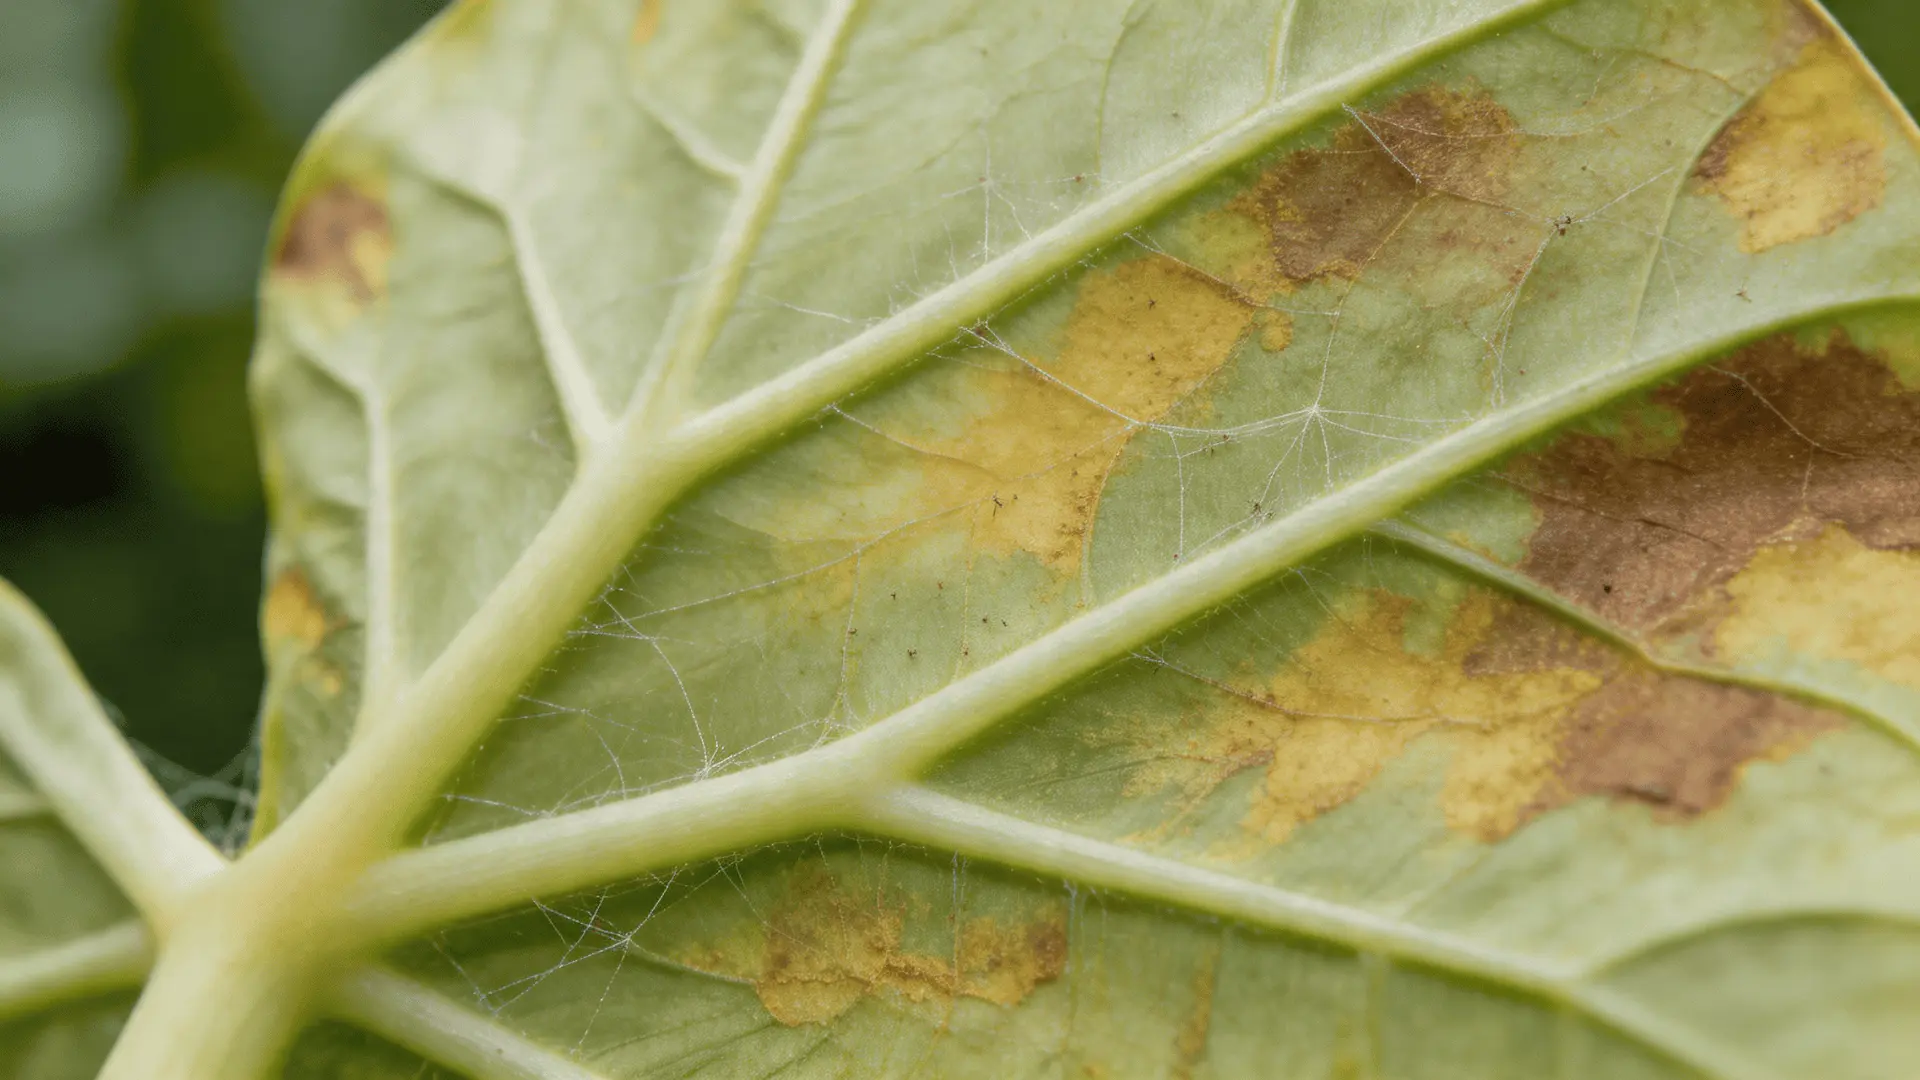
As the infestation grows, the signs become more visible. Look out for:
- White or pale speckles across leaves that spread over time
- Yellowing or bronze discoloration, especially on older leaves
- Fine webbing on leaves and stems, often in corners or between nodes
- Leaves sticking together due to web buildup
- Dry, brittle leaves that may curl, weaken, and fall off early
Most of the damage appears on the underside of leaves first, where mites tend to hide and feed.
If you start seeing heavy webbing, the infestation is already advanced. At this stage, mites are spreading quickly, and you’ll need to act fast to protect the rest of your plants.
How to Treat Spider Mites on Plants: A Step-by-Step Guide
Treating spider mites takes patience, but the right approach eliminates them completely. Miss one pocket of mites, and the cycle starts over.
Step 1: Isolate Your Plant Immediately
As soon as you confirm spider mites, move the plant away from all others. This helps stop the spread. Be careful while carrying it so the leaves don’t touch nearby plants, as mites can transfer easily.
Place the plant in a separate area where you can treat it comfortably. A bathroom, sink, or outdoor space works well. Keep it isolated during the full treatment period. Don’t move it back too soon, even if it starts to look better.
Step 2: Give It a Thorough Rinse
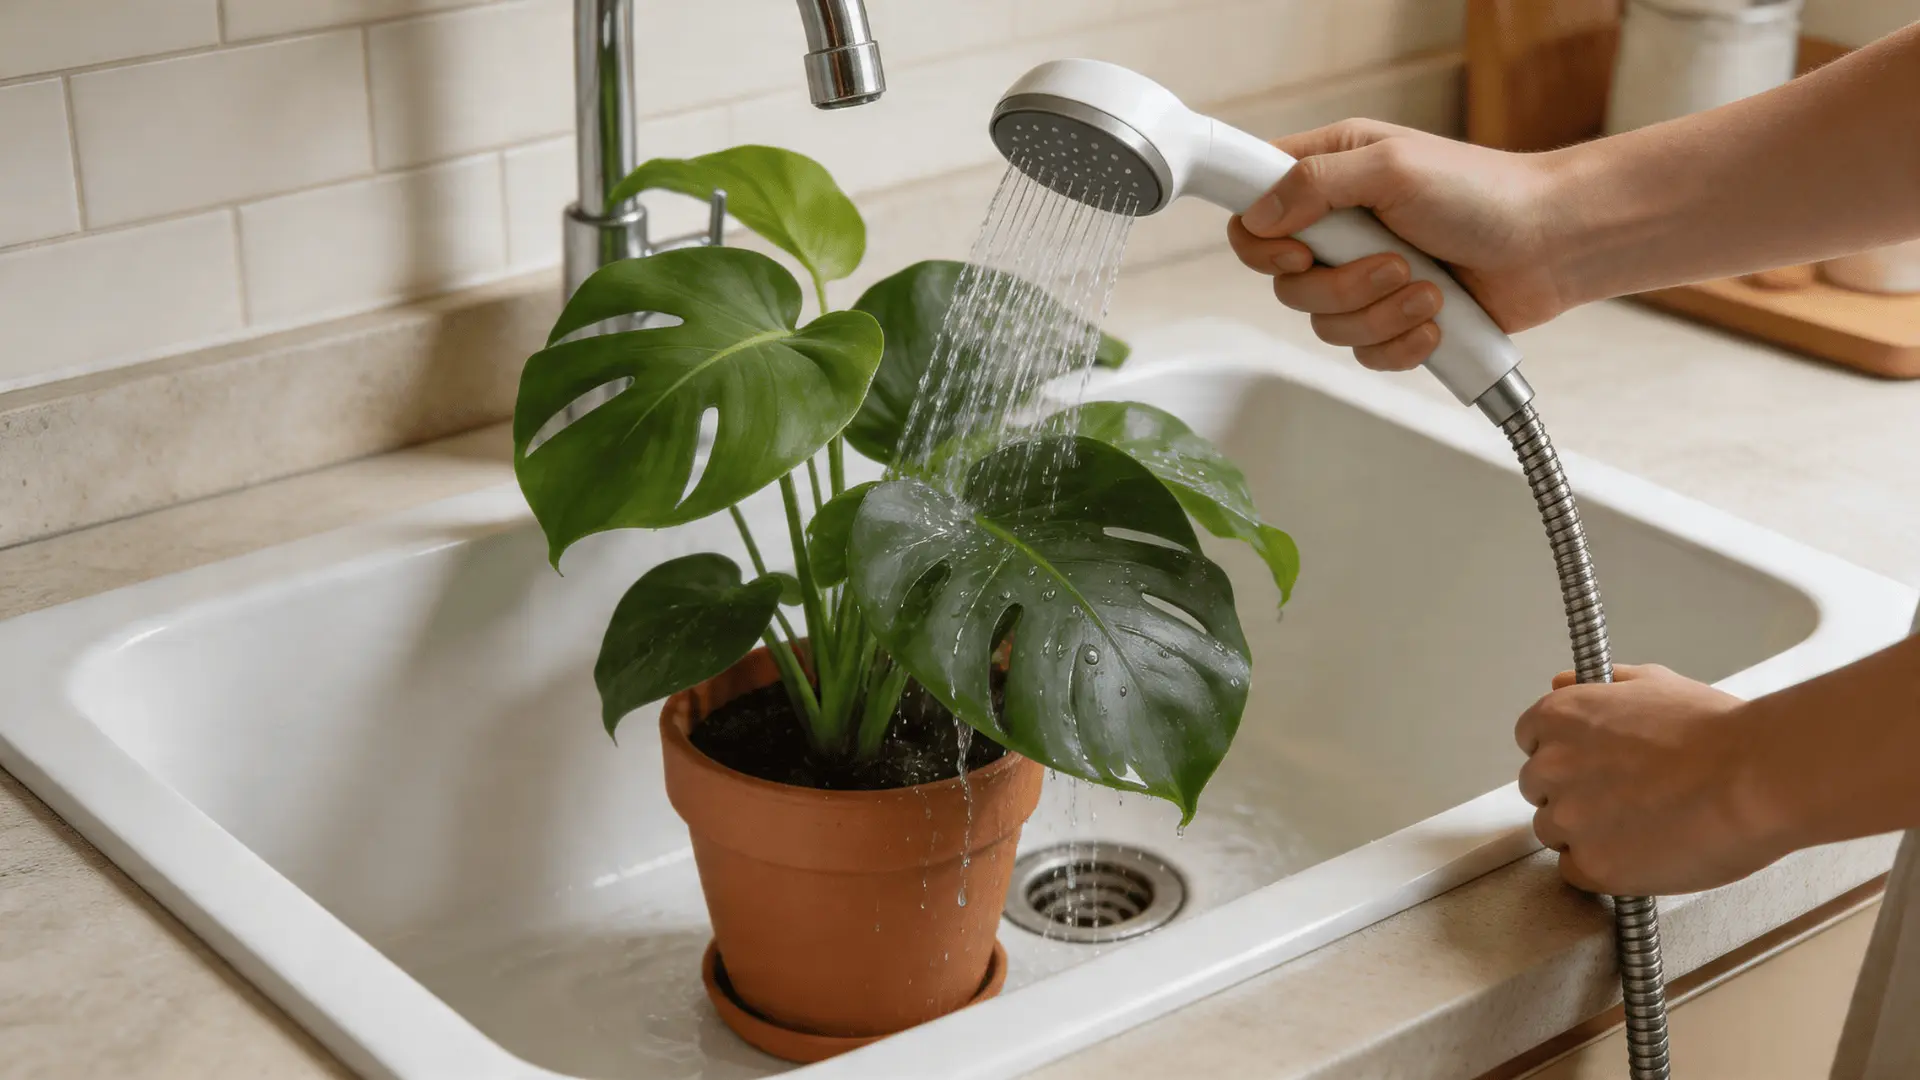
Start by rinsing the plant to remove as many mites as possible. Use a showerhead, hose, or sink sprayer and wash the plant from top to bottom.
Focus on the underside of leaves, along stems, and in tight corners where mites and webbing collect. The goal here is to physically knock them off and clean away any residue.
Before rinsing, cover the soil with a plastic bag to stop it from getting too wet or washing out.
Step 3: Wipe Down Every Leaf by Hand

After rinsing, go in with a cloth or paper towel and wipe each leaf carefully. Clean both the top and underside.
This step removes any remaining webbing and mites that water may have missed. It also helps your treatment product work better, since sprays can struggle to reach areas covered in webbing.
Take your time here. I’ve seen many cases where rushing this step leads to the mites coming right back. Once done, throw away or wash anything you used to avoid spreading them.
Step 4: Apply Your Pest Control Product

With the plant clean, apply your chosen treatment. Neem oil and insecticidal soap are common and effective options.
Spray the entire plant evenly. Make sure to cover all surfaces, including stems and the undersides of leaves, since that’s where mites usually stay and lay eggs.
Apply it thoroughly rather than lightly. Missing spots or using too little product often leads to the infestation returning. Repeat treatments as needed to fully break the cycle.
Spider mites often return after one treatment because of how they reproduce.
They lay tiny eggs on the underside of leaves. These eggs are not affected by most sprays. Within a few days, the eggs hatch into new mites, and the cycle starts again.
In warm and dry conditions, this process moves fast. A new generation can develop in less than a week. That’s why a single treatment only removes the active mites, not the ones about to hatch.
Repeated treatments are needed to catch each new wave before they multiply again. Missing even one round can allow the population to rebuild quickly.
How to Prevent Spider Mites from Returning
A few simple habits can help keep spider mites from coming back and protect your plants over time.
- Inspect your plants regularly: Check leaves often, especially the undersides. Look for early signs like speckles or webbing. Always inspect new or returning plants before placing them near others.
- Keep humidity at a healthy level: Spider mites thrive in dry air. Lightly misting plants or using a humidifier can slow their spread and make conditions less favorable for them.
- Use light preventive sprays when needed: If a plant has had mites before, a gentle neem oil or soap spray once in a while can help stop them early.
- Maintain distance after treatment: Keep treated plants separate for a while. Monitor them closely and only return them once you’re sure the mites are gone.
- Follow a proper reapplication schedule: After the first treatment, repeat it three times with a 3-day gap between each. Then continue every two weeks for a few more rounds to break the cycle completely.
Staying consistent with these steps makes it much easier to avoid future infestations and keep your plants healthy.
Which Indoor Plants are Most Vulnerable to Spider Mites
Spider mites can affect almost any houseplant, but they tend to target certain plants more often, especially in warm and dry indoor conditions.
Here’s a quick breakdown of the most vulnerable plants and why they attract mites:
| Plant | Why It’s Vulnerable | Early Signs to Watch |
|---|---|---|
| Palms | Dense fronds create hidden spots where mites can grow without being noticed | Fine webbing deep in fronds, dull or fading leaves |
| Alocasia | Large leaf undersides make an ideal feeding area | Yellowing or bronzing before webbing appears |
| Fiddle Leaf Fig | Broad, flat leaves attract mites in dry air | Pale speckles, dull patches on leaf surface |
| Dracaena | Thrives in dry indoor air, which also suits mites | Stippling, discoloration on long leaves |
| Ivy | Thick, trailing growth allows mites to spread quickly | Webbing between vines, leaves losing color |
| Schefflera (Umbrella Plant) | Sensitive to dry indoor air, especially in winter | Speckled leaves, early yellowing, slow decline |
If you have any of these plants, check them more often than others. Pay close attention to the underside of leaves and watch for early signs.
In my experience, adding a simple monthly preventive spray and keeping humidity slightly higher can go a long way in avoiding repeat infestations.
Final Thoughts
Spider mites may seem small, but they can quickly take over if ignored. The key is to stay consistent with your care routine and act early before the problem spreads.
Small checks, proper spacing, and balanced conditions indoors can make a big difference in keeping your plants healthy.
Once you understand how to get rid of spider mites on indoor plants, it becomes easier to manage and prevent future issues.
Try to build simple habits like regular inspections and light preventive care. Start today by checking your plants closely and taking the first step to keep them strong and pest-free.
Frequently Asked Questions
How to Get Rid of Spider Mites Permanently?
Treat the plant in repeated cycles, keep it isolated, and follow a strict reapplication schedule. Regular checks and preventive care help stop them from returning.
How to Immediately Kill Spider Mites?
Use a strong stream of water to knock mites off the plant. Then apply neem oil or insecticidal soap to kill remaining mites and eggs.
When Should You Call a Professional?
Call a professional if mites keep returning, spread to multiple plants, or if the plant is large, valuable, or heavily damaged.