How to Clean Aluminum Siding the Easy Way
I know how frustrating it can be when your aluminum siding starts looking dirty, dull, or covered in mildew. You want it clean, but without damaging it or spending a fortune.
I’ve been there and figured out a simple way that works. In this guide, I’ll show you how to clean aluminum siding step by step, using tools and products you probably already have at home.
You’ll learn what to use, what to avoid, and how to get it looking fresh again quickly.
Simple and Safe Method to Clean Aluminum Siding
If you want fast results without damaging your siding, here’s a simple method. First, spray the siding with water using a garden hose.
Next, scrub with a mix of dish soap and warm water or a 50/50 vinegar solution. Use a soft brush and clean one section at a time.
Rinse from the top down with clean water. For tough spots, a mild bleach solution can help, but always test it first. Skip high-pressure washers on older siding. Finish by checking for missed areas or streaks.
Checklist:
- Hose & spray nozzle
- Vinegar, soap, or mild bleach
- Soft-bristle brush
- A bucket of warm water
- Optional: aluminum polish for shine
How to Clean Aluminum Siding: Step-by-Step Guide
If you’re planning to clean your aluminum siding, here’s a simple method I’ve used that works well. You’ll need some household supplies and a little patience to make it look fresh again.
Step 1. Rinse the Surface
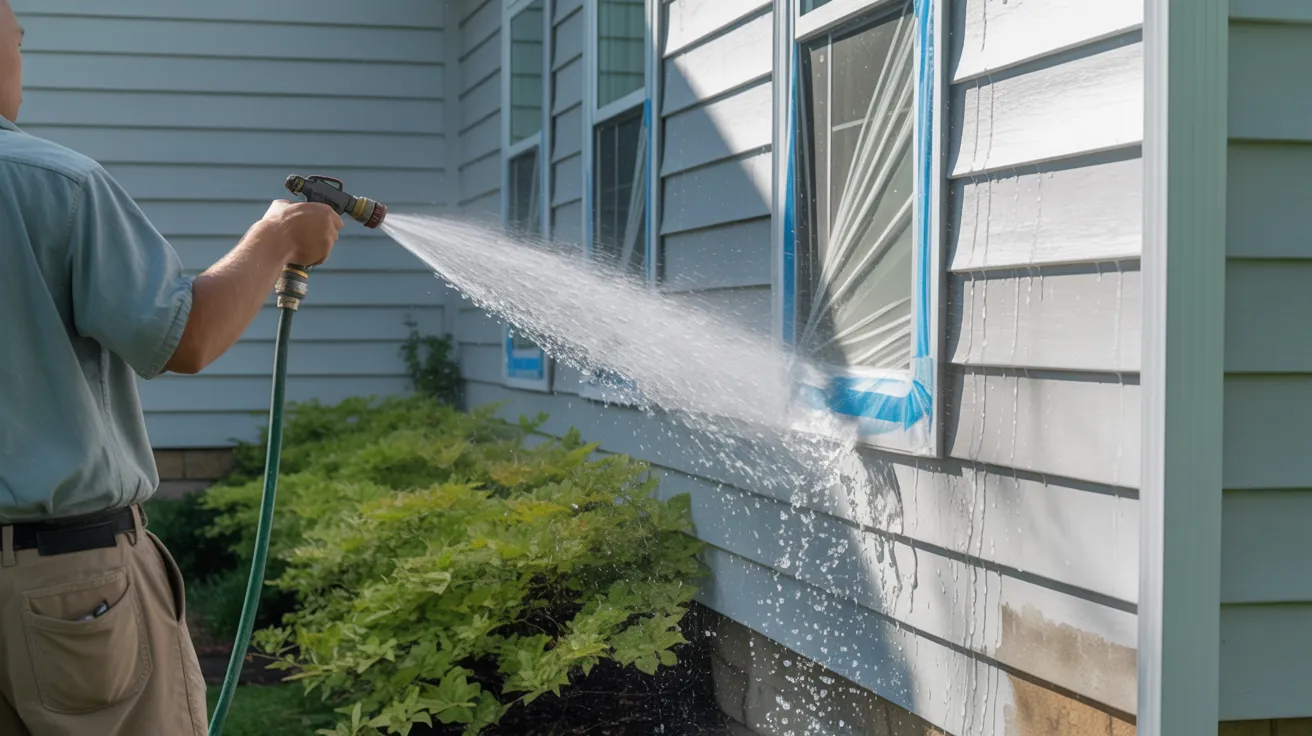
Start by rinsing the siding with a garden hose or a low-pressure washer. I always begin at the bottom and work my way up to avoid streaks. This helps loosen dirt and makes scrubbing easier later on.
If you have a lot of buildup, let the water sit for a minute before you move on.
Don’t rush this step; soaking the siding well helps the cleaner do its job better. Also, make sure nearby windows and plants are covered or out of the way before you begin.
Step 2. Choose Your Cleaning Solution

Now pick your cleaner. For an eco-friendly option, you can mix equal parts vinegar and water. I’ve also used dish soap and warm water, which is great for greasy spots.
For really tough stains, like mildew, use one part bleach to four parts water, but only on small areas, and wear gloves. Avoid using any harsh or unknown products that could damage the finish.
You can test a small hidden spot first to be safe before going over the whole surface with your chosen mix.
Step 3. Apply & Scrub in Sections

Dip a soft-bristle brush into your cleaning mix and scrub gently in small areas. I like to work from the bottom up when applying the cleaner so the solution doesn’t streak or run down untreated sections.
Be sure to go with the grain of the siding. This helps avoid scratching the surface. Work in manageable parts so the cleaner doesn’t dry before you rinse it off.
Focus extra effort on areas with visible stains or spots that usually don’t get much sunlight.
Step 4. Rinse & Inspect

After scrubbing, rinse everything off, starting from the top and working your way down. I’ve found that this helps avoid streaks and ensures that you don’t leave behind any soap.
Use clean water and give it a full rinse to remove every trace of cleaner. After that, check your work. Look closely for any spots you may have missed or for signs of residue or discoloration.
If you find a stain left behind, it might need a second round or a slightly stronger cleaner.
Step 5. Optional: Polish for Shine

If your siding looks clean but dull, you can bring back some shine with a basic aluminum polish. I usually apply it using a soft cloth in gentle circular motions.
Don’t overdo it, just a light touch in the visible areas is enough. Focus on spots where the sunlight hits or where the siding looks faded.
This step is optional, but if you have older siding, it can make a big difference. Just make sure the surface is dry before you begin polishing.
Best Products & Homemade Cleaners
You don’t need anything fancy to get great results, just the right mix of store-bought products or easy homemade solutions. I’ve tried both, and you can too, depending on what you prefer.
Safe Store-Bought Cleaners
If you want something ready to go, there are a few products I trust. Simple Green Oxy Solve is a great all-purpose cleaner that’s safe for siding.
TSP (Tri-Sodium Phosphate) works well too, but I’d use it cautiously, especially on painted surfaces. You can also find siding-specific cleaners at most hardware stores.
These are made for aluminum and help protect the finish. Just follow the label instructions, and make sure to test a small area first. That way, you’ll know it’s safe for your siding before doing the whole house.
Eco-Friendly DIY Options
If you’d rather skip store products, I’ve had great results with homemade cleaners. A vinegar and water mix (50/50) is gentle but still strong enough to lift dirt.
If your siding has grease or oily spots, I recommend using dish soap and warm water; it works every time. You can also add a few drops of essential oil for a mild scent, though that’s totally optional.
These are safer for the environment and cheaper, too. Additionally, you probably already have everything in your kitchen.
Power Washing vs. Soft Washing
Before you start cleaning, it’s important to know the difference between power washing and soft washing. I’ve used both, and each has its place, depending on your siding’s age and condition.
Can You Power Wash Aluminum Siding?
Yes, you can, but with caution. Power washing works well for heavy buildup, but too much pressure can dent or damage the siding.
I suggest using a low-pressure setting (under 1,500 PSI) and holding the nozzle at a 45-degree angle. Never spray upwards, as that could push water behind the panels.
Always test on a small spot first. If your siding is older or already worn, avoid this method. When done carefully, though, it can save you time and energy on large surfaces.
What is Soft Washing?
Soft washing is a gentler option that relies more on the cleaning solution than pressure. I’ve found it especially useful for older or fragile siding.
You spray on a mix of cleaner, often a mix of soap, water, and a mold remover, then rinse it off using a light spray. This method removes dirt and algae without scraping or damaging the finish.
If your siding is showing age or oxidation, soft washing is the safer route. It’s slower, but it protects your siding in the long run.
Cleaning Painted vs. Oxidized Aluminum Siding
Painted and oxidized aluminum siding needs different care. I’ve handled both, and with the right method, you can clean them safely.
How to Clean Painted Siding
Painted siding looks great when clean, but it’s easy to damage if you’re not careful. I always use gentle cleaners like diluted dish soap or a vinegar-water mix.
Avoid anything harsh, and never use bleach unless it’s extremely diluted. No abrasive scrubbing, either; stick to soft cloths or soft-bristle brushes.
Scrub lightly, working in small sections so the cleaner doesn’t dry. After rinsing, check for peeling paint or faded spots. This will help you decide if it needs repainting later.
How to Clean Oxidized Siding
Oxidized aluminum becomes chalky and dull over time. When you wipe it, you’ll notice a white residue; that’s oxidation.
Start by rinsing the area well. Then, apply a cleaner made for oxidation or use a light polish made for aluminum. Scrub gently using a soft cloth or brush, working in circles.
Don’t use anything too strong or gritty. Once cleaned, rinse thoroughly and check for shine. For better results, I sometimes follow up with a protective coat or polish to slow future buildup.
Maintenance Tips to Keep It Clean Longer
Keeping up with small tasks goes a long way. These habits help your siding stay cleaner, last longer, and avoid buildup or damage:
- Rinsing: Wash your siding once or twice a year to prevent long-term dirt buildup and stains.
- Trimming: Keep nearby trees and bushes trimmed to stop moisture and debris from collecting on siding.
- Sealing: Use a clear sealant on older siding to help protect it from fading and oxidation.
- Soap: Gentle cleaners like dish soap and water can clean well without damaging your siding’s surface.
- Brushes: Always use soft-bristle brushes to avoid leaving scratches or marks on your siding.
- Testing: Before applying the cleaner widely, test a small area to check for any discoloration or damage.
- Plants: Protect plants by covering or rinsing them before spraying siding with cleaning solution.
These easy habits can go a long way in keeping your siding strong, clean, and low-maintenance.
Common Mistakes That Can Damage Your Siding
Even small cleaning or maintenance mistakes can shorten the life of your siding. Here are a few common errors to watch out for:
- Abrasives: Using rough tools can scratch or permanently mark your siding.
- Bleach: Full-strength bleach can fade color and ruin the finish.
- Neglect: Leaving dirt or mildew too long may lead to stains.
- Sunlight: Cleaning in direct sunlight leaves streaks as the solution dries too quickly.
- Storms: Skipping post-storm checks can lead to small cracks developing into major damage.
Check your siding regularly and clean with care; it’ll last much longer if you do.
Conclusion
Now that you’ve learned how to clean aluminum siding, you can handle the job with confidence. I’ve shared what’s worked for me so you can do it yourself without stress.
Take your time, use the right tools, and perform regular maintenance. You’ll be surprised how much better your home looks afterward.
Don’t wait for buildup to take over; start small, and you’ll see big results.
Want more helpful tips like this? Check out my other home care blogs on the website and keep your house in top shape.