17 DIY Plant Stand Plans You Can Make Quickly
I used to have more plants than places to put them, and maybe you do too. If you’re tired of leaving your plants on the floor or windowsill, I’ve got something that’ll help.
In this post, I’m sharing diy plant stand plans. They’re easy, budget-friendly, and don’t need fancy tools or a full workshop. You’ll find styles that fit small spaces, outdoor corners, and even your living room.
So if you’re ready to build something useful and good-looking without the stress, let’s get started. Your plants deserve a better view.
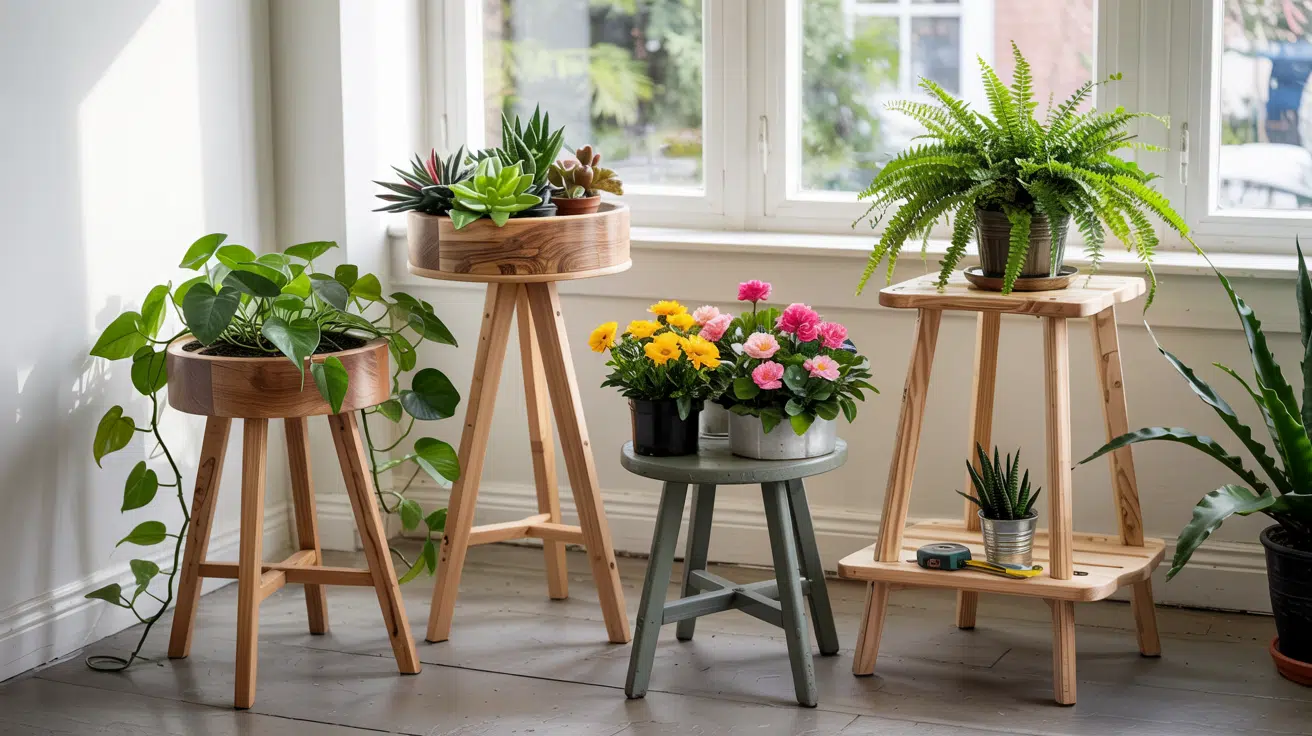
Easy and Affordable Plant Stand Ideas
These stand ideas are perfect for beginners or quick weekend builds. I prefer using what I already have, such as scrap wood and leftover paint, and keeping the design simple.
With just a little time and effort, you can create a plant stand that fits your space and adds a nice touch without incurring extra costs.
1. Scrap Wood Stand

This stand is made from leftover wood and has a simple square frame with no angled cuts. You can build using 1x2s from an old shelf project. It’s flat, light, and easy to assemble with wood glue or nails.
Perfect for beginners who want to keep things simple without any complex joinery. Use it on a tabletop or entryway floor, and add a quick finish if you’d like.
2. Tiered Plant Stand for Small Spaces
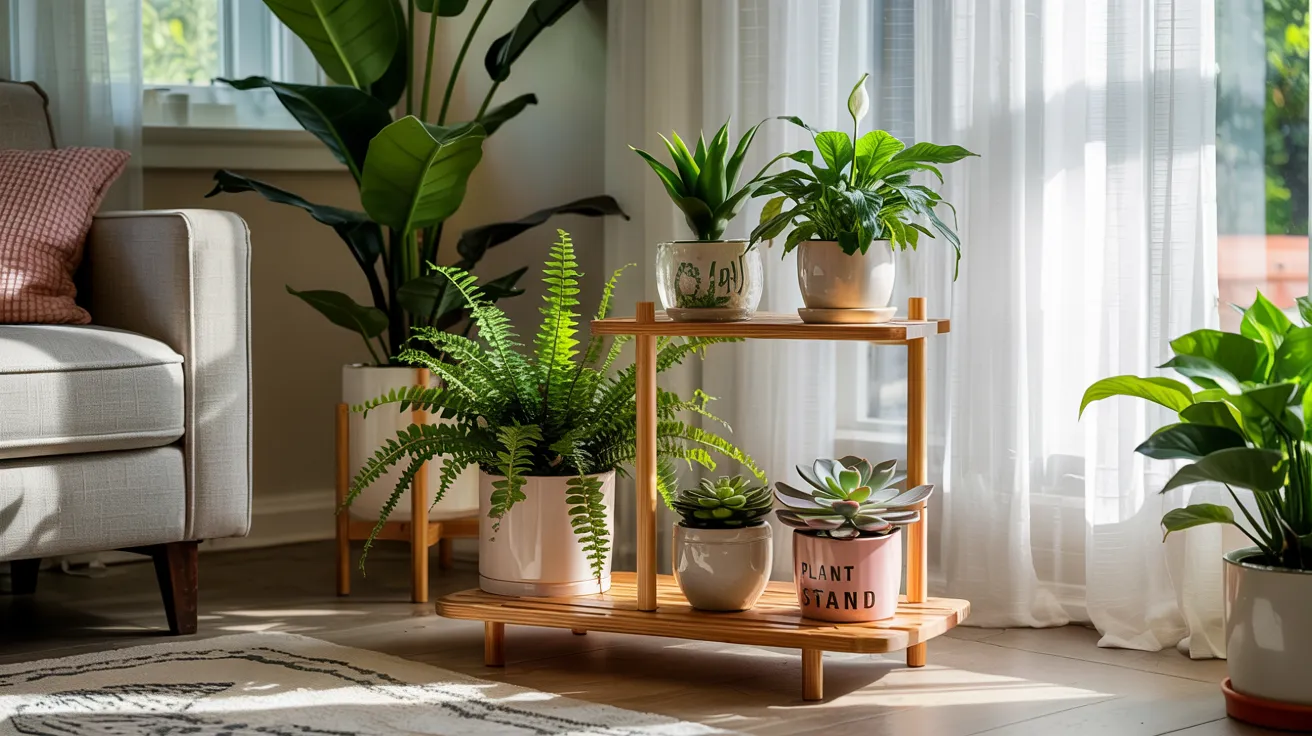
If you’re short on room, try going vertical. A multi-level stand allows you to showcase more plants without occupying the entire floor space. You can make 1x2s and plywood scraps.
The top tier is great for sun-loving plants, while the bottom works well for shade. This design fits well on a balcony or in a tight hallway.
You can adjust the shelf sizes based on your pots. It’s super useful and adds just the right amount of charm to any corner.
3. Dollar Store Hacks for Instant Stands
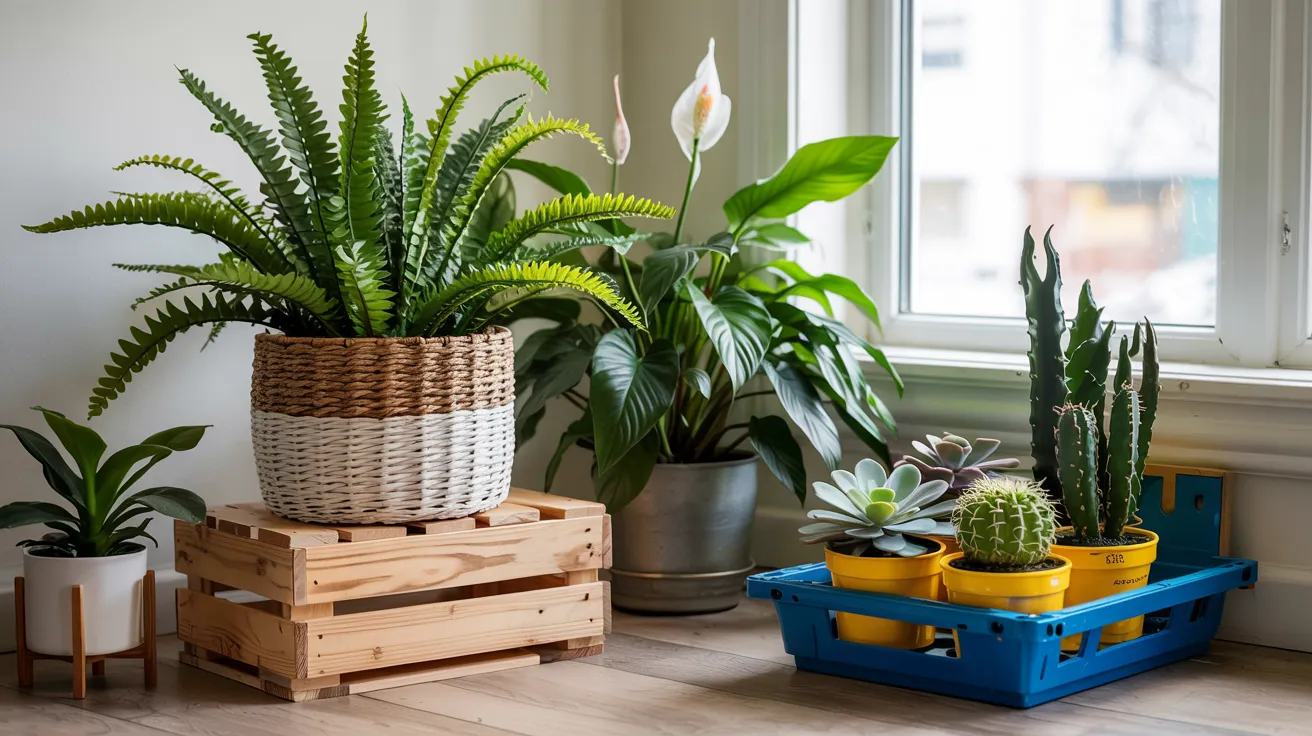
Find baskets, crates, and even stools at the dollar store that work perfectly for plants. You can flip a basket upside down, spray-paint it, and it looks great.
Stack two for a taller stand. Use trays as shelves or glue small bins together. This is the fastest way to lift plants off the floor. It’s easy to swap things out or move them at any time.
4. DIY Ladder-Style Plant Stand

This one’s perfect if you have multiple plants. You can build a ladder-style frame with three wide steps. Each shelf holds pots of different sizes and receives good light.
It leans against the wall and doesn’t take up much space. Use 1×3 boards and wood screws; alternatively, you can use reclaimed fence boards if you have them.
Great for indoor spots, such as kitchens or sunny corners. Plus, it’s sturdy and can be painted to match your style. You’ll enjoy making this one.
5. Upcycled Crate Stand

Old wooden crates are easily transformed into stands. Stack two crates, screw them together, and you’ve got shelves for small to medium pots. Sanded and painted mine white to match my indoor space.
You can add caster wheels if you want it to roll. Crates are easy to find at thrift stores or garage sales, and you won’t need to cut much. Perfect for beginners and renters. You get storage plus plant space all in one simple setup.
6. Hanging Plant Shelf

If you don’t have floor room, go up! A simple shelf with rope and hooks makes a great hanging stand. Use a wooden board and some twine, tied in knots at each end, and hang it from ceiling hooks.
It’s a fun project you can finish in an hour. It looks nice near a window and helps save floor space. You will love using this for trailing plants, such as pothos. Just ensure your ceiling can support the weight.
7. Painted Stool Plant Stand

Old stools work great for single plants. Found a second-hand one, gave it a fresh coat of paint, and placed it in a quiet corner.
You can even cut the legs shorter if needed. This is one of the easiest stands to assemble, requiring no tools and no fuss. If you want more than one height, use stools of different sizes.
It’s also easy to move them around when you rearrange. Great for balconies, hallways, or anywhere that needs a quick fix.
8. Simple Box Frame Stand

This one takes the basic square frame a step further. It uses 1×2 or 2×2 lumber and has more defined corners with horizontal connectors. The structure is sturdier, making it great for medium-sized pots.
You can build to sit flush against the wall, and you can easily adjust the size to suit your needs. It requires a few more cuts and screws, but the end result is stronger and more versatile for both indoor and outdoor use.
9. Corner Plant Shelf

This one fits snug in any corner. Use three boards and build an L-shape design with three shelf levels. Each level holds a few small pots. It makes good use of unused space and looks neat.
You can even angle the shelves a bit for more sunlight. It requires a bit of measuring, but it’s still beginner-friendly. Use leftover pine and add a touch of stain.
10. Tripod Stick Stand
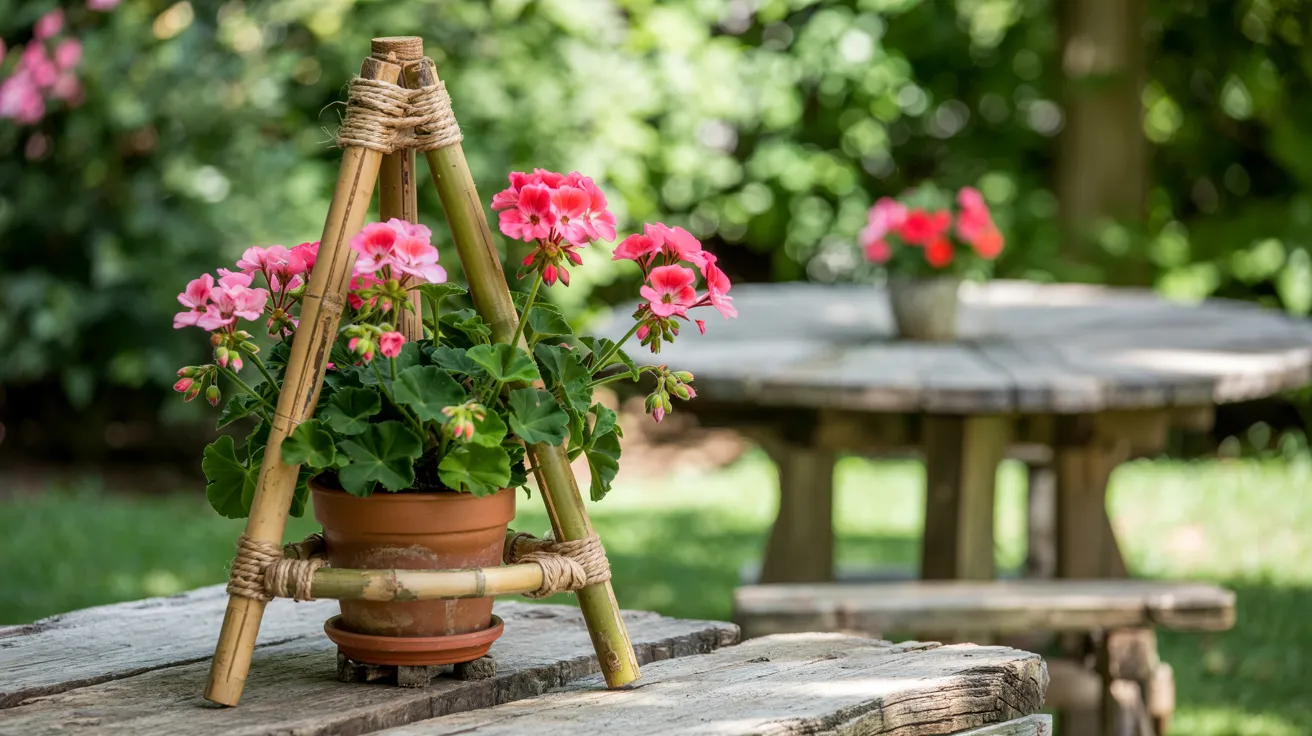
Use three strong sticks or wooden dowels and tie them together with rope or wire at the top. Spread the legs evenly and place a small pot in the center. Use bamboo sticks, which give a nice, natural look.
It’s quick and easy to build and great for rustic spaces or outdoor use. If the pot is small, you can balance it directly or use a shallow tray to support it. Great when you want a light, movable stand with almost no tools.
11. Folding Plant Shelf

A folding shelf offers flexibility and space-saving benefits. It’s built with hinged side supports and three narrow boards as steps. When not in use, it folds flat for easy storage. This design is ideal for small spaces or for use during the seasons.
The build involves a few extra steps compared to simpler stands, but remains straightforward with basic tools. Its compact form makes it a smart option for those who want functional storage that can be tucked away when not needed.
12. PVC Pipe Stand

PVC pipes can be used to make lightweight, durable plant stands. The frame comes together using T-joints and elbows, and the pipes are easy to cut with a simple pipe cutter. You can leave the pipes plain or spray-paint them to match your space.
Add wooden boards across the frame to create sturdy shelves. This type of stand is waterproof, easy to move, and works especially well outdoors. It can also be disassembled and reused, making it a practical choice for temporary or seasonal setups.
13. Reclaimed Table Legs Stand

Old table legs make excellent, strong, and stylish bases for plant stands. You can attach a square board on top, then sand and paint the whole piece for a fresh look. These legs often come with unique shapes that add character to your build.
This idea gives you flexibility to mix and match sizes and heights. It’s a smart way to utilize salvaged parts and create something sturdy without incurring significant costs. Plus, it helps keep useful materials out of the trash.
14. Hanging Ladder Rack

A small step ladder can become a hanging plant stand when mounted horizontally with chains or rope. The rungs work as shelf brackets or support posts directly. This setup is great near windows, offering space for trailing plants to grow and catch light.
The ladder can be painted, stained, or left natural, depending on the look you want. It’s a practical option if you need a vertical display without installing multiple hooks. Plus, it’s easy to take down or move as needed.
15. Cement Block Stand

Stacking cement blocks is a straightforward way to build a sturdy, stable plant stand. Blocks with holes can double as planters, or you can stick with solid ones for a clean, stacked look. No tools are needed, just stack and place.
This setup is ideal for heavy pots and outdoor use. It handles wind and rain without tipping over. If you prefer a low-effort, sturdy solution with a raw, simple feel, this idea works well with minimal time or materials.
16. Drawer Plant Shelf

An old drawer can become a useful plant stand with just a few updates. Add short wooden legs or mount it to the wall for support. You can paint the drawer or line it with contact paper for a clean finish.
This setup works well for small pots, succulents, or seedlings. It’s compact and fits nicely on desks, shelves, or countertops. Repurposing a drawer is a smart way to reuse furniture parts and create something both functional and decorative.
17. Stacked Pot Stand

Stacking pots is a simple, no-tool way to create a tall plant stand. Use a few pots of different sizes, upside down, to form the base, then add one right-side up on top to hold the plant.
Construction adhesive helps keep everything stable. Painting the stack a single color gives it a clean, unified look. This idea works well if you want height without having to build anything. Just place it on a flat surface to keep it steady and safe for your plants.
Choosing the Right Materials for Your Plant Stand
The material you pick affects both the look and durability of your stand. Here’s what works best based on where you’ll use it:
Best Woods for Indoor Use
Softwoods, such as pine and fir, are affordable and easy to paint or stain. Hardwoods like walnut or maple offer a richer look and better durability, making them ideal for a natural finish.
Outdoor-Grade Wood Options
For outdoor stands, opt for moisture-resistant woods such as cedar, redwood, or pressure-treated pine. They resist rot and bugs, making them ideal for patios or gardens.
Non-Wood Alternatives
- Concrete – Strong and rot-proof, but heavy.
- Metal (steel or aluminum) – Sleek and durable, watch for rust.
- Bamboo – Lightweight, natural, and eco-friendly.
Finishing Tips
Use water-resistant finishes for outdoor use. Seal MDF thoroughly. Always let coats dry fully for long-lasting results.
Plant Stand Plans for Every Skill Level
No matter what tools you have or how much experience you bring, you can follow these steps with confidence. I’ll walk you through picking a design, grabbing the right materials, building it step by step, and finishing it up strong.
Choose Your Plant Stand Design
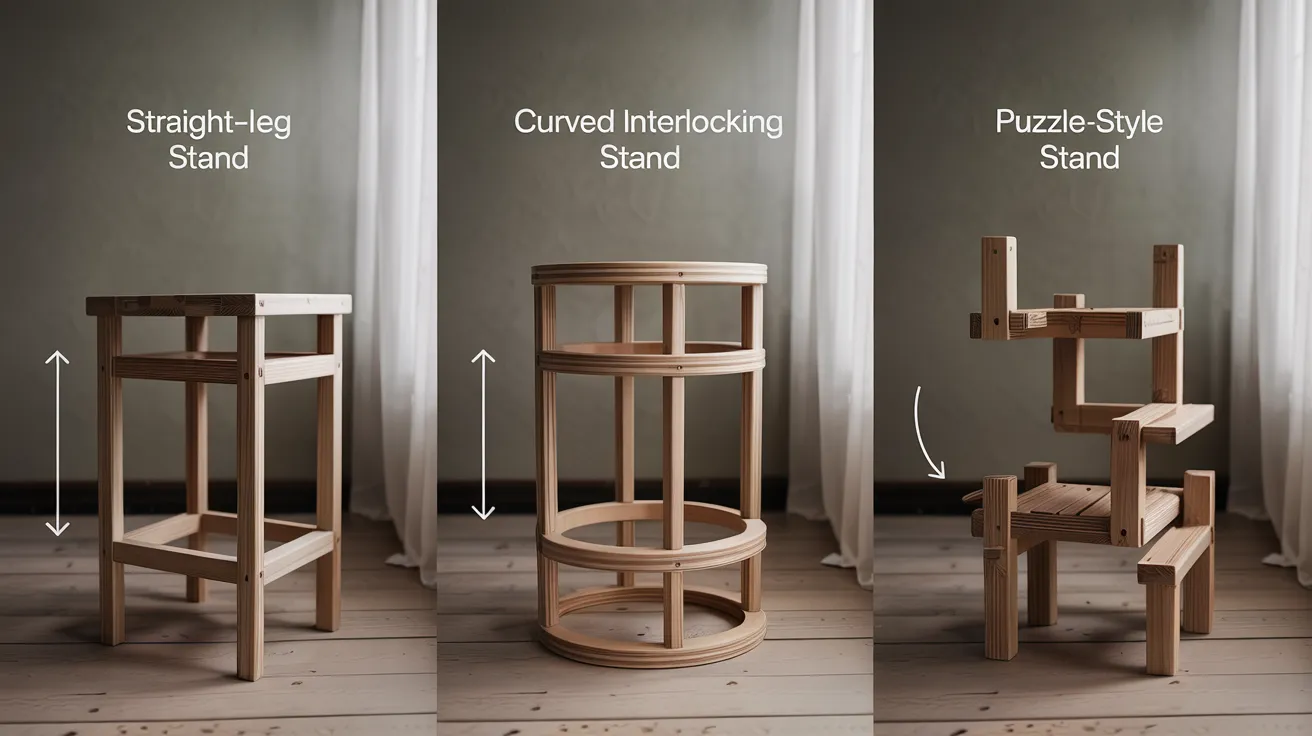
You’ve got three solid styles to start with, and each one fits a different tool setup. If you’ve only got the basics, go for the Simple Straight-Leg Stand; quick, easy, and clean-looking.
The Curved Interlocking Stand adds a bit more flair and works well with a band saw. And if you’ve access to a CNC or want to experiment with mixed woods, the Puzzle-Style Stand is perfect for customizing or even selling.
Gather Tools and Materials
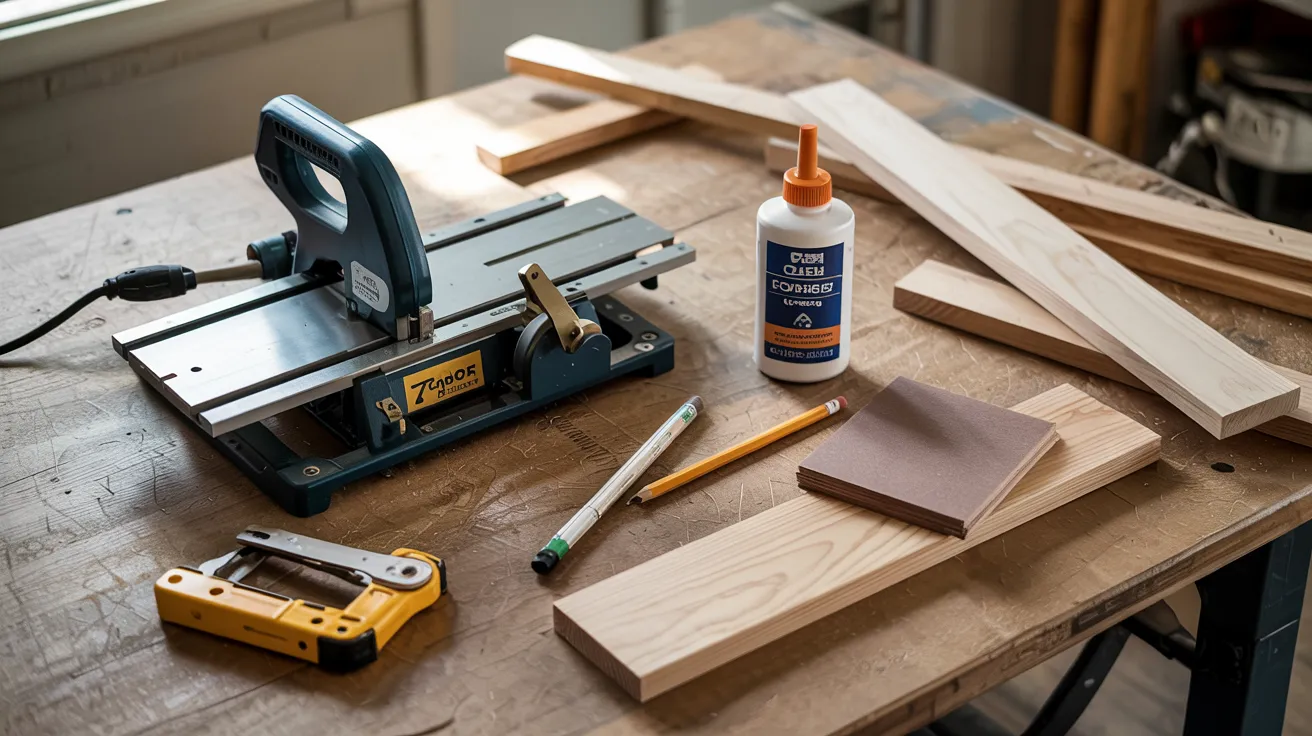
Before you begin, gather your tools and choose your wood based on the stand design.
General Tools
- Table saw / Band saw / CNC machine
- Clamps, square, pencil
- Sandpaper (60–120 grit)
- Wood glue
Wood Options
- ¾-inch thick boards (MDF, pine, walnut, maple)
- Use S4S wood if you don’t have planning tools
- Avoid raw MDF if using outdoors
1. Build the Simple Plant Stand
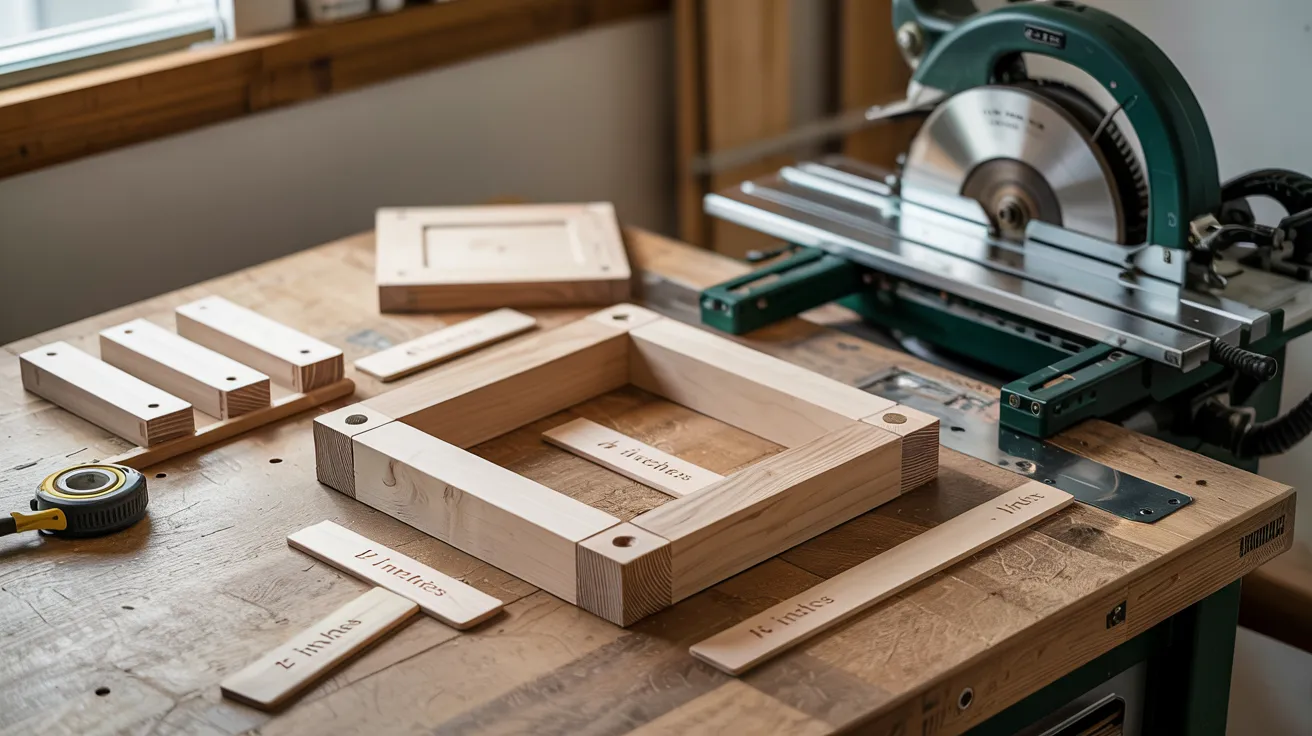
Start by cutting a 17″x4.5″x¾” board into 1-inch strips. You’ll need four 8-inch legs and two 8.5-inch connector pieces. Label each part so you don’t get them mixed up.
Mark where the joints go and clamp the pieces down before you cut. Use your table saw to make shallow rabbet joints (about halfway through the wood).
Test-fit everything before gluing. A quick sanding on the edges helps everything slide into place nice and snug.
2. Build the Curved Interlocking Stand
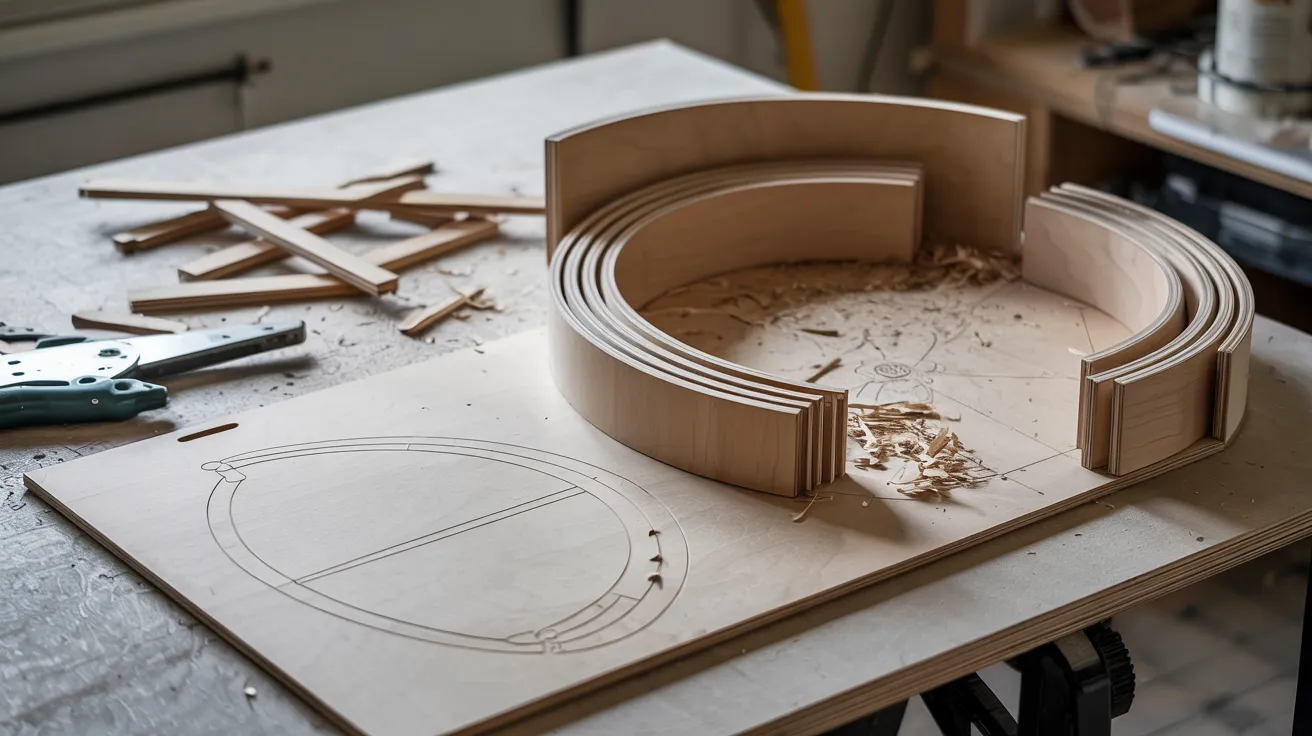
Begin by printing and cutting the template. Trace it onto ¾” MDF or softwood and make sure the connection tabs match the wood thickness. Cut out the pieces with a band saw or jigsaw.
For faster results, tape two boards together and cut both at the same time. Sand the edges to prevent splinters and test the fit before final assembly.
You can leave it raw, paint it, or seal it. Just remember, MDF needs a water-safe finish if it’ll be near moisture.
3. Build the Puzzle-Style Stand (Advanced)
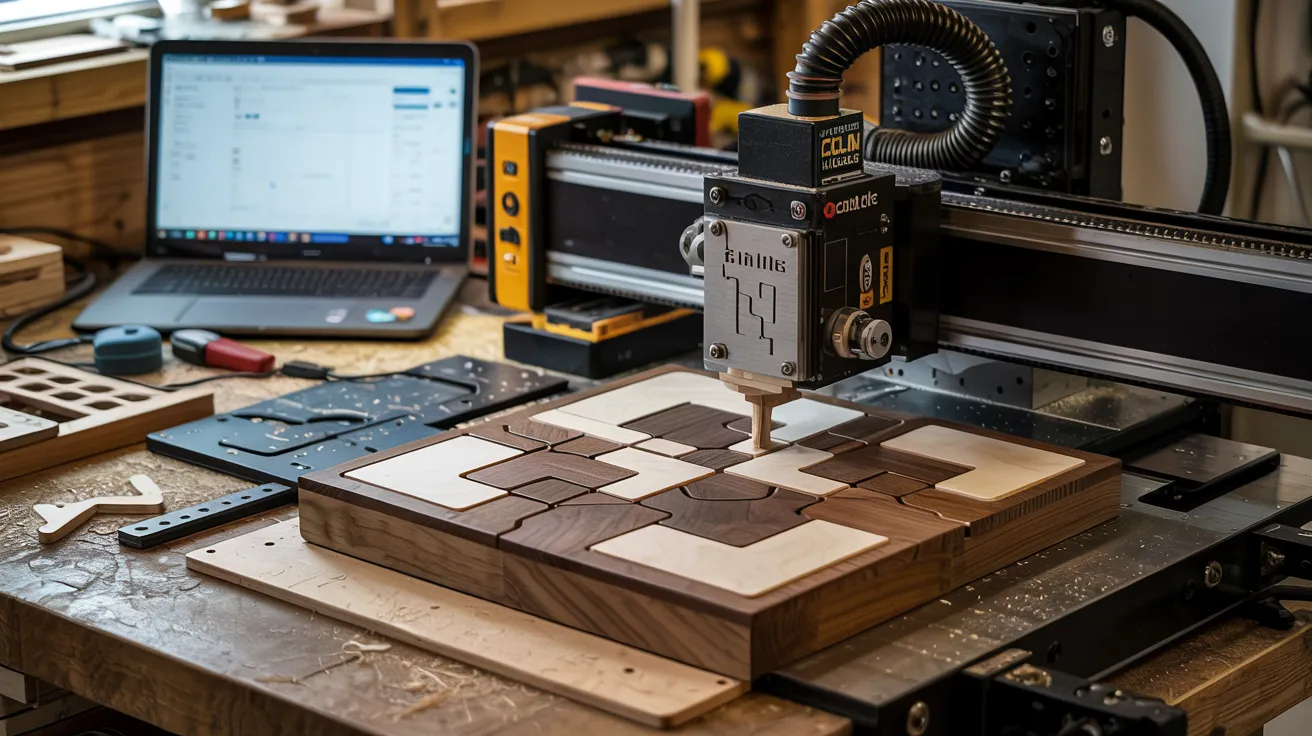
This design conserves wood and allows you to use various wood types for a one-of-a-kind look. Great for personalizing or selling at markets. Layout your shapes in Carbide Create and use a downcut bit for a clean cut.
Always cut outside the shape for the best fit. Add tabs to keep the pieces in place during cutting, but avoid overdoing it after cutting; smooth out the edges with a drum sander.
4. Final Assembly and Finishing

Only glue the joints, not the middle, so the stand can come apart if needed. Let it dry overnight before sanding. Use 120 grit for a smooth feel without overdoing it.
For finishes, Boiled Linseed Oil helps dark wood pop and keeps water out. Spar Urethane works well outdoors. If you’re using MDF or want to add some fun color, consider painting it instead.
5. Display or Sell Your Stands

Now comes the fun part, putting your stand to use. Set it up, add a plant, and admire what you built from scratch.
If you’re selling, offering different sizes or wood options makes a big difference. Ask friends which style they like best; it sparks ideas and helps improve future builds.
Snap a few photos, share your work, and enjoy seeing your project come to life.
Popular Plant Stand Styles to Build
Want a stand that suits your space and skills? These styles are ideal for beginners and cater to every setup.
Mid-Century Modern: Clean lines, angled legs, and simple frames. Built with 1x2s and dowels—no fancy tools needed. Paint or leave natural. Great for living rooms or bedrooms.
Tall and Slim: Perfect for tight spaces and corners. Lifts plants without using much floor space. Add cross supports for stability. A simple build with basic measuring.
Tripod and Geometric: Three-leg or angled designs made from dowels or shaped cuts. Great for indoor or outdoor use. Takes more time but adds a playful style.
Multi-Level/Stackable: Maximize plant space with tiered shelves or cubes. Ideal for patios or plant corners. More planning is needed, but it becomes easier if done one section at a time.
Common Mistakes to Avoid
Even simple builds can go sideways without a little planning. Here are a few less obvious mistakes to watch for:
- Skipping dry fits: Always test-fit your pieces before gluing or screwing them together to catch sizing issues early.
- Overtightening screws: This can crack softwood or MDF, especially near edges. Tighten just until snug.
- Ignoring wood grain direction: For visible builds, align grain direction for a cleaner finish and less warping over time.
- Using indoor glue outside: Make sure your adhesive is rated for outdoor use if the stand will face moisture.
- Forgetting felt pads or rubber feet: Add them to indoor stands to prevent floor scratches and improve stability
Budgeting and Time Estimates
For cost-saving, scrap wood or basic pine is a smart choice. These materials are affordable and widely available, making them ideal for budget-friendly projects.
Simple plant stand styles typically take 1–2 hours to complete, while more complex stacked or curved builds may require a full day, including drying time.
Additional time should be set aside for painting or sealing. Planning ahead and batching cuts can improve efficiency and minimize mistakes.
Conclusion
Now you’ve a full set of DIY plant stand plans to work with, and trust me, they really make a difference. I’ve built a few of these myself, and not only did my plants look better, but I felt proud of the final results.
Give one a try. Use what you have, take your time, and don’t worry about making it perfect. It’s all part of the fun.
If you’re excited to keep building, I’ve got more guides and ideas waiting for you. Take a look at other blogs on the website and see what you’ll make next.


