
12 DIY Wooden Pumpkin Crafts for Fall Decorating
Fall is my favorite time of year, and I love decorating my home with warm, cozy pieces. One of the best ways to add a rustic touch is with wooden pumpkin crafts.
Wooden pumpkins are a great way to bring a cozy, rustic feel to your home. They last longer than real pumpkins and can be customized in many ways. They’re easy to make, look great indoors or outdoors, and last for years.
In this blog, I’ll share some fun and simple wooden pumpkin craft ideas anyone can try.
Just a little creativity and some basic supplies will do the trick.
From painted pumpkins to stacked wood designs, there are plenty of ways to bring fall vibes into your space.
If you enjoy DIY projects and love the look of handmade decor, you’ll love these wooden pumpkin ideas. Let’s craft some beautiful fall decorations!
Why Make Wooden Pumpkins?
Wooden pumpkins are a great alternative to real pumpkins. Here are a few reasons why they’re worth making:
- Durable – Unlike real pumpkins, wooden pumpkins don’t rot and can be used year after year.
- Customizable – You can paint, stain, or decorate them in any style you like.
- Budget-Friendly – Many wooden pumpkin crafts can be made with scrap wood or inexpensive supplies.
- Mess-Free – No carving, no seeds, no mess! Just simple crafting fun.
Simple Wooden Pumpkin Craft Ideas
There are many ways to create wooden pumpkins, from simple designs to more detailed ones. Here are some easy DIY ideas to try:
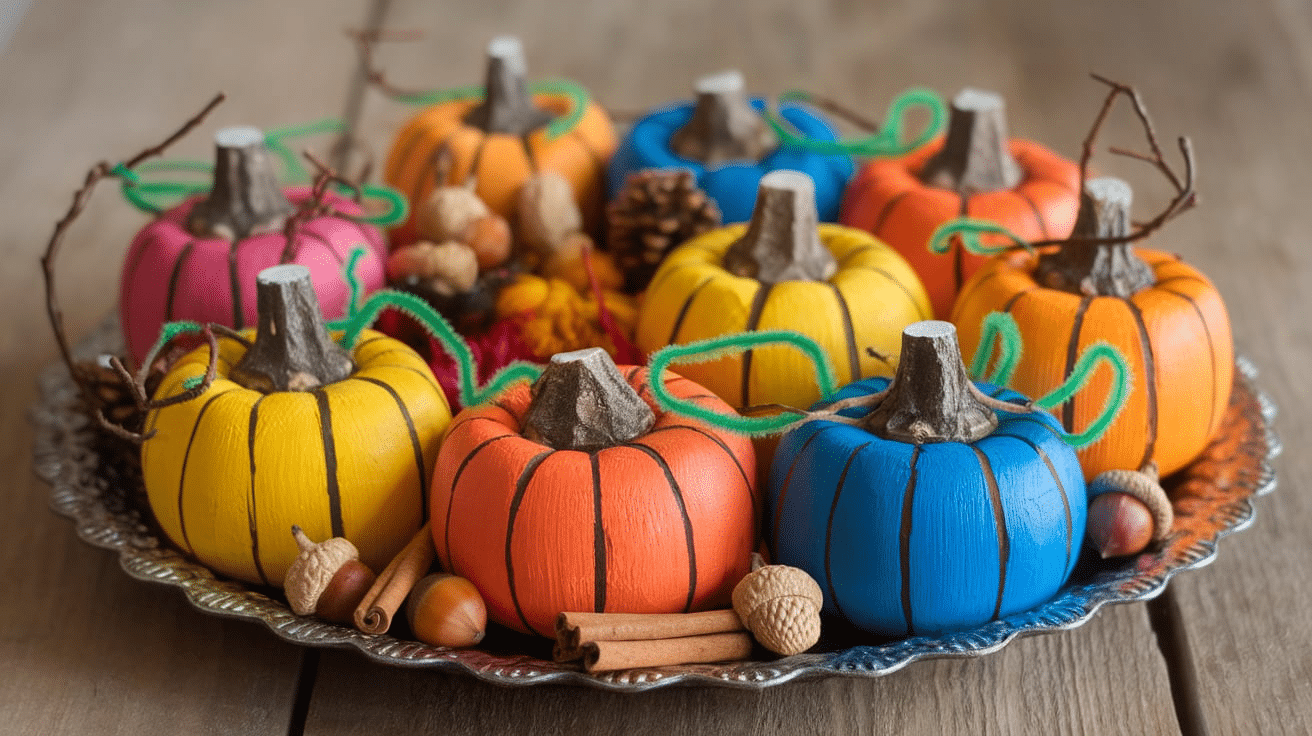
1. Wooden Block Pumpkins
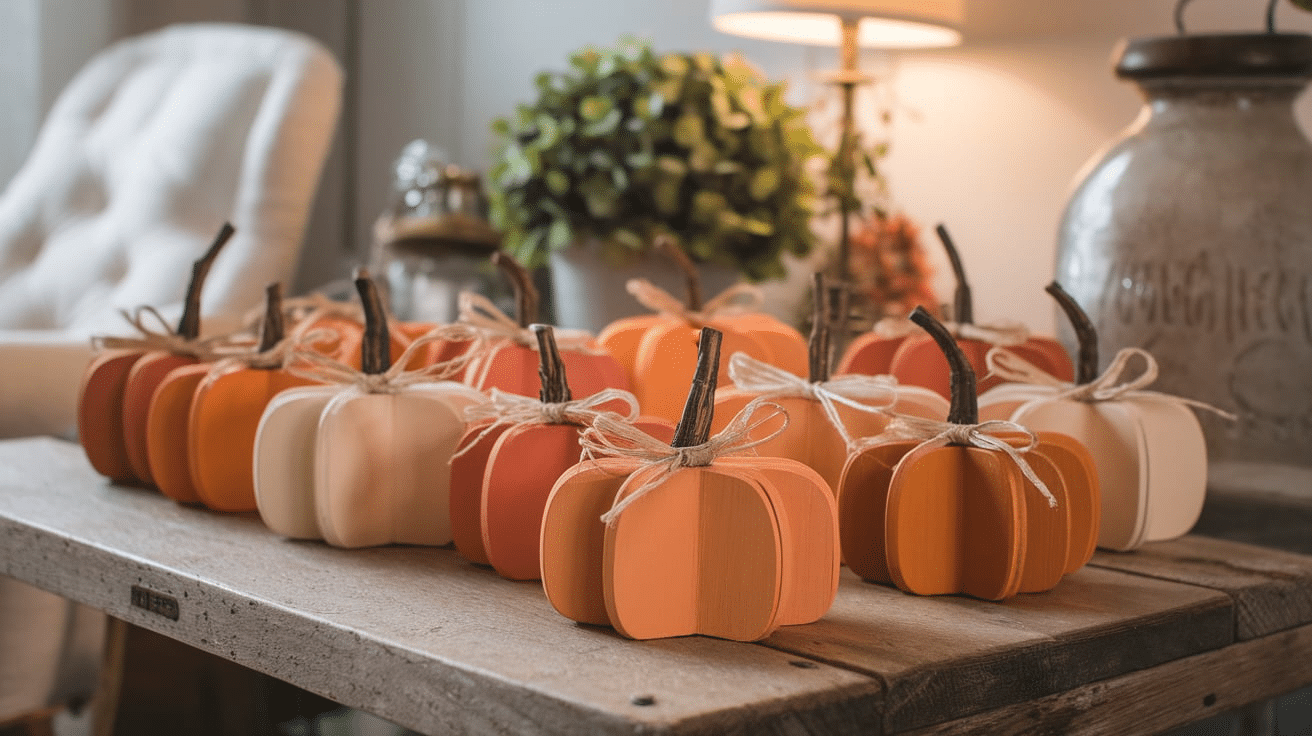
Wooden block pumpkins are one of the easiest and cutest crafts. They are made from scrap wood or 2×4 pieces and can be decorated however you like.
Supplies Needed:
- Small wooden blocks (cut into pumpkin shapes or squares)
- Orange paint or stain
- Sandpaper
- Twigs for stems
- Hot glue gun
- Ribbon or raffia (optional)
Steps to Make:
- Sand the wood blocks to smooth any rough edges.
- Paint or stain them in different shades of orange. Let dry.
- Lightly sand the edges to give them a rustic, distressed look.
- Glue a small twig on top of the stem.
- Tie a ribbon or raffia around the stem for extra charm.
These small pumpkins look great on shelves, tables, or even as part of a centerpiece.
2. Pallet Wood Pumpkins
If you have an old wooden pallet, you can turn it into a beautiful fall decoration.
Supplies Needed:
- Wooden pallet boards
- Saw (to cut pumpkin shapes)
- Orange and brown paint
- Sandpaper
- Twine or raffia
- Hot glue gun
Steps to Make:
- Draw a pumpkin shape on the pallet boards and cut it out.
- Sand the edges for a smooth finish.
- Paint the pumpkin orange and add brown details for shading.
- Attach a piece of twine or raffia around the stem for decoration.
Pallet pumpkins look great on front porches or as part of a rustic fall display.
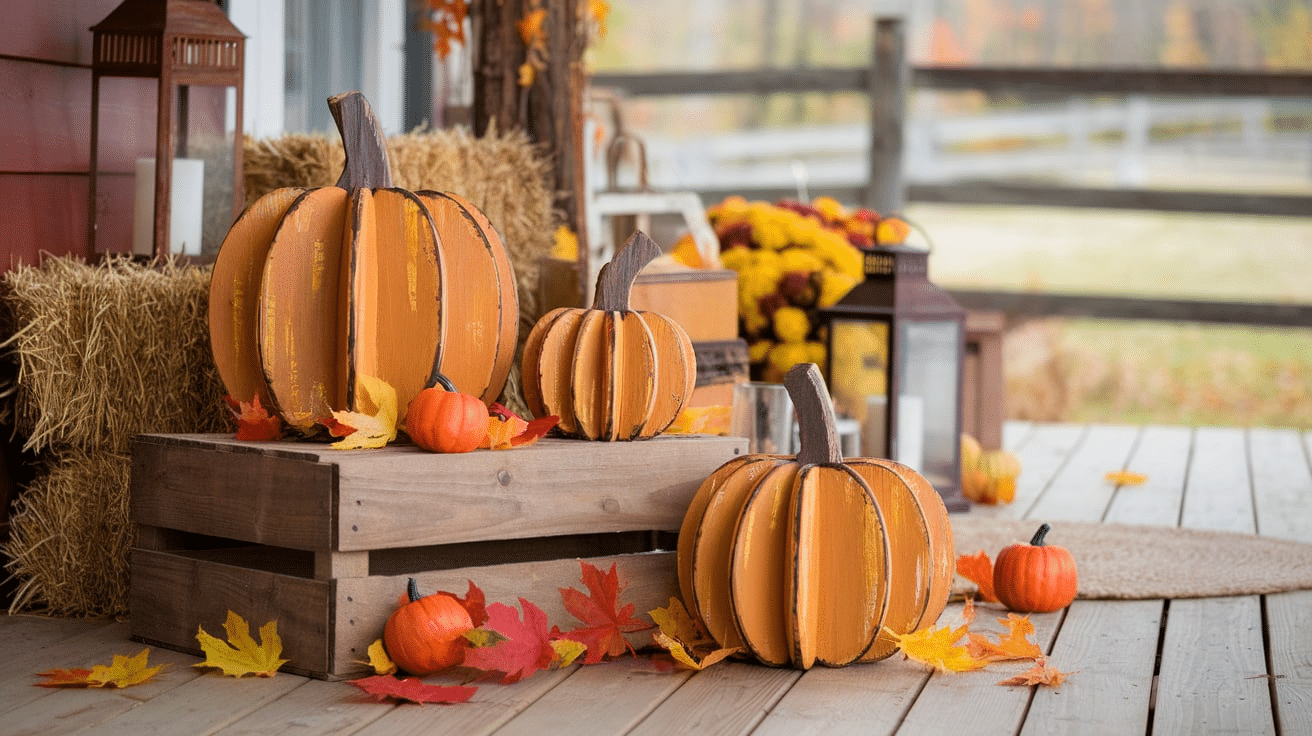
3. Wooden Plank Pumpkins

Wooden planks can be arranged together to create a pumpkin shape. This craft is great for making large porch decorations.
Supplies Needed:
- Wooden planks (cut into different lengths)
- Wood glue or nails
- Orange paint
- Twigs or wooden dowels for stems
- Ribbon or burlap
Steps to Make:
- Arrange the wooden planks side by side and secure them with glue or nails.
- Paint the entire piece orange and let it dry.
- Attach a small twig or wooden dowel as the stem.
- Add decorative touches like ribbon, burlap, or even painted designs.
This style of wooden pumpkin is great for leaning against a wall or placing it in the yard.
4. Wooden Pumpkin Signs
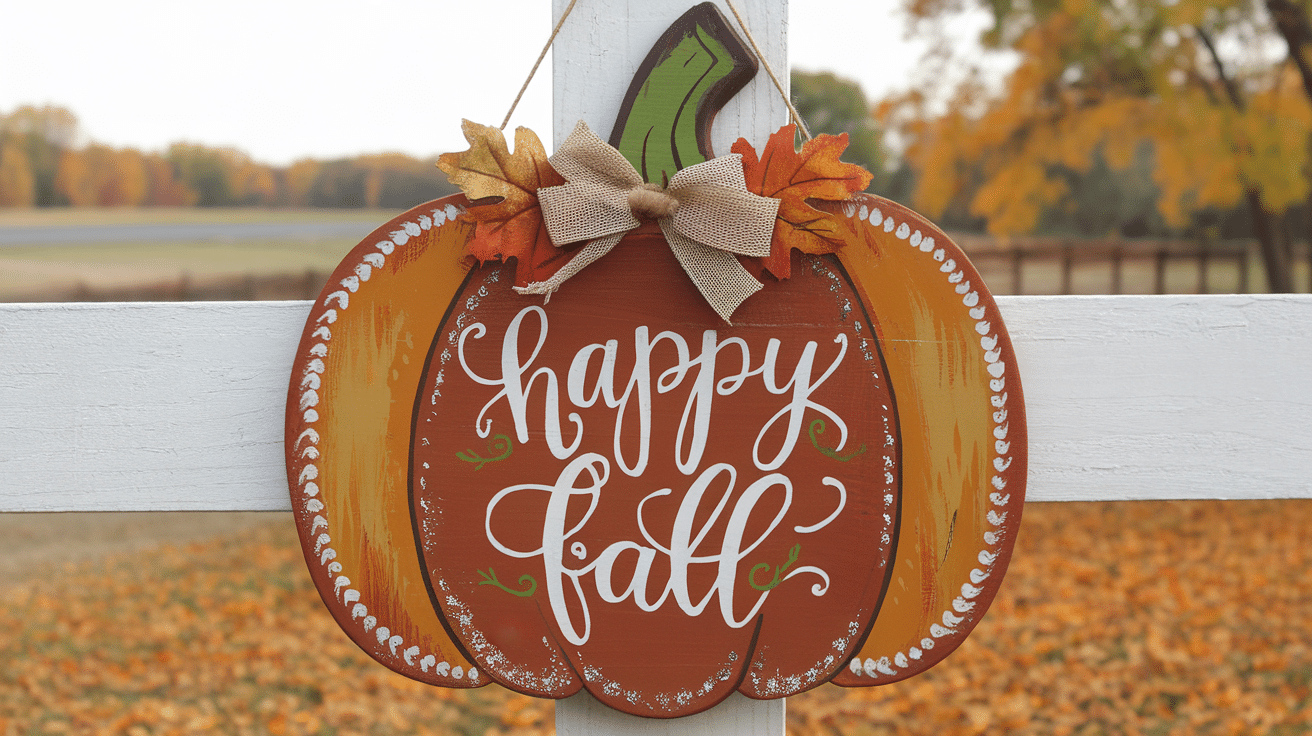
If you love farmhouse-style decor, a wooden pumpkin sign is a great craft to try.
Supplies Needed:
- Wooden board or pallet pieces
- Orange and white paint
- Stencils or hand lettering tools
- Twine or ribbon
Steps to Make:
- Paint the wooden board in your desired pumpkin color.
- Use stencils or hand-paint fall-themed words like “Happy Fall” or “Pumpkin Patch.”
- Add decorative touches like twine, ribbons, or small leaves.
These signs can be used indoors or outdoors to welcome guests with a festive touch.
5. Stacked Wooden Pumpkins
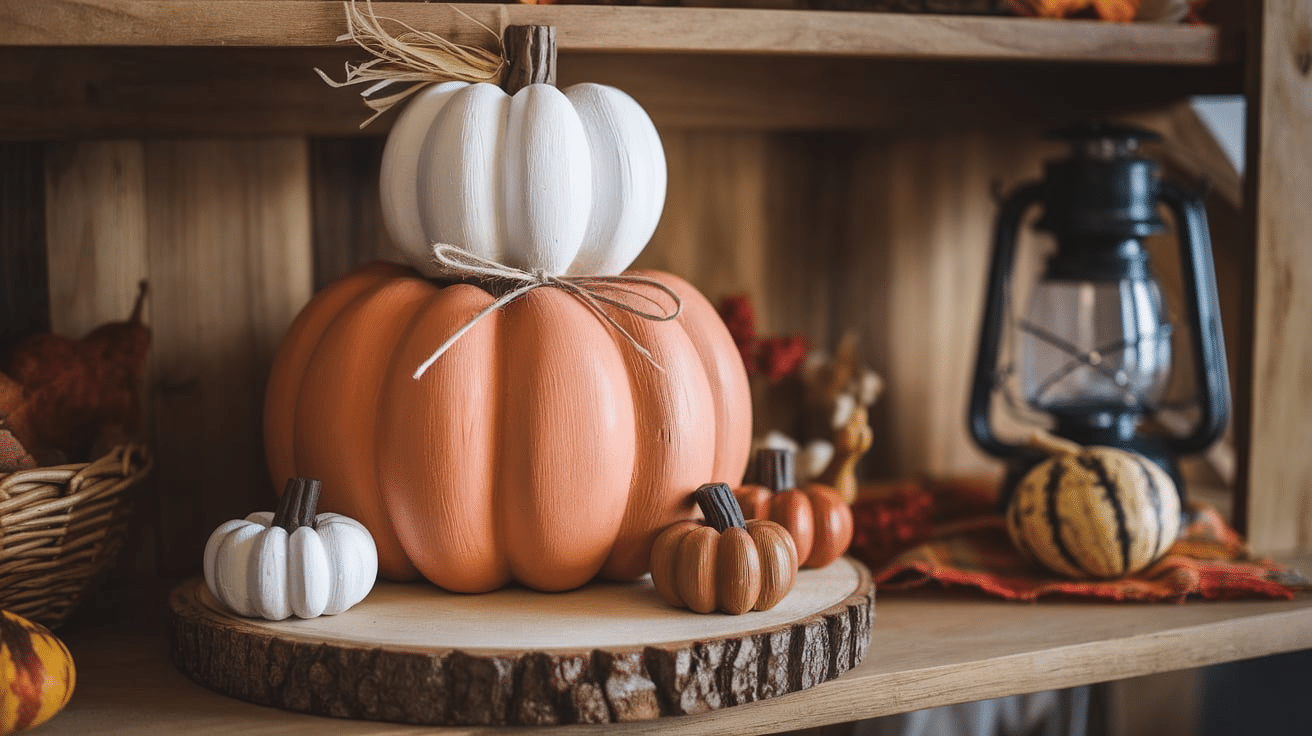
Create a unique decoration by stacking different-sized wooden pumpkins for a layered look.
Supplies Needed:
- Three wooden circles or oval shapes (small, medium, and large)
- Orange, white, or brown paint
- Sandpaper
- Hot glue or nails
- Ribbon, twine, or faux leaves
Steps to Make:
- Paint the wooden pieces in different fall shades. Let them dry.
- Sand the edges for a rustic, distressed look.
- Stack and glue them together, largest on the bottom, smallest on top.
- Attach a small twig or wooden dowel as the stem.
- Wrap twine or ribbon around the stem for decoration.
This makes a perfect porch or mantelpiece decoration!
6. Wooden Spool Pumpkins
Use leftover wooden spools to create cute mini pumpkins for a farmhouse-style display.
Supplies Needed:
- Wooden spools
- Orange paint
- Green pipe cleaners (for vines)
- Small wooden beads or twigs for stems
Steps to Make:
- Paint the spools orange and let them dry.
- Insert a twig or wooden bead into the center hole as a stem.
- Wrap a green pipe cleaner around the stem to create curly vines.
- Display them in groups for a cute rustic look.
These are great for tiered trays or tabletops!
7. Wooden Pumpkin Garland
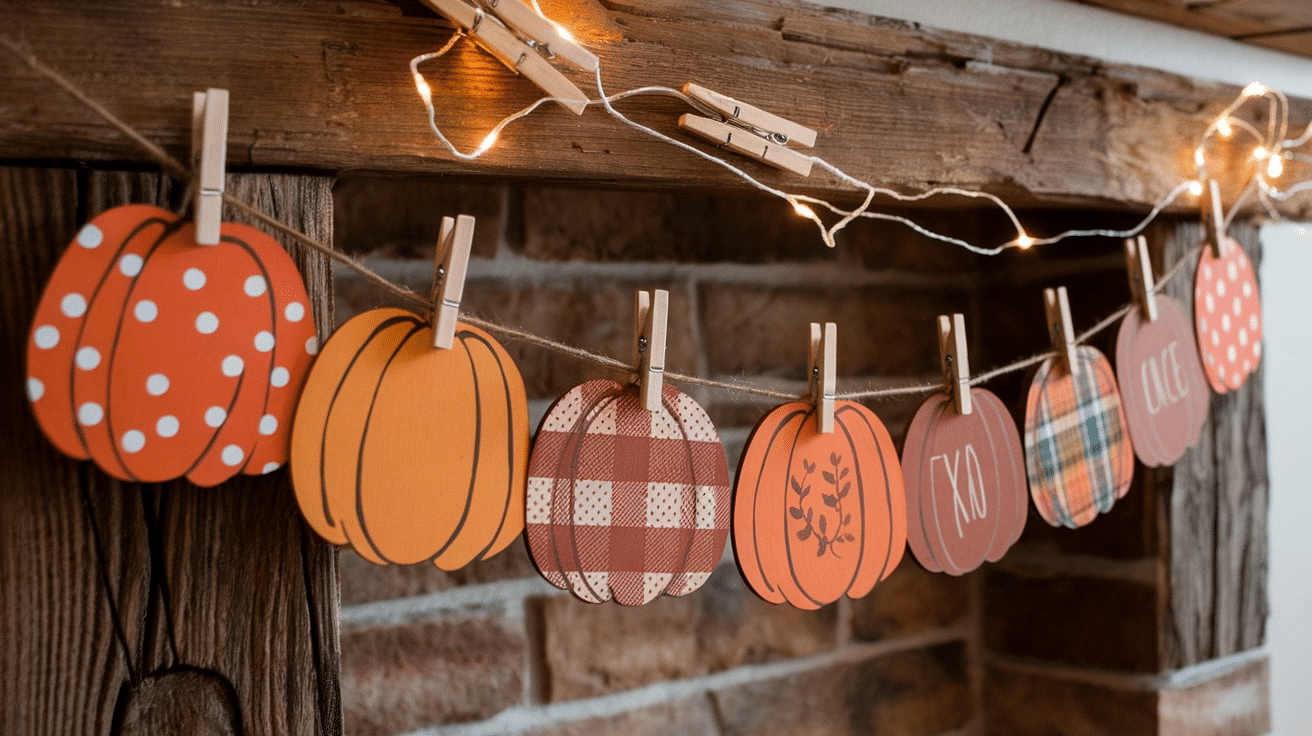
A wooden pumpkin garland is a fun way to decorate mantels, windows, or doorways.
Supplies Needed:
- Small wooden pumpkin cutouts
- Orange, white, and green paint
- Twine or string
- Mini clothespins or a drill to make holes
Steps to Make:
- Paint the wooden cutouts in different shades of orange or white.
- Use stencils or stamps to add polka dots, plaid, or words like “Fall” or “Harvest.”
- Attach them to twine using mini clothespins or drill small holes and string them together.
- Hang the garland on a fireplace mantel, across a window, or along a staircase.
This is an easy, lightweight decoration that adds charm anywhere!
8. Wooden Crate Pumpkin Display
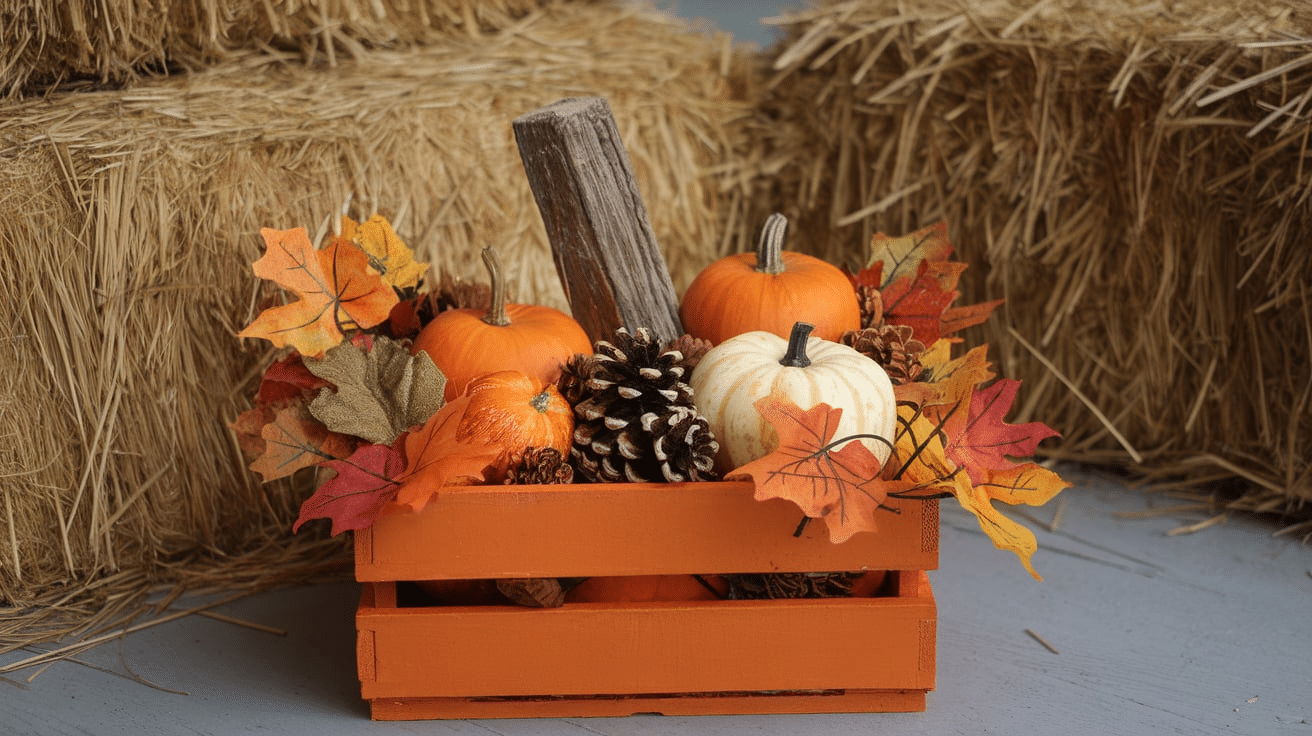
Repurpose a small wooden crate into a pumpkin-shaped decor piece.
Supplies Needed:
- Small wooden crate (unfinished or painted)
- Orange paint or stain
- Wood cutout for a stem
- Raffia, twine, or faux leaves
Steps to Make:
- Paint or stain the crate orange and let it dry.
- Attach a wooden stem (or a thick twig) on top.
- Tie raffia or twine around the stem for a rustic touch.
- Fill the crate with mini pumpkins, pinecones, or fall flowers.
This makes a cute tabletop or porch decoration!
9. Wooden Pumpkin Wreath
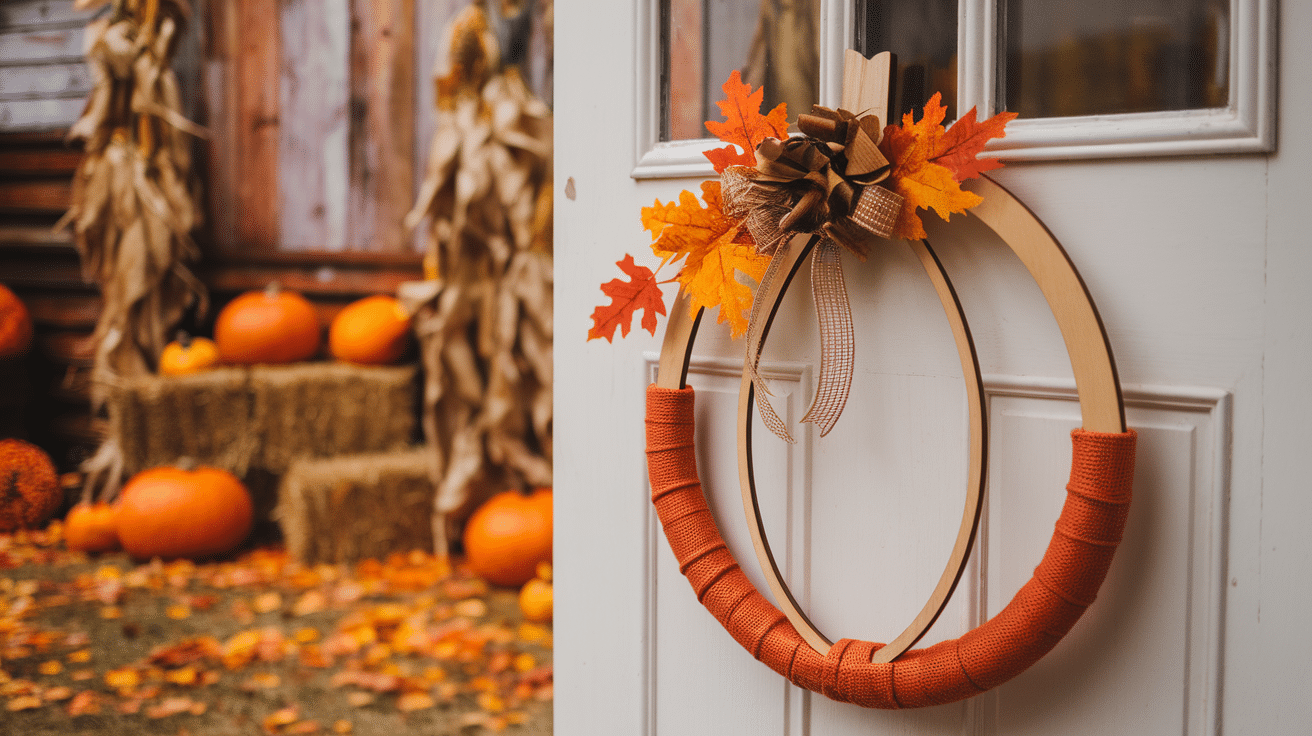
Instead of a traditional wreath, create a pumpkin-shaped wooden wreath for your front door.
Supplies Needed:
- Wooden embroidery hoop or circular wooden frame
- Orange and brown paint
- Twigs or wooden dowels for stems
- Faux leaves, burlap ribbon, or twine
Steps to Make:
- Paint the hoop orange or wrap it with orange burlap.
- Attach a wooden stem at the top using hot glue.
- Decorate with faux leaves, twine bows, or mini pumpkins.
- Hang it on your door with a ribbon or hook.
This makes a unique alternative to a regular fall wreath!
10. Wooden Pumpkin Name Place Cards
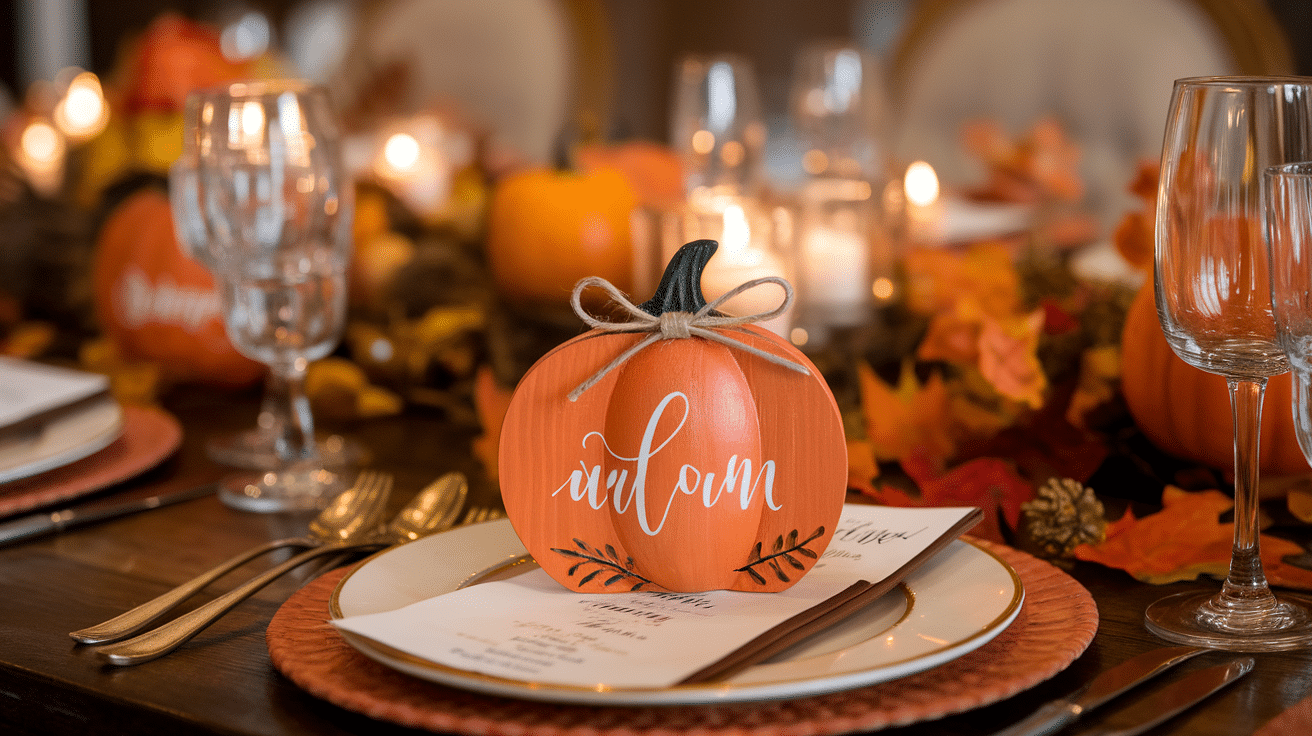
Make mini wooden pumpkins as name cards for fall dinner parties or Thanksgiving.
Supplies Needed:
- Small wooden slices or blocks
- Orange paint or stain
- Black or white paint pens
- Twine or small leaves
Steps to Make:
- Paint or stain the wooden slices.
- Write guests’ names using paint pens.
- Decorate with twine, small leaves, or mini pumpkins.
- Place on the table for a personalized touch.
This is perfect for Thanksgiving or fall dinner gatherings!
11. Glow-in-the-Dark Wooden Pumpkins
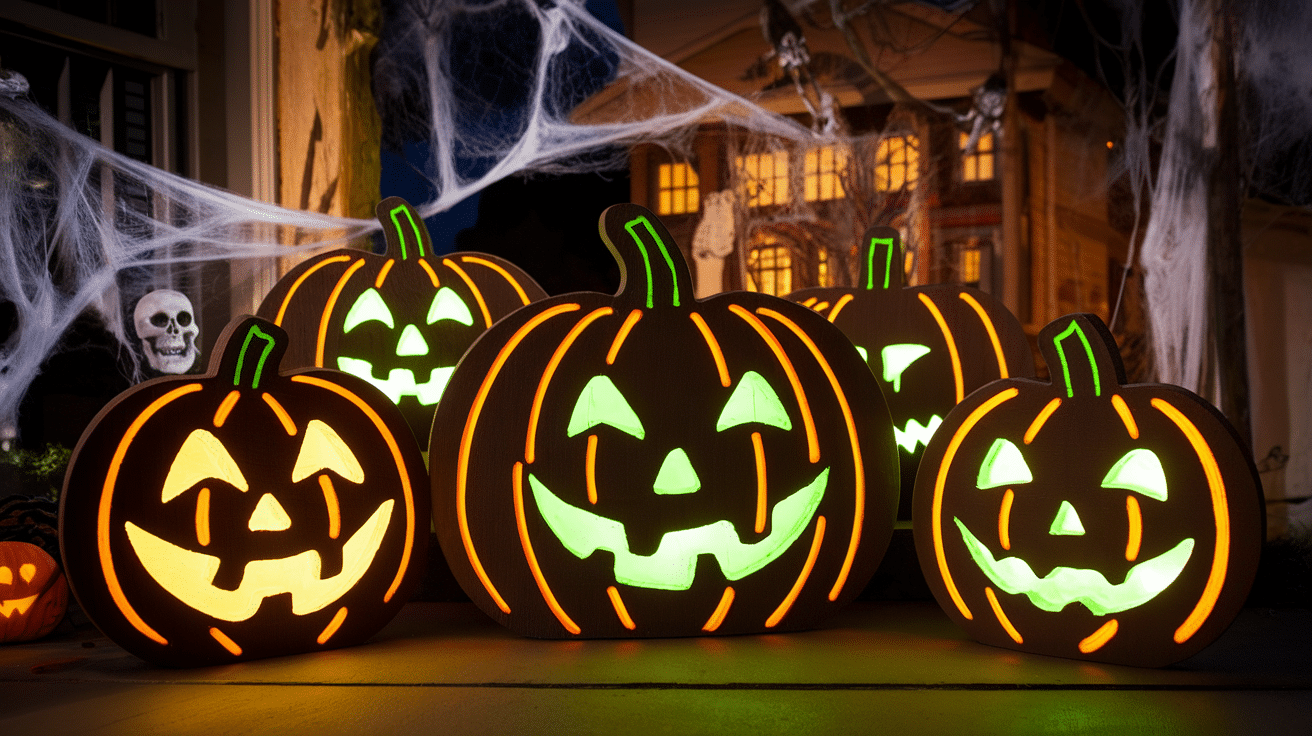
Add a fun twist with glow-in-the-dark paint for a spooky Halloween look.
Supplies Needed:
- Wooden pumpkin cutouts or blocks
- Glow-in-the-dark paint
- Black paint for faces or designs
Steps to Make:
- Paint the pumpkins orange and let them dry.
- Use glow-in-the-dark paint over the top for a cool nighttime effect.
- Add black-painted jack-o’-lantern faces or patterns.
- Display near a porch light or in a dark room for a glowing effect.
These are great for Halloween decorations!
12. Wooden Pumpkin Serving Tray
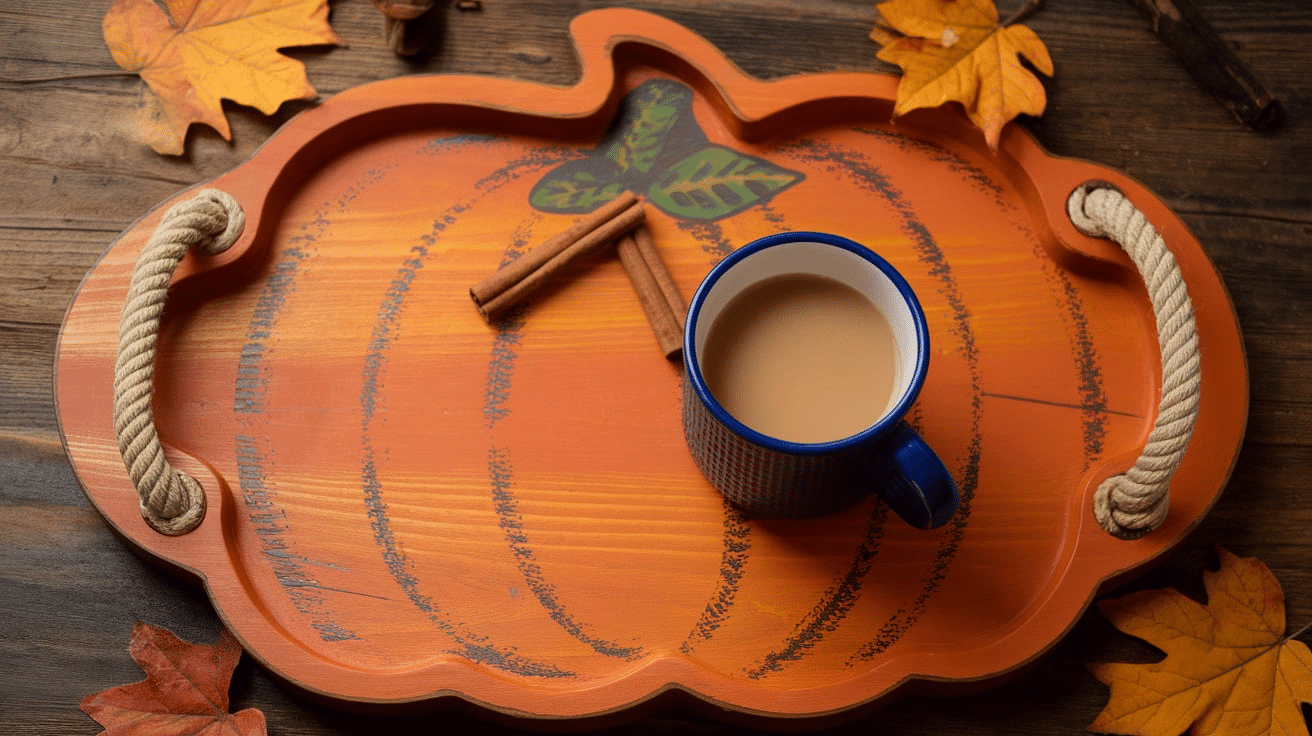
Turn a simple wooden board into a pumpkin-shaped serving tray for fall parties.
Supplies Needed:
- Wooden board
- Saw (to cut a pumpkin shape)
- Orange paint or food-safe stain
- Rope handles or metal handles
Steps to Make:
- Cut a pumpkin shape from the wooden board.
- Sand and paint or stain it in fall colors.
- Attach handles on the sides with screws.
- Use as a serving tray for snacks, candles, or fall drinks.
This makes a beautiful, functional fall centerpiece!
How to Customize Your Wooden Pumpkins
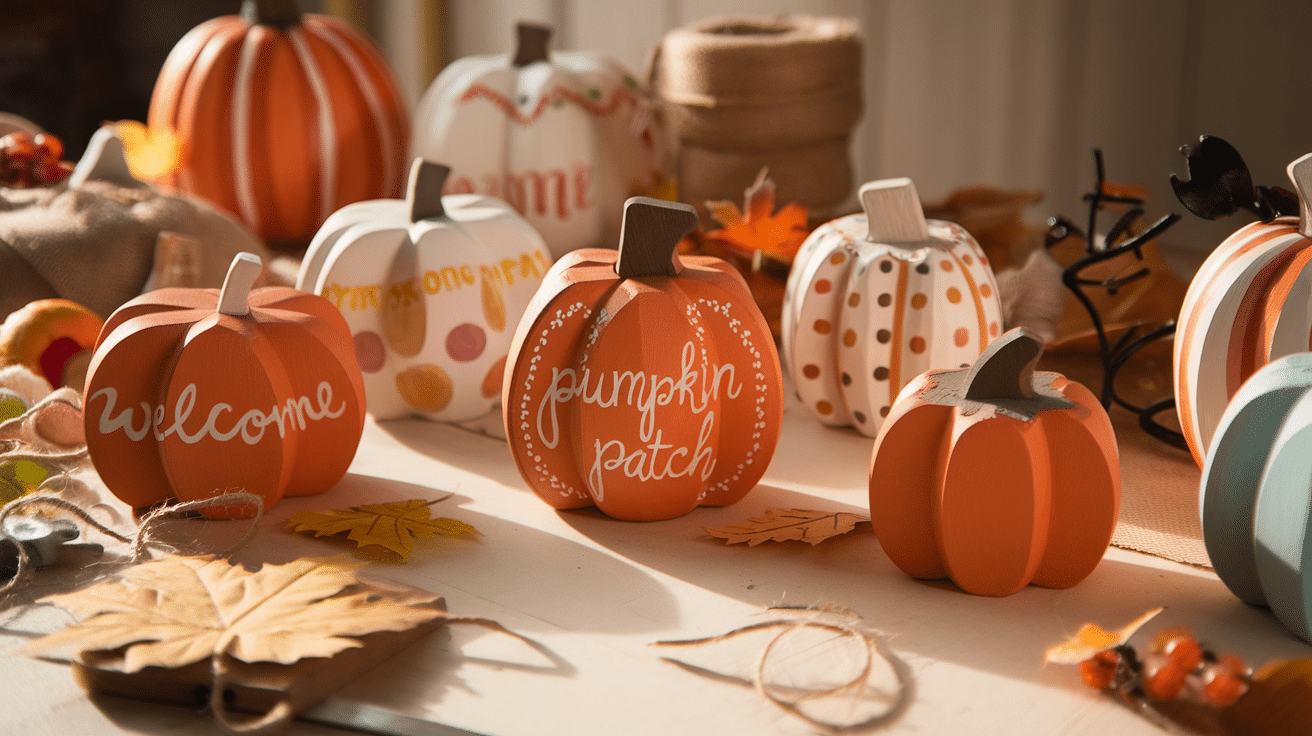
Wooden pumpkins can be styled in many different ways. Here are some ideas to make them unique:
1. Painted Pumpkins
- Use different shades of orange, white, or even pastel colors for a modern farmhouse look.
- Add polka dots, stripes, or floral designs for a fun touch.
- Use chalk paint for a matte, rustic finish.
2. Distressed Look
- Sand the edges after painting to give them a weathered, vintage feel.
- Use a dry brush technique with white or brown paint for an aged effect.
3. Stenciled or Hand-Lettered Designs
- Stencil words like “Welcome” or “Hello Fall” for a personalized touch.
- Use a wood-burning tool to engrave designs or letters.
4. Decorative Additions
- Glue on faux leaves, twigs, or raffia bows for extra charm.
- Wrap twine or burlap around the stems for a rustic look.
- Add fairy lights to create a cozy glow.
Where to Display Wooden Pumpkins
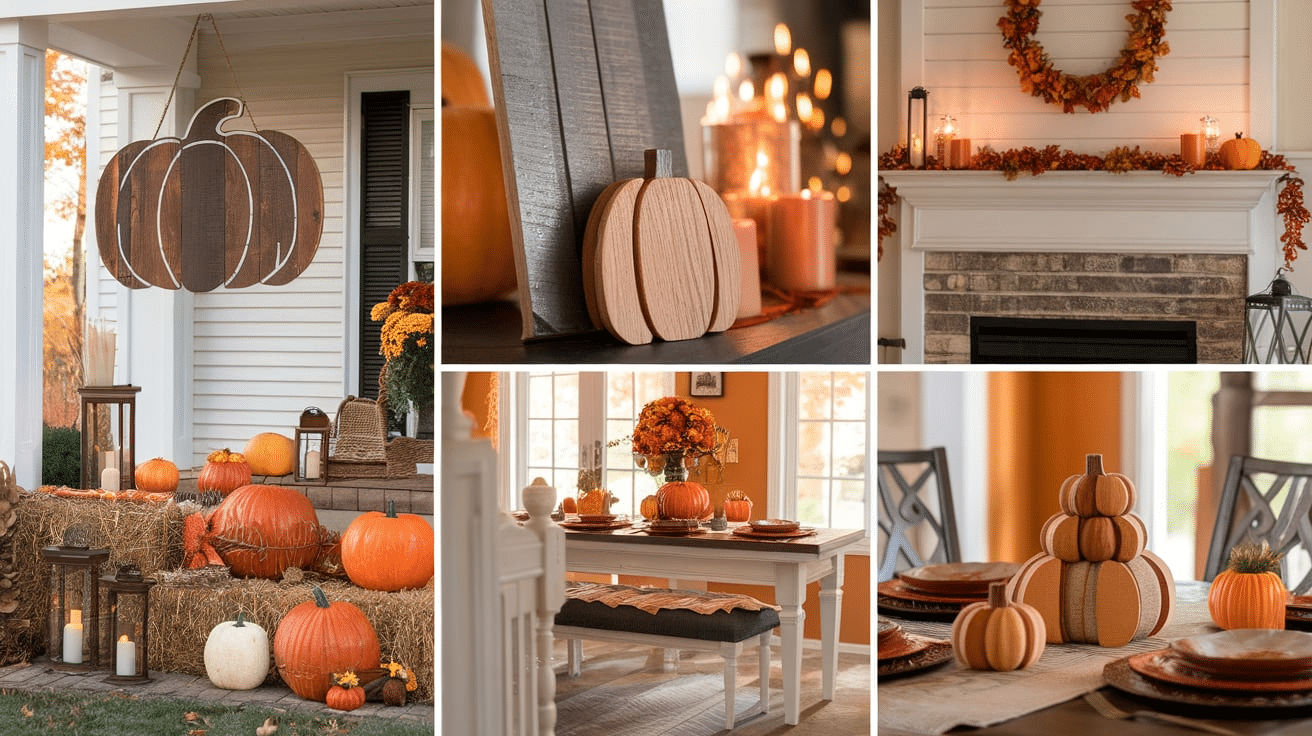
Once your wooden pumpkins are ready, it’s time to show them off! Here are some great places to display them:
- Front Porch: Place large wooden pumpkins near your front door with hay bales, lanterns, and real pumpkins for a welcoming entrance.
- Fireplace Mantel: Arrange wooden pumpkins with candles, fall garlands, and small autumn decorations for a cozy indoor display.
- Dining Table Centerpiece: Use small wooden pumpkins as part of a fall-themed table setup. Add candles, leaves, and mini pumpkins for a beautiful centerpiece.
- Bookshelves or Entryway Tables: Place wooden pumpkins on shelves or tables to add a subtle touch of fall decor throughout your home.
- Garden or Yard: Seal your wooden pumpkins with weatherproof paint and display them outdoors as part of a fall-themed garden setup.
Tips for Making Wooden Pumpkin Crafts
Here are some extra tips to make sure your wooden pumpkin projects turn out great:
- Use Scrap Wood – Repurpose old wood pieces or pallets to save money and add character.
- Seal for Outdoor Use – If you use wooden pumpkins outside, apply a clear sealant to protect them from the weather.
- Experiment with Colors – Orange is classic, but don’t be afraid to try white, green, or even black for a modern look.
- Mix and Match – Combine different sizes and styles of wooden pumpkins for a layered, eye-catching display.
- Get the Whole Family Involved – Let kids paint or decorate small wooden pumpkins for a fun family craft day.
Conclusion
Wooden pumpkin crafts are a fun and easy way to bring the beauty of fall into your home.
They last for years, can be customized in many ways, and make great decorations for any space.
From simple wooden blocks to detailed painted designs, there are so many ways to get creative.
These crafts are also a great way to spend time with family, try something new, or add a personal touch to your decor.
I hope these ideas inspire you to make your own wooden pumpkins. Try different styles, mix colors, and make something unique.
With these DIY projects, your home will feel warm and festive all season long.
Frequently Asked Questions
What kind of wood is best for wooden pumpkin crafts?
Pine, plywood, or reclaimed pallet wood works great. They are easy to cut, paint, and sand for a rustic look. Choose sturdy wood if making outdoor decorations.
Do I need power tools to make wooden pumpkins?
Not always! Some crafts use pre-cut wooden shapes, but for custom designs, a saw or jigsaw is helpful. Sandpaper is great for smoothing rough edges.
What kind of paint should I use?
Acrylic, chalk, or spray paint works well. Chalk paint gives a rustic look, while acrylic is bright and easy to apply. Use a clear sealant if displaying outdoors.
How do I make my wooden pumpkins look rustic?
Lightly sand the edges after painting for a distressed look. You can also dry-brush brown or white paint over the surface for a weathered effect.
How do I store wooden pumpkins after fall?
Keep them in a dry place, like a storage bin or closet. Wrap them in paper or cloth to prevent scratches for next year’s use.


