DIY Wall Mounted Headboard: A Complete Guide
A wall-mounted headboard is a smart way to add a fresh touch to your bedroom. It sits behind the bed, making the area look more put together without taking up extra space.
You can build one yourself using basic tools and easy-to-find materials. This option works well if you’re renting or want something that fits your space without being too fixed.
In this guide, you’ll see different styles, learn how to build one step by step, and get useful tips along the way.
Pick the design that works best for you and follow the steps that match your tools and budget.
What is a Wall-Mounted Headboard?
A wall-mounted headboard is a type of headboard that connects directly to the wall instead of the bed. It usually sits right behind the bed and can serve as a simple backdrop or support for sitting up.
This style gives you more freedom to match it with your room. It’s a good choice if you want something neat and easy to change later.
How is a Wall-Mounted Headboard Different?
Wall-mounted headboards are set directly on the wall, while standard headboards are fixed to the bed frame. This small change makes a big difference in how the room feels and functions.
No matter what kind of bed you have, you can place a wall-mounted headboard at the height you prefer. It’s a flexible option if you like to change things around or if your bed doesn’t have a headboard slot.
It also gives you the chance to try out more shapes and materials. Some people even make wide panels that stretch beyond the bed for a neat look.
Pros and Cons
A wall-mounted headboard has some helpful benefits, but there are a few things to think about, too.
It’s a good choice if you have an adjustable bed or want a clean, simple look. When set up carefully, it also works well in rented spaces.
Still, you’ll need the right hardware, and if it is not installed correctly, it may leave marks.
| Pros | Cons |
|---|---|
| Easier to fit with adjustable beds | Needs wall anchors or special hardware |
| Looks clean and neat | Might leave marks if not installed the right way |
| Good for renters if installed with care |
Styles and Material for Wall-Mounted Headboard
There are many ways to build a wall-mounted headboard. You can keep it simple or make it soft and padded. You can also use things around the house.
1. Wood-Based Designs
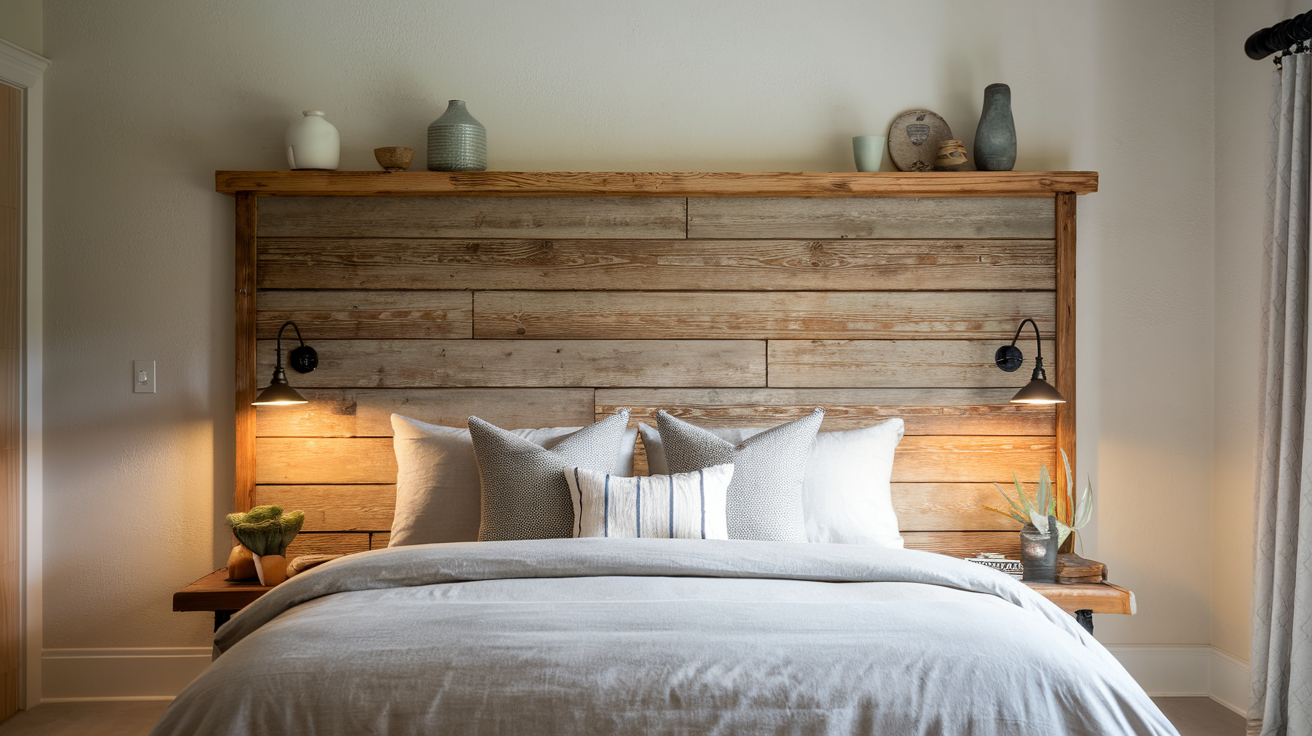
Wood designs are strong and can last a long time if built well. You can use plywood, shiplap, or even old doors from second-hand stores.
These give a clean and warm look that fits in many styles. Shiplap boards also add texture and work nicely in both small and large rooms.
If you like to work with wood, this is a solid and flexible option. You can stain, paint, or leave the wood natural, depending on your style.
2. Upholstered Designs
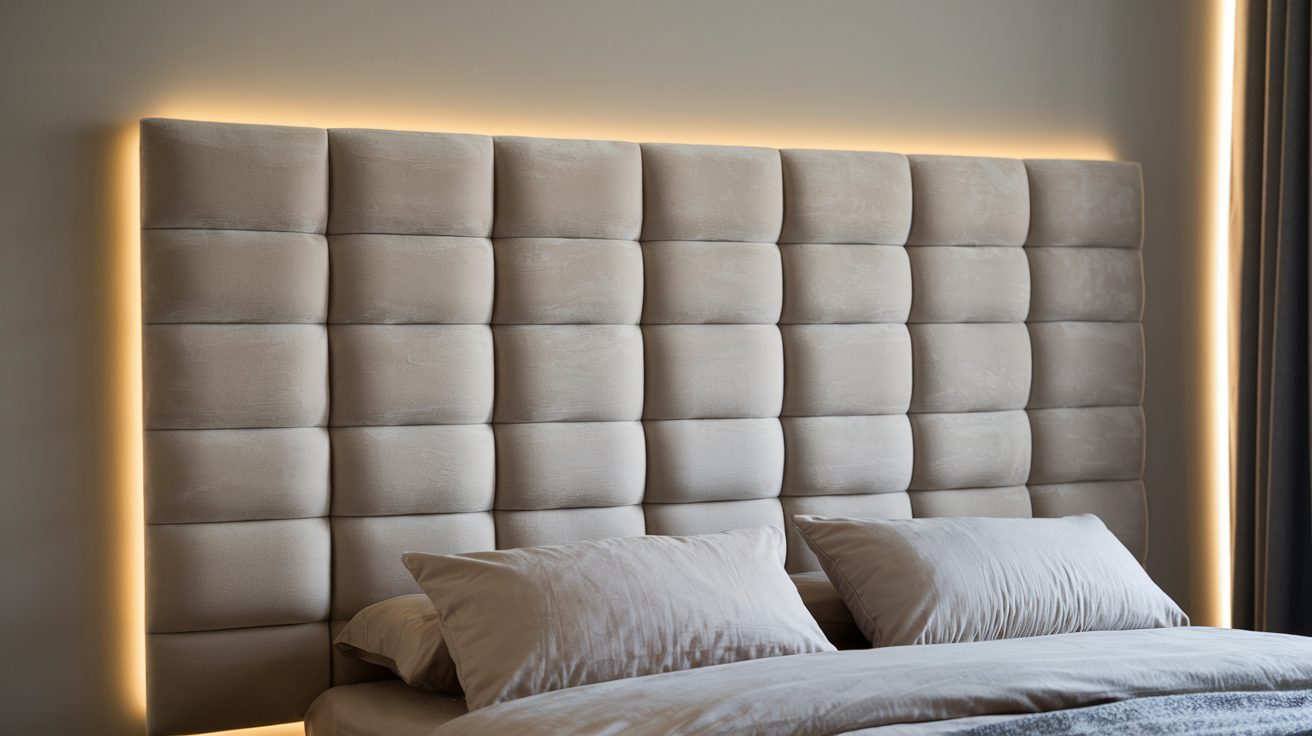
This type adds softness and comfort, which makes it nice for leaning against. You build a frame with plywood and cover it with foam and fabric.
Materials like cotton, velvet, or linen work well. You can also add buttons or seams for extra detail.
Upholstered headboards are a good pick if you want both comfort and design in one. They work well in both modern and relaxed bedroom spaces.
Mounting Methods Explained
Picking the right way to mount your headboard depends on the size, weight, and wall type. Some methods work better for heavy materials, while others are good for renters.
It’s important to use the right hardware so the headboard stays in place and looks neat.
| Mounting Method | How It Works | Good to Know |
|---|---|---|
| French Cleats | Two angled pieces: one on the wall, one on the headboard. They fit together firmly. | Best for heavy headboards. Walls may need anchors for support. |
| D-Rings and Hooks | D-rings go on the back of the headboard and hang on hooks installed on the wall. | Easy to install. Use a level to keep it straight. |
| Renter-Friendly | Use stick-on strips, Velcro, or lean the board against the wall. | No need to drill. Works well if you can’t make holes in the wall. |
Tools and Materials Required
Before you begin, make sure you have the right tools and supplies. The exact items will depend on the type of headboard you’re making, but here’s a simple guide to help you plan.
Tools:
- Saw
- Drill
- Tape measure
- Staple gun
- Level
- Screwdriver
- Scissors
Materials by Headboard Style
| Headboard Style | Materials Needed |
|---|---|
| Wood-Based Headboard |
|
| Upholstered Headboard |
|
| Creative Options |
|
Budget Alternatives
If you’re working with a small budget, you still have some good options. Dollar-store foam can be used as padding for upholstered headboards.
Fabric scraps or old curtains can replace store-bought fabric and still look great. Reclaimed wood works well for wood-based designs and adds character.
For mounting, you can find affordable hooks or brackets online, including on sites like Amazon.
Wall-Mounted Headboard: Step-by-Step Guide
Making a wall-mounted headboard at home is easier than you might think. You need a simple plan, the right tools, and a little time.
This section walks you through each step so you can build something that fits your space and style.
Step 1: Plan Your Design & Measure Your Wall
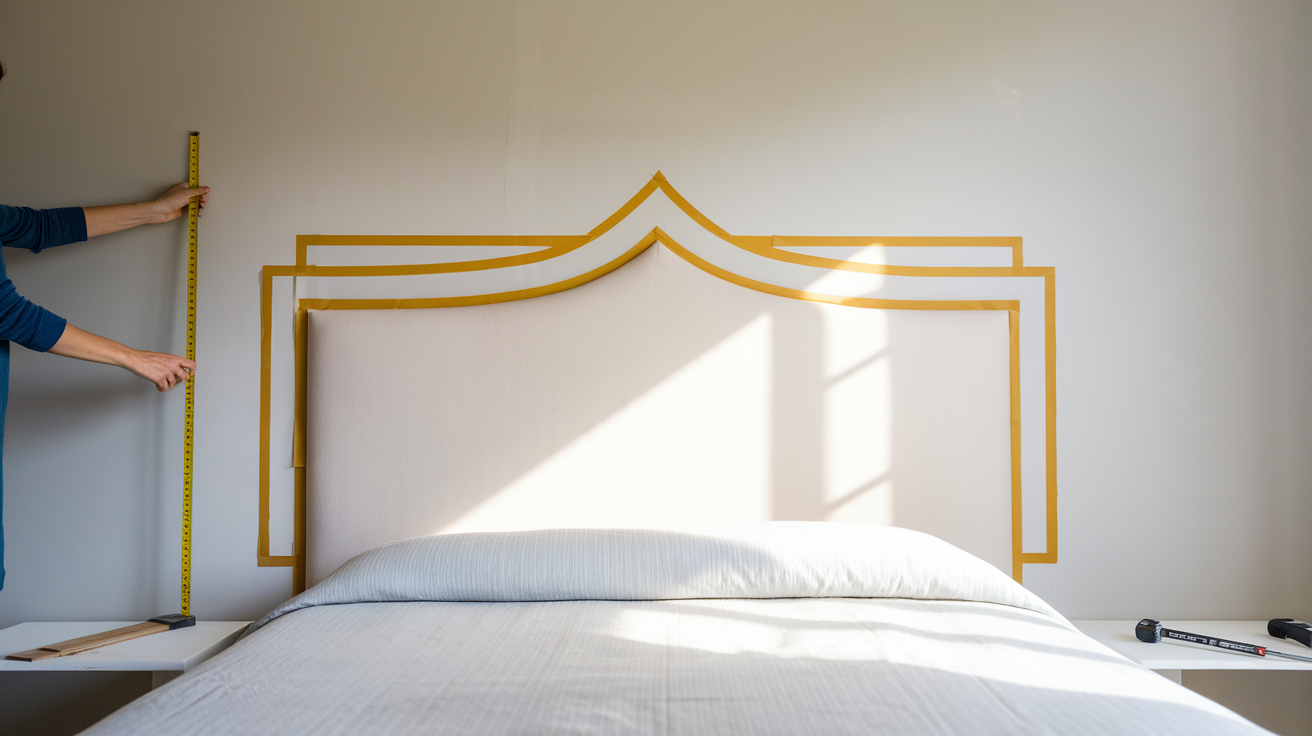
Start by deciding how wide and tall you want your headboard. Measure the width of your bed and add a few inches if you want extra coverage on the sides.
Then, look at how much vertical space you have between your mattress and the ceiling or any shelves.
Use painter’s tape to mark the outline of your headboard on the wall. This will help you check the size before you cut any material.
Planning now will help avoid extra work later. It also gives you a better feel for what fits your space.
Step 2: Cut Your Base Material
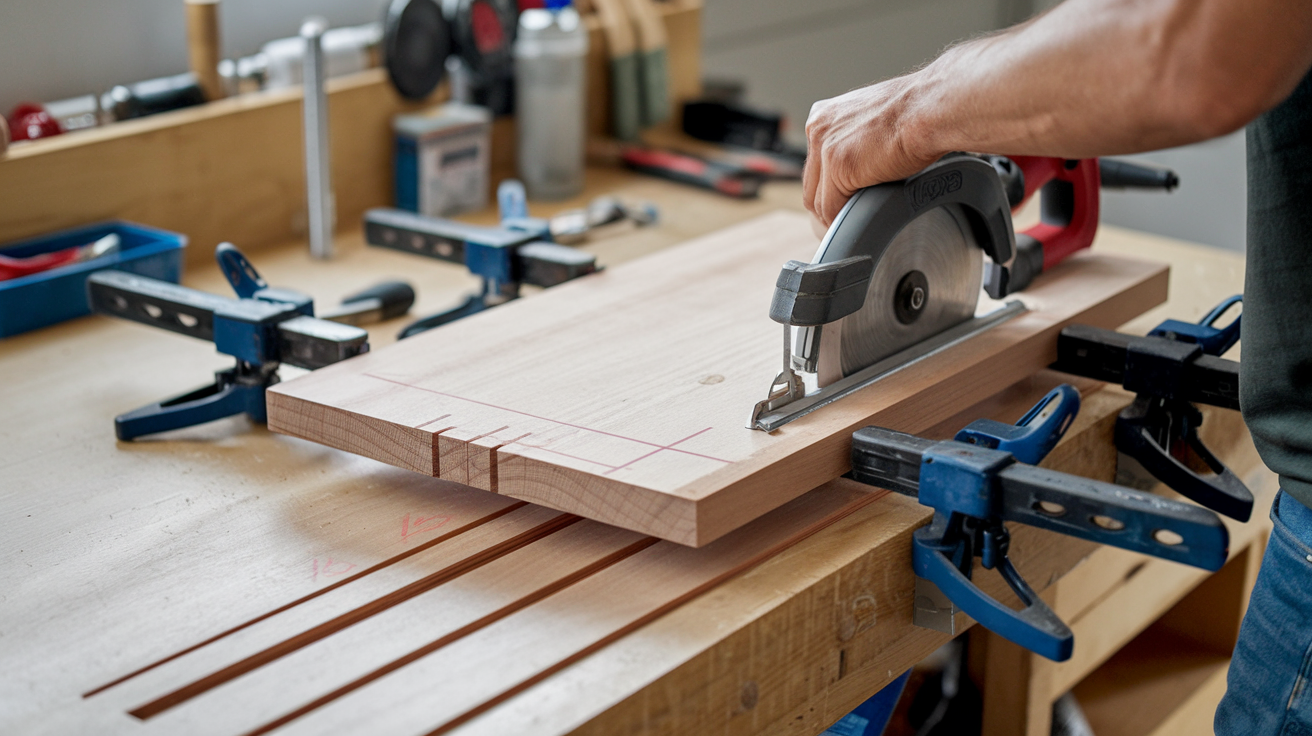
Once you’re sure about the size, use a saw to cut your plywood or wooden board.
If your headboard will have rounded edges or custom shapes, mark those with a pencil first.
For upholstered styles, check the edges—make sure they are smooth and not sharp. So the fabric or padding doesn’t tear or wear out. Sand any rough areas to avoid splinters.
Cut slowly and follow your lines as closely as possible. Use clamps if you need extra help holding the board steady.
Step 3: Add Upholstery or Finish (Optional)
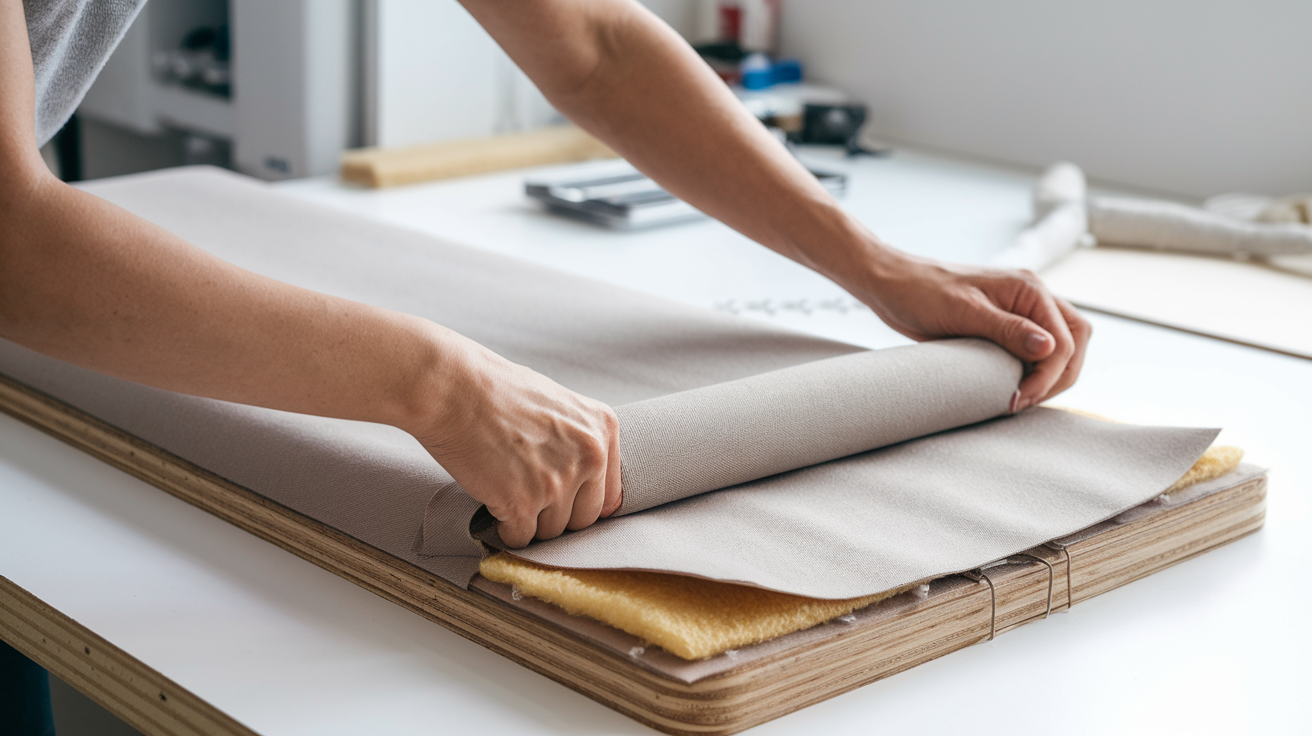
If you’re going for a padded design, place the foam over the board first, followed by a layer of batting.
This softens the edges and keeps everything in place under the fabric. Cut the fabric so it covers the entire board with a few inches extra on each side.
Pull the fabric tight and staple it to the back of the board. If you’re working with wood only, now is the time to stain or paint it. Let it dry fully before moving to the next step.
Try to work on a flat surface and smooth the fabric as you go. Staple from the center out to help avoid wrinkles.
Step 4: Install the Mounting Hardware
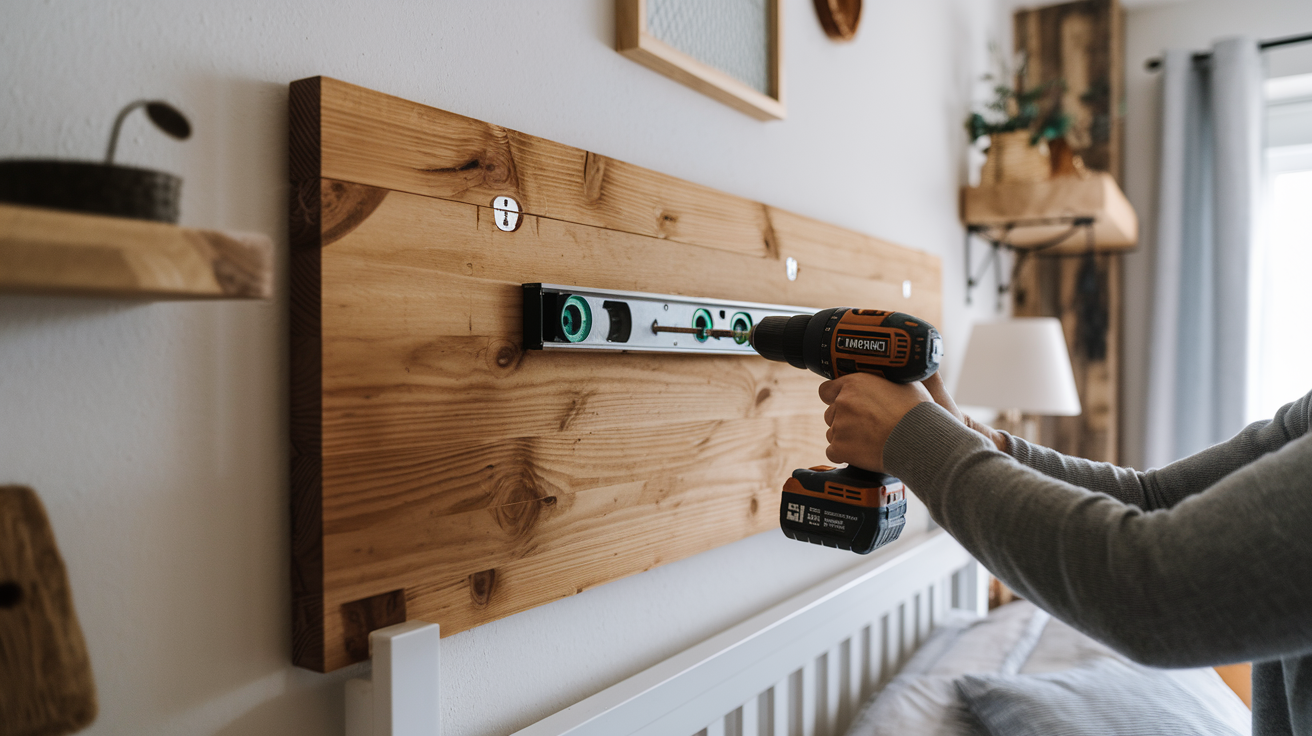
Decide what type of hardware you’ll use—French cleats, D-rings, or another method. Secure the hardware to the back of the headboard first.
Then, mark your wall where the matching piece will go. Use a level to make sure everything lines up straight.
Drill pilot holes and insert anchors if needed, especially if you’re attaching to drywall or plaster. Make sure all parts feel firm before hanging the headboard.
Double-check all measurements before drilling. If you’re unsure, ask someone to help hold it while marking.
Step 5: Hang and Adjust Your Headboard
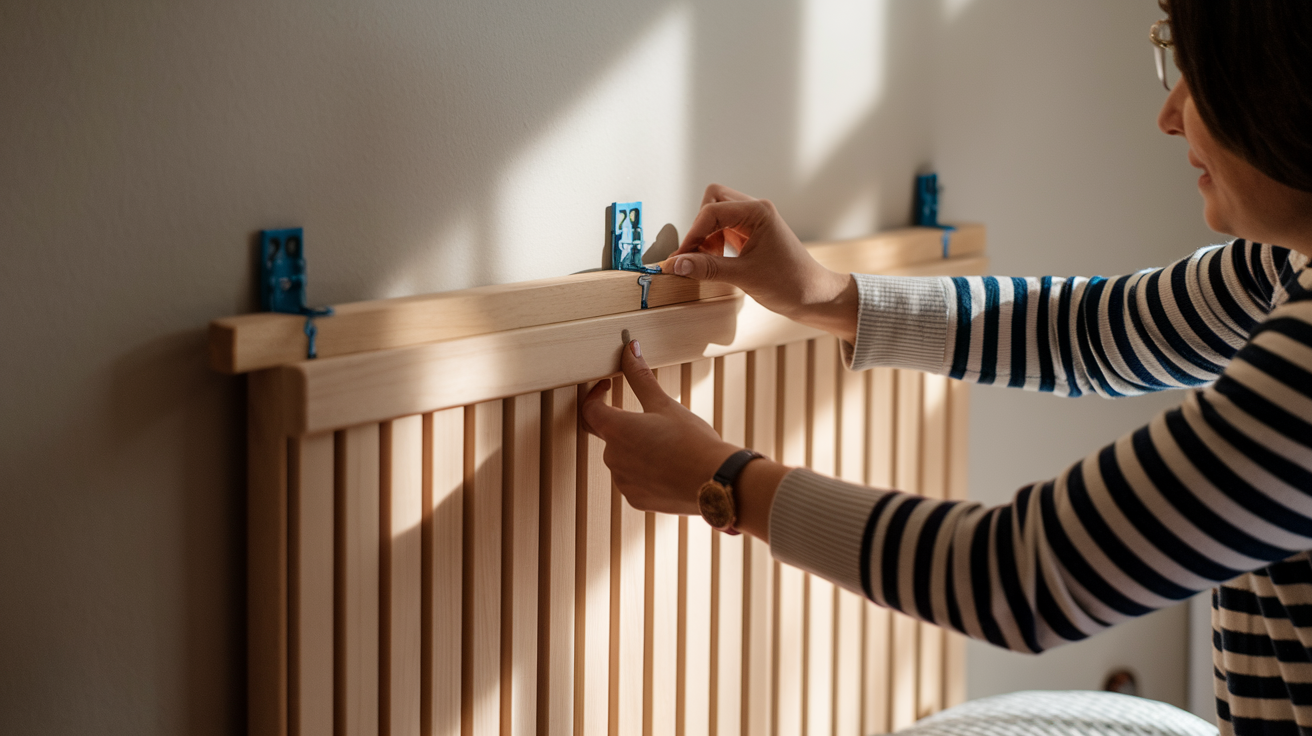
Now that everything’s ready, lift the headboard and carefully place it onto the wall hardware. Adjust it slightly until it’s centered and level.
Step back and take a look from different angles to make sure it sits evenly. If it’s not quite right, take it down and recheck your measurements or wall marks.
Once it looks good, press it in a place, and you’re done. Give the headboard a gentle push to test its stability. Make sure it feels secure before placing your pillows back.
Pro Tips for Success
Before you start, it helps to keep a few small things in mind. These tips can make your project go more smoothly and help avoid common problems.
Even small steps, like double-checking your work or using the right tools, can save time later.
- Measure twice, cut once: This helps avoid mistakes.
- Use a level: It makes sure your headboard isn’t crooked.
- Pre-drill holes: This makes it easier to screw into wood without splitting it.
- Practice on scrap: If you’re new to upholstery, test your fabric wrap first.
- Check the wall type: Drywall, concrete, or brick may need different anchors.
Final Thoughts
Building a wall-mounted headboard is a simple way to make your space feel more personal.
You’ve gone through the types of styles, tools, and mounting methods, along with steps to help you build with ease.
The tips are there to guide you, especially if this is your first time trying something like this. You don’t need fancy tools or a big budget—just patience and a plan.
Projects like this are not just about how things look. They’re about making something that works for your space and feels right to you.
If it’s not perfect, that’s okay. What matters most is that you made it yourself, and that kind of effort always counts for something.
Want more DIY ideas that make your space feel like home? Browse our other blogs for simple, budget-friendly projects you can do yourself.