DIY End Table Guide: Plans, Steps, Costs & Tips
A good end table is one of those small pieces that makes everyday living easier, but finding the right one is not always simple.
Size, style, and cost often don’t line up with what you actually need. That’s where a DIY end table becomes a practical option.
It gives you control over how it looks, how it fits your space, and how much you spend. Here, you’ll learn how to plan, build, and make the right choices so your project turns out clean, stable, and worth the effort.
What a DIY End Table Is and Why People Build One
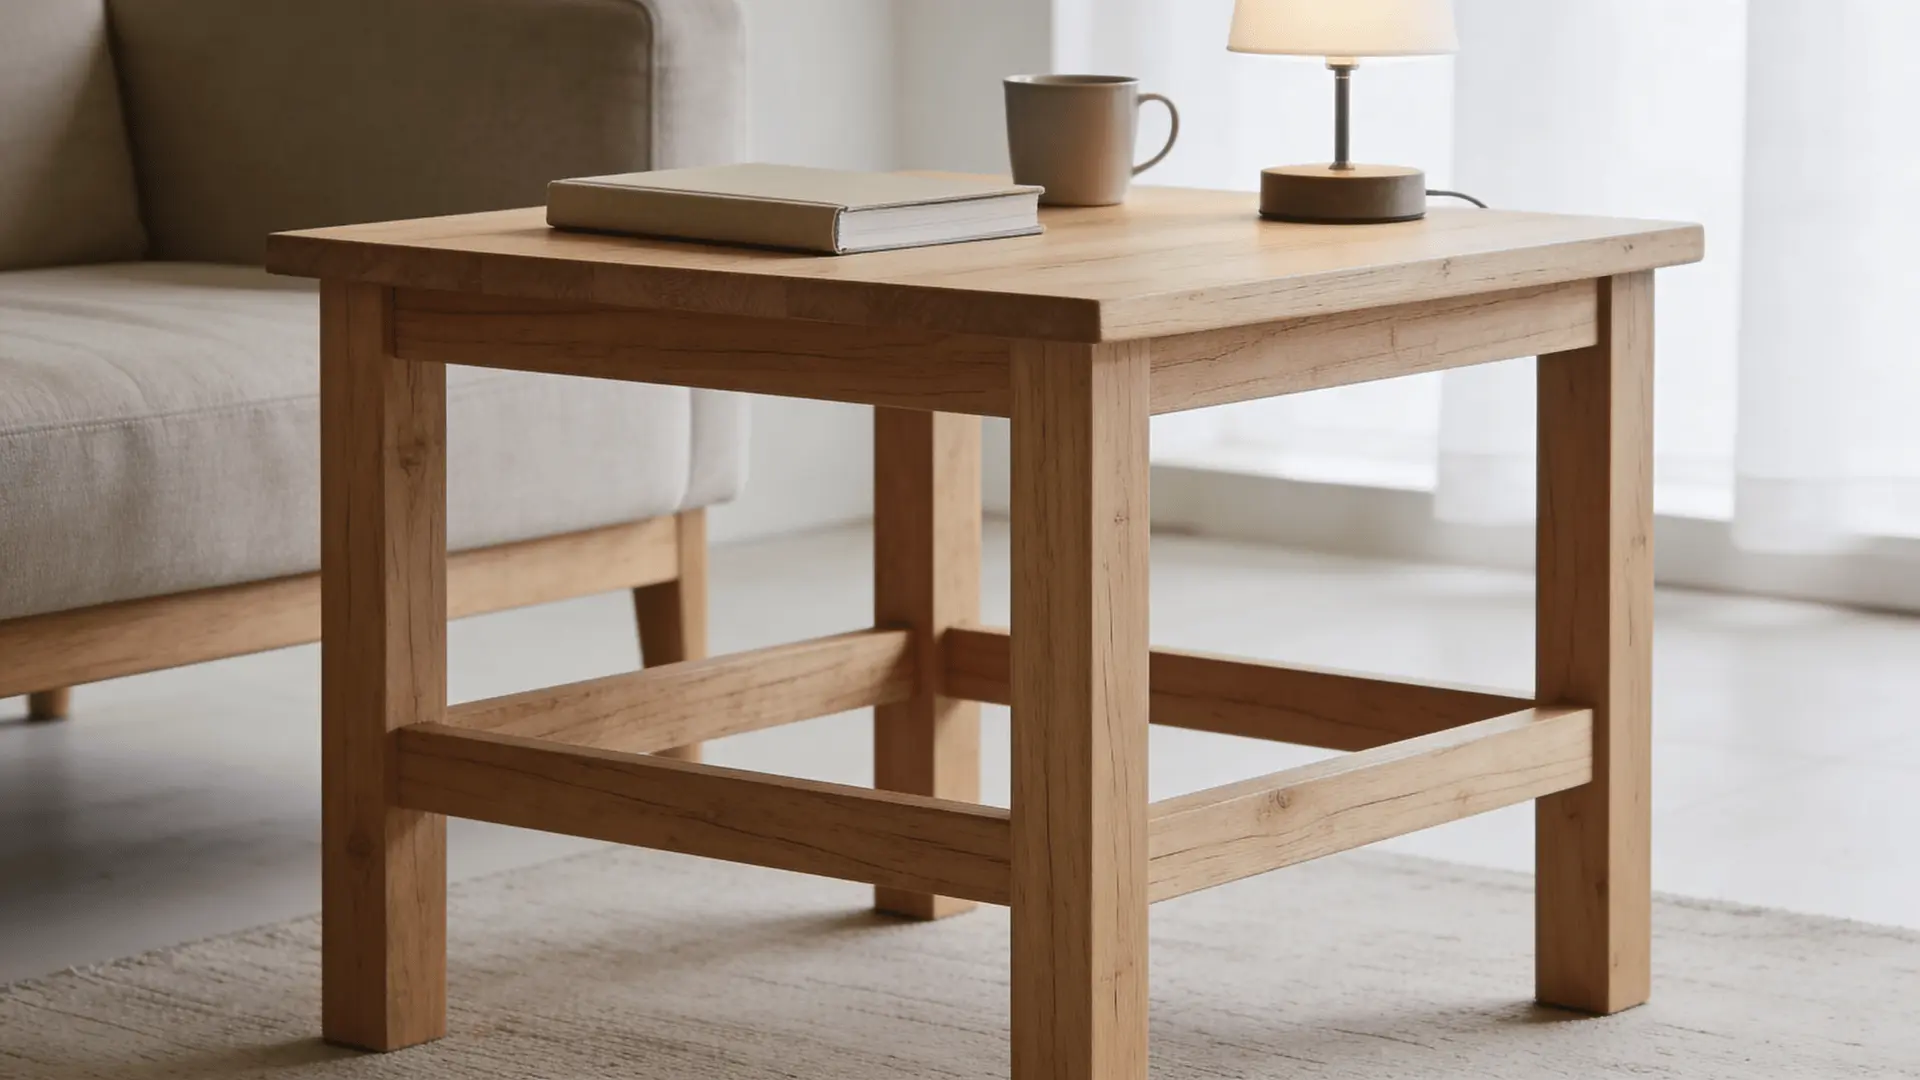
A DIY end table is a small table you build yourself, usually placed next to a sofa, chair, or bed. It holds everyday items like a lamp, phone, books, or a drink.
People build one mainly for control. You can set the exact size, match your space, and keep costs within budget. It’s a practical choice when store options don’t fit well or feel overpriced.
End tables and side tables are often used interchangeably. The difference is mostly placement. End tables sit next to a sofa, while side tables can go anywhere. In most homes, the terms overlap.
Building your own table means you control the details. You can match the height to your sofa or bed, decide if you need storage, and keep the design simple or styled to your space.
Typical Features of DIY End Tables
- Height: Matches or sits slightly below the sofa arm
- Surface: Flat top for daily use
- Storage: Optional shelf or drawer
- Size: Compact for tight spaces
- Structure: Simple frame or leg design for stability
Common Uses and Placement in a Room
End tables are placed where you need quick access to items. Common spots include:
- Next to a sofa or chair: For drinks, remotes, or lamps
- Beside a bed: As a nightstand
- In small corners: Where larger furniture won’t fit
- Between chairs: To share surface space
Placement matters more than design. A simple table in the right spot gets used more than a detailed one placed poorly.
DIY vs. Store-Bought: What You Gain vs. Trade-Offs
| Aspect | DIY End Table | Store-Bought End Table |
|---|---|---|
| Cost | Lower (great with scrap wood or simple builds) | Higher (especially solid wood) |
| Size Fit | Custom size for your exact space | Fixed sizes only |
| Style Control | Full control over design and finish | Limited options |
| Skill Benefit | Learn basic woodworking | No learning involved |
| Time | Takes time to build | Ready instantly |
| Tools | Needs basic tools | No tools needed |
| Quality | Depends on your skill | Consistent finish |
| Mistakes | Possible small flaws (wobble, uneven cuts) | No build errors |
Store-bought tables tend to have more consistent quality because they are machine-cut and assembled with precise measurements. This reduces issues like uneven legs or misalignment, which are more common in DIY builds, especially for beginners.
Types of DIY End Tables You Can Build
There isn’t just one way to build a DIY end table, and your design affects cost, tools, and effort. It also decides how simple or advanced the build will be.
1. Simple Beginner End Tables
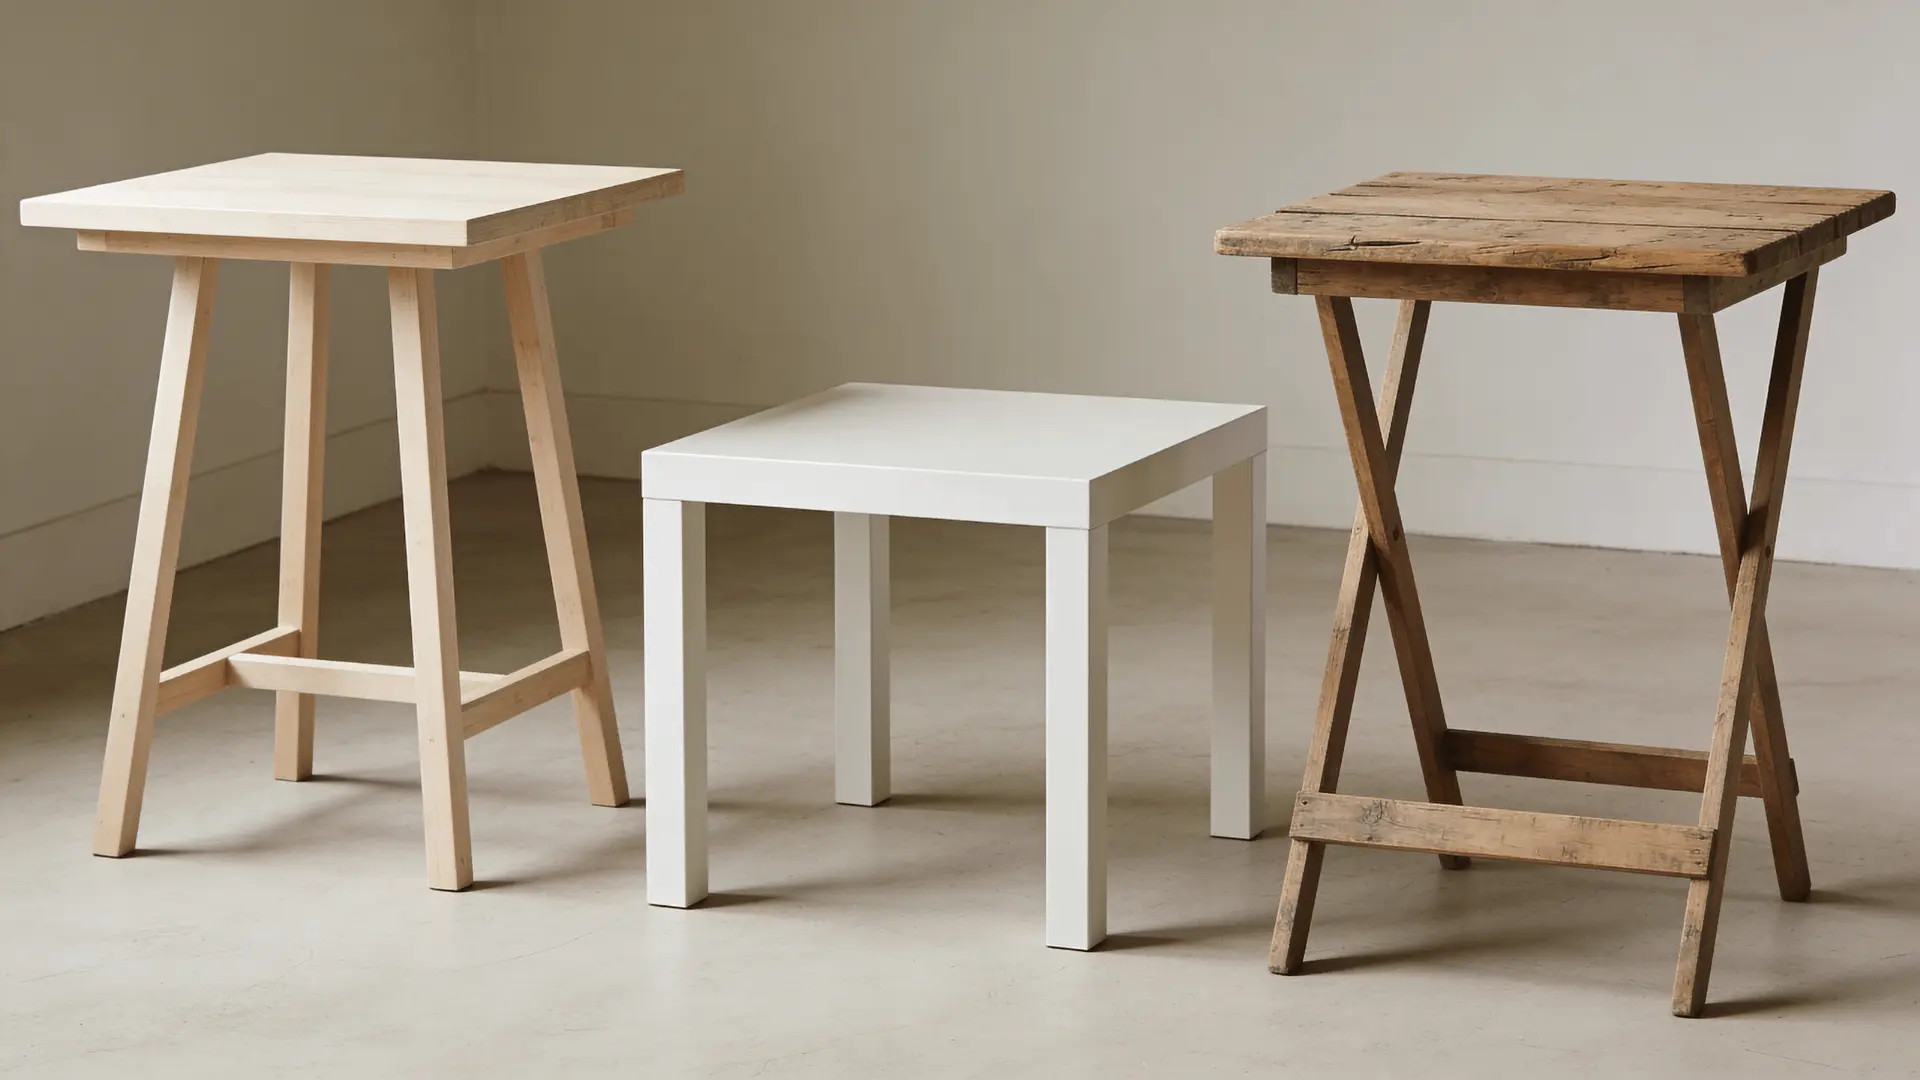
Simple beginner tables are the easiest place to start. These usually have a flat top, four legs, and sometimes a lower shelf.
The cuts are straight, the structure is basic, and you can build one using just a saw, drill, and screws.
This type works best if you want something quick, affordable, and functional without focusing too much on design. If you just need a sturdy table next to your sofa, this is the safest starting point.
2. Modern and Minimal Designs
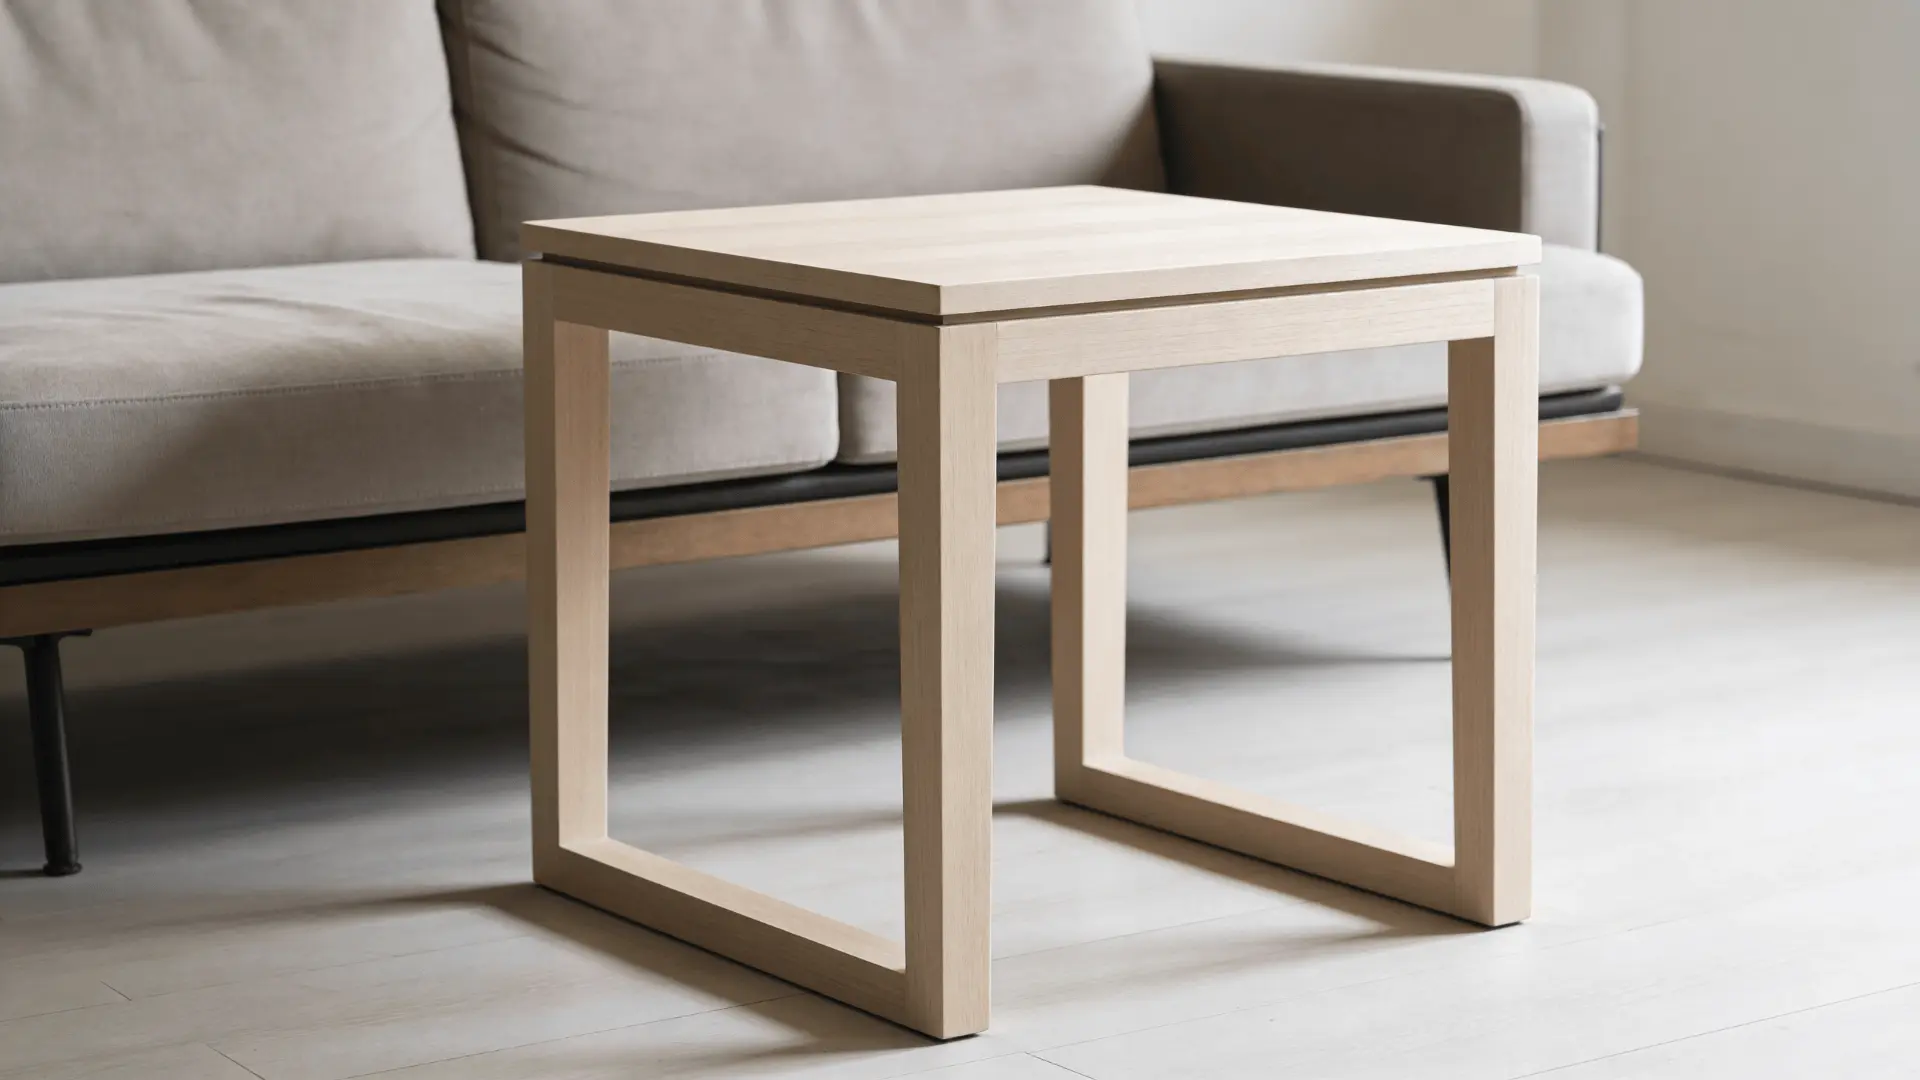
Modern end tables focus on clean lines and simple shapes. You’ll often see square tops, straight legs, and smooth finishes. While they look simple, they require more precision to get that clean, polished result.
These are a good choice if you want to match a modern interior or prefer a sharp, neat look. They suit builders who are comfortable taking extra time with cutting and finishing.
3. Rustic and Farmhouse Styles
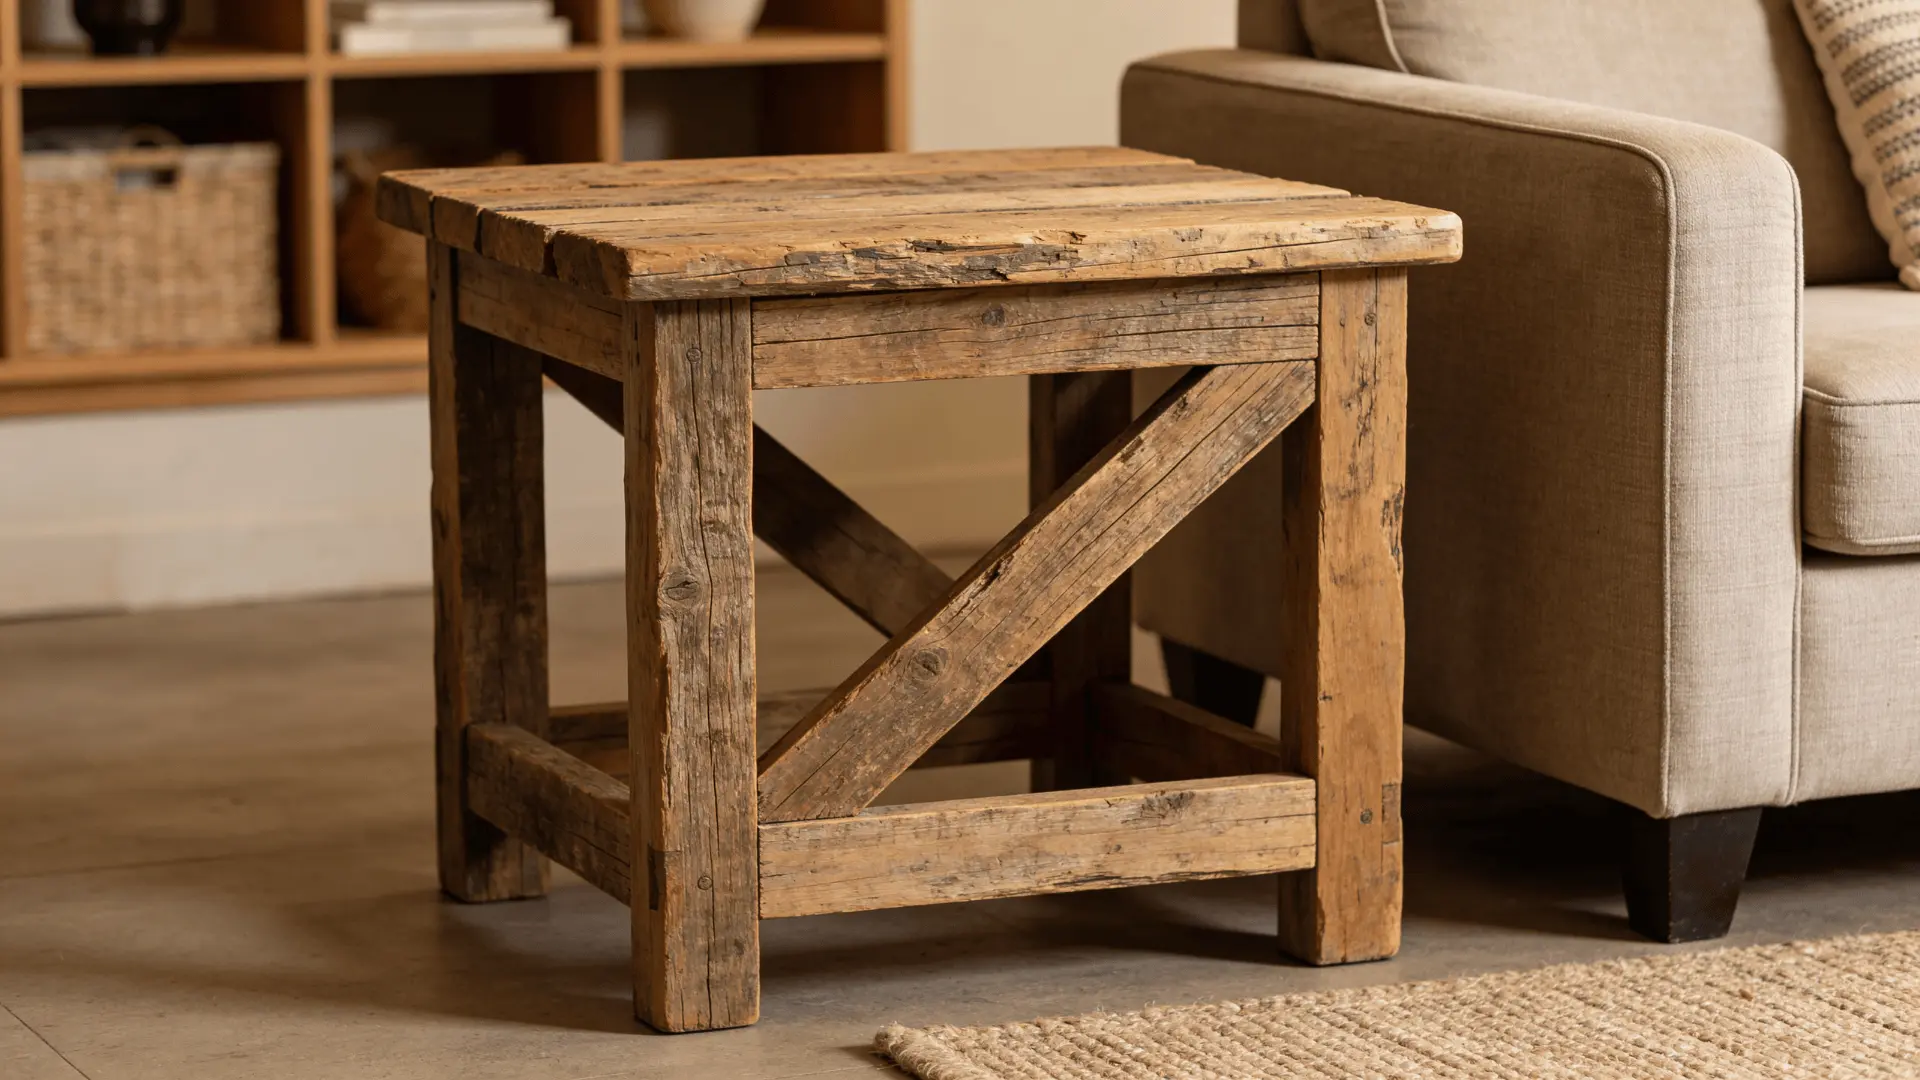
Rustic and farmhouse tables have a more natural and slightly rough look. They often use thicker wood like 2x4s or reclaimed boards, with visible grain and a heavier feel.
These builds are strong and forgiving. Small imperfections don’t stand out and can actually improve the look.
This style works well in cozy or traditional spaces and is a good option if you don’t want to stress about perfect cuts.
4. End Tables with Storage (Shelves, Drawers, Hidden Compartments)
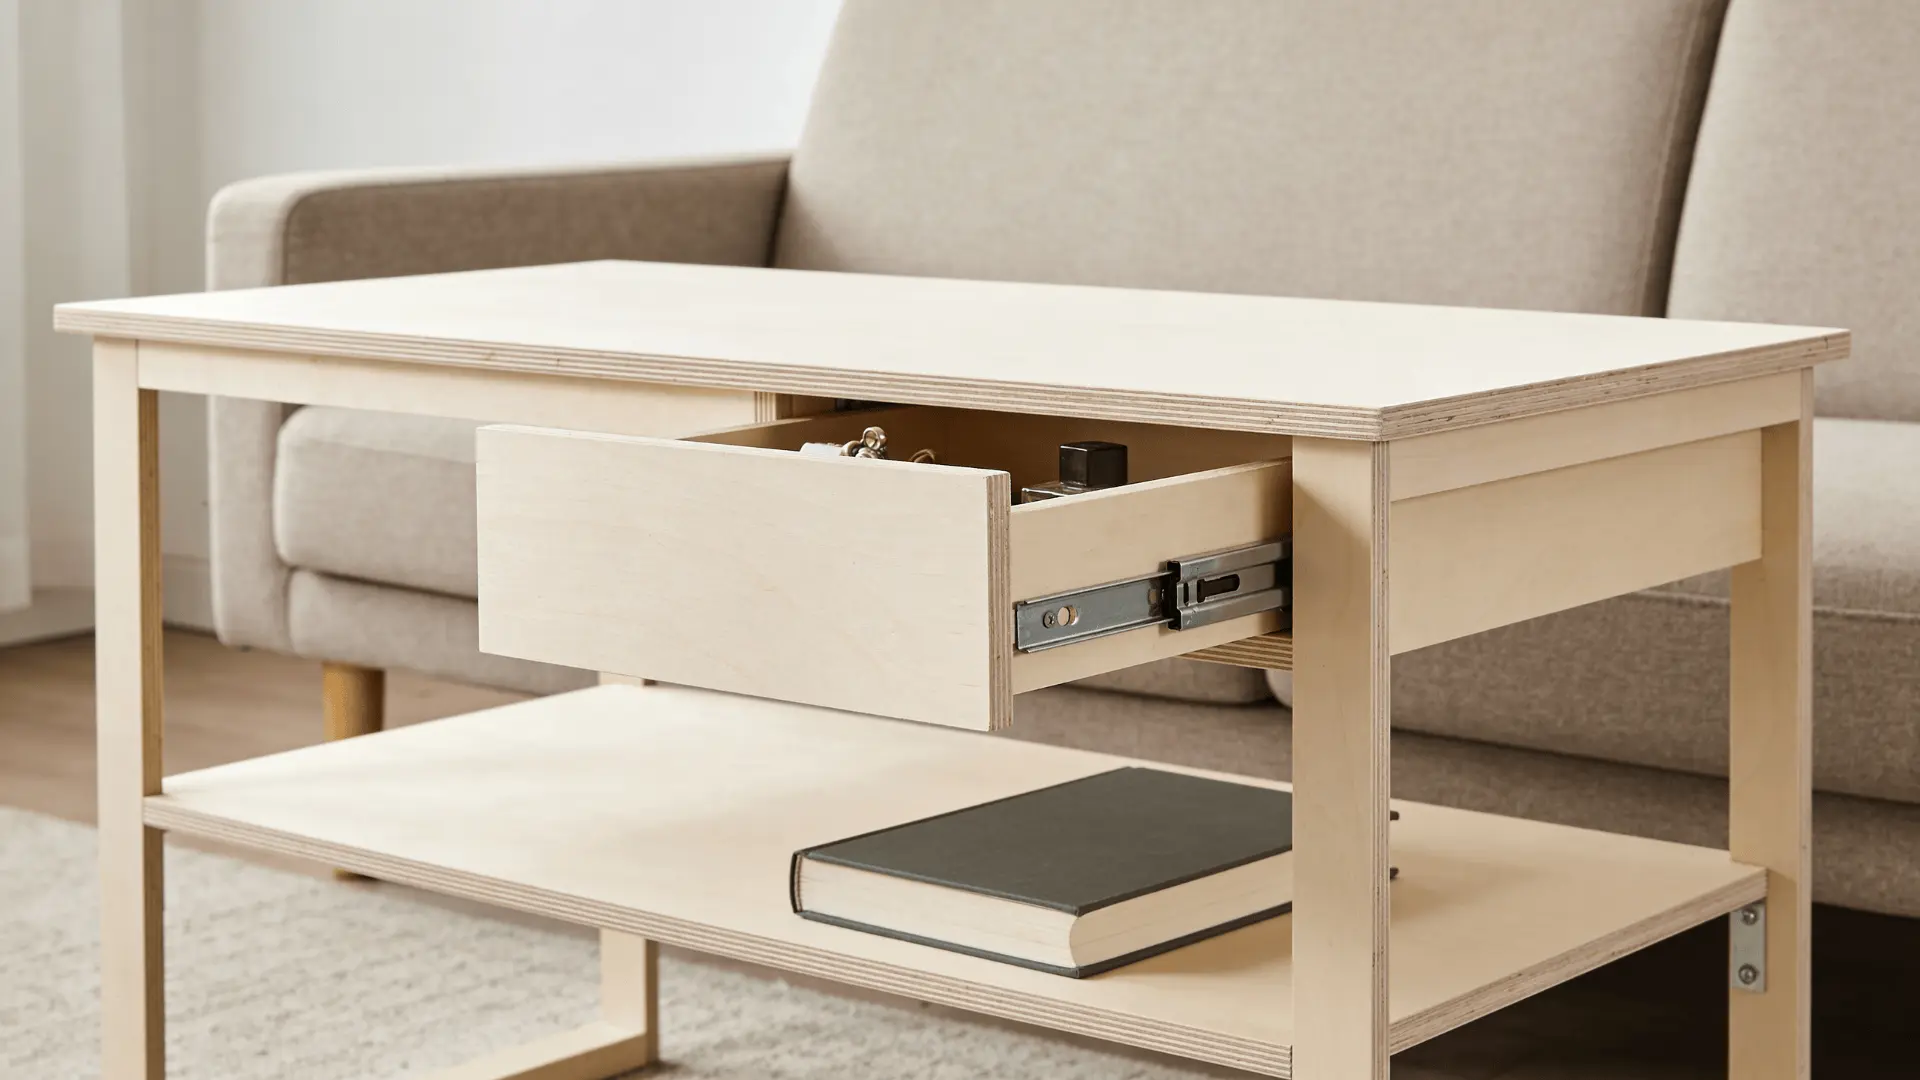
These tables add more function by including storage features. You might add a lower shelf for books, a drawer for small items, or even a hidden compartment.
They take more planning and involve more parts, so the build is slightly more complex. This type works well in smaller homes where extra storage matters and is better suited for those with some basic experience.
5. Space-Saving Options (Narrow, Nesting, C-Shaped)
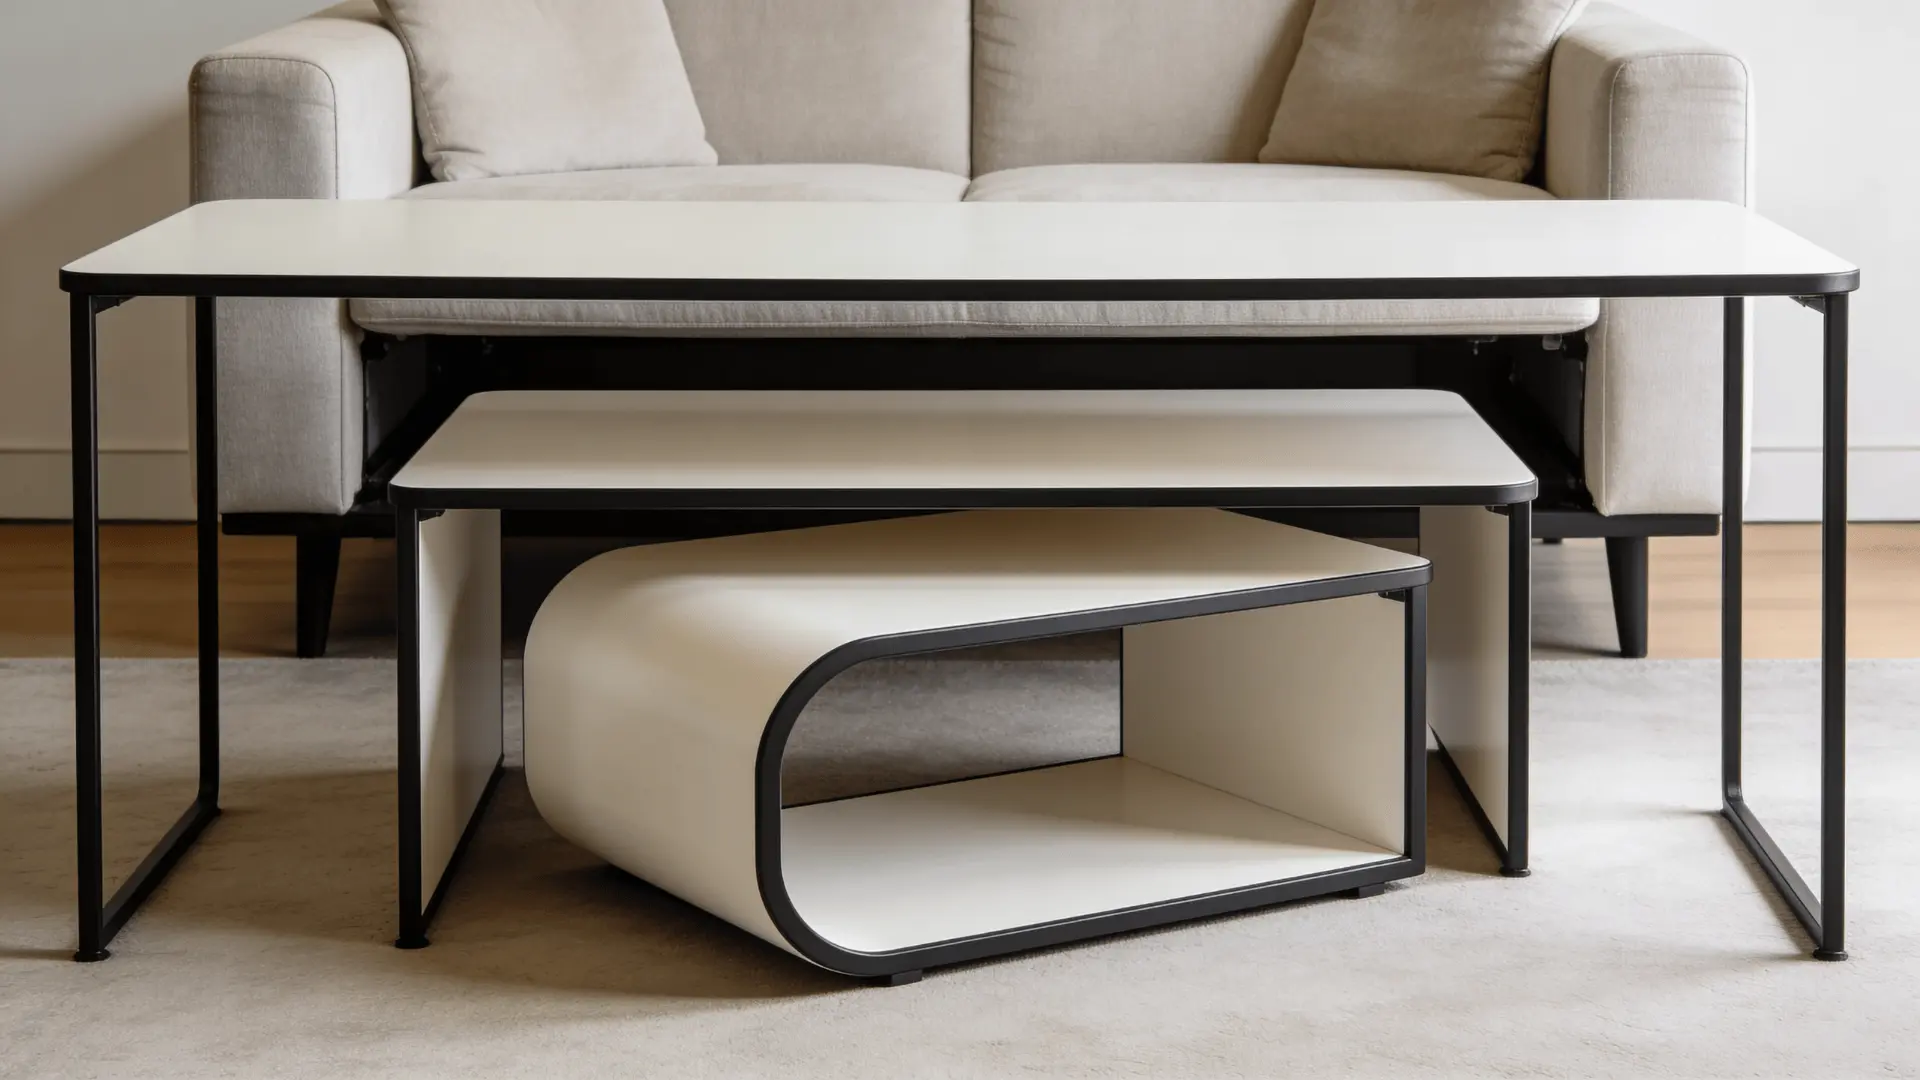
Space-saving designs are made for tight or flexible spaces. Narrow tables fit into slim gaps, nesting tables can stack together, and C-shaped tables slide under a couch for easy use.
These are great for apartments or multi-use rooms where space is limited. They’re practical, but they require careful measuring to make sure everything fits properly.
Pick a design that matches your skill level and space needs, and keep the build simple at first. You can always upgrade or try more detailed styles once you’re comfortable.
How to Build a Simple DIY End Table Step-By-Step
Building a simple DIY end table is a great beginner project using basic cuts, joints, and a few parts. Keep the design simple, and you can build a sturdy, useful table in just a weekend.
Materials and Tools You Need
Materials:
- Plywood
- 2×4 lumber
- Pine boards
- Hardwood (oak, maple, walnut)
- Pre-cut panels
- Wood screws and glue
- Brackets or fasteners
Tools:
- Measuring tape and pencil
- Hand saw or circular saw
- Drill
- Sandpaper or sanding block
- Clamps
- Miter saw
- Orbital sander
- Pocket hole jig
- Nail gun
Step 1: Planning Dimensions and Design
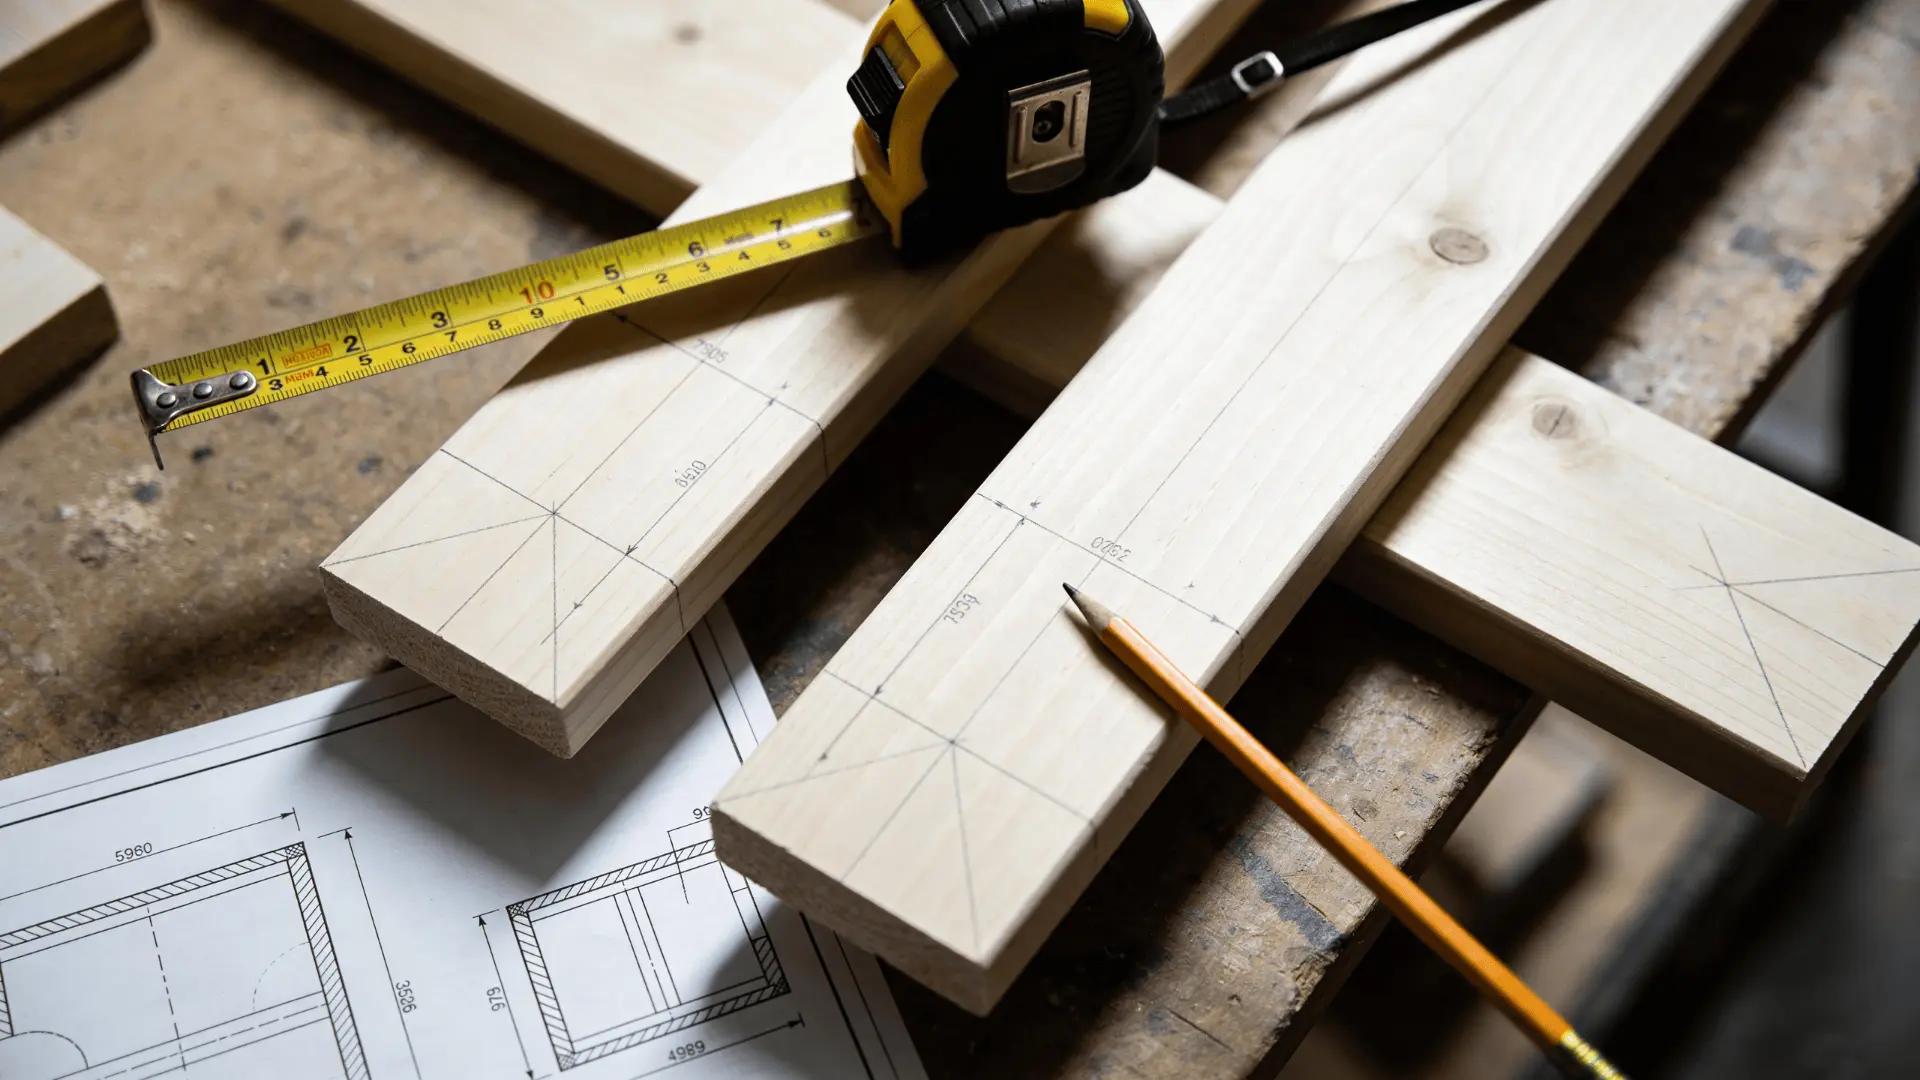
Start by deciding where the table will be placed. The right size depends on the furniture next to it. For a sofa, the table should sit level with or slightly below the arm. For a bed, it should be close to mattress height.
A beginner-friendly size usually falls between 22 to 26 inches in height and around 14 to 22 inches in width and depth.
At this stage, decide if you want just a tabletop or a table with a lower shelf. Keeping the design simple with four legs and a flat top makes the build easier and reduces mistakes.
Step 2: Cutting the Wood Pieces
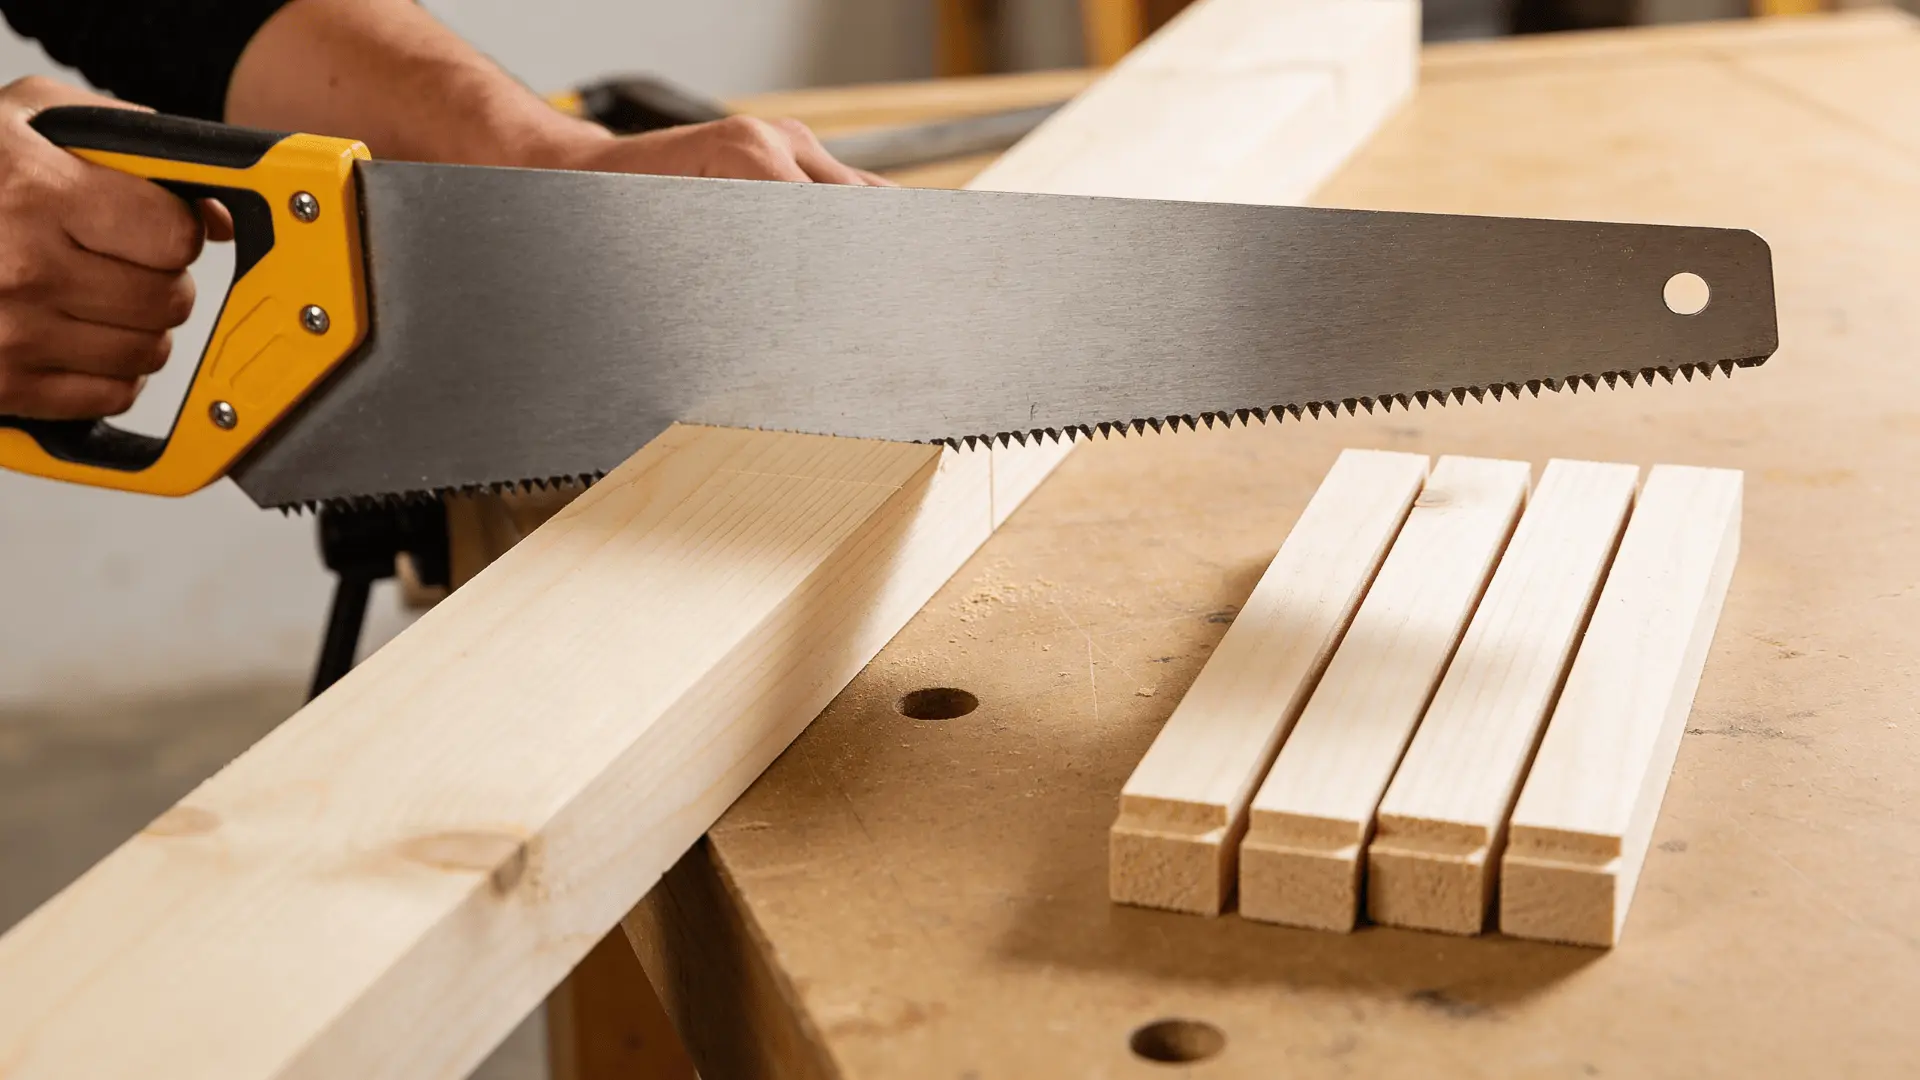
Once your measurements are set, cut all the pieces before assembling anything. A basic table includes four legs, a tabletop or panels, support pieces, and optional shelf parts.
This is where most mistakes happen. Uneven cuts can lead to wobble and poor alignment later.
Make sure all legs are the same length and matching pieces are consistent. Taking extra care here makes the rest of the build much smoother.
Step 3: Assembling the Frame and Legs
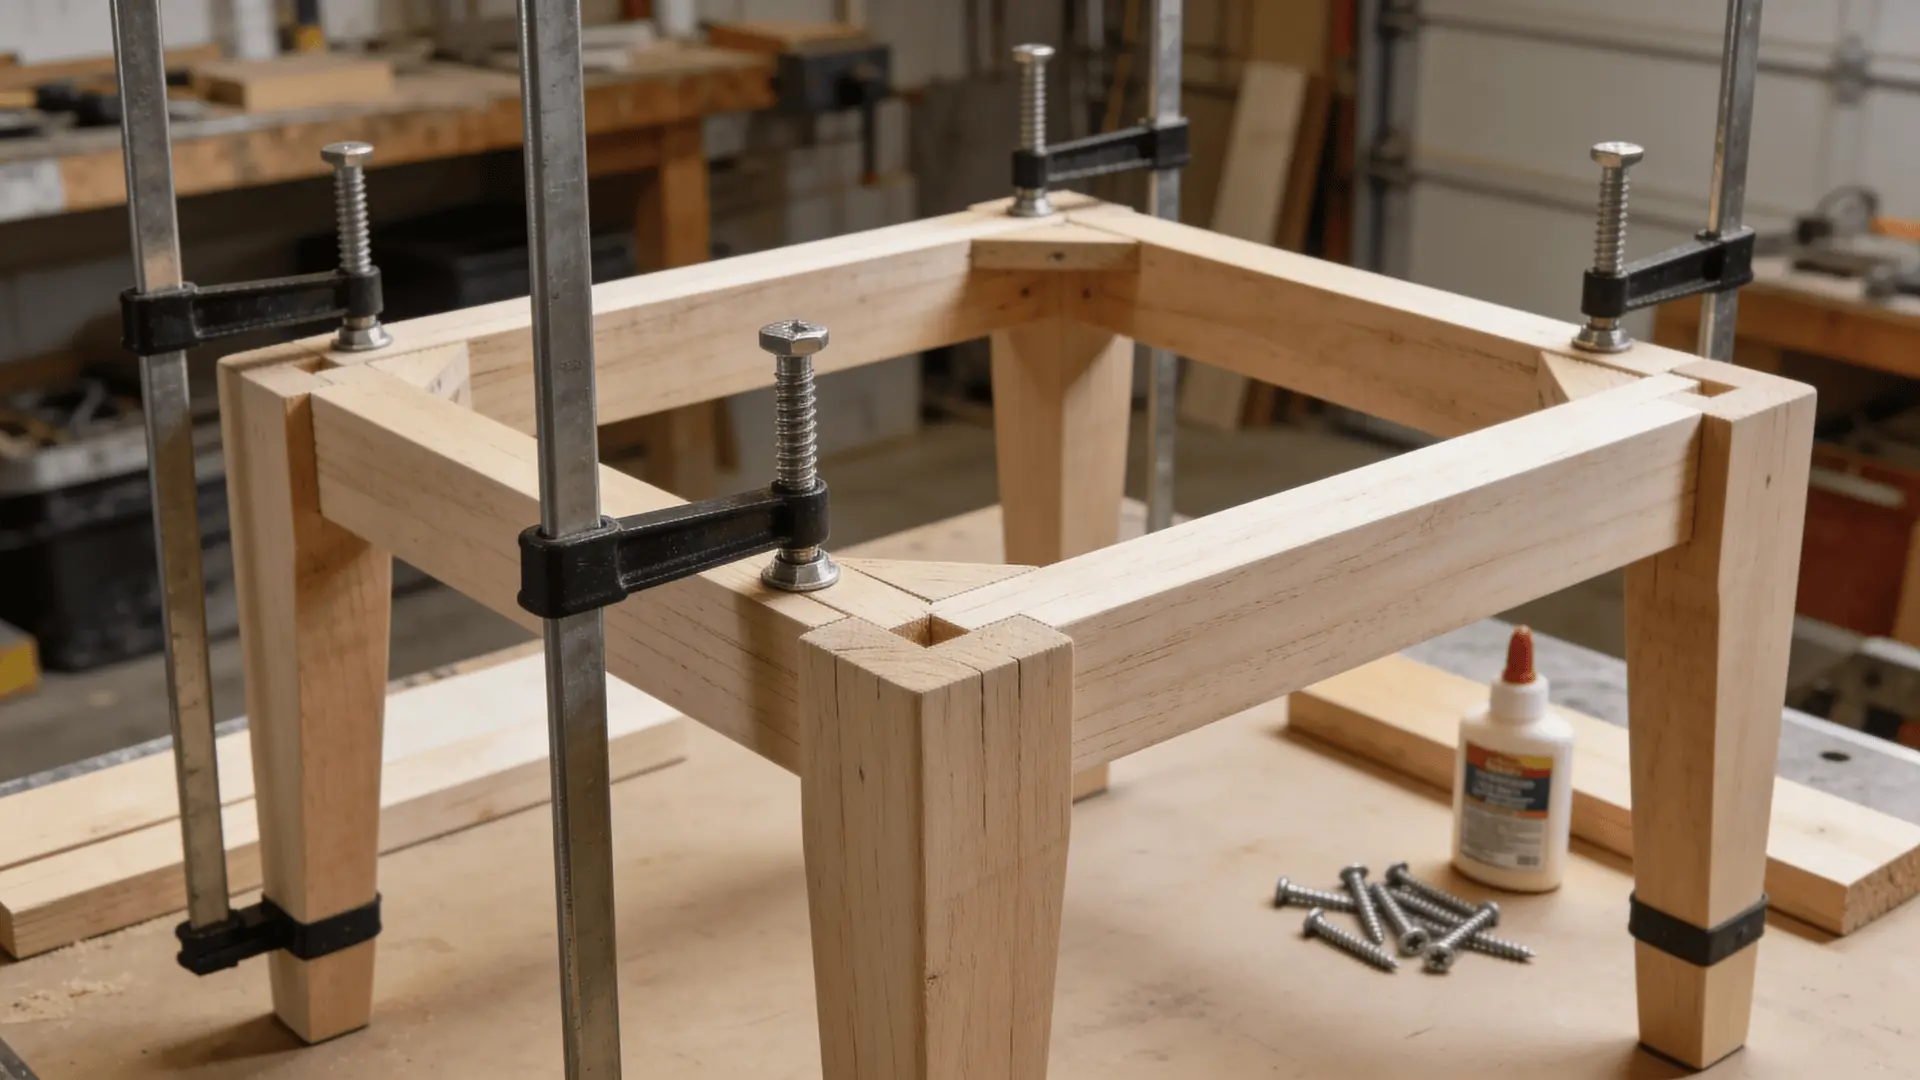
Start by building the base. Attach the support pieces to the legs to form a frame, then connect both sides together. Focus on keeping everything aligned and square.
Use wood glue along with screws to strengthen the joints. Before moving forward, place the base on a flat surface and check that it sits evenly without rocking.
A strong and stable base makes the rest of the build easier. Taking time here helps prevent wobble and alignment issues later in the build.
Step 4: Attaching the Tabletop and Shelf
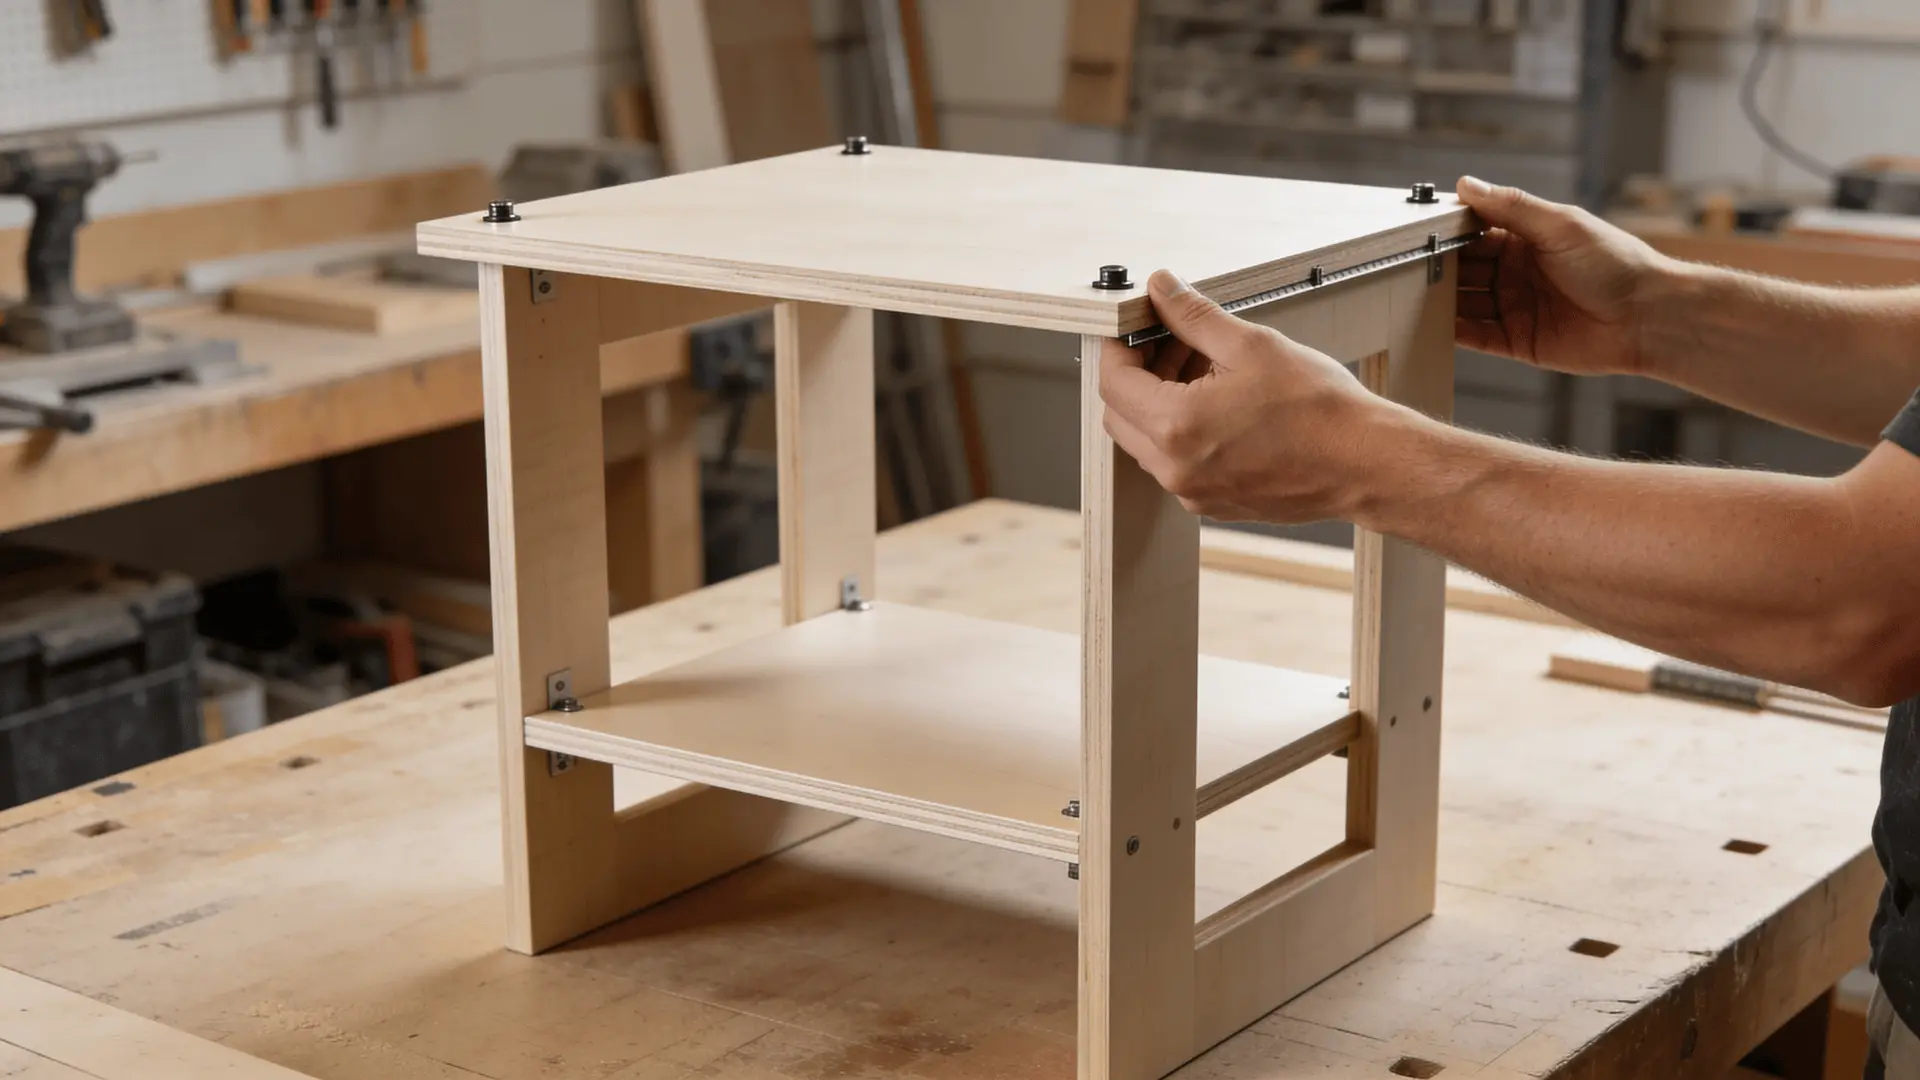
Once the frame is solid, attach the tabletop. Center it properly so it looks balanced from all sides.
If your design includes a shelf, install it after the base is stable and make sure it sits level between the legs.
This step affects both the look and function of the table, so pay attention to spacing and alignment. Even small misalignments can make the table look off.
Step 5: Sanding and Finishing
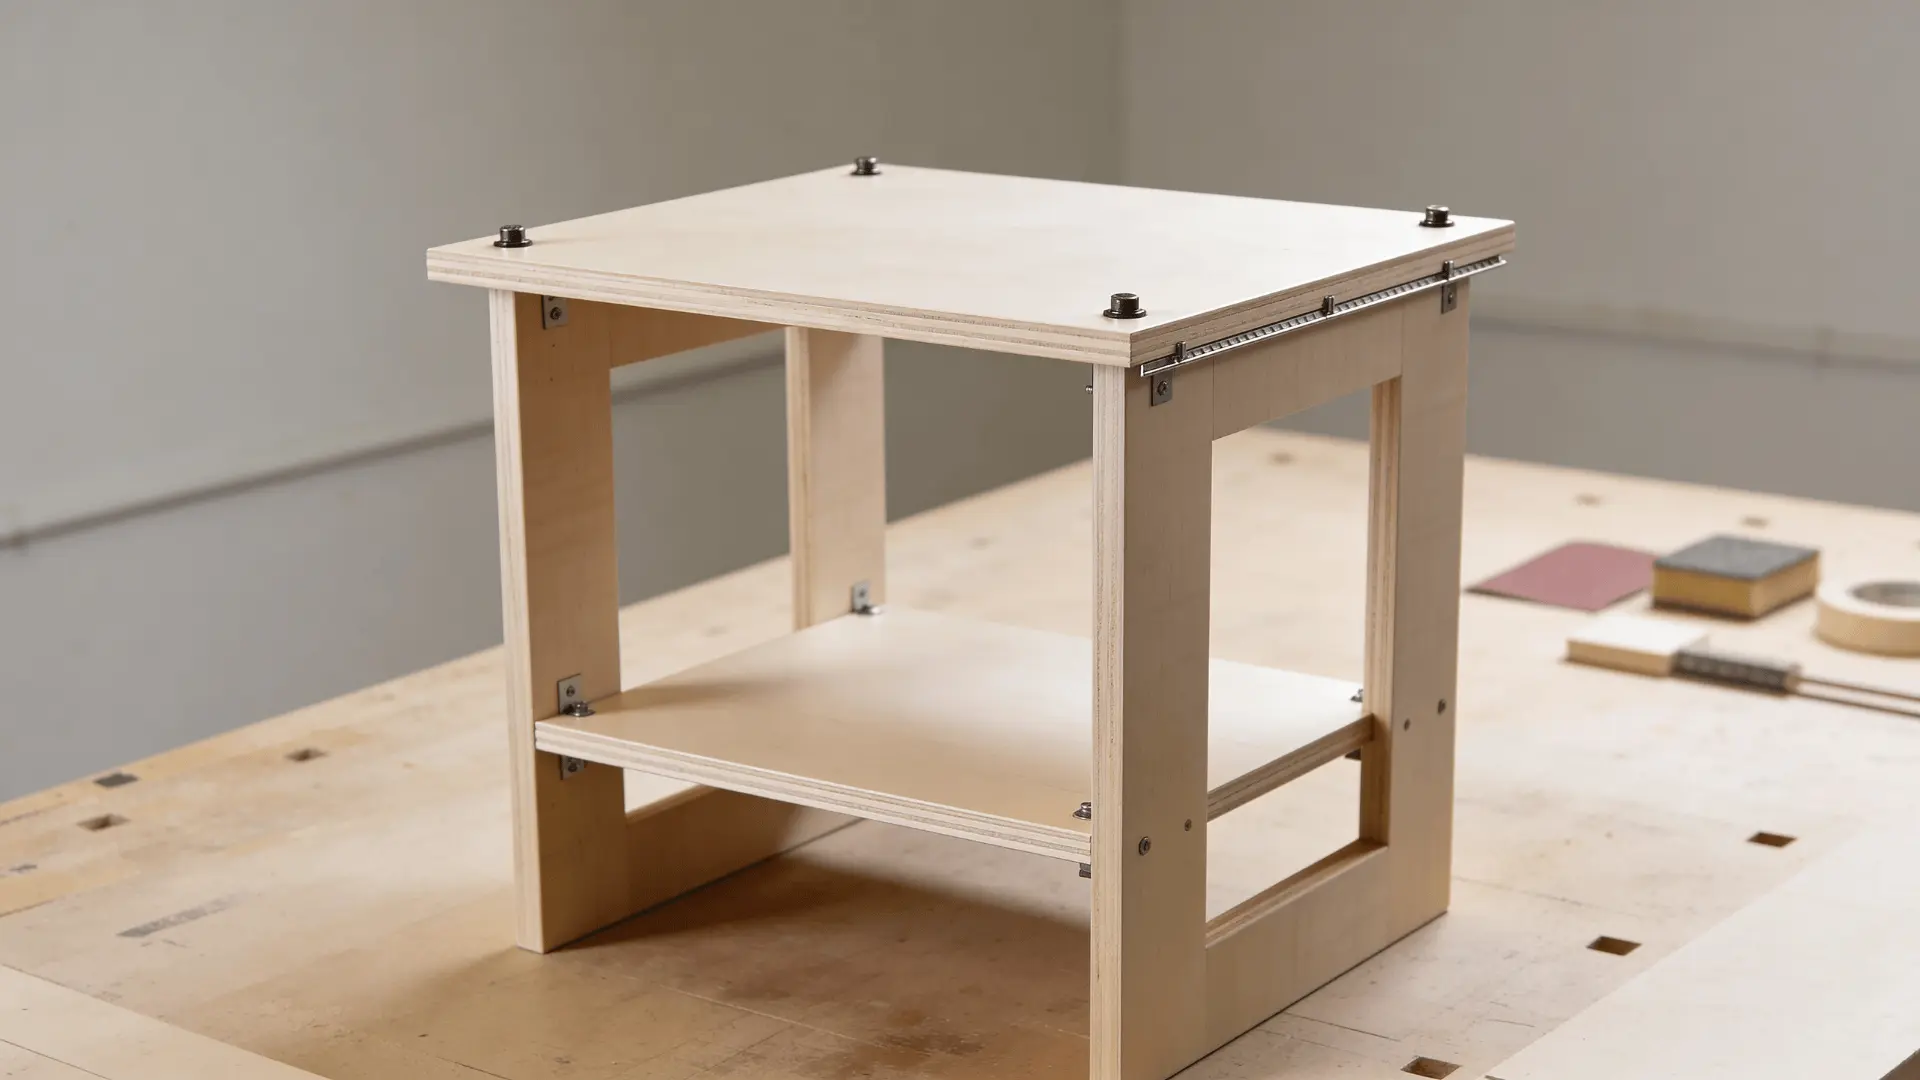
Sanding and finishing shape the final look. Start by smoothing rough edges and surfaces, then move to finer sanding for a clean finish. Focus on visible areas like edges, corners, and the tabletop.
After sanding, apply your finish. Paint gives a clean look, stain highlights the wood grain, and a clear coat keeps a natural appearance.
Apply thin, even coats and allow proper drying time between each layer. Taking your time here makes a big difference in how polished and professional the table looks.
Follow each step carefully for a solid, clean result. Most mistakes come from rushing or skipping steps.
Cost Breakdown and Budget Planning
The cost of a DIY end table can vary widely based on materials, tools, and design choices. Knowing the cost upfront helps you plan better and avoid overspending.
| Cost Component | Budget Build | Mid-Range Build | Premium Build |
|---|---|---|---|
| Wood (Primary Material) | $10–$30 (plywood, 2x4s) | $40–$100 (pine, panels) | $100–$300+ (hardwood) |
| Plywood (per sheet) | $12–$40 | $25–$70 | $70–$110+ |
| 2×4 Lumber (per piece) | $3–$8 | $5–$10 | — |
| Hardware (screws, glue) | $5–$15 | $15–$30 | $30–$80 |
| Finish (paint/stain) | $5–$15 | $15–$40 | $40–$150 |
| Tools (if needed) | $0–$50 | $50–$150 | $150–$300+ |
| Total Estimated Cost | $20–$50 | $80–$200 | $200–$600+ |
Budget Planning
The cost of a DIY end table depends mostly on the materials you choose and whether you already have the tools.
The biggest cost drivers are material type, added features like drawers or shelves, and tool purchases. Simple builds with plywood or 2x4s can stay under $50. Mid-range builds with better wood and finishes usually fall between $80 and $200.
DIY is not always cheaper. Costs increase when you use hardwood like oak or walnut, add complex features, or buy tools just for the project. In those cases, total cost can exceed $200 and match store prices.
A simple way to decide: DIY works best for a low-cost, functional table. Buying makes more sense if you want a premium finish without spending time or investing in tools.
Keeping the design simple and choosing practical materials gives you the best value.
Ways to Customize Your DIY End Table and Choose the Right Plan
This section builds on the table types above by focusing on small upgrades and refinements, rather than the overall structure or base design. Small upgrades can improve both function and style, while the right plan keeps the build simple and error-free.
- Add simple storage for more function: A lower shelf or drawer makes the table more useful. Shelves are beginner-friendly, while drawers need better planning and alignment.
- Upgrade small design details for better look: Rounded edges, trim, or tapered legs improve appearance without changing the structure, making the table look more finished.
- Use alternative materials or bases for uniqueness: Repurposed wood, pallets, or crates reduce cost and add character, while metal or hairpin legs can change the overall style.
- Start with beginner-friendly plans: Simple designs with straight cuts, basic structure, and minimal tools help avoid mistakes and keep the build manageable.
- Move to intermediate builds for refinement: Adding shelves, drawers, and better joinery improves function and finish but requires more accuracy and time.
- Shift to custom designs when ready: Once you can measure, cut, and plan accurately, you can start modifying or creating your own designs. Begin with small changes to existing plans to build confidence over time.
Start simple, then build up as your confidence grows. Small upgrades and the right plan can turn a basic table into something that fits your space perfectly.
Design Choices that Affect the Final Result
The final look of your end table depends on size, leg style, and finish. Small choices can make it feel balanced and useful or awkward in your space.
Choosing the Right Height and Width
Size plays a major role in how the table fits. The height should match or sit slightly below your sofa arm, or align with mattress height for bedside use.
Width and depth should suit the space. Compact tables work better in smaller areas, while wider tops suit larger setups.
The goal is enough surface space without crowding. A well-sized table feels natural, while poor proportions make it uncomfortable to use.
Leg Styles and Structural Support
Leg design affects both look and stability. Straight legs give a simple look, tapered legs feel lighter and modern, and thick square legs create a solid appearance.
Support is just as important. Aprons and frames prevent wobble, wider spacing improves balance, and strong joints ensure long-term stability.
A simple, well-supported design always works better than a complex but unstable one.
Paint vs. Stain: What to Pick and Why
Finish changes the overall feel of the table. Paint works best for a clean, solid color or imperfect wood.
Stain highlights natural grain and works well with better wood like pine or hardwood. A clear coat keeps a natural look while adding protection.
Choose a finish that matches or complements your existing furniture for a more cohesive result.
Getting the size, structure, and finish right makes a simple table look well-designed and feel practical. Small design choices here have the biggest impact on the final result.
Common Mistakes and How to Avoid Them
Most DIY end table problems come from small mistakes during cutting, assembly, or finishing. The good part is that these are easy to avoid if you focus on a few key areas.
- Uneven Cuts and Incorrect Measurements: Legs cut at slightly different lengths or wrong markings can cause wobble and misalignment. Measure twice, mark clearly, and keep matching pieces consistent.
- Weak Joints and Poor Structural Support: Relying only on screws or misaligned joints can make the table unstable. Use wood glue with screws, align parts properly, and check for square during assembly.
- Not Testing Stability Early: Waiting until the end to check balance can make fixes harder. Always place the frame on a flat surface early to catch issues.
- Poor Sanding and Surface Preparation: Skipping sanding or doing it unevenly leaves rough edges and affects how finish looks. Smooth all visible areas before moving ahead.
- Dust and Rushed Finishing: Dust on the surface and thick coats can ruin the final look. Clean properly and apply thin, even layers with enough drying time.
- Rushing the Overall Process: Trying to speed through steps often leads to multiple small errors. Taking your time at each stage gives a cleaner and more stable result.
A simple build done carefully will always look better than a complex one done in a hurry.
Conclusion
Building your own end table is not just about saving money, it’s about creating something that fits your space and needs perfectly.
When you keep the design simple and focus on the basics, a DIY end table can turn out both useful and long-lasting. The key is to plan well, take your time, and build within your skill level.
Start with a simple design and see how it fits your space. Once you’re comfortable, you can always build something better next time.