Best Way to Insulate Garage Door: A Step by Step Guide
Insulating a garage door repair is more than just a weekend DIY project; it’s a strategic upgrade that transforms your garage from a simple storage area or car park into a versatile, energy-efficient space. Whether your garage doubles as a workshop, a fitness room, or a quiet retreat, insulation can significantly enhance comfort by stabilizing temperature, reducing outdoor noise, and cutting down on energy costs.
This comprehensive guide takes you through every step of your garage door repair, providing detailed instructions and expert tips to ensure you achieve the best results. From selecting the ideal insulation material to the final touches that ensure durability and efficiency, we’ve got you covered. Let’s embark on this transformative journey, making your garage more than just a part of your home, but a cozy, functional extension of your living space.
In the quest for a more energy-efficient home, many overlook the garage door as a key player in energy loss and thermal inefficiency. Yet, this large, often under-insulated surface can be a significant source of energy leakage, affecting not only the garage’s internal temperature but also impacting the overall climate control within the home.
Insulating your garage door offers a myriad of benefits, extending beyond mere energy savings. It transforms your garage into a more livable space, reduces noise pollution, and can even increase the resale value of your home. With the right tools, materials, and a bit of patience, your garage door repair can be a rewarding DIY project that pays dividends in comfort and cost savings.
This step-by-step guide aims to provide you with all the knowledge and techniques needed to effectively help your needs for a garage door repair, turning it into a barrier against the elements and a gateway to improved home efficiency.
Understanding the Importance of Insulating Your Garage Door
Insulating your garage door can lead to significant benefits:
Energy Efficiency: Insulation helps maintain temperature, reducing heating and cooling costs.
Comfort: A well-insulated garage is more comfortable, especially if you use the space for hobbies or a workshop.
Noise Reduction: Insulation can dampen street noise and sounds from within the garage.
Increased Property Value: Energy-efficient improvements can enhance your home’s value.
Choosing the Right Insulation Material
There are several types of insulation materials suitable for garage doors, each with its advantages:
Fiberglass Batts: Easy to install and affordable, providing good thermal resistance.
Foam Board (Polystyrene or Polyurethane): Rigid and efficient, with higher R-values (a measure of thermal resistance) per inch than fiberglass.
Reflective Insulation: Ideal for hot climates, reflecting heat away from the garage door.
Spray Foam: Provides excellent air sealing and insulation, but requires professional installation for best results.
Tools and Materials
Before starting, gather the necessary tools and materials:
Insulation material of your choice
Tape measure
Utility knife or scissors
Straightedge or ruler
Adhesive (for foam boards) or stapler and staples (for fiberglass batts)
Gloves and safety goggles
Step-by-Step Guide to Insulating Your Garage Door
Step 1: Measure Your Garage Door Panels
Measure the dimensions of each panel on your garage door. Panels are the individual sections that move independently in a sectional roll-up door. Knowing the size of each panel will help you cut your insulation to fit.
Step 2: Cut the Insulation
Using your measurements, cut the insulation material to fit each panel. It’s essential to be precise; too small, and it won’t fit snugly, too large, and it may not fit at all.
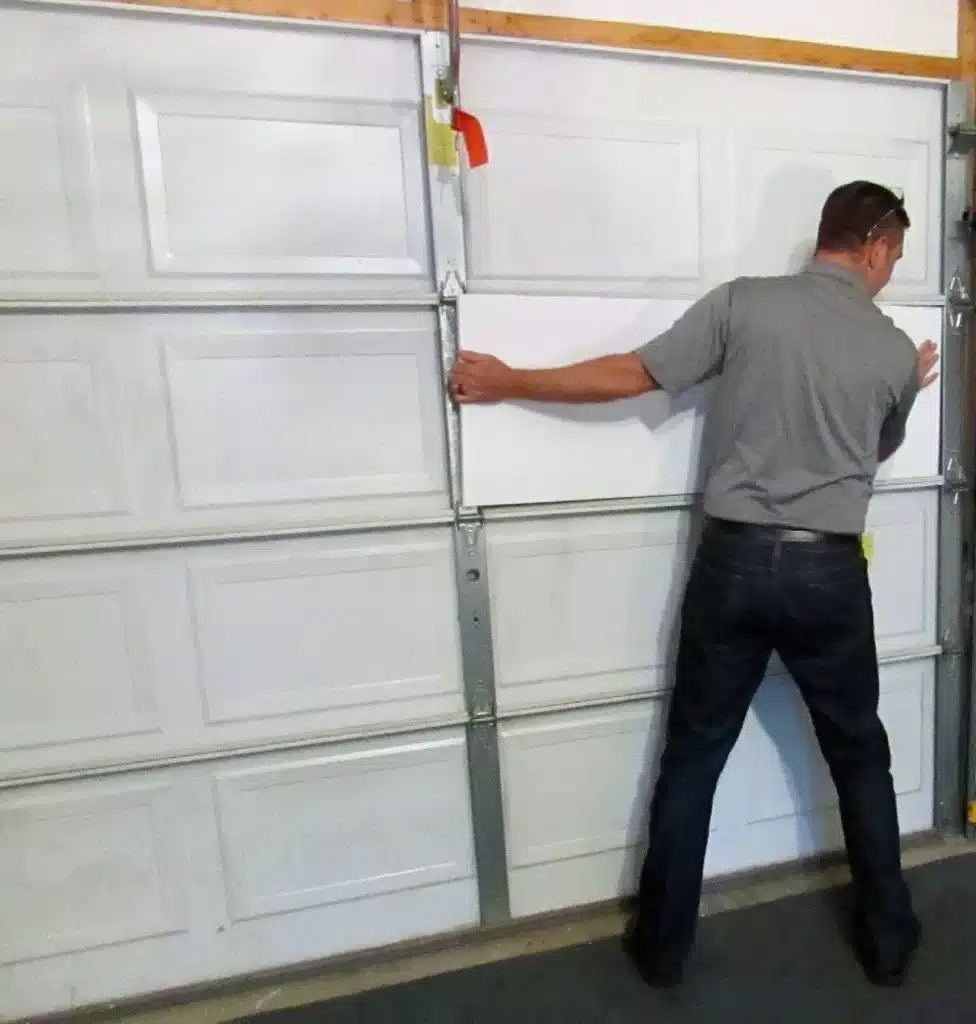
Step 3: Attach the Insulation
For Fiberglass Batts: Fit the batts into each panel, securing them with staples to the garage door. Ensure the vapor barrier (if present) faces the inside of the garage.
For Foam Boards: Apply adhesive to the back of each cut piece, then press firmly into place within each panel.
For Reflective Insulation: This often comes in rolls and can be cut to size, then taped or glued directly onto the garage door panels.
Step 4: Seal the Edges
Use weatherstripping or foam tape around the edges of the insulation to prevent air leaks. This step is crucial for maintaining energy efficiency.
Step 5: Test the Door
Once the insulation is installed, carefully test the garage door to ensure it opens and closes smoothly. Adjust as necessary.
Additional Tips
Consider adding a garage door insulation kit to your door for an all-in-one solution.
Regularly inspect and maintain your garage door to ensure optimal performance.
If you use your garage for activities requiring ventilation (e.g., woodworking), ensure there’s adequate airflow.
Conclusion
Embarking on the project of insulating your garage door is an investment in your home’s future, offering a blend of immediate satisfaction and long-term benefits. By following the detailed steps provided in this guide, you’ve not only taken a significant stride towards enhancing your garage’s energy efficiency but also towards creating a more comfortable, versatile space.
Insulation is more than just a barrier to heat or cold; it’s a transformation that elevates your garage to a new level of functionality and comfort. As we conclude this comprehensive journey, remember that the success of your project hinges on careful planning, precise execution, and a keen eye for detail. With your garage door now insulated, you can look forward to a space that is more than just a part of your home—it’s a year-round, energy-efficient extension of your living environment. Congratulations on completing this rewarding home improvement project. Your garage, and your home, will thank you for years to come.
Lily Morgan is a prolific writer and an authority on practicals who carries space-saving solutions with a bachelor's degree in industrial engineering from Georgia Tech and over 12 years of experience in space optimization and maintenance. Her journey in professional writing began in 2010, contributing insightful articles to several leading home improvement magazines.
Her expertise stems from a unique blend of practical experience and academic knowledge. Her work extends beyond writing, involving hands-on workshops and seminars. She is an outdoor enthusiast and often spends her weekends cycling and hiking. Sometimes, she enjoys woodworking.

 Insulating your garage door can lead to significant benefits: