Air Dry Clay Ornaments Made Easy: Step-By-Step Tutorial and Care Tips
Find the joy of crafting with air-dry clay as we guide you through creating beautiful ornaments. This step-by-step tutorial will take you from novice to skilled creator, showing you how to mold, shape, and decorate your own unique pieces.
We’ll cover everything from choosing the right clay to adding those final artistic touches. But our journey doesn’t end there – we’ll also share essential care tips to ensure your creations stand the test of time.
Whether you’re looking for a fun weekend project or planning to make heartfelt gifts, this guide has you covered. Get ready to unlock your creative potential and bring your imaginative ideas to life with air-dry clay ornaments.
What to Know About Air Dry Clay Before Using it
Air-dry clay is a versatile and easy-to-use medium for crafting, perfect for creating detailed ornaments and sculptures. However, understanding its properties and handling precautions is essential for achieving the best results.
Types of Air-Dry Clay: Air-dry clay comes in various types, including natural clay and synthetic versions like paper-based or polymer clays.
Drying Time: Air-dry clay usually takes 24 to 72 hours to dry completely, depending on the thickness and humidity of the environment.
Shrinkage During Drying: As air-dry clay dries, it shrinks slightly, leading to minor cracks, especially if the piece is thick or uneven.
Sealing and Painting: Once fully dry, air-dry clay can be painted with acrylics or sealed with varnish to protect the surface and prevent moisture damage.
Precaution with Drying: Avoid drying air-dried clay in direct sunlight or near a heat source, as this can cause rapid drying and lead to cracking. Instead, allow it to dry naturally in a cool, dry place.
Materials Required Before Beginning the Project
Here are the lists of all the Equipment and supplies you would need before creating air dry ornaments.
Equipment Required
- Rolling pin or bottle (not used for food)
- Cookie cutters
- Thickness guides (e.g., wooden rulers or similar)
- Metal straw (or an alternative like an eyeliner cap for making holes)
- Sponge and bowl of water
Supplies to Get
- Air-dry clay
- Natural elements (e.g., evergreen branches or lace for texture)
- Wax paper or baking paper (to prevent sticking)
- Stamps or cookie stampers (for custom designs)
- Jute twine or string for hanging
Here is a Step-by-Step Guide to Help You Make Clay Ornaments
1. Prepare the Workspace and Materials
- Gather air-dry clay, rolling pin or bottle, cookie cutters, stamps, natural elements (like leaves), and tools such as a metal straw for making holes.
- Lay down wax or baking paper to prevent sticking.
2. Knead the Clay
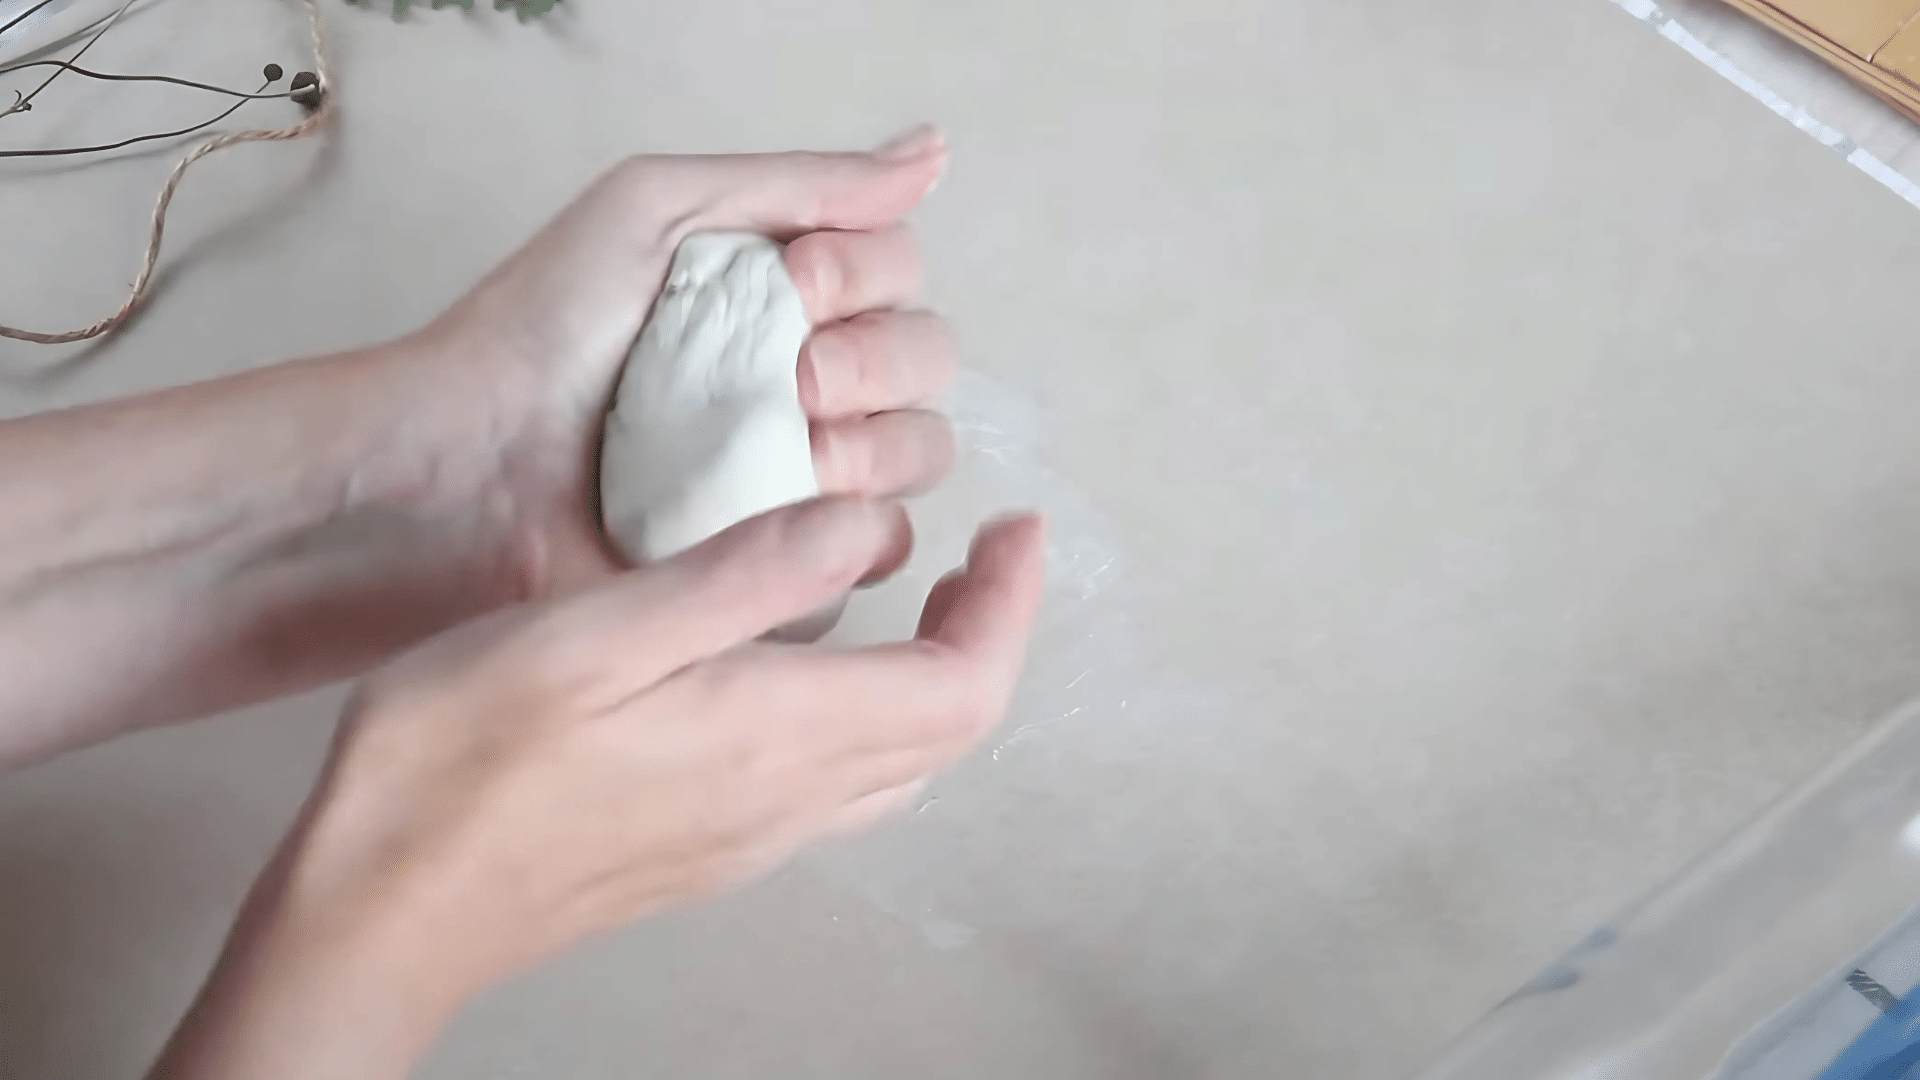
- Cut off a chunk of air-dry clay and knead it to soften.
- Keep a wet sponge nearby to dampen your fingers, preventing the clay from sticking.
3. Roll the Clay Evenly
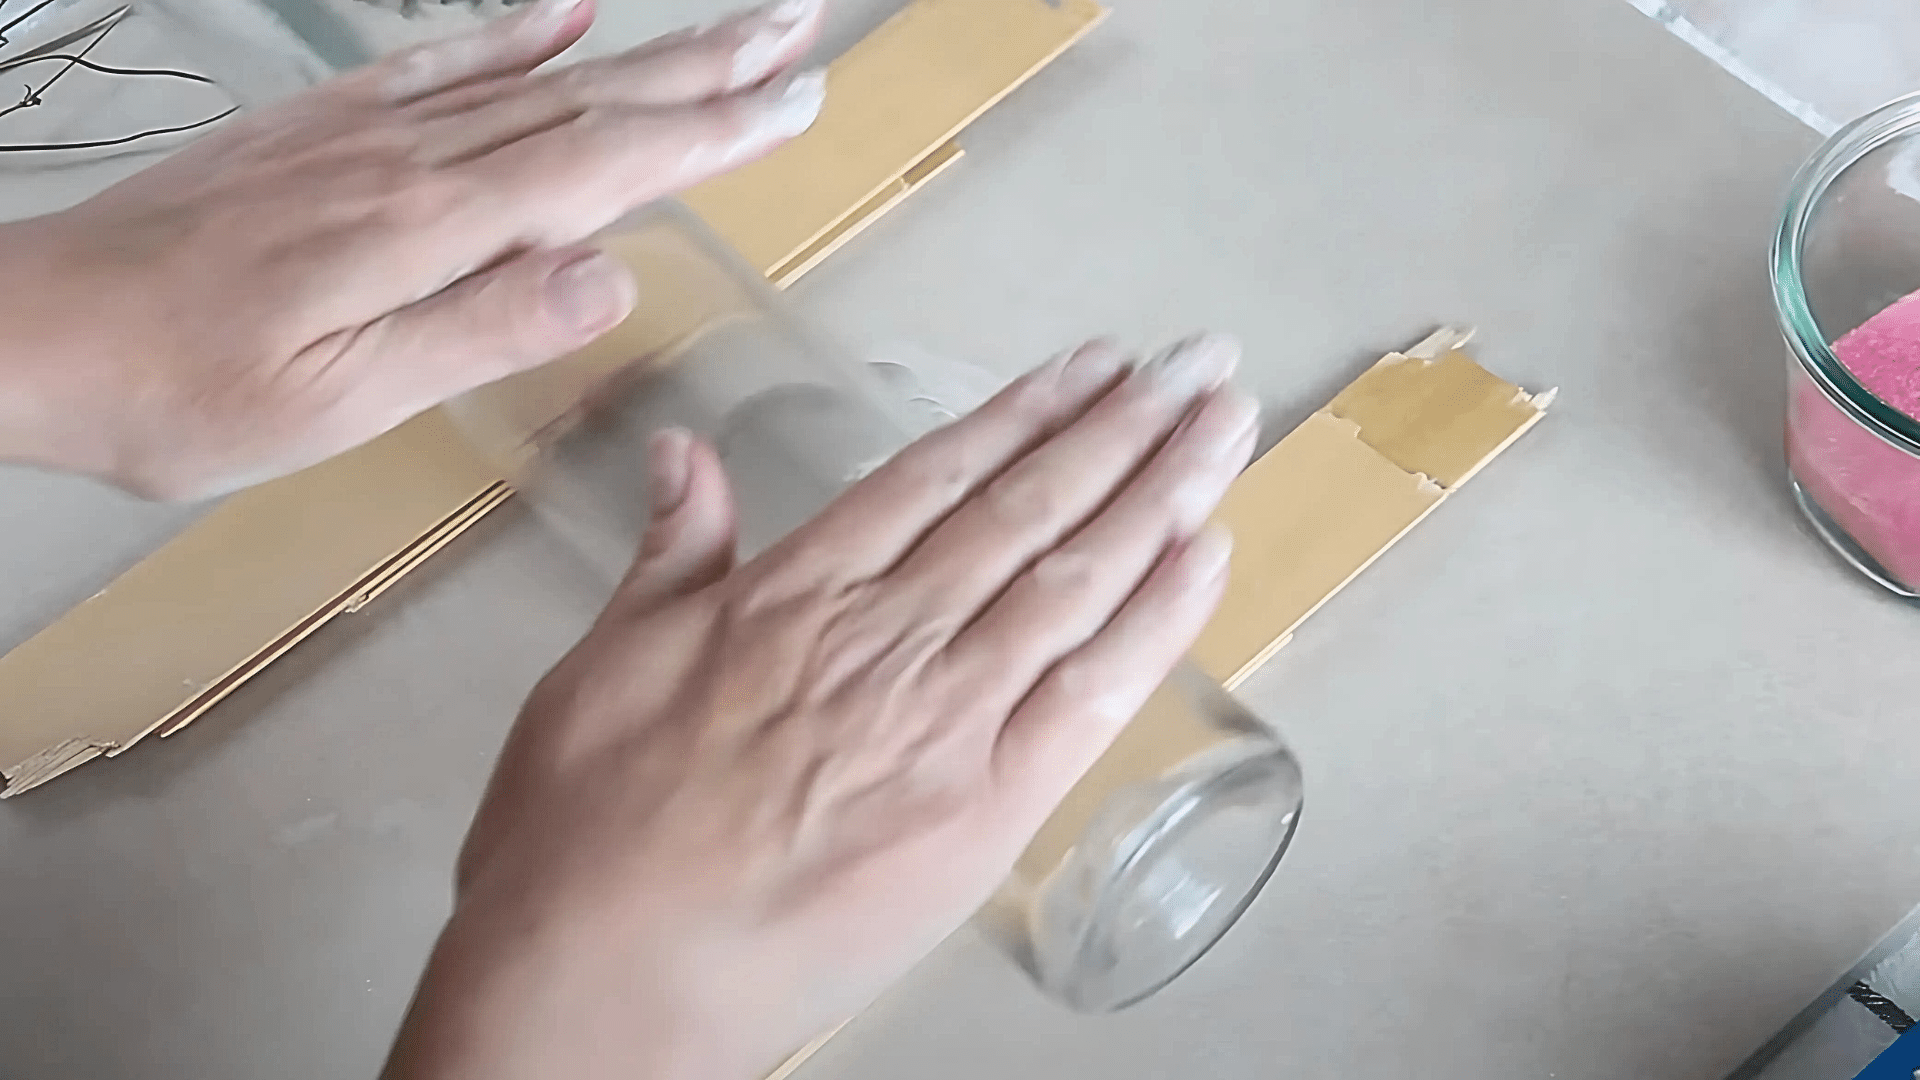
- Use thickness guides (like glued wooden rulers) to ensure uniform thickness across your ornaments.
- Roll the clay with a rolling pin or bottle until it is smooth and flat.
4. Create Patterns and Designs
- Press natural elements like evergreen branches or lace ribbon onto the clay to create textured patterns.
- Roll over the designs gently to imprint them.
5. Cut Out Shapes
- Use cookie cutters to cut out ornament shapes from the rolled clay.
- Remove excess clay around the cutter to lift the ornaments easily.
6. Smooth Edges and Add Details
- Wet your fingers to smooth the edges and imperfections of the ornaments.
- Add stamped designs or use cookie stampers for custom lettering. Remember to reverse letters for proper stamping.
7. Make Holes for Hanging
- Use a metal straw or similar object to make small holes at the top of each ornament for threading string or twine.
- Dip the straw in water to prevent the clay from sticking inside.
8. Dry and Finish the Ornaments
- Allow the ornaments to dry completely. Add jute twine or string through the holes for hanging.
- Optional: Thread beads onto the string for a decorative touch. These ornaments can also double as gift tags or table place markers.
Here is a YouTube video for detailed instructions:
7 Design Ideas and Inspiration of What to Create
Here are seven distinct ideas for air-dried ornaments to feed your creativity and inspire you to create your own design.
1. Pressed Evergreen Ornament
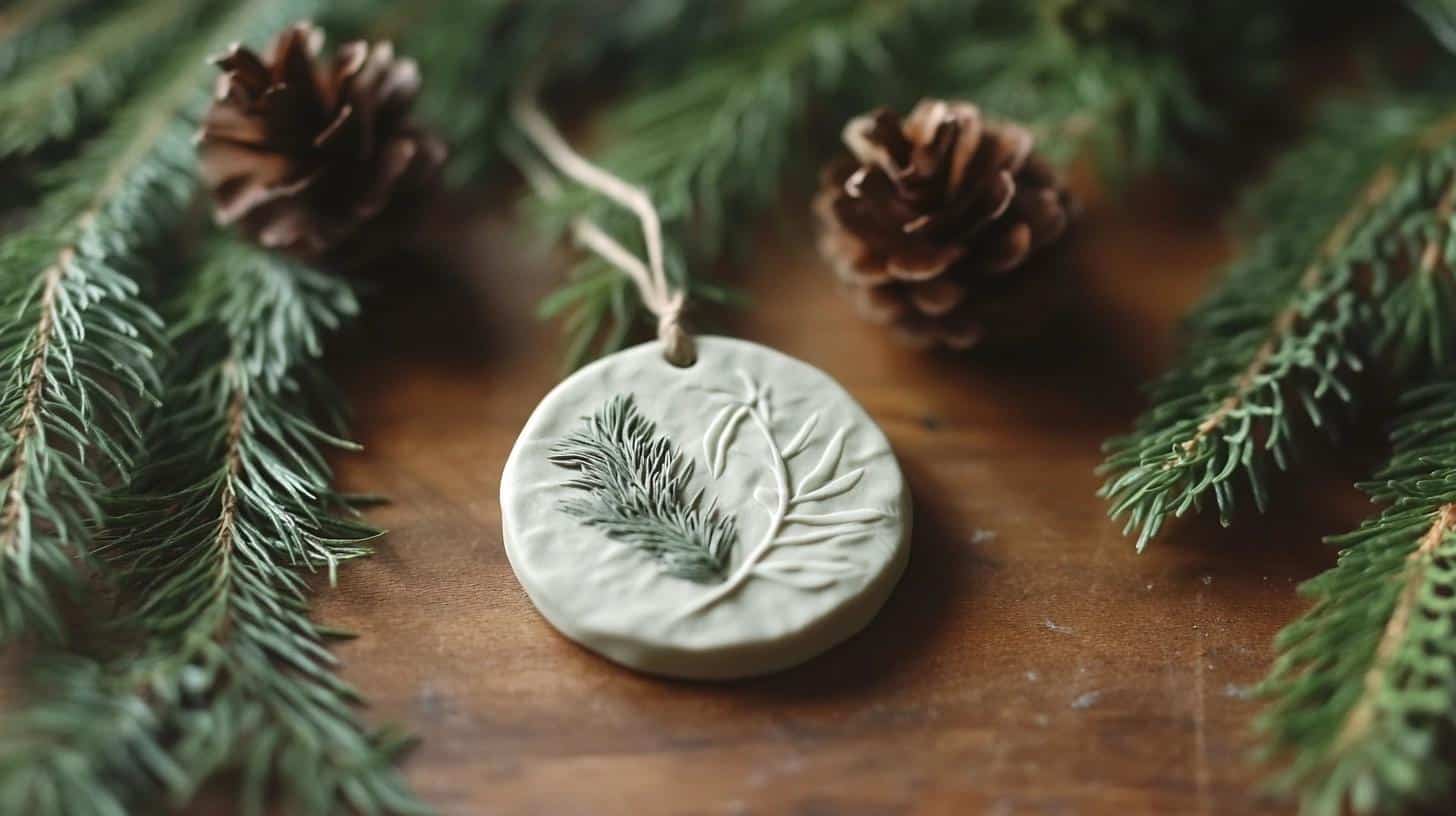
Press small evergreen branches or leaves into the clay to create natural, textured patterns. The design adds a rustic, botanical feel perfect for holiday decorations.
Materials Required: Evergreen branches, rolling pin, air-dry clay, cookie cutter.
2. Lace-Imprinted Ornament
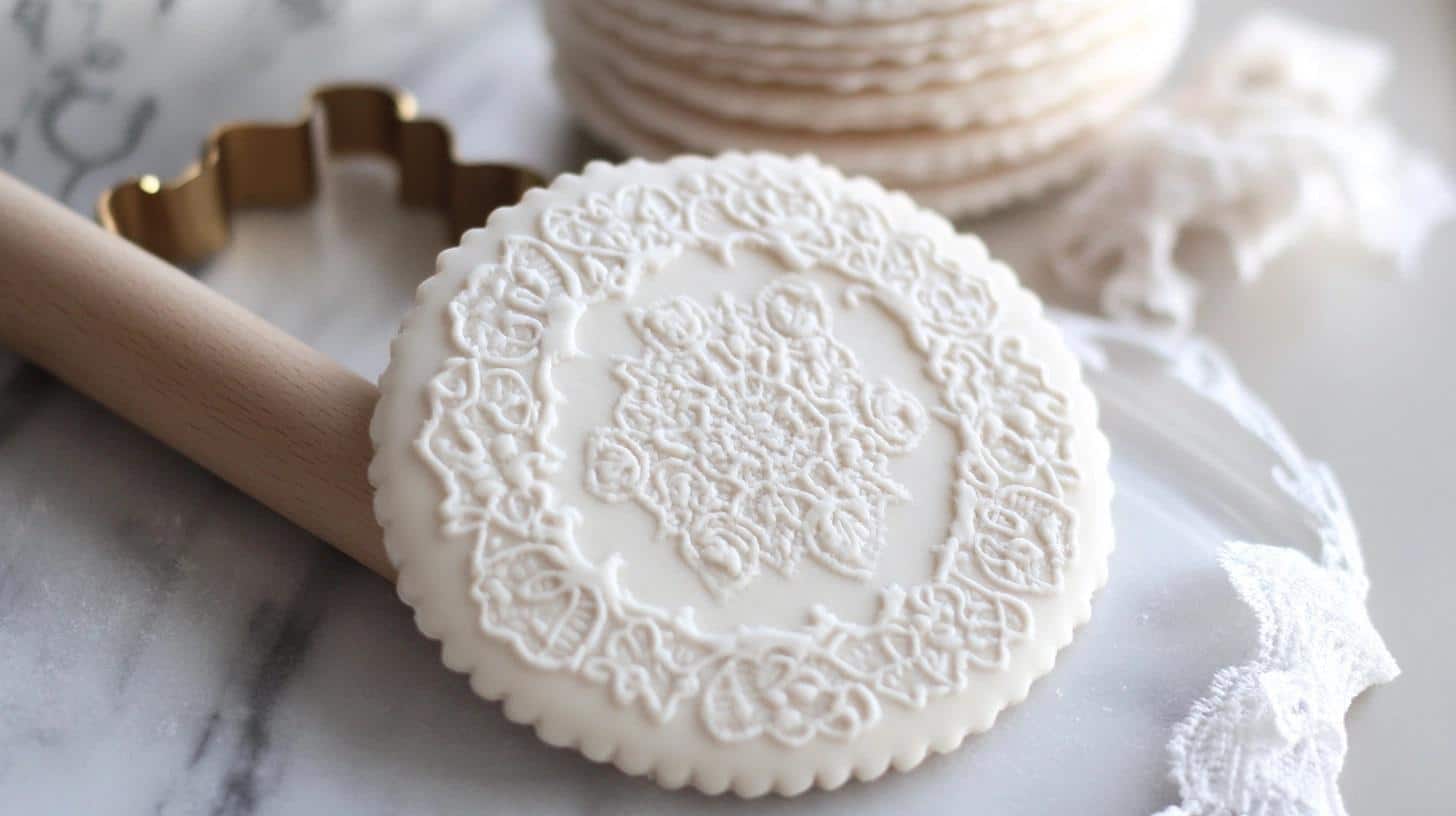
Lay a piece of lace fabric over the rolled clay and press down to transfer its intricate pattern. This design creates a delicate and vintage-style ornament.
Materials Required: Lace fabric, rolling pin, air-dry clay, cookie cutter.
3. Stamped Word Ornament

Use letter stamps to imprint words like “Joy” or “Peace” into the clay for a personalized touch. Ideal for creating meaningful, festive ornaments.
Materials Required: Letter stamps, rolling pin, air-dry clay, cookie cutter.
4. Snowflake Cookie Cutter Ornament
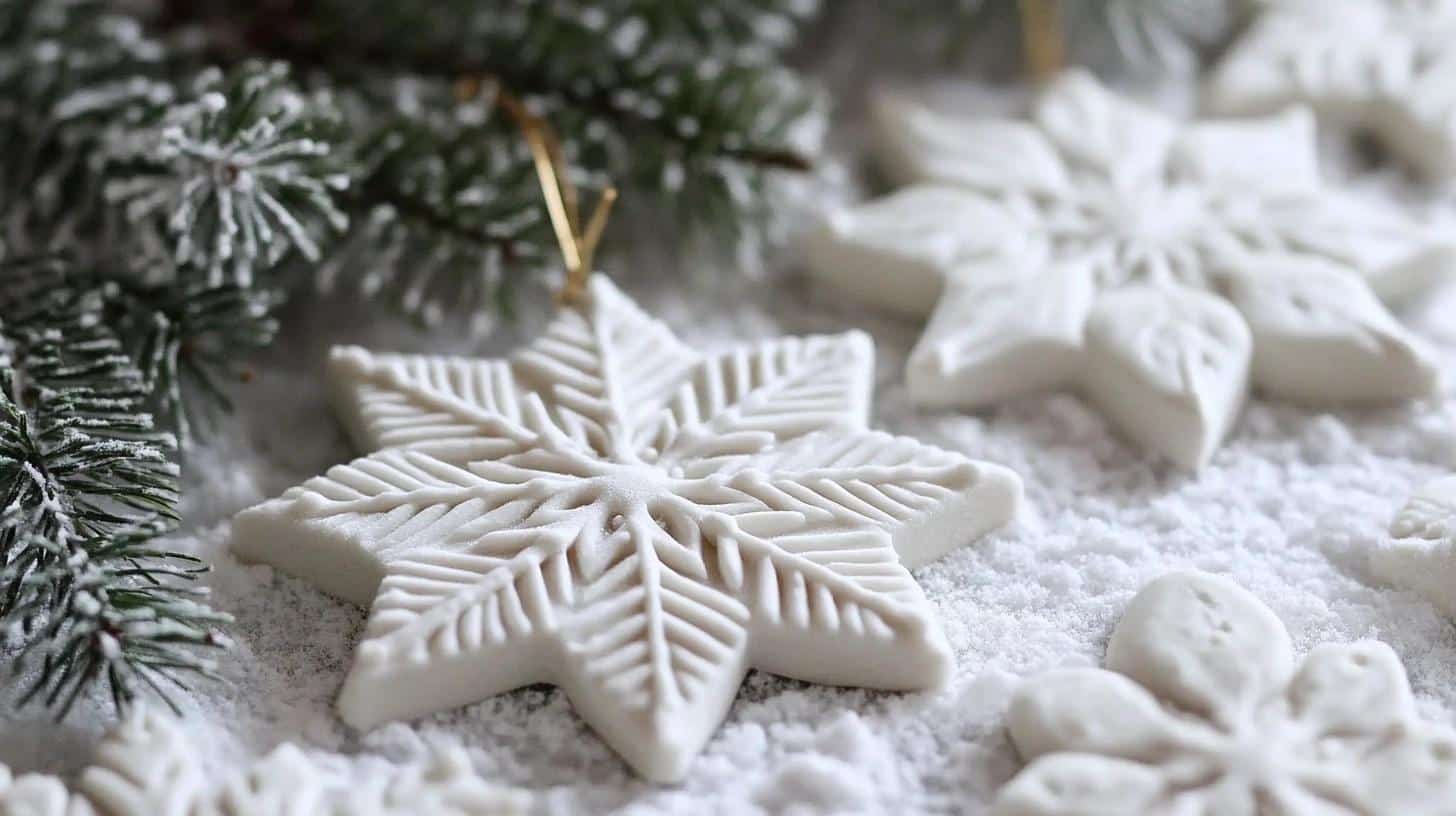
Cut out ornaments in the shape of snowflakes using a cookie cutter, and add texture with small tools or stamps to create a wintry, frosted look.
Materials Required: Snowflake cookie cutter, texture tools, air-dry clay.
5. Embossed Rolling Pin Ornament
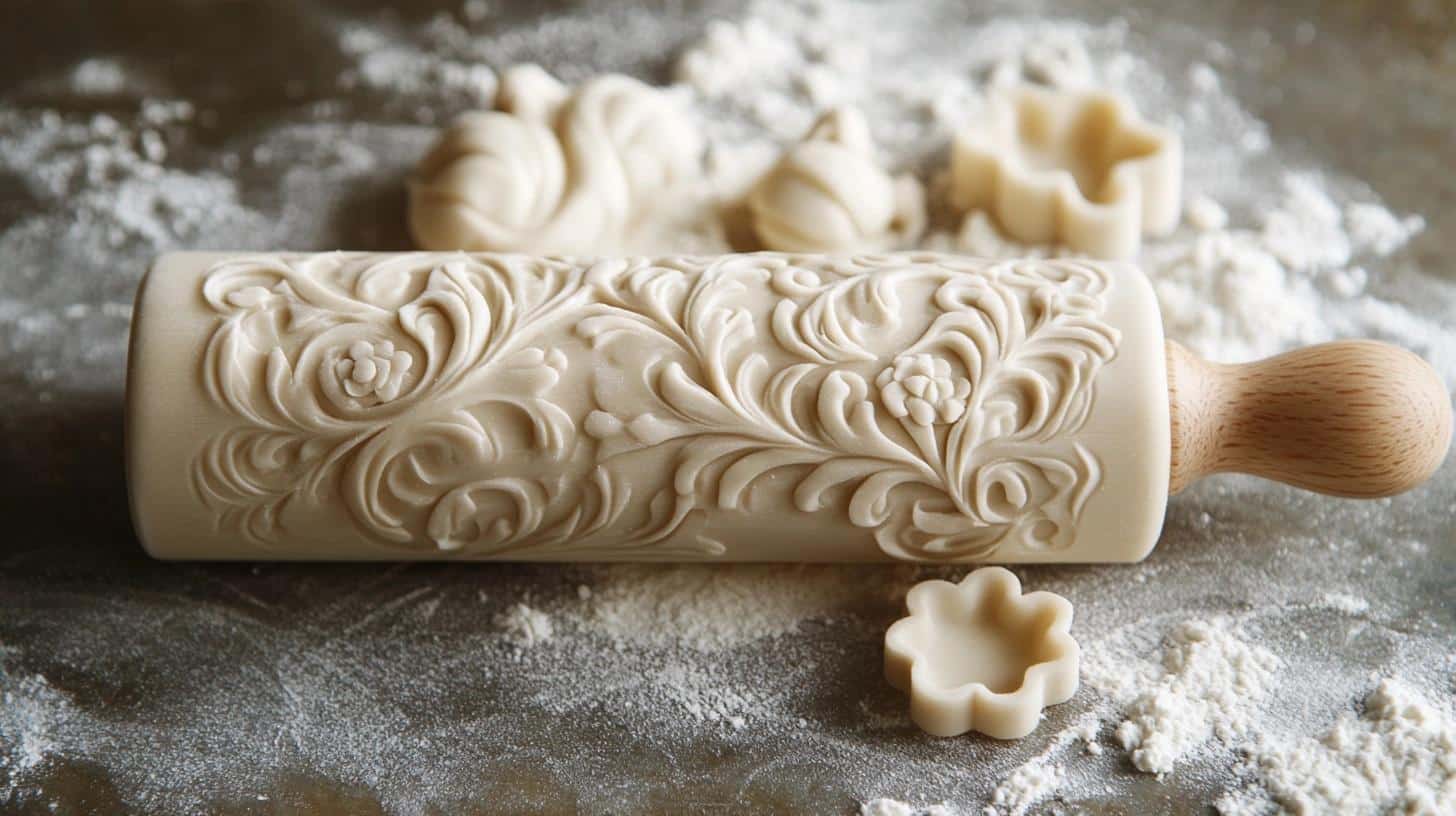
Use an embossed rolling pin to create a repeating decorative pattern across the surface of the clay. This technique makes elegant, textured designs for any occasion.
Materials Required: Embossed rolling pin, air-dry clay, cookie cutter.
6. Hand-Drawn Pattern Ornament
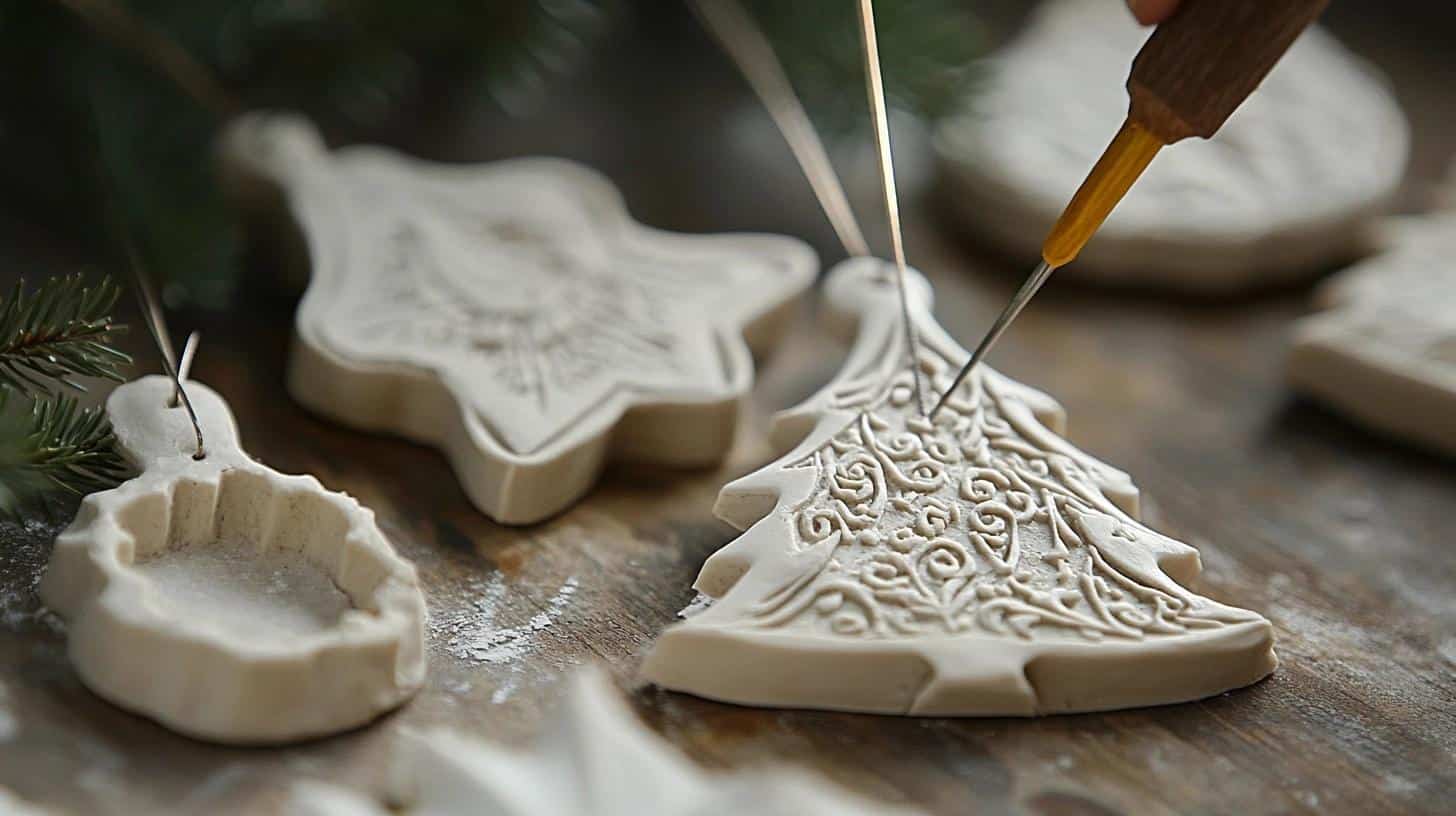
Use a needle or toothpick to etch simple drawings or designs directly into the clay, adding a personal and artistic touch to each ornament.
Materials Required: Needle or toothpick, air-dry clay, cookie cutter.
7. Pressed Flower Ornament
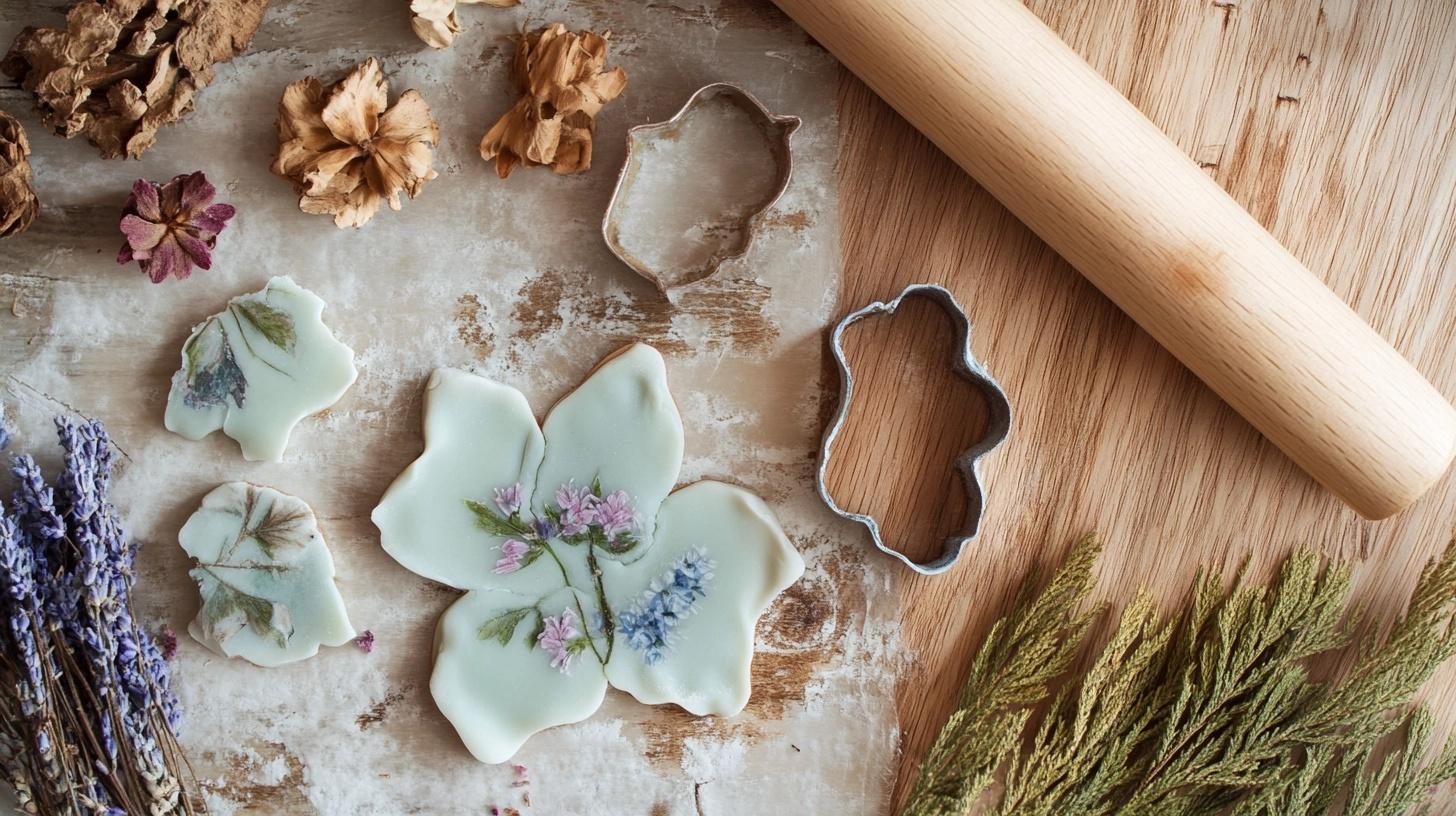
Press dried flowers or petals into the surface of the clay for a beautiful, nature-inspired ornament with organic patterns and soft colors.
Materials Required: Dried flowers, rolling pin, air-dry clay, cookie cutter.
How to Properly Dry Air Dry Clay Decorations

Drying air-dry clay decorations correctly is essential for achieving the best results and preventing cracks or warping. Following the right techniques ensures your creations dry evenly and maintain their intended shape, resulting in beautiful, long-lasting pieces.
Dry in a Cool, Well-Ventilated Area: Place the clay decorations in a cool, dry, and well-ventilated space, away from direct sunlight or heat sources, to prevent rapid drying and cracking.
Flip Decorations Occasionally: Turn the decorations over every few hours to ensure even drying on both sides and prevent warping, especially for thicker pieces.
Allow Ample Time for Drying: Depending on the thickness, air-dry clay can take anywhere from 24 to 72 hours to dry completely. Be patient and avoid handling the pieces too soon.
Use Wax Paper to Prevent Sticking: Place the ornaments on a sheet of wax or baking paper while drying to prevent them from sticking to the surface and causing damage.
How to Store Air-Dry Clay Without Drying It Out
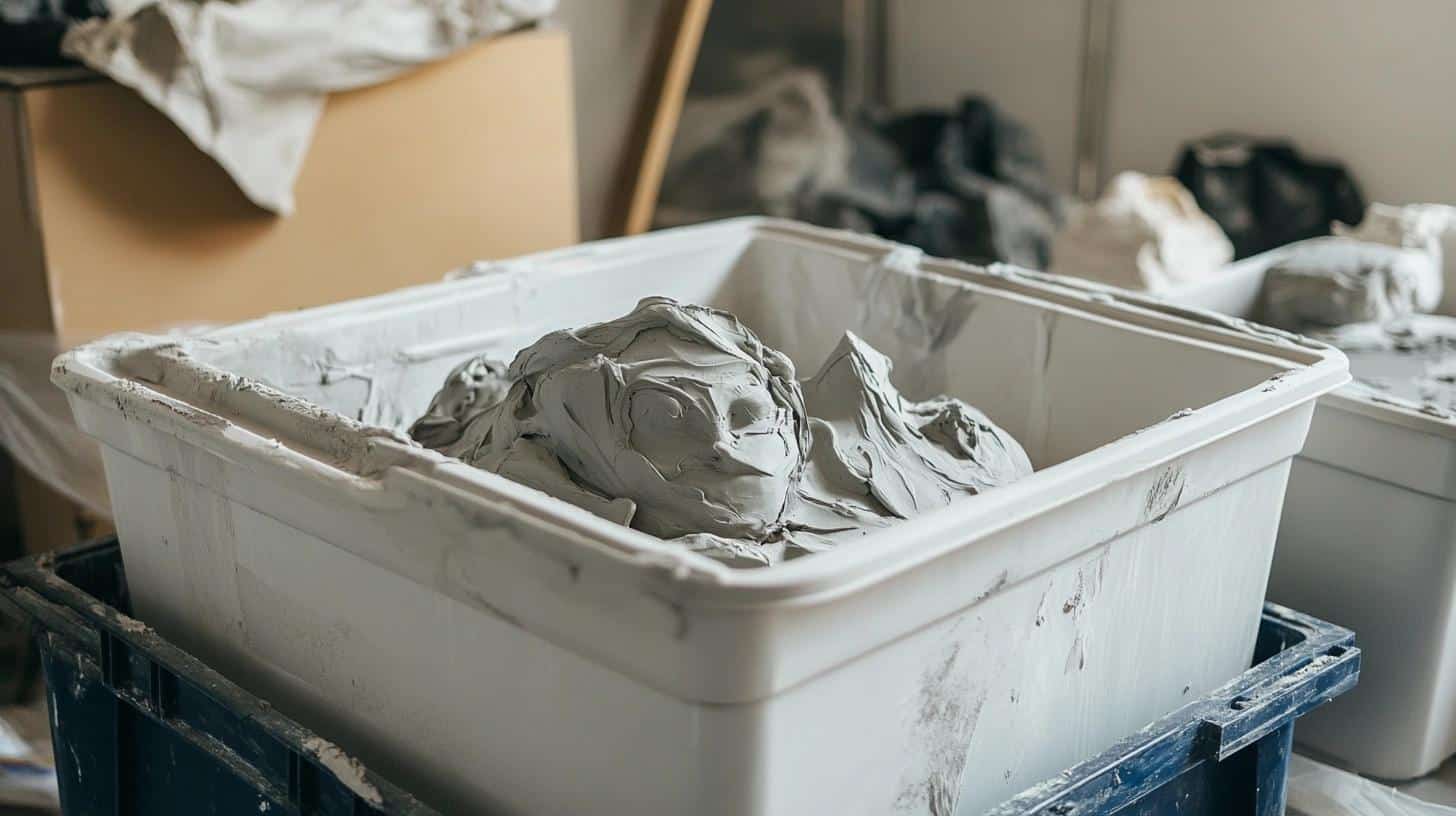
Preserving the pliability of air-dry clay is crucial for maintaining its usefulness and extending its shelf life. With the right storage techniques, you can keep your clay soft and workable for extended periods, ensuring it’s always ready when creativity strikes.
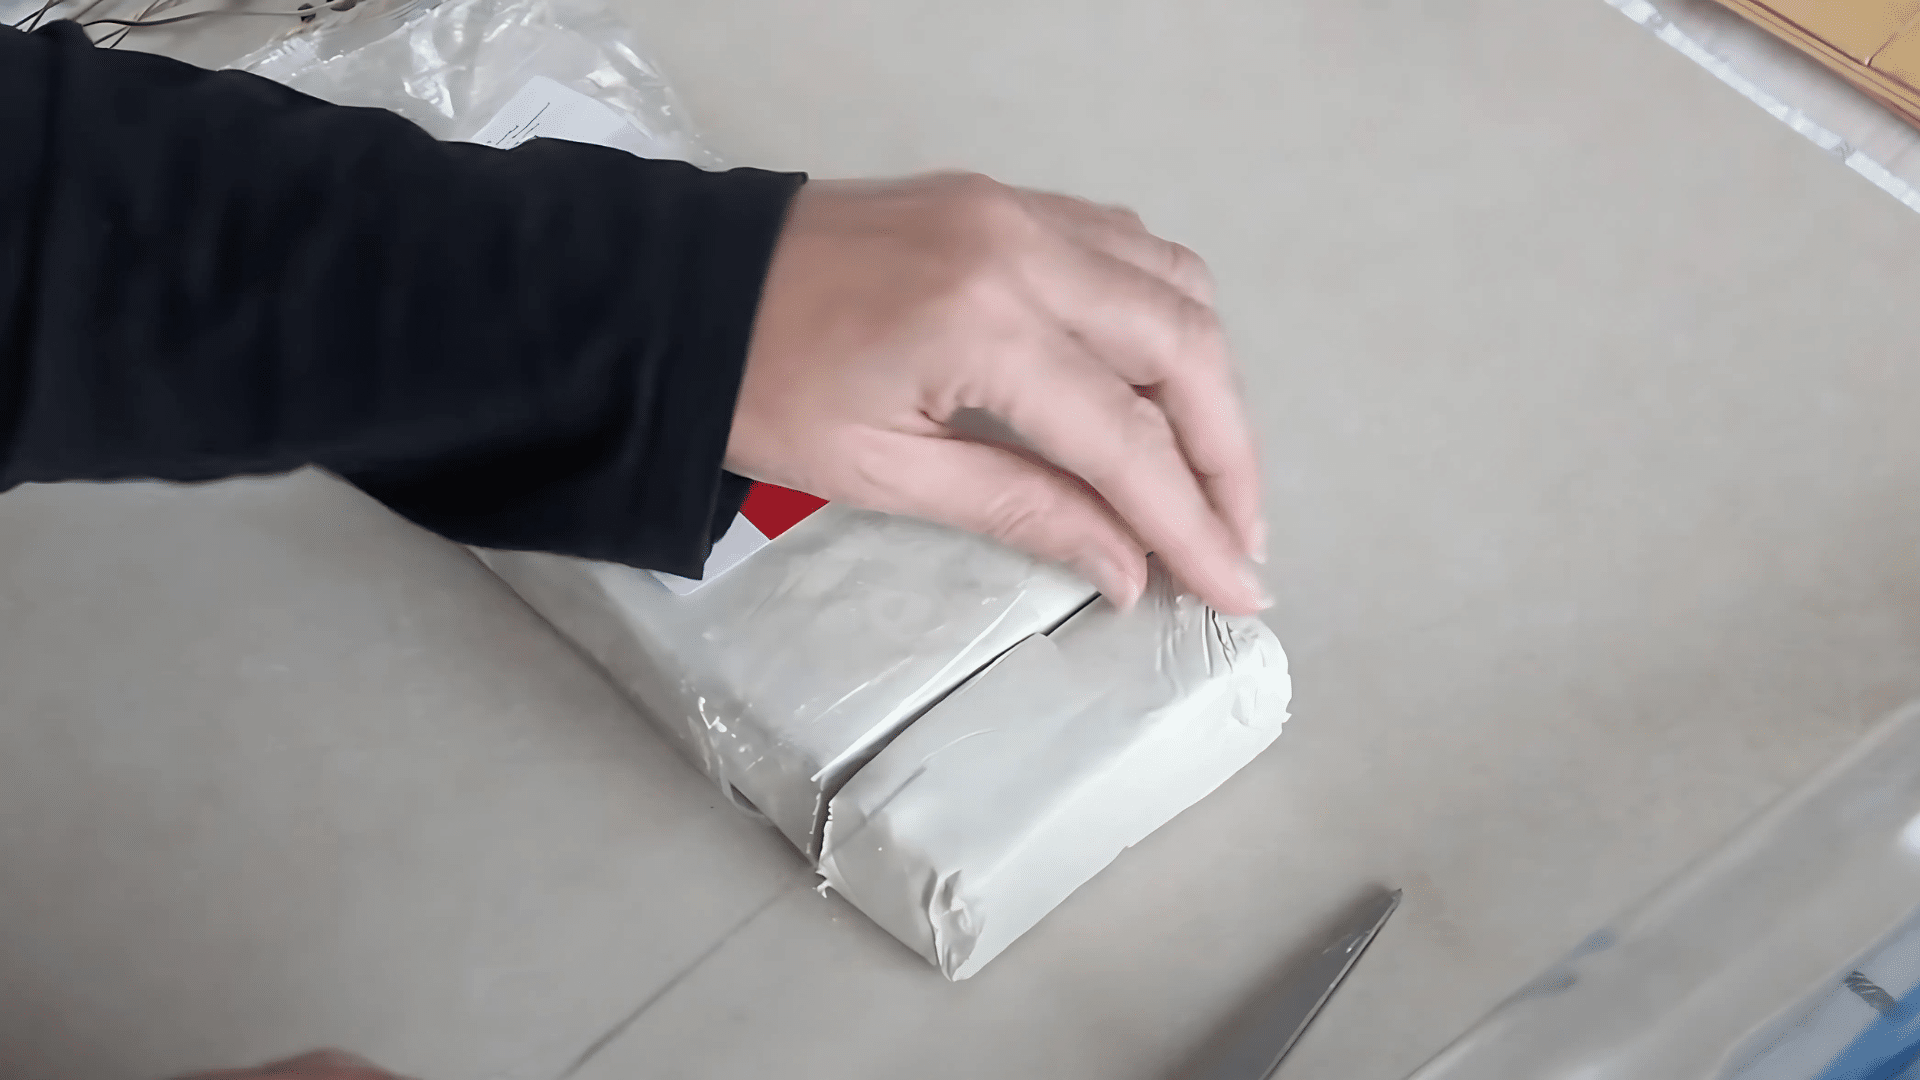
1. Wrap Tightly in Plastic
Wrap the unused clay tightly in plastic wrap or a resealable plastic bag, ensuring there are no air pockets. This helps keep the moisture in and prevents drying.
For extra protection, consider double-wrapping the clay to create an additional barrier against air exposure.
2. Use an Airtight Container
Place the wrapped clay inside an airtight container or sealed plastic tub to provide an extra layer of protection against air exposure.
Choose a container that’s only slightly larger than your clay to minimize the amount of air inside.
3. Add a Damp Cloth
Place a slightly damp cloth or paper towel inside the storage bag or container to maintain moisture levels. Ensure the cloth is not too wet to avoid making the clay soggy.
Replace the damp cloth regularly to prevent mold growth and keep the humidity consistent.
Conclusion
As we wrap up our journey into the world of air-dry clay, we hope you’re feeling inspired and equipped to start your creative adventures. From proper storage techniques to ensure your clay stays pliable to drying your creations just right, you now know how to make the most of this versatile medium.
The design ideas we’ve shared are just the beginning – let your imagination run wild and see where it takes you. Remember, working with air-dry clay is not just about the end result but also about enjoying creating something unique with your hands.
So get your hands dirty and bring your ideas to life. Who knows? Your next clay project might become a cherished keepsake or a stunning piece of home decor.
FAQ (Frequently Asked Questions)
How Durable are Air Dry Clay Ornaments?
When properly made and cared for, air-dry clay ornaments are moderately durable. They resist minor impacts and handling but can break if dropped. Sealing them with varnish increases their durability and protects against moisture.
Can Airdry Clay Ornaments be Used Outdoors?
Air-dry clay ornaments are not naturally suitable for outdoor use as they’re vulnerable to moisture and weather. However, they can withstand limited outdoor exposure if thoroughly sealed with weatherproof varnish and placed in a sheltered area.
How to Fix Cracks or Breaks in Ornaments?
Small cracks can be filled with a mixture of clay and water. For breaks, use a strong glue like epoxy. Once repaired and dry, smooth the area and touch up with paint if needed.