55 DIY Halloween Props You Can Actually Build This Year
DIY Halloween props don’t require a big store run or a steep bill. Some of the best builds start with things already sitting in a garage, like chicken wire, old bedsheets, cardboard, and black spray paint.
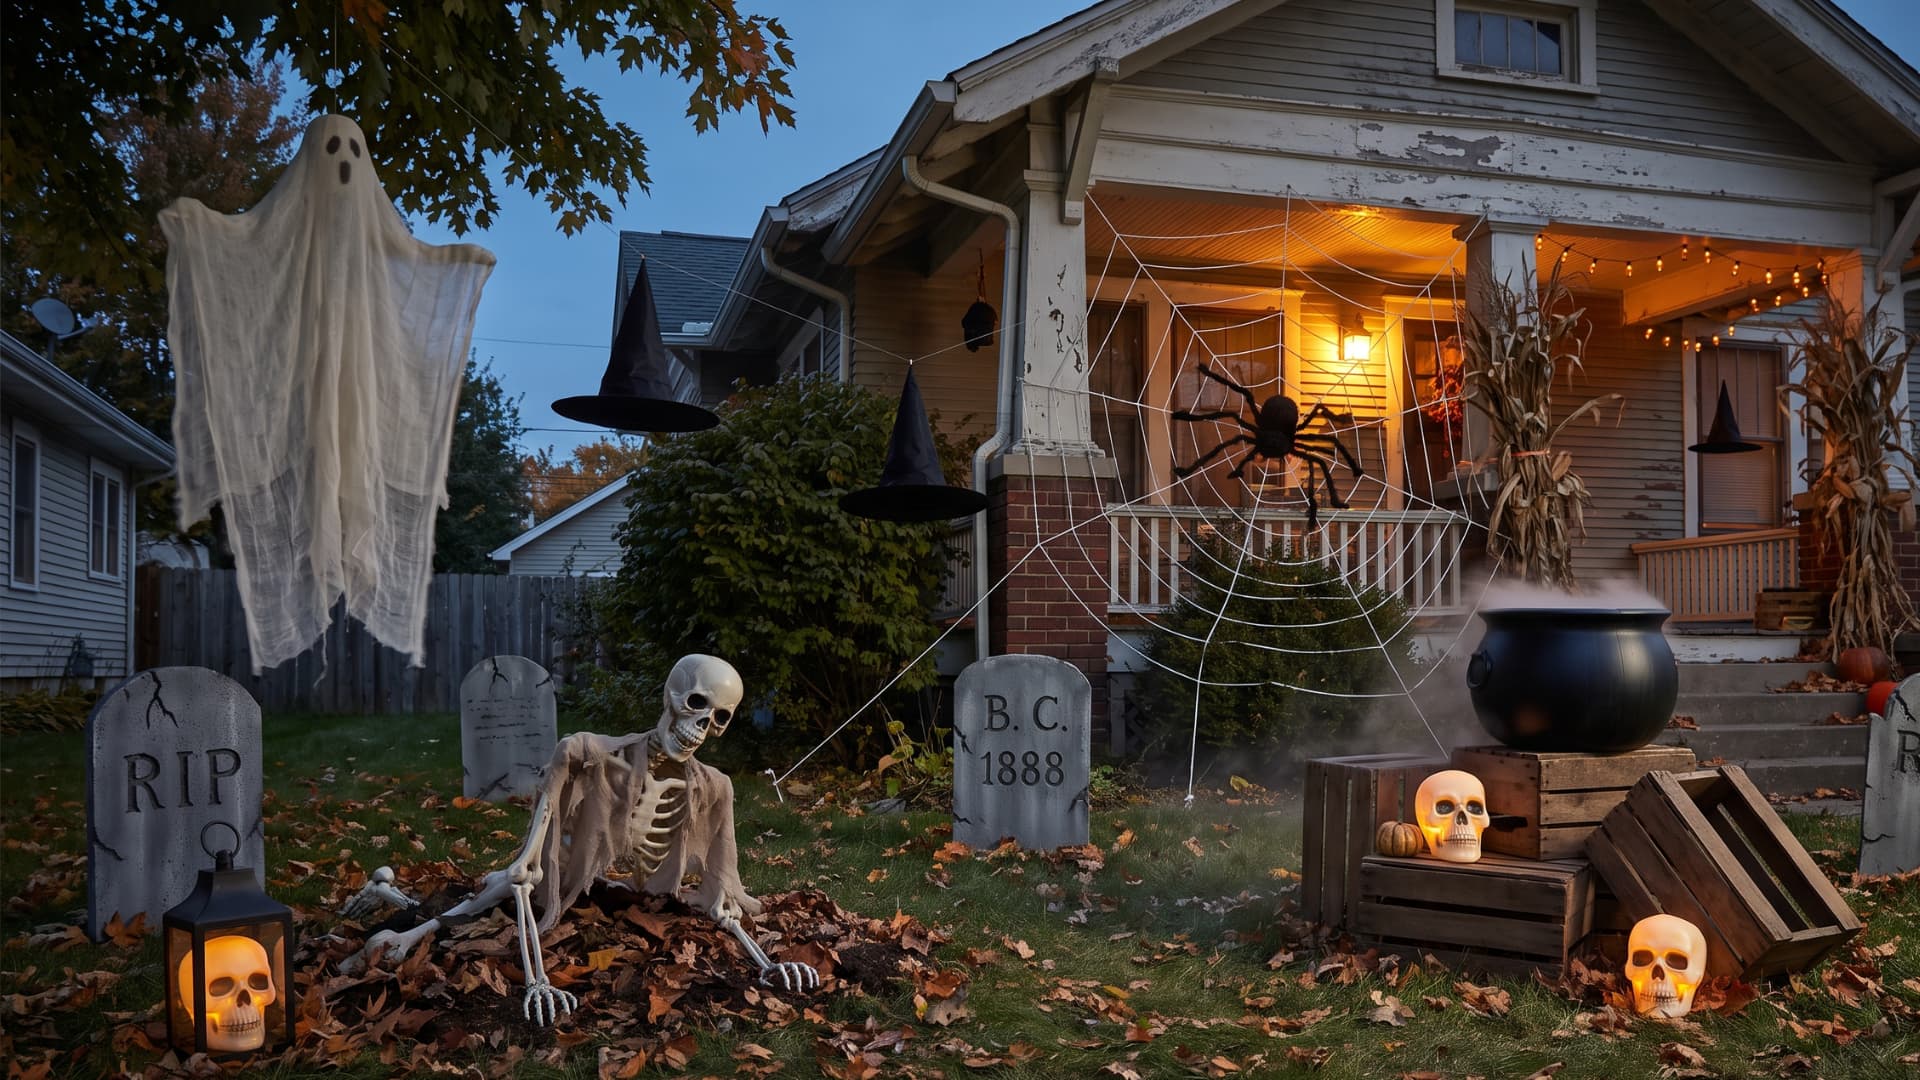
This article covers DIY Halloween props, sorted by type, with real steps instead of just a photo and a link. A friendly pumpkin fits a family porch, and a full graveyard scene fits a haunted yard, so pick what best suits you.
What Counts as a DIY Halloween Prop?
A DIY Halloween prop is any handmade Halloween decoration built to stand on its own, not just hang flat like a poster or a printable.
Ghosts, skeletons, tombstones, and giant spiders all count as props because someone can walk around them, add them to a scene, or move them from the porch to the yard.
Homemade Halloween decorations that only need tape or a wall, like a paper bat or a window cling, are simpler than true props. The line matters because a prop usually needs a frame, a base, or some kind of support to hold its shape outdoors.
Before You Start: A Quick Supply and Tool Checklist
A good build starts with the right supplies already on hand, not a rushed trip to five different stores. Here is a short list that covers most of the DIY Halloween props below.
|
Supply |
Common Use |
Typical Cost |
|---|---|---|
|
Chicken wire |
Ghost and monster frames |
$8–$12 per roll |
|
Cheesecloth |
Ghost skin, tattered fabric look |
$5–$10 |
|
Black spray paint |
Tombstones, skeletons, silhouettes |
$6–$8 per can |
|
Zip ties |
Joining wire and PVC frames |
Around $5 |
|
Hot glue gun and glue sticks |
Nearly every prop on this list |
$10–$15 |
|
Battery tea lights |
Skulls, jars, lanterns |
$8–$12 per pack |
|
Cardboard or foam board |
Tombstones, signs |
Free–$10 |
|
Fishing line |
Hanging ghosts, bats, spiders |
$4–$6 |
|
Old bedsheets or pillowcases |
Ghosts, mummies |
Usually already on hand |
|
PVC pipe |
Zombie and scarecrow frames |
$5–$10 |
Ghosts and Ghouls: Classic DIY Halloween Props
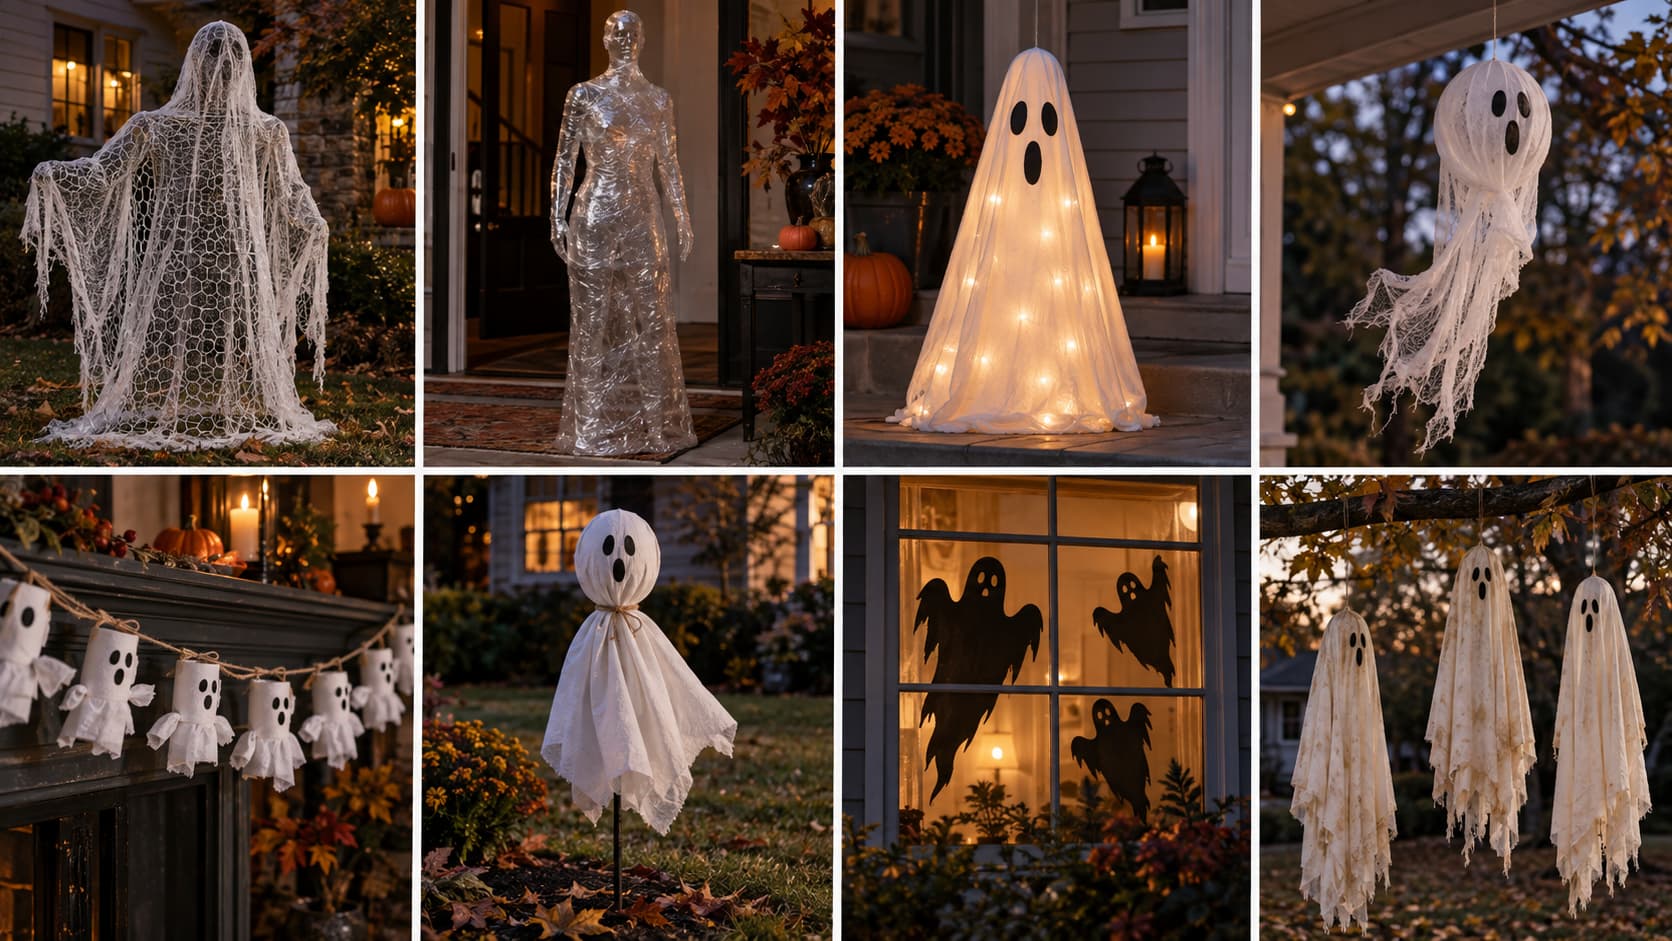
Ghosts are the easiest entry point into DIY Halloween props because most builds use fabric you already own. Start here if this is the first prop you have ever put together.
1. Chicken-Wire and Cheesecloth Ghost
This ghost holds its shape because a bent chicken-wire frame gives the cheesecloth something to hang on, so wind does not flatten it. Bend the wire into a rough body shape, drape soaked cheesecloth over it, and let it dry stiff overnight.
2. Packing-Tape Ghost From a Mannequin Form
Wrap a mannequin or dress form in clear packing tape, sticky side out first, then sticky side in to seal it. Cut the shell up the back, remove it from the form, and it holds a human shape on its own.
3. Tomato-Cage Porch Ghost
An upside-down tomato cage gives a porch ghost a wide base that will not tip over in the wind. Slip a white pillowcase over the top, wrap string lights inside the cage, and draw on a simple face.
4. Balloon-and-Gauze Floating Ghost
A balloon head wrapped in stiffened gauze looks like it is floating once it hangs from a tree branch or a porch beam. Dip gauze strips in fabric stiffener, layer them over an inflated balloon, and let it dry before popping the balloon inside.
5. Toilet-Paper-Roll Ghost Garland
Small toilet-paper-roll ghosts strung together make a cheap garland for a mantel or a porch railing. Glue on a round cheesecloth head, add two googly eyes, and thread string through the top of each roll.
6. Pillowcase Yard Ghost on a Stake
A pillowcase stuffed with plastic bags and mounted on a garden stake works well for a quick yard scene. Stuff the case, tie it below the neck, and push the stake through the bottom into the ground.
7. Cardstock Ghost Window Silhouettes
Cut ghost shapes from black cardstock and tape them to a window for a display that reads from the street at night. Vary the sizes so the group looks natural instead of lined up in a row.
8. Hanging Bedsheet Ghost Trio
Three bedsheets soaked in black tea and cut with ragged edges make a fast, low-cost tree display. Hang each sheet from a low branch with fishing line so it moves with the wind instead of standing still.
Skeletons, Bones, and Body Parts: DIY Halloween Props With Real Bite
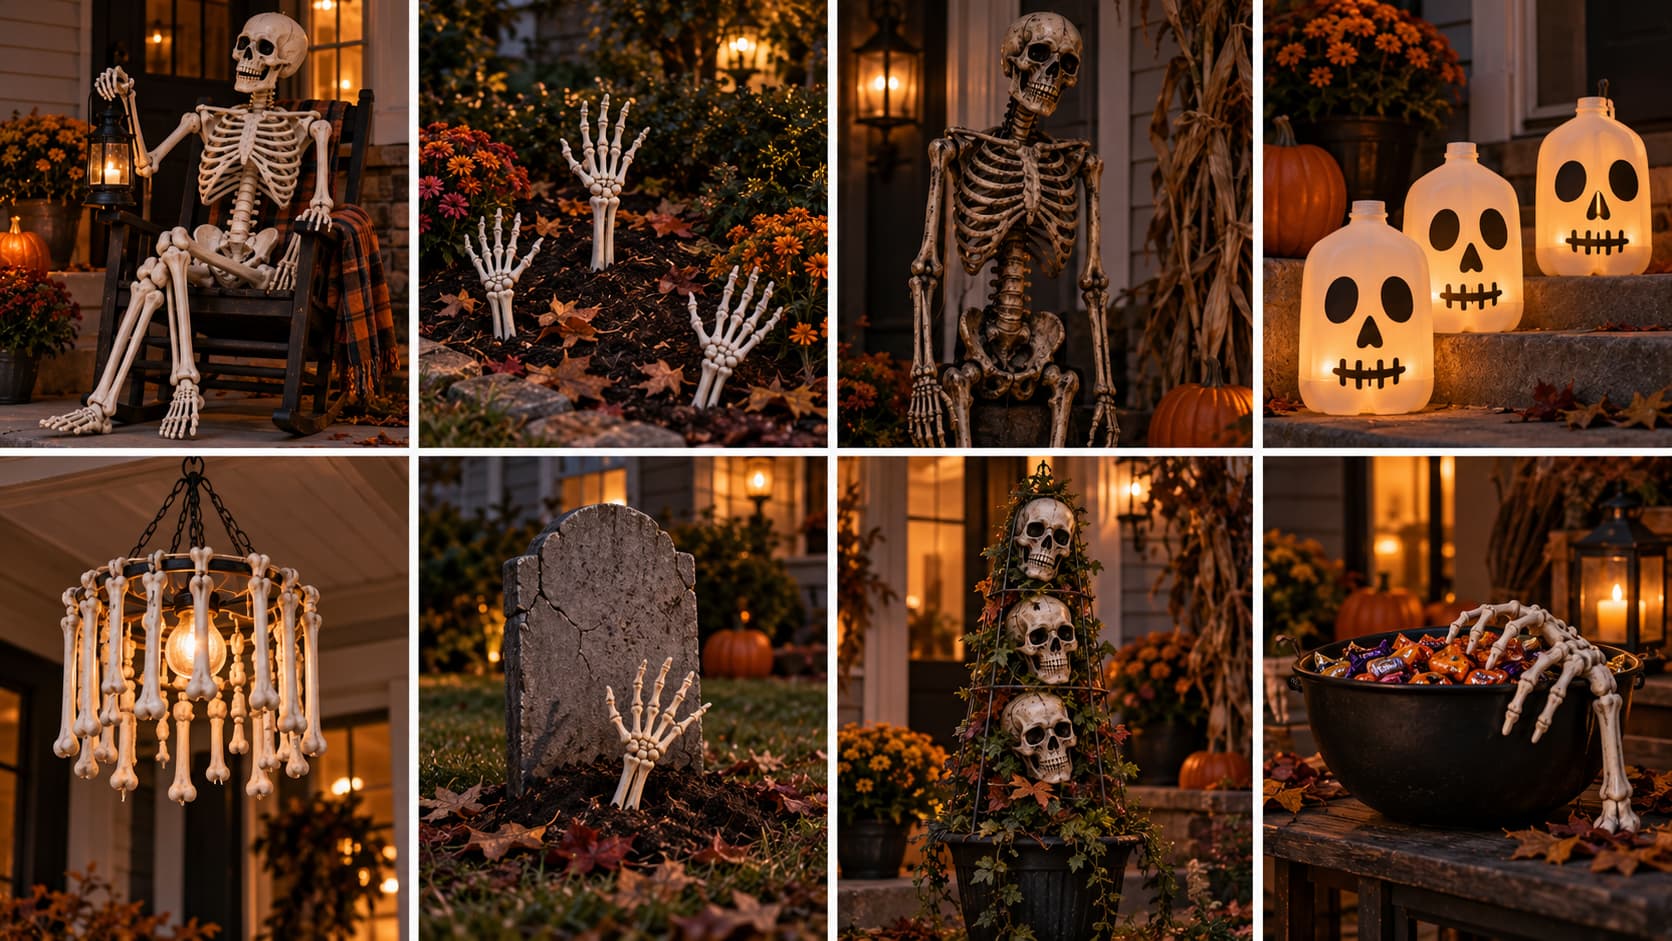
Skeleton-based DIY Halloween props read as scary from far away, even with basic materials. Most of these builds reuse one dollar-store skeleton in different poses.
9. Posed Dollar-Store Skeleton Scene
A single plastic skeleton looks far more real once it sits, leans, or holds a prop instead of standing straight. Wire the joints at the elbows and knees so the pose stays put in wind.
10. Skeleton Hands Planted in a Flower Bed
Push plastic hands into soil at different angles so they look like something is climbing out. Add a light layer of dirt and mulch around the wrist to hide the plastic edge.
11. Corpsed Skeleton With Stain and Paint
A gel-stain wash over a plastic skeleton adds shadow and texture that plastic alone lacks. Brush on dark stain, wipe most of it off, and let the stain settle into the joints and grooves.
12. Milk-Jug Skull Lanterns
Cut a simple skull face into an empty milk jug and drop a battery light inside for a glowing lantern. Trace the eyes and mouth first with marker, then cut carefully with a utility knife.
13. Bone-and-Zip-Tie Chandelier
Zip-tie plastic bones around an old light fixture to turn it into a hanging Halloween piece for a porch or entryway. Space the bones evenly around the frame before tightening each zip tie flush.
14. Cardboard Tombstone With a Reaching Hand
A flat cardboard tombstone gains depth when a plastic hand appears to reach out from the base. Cut a slit near the ground line and slide the wrist through before gluing it in place.
15. Skull-Topped Tomato-Cage Topiary
An upside-down tomato cage stacked with foam skulls makes a topiary shape without any real plant material. Slide the skulls onto the frame from top to bottom and secure each one with hot glue.
16. Severed-Hand Candy Bowl Guard
A fake hand glued to the rim of a candy bowl looks like it is reaching in for the same treats. Bend the fingers slightly over the edge so the hand looks like it is gripping the bowl.
Witches and Cauldrons: DIY Halloween Props for a Magic Touch
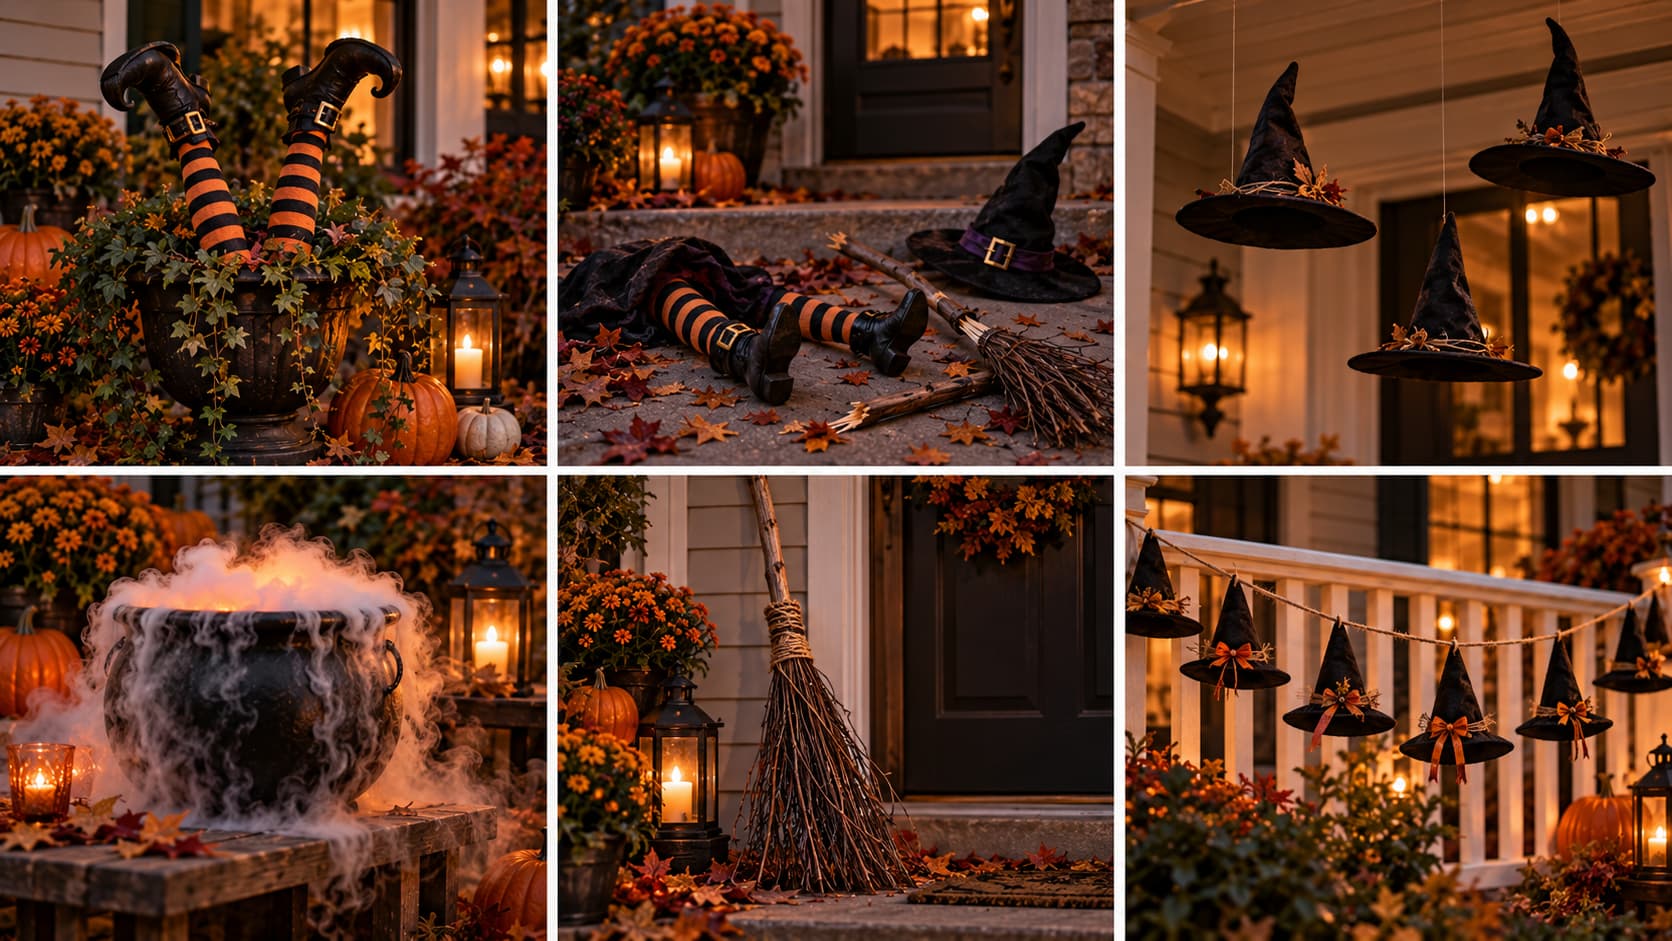
Witch-themed DIY Halloween props work well on porches, since most of these pieces stay upright without much support. A pool noodle and a few thrifted boots cover most of this category.
17. Pool-Noodle Witch-Legs Planter
A pool noodle cut in half and dressed in striped stockings looks like a witch crashed into your planter. Slide a dowel rod through the noodle for support, then tuck the base into soil or floral foam.
18. Broken-Broomstick Crash-Landing Scene
Snap an old broom in half and lay it beside a pair of witch legs for a scene that tells its own story. Add a witch hat a few feet away to suggest she is still nearby.
19. Levitating Witch Hats on Fishing Line
Thread fishing line through the point of a witch hat to hang it at different heights over a doorway. Tie each hat at a slightly different length so the group looks scattered, not flat.
20. Foaming Dry-Ice Cauldron
A black cauldron filled with warm water and a small piece of dry ice creates a low fog effect for a porch table. Handle dry ice with gloves only, since bare skin can burn on contact.
21. Twig-and-Twine Witch’s Broom
A bundle of foraged twigs tied around a straight branch makes a broom that looks better than most store versions. Trim the twig ends evenly before tying them tight with twine or wire.
22. Witch-Hat Pennant Garland
Small felt or paper witch hats strung along a cord make a simple garland for a porch railing or window. Cut the hat shapes from a template first so every piece in the garland matches.
Zombies and Monsters: DIY Halloween Props That Move
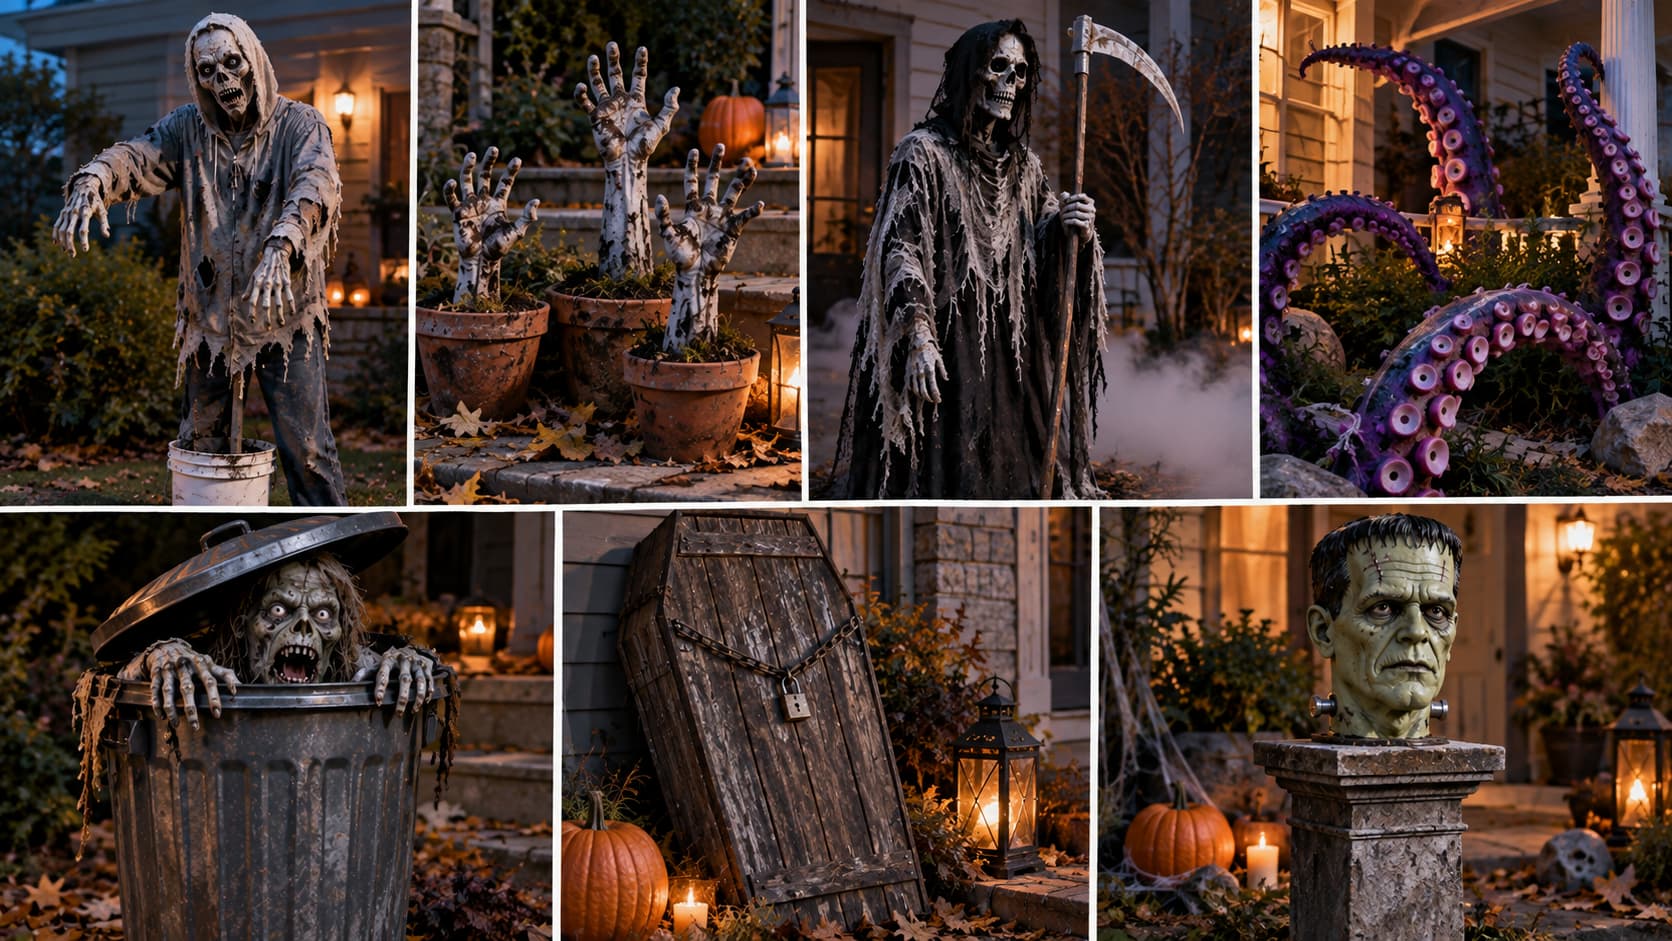
This group covers the bigger builds among DIY Halloween props, the ones that take an afternoon instead of twenty minutes. Start with the bucket zombie if this is your first larger project.
23. Bucket-and-PVC-Pipe Zombie
A five-gallon bucket with a PVC frame and a hooded sweatshirt turns into a full zombie figure standing over a yard. Drill the bucket for the pipe, dress the frame, and add a foam head with basic makeup.
24. Zombie Hands Planted in Pots
Plant fake gray-painted hands in small pots around a porch for a version of the skeleton-hands trick with more texture. Paint the hands gray before planting so they read as decayed rather than plastic.
25. Monster-Mud Grim Reaper
A chicken-wire frame coated in a mud-and-fabric mixture gives a reaper figure real texture and a rough, aged surface. Mix the monster mud to the ratio listed on your fabric-glue container, then coat the wire in layers.
26. Giant Tentacle Monster for the Porch
Foam insulation shaped and painted into curling tentacles reads as a large sea creature climbing up a porch post. Wrap foam strips around a support pole and secure with spray adhesive before painting.
27. Trash-Can Pop-Up Scare Character
A hidden figure that pops up from inside a trash can works well near a front walk where trick-or-treaters pass close by. Rig a simple pull-string or spring mechanism inside the lid so the figure jumps on cue.
28. Pallet-Wood Coffin With Foam and Paint
Old pallet boards cut and joined into a coffin shape make a strong base for a graveyard scene. Sand the rough edges, paint the wood dark, and add a chain and lock for detail.
29. Frankenstein Head on a Pedestal
A foam head painted green and set on a simple pedestal makes a great centerpiece for a party table or entryway. Build the pedestal from a cake stand or an old candlestick base for quick assembly.
Tombstones, Graveyard, and Cemetery DIY Halloween Props
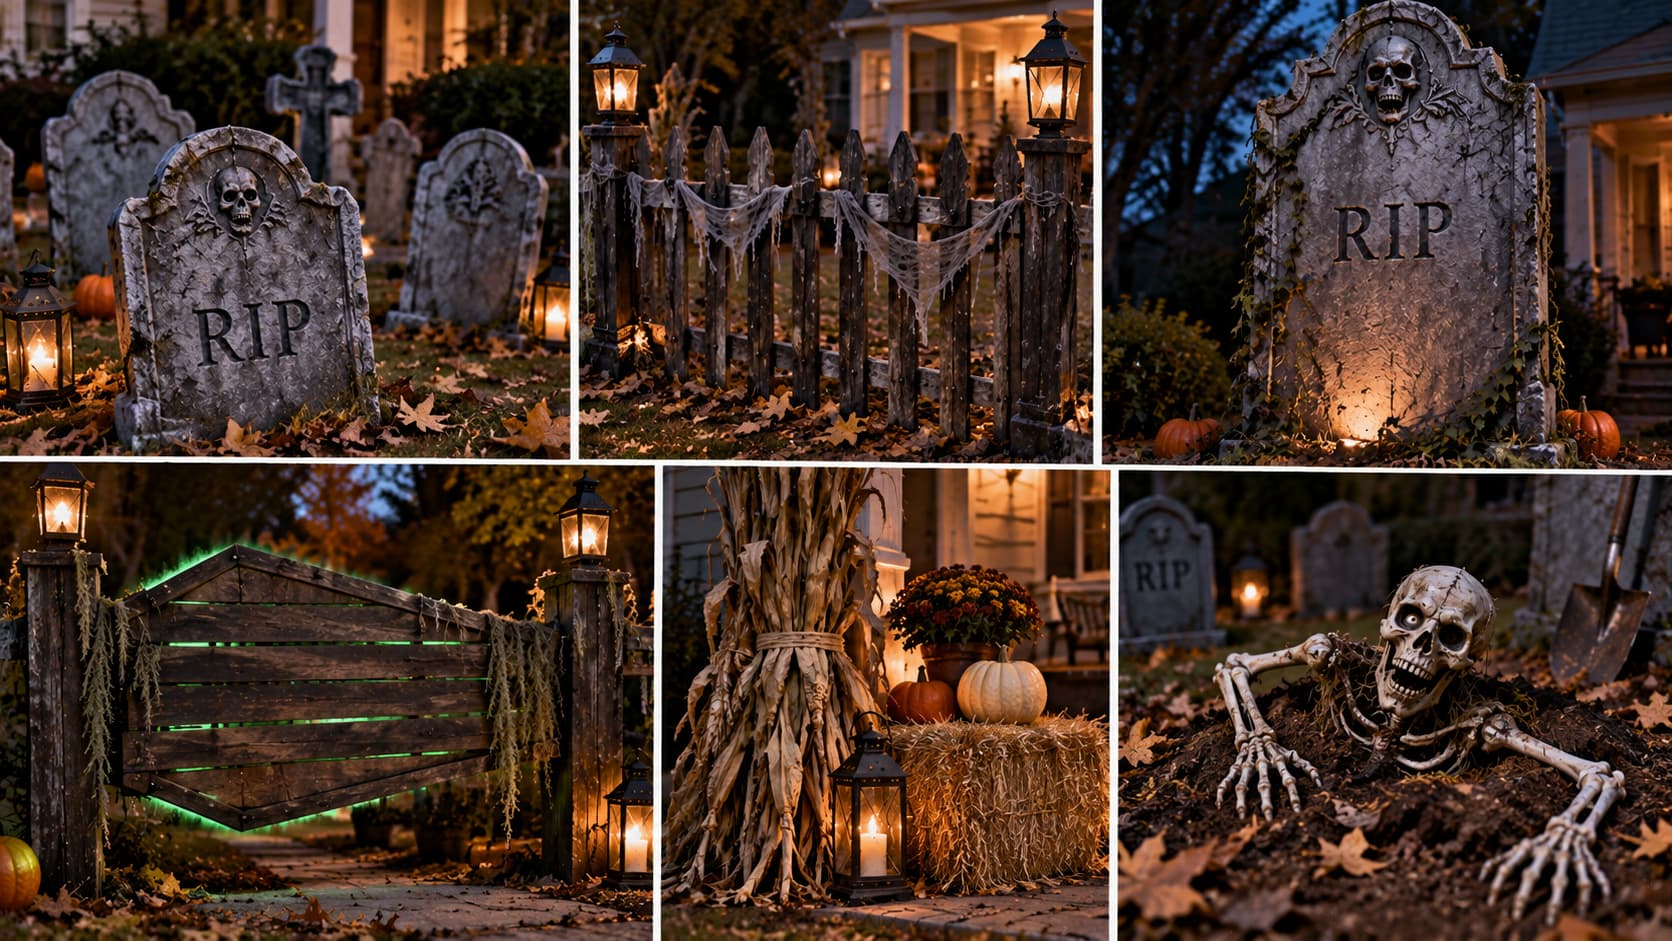
A few tombstones grouped together turn any front yard into a small graveyard scene. These DIY Halloween props work best in a cluster rather than spread out one by one.
30. Foam-Board Tombstones With Funny Epitaphs
Foam insulation board cut into tombstone shapes and painted gray holds up outdoors far better than plain cardboard. Carve a shallow inscription with a screwdriver before painting for a stone-like texture.
31. Cardboard Cemetery Fence
Cut cardboard or thin wood into fence pickets and stain them a weathered brown to frame a graveyard scene. Space the pickets evenly and anchor each one into the ground with a wood stake.
32. Oversized Foam Tombstone
A single tombstone built at double the normal height matches the current trend for larger-than-life yard skeletons. Scale up the same foam-board method used for the smaller tombstones, just with a taller sheet.
33. Pallet-Wood Coffin Gate
A pallet coffin turned on its side and mounted between two posts a yard display. Add a green rope light along the inside edge for a glow that shows through the slats.
34. Cornstalk-and-Hay-Bale Graveyard Corner
Real or fake cornstalks tied to a porch post next to a hay bale add texture without much building at all. Lean the stalks against the post first, then wrap twine around the middle to hold them upright.
35. Half-Buried Crawling-Out Skeleton Scene
A skeleton dug partway into the ground with dirt and mulch piled around the torso looks like it just crawled up. Dig a shallow trench, lay the skeleton in at an angle, and pile dirt back over the lower half.
Spiders, Bats, and Creepy Crawlies as DIY Halloween Props
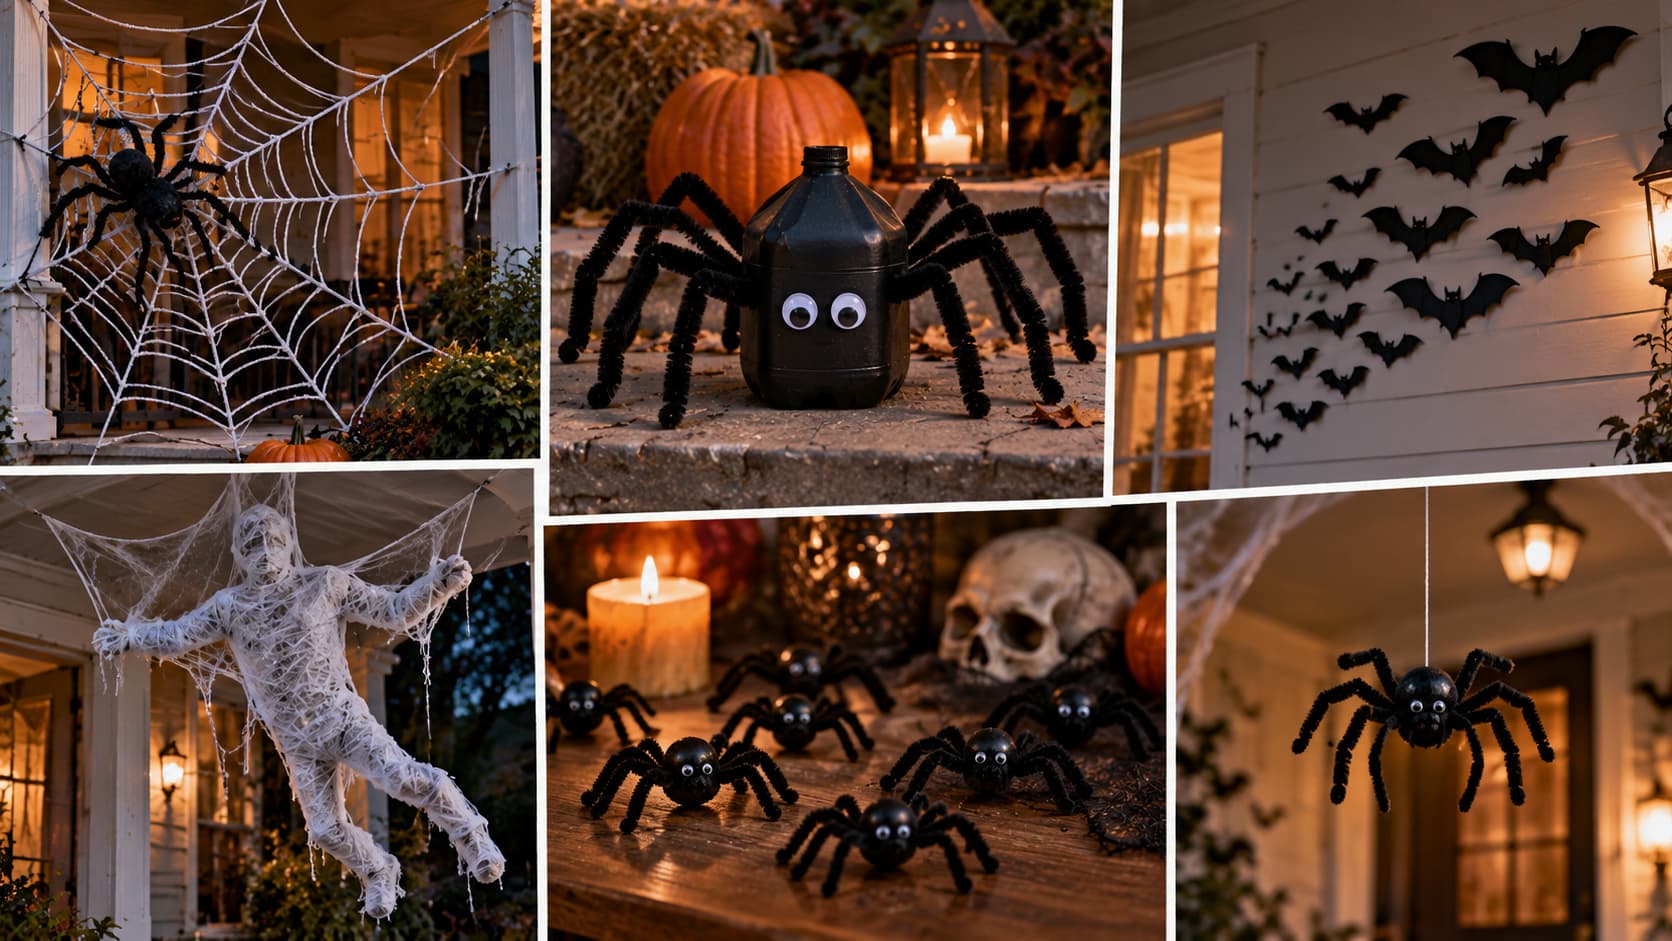
36. Giant Yarn Spiderweb
Three sticks tied at the center and wrapped with white yarn in a spiral pattern make a web large enough to cover a porch corner. Anchor the outer points to a railing or fence so the web stays taut.
37. Milk-Jug Spider With Pipe-Cleaner Legs
An empty milk jug painted black becomes a spider body once eight bent pipe cleaners are pushed through the sides as legs. Poke small holes in pairs along the jug before inserting each leg for even spacing.
38. Black-Cardstock Bat Swarm
Bats cut from black cardstock in three different sizes and taped in a loose cluster look like they are flying across a wall or door. Start with the smallest bats at one corner and increase size as the cluster spreads.
39. Person-Caught-in-a-Web Display
A human-shaped form wrapped in cobweb material and hung near a porch ceiling reads as someone caught mid-escape. Build the form from stuffed plastic bags, then layer store-bought cobweb over the top.
40. Scattered Pipe-Cleaner Mini Spiders
Tiny spiders bent from black pipe cleaners and a bead body work well scattered across a mantel or table setting. Bend four pipe cleaners in half, twist them at the center, and glue on a small black bead.
41. Fishing-Line Hanging Spider Drop
A single large spider on fishing line, rigged to drop a few inches when someone walks under it, adds a quick startle to a porch entry. Attach the line to a simple hook and release mechanism above the walkway.
Lighting, Fog, and Sound Effects for DIY Halloween Props
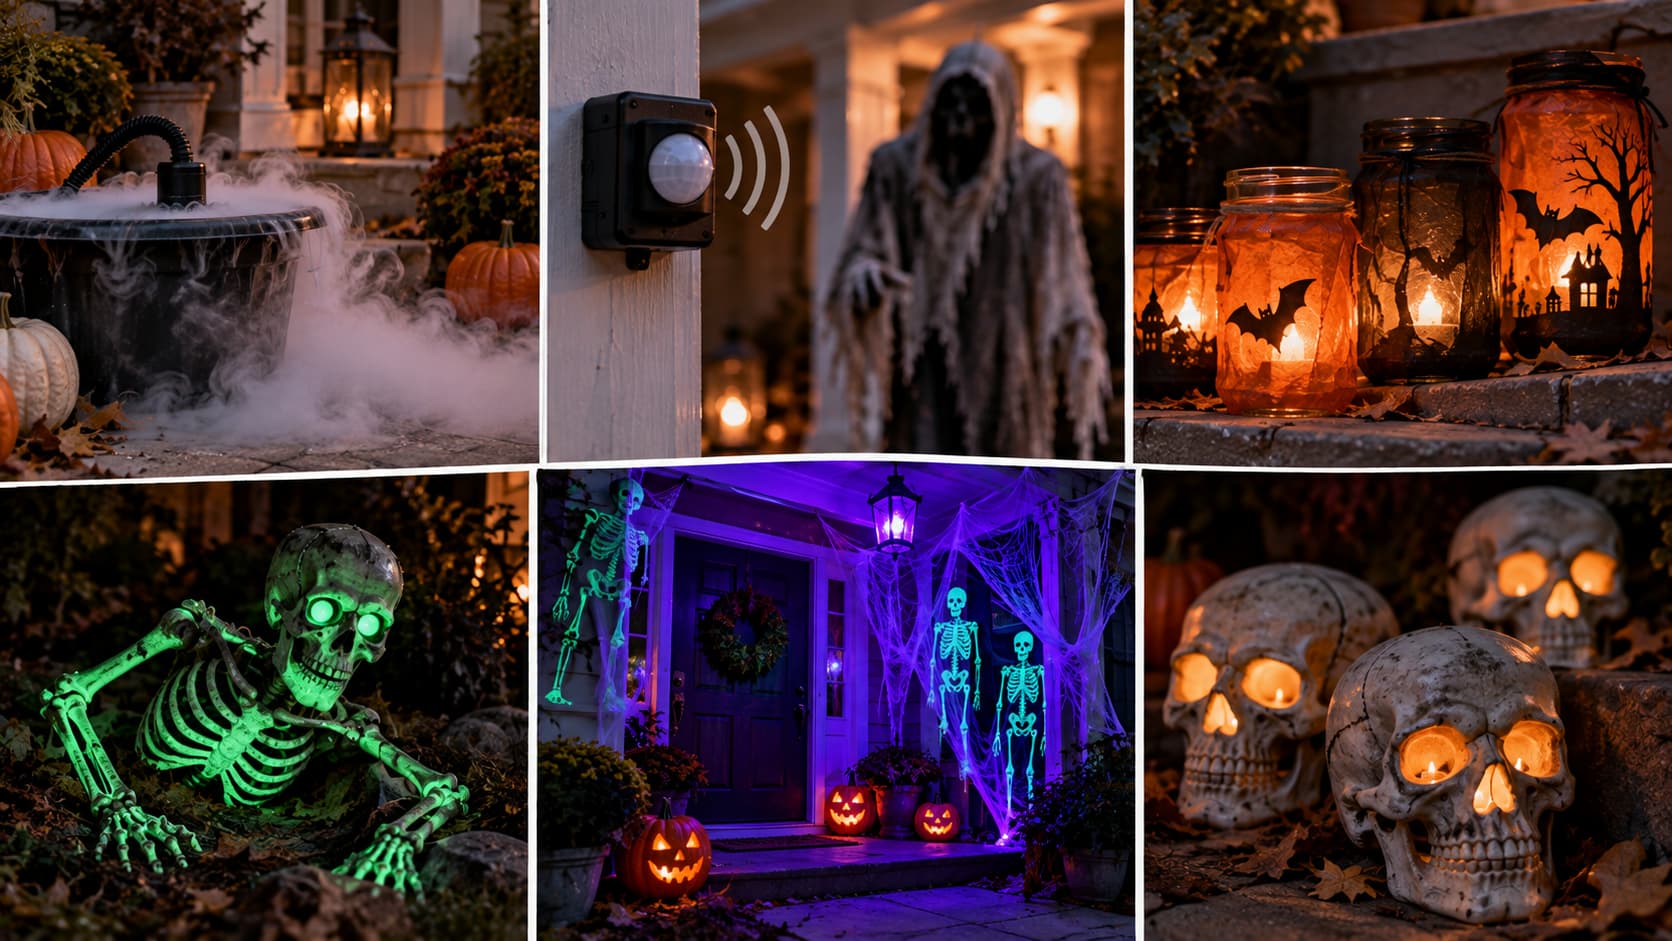
Light and fog make every prop on this list look better after dark, so this group of DIY Halloween props works best paired with the ones above. A little glow goes further than most people expect.
42. Water-Only Fog Machine
A small aquarium pump and a container of water can create a light fog effect without dry ice or fog juice. Follow the build instructions for your specific pump model closely, since parts vary by kit.
43. Motion-Sensor Trigger for Any Prop
A basic motion sensor wired to a light or sound module adds a jump-scare moment to a static prop without much extra work. Mount the sensor near a walking path so it triggers as trick-or-treaters pass by.
44. Flickering Battery Candle Jars
Battery candles set inside mason jars give a warm, flickering glow that is safe near paper decorations and fabric. Wrap a strip of orange or black tissue paper around the jar for extra color.
45. Glow-in-the-Dark Paint Accents
A thin coat of glow-in-the-dark paint on skeleton bones or spider eyes makes a prop pop after the sun goes down. Charge the paint under a bright light for a few minutes before dark for the strongest glow.
46. Blacklight Porch Corner
A single blacklight bulb aimed at white or glow paint turns an ordinary porch corner into a strong visual moment. Swap a regular porch bulb for a blacklight version and pair it with white fabric or paint nearby.
47. Battery Tea-Light Skull Lanterns
Battery tea lights placed inside foam skulls avoid any open flame while still giving props a lit-from-within look. Cut a small hole in the back or base of the skull to slide the light inside.
Cute and Family-Friendly DIY Halloween Props
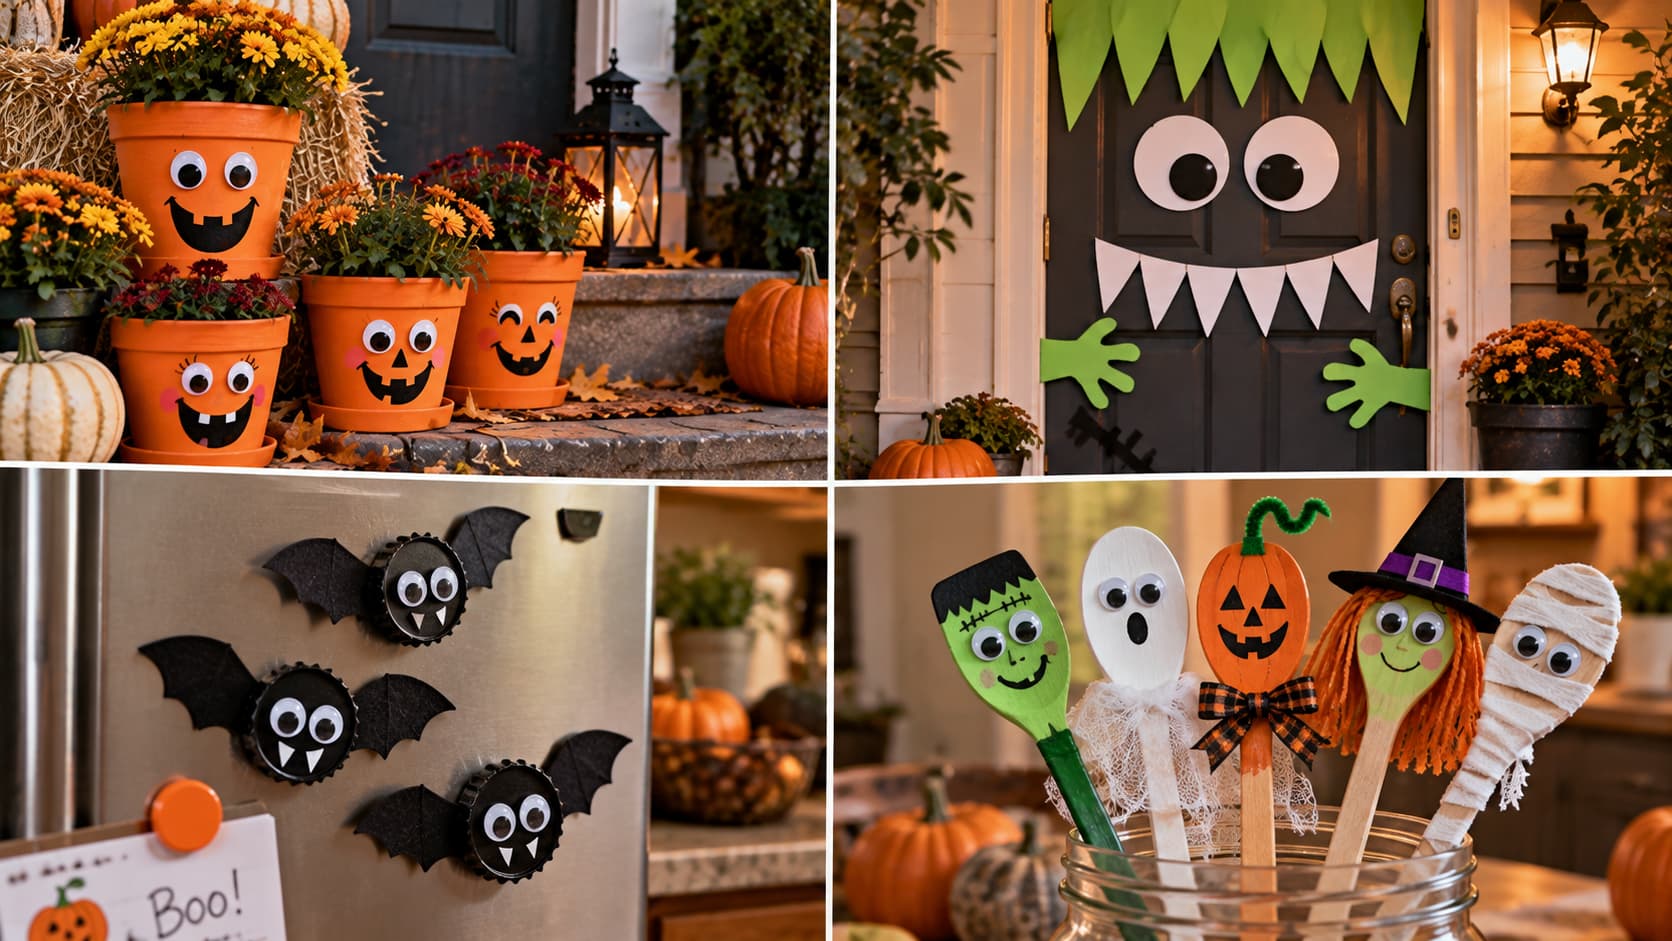
Not every household wants a scary yard, and this group of DIY Halloween props covers the friendlier side of the holiday. These also work well as projects to build together with kids.
48. Painted Flower-Pot Pumpkin Characters
A plain terracotta pot painted orange with a simple face becomes a pumpkin character for a porch or entry table. Let kids paint their own face designs for a set that looks different pot to pot.
49. Googly-Eyed Monster Door Cover
Colored cardstock cut into teeth and eye shapes turns a front door into a friendly monster face for trick-or-treaters. Tape the pieces directly onto the door so the whole thing peels off without any damage.
50. Bottle-Cap Bat Magnets
Black bottle caps with felt wings and googly eyes make small bat magnets for a fridge or a metal porch railing. Glue the wings to the back of the cap before adding the magnet strip.
51. Wooden-Spoon Monster Puppets
Painted wooden spoons dressed up as ghosts, mummies, or witches double as puppets during the build and decorations after. Add fabric scraps and googly eyes once the base paint has fully dried.
Dollar-Store and Recycled-Material DIY Halloween Props
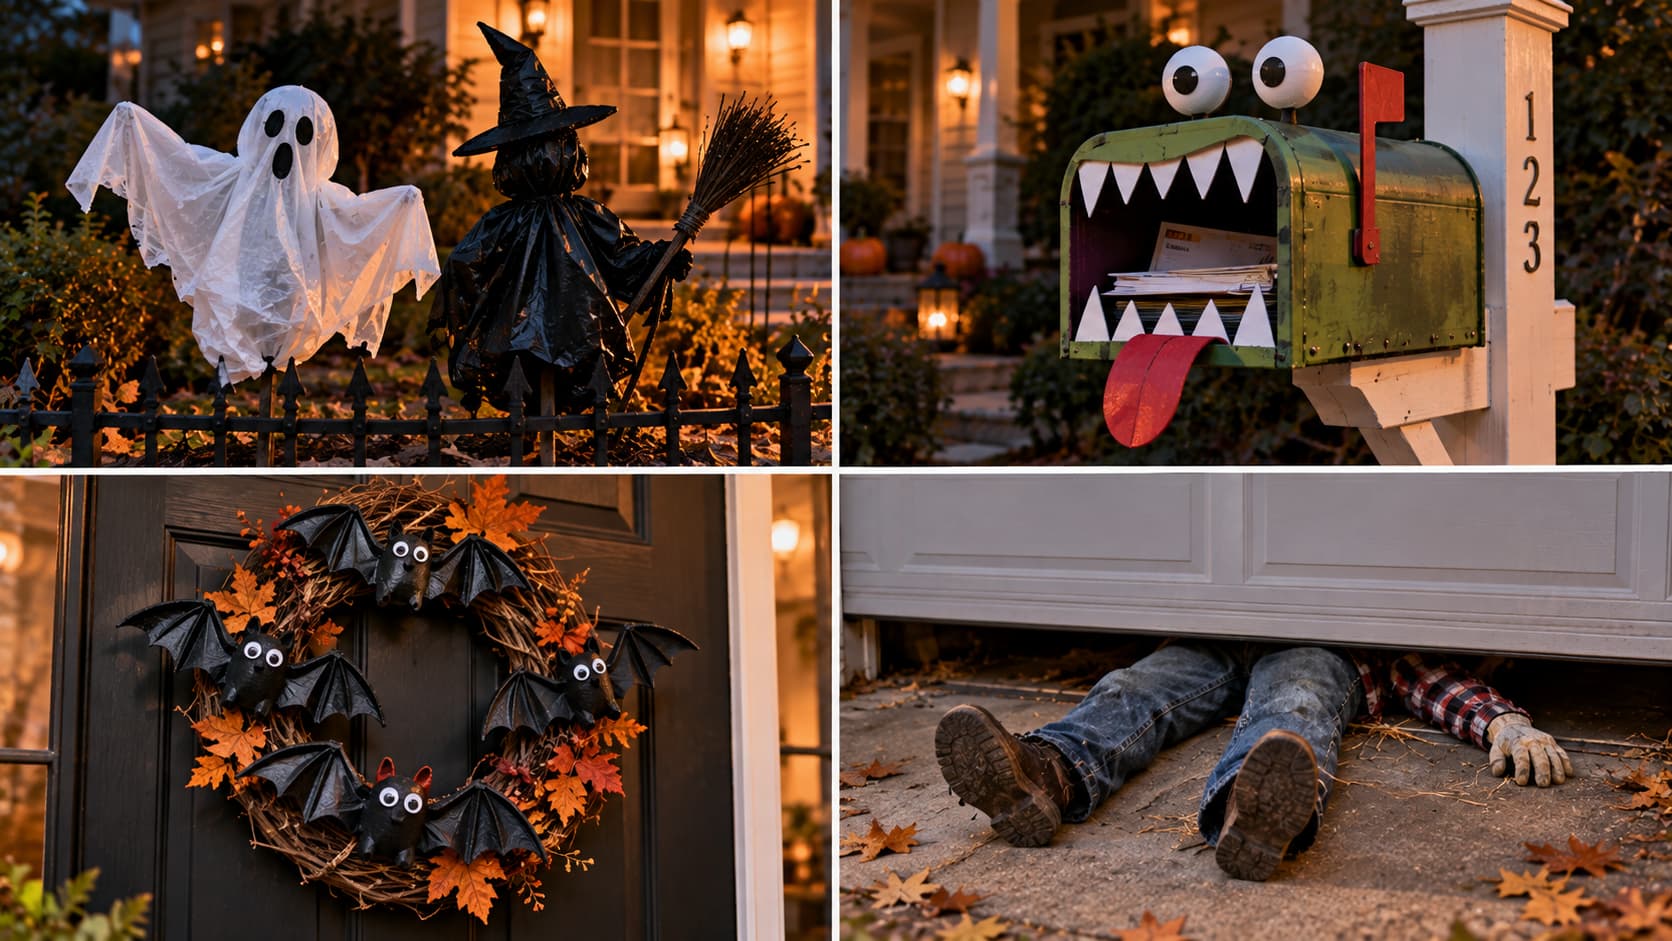
The last group of DIY Halloween props costs the least of anything on this list, since almost everything comes from a bin already headed for recycling. These are good options if a display needs one more piece the night before Halloween.
52. Trash-Bag Witch and Ghost Silhouettes
Black-and-white trash bags stuffed and shaped over a garden stake make quick silhouettes for a fence line or yard edge. Cut a simple hat or head shape from foam and attach it to the top of the stuffed bag.
53. Cardboard-Box Mailbox Monster
A few cardboard flaps and paint turn an ordinary mailbox into a monster mouth waiting to swallow the mail. Cut teeth shapes from white cardstock and glue them around the mailbox opening.
54. Egg-Carton Bat Wings for a Wreath
Cut and paint egg-carton sections to become small bat wings that glue onto a plain fall wreath for a Halloween update. Trim each carton section into a wing shape before painting both sides black.
55. Thrifted-Clothes Body-Under-the-Garage-Door Gag
Old clothes stuffed with plastic bags and arranged under a slightly open garage door create the illusion of someone trapped underneath. Add a shoe or a glove peeking out at the edge for the final touch.
DIY vs. Store-Bought: Is It Actually Worth It?
Store-bought Halloween decorations save time, but DIY Halloween props usually save money and hold up better outdoors. A side-by-side look makes the trade-off easier to judge.
|
Prop Type |
Store-Bought Cost |
DIY Cost |
Build Time |
Reusable? |
|---|---|---|---|---|
|
Life-size skeleton |
$35–$60 |
$15–$25 (posed dollar-store skeleton) |
20–30 min |
Yes, for years |
|
Porch ghost |
$20–$30 |
$5–$10 (pillowcase or tomato-cage ghost) |
15–20 min |
Yes |
|
Single tombstone |
$15–$25 |
$3–$6 (foam board) |
30–45 min |
Yes |
|
Giant spiderweb |
$10–$15 |
$2–$4 (yarn and sticks) |
20 min |
Yes, if stored flat |
The National Retail Federation’s 2025 survey found that 78 percent of Halloween shoppers planned to buy decorations, with total spending near $4.2 billion.
How to Build Props That Survive Wind and Rain
Outdoor DIY Halloween props fail most often because of water, not because the build itself was wrong. Seal foam board and cardboard with a coat of outdoor spray sealant or a layer of packing tape before painting, since raw cardboard softens after one wet night.
Anchor lightweight props like ghosts and tombstones with garden stakes, sandbags, or zip ties around a fence post, so wind does not knock them flat by morning.
Store fabric pieces like cheesecloth ghosts in a dry bin between seasons instead of a damp garage shelf, since mildew sets in fast on stiffened fabric. Battery lights are worth using instead of real candles in almost every prop on this list, both for weather reasons and basic fire safety.
The National Fire Protection Association’s Halloween safety guidance backs this up directly, since a large share of decoration fires start when a heat source sits too close to flammable material like dried leaves or fabric.
Conclusion
Fifty-five props is a lot to look at, but nobody needs to build them all in one weekend. Pick two or three that match your space and your time, get the base shape right first, and add paint, lights, or fog once the bones are solid.
A well-built DIY Halloween prop from a garage often looks better on a porch than a plastic one from a big-box store, and it still costs a fraction of the price.