
DIY Hammered Flower Art: Guide for Beginners
Hammered or pounding flower art is a fun and easy way to create beautiful prints using real flowers and leaves.
Instead of paint or markers, you use a hammer to press the natural colors from petals and leaves onto fabric or paper.
It’s a simple craft that anyone can try for making handmade cards, wall art, or unique fabric designs. All you need are fresh flowers, a hammer, some paper or fabric, and a hard surface.
Each design is one-of-a-kind because no two flowers leave the same print! This craft is great for all ages and a perfect way to enjoy nature in a creative way.
In this blog, I’ll go over everything you need to know—from picking the best flowers to step-by-step instructions. So you can start making your own beautiful hammered flower art at home anytime.
What Is Hammered Flower Art?
Hammered flower art is an innovative way to create colorful prints using real flowers and leaves. Instead of using paint or markers, you press flowers onto fabric or paper by gently hammering them.
This releases their natural pigments, leaving behind beautiful and detailed designs.
It’s a great way to capture the beauty of nature in your artwork. One of the best things about hammered flower art is that it doesn’t require any special skills.
If you’re crafting just for fun or looking for a creative project with natural materials, this technique is a perfect choice.
Supplies You’ll Need
Before you start making hammered flower art, you’ll need a few simple supplies and most of these items are easy to find.
- Fresh flowers and leaves: Choose colorful flowers with bright pigments. Leaves with strong veins, like ferns or maple leaves, also work great.
- Hammer or mallet: This is what you’ll use to press the flowers and transfer their colors onto paper or fabric.
- Paper or fabric: Watercolor paper, cotton fabric, or even plain white cardstock work well for making prints.
- Hard surface: A wooden cutting board, a table or a thick book can provide the support you need.
- Parchment paper or paper towel: Placing a sheet over the flowers can help prevent mess and keep everything in place while you hammer.
With these simple supplies, you’re ready to create your own flower prints.
Step-by-Step Guide to Making Hammered Flower Art
Creating hammered flower art is not only fun, it’s also super easy. Follow these simple steps to turn fresh flowers into colorful prints.
Step 1: Gather and Prepare Your Flowers
First, pick fresh flowers and leaves. Look for bright colored petals and interesting leaf shapes. The best flowers to use are pansies, marigolds, violets, or cosmos because they have strong natural pigments. If the flowers are too thick, gently press them between books for a few hours to flatten them.
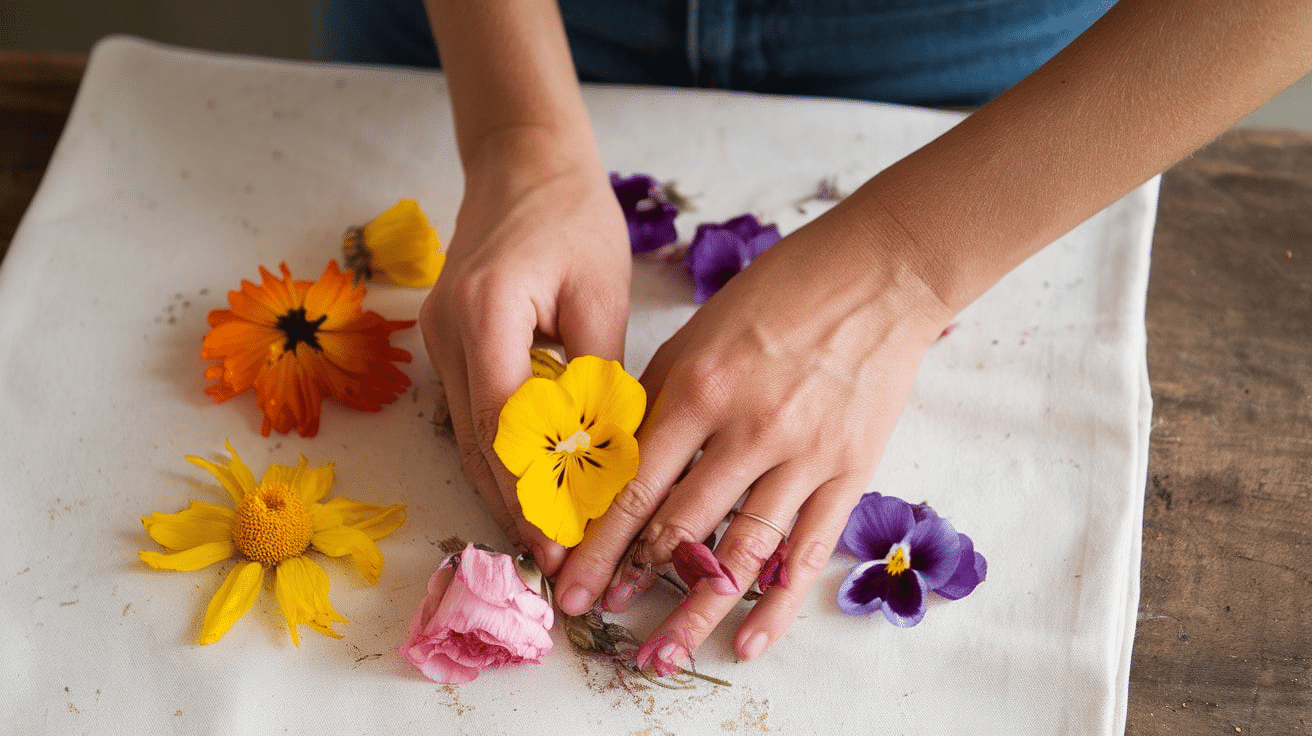
Step 2: Arrange the Flowers on Paper or Fabric
Lay your paper or fabric on a hard surface like a wooden cutting board. Arrange the flowers and leaves in a design you like. You can place them randomly for a natural look or create patterns and shapes. Make sure to place them face down so the colors transfer better.
Step 3: Cover with Parchment Paper
To keep everything in place and prevent a mess, place a piece of parchment paper or a paper towel over the flowers. This will also help protect your hammer from getting stained with flower juice. This step is completely optional, so you can skip through it if you want.
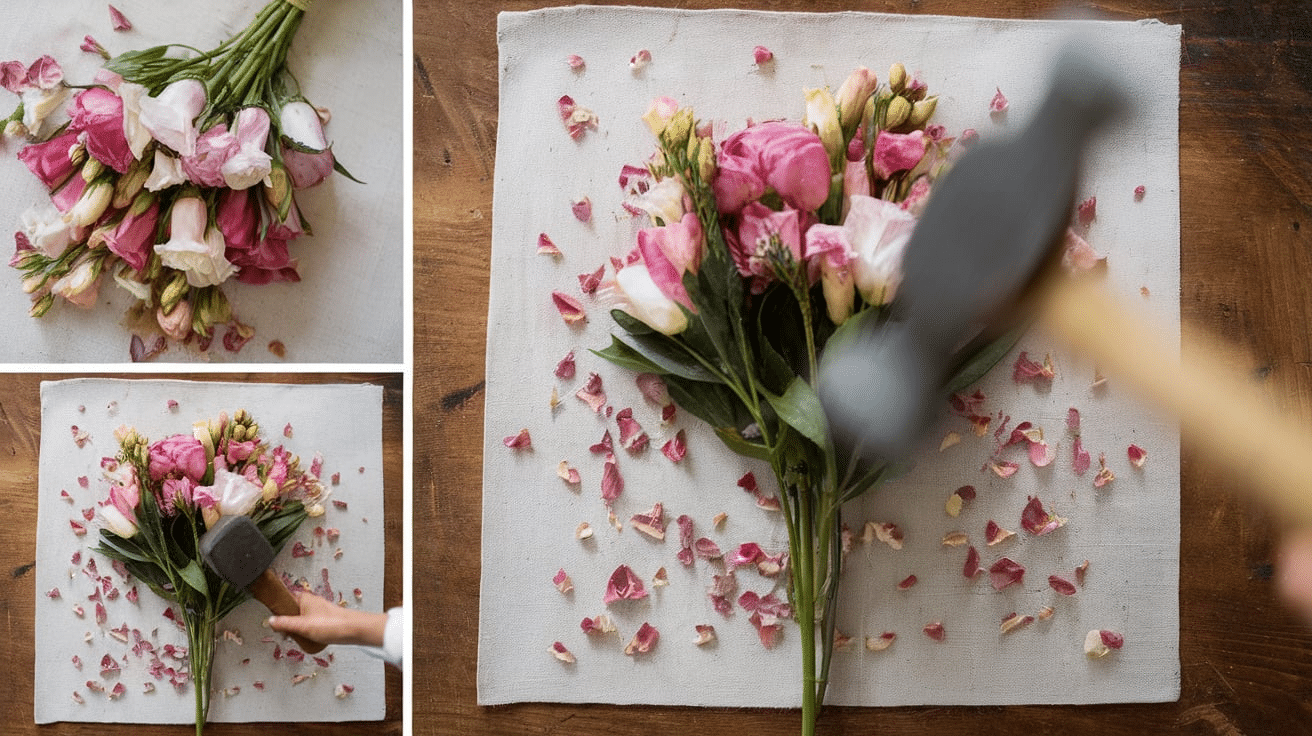
Step 4: Gently Hammer the Flowers
Now comes the main part. Using a hammer or mallet, gently tap on the flowers. Start with light taps and increase the pressure if needed. Hammer evenly over the entire flower to make sure the colors transfer well. You’ll start seeing the pigments soaking into the paper or fabric.
Step 5: Peel Off the Flowers to Reveal Your Print
Carefully remove the flowers and leaves from the paper or fabric. You should see a beautiful print left behind. Some flowers will leave a bold color, while others might create a soft, watercolor effect. Either way, it’s gonna end up looking great.
Step 6: Let It Dry and Set the Colors
Let your print dry completely before handling it. If you used fabric, you can set the colors by ironing it on low heat with a piece of parchment paper on top. For paper prints, you can spray a light sealant to preserve the colors longer.
Now you have your own unique hammered flower artwork. Experiment with different flowers and patterns to create a design that’s completely your own.
Best Flowers and Leaves for Hammered Flower Art
Not all flowers and leaves work the same way for hammered flower art. Some have strong pigments that create bright, colorful prints, while others may not transfer well.
To get the best results, it’s important to choose flowers and leaves with naturally rich colors and a good amount of moisture. Here’s a guide to help you pick the best ones!
1. Best Flowers for Hammered Flower Art
- Pansies – Pansies create small and detailed prints in purple, yellow, and blue shades.
- Marigolds – Their bright orange and yellow petals leave vibrant prints.
- Cosmos – These flowers come in pink, white, and red shades and create soft, watercolor-like prints.
- Violets – Their deep purple pigments transfer well onto paper and fabric.
- Petunias – These flowers produce bold colors, making them a great choice for all designs.
- Roses (petals only) – Rose petals leave a soft print in shades of red, pink, or yellow.
- Hibiscus – These flowers are packed with pigment and can create dark prints.
- Daisies – White petals may not transfer well, but yellow and colorful daisies work well.
- Cornflowers – These deep blue flowers make pretty and unique prints.
3. Best Leaves for Hammered Flower Art
- Ferns – Their delicate, detailed shape makes amazing patterns on paper and fabric.
- Maple Leaves – These large leaves create bold prints with unique vein patterns.
- Basil Leaves – Besides smelling great, basil leaves transfer a deep green color.
- Mint Leaves – These create small, textured prints and add a fresh scent to your artwork.
- Sage Leaves – Soft and full of moisture, these leaves transfer well.
- Ginkgo Leaves – Their fan-like shape looks beautiful when printed.
- Eucalyptus Leaves – These leaves hold a lot of pigment and create soft prints.
3. Flowers and Leaves to Avoid
- Dry or brittle flowers – They won’t release much color.
- Very thick flowers – They can be hard to press properly.
- Pale or white flowers – Their color is too light to make a visible print.
- Succulent leaves – They are too thick and wet, making them messy instead of leaving a clean print.
By choosing the right flowers and leaves, you can create beautiful, vibrant prints that look like nature’s own artwork. Try different combinations to see what works best and have fun experimenting with colors and textures.
Hammered Flower Art: Where to Use it?
Once you’ve made your hammered flower prints, you might be wondering, what now? These colorful nature-inspired designs can be used in so many fun and creative ways! Here are some ideas to turn your flower prints into something special.
- Handmade Greeting Cards: Turn your flower prints into greeting cards. Simply fold a piece of cardstock in half and glue your flower print on the front.
- Framed Wall Art: Create artwork for your home by framing your favorite hammered flower prints. Choose a simple frame to let the colors and patterns stand out.
- DIY Bookmarks: Cut your hammered flower print into small strips and laminate them to make bookmarks. Punch a hole at the top and add a ribbon for a decorative touch. These make great gifts for book lovers.
- Personalized Journals or Scrapbooks: Use your flower prints to decorate the covers of journals or scrapbooks. Simply glue or tape them onto a notebook cover or use clear contact paper to protect them.
- Fabric Prints for Tote Bags and Napkins: If you used fabric instead of paper, your hammered flower prints can be turned into stylish tote bags, napkins, or pillowcases. Iron the fabric on low heat to set the colors.
- Gift Wrap and Tags: Use your flower prints as unique wrapping paper for small gifts.
- DIY Home Decor: Create one-of-a-kind coasters by sealing your flower prints onto wooden or cork coasters with a clear sealant. You can also glue them onto candles, vases, or trays.
- Nature-Inspired Stationery: Make personalized stationery by using your hammered flower prints as letter paper.
- Handmade Envelopes: Fold your flower-printed paper into envelopes for a handmade touch. This is perfect for sending letters, invitations, or thank-you notes.
With so many ways to use your hammered flower prints, its definitely worth giving this project a shot. Try experimenting with different flowers, layouts, and surfaces to create unique, nature-inspired artwork.
Tips to Preserve Your Hammered Flower Art
Since flowers are natural materials, their colors may fade over time if not properly preserved. Luckily, there are a few simple ways to protect your artwork and make it last.
1. Let It Fully Dry: Before doing anything else, allow your flower print to dry completely. If there is any moisture left, it can cause smudging or mold over time. Leave your artwork in a dry place for at least 24 hours before sealing it.
2. Use a Fixative Spray: A clear fixative spray, like those used for charcoal or pastel art, can help lock in the colors and prevent fading. Hold the spray about 12 inches away and apply a light, even coat. Let it dry before adding a second layer if needed.
3. Press It Between Wax Paper: If you want to keep the natural flower texture, place your print between two sheets of wax paper and gently press it with a warm iron for a few seconds. This helps seal the colors and prevents the petals from crumbling.
4. Laminate Your Artwork: For a long-lasting finish, you can laminate your hammered flower print. This works especially well for bookmarks, gift tags, or small decorative pieces. Laminating keeps moisture out and protects the print from dust and smudges.
5. Frame It Under Glass: Framing your artwork is a great way to protect it while displaying it beautifully. Choose a frame with glass to keep the print safe from air, moisture, and light exposure. If possible, use UV-protective glass to prevent sun damage.
By following these simple steps, you can keep your hammered flower art looking as good as new for a long time.
Conclusion
Hammered flower art is a fun and creative way to make beautiful artwork using real flowers. The process is simple – you place flowers on a piece of paper or fabric and gently hammer them to release their natural colors and shapes.
The result is a delicate, one-of-a-kind print that captures the beauty of nature in a unique way. It’s a great craft for anyone, no matter how skilled you are with art. All you need are some fresh flowers, a hammer, and a surface to work on.
You can use it to make cards, decorations, or even framed art pieces. If you want to add some nature-inspired art to your home or just want to try something new, hammered flower art is an enjoyable and easy project.
Frequently Asked Questions
Can I frame hammered flower art?
Yes, framing it will protect the design and showcase it beautifully.
How long does it take to make a hammered flower art piece?
It usually takes about 30 minutes to an hour, depending on the complexity.
Is hammered flower art suitable for beginners?
Yes, it’s beginner-friendly and requires minimal materials and skills.
Can I use hammered flower art for clothing or accessories?
Yes, you can transfer it onto fabric to make unique designs on clothing or accessories.
Can I create hammered flower art on canvas?
Yes, canvas is a great option for a more textured and durable artwork.


