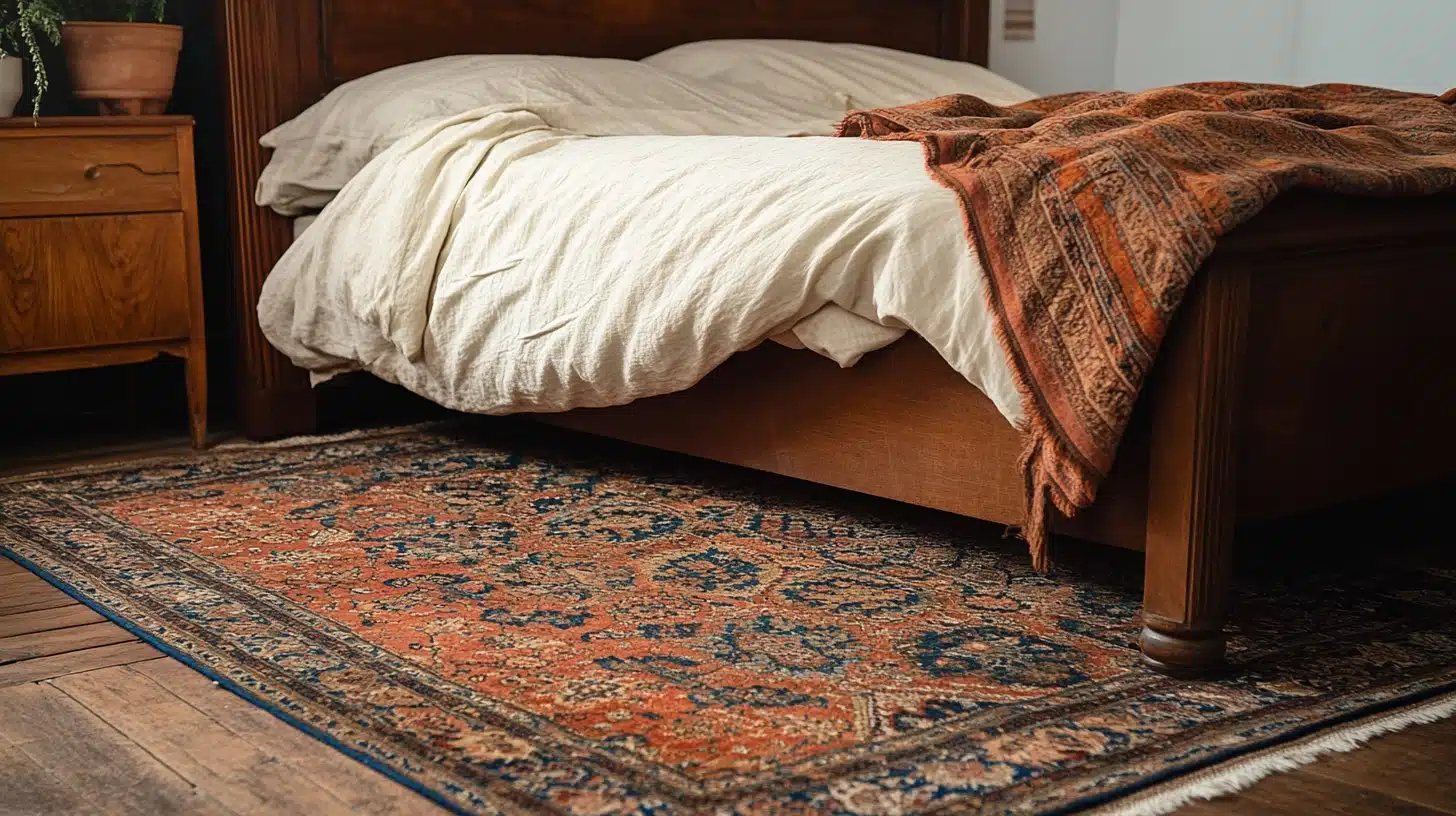
How to Turn Dresser Drawers Into Shelves?
Last month, I found an old dresser by the curb near my house. While the structure wasn’t worth saving, those solid wood drawers caught my eye.
Instead of letting them go to waste, I turned them into wall shelves for my home office. The project took just one weekend and basic tools I already owned.
The results went beyond my hopes – these shelves now hold my books, plants, and small items with style.
Better yet, I spent less than $30 on supplies. In this guide, I’ll show you exactly how I transformed these drawers step by step.
You’ll learn which tools you need, how to prep the drawers and the best ways to mount them safely.
I’ve made all the mistakes already, so you don’t have to. By the end of this article, you’ll know how to create unique shelves that save money and give old furniture new life.
Tools and Materials Needed for the Project
Basic Tools Required
When I started this project, I kept things simple with tools I already had in my garage. I used a measuring tape, a screwdriver (both Phillips and flathead), a level, a pencil, and a drill.
The drill was essential – I first tried without one and quickly realized my mistake.
For removing old hardware, I needed pliers. I also grabbed some sandpaper (medium and fine grit) to smooth rough spots.
My most useful tool was a stud finder – I learned this the hard way after my first shelf nearly pulled out of the drywall.
Materials You’ll Need
I picked up L-brackets (two per drawer), wall anchors, and screws that matched my drawer depth.
For finishing, I used wood primer and paint – I chose a semi-gloss finish because it’s easier to clean.
A money-saving tip I learned was to get sample-size paint cans if you’re doing just a few drawers. I also bought wood filler to patch old hardware holes.
Total cost? About $30, much less than the new shelves.
Decorative Touches for the Shelves
I tried several ways to make these shelves stand out. Contact paper worked well to line the inside – it’s cheap and easy to replace.
I added small battery-operated lights under one shelf, which looks great at night. For the edges, I used decorative trim from the hardware store, but simple wood trim works too.
My favorite addition was a cork liner on one shelf, perfect for pinning notes and photos.
A word of caution from my experience: don’t skip the primer if you’re painting – I did on my first drawer and had to redo it.
Also, measure twice before drilling any holes. I spent an extra hour patching mistakes because I rushed this step.
These shelves are in my home now, holding books and plants, and every visitor asks about them.
Step-by-Step Guide to Turning Dresser Drawers into Shelves
Step 1: Remove the Drawers from the Dresser
First, I pulled each drawer out completely. Some came out smoothly, but a few stuck. I learned to lift the front slightly while pulling – this helps clear the track.
Before you toss the dresser, I suggest keeping the hardware in a small container. You never know what might be useful later. I found those old drawer pulls perfect for another project.
Step 2: Clean and Sand the Drawers
This step took me longer than expected, but it’s worth doing right. I wiped each drawer with soap and water first, letting them dry completely.
Then, I sanded everything – inside and out. I started with medium-grit sandpaper for rough spots, then switched to fine-grit for smoothness.
A tip from my mistakes: don’t skip sanding the edges – that’s where most splinters hide!
Step 3: Remove the Drawer Front and/or Drawer Runners
Some of my drawers had metal runners that needed to go. I used pliers to pull out the staples and screws holding them.
For wooden runners, a hammer worked well to tap them loose. I kept the drawer fronts on mine, but if yours are damaged, they come off with a few screws.
Just fill any holes with wood filler afterward.
Step 4: Install Brackets or Wall Supports
Here’s where that stud finder earned its keep. I marked each stud location with a pencil, then held up the L-brackets to mark screw holes.
For places between studs, I used wall anchors rated for twice the weight I planned to put on the shelves.
My rule: better too strong than too weak.
Step 5: Secure the Drawers to the Wall or Surface
This step needs a friend – trust me, I tried alone and nearly dropped a drawer. Hold the drawer level (use that bubble level tool), and mark where it meets the brackets.
I pre-drilled holes to prevent splitting, then secured each drawer with screws. Check the level again before the final tightening.
Step 6: Finish with Paint or Decorative Details
The fun part! I applied primer first, letting it dry overnight. Two coats of paint followed, with light sanding between coats.
My secret weapon? Small foam rollers – they leave no brush marks. For the inside, I used light colors to make items easier to see.
Let everything dry for 24 hours before adding books or decorations.
Remember what I learned: take your time measuring and leveling. My first shelf ended up slightly crooked because I rushed.
Also, test the shelf strength by pressing down gently before loading it up. Better safe than sorry – I speak from experience
Creative Ways to Use Your New Shelves
Use as Floating Shelves in the Living Room
In my living room, I mounted a large drawer shelf right above my sofa. It’s perfect for framed photos and small plants.
I put a larger snake plant in the corner of the shelf – it fits nicely in the drawer’s depth. One thing I found helpful: I used small clear museum gel dots under items to keep them from sliding when someone bumps the couch.
The wood tones of the old drawer match my coffee table, making it look like a planned part of the room.
Turn Into a Bathroom Shelf for Storage
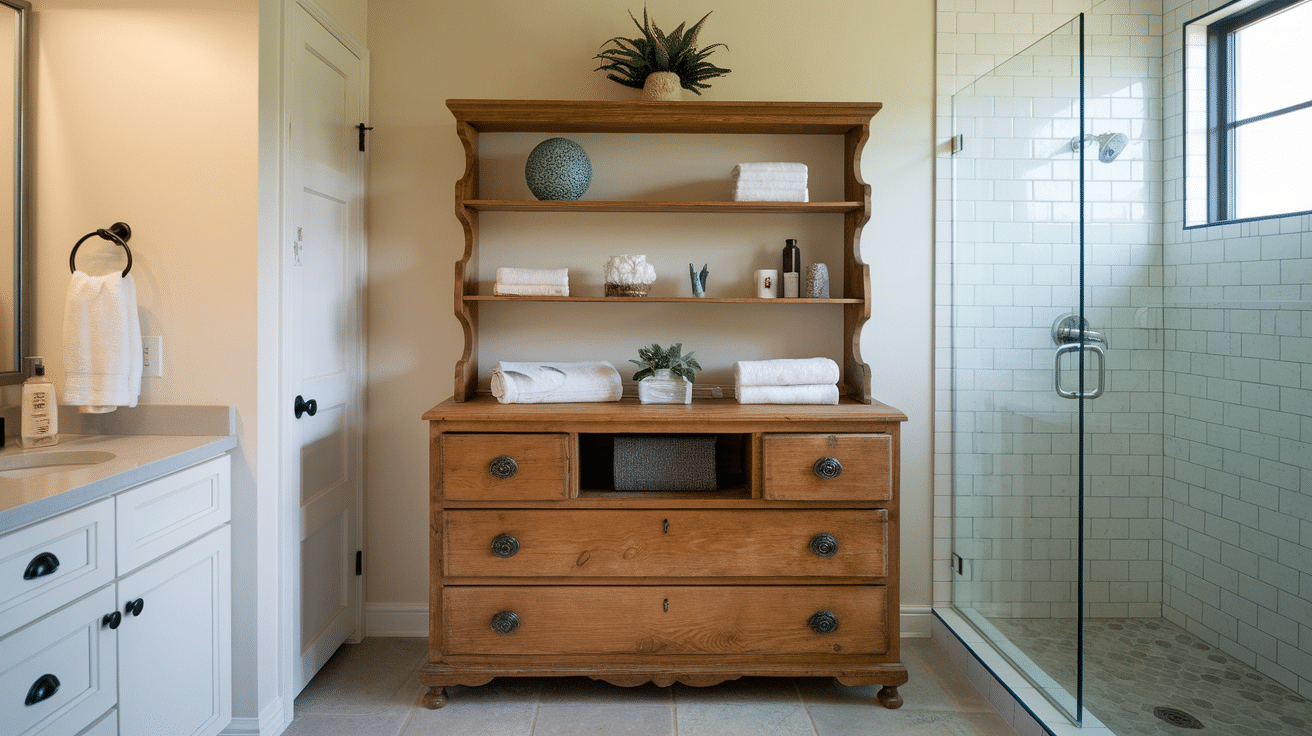
My small bathroom needed extra storage, so I put two drawer shelves above the toilet. I painted them white to match the tiles and added small plastic bins inside for toiletries.
Tip: coating the shelves with polyurethane helps protect them from bathroom moisture. I keep towels rolled up in one and bathroom supplies in the other.
The drawer’s natural lip keeps things from falling off – much better than my old flat shelves.
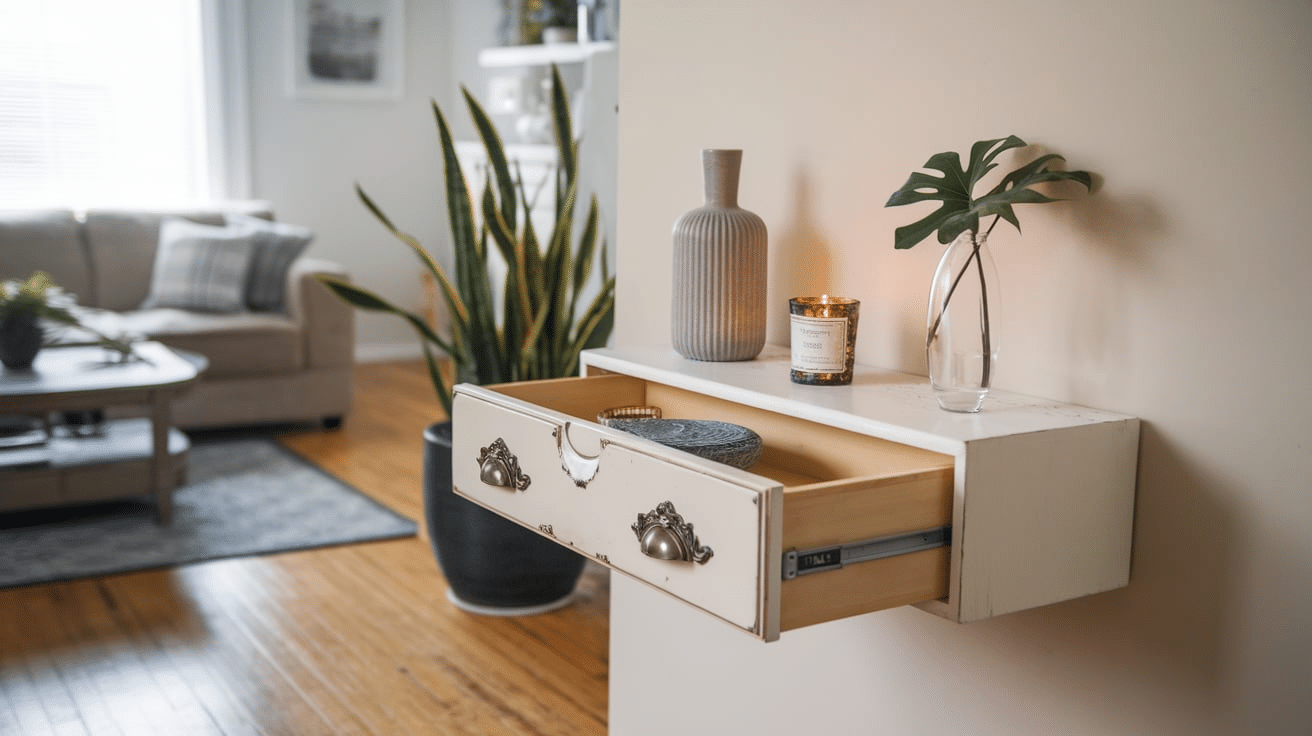
Use for Displaying Books and Decor in the Bedroom or Office

My home office has three drawer shelves in a stepping pattern. The deepest drawer holds my reference books, while the others display my favorite knick-knacks and a small clock.
I found that paperbacks fit perfectly when lined up spine-out, and the drawer’s original handleholes work great for running charging cables through.
Small potted succulents sit safely in the corners where the drawer sides protect them.
Add to the Entryway for Shoes or Accessories

The entryway was my latest project. I mounted a large drawer low on the wall for shoes – the depth keeps them from sticking out into the walkway.
Above it, a smaller drawer holds keys, mail, and sunglasses. I added hooks under the bottom shelf for umbrellas. One smart addition: I put a small tray in the top drawer to catch the loose change and keys.
The wood has held up well to daily use, even with wet shoes underneath.
A note about placement: I learned to think about what I need most in each room. In my entrance, keeping things at grab-and-go height made all the difference.
For my office shelves, I put reference books at eye level when seated. These little planning details made the shelves much more useful in daily life.
Tips for Making the Most of Your Drawer Shelves
How to Organize Your Shelves for Maximum Functionality?
After installing several drawer shelves, I learned some key lessons about organization. I started by sorting items by how often I use them.
My everyday items sit at eye level – no stretching or bending needed. For my office drawer shelf, I added small wooden dividers (leftover paint stirrers work great) to keep books upright.
In the living room, I put heavier items like photo albums near the brackets for better support.
My best find was using small clear bins inside the drawers. They slide out like mini drawers within the shelf, perfect for sorting small items.
For my craft supplies, I labeled the front of each bin. When friends ask how I keep things so neat, I tell them it’s all about zones – each shelf has its purpose, and everything has its spot.
Choosing the Right Style and Finish for Your Space
Paint made a huge difference in how these shelves fit my home. In my kitchen, I painted the drawer shelves the same color as my walls – they blend right in.
For my bedroom, I stripped the old paint and stained the wood to match my bed frame.
Tip: test paint colors on the drawer bottom first. What looked perfect on a sample card looked very different on the whole shelf.
I tried different finishes too. Chalk paint gave a nice matte look in my living room, while semi-gloss worked better in my bathroom where I clean more often.
Some drawers had beautiful wood grain, so I just sealed those with a clear coat – they’re now the stars of my home office.
How to Add Additional Storage to Your Shelves?
I found ways to make these shelves work even harder. Under one shelf, I screwed in small cup hooks – perfect for hanging mugs in my kitchen corner.
For my craft room shelf, I added a tension rod inside the drawer space to hold rolls of ribbon.
Another trick is to try magnetic strips stuck inside the drawer sides to hold scissors and metal tools.
In my bedroom, I lined one drawer shelf with cork – now it’s both storage and a mini bulletin board. For my entryway shelf, I added a small rail along the front edge to keep keys from falling.
These small additions didn’t cost much but made the shelves much more useful.
One last thing I learned: give yourself permission to change things up. What worked in my office didn’t work in my bedroom, and that’s okay.
I moved things around until I found the perfect spot for each drawer shelf. Now they’re not just storage – they’re part of what makes my house feel like home.
Common Mistakes to Avoid
Not Securing the Shelves Properly
My first drawer shelf attempt – it wasn’t pretty. I skipped the stud finder, thinking wall anchors alone would work.
Three days later, I heard a crash in the middle of the night. Lesson learned! Now, I always locate studs first. When I can’t hit a stud, I use heavy-duty wall anchors rated for at least 50 pounds.
I also learned to check the bracket size – those tiny decorative ones I bought first weren’t strong enough.
I found out the hard way that not all L-brackets are equal. After my first mishap, I now use brackets that extend at least two-thirds the depth of the drawer.
Each shelf gets a minimum of two brackets, even if it’s small. I also check all screws monthly – they can loosen over time.
This might seem like extra work, but it’s better than cleaning up a fallen shelf mess like I did.
Overloading the Shelves
My biggest mistake was treating these shelves like standard ones. I loaded up my first drawer shelf with books – all of them.
The shelf didn’t fall, but it started to bow in the middle. Now I spread heavy items toward the brackets, not the center. I keep a bathroom scale handy to weigh items if I’m unsure.
For my office shelf, I made a simple rule: if it’s heavier than my laptop, it needs its own space near a bracket.
Weight distribution matters too. I put my plant collection on one shelf but noticed water spots on the wall below. Moving the plants to containers with saucers fixed this.
I also learned to leave some empty space – not every inch needs something on it. The shelves look better, and I don’t worry about weight limits.
Skipping the Prep Work for Better Durability
In my rush to finish, I once skipped sanding and priming. Big mistake. The paint peeled within weeks, and watermarks showed up on the raw wood.
Now I know better. I sand everything, even if it looks smooth. Primer isn’t optional – it helps paint stick and protects the wood. I spent an extra hour on prep for my latest shelf, and it still looks perfect months later.
The old finish needs attention too. I ignored some sticky residue on one drawer, thinking paint would cover it. It showed through and stayed tacky.
Now I clean every surface with mineral spirits first. I also check for loose joints or cracks – wood glue and clamps overnight make a huge difference. These extra steps might add a day to the project, but they save weeks of fixes later.
I keep these lessons taped to my workshop wall now. They remind me to take my time and do things right. When friends ask for help with their drawer shelf projects, these are the first tips I share.
After all, I already made these mistakes – no need for anyone else to repeat them.
Conclusion
After making over 20 drawer shelves for my home, I can say this project brings real value. Old drawers that might end up in landfills can become useful storage spaces.
The best part? Each shelf tells a story and adds character to your home.
These shelves do more than store items – they start conversations. Every time someone visits, they ask about my unique shelves.
The key is taking your time with each step, from prep to final touches. Your patience will pay off with shelves that last for years.
Ready to start your own drawer shelf project? Remember to check those studs, take time with prep work, and most importantly, have fun creating something new.
Share photos of your finished shelves in the comments below – I’d love to see how yours turn out!
Want more furniture repurposing ideas? Sign up for my monthly newsletter for tips and tricks straight from my workshop to your inbox.
Frequently Asked Questions
How Long Does It Take to Turn a Drawer Into a Shelf?
From my experience, a single drawer takes about 4-6 hours total work time, spread over 2 days.
This includes cleaning (30 minutes), sanding (1 hour), priming and painting (2-3 hours with drying time), and mounting (1 hour). Let the paint dry overnight for best results.
What Kind of Dresser Drawers Work Best for This Project?
Solid wood drawers give the best results. I’ve found that drawers at least 4 inches deep and 24 inches wide work well for most spaces.
Avoid particle board drawers – they often crumble when you try to mount them. Dovetail joints are a bonus, as they add extra strength.
Will These Shelves Hold Heavy Items?
When mounted properly into studs with good brackets, each shelf can hold 20-30 pounds safely. I’ve tested this with books and small appliances.
Always check your wall anchor weight limits and use proper mounting hardware.
Can I Stack Multiple Drawers Together?
Yes! I’ve stacked three drawers vertically with proper wall support. The key is securing each drawer individually into wall studs. Leave about 12 inches between shelves for easy access.
Make sure lower shelves have extra support if you plan to stack.
How Do I Prevent the Shelves from Warping Over Time?
The secret is proper sealing. I seal all surfaces – even hidden ones – with primer and paint or polyurethane. Keep heavy items toward the brackets, not the middle.
Check for any water damage before starting, and avoid placing shelves in very humid areas without proper sealing.