10 Creative Ideas for Using Gold Leaf in Furniture Design
I never thought I’d become obsessed with gold leaf furniture until I transformed my grandmother’s old dresser last spring.
After hours of YouTube tutorials and several failed attempts, I finally figured out how to bring that stunning metallic finish into my home without breaking the bank.
In this guide, I’ll walk you through everything I wish I’d known before starting my gold leaf journey.
Whether you’re looking to refresh a tired piece of furniture or create something that looks like it belongs in a luxury hotel, I’ve got you covered.
You’ll learn the exact techniques I used, from choosing the right adhesive to applying those delicate gold sheets without tearing them (trust me, I ruined plenty before getting it right).
As someone who’s made all the rookie mistakes, I’ll share my tested tips to help you avoid the common pitfalls and create beautiful, lasting results on your first try.
Creative Ideas for Using Gold Leaf in Furniture Design
1. Gold Leaf Coffee Table
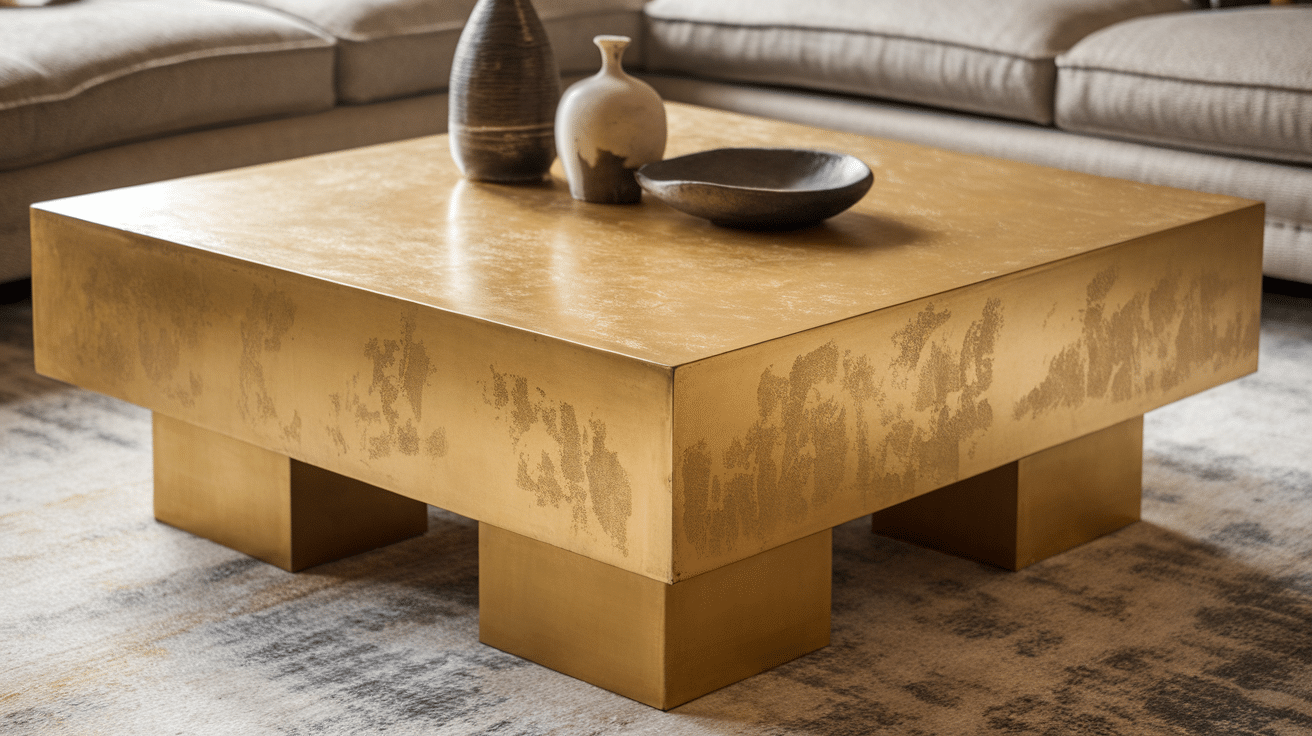
I transformed my old coffee table into a statement piece by applying gold leaf. The rich gold finish complemented my living room, giving it a modern yet luxurious vibe.
Steps to Follow:
- Sand the table to create a smooth surface.
- Apply a coat of adhesive sizing for the gold leaf to stick.
- Gently lay the gold leaf sheets over the adhesive, smoothing them with a soft brush.
- Let it dry completely before applying a topcoat to protect the finish.
2. Gold Leaf Mirror Frame
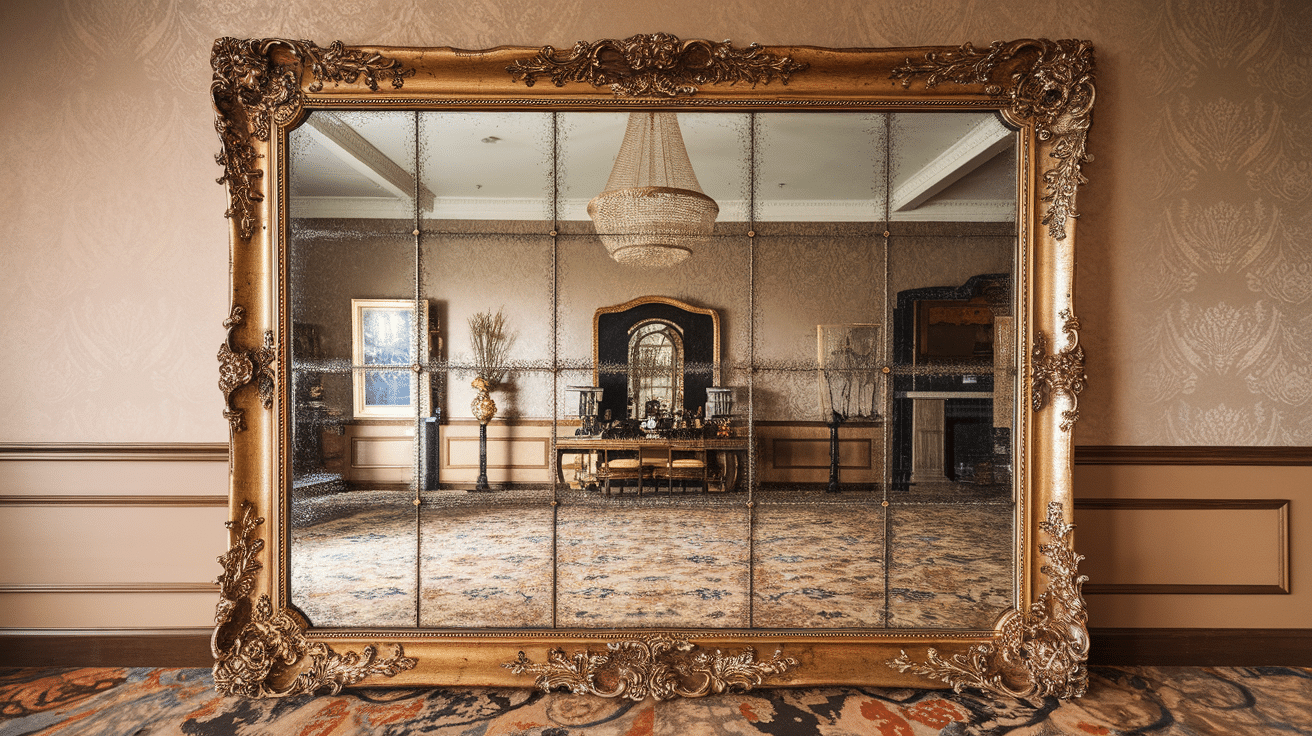
I revamped a simple mirror frame by adding gold leaf. The delicate yet bold gold accents created a beautiful contrast against the dark wood, making the room feel more sophisticated.
Steps to Follow:
- Clean the mirror frame thoroughly to remove any dust or grime.
- Apply a thin layer of adhesive sizing on the frame.
- Carefully place the gold leaf sheets over the frame, smoothing with a soft brush.
- After drying, seal the frame with a clear varnish to preserve the gold leaf.
3. Gold Leaf Dresser Drawers
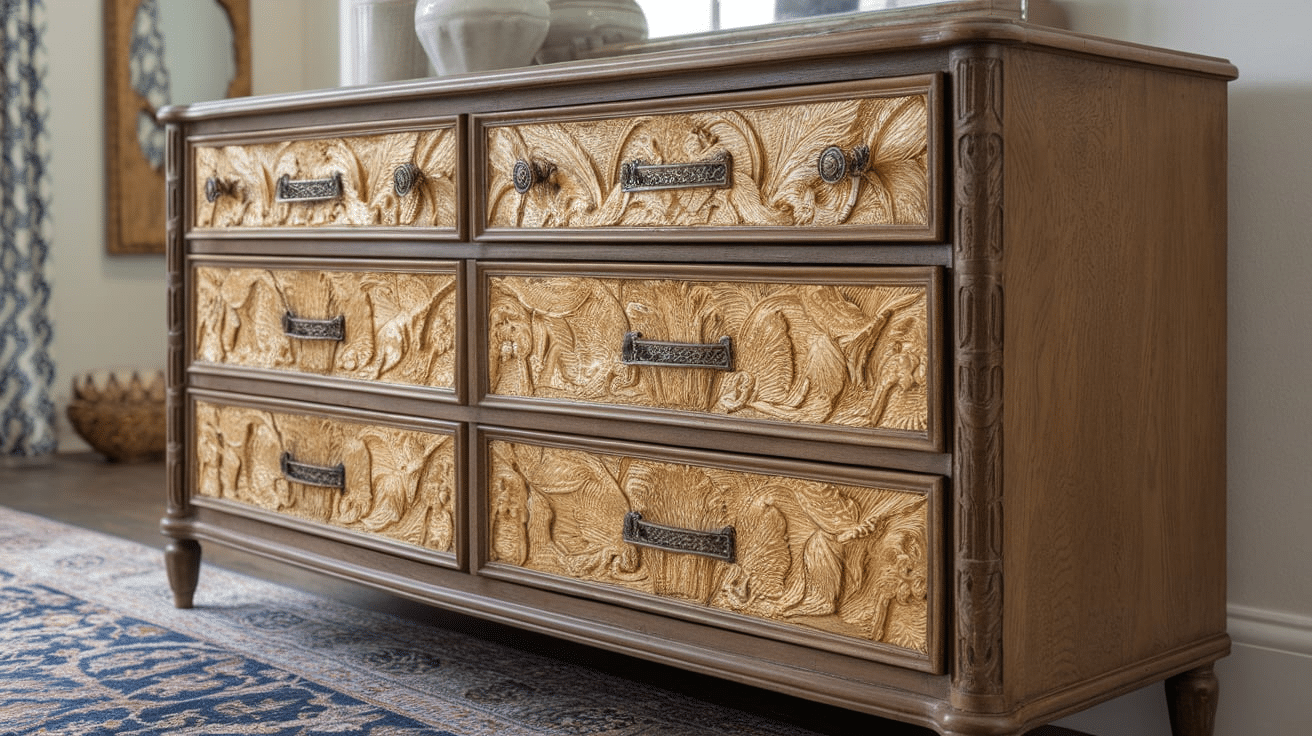
I wanted to add a touch of glamour to my old dresser, so I applied gold leaf to just the drawer fronts. It instantly transformed the piece, making it stand out.
Steps to Follow:
- Remove the drawer handles and clean the surface.
- Sand lightly to ensure the paint adheres well.
- Apply adhesive sizing to the drawer fronts.
- Lay the gold leaf sheets carefully over the sizing, pressing gently.
- Seal the surface with wax to enhance durability.
4. Gold Leaf Lamp Base
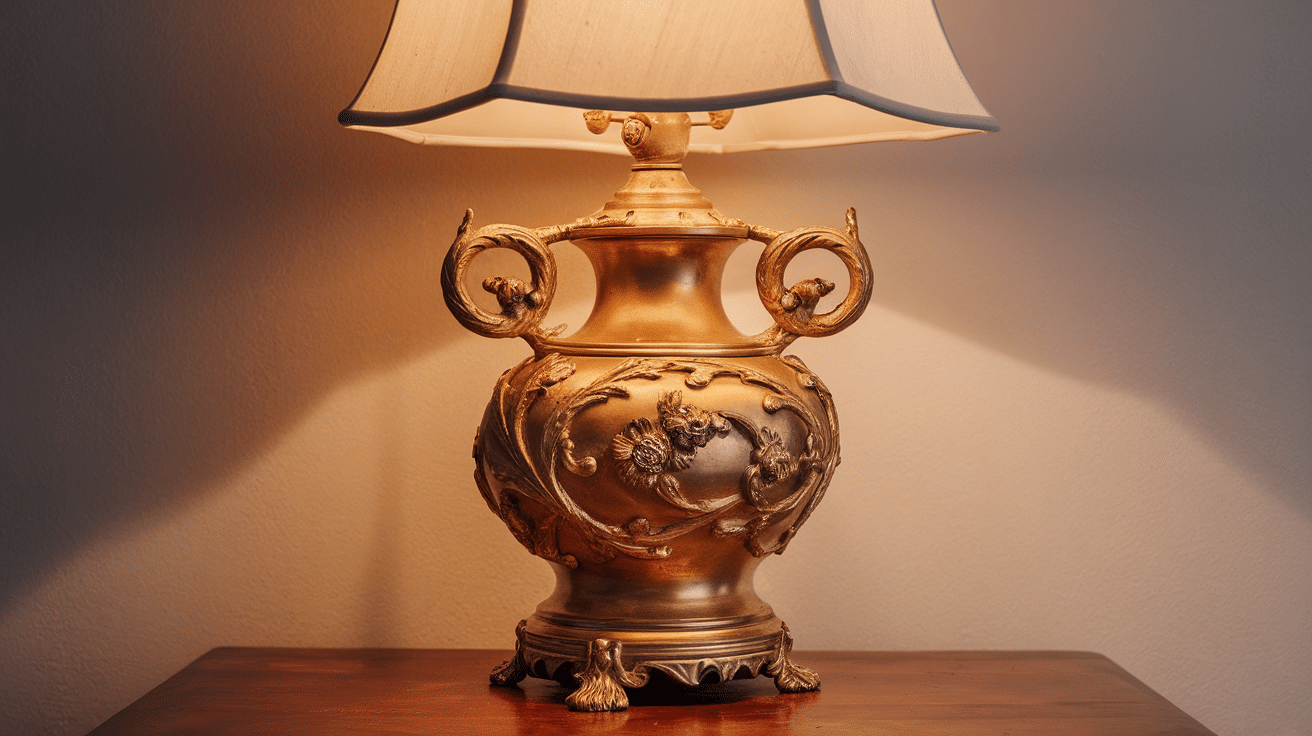
To enhance my bedside lamp, I added gold leaf to the lamp’s base. The golden glow at night gives it an elegant, cozy atmosphere.
Steps to Follow:
- Remove the lamp’s bulb and shade.
- Clean the base thoroughly to remove dust.
- Apply adhesive sizing to the lamp base.
- Lay the gold leaf over the adhesive, smoothing it out.
- Once dry, seal the base with a clear varnish to keep the gold intact.
5. Gold Leaf Chair Legs
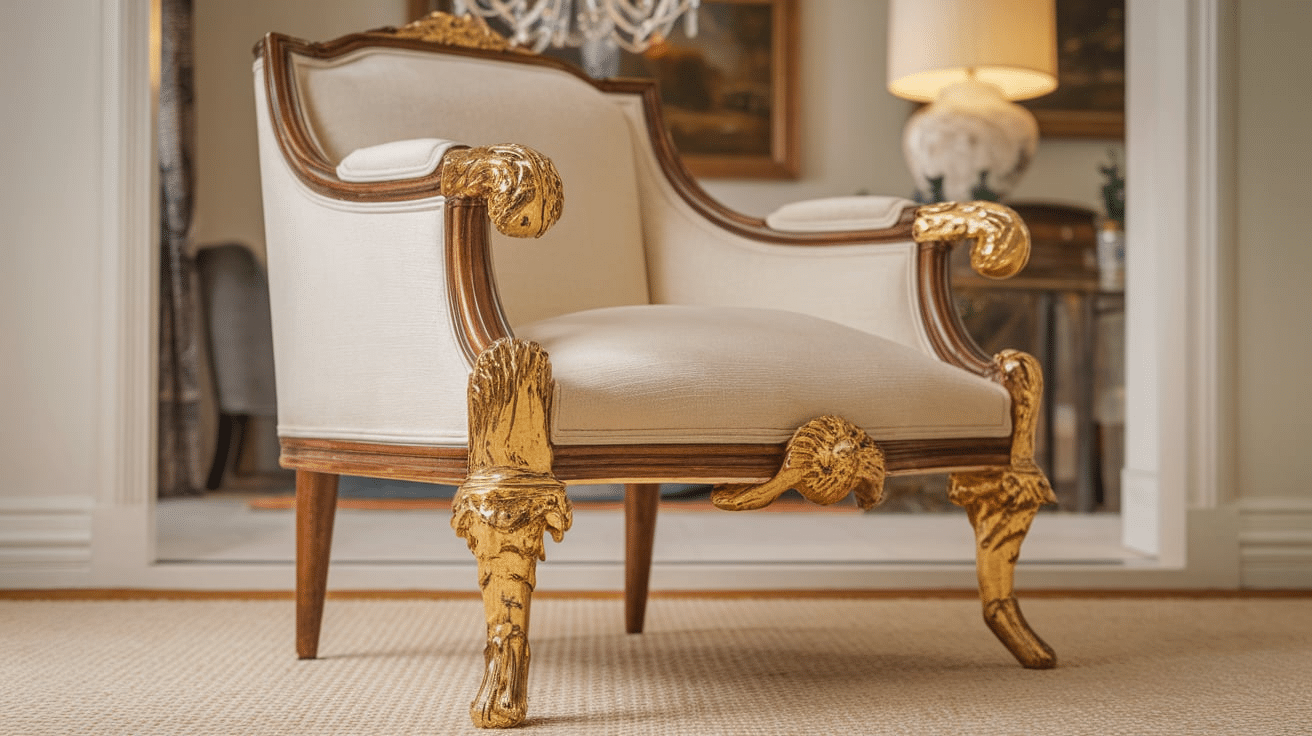
I gave my dining chairs a new life by adding gold leaf to the legs. It brought a chic and sophisticated look to the entire room.
Steps to Follow:
- Detach the seat from the chair frame.
- Sand the chair legs to smooth out any imperfections.
- Apply adhesive sizing to the legs.
- Lay the gold leaf carefully on the legs, smoothing it with a soft cloth.
- Let it dry and apply a protective topcoat for longevity.
6. Gold Leaf Side Table
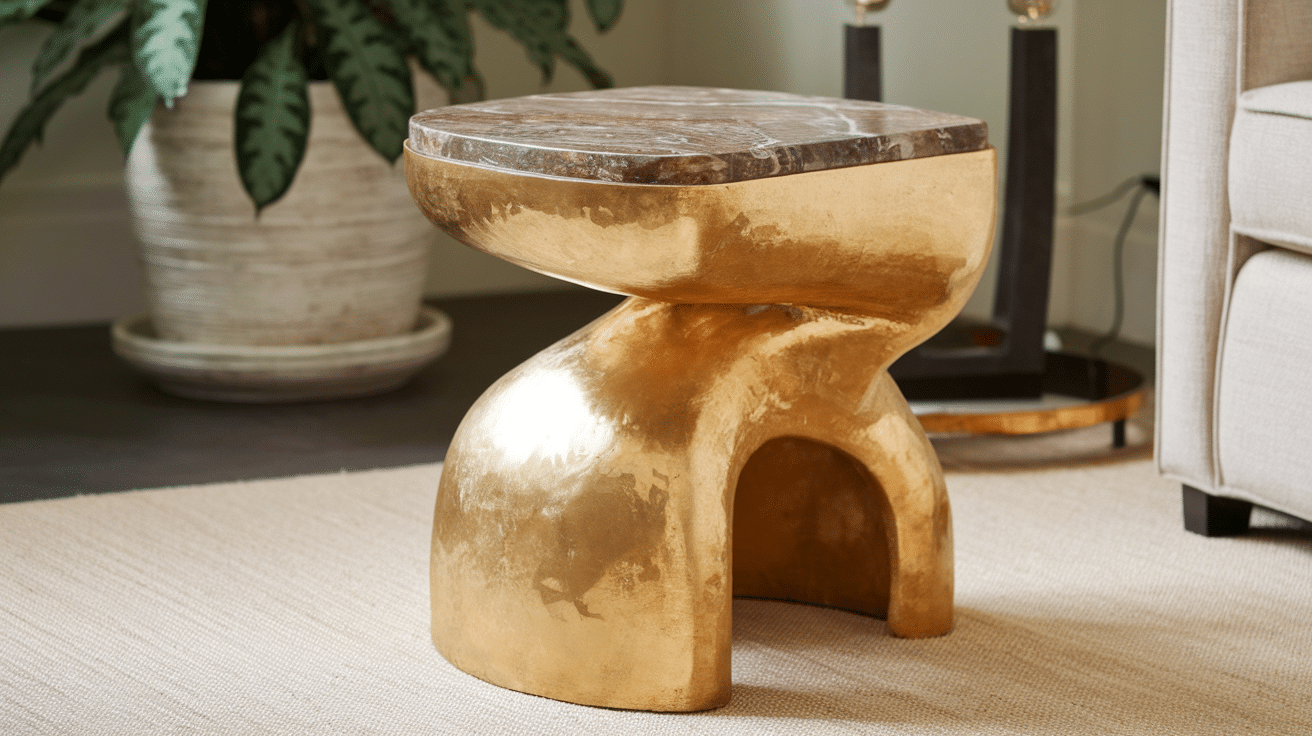
I decided to refresh my side table by using gold leaf on its legs. The shiny finish paired perfectly with the minimalist décor of my living room.
Steps to Follow:
- Clean and lightly sand the table legs to ensure adhesion.
- Apply a thin layer of adhesive sizing to the legs.
- Gently place the gold leaf sheets over the sizing and press them down.
- Allow the table to dry before applying a protective topcoat.
7. Gold Leaf Wooden Tray
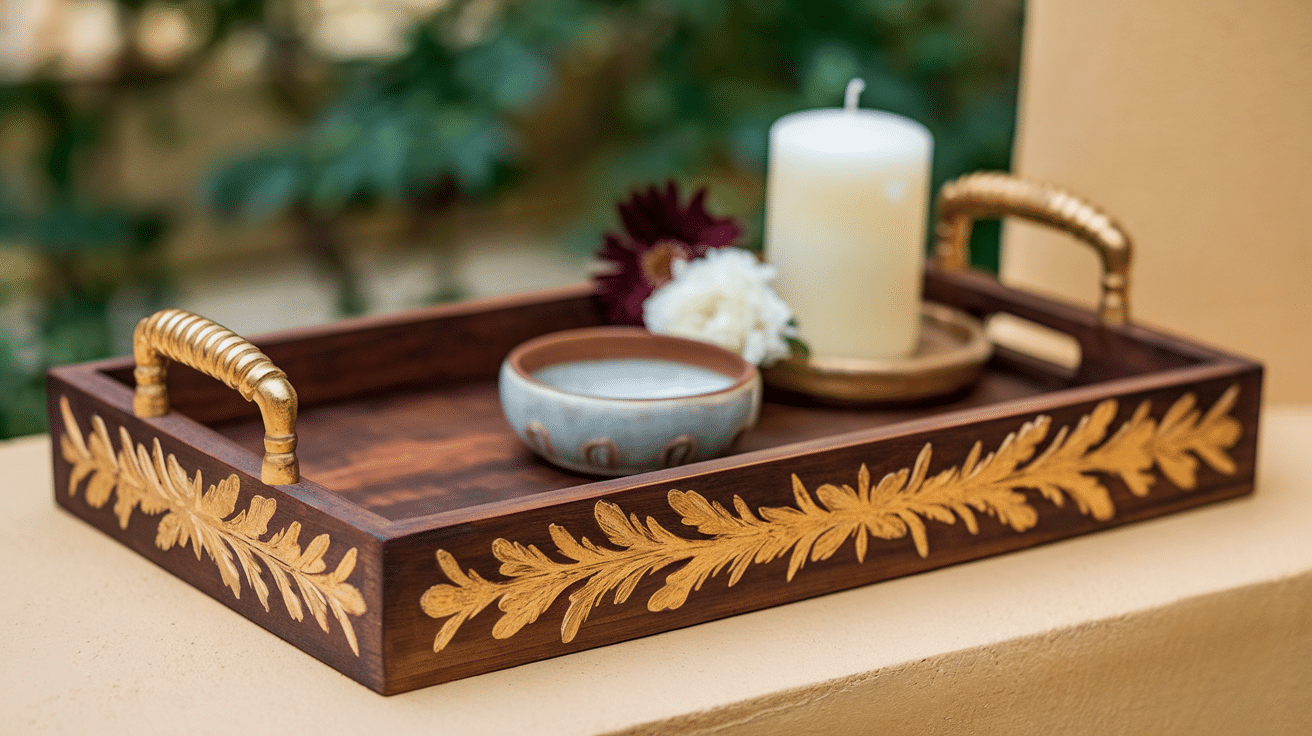
To make my serving tray stand out, I added gold leaf to the edges. It became a perfect accent piece that caught everyone’s eye during gatherings.
Steps to Follow:
- Sand the tray edges lightly to prepare them.
- Apply adhesive sizing to the edges of the tray.
- Carefully lay the gold leaf on the edges, smoothing it out.
- Once dry, seal it with a clear varnish for added protection.
8. Gold Leaf Cabinet Doors
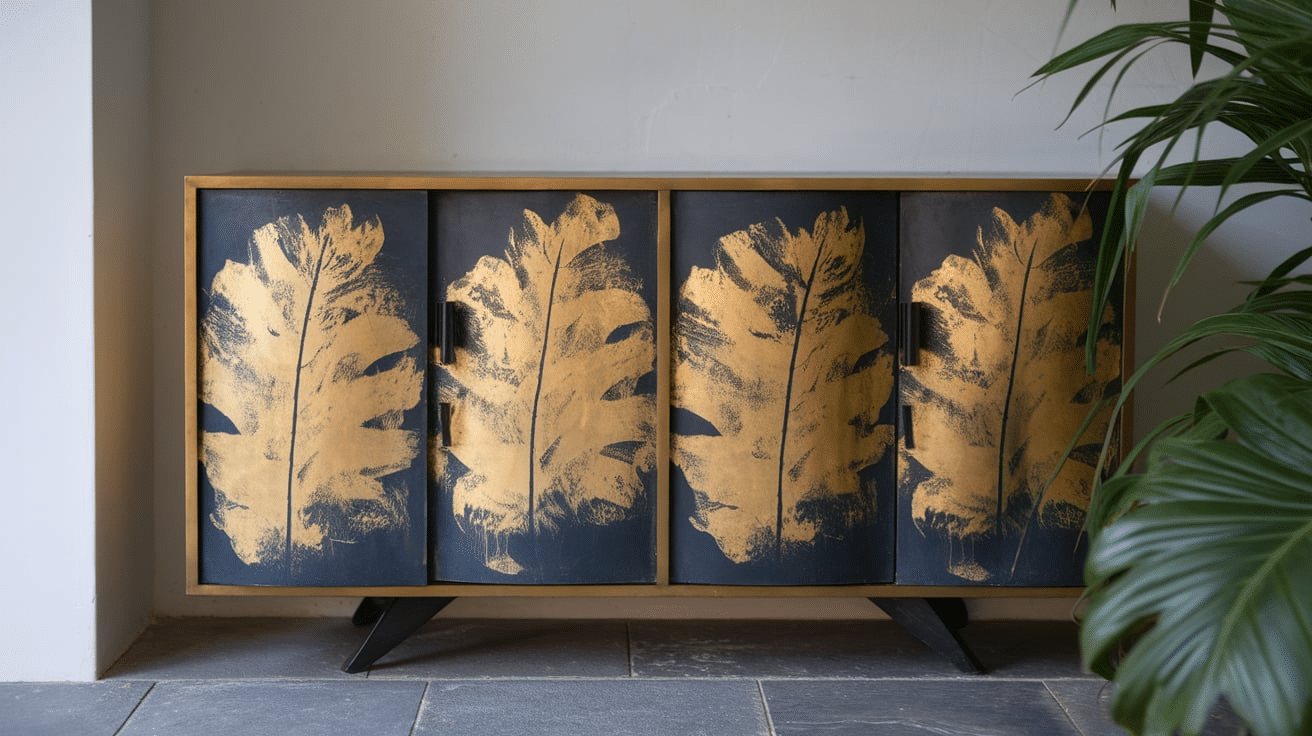
I wanted a more luxurious look for my kitchen cabinets, so I applied gold leaf to the door panels. It elevated the entire space, giving it a regal touch.
Steps to Follow:
- Remove the cabinet doors and handles.
- Sand the surface of the doors to create a smooth base.
- Apply adhesive sizing and let it sit for a few minutes.
- Lay the gold leaf over the adhesive, smoothing out wrinkles.
- Seal with a protective finish to maintain the shine.
9. Gold Leaf Stool
I added gold leaf accents to a simple stool I had lying around. The added gold made it look stylish and modern, perfect for my contemporary space.
Steps to Follow:
- Sand the stool to remove any old finish.
- Apply a thin layer of adhesive sizing.
- Lay the gold leaf on the stool, pressing gently.
- Allow the stool to dry, then apply a clear protective finish.
10. Gold Leaf Bookshelf

I applied gold leaf to the edges of my bookshelf, giving it a glamorous touch that contrasted beautifully with the neutral tones of my room.
Steps to Follow:
- Disassemble the bookshelf if necessary and sand the edges.
- Apply adhesive sizing evenly on the edges.
- Lay the gold leaf sheets over the sizing, smoothing them gently.
- Seal the bookshelf with a varnish to protect the gold leaf and prevent wear.
How to Care for Gold Leaf Furniture?
Cleaning and Maintenance Tips
I’ve learned that caring for gold leaf furniture isn’t as scary as I first thought. After gilding my dresser, I discovered that gentle is the way to go.
I use a clean, dry microfiber cloth for daily dusting – just like the ones you’d use on eyeglasses. When I need to do a deeper clean, I lightly dampen the cloth with distilled water.
Regular tap water left spots on my first attempt, so trust me on this one.
One thing that surprised me was how sensitive my gold-leafed surface is to household cleaners.
After ruining a small test patch with regular furniture polish, I now avoid any chemical cleaners.
Instead, I keep a special soft-bristled brush just for my gilded pieces.
When the dust settles into the crevices, I gently brush it away using light, sweeping motions.
Preventing Damage to Gold Leaf Finishes
Living with gold leaf furniture has taught me some valuable lessons about protection.
I learned to keep my gilded dresser away from direct sunlight after noticing slight discoloration on one edge that caught afternoon rays.
Now I’ve rearranged my room to protect it, and I’m much happier with how it’s holding up.
The biggest challenge I faced was protecting the surface from daily wear. I made the mistake of placing a vase directly on the gold leaf, and it left a ring mark.
Now I use felt pads under any decorative items, and I’ve trained myself to never place drinks or water-based items on the surface.
When my niece visits, I cover the lower portions with a soft cloth because little fingerprints can be surprisingly damaging to the delicate finish.
Temperature changes were another surprise factor. I originally placed my dresser near an air vent, but the constant hot and cold air caused some lifting at the edges.
I’ve since moved it to a more stable spot with consistent temperature, and it’s made a huge difference in preserving the finish.
I’m still amazed at how well my gold leaf furniture has held up since following these simple care routines. While it does require some special attention, it’s not nearly as high-maintenance as I initially feared.
Just remember: gentle cleaning, thoughtful placement, and consistent protection will keep your pieces looking stunning for years to come.
Where to Buy Gold Leaf Furniture or Supplies?
Top Online Stores for Gold Leaf Furniture
When I first started my gold leaf journey, finding high-quality pieces was overwhelming. After many purchases (and a few returns), I’ve found my go-to sources.
I absolutely love Etsy’s artisan shops for unique, handcrafted gold leaf furniture. The piece that inspired my DIY adventure was a stunning console table I saw there – though it was way out of my budget at $2,000, which is exactly why I decided to try it myself.
I’ve also discovered some hidden gems on Wayfair and Overstock, especially during their holiday sales.
Just last month, I spotted a gold-leafed mirror frame that looked identical to one I’d seen in a high-end boutique, but at a third of the price.
Tip: always read the product descriptions carefully. Some listings advertise “gold finish” when they really mean paint, not genuine gold leaf.
Best Suppliers for DIY Gold Leaf Kits
After trying supplies from several different sources, I’ve found my perfect combination. I get my gold leaf sheets from Speedball Art – their 25-sheet booklet has never failed me.
The sheets are the perfect thickness, and I’ve noticed they’re more forgiving for beginners compared to other brands I tried. For size (adhesive) and sealer, I swear by Michael Gilder’s products, which I order directly from their website.
My favorite discovery has been a small online retailer called Gold Leaf Supply Co. Their starter kit saved me so much trial and error – it includes everything from the gilder’s tip to the burnishing tools, plus detailed instructions.
It cost me about $85, but considering I ruined almost that much in materials learning on my own, it’s worth every penny.
One word of caution from my experience: I made the mistake of buying the cheapest supplies I could find on Amazon for my first project.
The gold leaf was so thin it shredded before I could apply it, and the adhesive never got tacky enough. Now I know that spending a bit more on quality materials actually saves money in the long run because you waste less and get better results.
For anyone just starting out, I recommend getting a small practice kit first. I wasted an entire box of gold leaf on my first attempt because I didn’t know what I was doing.
Most suppliers offer sample packs – that’s the perfect way to test your technique before investing in larger quantities.
Conclusion
After spending months working with gold leaf furniture, I can tell you that the magic lies in the details.
Whether you’re refreshing a family heirloom or buying a ready-made piece, gold leaf adds a timeless elegance that simply can’t be matched by paint or other finishes.
Remember: start with good preparation, invest in quality materials, and take your time with the application. Don’t get discouraged if your first attempt isn’t perfect – mine certainly wasn’t.
The key is to treat your gold-leafed pieces with care, keeping them away from direct sunlight and protecting them from moisture.
Ready to start your gold leaf journey? Begin with a small piece like a picture frame or side table. Once you master the basics, you’ll be amazed at what you can create.
Want to learn more? Join me for such exclusive tips and project ideas.
Frequently Asked Questions About Gold Leaf Furniture
How Long Does Gold Leaf Furniture Last?
From my hands-on experience, properly sealed and maintained gold leaf furniture can last 15-20 years or more. Mine still looks fresh after two years of daily use.
The key is applying a quality sealer and keeping it away from excessive moisture and direct sunlight. Regular gentle cleaning with a microfiber cloth helps maintain its shine.
Can I Apply Gold Leaf Over Painted Surfaces?
Absolutely! I’ve successfully applied gold leaf over both painted and bare wood surfaces. The secret is thorough preparation – sand the surface smooth, apply primer, and ensure it’s completely clean and dry before starting. I always do a small test patch first to check adhesion.
What’s the Difference Between Real and Imitation Gold Leaf?
After working with both, I can tell you real gold leaf has a warmer, richer tone and won’t tarnish over time. It costs about $40-50 per booklet.
Imitation leaf (sometimes called composition leaf) runs around $10 per booklet. While it looks similar initially, it may oxidize over time. I use real gold leaf for heirloom pieces and imitation for decorative accents.
Is Gold Leafing Furniture Difficult for Beginners?
While I won’t sugarcoat it – my first attempt was challenging – it’s definitely doable with patience. Start with a small, flat surface like a picture frame.
The trickiest part I found was handling the delicate sheets. After about two practice pieces, you’ll get the hang of it. Just expect some mistakes early on.
How Much Does It Cost to Gold Leaf a Piece of Furniture?
For my dresser project, I spent about $150 total on supplies (gold leaf, adhesive, sealer, and tools). This covered a medium-sized dresser with some leftover materials.
Smaller projects like a side table might cost $75-100. While it seems expensive upfront, it’s significantly cheaper than buying pre-made gold leaf furniture, which can run thousands of dollars.