
DIY Waterproofing Basement Walls That Work
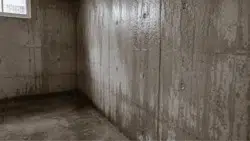
Basement wall moisture can slowly turn into a serious problem if it is ignored for too long. Damp walls often lead to mold growth, peeling paint, musty smells, and damage to flooring or stored items.
In many homes, the first signs are small water stains, damp corners, or walls that feel cold and wet after heavy rain.
Because major basement repairs can get expensive, many homeowners first try DIY waterproofing methods to control moisture before calling a contractor.
Still, before sealing basement walls, it is important to figure out where the moisture is actually coming from. Not every damp basement wall is caused by a leak.
What Causes Basement Walls to Get Wet?
Basement walls usually get wet because water collects around the foundation and slowly pushes through weak spots in the concrete.
In some homes, the problem comes from outdoor drainage, while others deal with indoor moisture buildup.
Many waterproofing professionals recommend identifying the exact source first before sealing basement walls. That helps avoid temporary fixes that fail after a few months.
- Poor drainage around the foundation can force water toward basement walls
- Clogged gutters and short downspouts often increase moisture problems
- Concrete walls naturally develop small cracks over time
- Musty smells and damp walls are often signs of excess indoor moisture
- Leaks usually leave stains, wet patches, or dripping cracks after rain
Interior vs. Exterior Waterproofing

Before starting DIY basement waterproofing, it helps to understand the difference between interior and exterior methods. Each option works differently depending on how serious the moisture problem is.
| Waterproofing Type | How It Works | Best For |
|---|---|---|
| Interior Waterproofing | Adds sealants, coatings, drainage systems, or sump pumps inside the basement | Managing minor leaks, damp walls, and water that has already entered |
| Exterior Waterproofing | Stops water from reaching the basement walls by sealing the outside foundation | Long-term protection against heavy groundwater and foundation moisture |
| Interior Wall Coatings | Products are applied directly to basement walls to reduce moisture seepage | Small moisture issues on concrete, brick, or block walls |
| Exterior Foundation Sealants | Waterproof membranes or coatings are added outside the foundation | Homes with serious water pressure from outside soil |
| Drainage Support | Interior or exterior drains move water away from the basement | Basements with repeated water buildup |
| Cost and Labor | Interior methods are usually easier and cheaper, while exterior work often needs excavation | Choosing based on budget, leak severity, and long-term needs |
Most homeowners begin with interior fixes for mild dampness or small leaks. Exterior waterproofing is usually recommended for long-term water intrusion or repeated flooding problems.
DIY Interior Waterproofing Fixes
Many waterproofing professionals recommend starting with simple repairs before moving to expensive drainage systems or foundation work. Small moisture problems are often easier and cheaper to control early.
Step 1 – Do a Simple Foil Test First

Before sealing basement walls, it is important to confirm where the moisture is coming from. Many homeowners mistake humidity for an actual wall leak and end up using the wrong solution.
Tape aluminum foil tightly against the basement wall and leave it in place for 24 hours. If moisture appears behind the foil, water is entering through the wall. If moisture forms on the front side, humidity inside the basement is likely the issue.
Step 2 – Clean Basement Walls Properly

Waterproof products hold much better on clean concrete surfaces. Dirt, peeling paint, and dust can weaken the seal and shorten the lifespan of waterproof coatings.
Most contractors recommend scraping away loose paint, brushing off debris, and cleaning mold spots before applying any waterproofing product. The walls should also dry fully before sealing begins.
Step 3 – Seal Cracks Before Waterproofing

Waterproof coatings alone will not stop leaks coming through foundation cracks. Even small openings can allow steady moisture into the basement over time.
Hydraulic cement and polyurethane sealants are commonly used for crack repair. Hydraulic cement is especially popular because it expands while drying and helps block water entry more effectively.
Professionals often recommend repairing small cracks early because water pressure outside the foundation can slowly make them larger.
Step 4 – Apply Waterproof Masonry Coatings

Once the walls are clean and cracks are sealed, waterproof masonry coatings can help reduce moisture penetration through concrete surfaces.
Products like Drylok, Zinsser Watertite, and liquid rubber sealers are commonly used in basements. Most professionals recommend applying the first coat evenly with a masonry brush or roller and allowing it to dry completely before adding another layer.
Two coats usually provide stronger and longer-lasting protection than a single application, especially in damp basements with recurring moisture problems.
DIY Exterior Waterproofing Fixes
Exterior waterproofing focuses on keeping water away from the foundation before it reaches the basement walls. Many professionals recommend starting with simple outdoor fixes before considering major excavation work.
Some exterior waterproofing methods are manageable for homeowners, especially when the moisture problem is still mild.
Step 1 – Improve Drainage Around the Home

Poor drainage is one of the biggest causes of basement leaks. Water that collects near the foundation slowly increases pressure against basement walls.
Many homeowners improve drainage by cleaning gutters, extending downspouts, and fixing low areas where rainwater pools near the house.
Step 2 – Adjust the Soil Slope

The ground around the foundation should slope away from the home instead of toward it. Flat grading allows water to sit against basement walls after rain.
A common DIY fix is adding compacted soil around the foundation to help direct water away from the house.
Step 3 – Seal Small Exterior Cracks

Small cracks on exterior foundation walls can allow water to enter during heavy rain. Contractors often recommend sealing them early before they become larger problems.
Polyurethane sealants and exterior masonry crack fillers are commonly used for this type of repair.
Step 4 – Apply Exterior Waterproof Coating

Some homeowners apply waterproof coatings to accessible exterior foundation walls. These coatings help reduce moisture penetration through concrete surfaces.
Professionals usually recommend cleaning the surface thoroughly before applying any exterior waterproof product for better adhesion.
Step 5 – Keep Water Sources Away from the Foundation

Sprinklers, garden hoses, and heavy watering near the home can keep the soil around the foundation constantly wet. Over time, that moisture may contribute to basement dampness.
Simple adjustments like redirecting sprinkler heads and avoiding overwatering near basement walls can help reduce moisture buildup outside the home.
Why It’s Important to Tell Humidity and Leaks Apart
A basement can feel damp for different reasons. Sometimes water enters through foundation cracks, while other times indoor humidity creates condensation on the walls.
This difference matters because each problem needs a different fix. Humidity problems may improve with better airflow or a dehumidifier, while actual leaks often need crack repair, drainage fixes, or waterproof coatings.
Understanding the source of the moisture can help homeowners avoid wasting time and money on the wrong solution
Signs it May be Time to Call a Professional
DIY waterproofing methods can help with small moisture problems, but some basement issues usually need professional attention to prevent bigger damage later.
- Standing water after rain usually points to a larger drainage or foundation problem.
- Large cracks or bowing walls may signal structural pressure that needs professional repair.
- Mold returning repeatedly often means hidden moisture is still present behind walls or flooring.
Professional waterproofing inspections can help identify deeper problems before they turn into costly foundation repairs.
Conclusion
Waterproofing basement walls early can help prevent mold, peeling paint, musty smells, and costly water damage later. Small moisture problems are usually much easier to handle before they turn into major foundation repairs.
Many homeowners start with simple DIY methods like crack sealing, waterproof masonry coatings, and outdoor drainage improvements. These fixes often work well for mild dampness and small leaks when done properly.
At the same time, repeated flooding, large wall cracks, or standing water should never be ignored. In those situations, professional waterproofing repairs may be the safer long-term solution.


