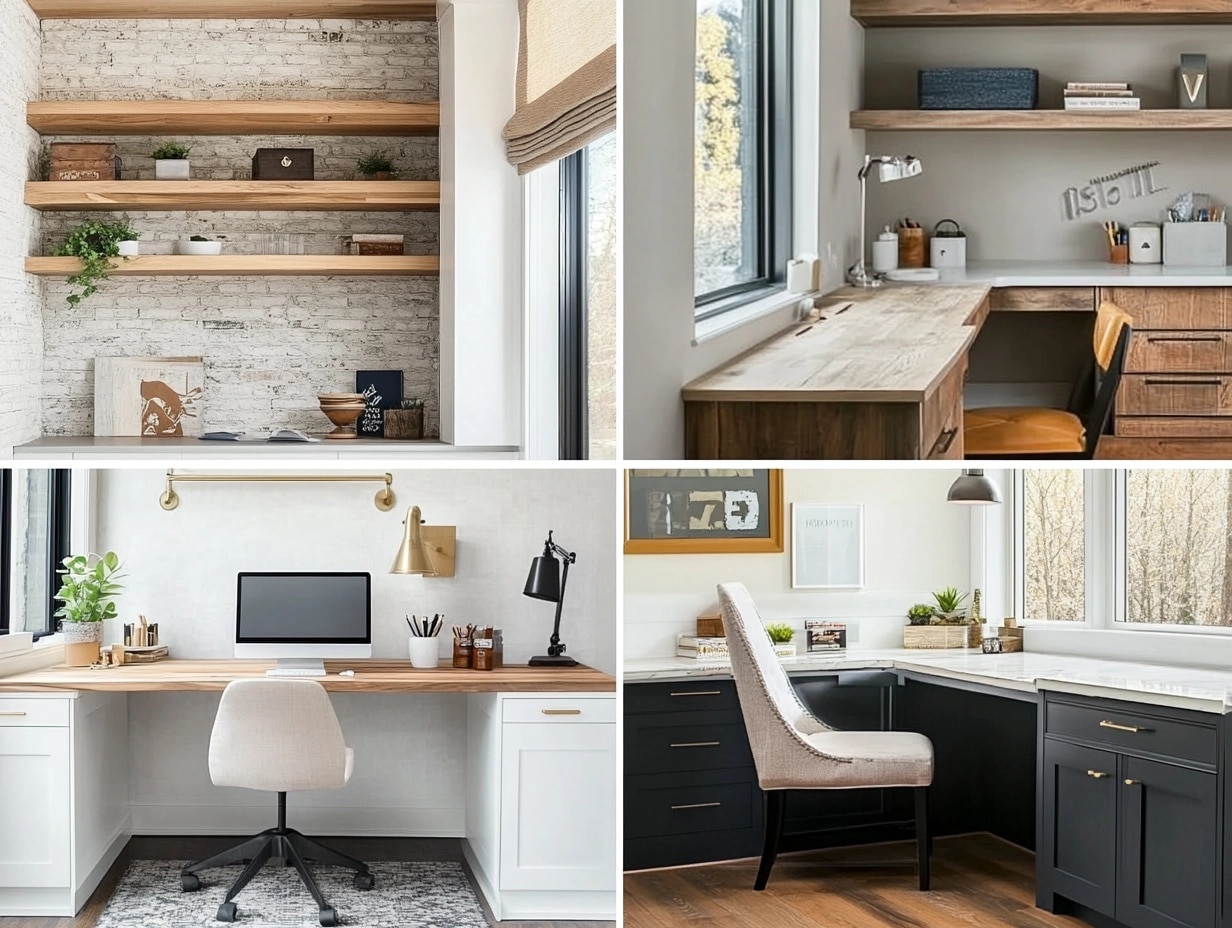
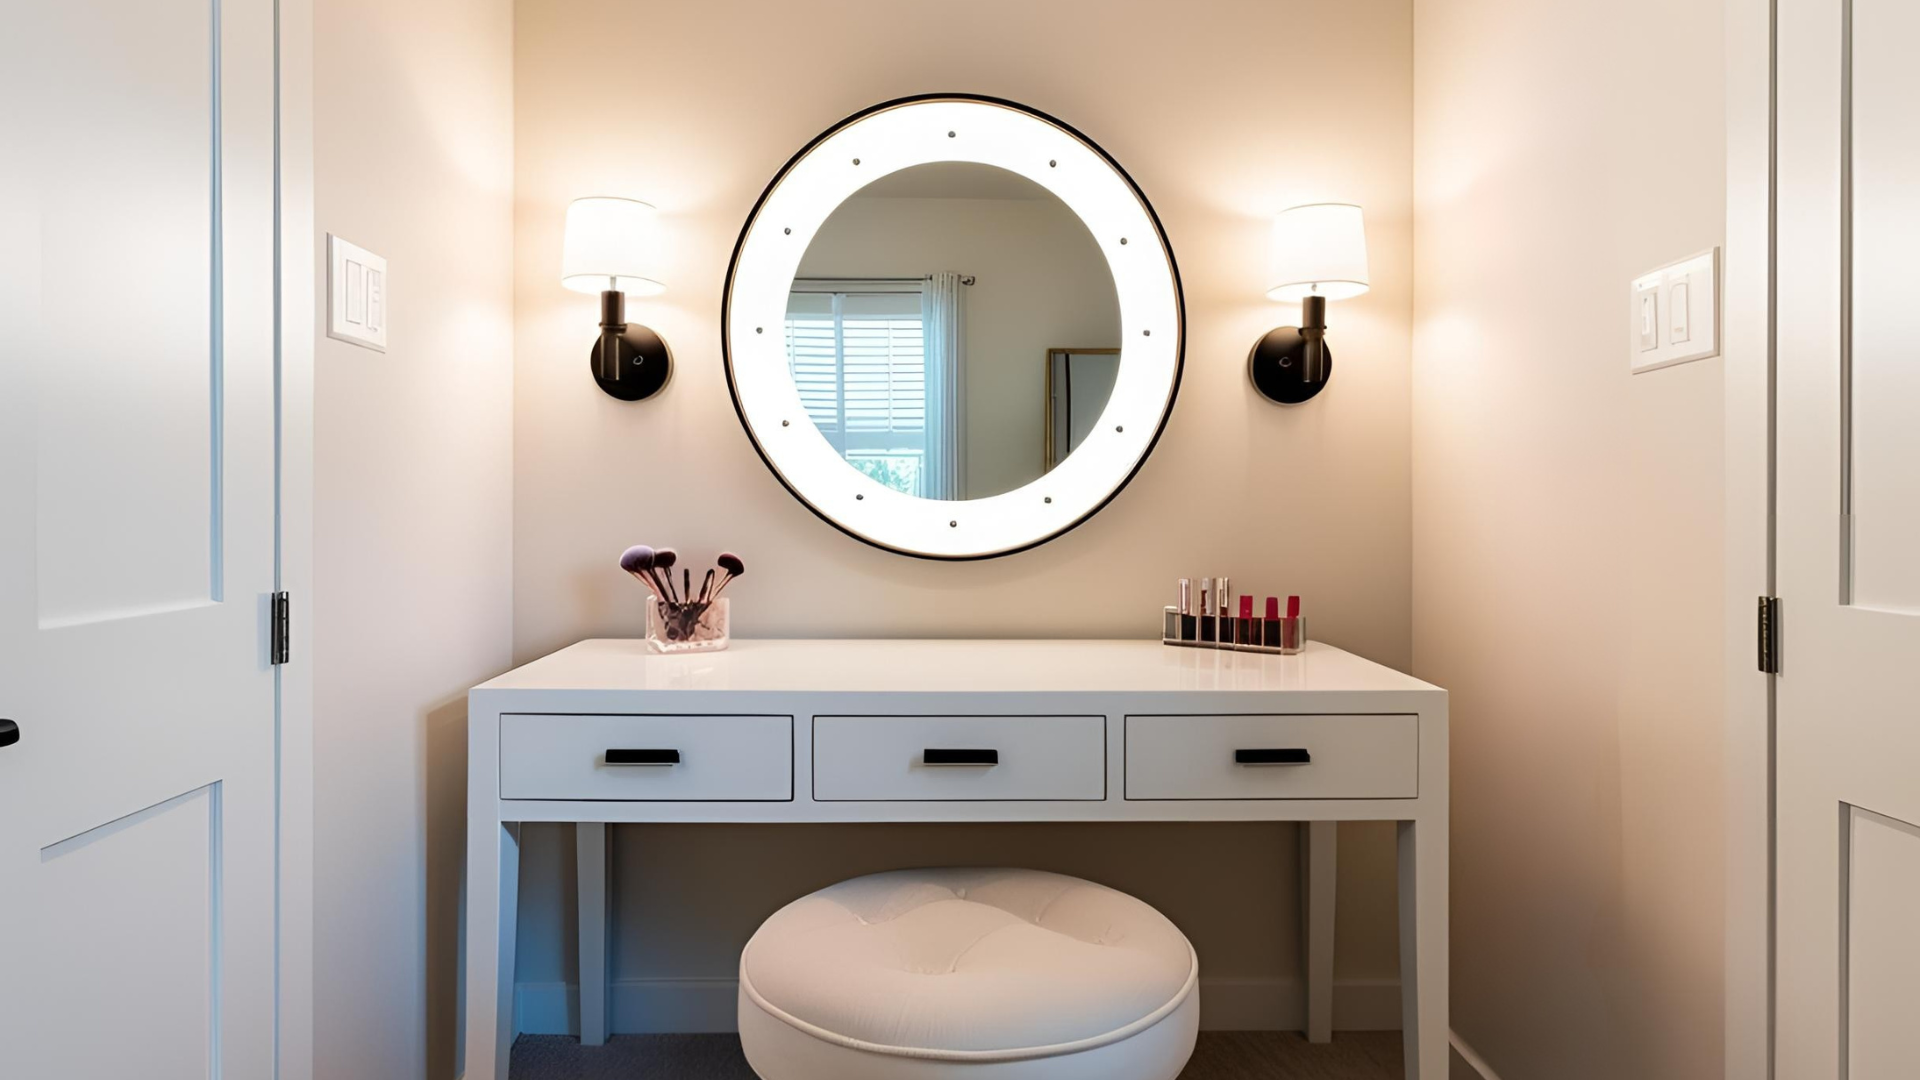
25 Stylish Built-In Desk Designs to Inspire You
A well-designed built-in desk can transform any corner of your home into a functional, stylish workspace.
Whether working from home, studying, or pursuing hobbies, the right desk can make a world of difference.
Built-in desks are space-efficient and customizable to suit your needs and aesthetic preferences.
From minimalist floating designs to elaborate U-shaped workspaces, there’s a solution for every room and personality.
In this blog, I’ll guide you through 25 innovative built-in desk ideas that inspire you to create the perfect workstation for productivity, comfort, and style.
Creative Ideas for a Built-In Desk
1. Minimalist Wall-Mounted Desk
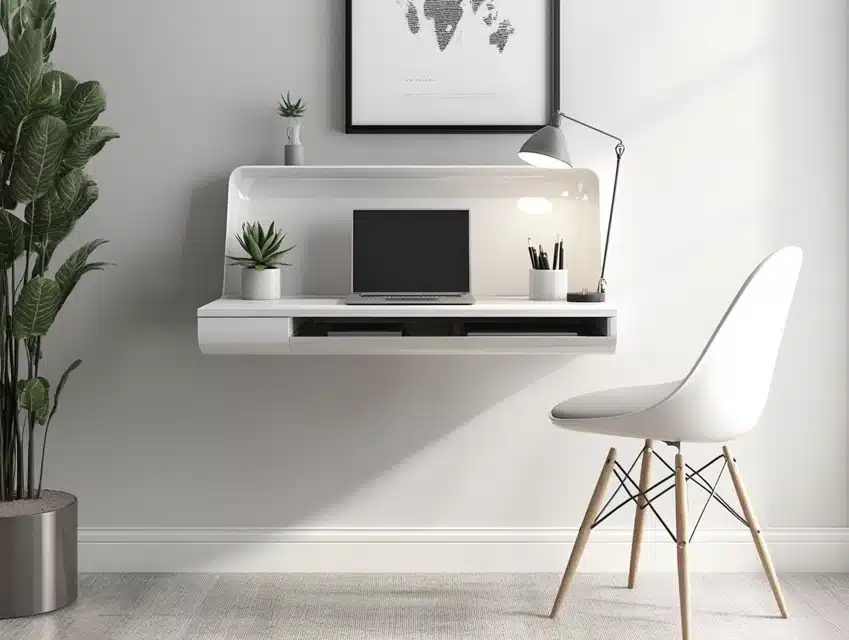
A minimalist wall-mounted desk is perfect for creating a streamlined and functional workspace without occupying too much room.
This design typically features a sleek, floating surface attached directly to the wall, which can include hidden storage compartments or drawers.
It’s ideal for those who value clean lines and a clutter-free look.
I once installed one in a small home office, and the transformation was incredible.
The desk blended seamlessly with the decor, and the hidden storage kept essentials tucked away.
Pair it with a simple chair and some minimal decor for a chic, modern vibe that feels effortlessly sophisticated.
DIY Steps:
- Measure the wall space to determine the dimensions of your desk.
- Cut a sturdy wooden board to the desired size and sand it for a smooth finish.
- Attach metal brackets to the wall, ensuring they are level and secure.
- Mount the wooden board onto the brackets using screws.
- Add a coat of paint or stain to match your decor.
- Install optional storage features, like hidden compartments or a small drawer underneath.
2. Desk with Floating Shelves
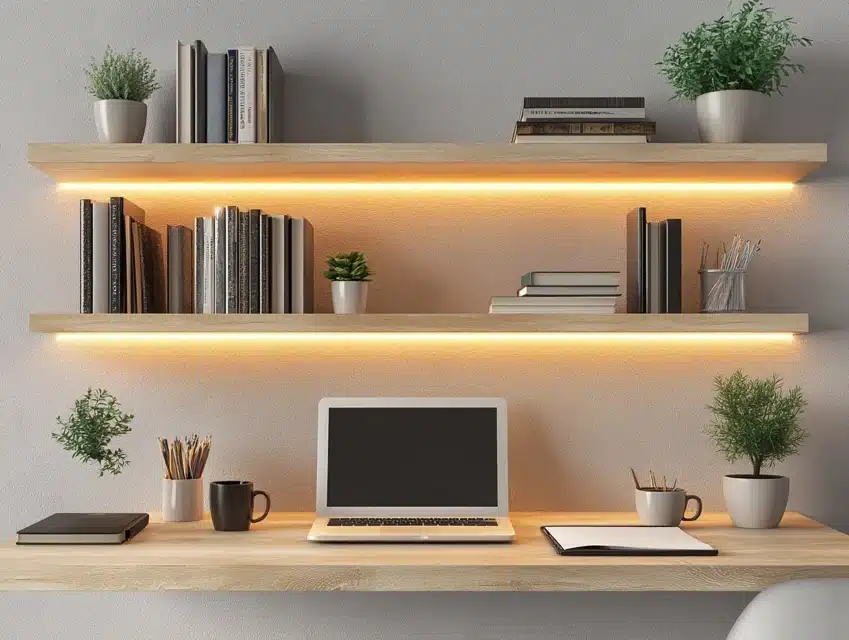
Combining a built-in desk with floating shelves above it adds a vertical storage solution that maximizes space efficiency.
This setup works wonders in smaller rooms or home offices where floor space is at a premium.
Use the shelves to store books, display decor, or even house plants for a personal touch.
I’ve seen this design in action in a friend’s studio apartment, where the floating shelves made the space feel open and less crowded.
The best part? It’s customizable—you can add as many shelves as your wall allows while keeping everything accessible and stylish.
DIY Steps:
- Select a sturdy board for the desk and matching wood for the floating shelves.
- Install brackets for the desk at a comfortable working height.
- Secure the desk board onto the brackets using screws.
- Mount additional brackets above the desk for the floating shelves.
- Place and secure the shelves, ensuring they are evenly spaced.
- Decorate with books, plants, or office essentials to personalize the space.
3. Corner Built-In Desk
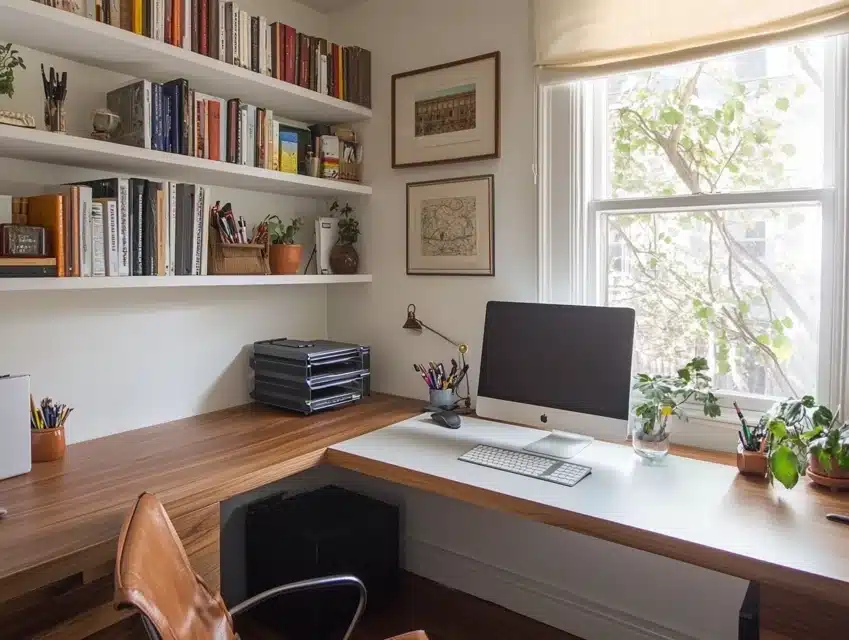
Corners often go unused, but a custom L-shaped built-in desk makes them highly functional.
This design maximizes space by providing two working surfaces, making it ideal for multitaskers or those needing room for multiple devices.
I’ve seen corner desks transform awkward nooks into productive work zones that feel cozy and private.
They’re especially great for home offices or shared spaces where you need to optimize every square inch.
Add shelves or storage units above and below the desk for a complete, organized setup that fits seamlessly into the corner.
DIY Steps:
- Measure the corner space and decide the dimensions for each leg of the L-shaped desk.
- Cut two wooden boards to match the measurements and sand them for a smooth finish.
- Attach sturdy brackets or supports to the walls, ensuring they are level.
- Mount the boards onto the brackets to form the L-shape.
- Add a coat of paint or stain to match your room’s decor.
- Install optional shelving or storage units above the desk for extra functionality.
4. Window-Facing Desk

Something is inspiring about placing a built-in desk under a window. Natural light floods the space, making it perfect for working, studying, or pursuing creative hobbies.
I once helped a friend set up a window-facing desk, and it became their favorite spot for brainstorming ideas.
The view outside can also provide a calming effect during breaks, boosting productivity and creativity.
Add curtains or blinds to control sunlight when needed, and keep the setup minimal to let the view take center stage.
DIY Steps:
- Measure the width of the window area to determine the desk’s size.
- Cut a wooden board to fit the space and sand it to ensure a smooth surface.
- Attach brackets or legs to the underside of the board for support.
- Position and secure the desk against the wall beneath the window.
- Paint or stain the desk to complement the room’s decor.
- Add a chair and minimal decor to keep the area uncluttered and focused.
5. Rustic Wooden Desk
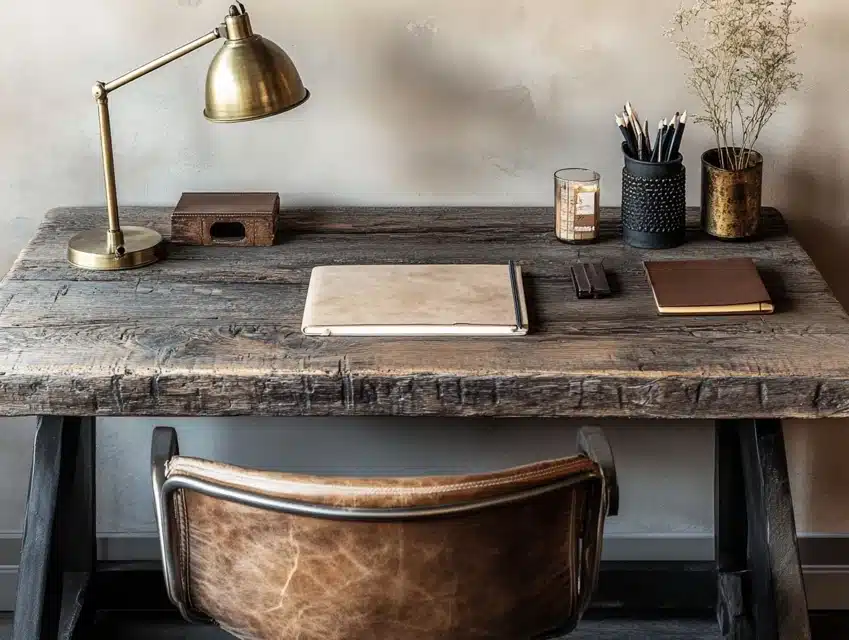
A rustic wooden desk made from reclaimed wood adds warmth and character to any room.
It’s perfect for those who love earthy tones and a natural aesthetic.
I’ve always admired how rustic desks bring a unique charm, with each piece of wood telling its own story.
They’re sturdy, timeless, and pair beautifully with both modern and traditional interiors.
Adding metal accents or vintage hardware enhances the rustic feel, making it a standout feature in your space.
DIY Steps:
- Source reclaimed wood, ensuring it’s clean and free from damage.
- Measure and cut the wood to your desired desk size.
- Sand the wood to remove rough edges while retaining its natural texture.
- Assemble the desk using screws or wood glue, reinforcing with metal brackets if needed.
- Apply a protective finish to preserve the wood’s character and durability.
- Add metal hardware or vintage accents for an authentic rustic touch.
6. Built-In Desk with Cabinets
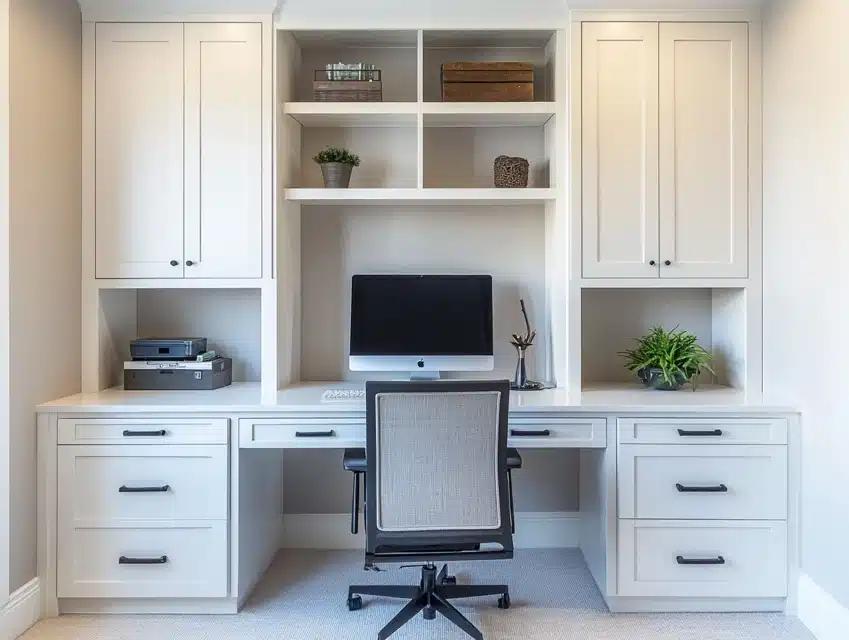
A built-in desk with cabinets combines style and storage, making it perfect for keeping your workspace organized.
Cabinets above and below the desk provide ample room for files, office supplies, or personal items, creating a seamless and polished look.
I once designed a similar setup for a client, and it completely transformed their productivity.
Everything they needed was within reach, and the cohesive design elevated the room’s aesthetics.
DIY Steps:
- Measure the wall space to determine the size of the desk and cabinets.
- Build or purchase pre-made cabinets that fit the dimensions.
- Secure the cabinets to the wall, leaving room for the desk surface in between.
- Install the desk board, ensuring it’s level and supported by the cabinets.
- Paint or stain the entire unit for a cohesive appearance.
- Add handles, knobs, or hardware to the cabinets for easy access and style.
7. Nook Desk
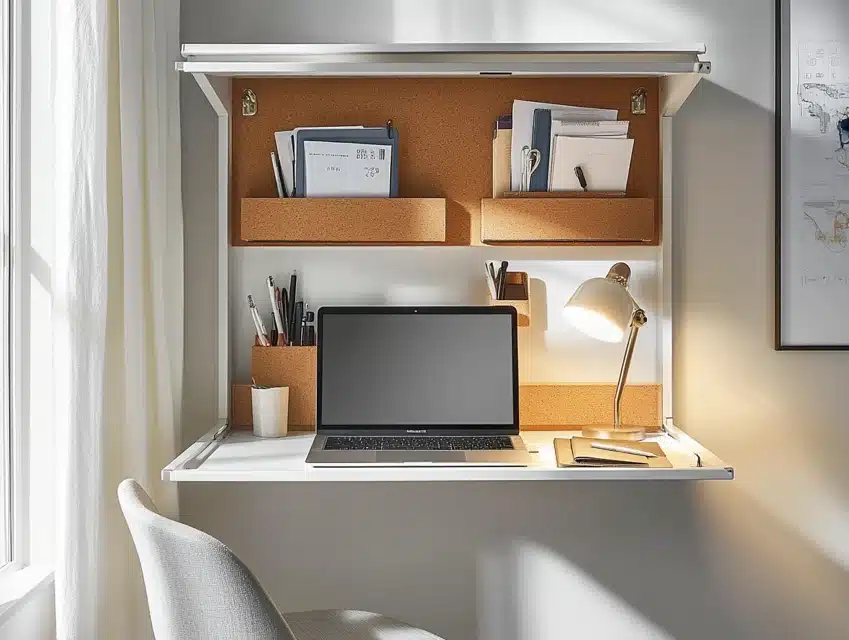
A nook desk transforms small alcoves or niches into functional workspaces. This is an excellent solution for compact homes or apartments where every inch counts.
I’ve seen this setup turn awkward, unused spaces into cozy work zones that blend beautifully with the room’s overall design.
The compactness makes it ideal for focused tasks, and adding built-in shelves above or below the desk enhances its practicality.
It’s amazing how a little creativity can make even the tiniest space purposeful.
DIY Steps:
- Measure the dimensions of the alcove or niche to determine the desk’s size.
- Cut a wooden board to fit the nook perfectly, sanding it for a smooth finish.
- Install brackets or supports along the walls of the niche to hold the desk board.
- Secure the board onto the brackets and ensure it is level.
- Add shelves or a small drawer unit above or below the desk for extra storage.
- Finish with paint or stain to match the room’s decor and personalize with a chair and decor.
8. Desk with Chalkboard Backdrop

A chalkboard wall behind your desk adds both function and creativity. It’s perfect for jotting down notes, reminders, or even doodling during breaks.
I added a chalkboard backdrop to my workspace once, and it became a conversation starter as well as an efficient organizational tool.
It’s particularly great for kids’ study areas or home offices where brainstorming happens frequently.
Pair it with a simple desk to keep the focus on the chalkboard feature.
DIY Steps:
- Select a chalkboard paint color and prepare the wall behind your desk.
- Apply multiple coats of chalkboard paint, letting each layer dry thoroughly.
- Install your built-in desk using a sturdy board and brackets.
- Decorate the desk minimally to keep the chalkboard accessible.
- Stock up on colorful chalks for notes, reminders, or art.
- Maintain the chalkboard by wiping it down regularly with a damp cloth.
9. Library-Inspired Desk
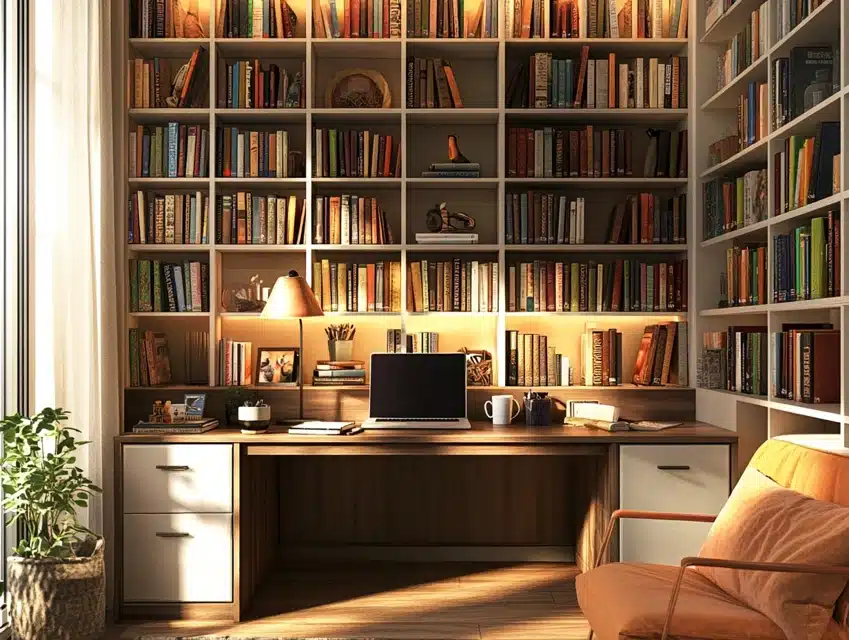
A library-inspired desk surrounded by floor-to-ceiling bookshelves creates a studious and elegant workspace. It’s ideal for book lovers who want their favorite reads within arm’s reach.
I’ve always admired how this setup brings a scholarly charm to any room while maximizing storage.
The desk becomes a centerpiece, with the bookshelves framing the workspace beautifully.
Add a comfortable chair and good lighting, and you’ve got the perfect space for deep focus and creativity.
DIY Steps:
- Measure the wall to plan the placement of bookshelves and desk.
- Install floor-to-ceiling bookshelves on either side of the desk area.
- Cut a wooden board to fit between the shelves as the desk surface.
- Secure the desk board with brackets or mount it onto the shelving units.
- Paint or stain the entire setup for a cohesive look.
- Arrange books, decor, and essentials to personalize the space and create a cozy atmosphere.
10. Two-Person Workspace
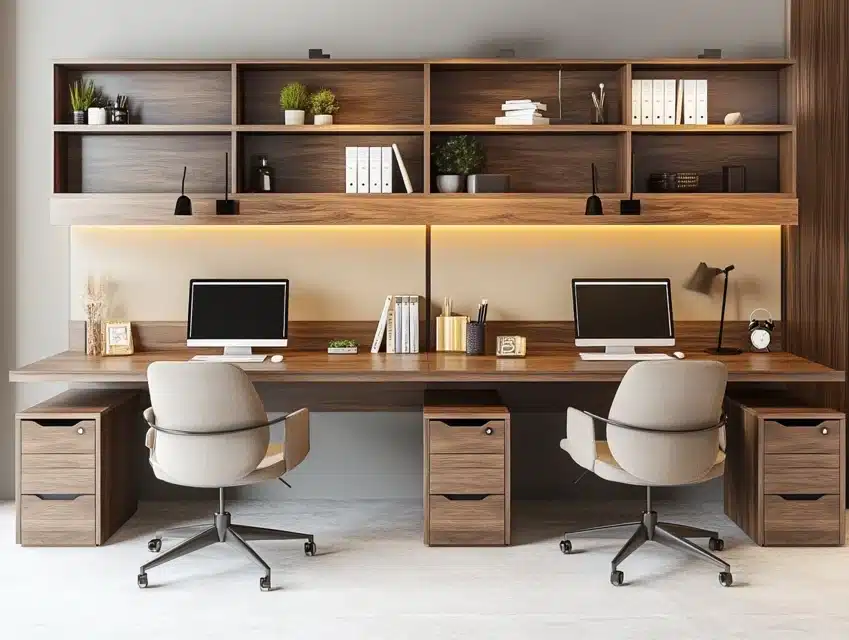
A two-person workspace is perfect for shared offices or family members working side by side.
This design features a long built-in desk with enough space for two chairs and personal storage areas.
I helped a family create this setup once, and it improved their workflow while fostering collaboration.
It’s a great way to make the most of a larger wall or room, keeping both users comfortable and productive without feeling cramped.
DIY Steps:
- Measure the length of the wall to determine the size of the desk.
- Cut a single long wooden board or two separate boards to accommodate two workstations.
- Install brackets or cabinets at intervals to support the desk and provide storage.
- Mount the desk board securely, ensuring it is level across its length.
- Add dividers or individual storage compartments for personal organization.
- Finish with matching chairs and decor for a harmonious and functional workspace.
11. Floating Desk with Drawers
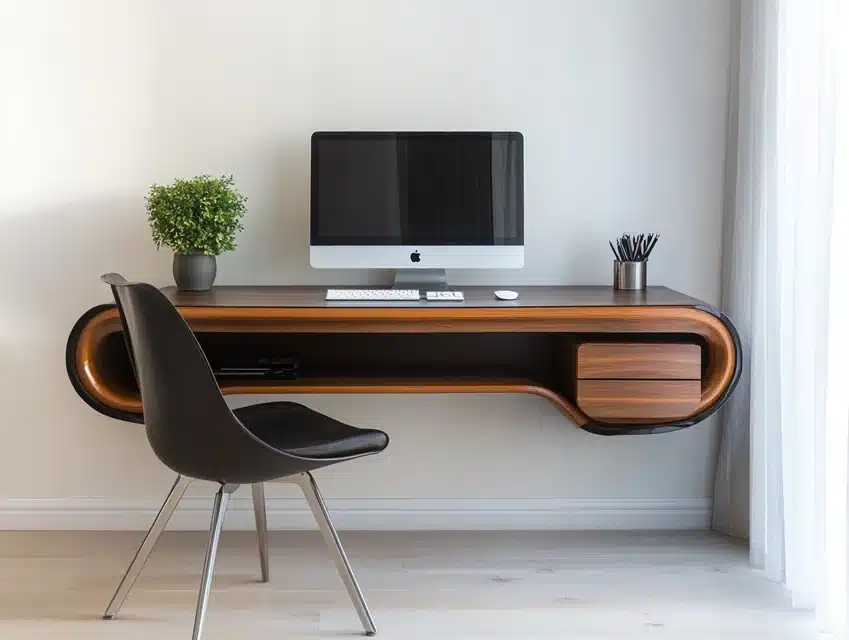
A floating desk with built-in drawers offers the perfect combination of style and functionality.
It creates a clean, minimalist look while providing hidden storage for essentials like stationery or gadgets. I’ve always appreciated how this design eliminates bulky legs, giving the workspace a sleek, airy feel.
The built-in drawers help keep the surface clutter-free, making it ideal for compact rooms where space is precious.
It’s a smart choice for modern or contemporary interiors.
DIY Steps:
- Measure the wall space to determine the desk’s size.
- Cut a sturdy wooden board for the desk surface and smaller panels for the drawers.
- Assemble and attach the drawers underneath the desk board using rails or brackets.
- Secure the desk to the wall using heavy-duty brackets, ensuring it’s level.
- Paint or stain the desk to match the room’s decor.
- Add drawer handles or knobs for easy access, and style the desk with a chair and accessories.
12. Compact Closet Desk
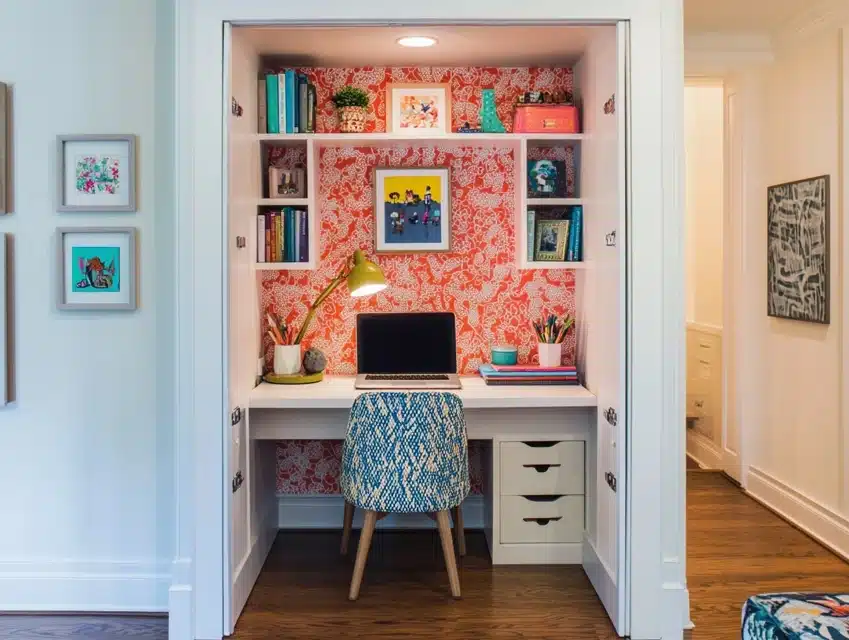
A compact closet desk is a genius way to transform an unused closet into a functional workspace.
It’s perfect for small homes or apartments, providing a private area that can be tucked away when not in use.
I’ve helped a friend create one, and it became a favorite spot for focused tasks.
Adding shelves, lighting, and a comfy chair completes the look, turning a mundane closet into a creative hub.
DIY Steps:
- Empty the closet and measure the dimensions for the desk.
- Cut a wooden board to fit the width of the closet and sand it for a smooth finish.
- Install brackets or supports inside the closet to hold the desk board securely.
- Add shelves above the desk for extra storage and organization.
- Install a small light fixture or LED strip lighting for proper illumination.
- Finish with a comfortable chair and personal decor to make the space inviting.
13. Modern Built-In Desk with LED Lighting

A modern built-in desk with LED lighting brings a futuristic, polished vibe to any workspace.
LED strip lights installed under shelves or around the desk area add a soft glow, making it functional and stylish.
I’ve seen this design elevate otherwise simple desks, creating a high-end look with minimal effort.
It’s perfect for late-night work sessions or adding ambiance to your room.
Pair it with sleek furniture and metallic accents for a cohesive aesthetic.
DIY Steps:
- Measure and cut the desk board to fit the desired space.
- Install brackets or supports to mount the desk securely to the wall.
- Attach shelves above the desk for storage and additional lighting installation.
- Add LED strip lights underneath the shelves or around the desk’s edges.
- Connect the LED strips to a nearby power source or use a rechargeable option.
- Paint or stain the desk for a modern finish and accessorize with stylish decor.
14. Custom Desk with Filing Drawers
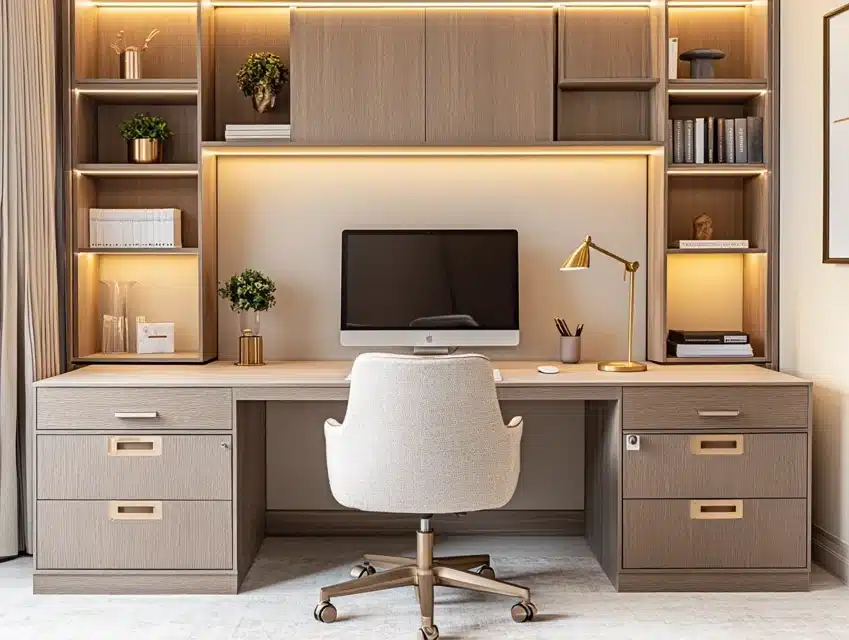
A custom desk with built-in filing drawers is ideal for those needing extra organization in their workspace.
It’s a practical option for professionals or students who deal with paperwork or multiple projects.
I once designed a similar desk, and the filing drawers were a game-changer for keeping everything sorted.
It’s a timeless, efficient design that works well in both home offices and corporate settings.
DIY Steps:
- Measure the space and decide the size of the desk and filing drawers.
- Cut wooden boards for the desk surface and drawer compartments.
- Assemble the filing drawers using pre-made slides for smooth operation.
- Attach the drawers underneath the desk or to the side for easy access.
- Mount the desk securely on brackets or legs, ensuring it is level.
- Add a coat of paint or stain and handles for the drawers to complete the look.
15. Desk with Hidden Charging Station
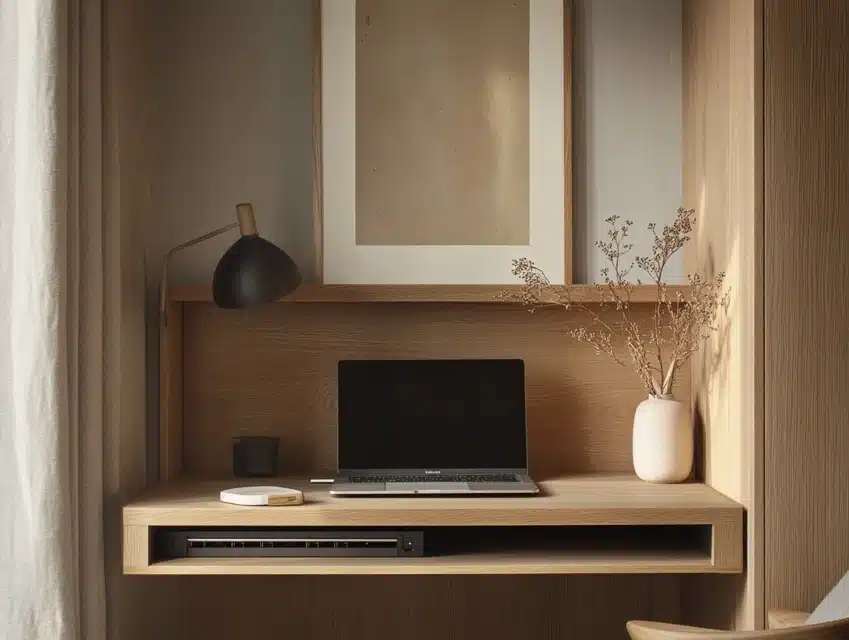
A built-in desk with a hidden charging station is the ultimate way to keep tech clutter at bay.
This design conceals cables and power outlets, creating a clean and organized workspace.
I’ve installed one in my home office, and it’s a lifesaver for charging devices without messy cords everywhere.
The hidden station also adds a touch of sophistication and functionality to the desk, making it perfect for tech-savvy individuals.
DIY Steps:
- Measure and cut a wooden board for the desk surface.
- Create a compartment underneath the desk for storing cables and a power strip.
- Drill discreet holes in the desk surface for cables to pass through.
- Install the desk using brackets or legs for support.
- Place a power strip inside the hidden compartment and connect it to a nearby outlet.
- Paint or stain the desk and add decor to personalize the workspace.
16. Industrial-Style Desk
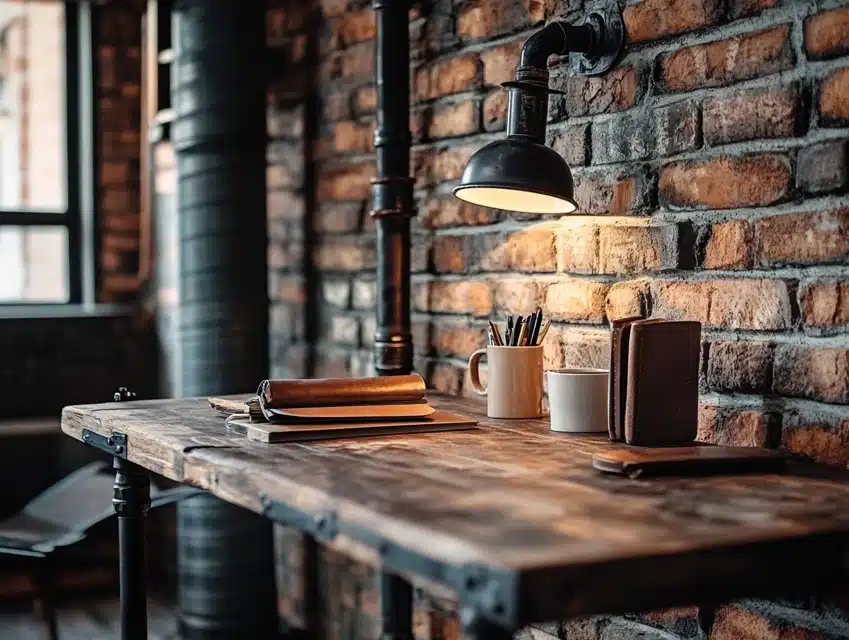
An industrial-style desk combines raw materials like wood and metal for a bold, edgy look.
It’s ideal for lofts or modern spaces that embrace an urban aesthetic.
I love how this design balances practicality with a unique, rugged charm.
The exposed brackets and sturdy construction make it durable, while the wooden surface softens the overall appearance.
Pair it with industrial lighting or metal accents for a cohesive design.
DIY Steps:
- Select a thick wooden board for the desk surface and sand it for a smooth finish.
- Attach metal brackets or pipes to the wall for supporting the desk.
- Mount the wooden board onto the brackets, ensuring it’s level and secure.
- Add metal hardware or decorative screws to enhance the industrial look.
- Apply a protective finish to the wood to preserve its texture and color.
- Complete the setup with industrial-style decor like metal lamps or wire baskets.
17. Built-In Desk Under the Stairs
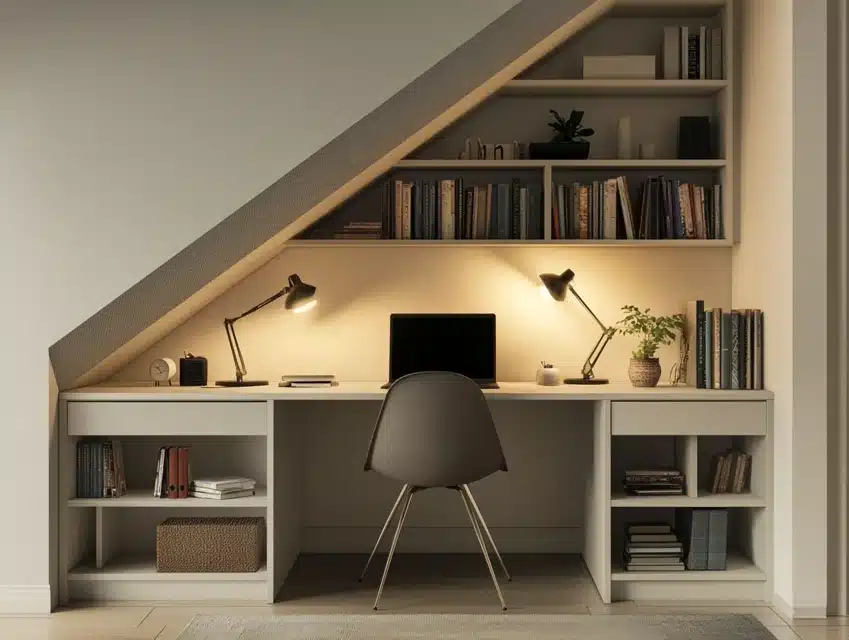
A built-in desk under the stairs is a smart way to utilize unused space creatively.
It transforms an awkward area into a cozy, functional workstation.
I’ve seen this design work beautifully in homes where space is at a premium.
Adding shelves or cabinets under the stairs enhances storage, while the sloped ceiling creates a charming nook perfect for focused tasks.
DIY Steps:
- Measure the space under the stairs to determine the desk’s size.
- Cut a wooden board to fit the area and sand it for a smooth finish.
- Install brackets or supports on the wall to hold the desk board securely.
- Add shelves or small cabinets underneath the stairs for extra storage.
- Paint or stain the desk and shelving to match the surrounding decor.
- Style the desk with a chair and personal accessories to make the nook inviting.
18. White Built-In Desk with Shiplap Wall
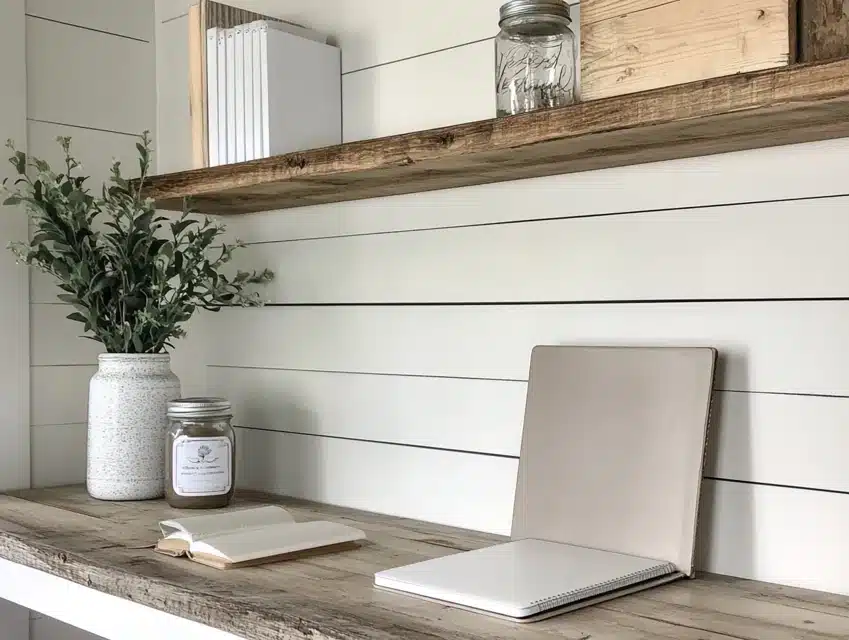
A white built-in desk paired with a shiplap wall brings farmhouse charm to any workspace.
The clean, bright aesthetic creates a warm and inviting atmosphere perfect for both work and relaxation.
I’ve helped design one of these setups for a friend, and it became the centerpiece of their home office.
The shiplap adds texture, while the white desk keeps the space light and airy.
DIY Steps:
- Measure and cut a wooden board for the desk, sanding it for a smooth finish.
- Install shiplap panels on the wall behind the desk using nails or adhesive.
- Secure the desk to the wall with brackets or legs for support.
- Paint both the desk and shiplap in white or a complementary color.
- Add small shelves or decor above the desk to enhance the farmhouse look.
- Finish with rustic or minimalist accessories to complete the cozy aesthetic.
19. Mid-Century Modern Desk
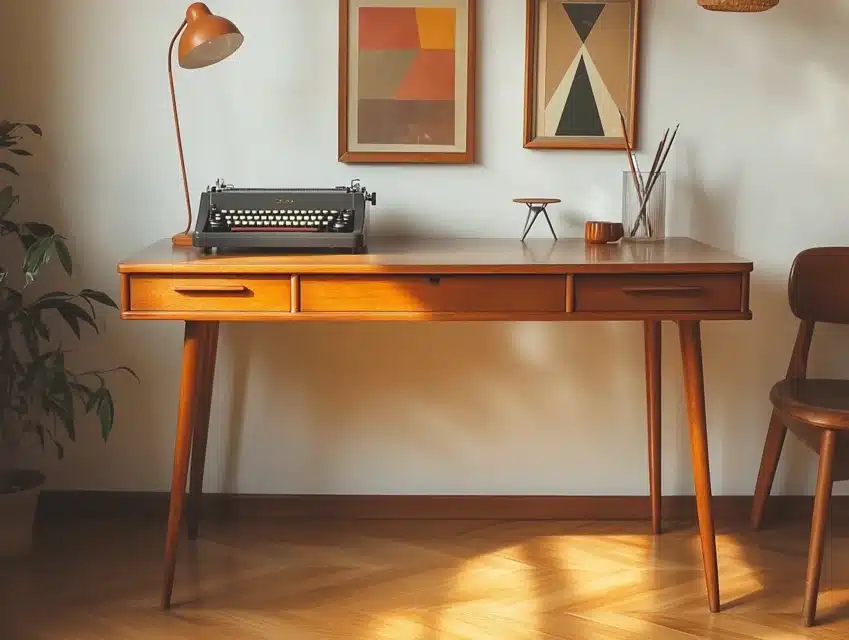
This style blends seamlessly into both contemporary and vintage interiors, making it incredibly versatile.
I’ve always admired the simplicity and functionality of mid-century designs, which prioritize aesthetics without compromising usability.
Pair this desk with retro-inspired accessories or a statement chair to complete the look.
DIY Steps:
- Choose a wooden board with a rich tone, like walnut, for the desk surface.
- Cut and sand the board to your desired size.
- Attach tapered wooden legs to the underside of the desk using mounting plates.
- Add a clear protective finish to enhance the natural wood grain.
- Install a slim drawer or storage compartment for added functionality.
- Decorate with mid-century accents like a vintage lamp or geometric decor.
20. U-Shaped Workspace
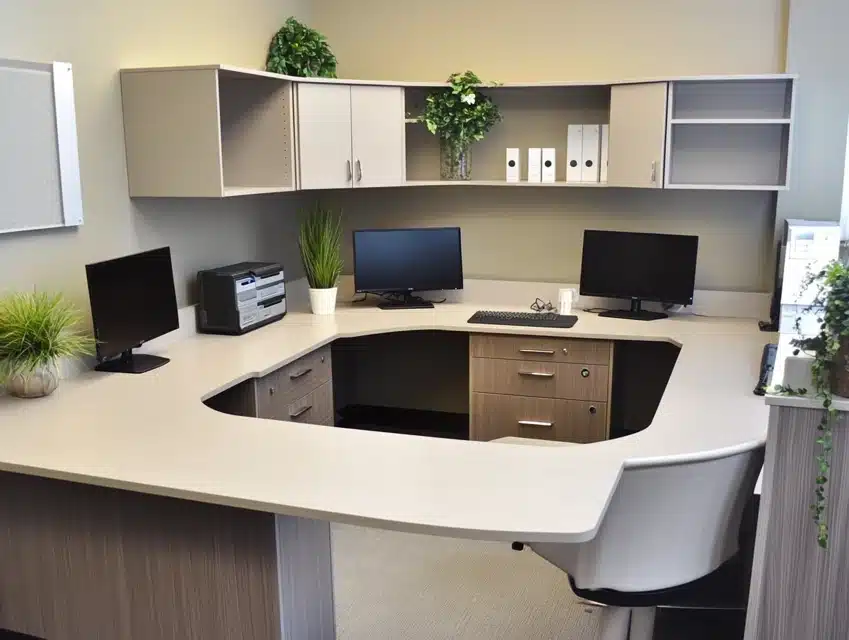
A U-shaped workspace is ideal for multitaskers who need plenty of surface area and storage.
This design surrounds you with a built-in desk on three sides, creating a dedicated zone for work, hobbies, or projects.
I’ve seen this layout transform large home offices into efficient, organized spaces that keep everything within reach.
It’s perfect for those juggling multiple devices or tasks.
DIY Steps:
- Measure and outline the U-shape based on your room’s dimensions.
- Cut three wooden boards for each side of the U, sanding them for a smooth finish.
- Install brackets or cabinets at the base to support the desk boards.
- Secure each board to the brackets, ensuring they are level and well-aligned.
- Add built-in drawers or shelving units for extra storage.
- Paint or stain the desk to match your room’s decor, and add a comfortable chair.
21. Desk with Glass Top
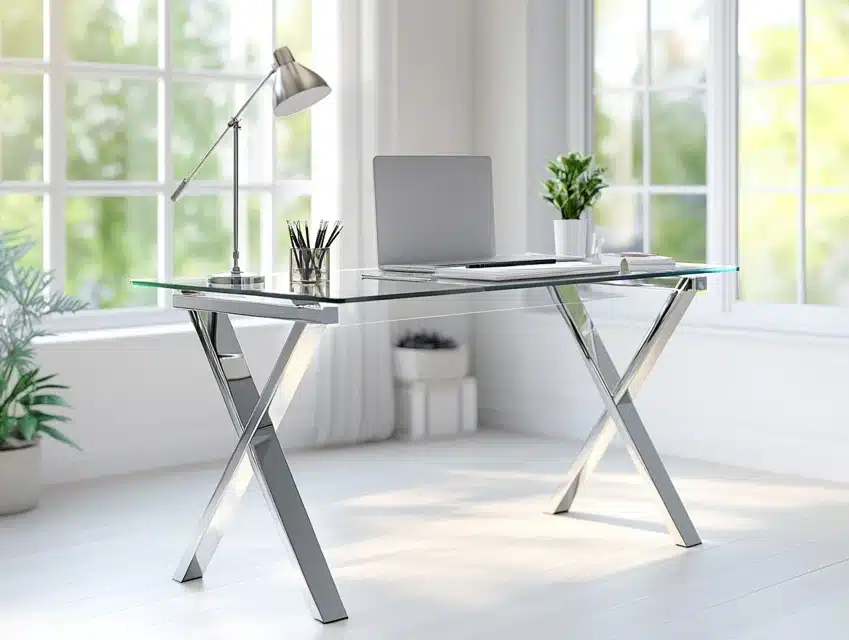
A desk with a glass top adds a sleek, contemporary touch to any workspace.
The transparent surface creates a light and airy feel, making it a great option for smaller spaces.
I once installed a glass-top desk for a client, and they loved how it made their home office look modern and uncluttered.
Pair it with metal or wooden supports for a striking contrast and durability.
DIY Steps:
- Choose a tempered glass sheet cut to your desired desk size.
- Select a sturdy base, such as metal legs or wooden supports, to hold the glass top.
- Secure the glass top to the base using non-slip pads or adhesive brackets.
- Add cable management solutions to keep the workspace tidy.
- Place minimal decor or accessories on the glass surface to maintain the clean look.
- Ensure proper lighting to highlight the transparency and elegance of the desk.
22. Built-In Desk with Corkboard Panel
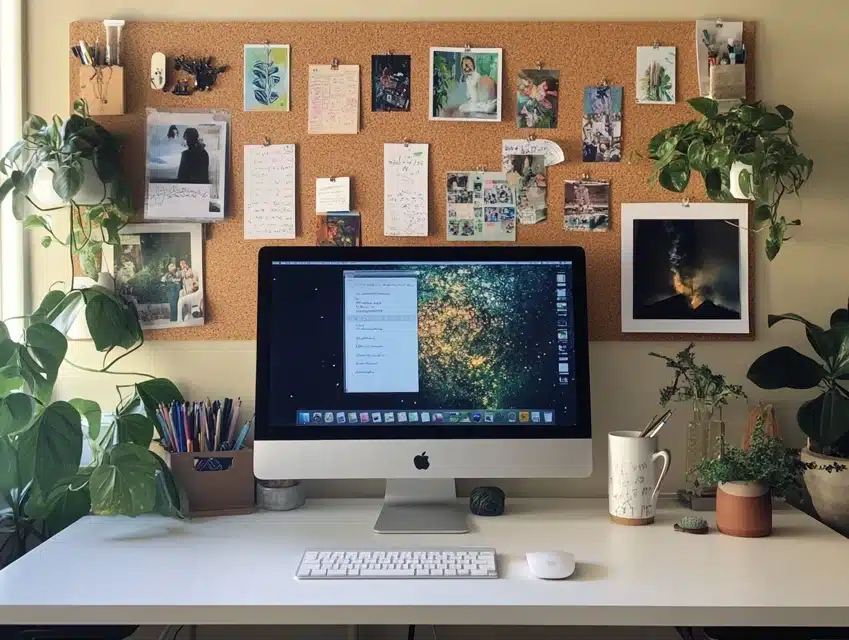
Adding a corkboard panel above your built-in desk is both functional and fun.
It’s perfect for pinning notes, photos, or reminders, helping you stay organized while adding personality to your workspace.
I’ve always found this feature handy for brainstorming or tracking goals.
The corkboard creates a creative, interactive backdrop that keeps your desk area dynamic and engaging.
DIY Steps:
- Measure the space above your desk to fit a corkboard panel.
- Purchase a corkboard sheet or tiles and cut them to size if necessary.
- Secure the corkboard to the wall using adhesive or screws.
- Build and install the desk below the corkboard using a wooden board and brackets.
- Paint or stain the desk to complement the corkboard and surrounding decor.
- Pin photos, notes, or decorative items to personalize the space and make it inspiring.
23. Fold-Down Desk
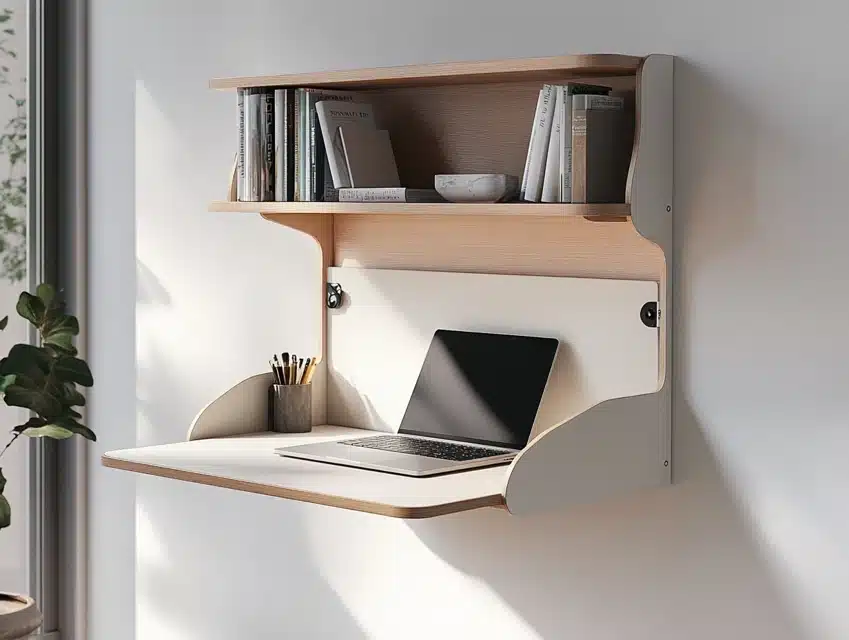
A fold-down desk is a clever, space-saving solution for small homes or multifunctional spaces.
When not in use, it folds neatly against the wall, freeing up valuable floor area.
I’ve installed one in a compact apartment, and it worked brilliantly as a hidden office.
This design is perfect for those who need a workspace that doesn’t dominate the room but is functional and stylish when in use.
DIY Steps:
- Measure the wall space and decide on the size of the fold-down desk.
- Cut a wooden board for the desk surface and sand it for smoothness.
- Attach sturdy hinges to the bottom edge of the desk board.
- Mount the desk to the wall, ensuring it folds up and down smoothly.
- Install a support mechanism, such as folding legs or wall-mounted brackets.
- Paint or stain the desk and add a handle for easy folding and unfolding.
24. Desk with Bold Accent Wall
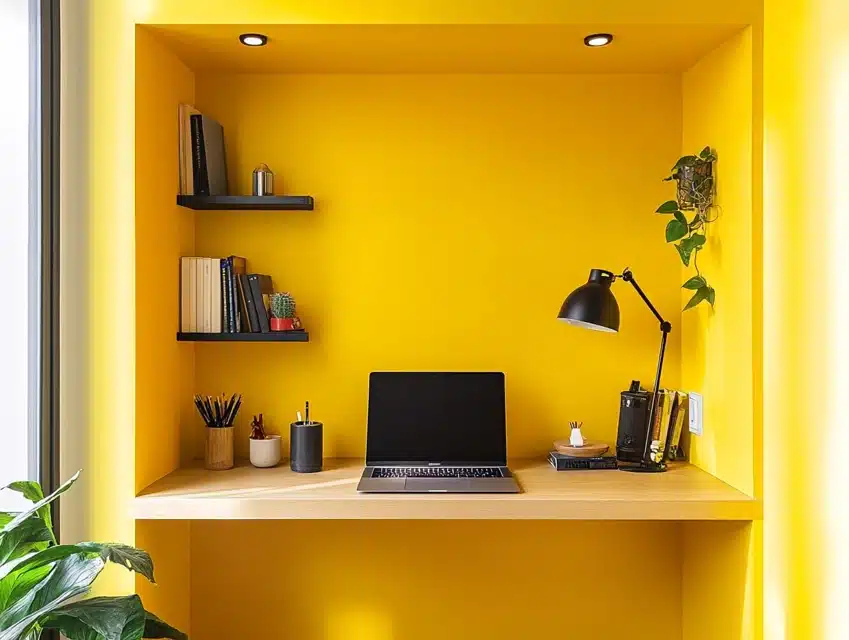
A desk with a bold accent wall turns your workspace into a statement feature.
The backdrop draws attention and adds personality to the room, whether it’s vibrant paint, patterned wallpaper, or textured panels.
I’ve seen this setup bring energy to home offices, inspiring creativity and focus.
The accent wall also creates a visually distinct area, making your desk feel like its own space even in shared rooms.
DIY Steps:
- Choose a bold paint color, wallpaper, or textured panels for the accent wall.
- Prepare the wall by cleaning and applying primer if needed.
- Apply paint or install wallpaper/panels, ensuring even coverage.
- Build and install the desk using a wooden board and brackets.
- Add minimal decor to let the accent wall take center stage.
- Incorporate complementary lighting to highlight the vibrant background.
25. Custom Desk with Built-In Monitor Shelf
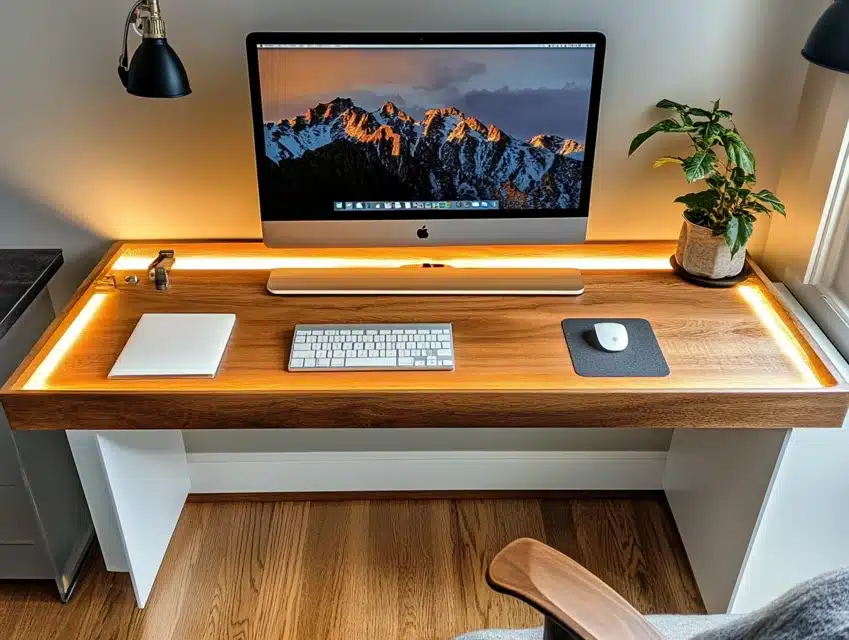
A custom desk with a built-in monitor shelf improves ergonomics and reduces clutter.
The raised shelf keeps the monitor at eye level, reducing strain on your neck while freeing up desk space for other essentials.
I’ve built one for a friend, and they loved how it streamlined their workspace and made long hours at the computer more comfortable.
It’s a practical addition for those working with multiple devices.
DIY Steps:
- Measure and cut a wooden board for the desk surface and a smaller board for the monitor shelf.
- Attach the monitor shelf to the desk using small brackets or wooden supports.
- Install the desk securely on brackets or legs, ensuring it is level.
- Paint or stain the desk and shelf for a cohesive look.
- Place the monitor on the raised shelf and organize other devices below.
- Add cable management solutions to keep the workspace tidy and clutter-free.
Conclusion
Creating a built-in desk isn’t just about functionality; it’s about enhancing your space and making it uniquely yours.
With these 25 ideas, there’s a design to fit every home, from compact apartments to spacious offices.
Whether you prefer the simplicity of a floating desk or the practicality of built-in storage, these designs will help you achieve a workspace that’s both beautiful and efficient.
So, roll up your sleeves and start designing your dream built-in desk today.
After all, your workspace should be as inspiring as your work!
Frequently Asked Questions
How Do I Decide Which Built-In Desk Style Is Right for Me?
Start by assessing your space and needs. If you’re working in a small room, a floating desk or fold-down desk can save space.
For larger spaces, consider a U-shaped desk or one with ample storage.
Your aesthetic preferences also matter—choose a style that complements your room’s decor, such as rustic for a cozy vibe or minimalist for a modern look.
Are Built-In Desks Expensive to Install?
The cost depends on the materials and complexity of the design.
DIY options, like a floating desk or a closet desk, can be budget-friendly, especially if you already have tools and basic materials.
Hiring a professional for custom-built desks with features like cabinets or LED lighting will cost more but often yields a high-quality, tailored finish.
Can a Built-In Desk Be Removed or Relocated?
Yes, but it depends on how the desk is installed.
Most built-in desks can be dismantled, especially if they are secured with brackets or screws.
However, designs that are heavily integrated into the wall or include permanent fixtures may require more effort to remove.
If you anticipate the need to relocate, consider modular built-in desks that are easier to disassemble.

