28 Stunning Kitchens with Floating Shelves Designs
Many dream of a stylish, well-organized kitchen but struggle with limited space and cluttered countertops. We know the frustration of reaching for ingredients or utensils in cramped cabinets.
But what if there was a simple solution to make your kitchen more functional and visually appealing?
We have good news! Floating shelves can transform your kitchen, adding both style and practicality. These versatile additions can open your space, showcase your favorite items, and improve accessibility.
In this post, we’ll show you how to use floating shelves to enhance your kitchen design.
We’ll cover:
- The benefits of open shelving
- 28 Floating shelves ideas
- How to install DIY floating shelves
- Provide tips for styling them
Get ready to create a kitchen that’s both beautiful and efficient!
Are Kitchens With Floating Shelves Still Popular in 2024?
Yes, kitchens with floating shelves are still quite popular in 2024. While design trends come and go, these shelves have shown staying power due to their practical benefits and adaptable style.
Many homeowners continue to favor the open, airy look that floating shelves provide.
They’re particularly loved in smaller kitchens where they help create a sense of space. The trend towards minimalism in home design has also kept these shelves in the spotlight.
In 2024, we’re seeing some new twists on the floating shelf trend:
- Mixed materials: Combining wood with metal accents or glass with concrete for a more textured look.
- Smart shelving: Some floating shelves now come with built-in lighting or charging stations for devices.
- Eco-friendly options: Reclaimed wood and sustainable materials are gaining popularity for these shelves.
- Color pop: While natural wood tones remain popular, bold colored shelves are being used as statement pieces.
- Curved edges: Softer, rounded floating shelves are emerging as a trend, moving away from sharp corners.
While not everyone loves the look of open shelving, floating shelves have proven to be more than just a passing fad.
Their functionality and flexibility continue to make them a popular choice for many kitchens in 2024.
Benefits of Having Floating Shelves in the Kitchen
Open and Airy Feel
Floating shelves can make your kitchen feel more spacious. We create the illusion of extra room by replacing bulky upper cabinets with sleek shelves.
The absence of cabinet doors makes your walls more visible, which helps to open up the space visually. This is especially useful in smaller kitchens where every inch counts.
Accessibility
One of the biggest advantages of floating shelves is improving access to everyday items. No more fumbling through dark cabinets!
With open shelving, everything is right there at your fingertips. It’s perfect for keeping frequently used dishes, glasses, or cooking ingredients within easy reach.
This setup can save you time and make your cooking process more efficient.
Aesthetic Appeal
Floating shelves bring a clean, modern look to any kitchen. Their simple lines and uncluttered appearance can instantly update your space.
These shelves also offer a great opportunity to show off your favorite dishes, cookbooks, or decorative items. They can be a focal point in your kitchen, adding visual interest and personality to the room.
Versatility
One of the best things about floating shelves is how well they adapt to different kitchen styles. In a modern kitchen, sleek metal or glass shelves enhance the high-tech feel.
Rustic wooden shelves can add warmth and charm to a farmhouse-style kitchen. In a minimalist space, simple white shelves can maintain a clean, uncluttered look.
This flexibility means floating shelves can complement your decor or help you achieve a new look.
Kitchens with Floating Shelves Ideas to Elevate Your Space
1. Back Shelves With Wallpaper
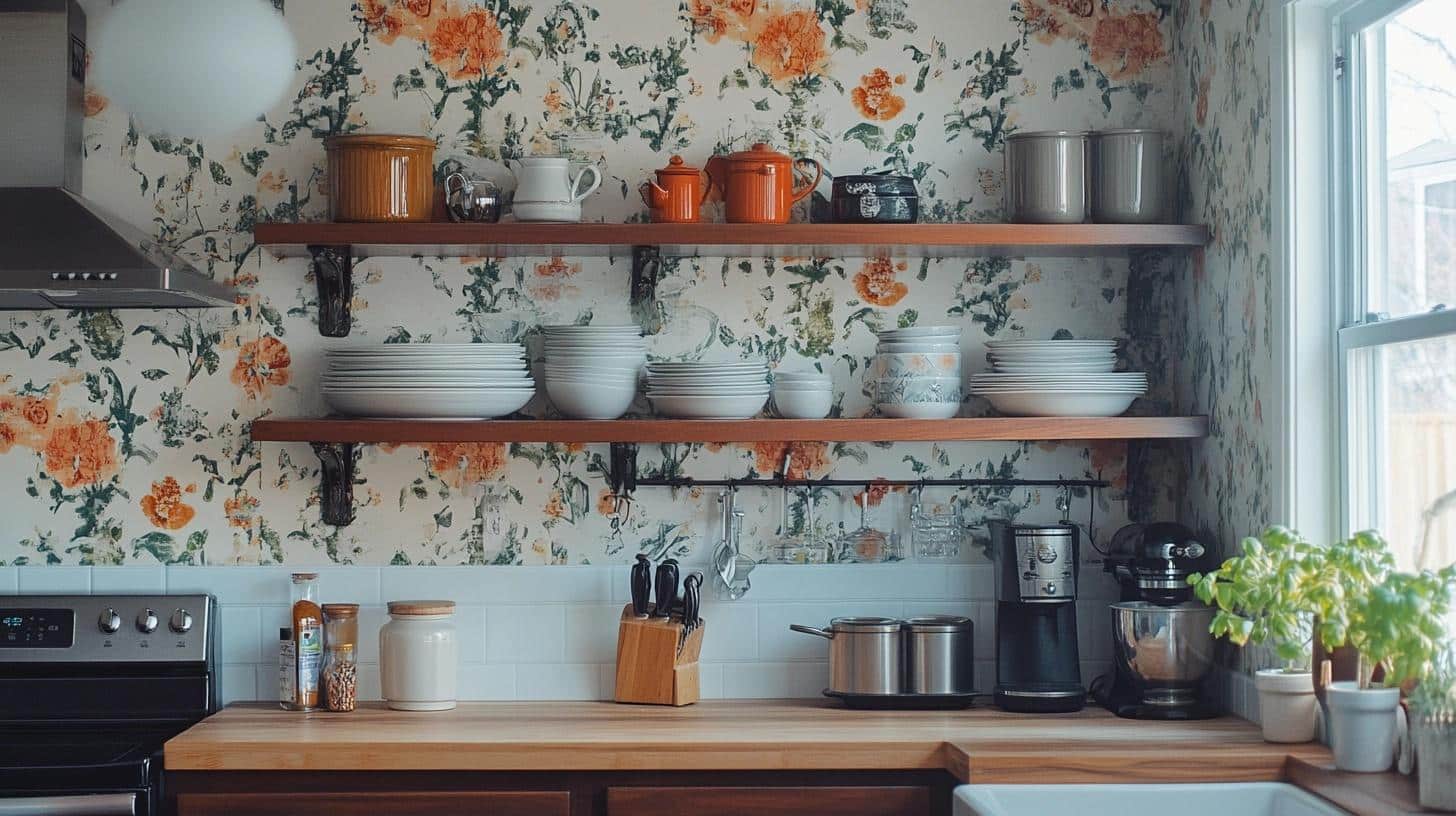
- Why It Works: Adds personality and depth to the shelves without overwhelming the kitchen.
- Materials Used: Wallpaper, wood shelves, and mounting brackets.
- Seasonal Styling Ideas: Use floral prints in spring and snowy patterns in winter.
- DIY Budget Range: $50-$150, depending on wallpaper and shelf material.
2. Floating Shelves with Built-in Wine Racks
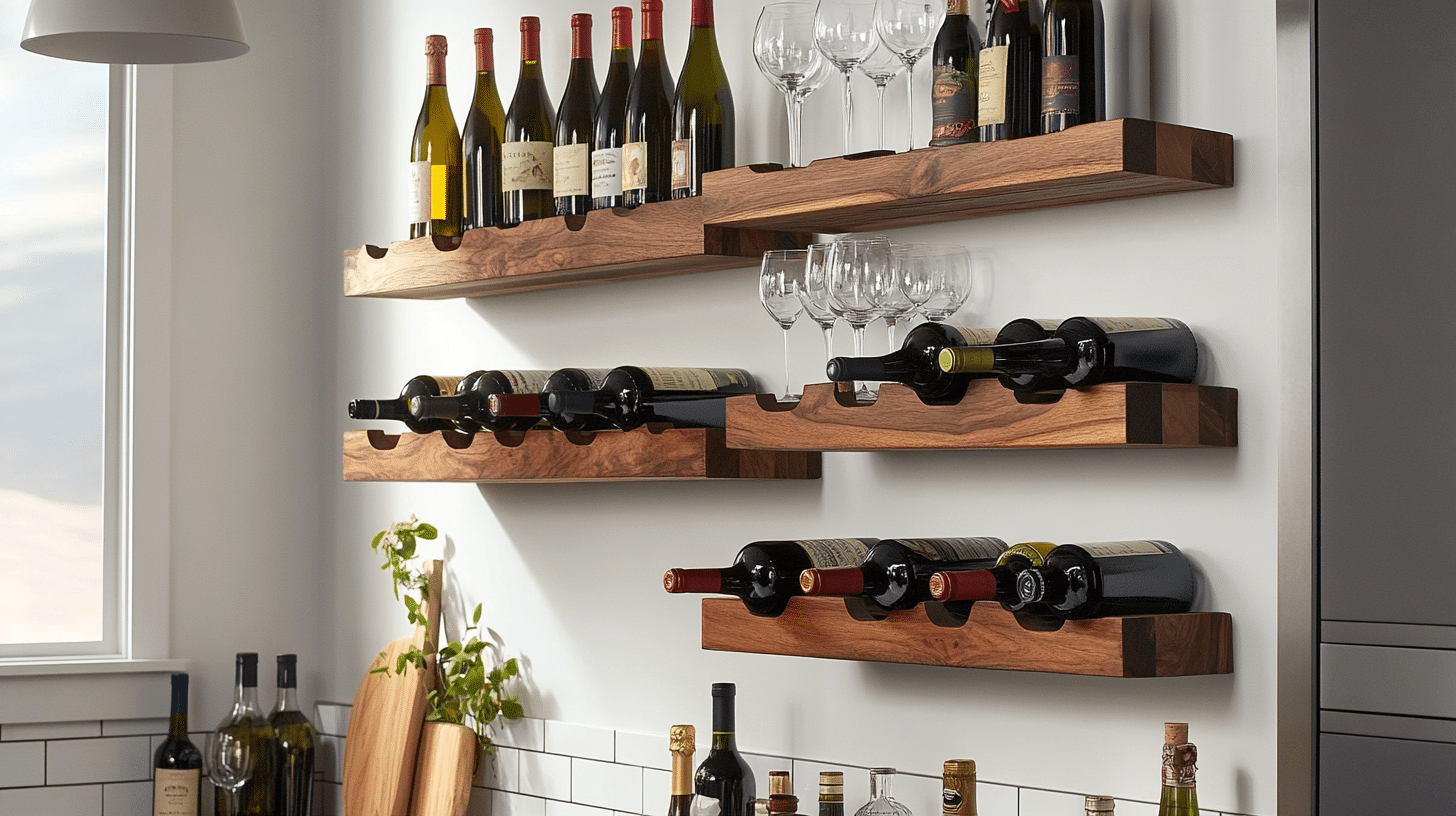
- Why It Works: Combines storage and function, perfect for wine lovers.
- Materials Used: Wood or metal shelves with integrated wine holders.
- Seasonal Styling Ideas: Add holiday-themed wine labels and festive glassware during winter.
- DIY Budget Range: $100-$300, depending on shelf size and wine rack design.
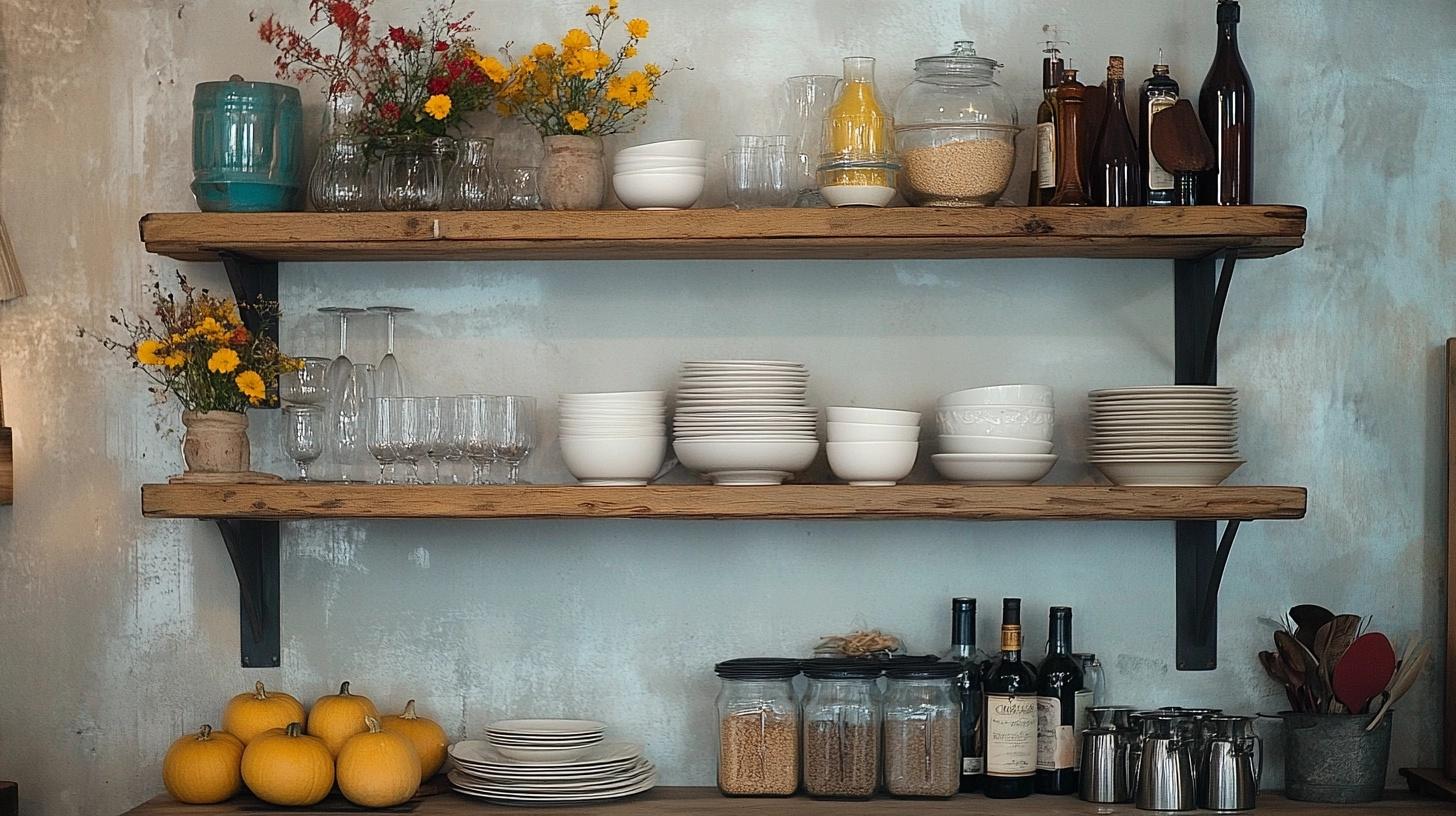
3. Black Floating Shelves on Light Walls
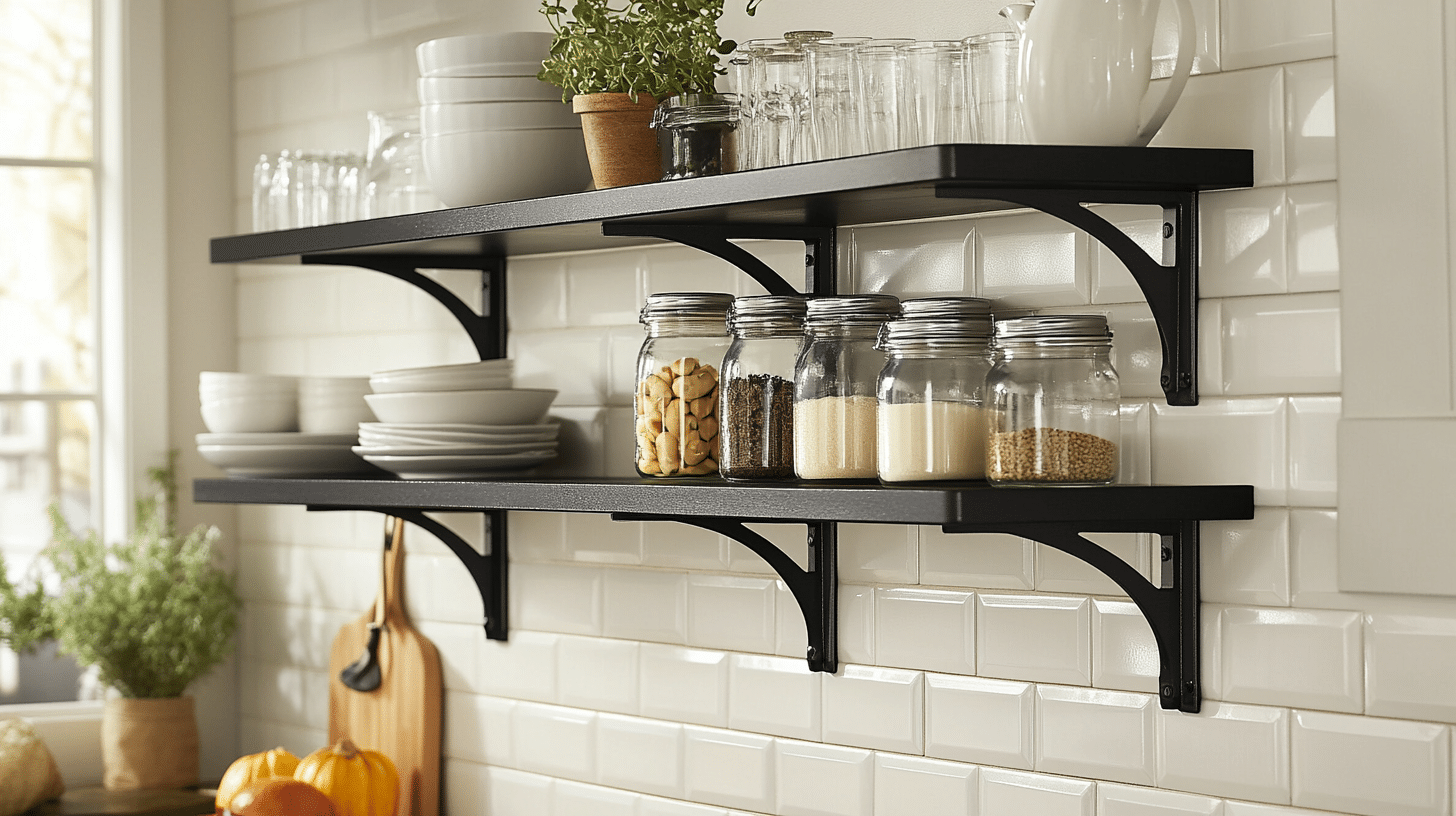
- Why It Works: Creates a striking contrast, making the shelves stand out.
- Materials Used: Matte black wood or metal shelves, wall brackets.
- Seasonal Styling Ideas: Display fresh flowers in spring and pumpkins in fall.
- DIY Budget Range: $60-$200, depending on shelf material and size.
4. Floating Shelves Around a Window
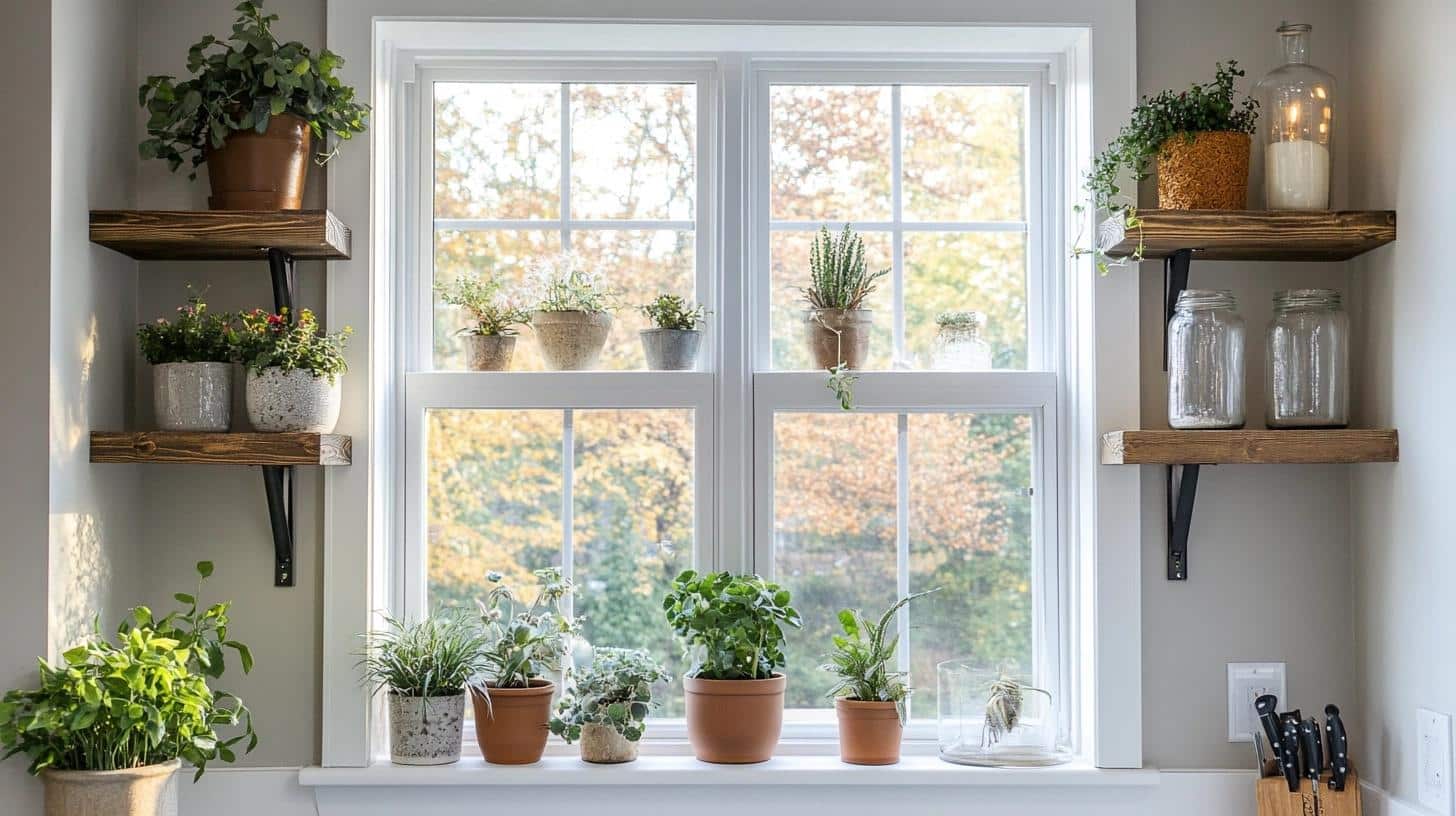
- Why It Works: Maximizes natural light while adding storage.
- Materials Used: Wood or glass shelves, window brackets.
- Seasonal Styling Ideas: Add plants in summer and string lights during winter for warmth.
- DIY Budget Range: $75-$250, depending on window size and shelf material.
5. Wood Floating Shelves and Subway Tile
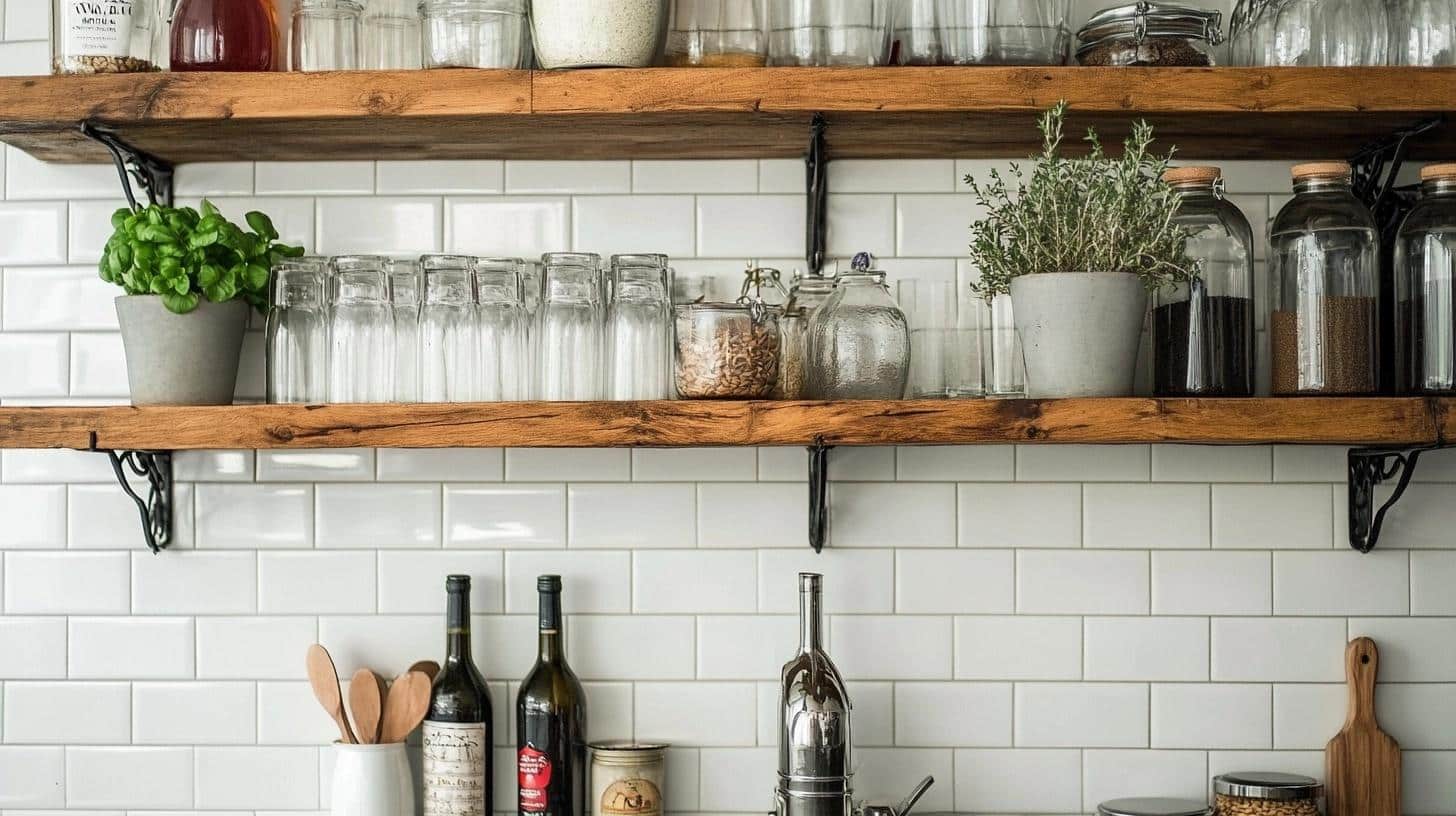
- Why It Works: Offers a timeless, clean look with a warm touch of wood.
- Materials Used: Solid wood shelves, white subway tiles, metal brackets.
- Seasonal Styling Ideas: Display fresh herbs in summer and pinecones in winter.
- DIY Budget Range: $80-$200, depending on wood type and tile costs.
6. Rounded Open Shelves
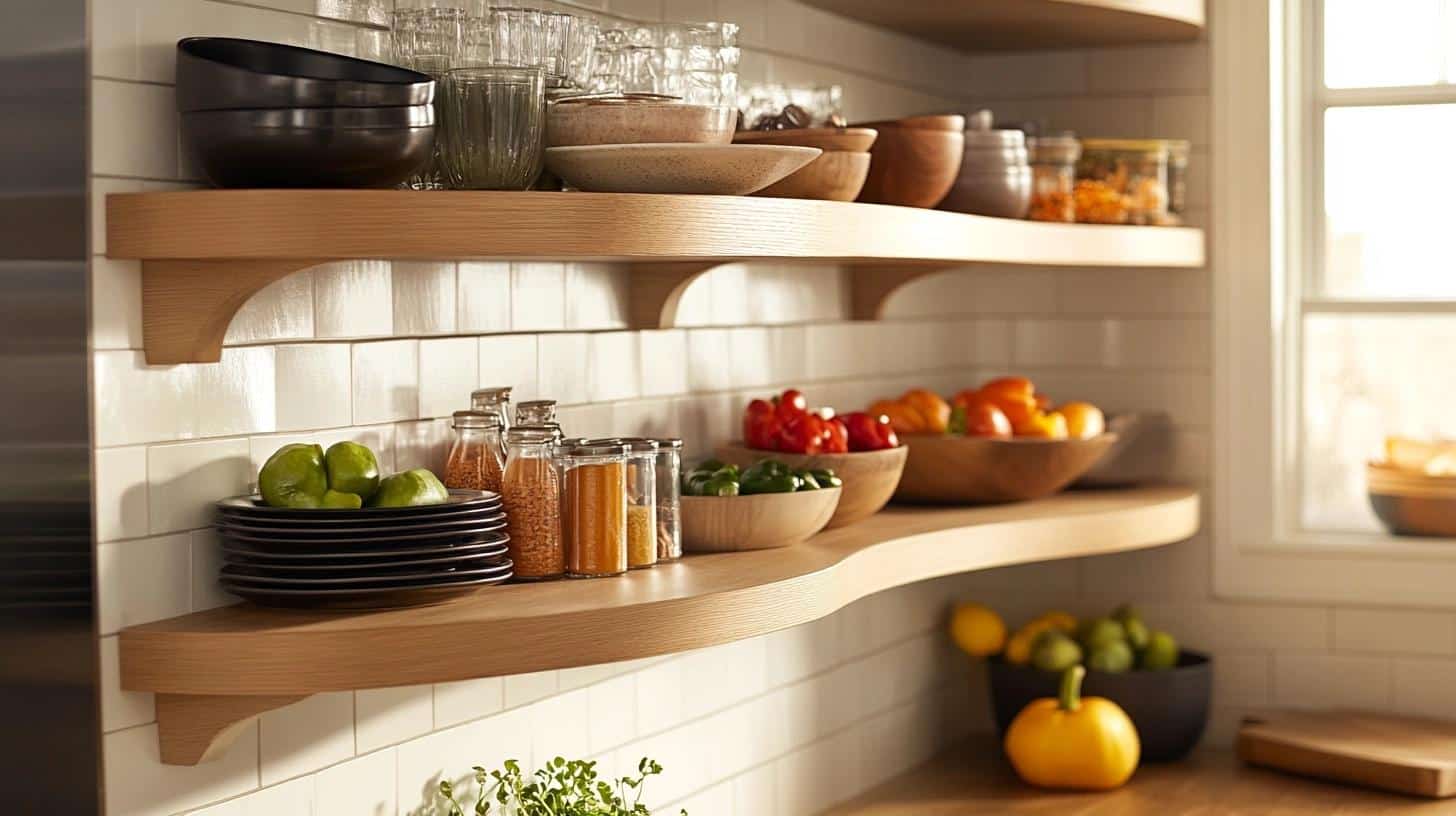
- Why It Works: Softens the look of the kitchen with curved, elegant shelving.
- Materials Used: Curved wood or metal shelves, rounded brackets.
- Seasonal Styling Ideas: Add colorful ceramics in spring and fall-themed accents like gourds.
- DIY Budget Range: $100-$250, depending on custom curved shelf material.
7. Open Shelf with Hooks Underneath
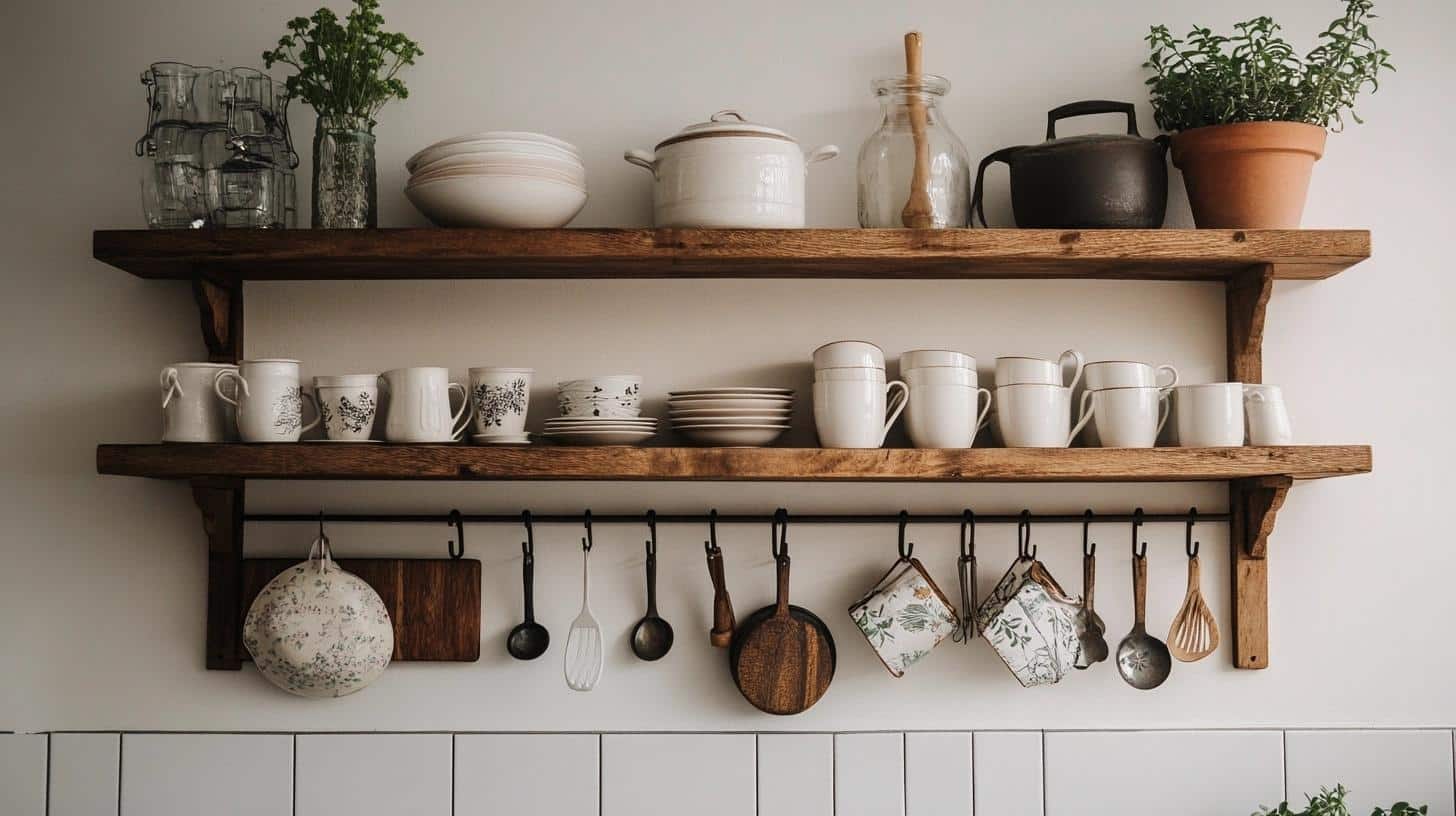
- Why It Works: Combines open storage with functionality, perfect for hanging utensils.
- Materials Used: Wood or metal shelves, sturdy hooks underneath.
- Seasonal Styling Ideas: Hang festive mugs in winter and floral tea towels in spring.
- DIY Budget Range: $50-$150, depending on shelf material and hook quality.
8. Walnut Floating Shelves
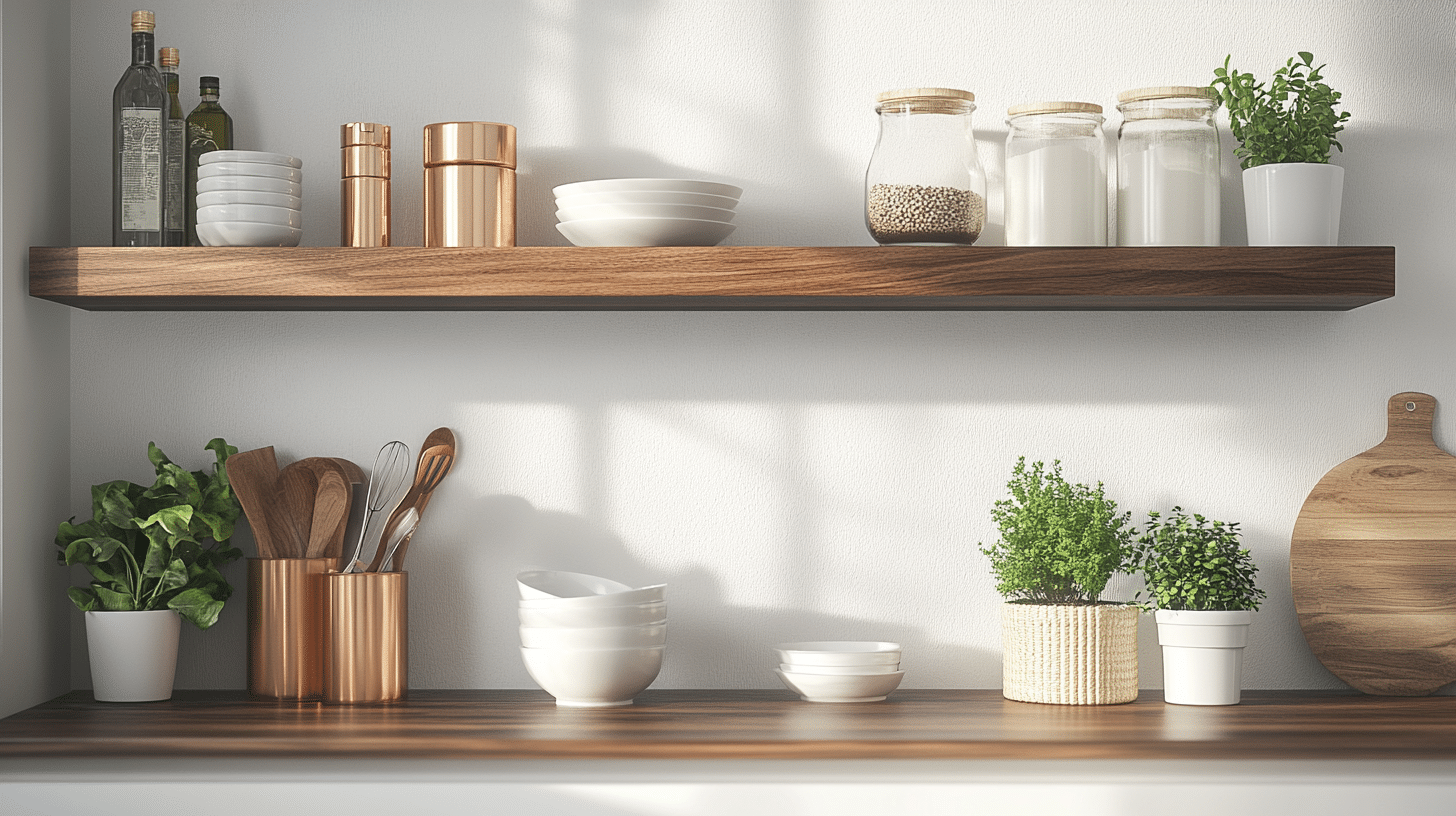
- Why It Works: Adds rich, dark tones to your kitchen for a sophisticated feel.
- Materials Used: Solid walnut wood, floating brackets.
- Seasonal Styling Ideas: Display copper accents in fall and minimalist white décor in summer.
- DIY Budget Range: $100-$300, depending on the size and thickness of the walnut wood.
9. Metal Kitchen Floating Shelves with Wood Cabinetry
- Why It Works: Blends industrial elements with warm wood for a balanced look.
- Materials Used: Metal shelving, wooden cabinetry.
- Seasonal Styling Ideas: Combine metal accents with greenery in spring and industrial lanterns in winter.
- DIY Budget Range: $150-$400, depending on metal and wood quality.
10. Floating Shelves with Built-in Lighting
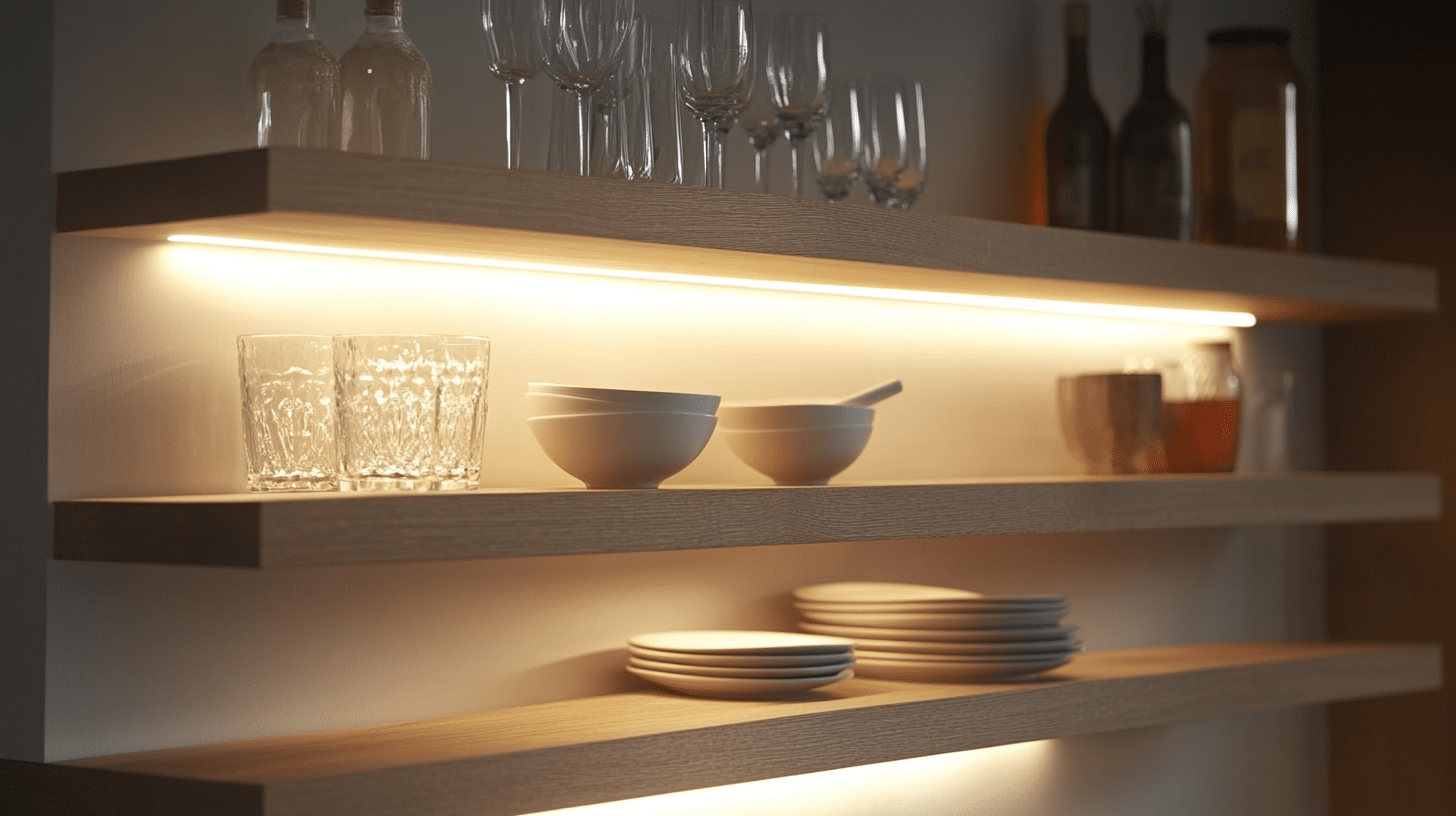
- Why It Works: Illuminates the space while adding stylish storage.
- Materials Used: Wood or glass shelves with integrated LED lighting.
- Seasonal Styling Ideas: Use glowing ornaments in winter and bright kitchenware in summer.
- DIY Budget Range: $100-$250, depending on shelf material and lighting complexity.
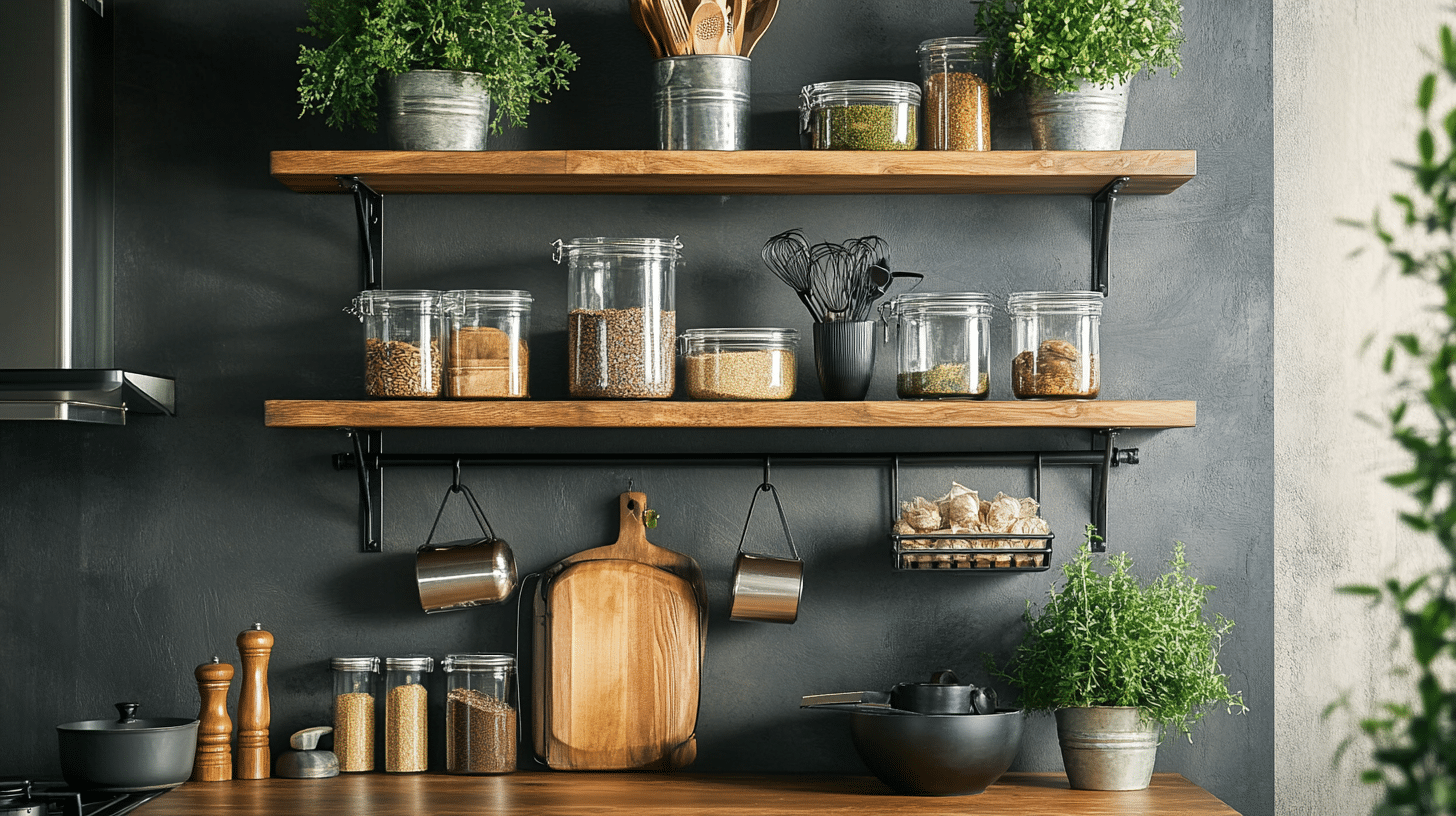
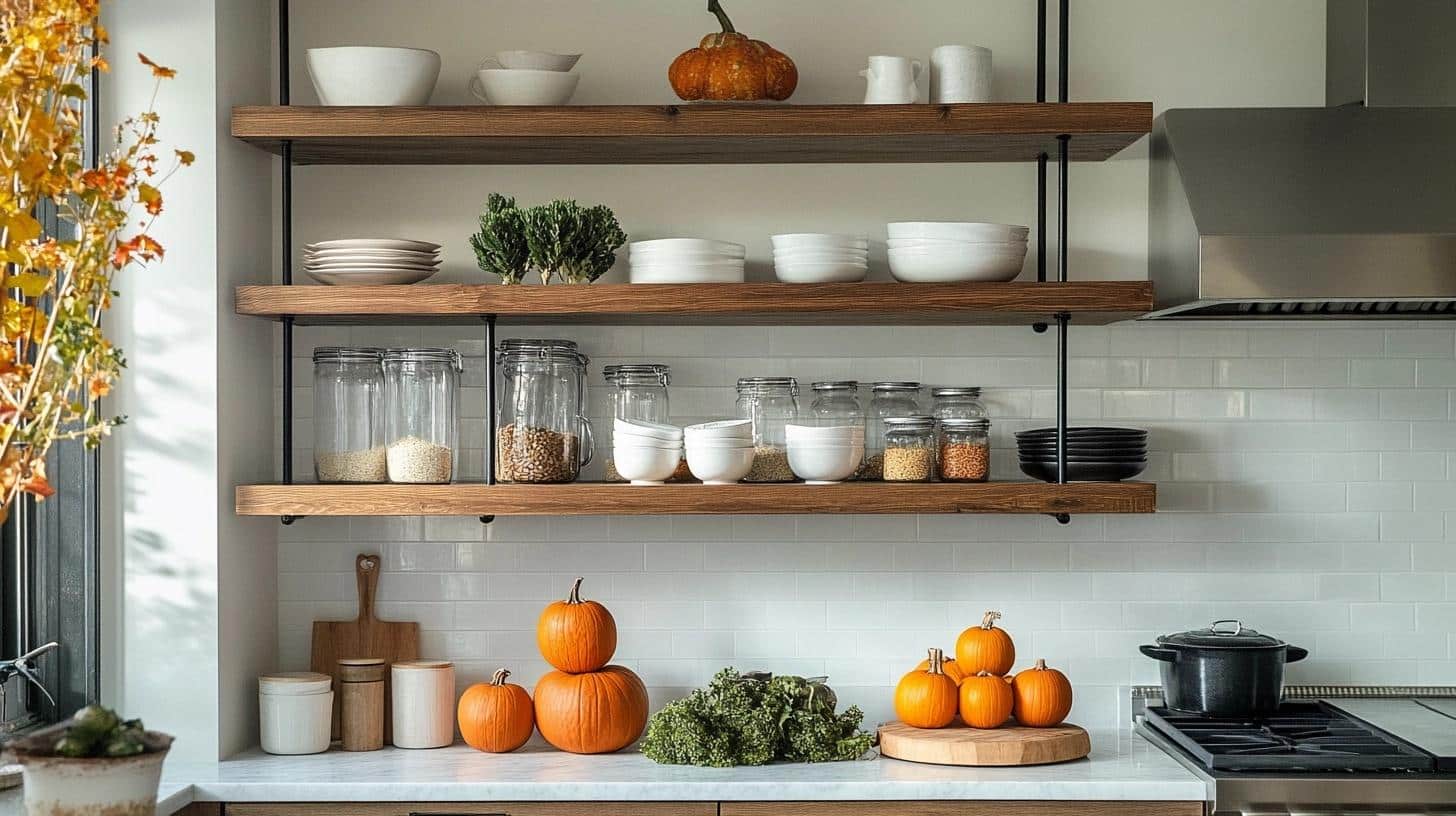
11. Industrial Kitchen Open Shelving with Neutral Color Scheme

- Why It Works: Combines raw materials and neutral tones for a sleek, modern look.
- Materials Used: Metal or wood shelving, neutral wall paint, exposed brackets.
- Seasonal Styling Ideas: Add dark accents in winter and fresh plants in spring.
- DIY Budget Range: $150-$300, depending on shelf material and décor.
12. Rustic Wooden Shelves Above a Farmhouse Sink
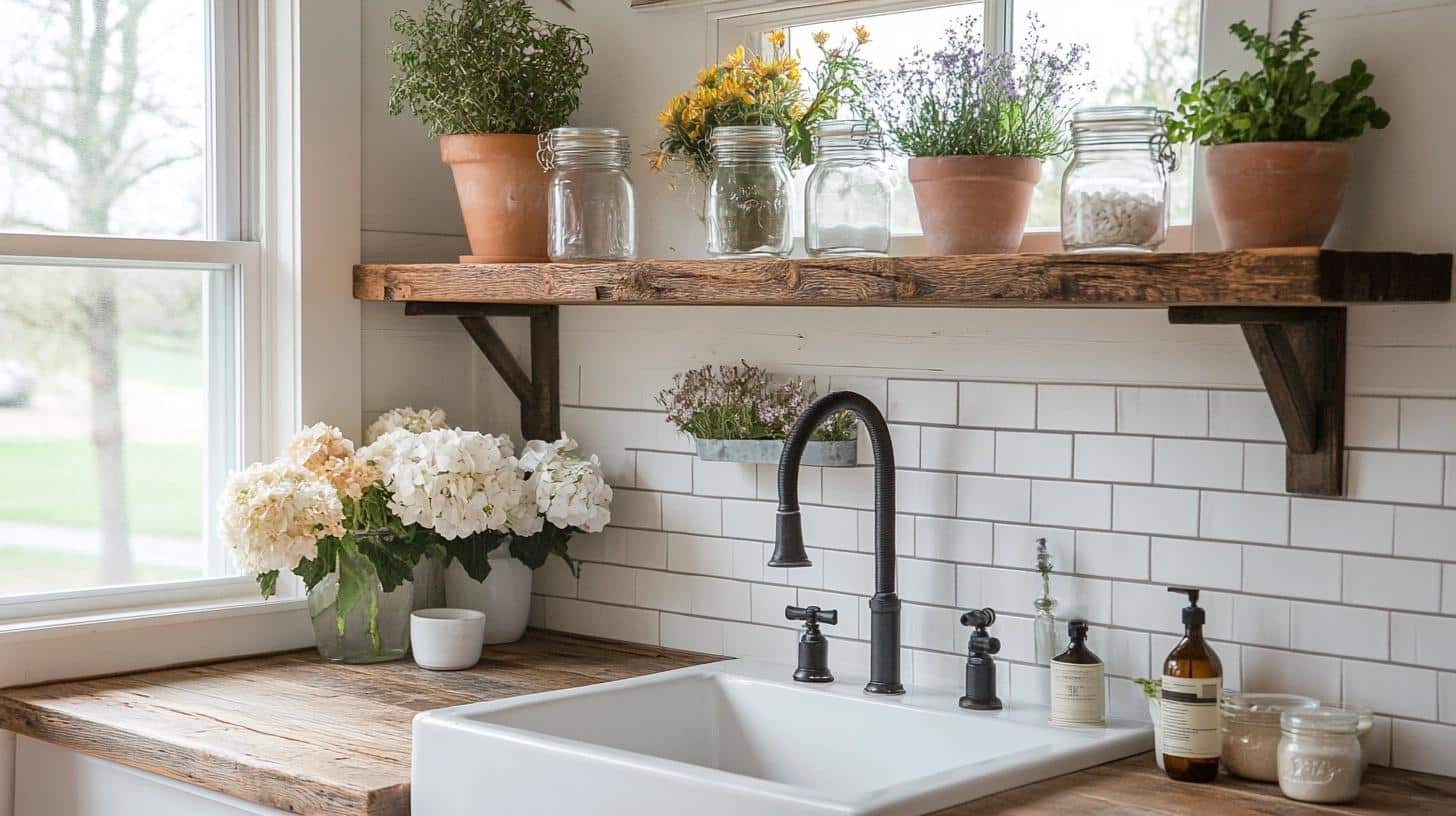
- Why It Works: Complements the farmhouse style with a cozy, natural look.
- Materials Used: Reclaimed wood, rustic brackets.
- Seasonal Styling Ideas: Display mason jars with seasonal flowers in spring and candles in fall.
- DIY Budget Range: $70-$200, depending on wood type and bracket choice.
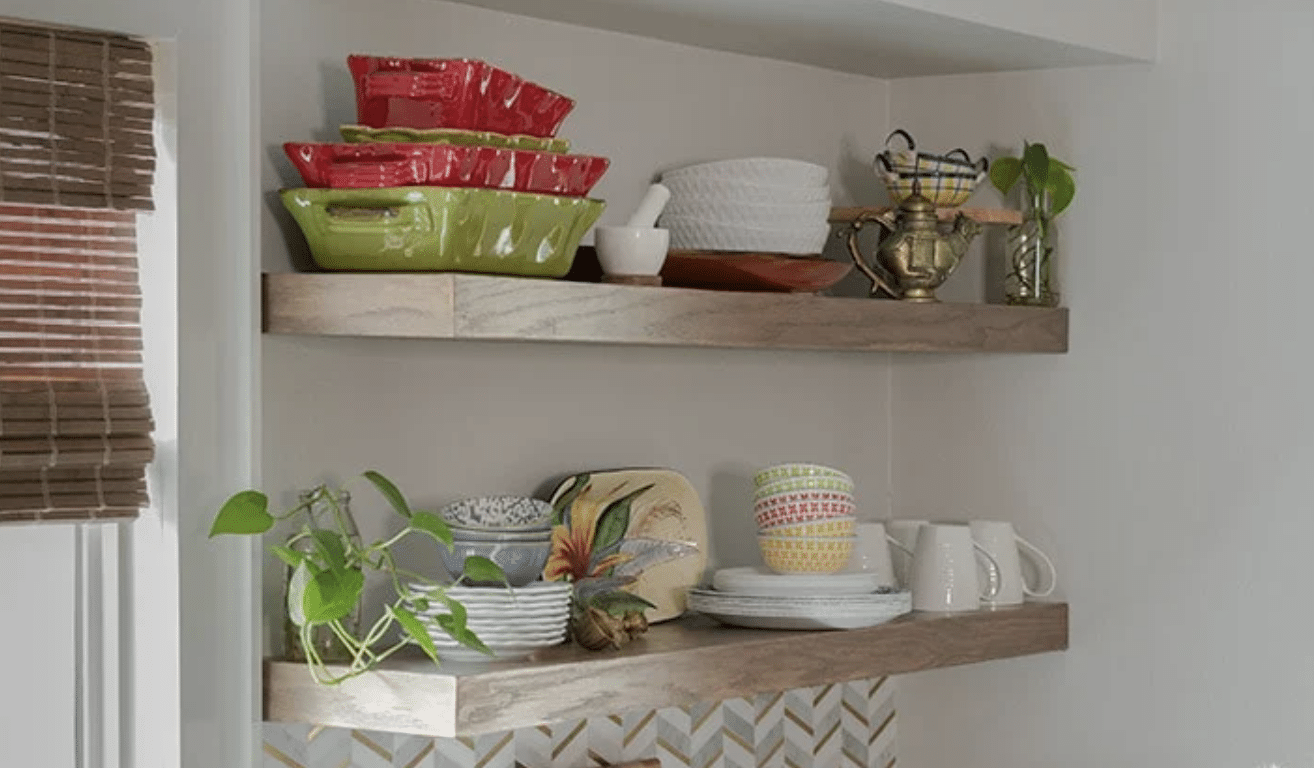
13. Colorful Floating Shelves
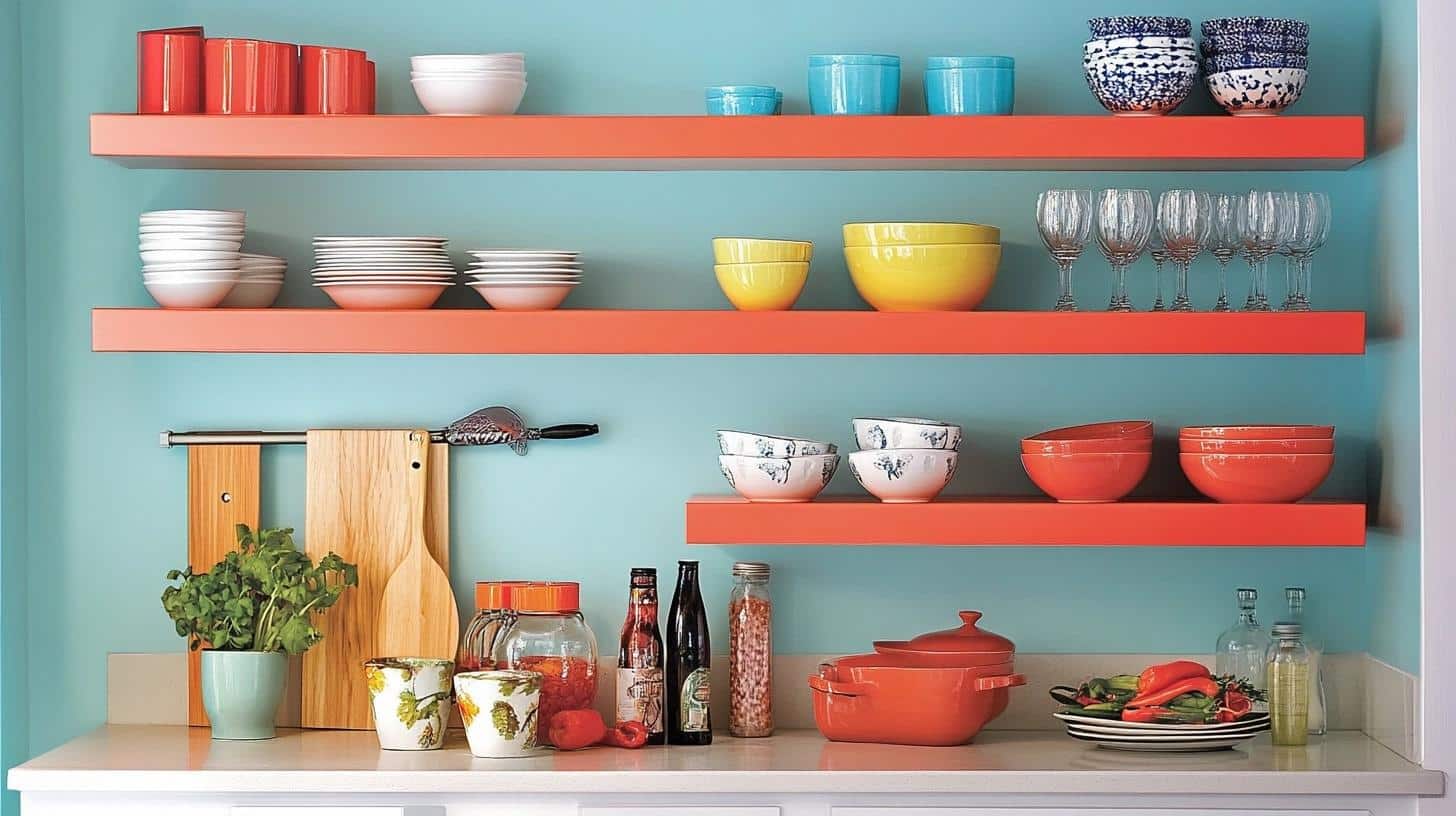
- Why It Works: Adds a vibrant pop of color to a neutral kitchen space.
- Materials Used: Painted wood or metal shelves, wall brackets.
- Seasonal Styling Ideas: Coordinate shelf colors with the season—bright pastels in spring, deep reds in winter.
- DIY Budget Range: $50-$150, depending on shelf material and paint quality.
14. Slate Mosaic Tiles and Floating Shelves
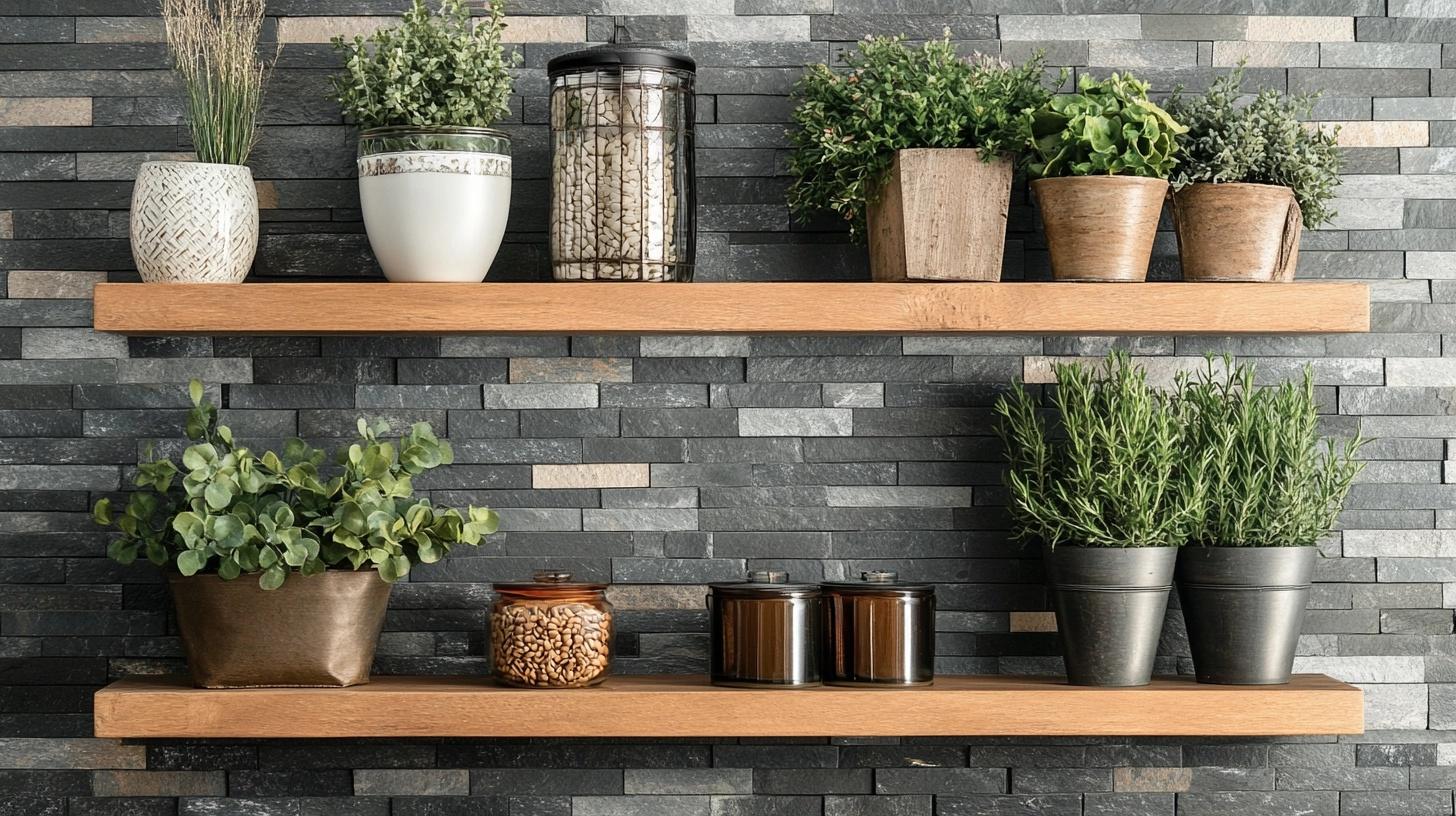
- Why It Works: Provides a textured, earthy backdrop for modern floating shelves.
- Materials Used: Slate mosaic tiles, wood or metal shelves.
- Seasonal Styling Ideas: Accent with seasonal décor like greenery in summer and rustic candles in winter.
- DIY Budget Range: $100-$300, depending on tile and shelf materials.
15. Two-Tone Shelves Matching Cabinet and Wall Colors
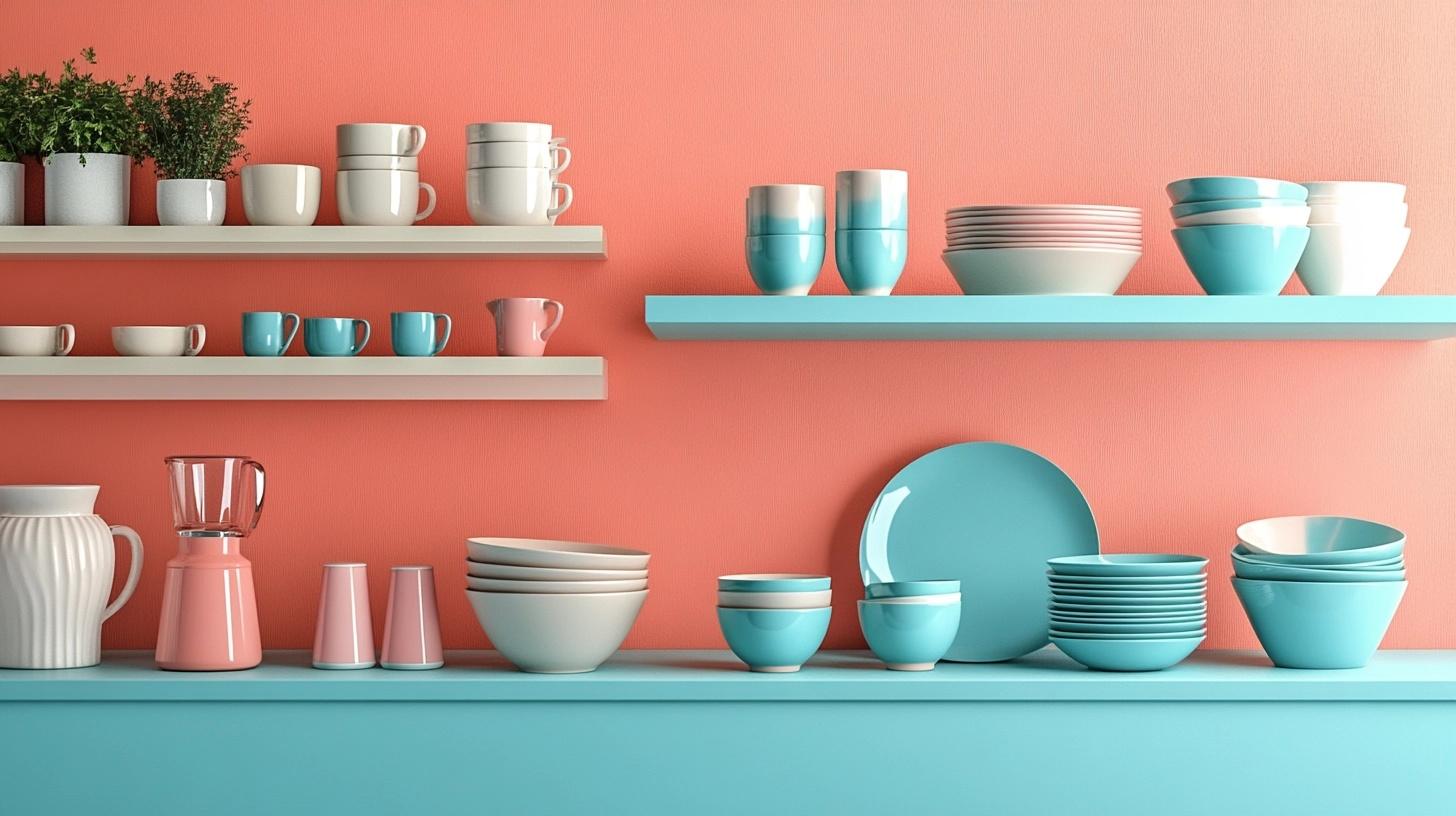
- Why It Works: Blends shelves seamlessly with the kitchen’s color palette for a cohesive design.
- Materials Used: Painted wood shelves, color-matched paint for walls and cabinets.
- Seasonal Styling Ideas: Add seasonal ceramics or glassware to match changing colors.
- DIY Budget Range: $60-$180, depending on paint and shelf material.
16. White Kitchen Floating Shelves
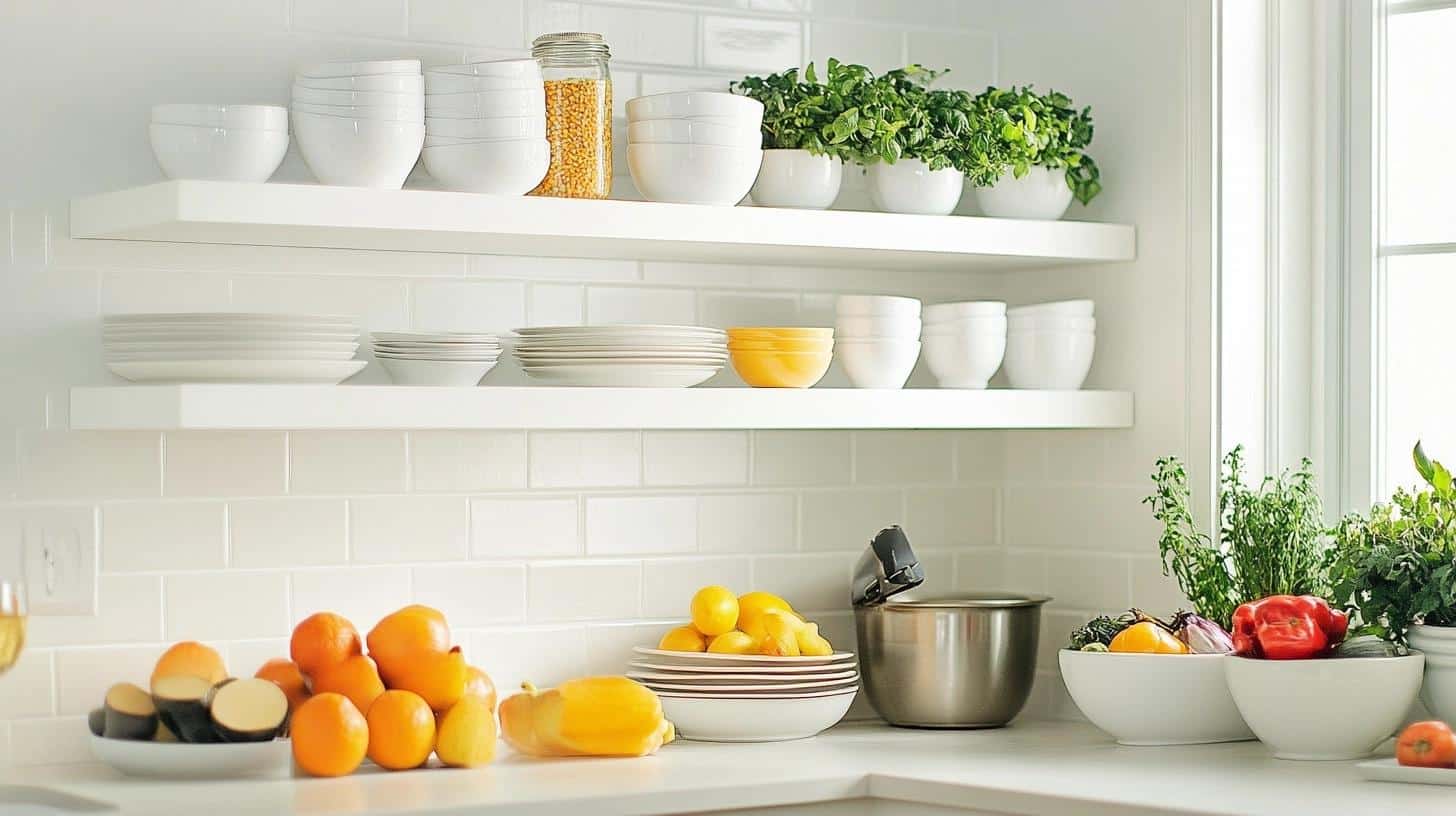
- Why It Works: Keeps the kitchen light and airy while offering practical storage.
- Materials Used: White-painted wood shelves, hidden brackets.
- Seasonal Styling Ideas: Use white shelves as a neutral backdrop for colorful holiday décor.
- DIY Budget Range: $50-$120, depending on shelf size and paint.
17. Floating Shelves with Marble Backsplash
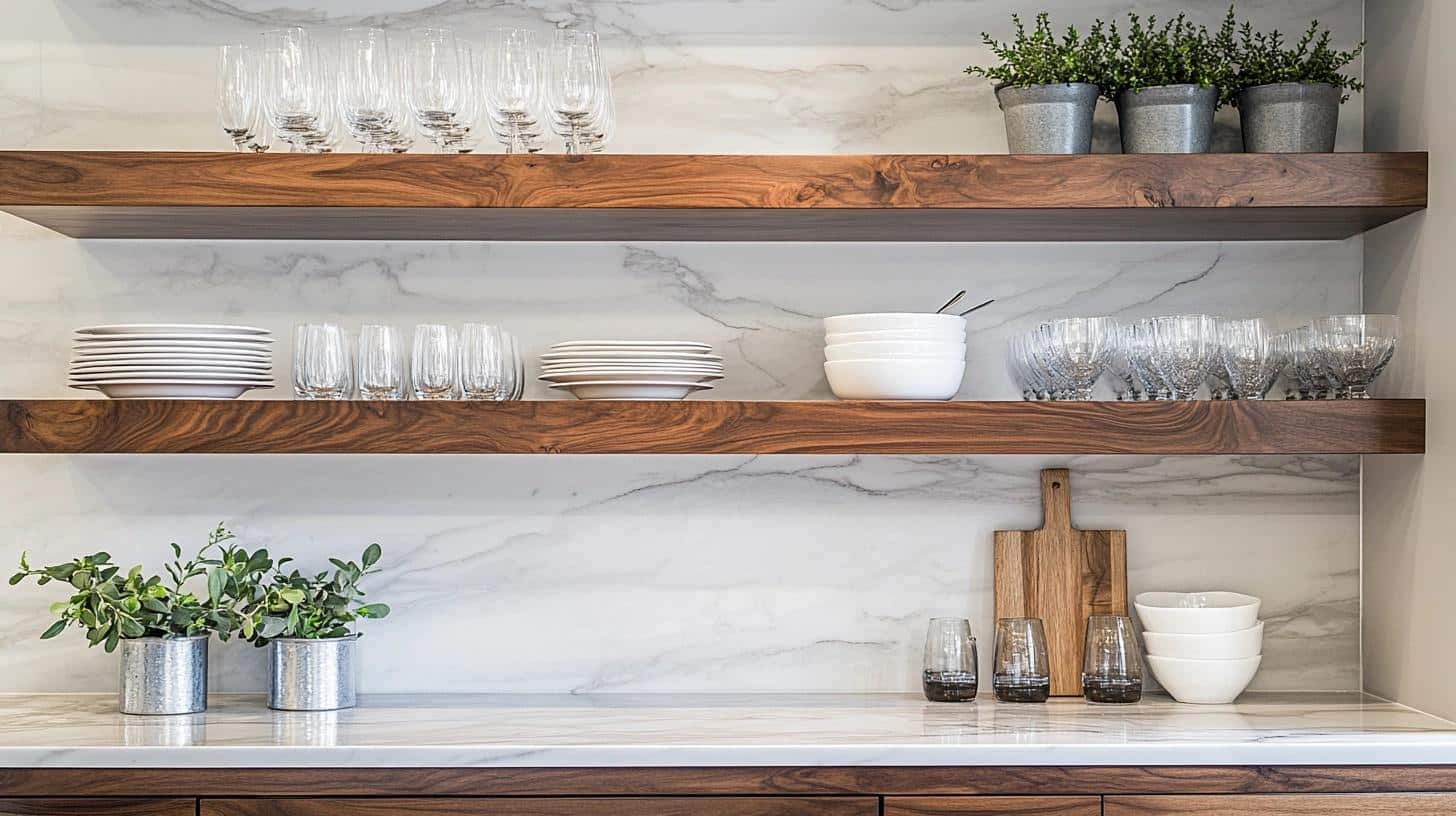
- Why It Works: Luxurious and modern, adds elegance while providing storage.
- Materials Used: Marble tiles for backsplash, wood or metal shelves.
- Seasonal Styling Ideas: Decorate with simple, high-end items like crystal glassware or minimalist greenery.
- DIY Budget Range: $150-$400, depending on marble and shelf material.
18. Standalone Open Shelf
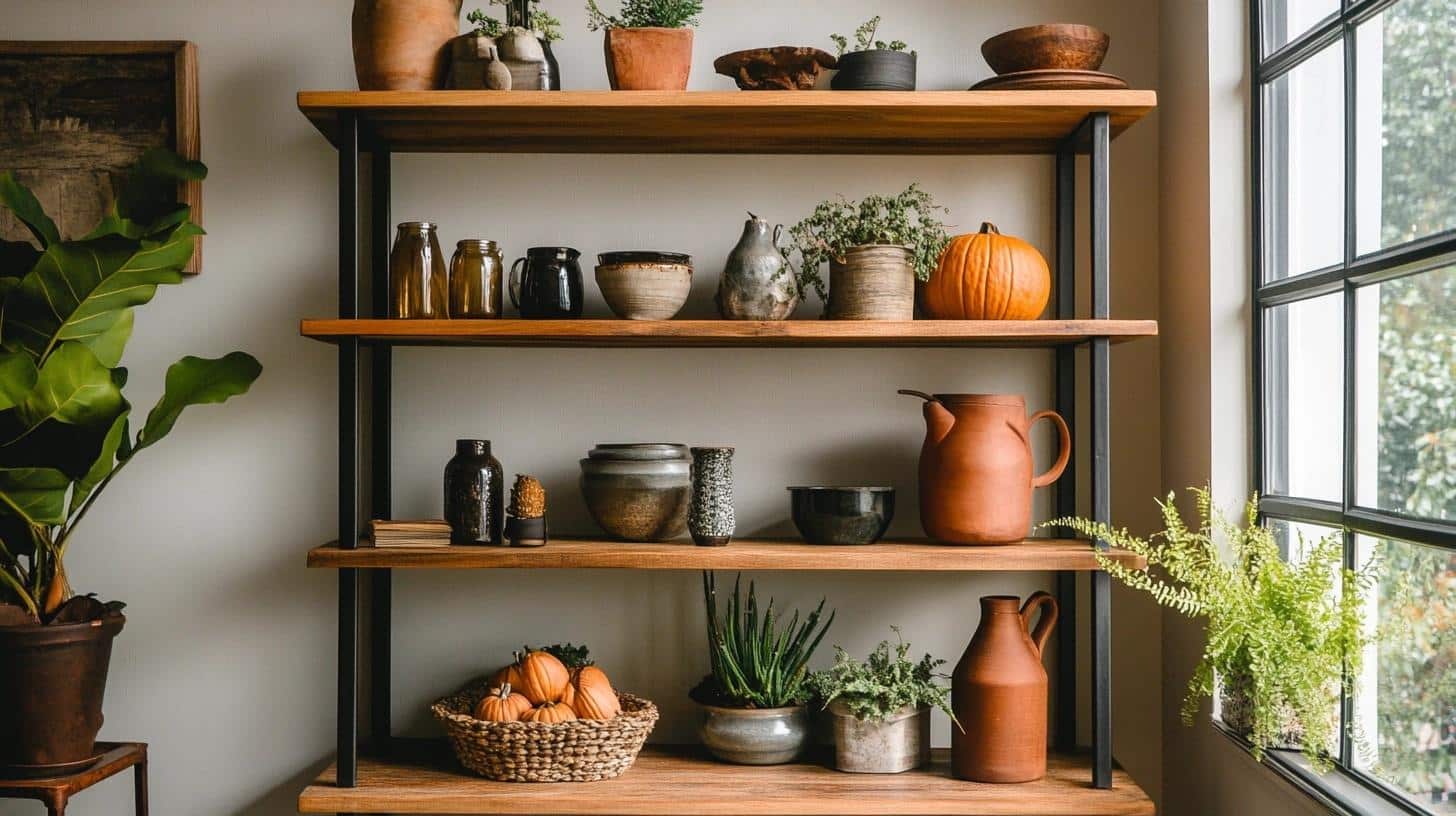
- Why It Works: Acts as both storage and a display feature without taking up wall space.
- Materials Used: Freestanding wood or metal shelf unit.
- Seasonal Styling Ideas: Switch out seasonal accessories like pumpkins in fall and vases in spring.
- DIY Budget Range: $80-$250, depending on shelf material and size.
19. Fill Gaps with Open Shelves
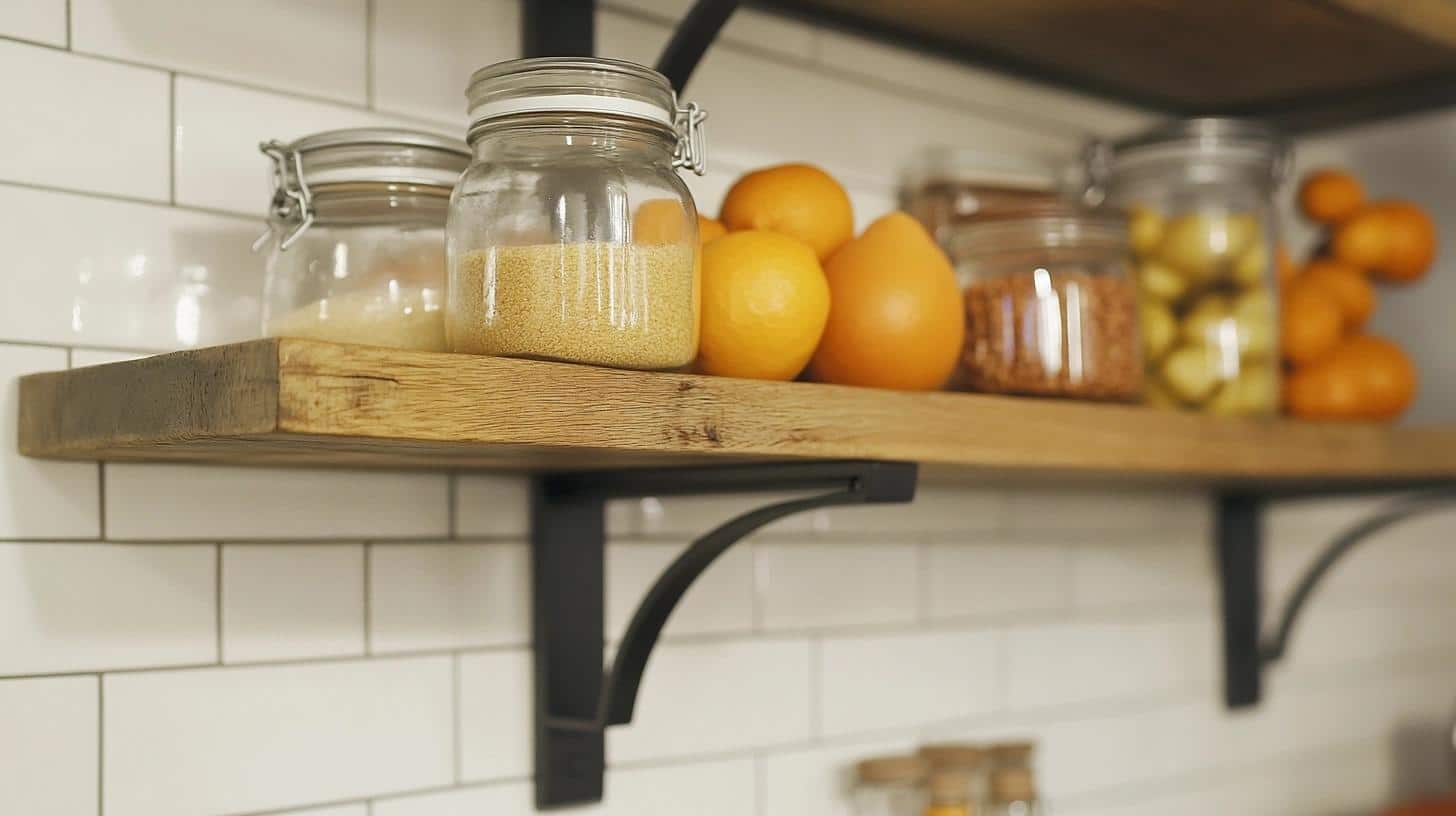
- Why It Works: Utilizes unused spaces in the kitchen for extra storage.
- Materials Used: Custom wood or metal shelves, brackets.
- Seasonal Styling Ideas: Display seasonal fruits or decorative jars that change with the time of year.
- DIY Budget Range: $60-$200, depending on shelf size and materials.
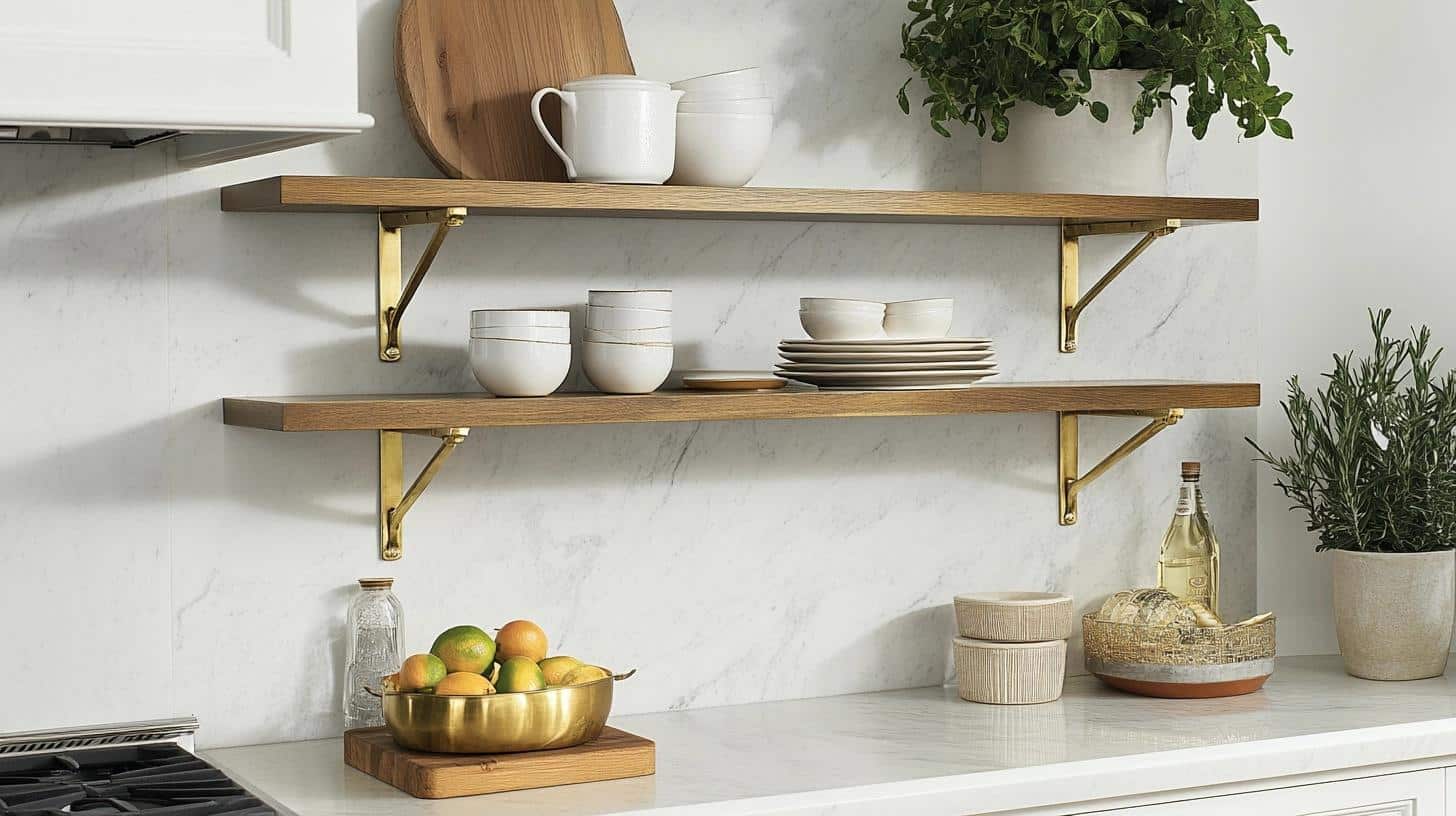
20. Floating Shelves with Brass Finish
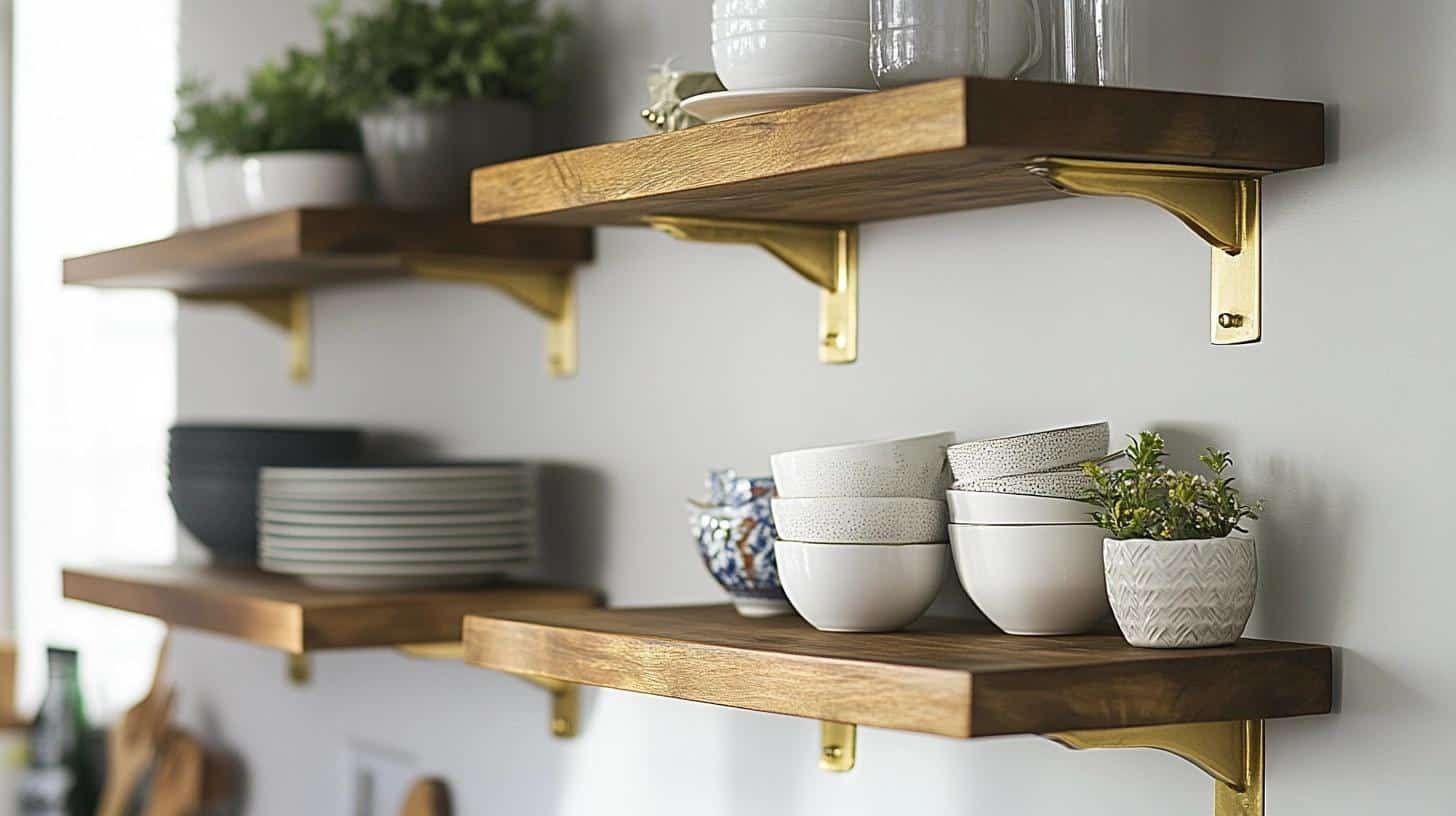
- Why It Works: Adds a touch of glamour and warmth to any kitchen.
- Materials Used: Brass-finished metal shelves or brass brackets with wood shelves.
- Seasonal Styling Ideas: Add holiday-themed gold or metallic accents during winter.
- DIY Budget Range: $100-$300, depending on brass finish quality and shelf materials.
21. Perfect Cookbook Shelves
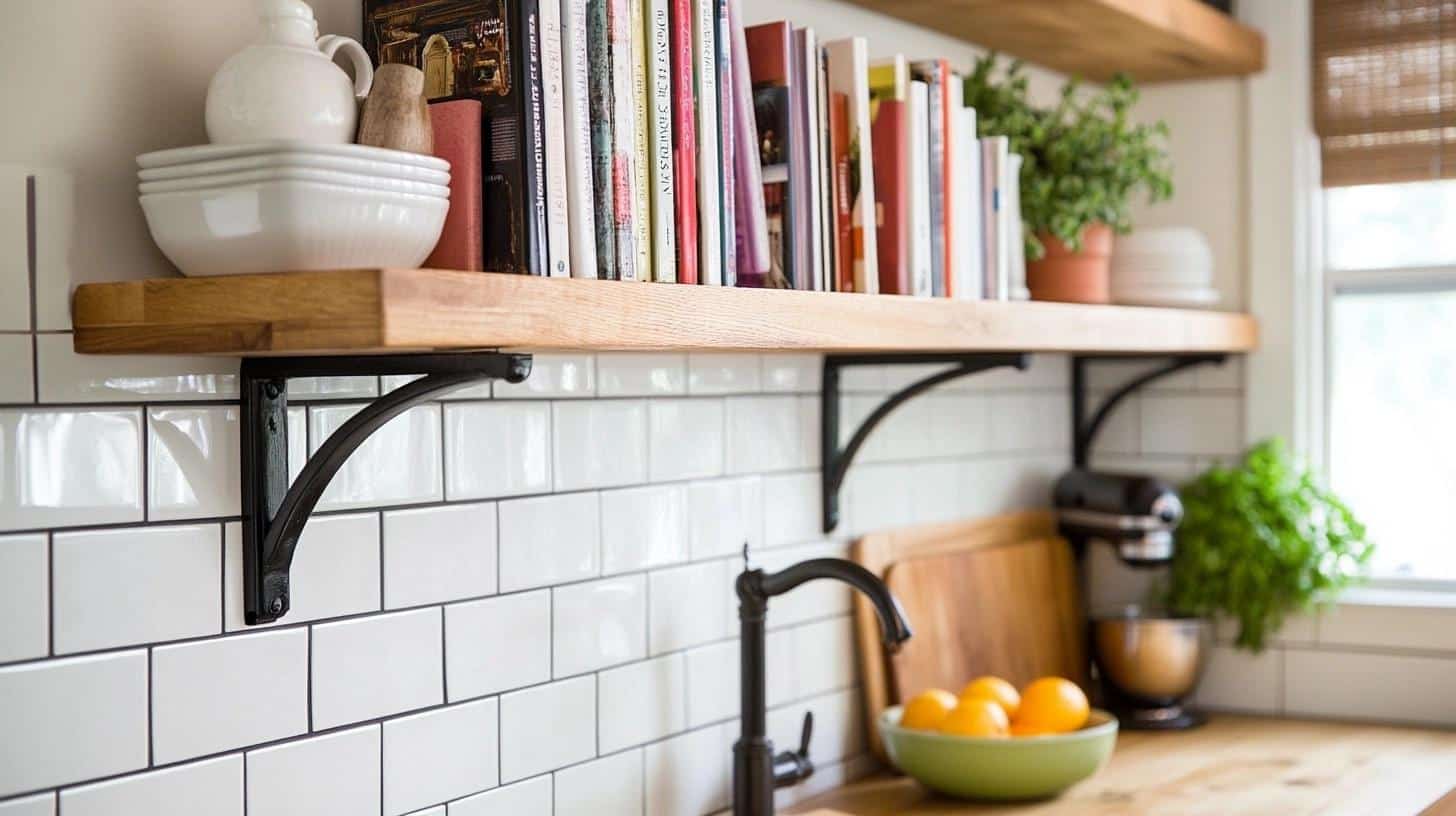
- Why It Works: Keeps cookbooks organized and within easy reach while adding personality to the kitchen.
- Materials Used: Wood or metal shelves, sturdy brackets.
- Seasonal Styling Ideas: Display seasonal cookbooks or add small décor like plants alongside books.
- DIY Budget Range: $50-$150, depending on shelf material and bracket quality.
22. Dividing Space with Floating Shelves
- Why It Works: Functions as both storage and a room divider in open-plan kitchens.
- Materials Used: Wood or metal shelves, strong supports for stability.
- Seasonal Styling Ideas: Use shelves to display seasonal decorations like pumpkins in fall or flowers in spring.
- DIY Budget Range: $150-$400, depending on shelf size and materials.
23. Glass Kitchen Floating Shelves
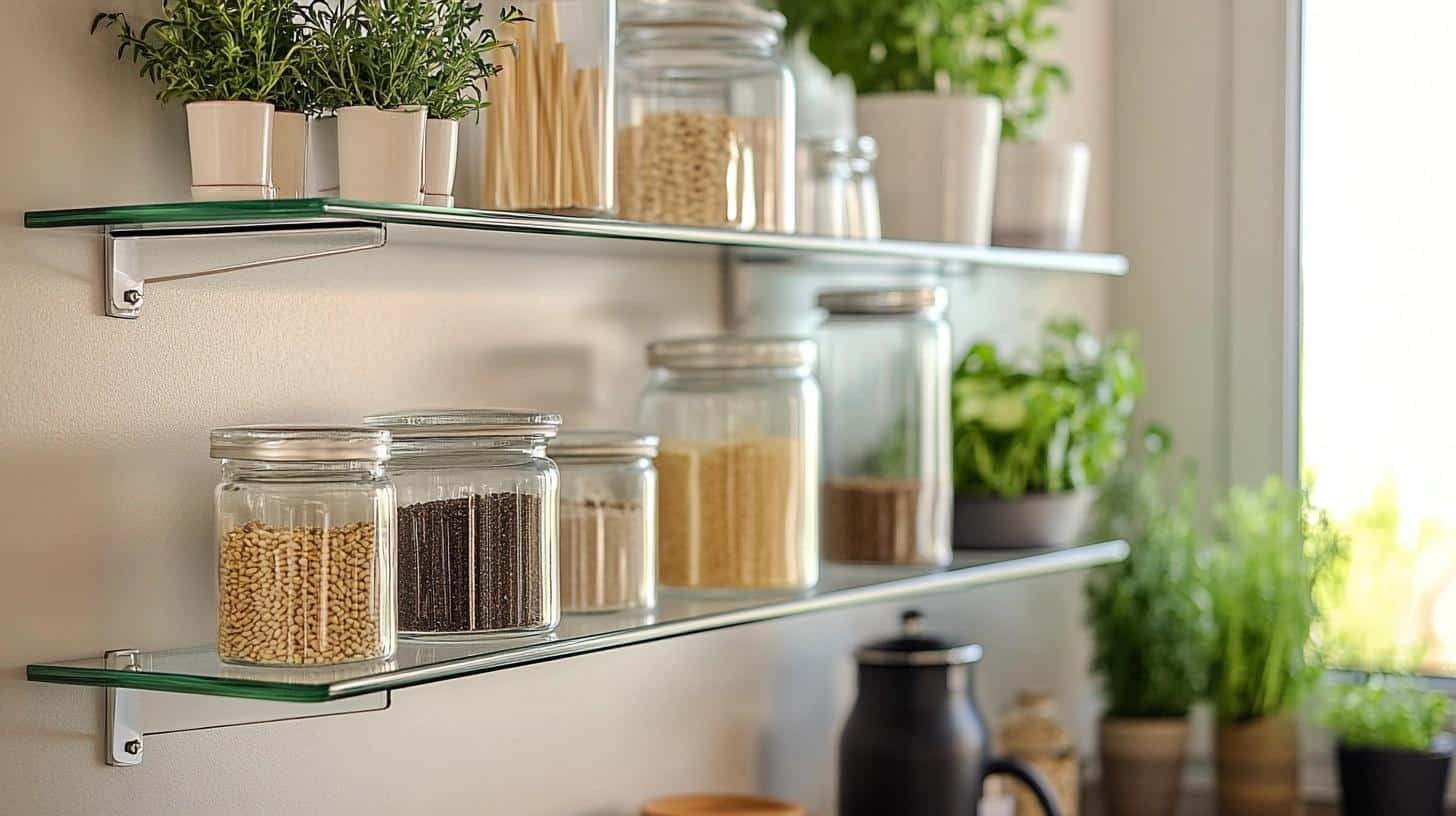
- Why It Works: Creates an open, airy feel while offering storage without overwhelming the space.
- Materials Used: Tempered glass shelves, hidden brackets.
- Seasonal Styling Ideas: Display simple seasonal décor like candles in winter or fresh herbs in summer.
- DIY Budget Range: $100-$250, depending on glass quality and bracket type.
24. Create a Coffee Bar
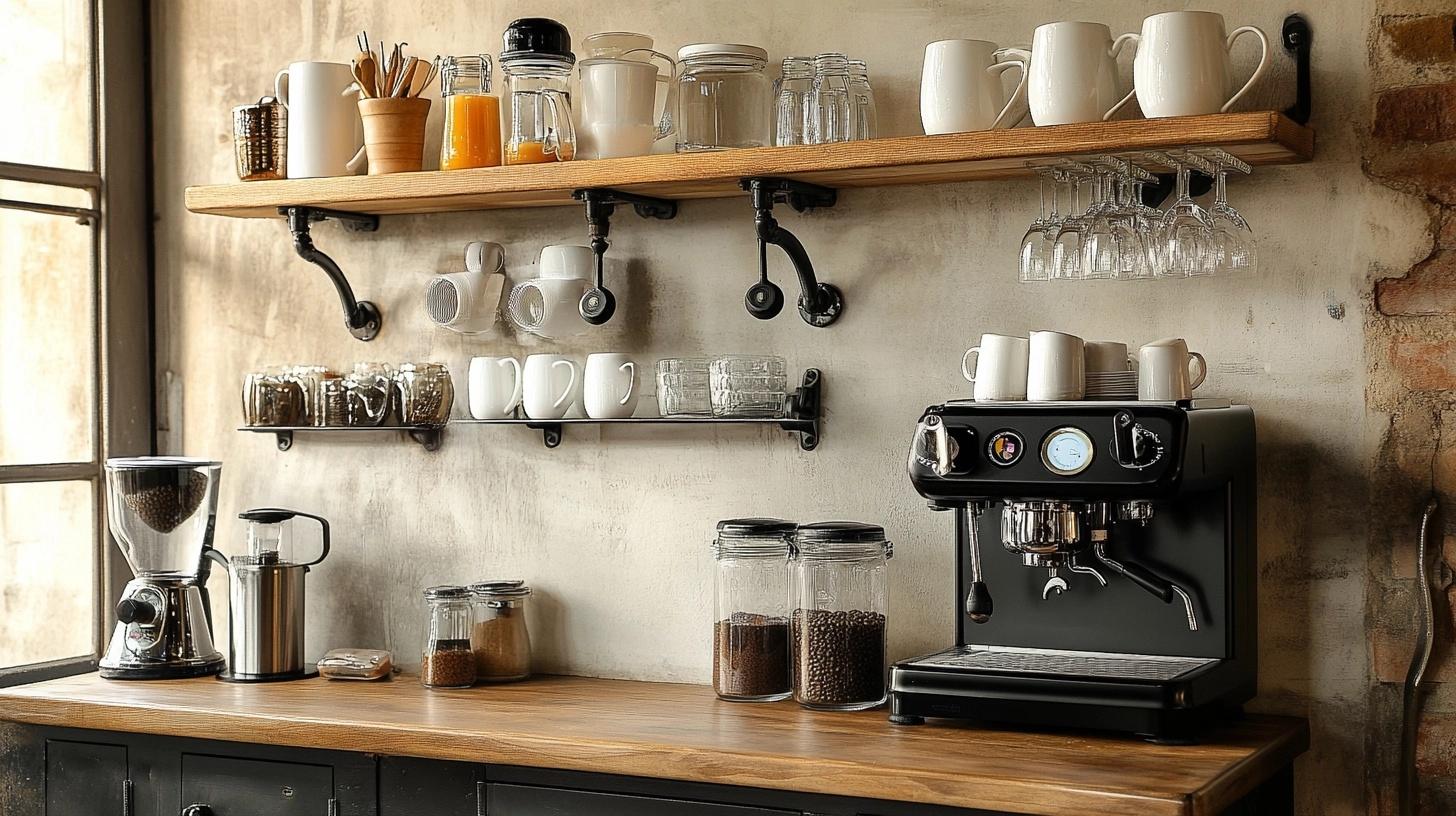
- Why It Works: Transforms unused wall space into a practical and stylish coffee station.
- Materials Used: Wood or metal shelves, hooks for mugs, coffee machine.
- Seasonal Styling Ideas: Add seasonal coffee mugs or flavored syrups like peppermint in winter.
- DIY Budget Range: $75-$200, depending on shelf material and coffee accessories.
25. Open Shelving Unit Replacing a Pantry Door
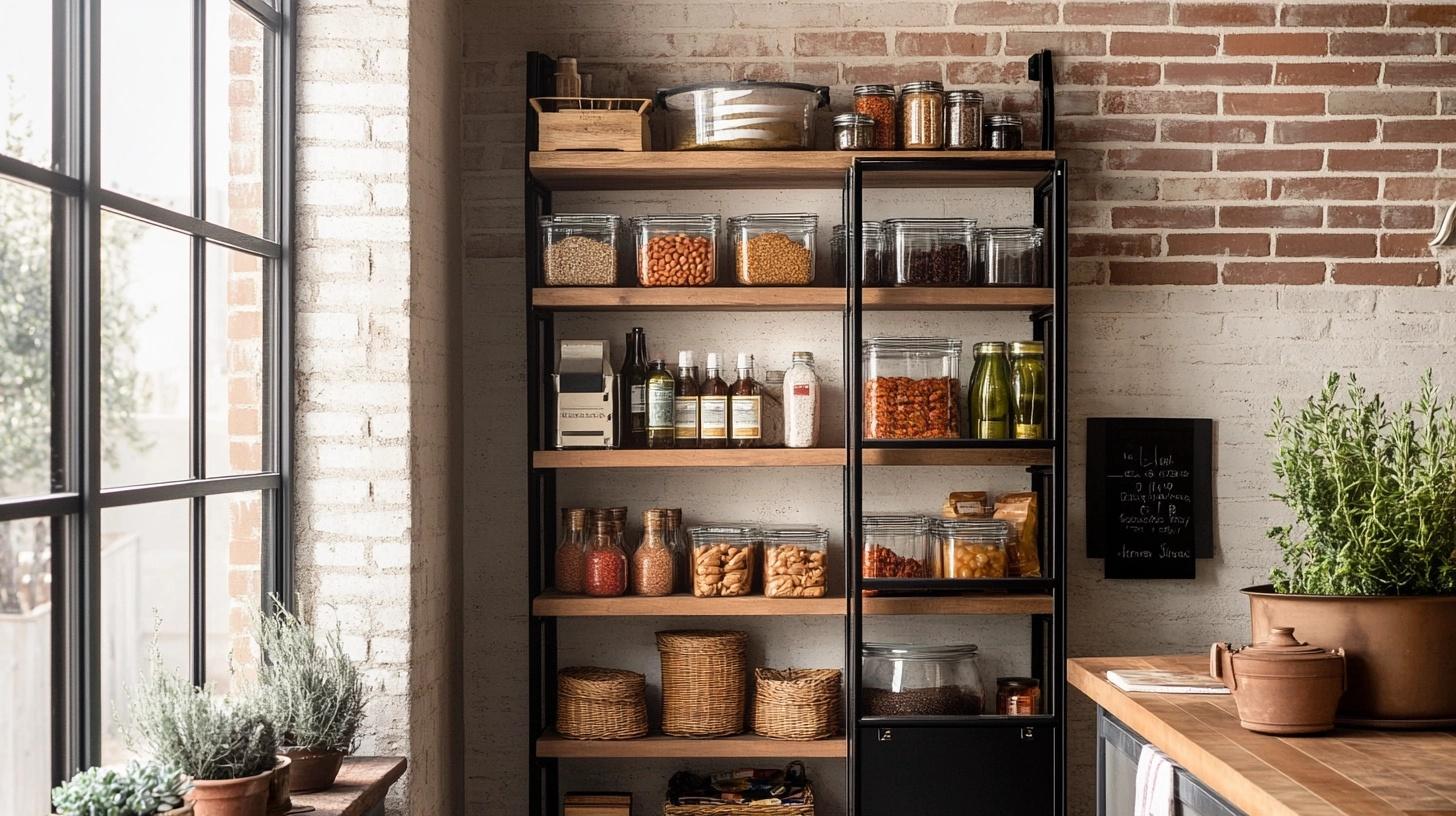
- Why It Works: Provides easy access to pantry items while displaying them in an organized way.
- Materials Used: Wooden or metal shelving unit, open design.
- Seasonal Styling Ideas: Store seasonal items like holiday baking supplies in winter and fresh produce in summer.
- DIY Budget Range: $100-$300, depending on shelf material and size.
26. Narrow Shelves Fitting Between Upper Cabinets
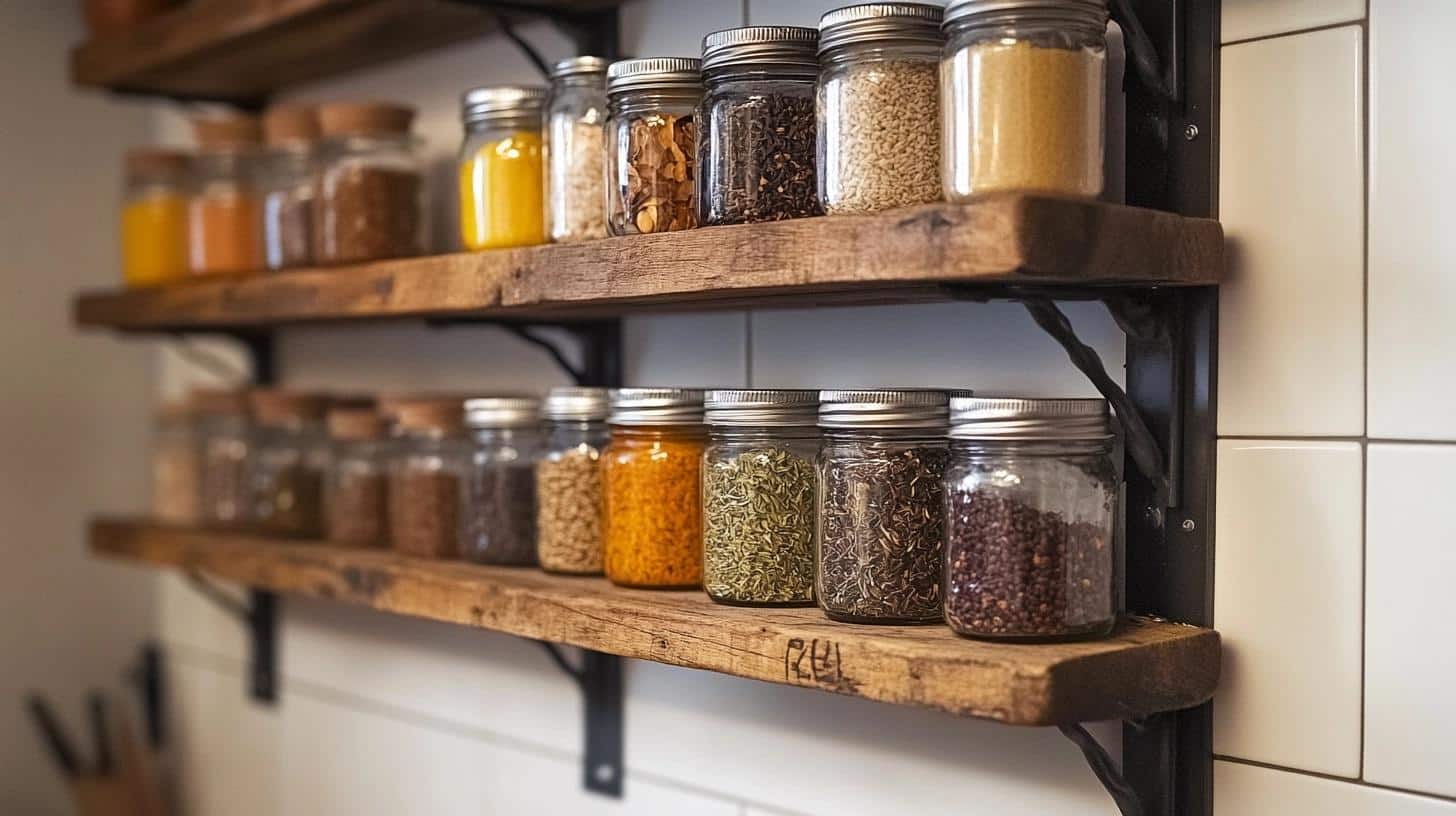
- Why It Works: Utilizes small, often wasted spaces for additional storage.
- Materials Used: Narrow wood or metal shelves, sturdy brackets.
- Seasonal Styling Ideas: Store spices or seasonal ingredients in small jars on the shelves.
- DIY Budget Range: $50-$150, depending on shelf material and length.
27. Open Pantry on the Side of Kitchen Island
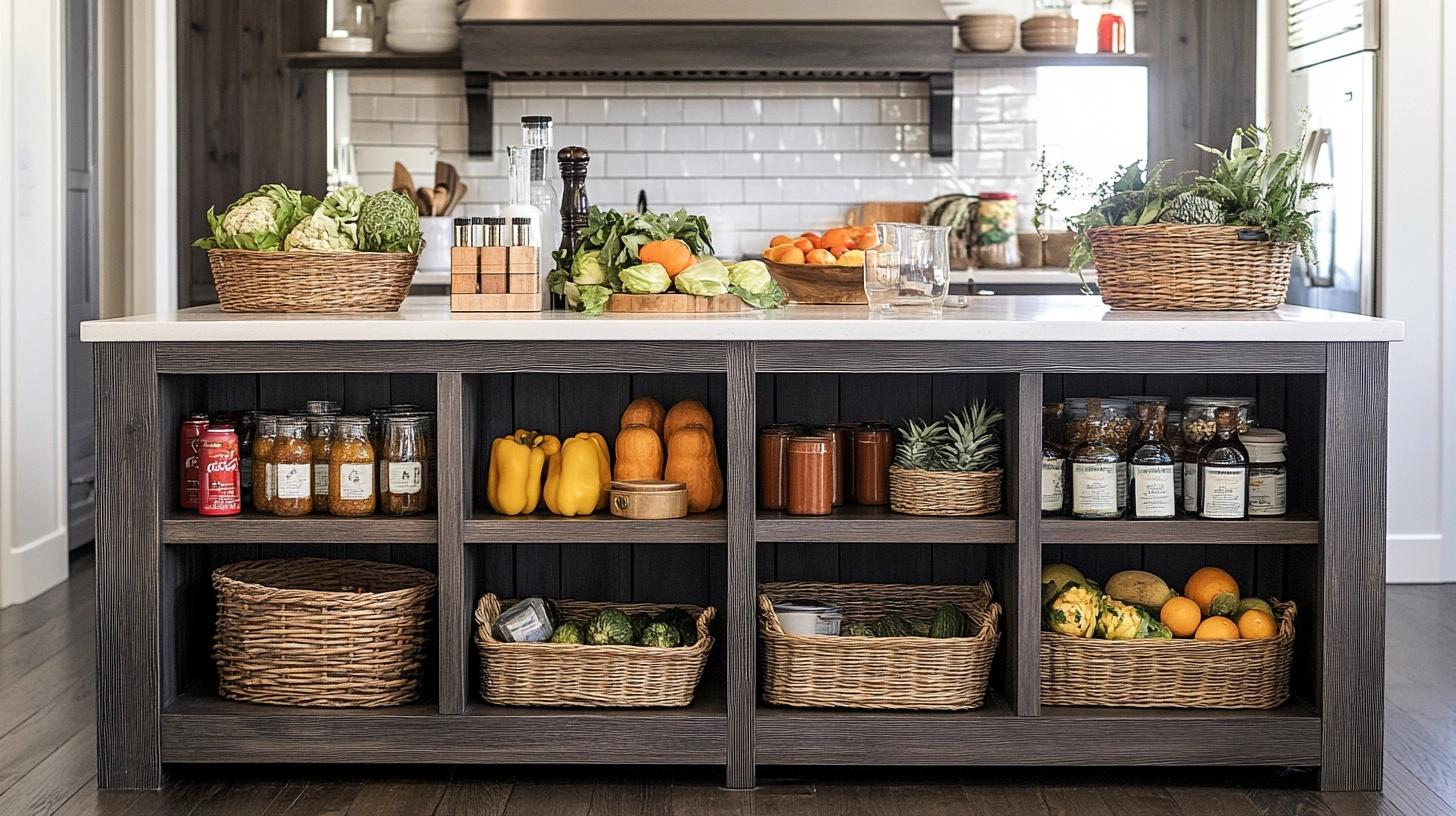
- Why It Works: Maximizes space by providing additional storage in an easily accessible spot.
- Materials Used: Wood or metal shelves, integrated into the side of the kitchen island.
- Seasonal Styling Ideas: Display seasonal pantry items like holiday-themed containers or baskets filled with fresh produce.
- DIY Budget Range: $100-$250, depending on the island’s structure and shelf material.
28. Open Shelves on an Accent Wall
- Why It Works: Adds visual interest while providing functional storage, perfect for showcasing decorative or functional kitchen items.
- Materials Used: Wood, metal, or glass shelves mounted on a painted or wallpapered accent wall.
- Seasonal Styling Ideas: Change the display to match seasons—think pumpkins in fall, bright florals in spring.
- DIY Budget Range: $80-$200, depending on shelf materials and wall treatment.
Step-by-Step Tutorial on Building DIY Kitchen Floating Shelves
1. Materials and Tools Required
| Materials | Tools |
|---|---|
| 1×2 and 1×3 boards | Kreg Jig |
| ¾” plywood | Miter saw |
| 4″ GRK structural screws | Circular saw or table saw |
| 4″ toggle bolts | Drill-driver or impact driver |
| 1¼” pocket hole screws | Clamps (face clamps and trigger clamps) |
| Finish nails (1¼”) | Sanding sponge |
| Wood glue | Screwdriver (for seam finishing) |
| Wood putty | Finish nailer |
| Stain (optional) | Angle gauge (for precise cuts) |
2. Step by Step Instructions
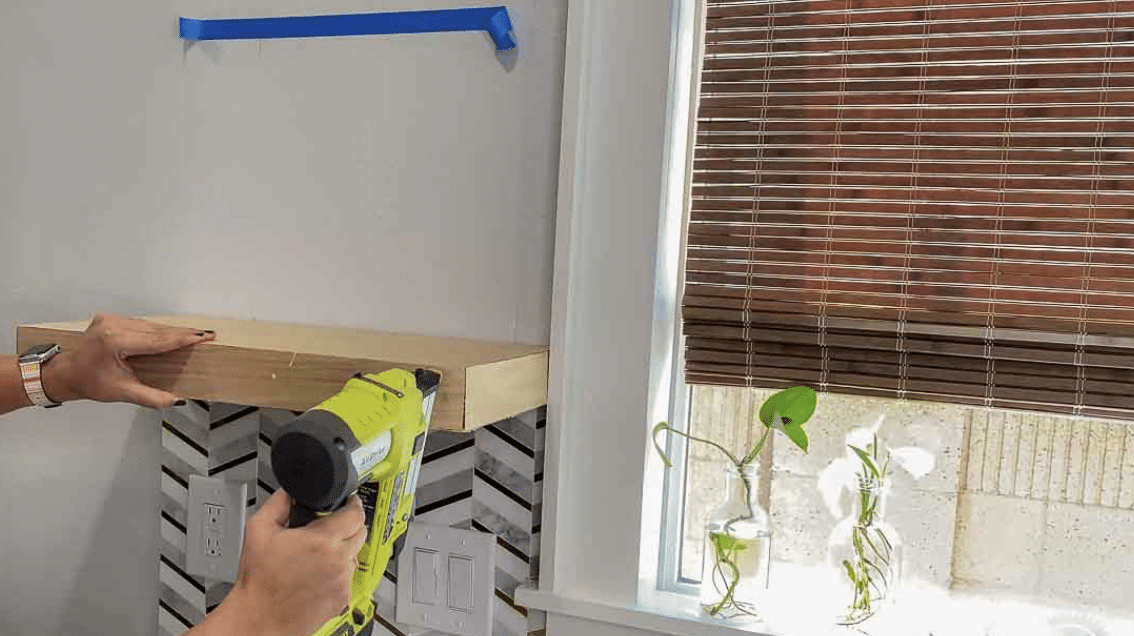
Step 1: Attach the Support Board to the Wall
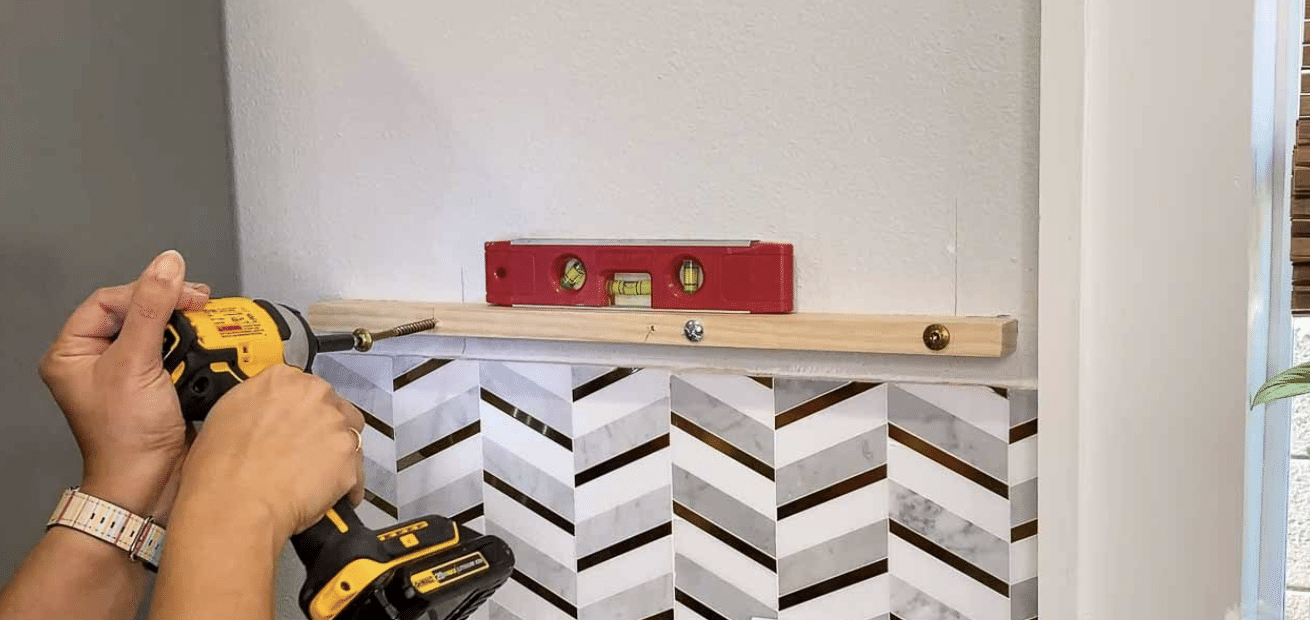
- Explanation: Mark the spot on the wall where your shelf will go, ensuring you account for the depth of the plywood wrap-around. Locate the wall studs and transfer those marks to the support board (1×2).
- Action: Pre-drill holes for the screws at the stud locations, and for additional support, add toggle bolts. Attach the 1×2 support board to the wall using structural screws and toggle bolts.
Step 2: Build the Brace

- Explanation: The brace is what holds the shelf structure firmly in place.
- Action: Cut the 1×3 boards to the desired shelf depth. Create pocket holes on both ends using a Kreg Jig. Attach these 1×3 boards perpendicularly to the support board, ensuring they don’t interfere with the screws mounted into the wall. Secure the boards with wood glue and pocket hole screws.
Step 3: Cut the Plywood for the Shelf
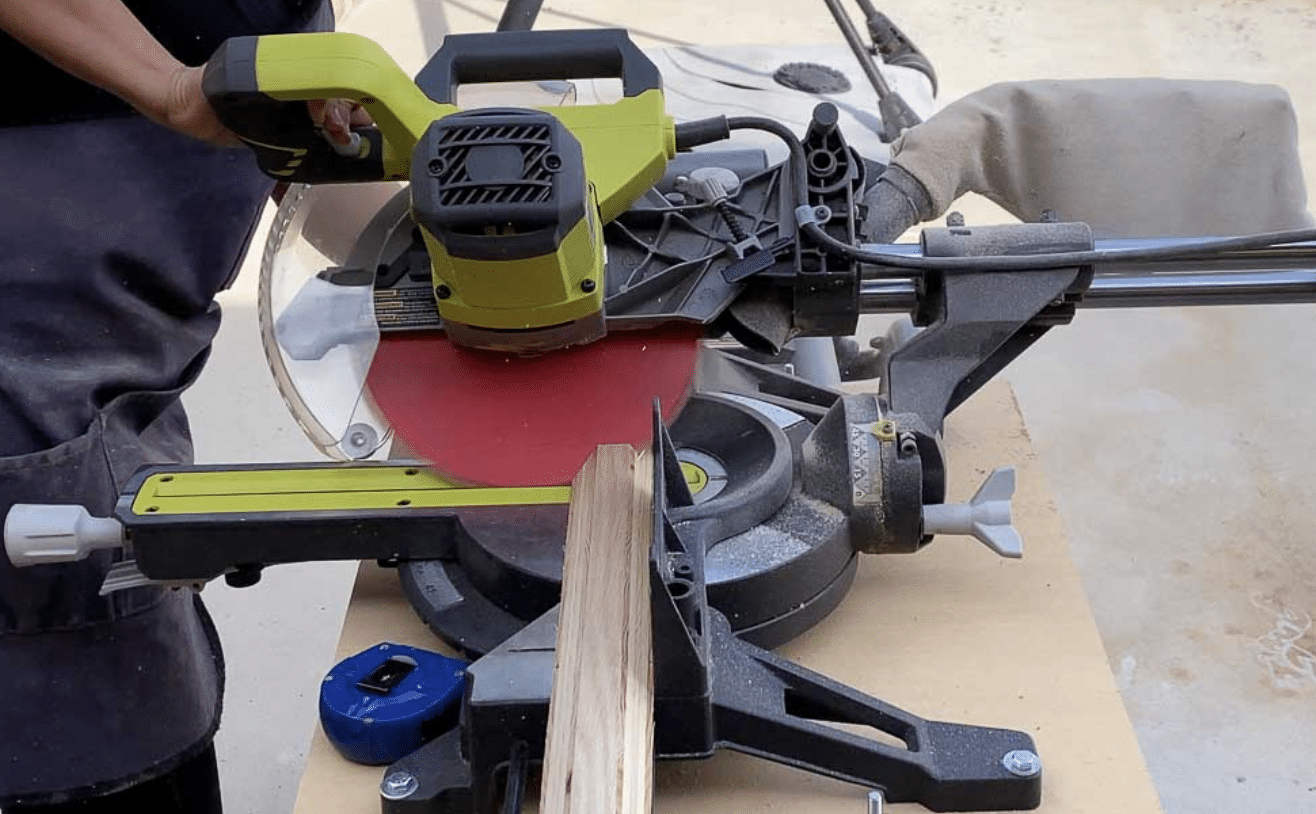
- Explanation: The shelf “box” wraps around the brace and forms the visible shelf. The plywood needs to be precisely cut for a seamless fit.
- Action: Set your table saw blade to 45 degrees for a beveled cut. Cut the plywood into strips for the top, bottom, and sides of the shelf, ensuring the front and side strips match the desired shelf thickness (about 2 inches).
Step 4: Assemble the Shelf Box
- Explanation: The plywood pieces are now assembled to form the outer shell of the shelf.
- Action: Use wood glue and finish nails to assemble the shelf pieces. Clamps are useful to keep everything aligned. Slide the plywood box over the brace and secure it by nailing it in place. This prevents the shelf from accidentally sliding off.
Step 5: Finish the Shelf
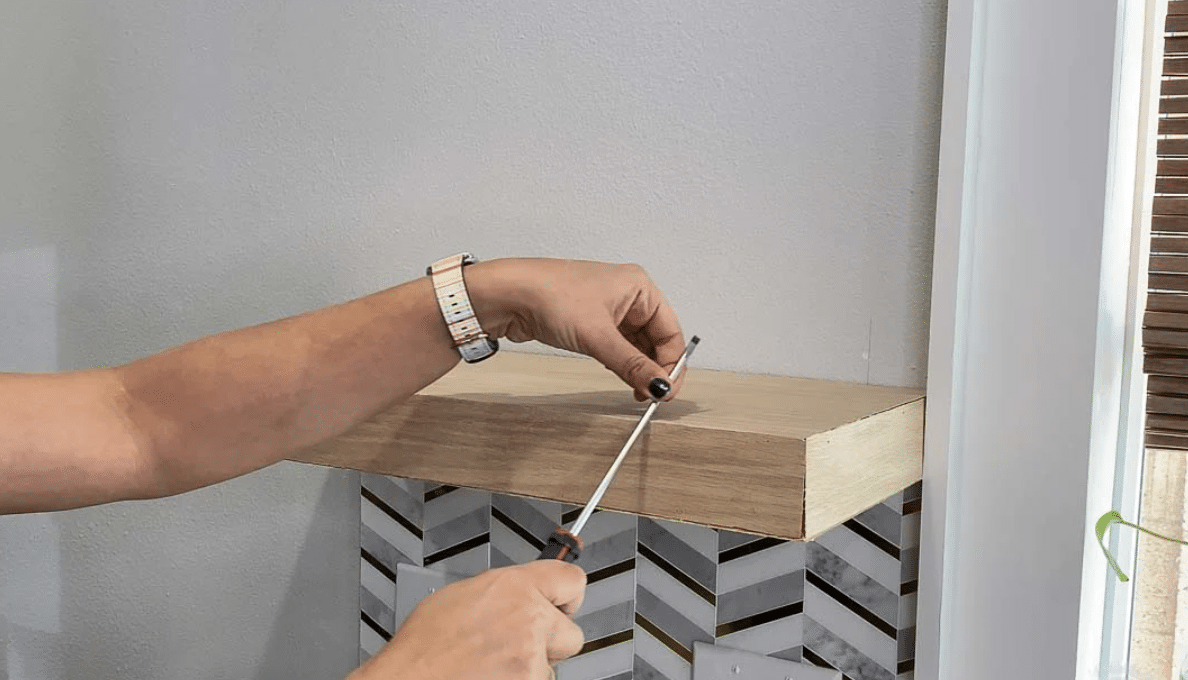
- Explanation: The final step ensures a smooth and polished appearance.
- Action: Rub a screwdriver shaft along the seams to tighten them and sand lightly for a seamless finish. Apply stain or paint to match your kitchen’s decor. You can add a top coat for added durability.
Tips for Styling and Organizing Kitchen Floating Shelves
- Keep it tidy: Only display items you use often to avoid clutter.
- Group similar items: Arrange dishes, glasses, or cookbooks in sets.
- Use color coordination: Pick a color scheme that matches your kitchen decor.
- Mix heights: Vary the height of objects for visual interest.
- Add greenery: Small plants or herbs can bring life to your shelves.
- Incorporate texture: Mix smooth ceramics with rough woven baskets.
- Incorporate lighting: Add under-shelf lighting for ambiance and functionality.
- Leave some space: Don’t overcrowd; empty space can be visually appealing.
- Use containers: Jars or canisters can store loose items neatly.
- Display collections: Show off your favorite mugs or vintage kitchenware.
- Add labels: For pantry items, labels can add order and style.
- Create zones: Designate shelves for specific purposes (e.g., coffee station, baking supplies).
- Use odd numbers: Grouping items in threes or fives is pleasing to the eye.
- Stick to a theme: Choose a style (rustic, modern, etc.) and stay consistent.
Maintenance and Care of Kitchen Foating Shelves
Cleaning Different Materials
Keeping your floating shelves clean is key to maintaining their beauty. For wooden shelves, use a soft, damp cloth and mild soap.
Glass shelves can be cleaned with a glass cleaner and lint-free cloth. Metal shelves often just need a wipe with a damp cloth, but you can use a metal polish for extra shine.
Always dry your shelves after cleaning to prevent water damage.
Protecting Shelves from Damage
To keep your floating shelves in top shape, use coasters under glasses and vases to prevent water rings. Consider adding felt pads to the bottom of items to avoid scratches.
Be mindful of weight limits and distribute heavy items evenly. In the kitchen, keep shelves away from direct heat or steam sources.
Regular dusting can prevent buildup that might lead to staining or scratches.
Periodic Safety Checks
Safety should be a top priority with floating shelves. Every few months, check that all screws and brackets are tight and secure. Look for any signs of sagging or separation from the wall.
If you notice any issues, remove items from the shelf and tighten or reinforce as needed.
For shelves holding heavy items, consider more frequent checks to ensure they remain stable and safe.
Accessories to Decorate Your Kitchen Floating Shelves
Disclaimer: These recommendations are based on personal preference and experience. None of the products mentioned are affiliated or sponsored.
1. Concrete Fruit Bowl
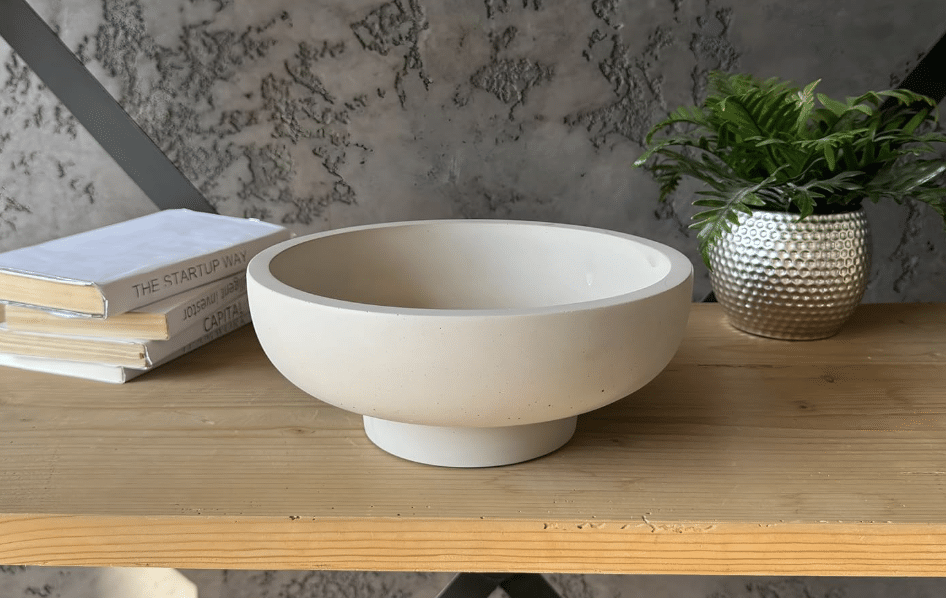
- Material: Concrete
- Colors Available: White/Cream
- Price: $49.50
2. Paper Towel Holder
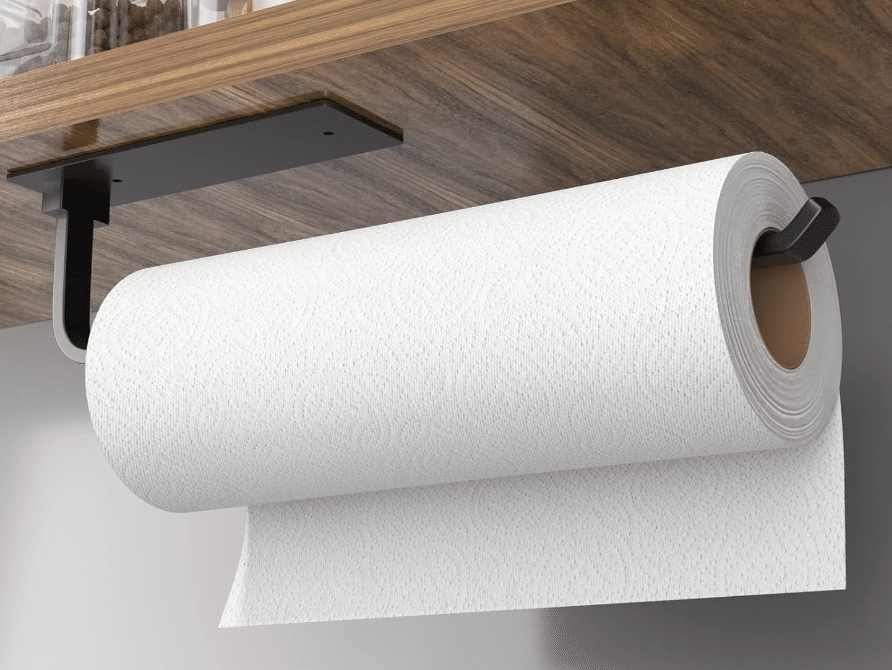
- Material: Aluminum
- Colors Available: Black, Gold, White
- Price: $7.99
3. Food & Beverage Figurines
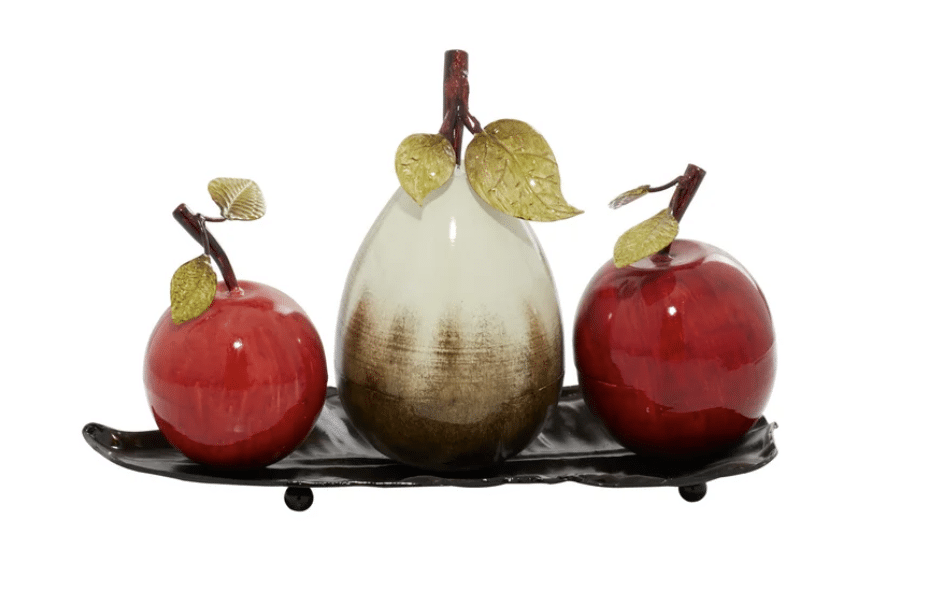
- Material: Metal
- Colors Available: White/Red
- Price: $44.99
4. Ceramic / Porcelain Canister – Set of 3
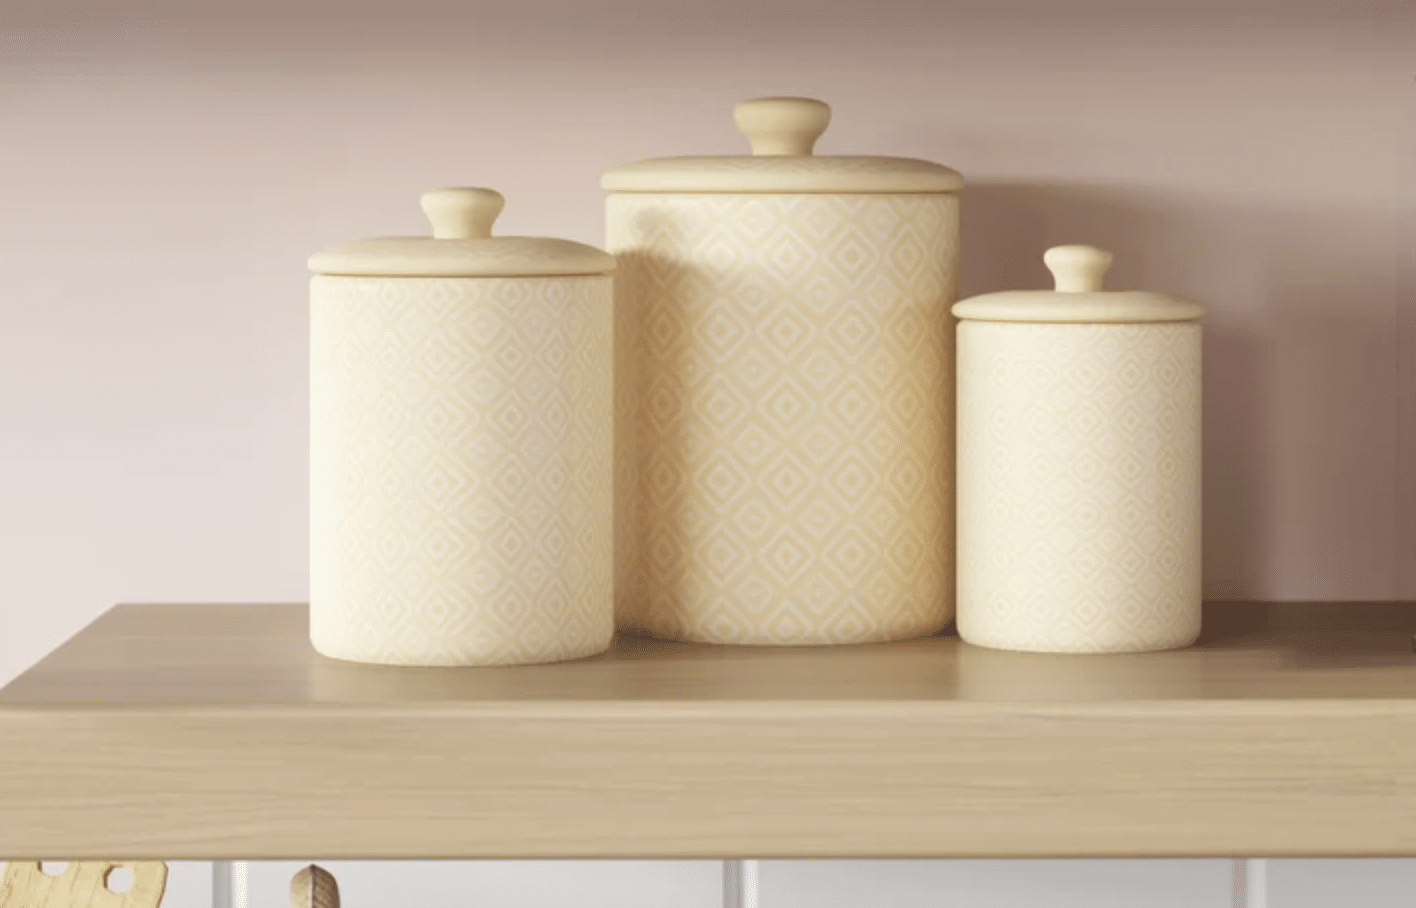
- Material: Ceramic / Porcelain
- Colors Available: Yellow, Blue, Grey, Red
- Price: $45.99
5. Utensil Holder with 4 Compartments
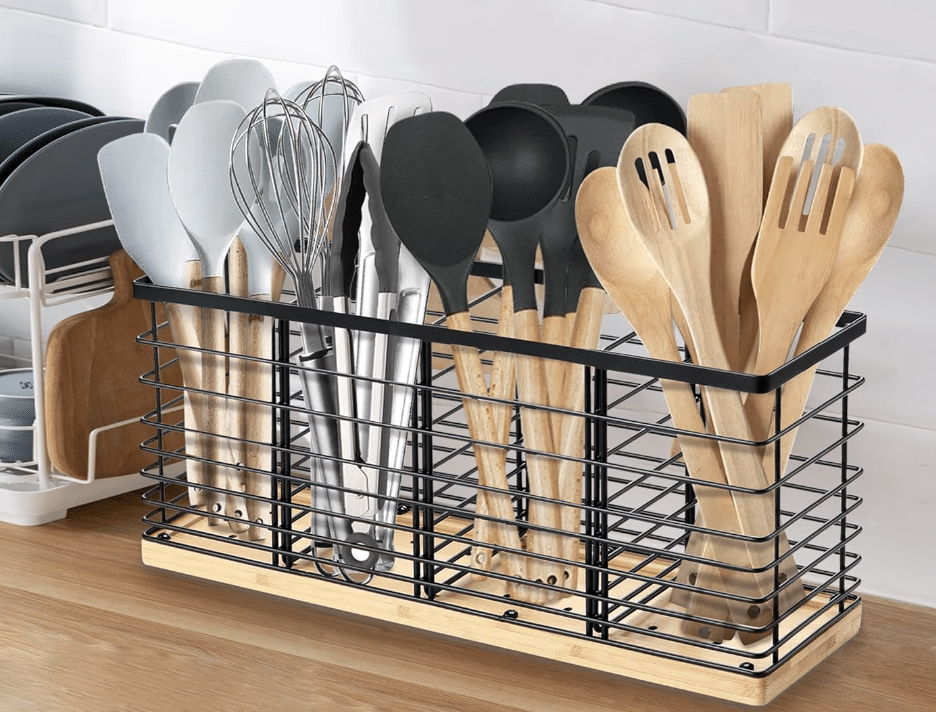
- Material: Wood, Metal
- Colors Available: Black
- Price: $28.99
6. Havana Hourglass
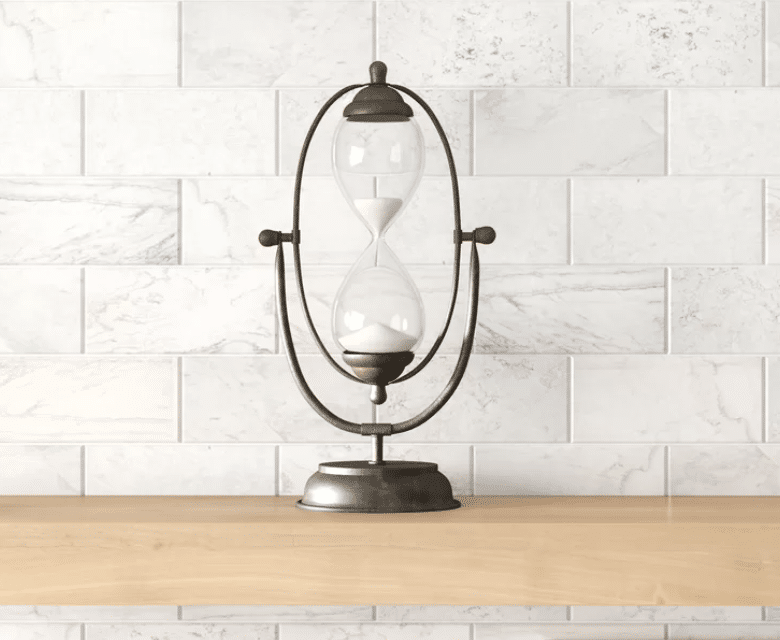
- Material: Metal
- Colors Available: Black
- Price: $48.99
7. Mug Holder Tree
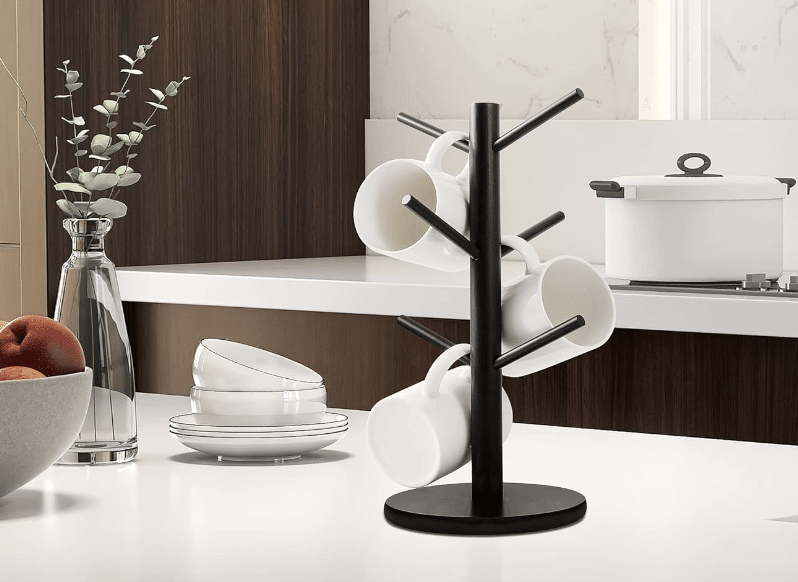
- Material: Wood
- Colors Available: Black
- Price: $16.99
8. Handmade Letter Block
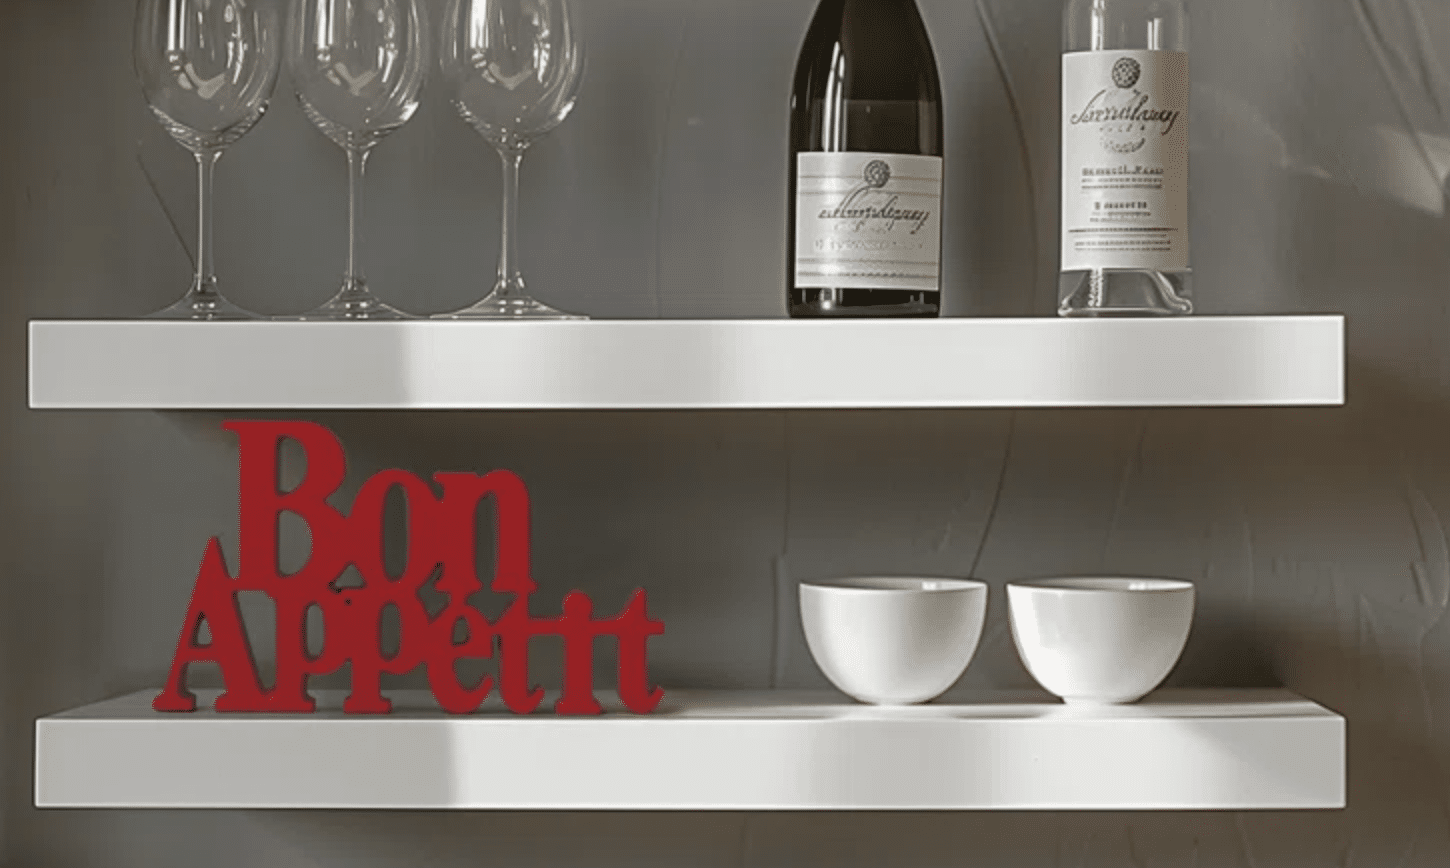
- Material: Resin
- Colors Available: Red
- Price: $44.99
9. Figurine Chef Decorative Sculpture
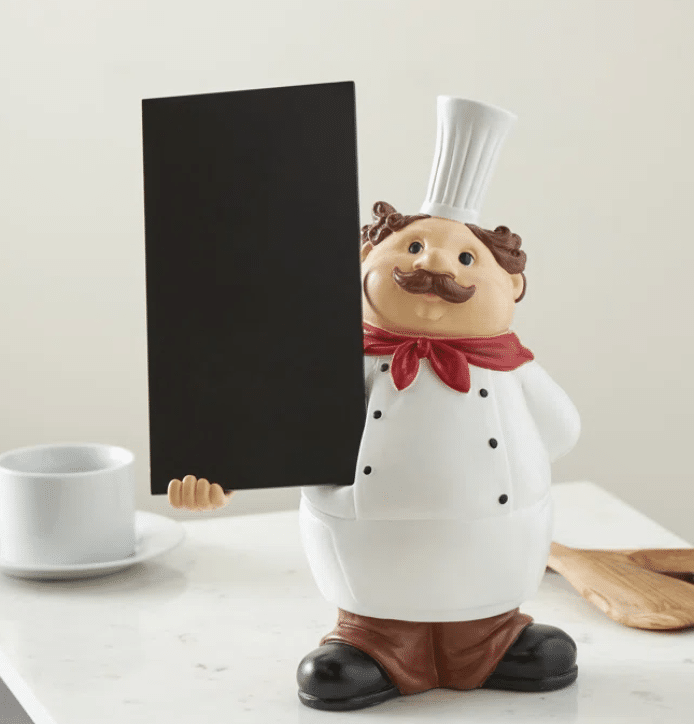
- Material: Resin
- Colors Available: White
- Price: $33.99
10. Coffee Pod/ Capsules Holder
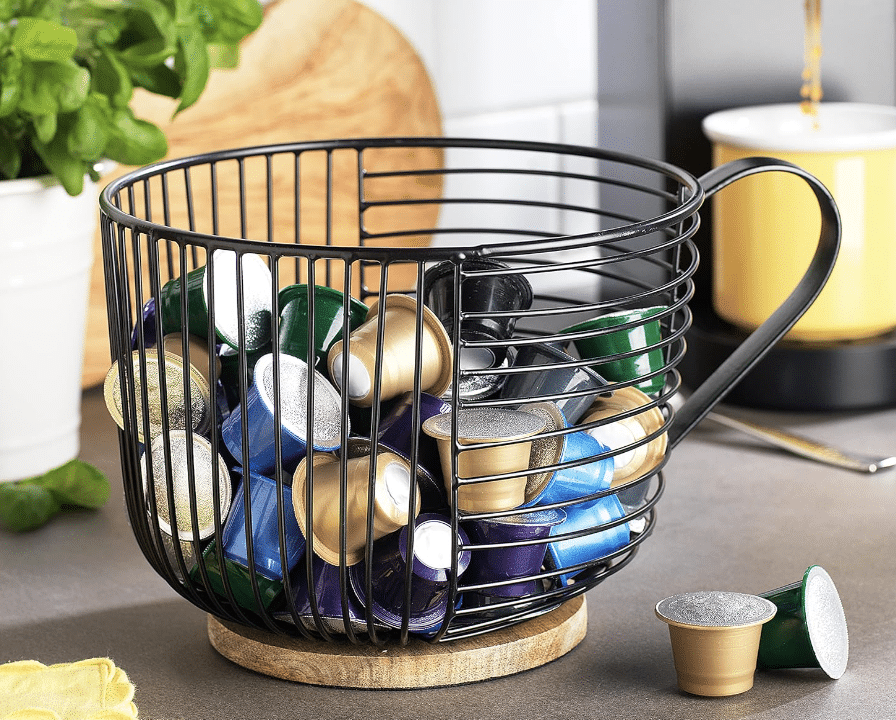
- Material: Wood, Metal
- Colors Available: Black
- Price: $21.99
Wrapping It Up
Let’s wrap up our journey through the world of kitchen floating shelves. We’ve explored their benefits, from creating an open feel to adding style and function.
We’ve seen how they’re still trending in 2024 and picked up some great tips for styling them.
Remember, floating shelves can transform your kitchen, making it more spacious and organized. They’re not just about looks – they’re practical too, giving you easy access to your everyday items.
A floating shelf design will fit right in whether you’re going for a modern, rustic, or minimalist look. And with proper care, they’ll keep looking great for years.
Ready to give your kitchen a fresh new look? Why not start with some Tile-Backed Floating Shelves? Your dream kitchen might be just a few shelves away!