Stepwise Guide to DIY Bed Frame with Storage
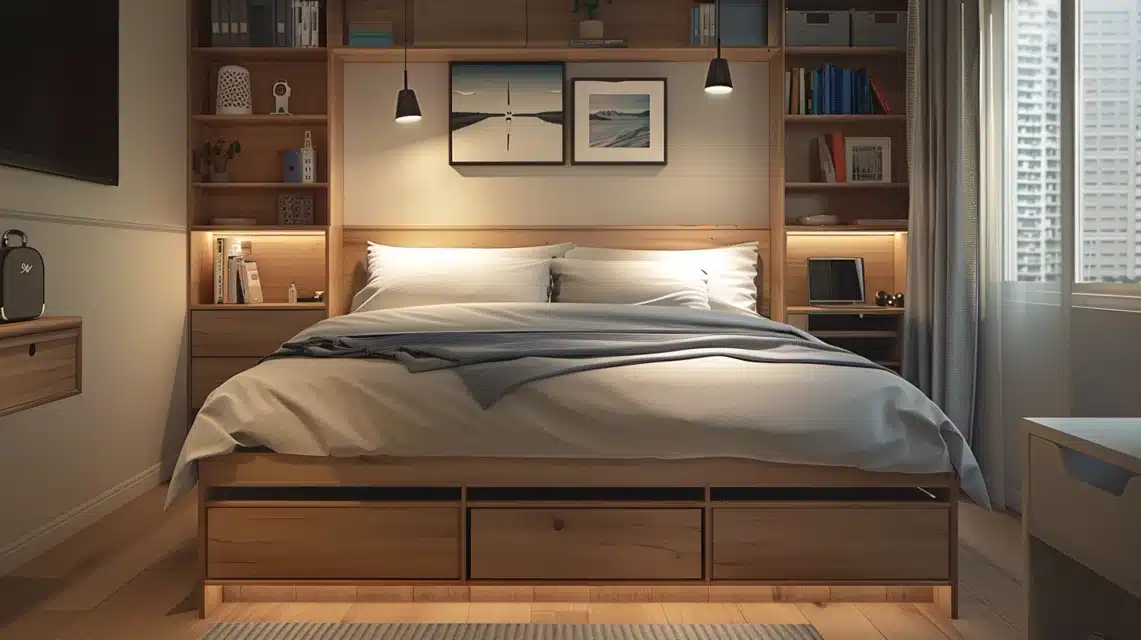
I’m excited to share this complete building guide with you, having built several storage beds, including one for my small apartment.
This project combines practical storage with solid construction methods, perfect for anyone looking to maximize their bedroom space.
With basic tools and careful planning, you can create a quality bed that fits your needs and budget.
Let us get started!
Stepwise Guide to Building a Bed with Storage
Step 1: Gather Tools, Materials, and Measurements
Tools Needed:
- Circular Saw / Chop Saw
- Jigsaw
- Pocket Hole Jig and Screws
- Drill
- Clamps
- Doweling Jig
- Edge Banding Iron
- Measuring Tape
- Screwdriver
- Wood Glue
- Sandpaper
Materials Needed:
- Plywood (Red Oak preferred, though pine/spruce also works)
- 1x3s and 1x4s (can be plywood or solid wood, depending on budget)
- 2x4s for drawer framing and slats support
- Edge Banding (if using plywood for a solid wood look)
- Drawer Slides (22 inches)
- Wood Stain (Minwax Weathered Oak or preferred finish)
- Clear Sealant
- Screws
Measurements:
- Side Rails: 13 inches wide (length depends on bed size)
- Drawer Opening: 8 inches in height with an allowance for drawer slides
- Drawer Front: 7 ¾ inches height for clearance within the opening
- Bed Slats: Trimmed to fit bed width, with center supports at intervals
Step 2: Prepare Side Rails
- Rip two 13-inch wide strips of plywood for the side rails.
- Cut to length based on the bed size (twin, full, queen, king).
- Mark drawer openings and cut sections for drawer fronts with a jigsaw.
- Reinforce edges with 1x3s (cut to length) on the top, bottom, and around drawer openings.
Step 3: Build Drawers
- Cut plywood sections for drawer boxes, with grooves to install a plywood bottom panel.
- Assemble boxes with pocket holes and screws, inserting a ¼ inch plywood bottom.
- Attach drawer slides to drawer sides, positioning 1¼ inches from the bottom.
Step 4: Attach Drawer Fronts
- Smooth drawer front edges by trimming on the table saw.
- Add edge banding for a refined look.
- Attach drawer fronts to drawer boxes using screws from the inside.
Step 5: Assemble the Headboard and Footboard
- Cut two 2x4s for the headboard sides and one for the top frame.
- Use a doweling jig to drill dowel holes and assemble the frame with dowels and glue.
- Repeat the process for the footboard, adjusting height if needed.
- Add plywood panels, cut to fit precisely, and install using pocket hole screws.
- Add 1×3 trim details vertically for aesthetics.
Step 6: Add Trim for Finishing Touches
- Cut ¾-inch wide, 3/8-inch thick strips of red oak for added dimension.
- Glue and clamp these onto any exposed edges or small gaps for a great look.
Step 7: Assemble Bed Frame
- Attach bed brackets to side rails and head/footboard legs.
- Use blocks to position rails, securing brackets at each corner.
- For drawer stability, add a removable 2×4 support across the back.
Step 8: Install Bed Slats
- Trim slats (1x4s) to width, attaching a 2×2 in the center for added support.
- The rest of the slats on strips were installed earlier along the side rails.
Step 9: Finishing Touches
- Sand all surfaces and edges.
- Apply stain (Minwax Weathered Oak or preferred) and allow it to dry.
- Seal with a clear coat.
- Install drawer knobs.
Why Build a DIY Bed Frame with Storage?
- When building your bed frame, you can choose high-quality materials according to your needs.
- DIY construction uses durable joints, solid wood, and quality finishes, resulting in a longer-lasting bed than many mass-produced alternatives.
- Most retail bed frames come in standard designs and sizes. For those seeking modern aesthetics with quality craftsmanship, Castlery bed frames offer stylish options that suit a variety of interiors.
- With a DIY project, you can select materials that fit your budget, from more economical woods like pine to premium hardwoods. You can also repurpose wood or source it from budget-friendly suppliers.
- Building the bed allows you to make efficient cuts and repurpose wood scraps, reducing waste and material costs.
Customization Inspiration from Finished Designs
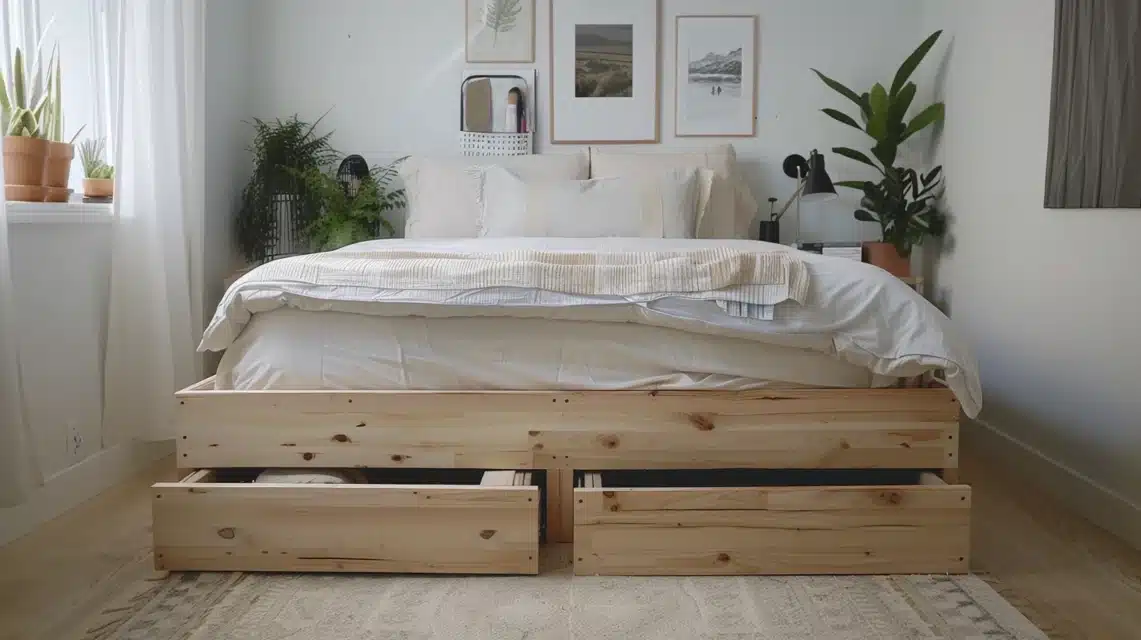
- Modern Minimalist: A bed frame with clean lines, painted or stained in a single color (e.g., black or gray), flush storage drawers, and minimal hardware for a streamlined look.
- Rustic Farmhouse: Use reclaimed wood or distressed finishes for a rustic touch. Add chunky side rails and visible wood grain for a farmhouse style.
- Scandinavian Style: Light-colored wood like birch or pine, with natural finishes and simple hardware. Incorporate open cubbies and drawers for a mix of hidden and open storage.
- Mid-Century Modern: Tapered legs, warm wood tones like walnut or oak, and brass or gold-accented hardware add a vintage feel. Customize the storage layout to keep drawer fronts unembellished.
Summing Up
It’s one of the most practical projects you can tackle. Not only did I save money, but I also got exactly what I wanted—a strong, good-looking bed with plenty of storage space.
The best part? You can modify this design to match your style and space needs.
Take time with measurements and joints – they’re crucial for long-term stability.
With this guide and some patience, you’ll create a functional and long-lasting bed.
Frequently Asked Questions
Does a Storage Bed Need a Boxspring?
No, storage beds don’t typically need a boxspring. They are designed to support the mattress directly with slats or a solid base.
What are the Disadvantages of Storage Beds?
Storage beds are often heavy, difficult to move, and may have limited ventilation. Trapped moisture in these beds can potentially impact mattress longevity.
Do Storage Beds Get Dusty?
Yes, storage beds can collect dust, especially in unused compartments. Regular cleaning and dusting help keep storage spaces fresh and hygienic.

