Simple Tips for Designing a Shower that Fits Your Life
Your shower should be more than just a place to rinse off—it should feel good to use and work well for your routine. The right design brings together a smart layout, simple upgrades, and materials that last.
No matter the size of your bathroom or your budget, there are clear options that can help shape a shower that fits your needs.
This blog covers real steps to plan a shower that supports daily comfort and adds value to your home. From layout ideas to choosing the right features, each part plays a role.
If you’ve been thinking about shower design and want ideas that make sense, you’re in the right place.
Let’s get into it.
Key Considerations Before You Start
Before jumping into your shower design, it’s important to think about your daily needs and habits.
Take time to look at your bathroom layout, water usage, and how much space you have.
1. Measure Your Space
Start by taking accurate measurements of your bathroom space. Standard showers typically range from 32×32 inches (for small bathrooms) to 60×36 inches or larger for more spacious areas.
For compact bathrooms, consider corner installations that maximize limited floor space. In awkward layouts, custom-sized enclosures might be necessary to make the most of available rooms.
2. Plan Your Plumbing
The location of your water lines and drain significantly impacts both design options and budget. Moving existing plumbing can increase costs substantially, sometimes doubling your project expenses.
When possible, design around current pipe locations. If you must relocate plumbing, factor this into your budget early in the planning process.
Shower Layouts and Types

Choosing the right layout sets the tone for your bathroom’s look and function.
From walk-in showers to corner units, each type works best in certain spaces and routines.
Shower Layout Types
Corner showers: Fit neatly into bathroom corners, making them ideal for smaller spaces. They typically use two walls plus glass panels.
Alcove showers: Use three existing walls and add a door or curtain to the fourth side. This common configuration works well in most standard bathrooms.
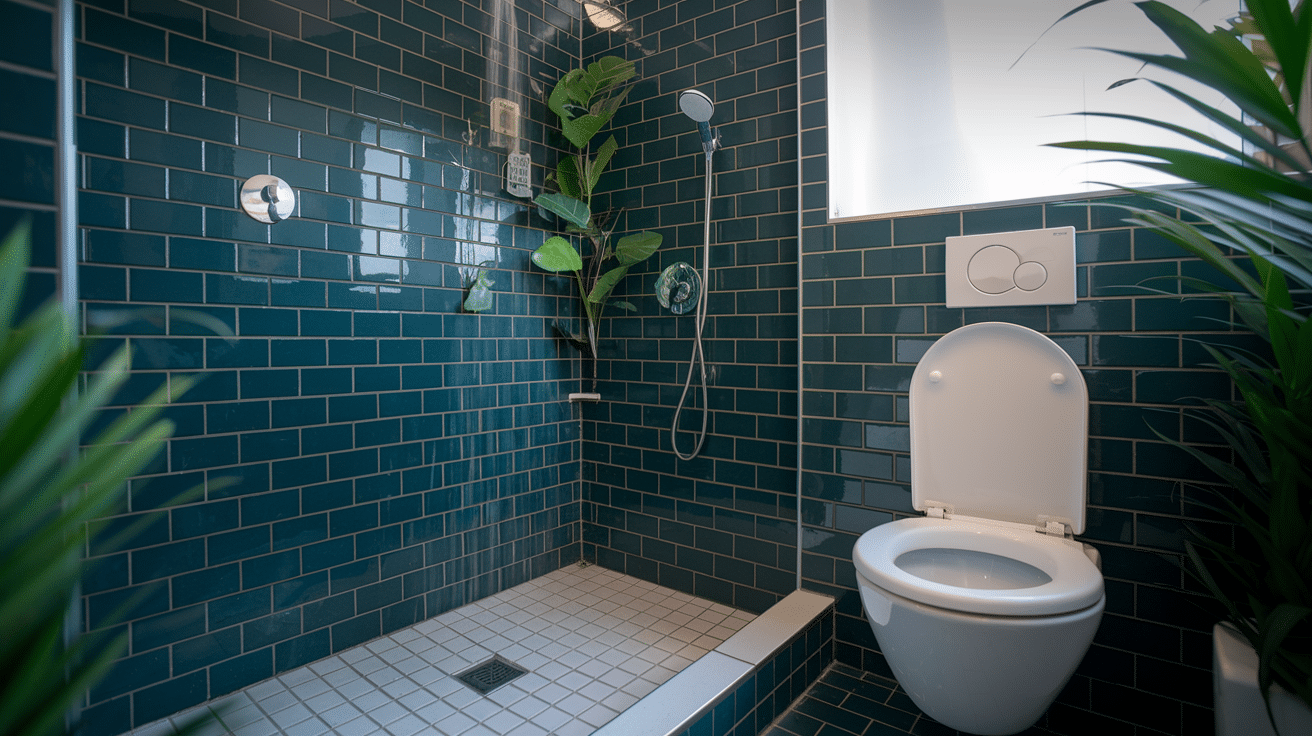
Walk-in showers: Offer open entry without doors, creating an accessible, spacious feel. They require careful planning for water containment.
Wet rooms waterproof the entire bathroom, allowing for a fully open shower area. While costly to install, they create a modern, accessible space.
Each layout has specific advantages based on your space constraints, accessibility needs, and style preferences.
Shower-Tub Combos
For bathrooms with limited space, shower-tub combinations provide versatility.
Modern options include deep soaking tubs with integrated shower systems, sliding doors that save space, and custom tile work that creates visual interest without overwhelming small rooms.
To enhance style in shower-tub combos, consider glass doors instead of curtains, accent tile on the back wall, or a built-in storage niche.
Curbed vs. Curbless Showers
Choosing between a curbed or curbless shower depends on your space, comfort needs, and style preferences.
Curbed showers help contain water and are easy to install in most bathrooms. Curbless options offer smooth entry and are often chosen for easier access and a more open feel.
| Feature | Curbed Showers | Curbless Showers |
|---|---|---|
| Threshold | Has a step (usually 4–6 inches high) | No step; the floor is flush, and even |
| Visual Impact | Defines the shower space clearly | Creates a more open, continuous look |
| Accessibility | Less friendly for people with mobility needs | Easier access for everyone, including wheelchair users |
| Installation | Easier and less costly to install | More complex—needs floor rework and drainage adjustment |
| Cost | Lower overall cost | Typically, 20–30% higher due to extra labor and materials |
| Best For | Homes on a tighter budget or without accessibility concerns | Modern updates or homes needing better access and open space feel |
Choosing Shower Doors or Curtains

This choice affects both how your shower looks and how easy it is to use. Shower doors offer a clean, solid feel, while curtains are flexible and simple to change.
Think about space, cleaning needs, and your overall bathroom setup before you decide.
Options for Shower Doors
Swing doors open outward, providing easy access but requiring clear floor space to operate. They work best in larger bathrooms.
Sliding doors move horizontally along tracks, saving space in tight bathrooms. However, the tracks require regular cleaning to prevent buildup.
Frameless doors use thicker tempered glass with minimal hardware, creating a clean, open appearance. While more expensive, they make spaces appear larger and are easier to clean.
No-Door (Open Panel) Showers
Open panel showers use fixed glass barriers without doors to contain spray while maintaining an open feel. For this design to work effectively, the shower area must be large enough (typically at least 36 inches deep) and positioned far enough from toilets and vanities to prevent water damage.
To control spray, these showers often incorporate slightly sloped floors, strategically placed drains, and showerheads installed away from the opening.
Functional Additions to Consider
Adding useful features to your shower can improve comfort and convenience.
Think about built-in seating, grab bars, or a handheld showerhead for better reach.
These small changes can support daily use and make the space work better for everyone.
Built-in Benches and Seating
Built-in shower benches provide comfort and accessibility. The recommended height ranges from 17-19 inches for comfortable use.
Materials should match your shower walls for visual consistency, with porcelain or stone offering durability against constant water exposure.
For smaller spaces, consider fold-down teak seats that provide functionality without permanently taking up floor space.
Niches vs. Ledges
Shower niches create recessed storage within the wall, keeping products accessible without cluttering the space. Ideal placement is between 40-60 inches from the floor, away from main water spray.
Ledges or shelves offer simpler installation but extend into the shower space. They work well when wall cavity access is limited.
For either option, the size should accommodate your typical products; standard dimensions range from 12×12 inches to 12×24 inches.
Picking the Right Fixtures
Fixtures play a big role in both how your shower works and how it feels to use. Think about the water pressure, spray settings, and how easy it is to clean.
Choose finishes that match the rest of your bathroom. Focus on quality and comfort instead of just appearance.
Different Types of Showerheads

Wall-mounted showerheads remain the most common option, with standard installation at 80 inches from the floor. They suit most users and are easy to install.
Ceiling-mounted rain showerheads create a gentle downpour effect. They require ceiling access for plumbing but offer a luxurious experience.
Handheld showerheads on sliding bars accommodate users of different heights, assist with cleaning, and help those with mobility issues.
Consider water pressure when selecting fixtures; homes with lower pressure benefit from pressure-compensating models rather than rainfall designs.
Body Sprayers and Steam Showers
Body sprayers positioned at different heights provide a massage-like experience but require higher water pressure and additional plumbing work.
Steam showers need a complete enclosure to contain vapor, vapor-proof materials throughout, and a specialized steam generator.
They also require proper ventilation to manage moisture after use. Budget at least $2,000-4,000 above standard shower costs for these features.
Lighting and Ventilation

Good lighting helps you see clearly and adds comfort to your daily routine.
Proper ventilation removes excess moisture, which helps prevent mold and keeps the space fresh.
Shower Lighting
Proper lighting enhances safety and functionality. Recessed ceiling lights with damp-rated trims work well for general illumination. Position them to minimize shadows, typically centered in the shower space.
For larger showers, multiple lights prevent dark corners. LED strip lighting can be incorporated into niches or under benches for added visibility and style.
Steam and Airflow
Effective ventilation prevents mold and mildew. Bathrooms with showers need exhaust fans rated at least 50 CFM (cubic feet per minute), with larger or enclosed showers requiring up to 80 CFM.
Position fans near the shower but not directly over it, and consider humidity-sensing models that run automatically when moisture levels rise.
Stylish Materials and Finishes

The materials you choose can shape the entire look and feel of your shower.
From smooth tiles to brushed metal accents, these choices help create a space that feels clean and put together.
Tile Options for Walls and Floors
For floor tiles, look for materials with slip resistance ratings appropriate for wet areas (COF rating of 0.42 or higher). Smaller tiles (2×2 inches or less) provide better traction due to more grout lines.
For walls, larger format tiles reduce grout lines and cleaning demands. Porcelain offers excellent water resistance and comes in styles mimicking natural stone or wood.
Epoxy or stain-resistant grout formulations resist discoloration and mildew, reducing maintenance needs.
Coordinating Fixtures and Accessories
When mixing metal finishes, limit choices to two complementary types (like chrome and brass) and distribute them evenly throughout the space.
Consider the entire bathroom when selecting fixture finishes to maintain visual balance. Matte black and brushed brass fixtures stand out against light tiles, while chrome and brushed nickel blend more subtly.
High-Tech Features
Modern showers now offer more comfort and control through smart systems.
You can enjoy voice-activated temperature settings, digital displays, or built-in Bluetooth speakers—all designed to make your routine smoother.
Smart Controls and Connected Showers
Digital shower controls offer preset temperature and flow options for multiple users.
These systems can reduce water waste by heating to exact temperatures and allowing remote startup from your phone.
Consider these features justify the added expense and potential repair complexity.
Common Mistakes to Avoid
Knowing common mistakes helps you plan better, save time, and avoid problems that could cost more later.
- Inadequate floor slope leads to standing water. Ensure a minimum 2% slope toward drains.
- Installing shower doors that are too large or too small for the space creates leaks or access issues.
- Poor lighting placement causes shadows exactly where you need visibility for shaving or other tasks.
- Attempting DIY installation of curbless showers often leads to leaks and damage; these projects typically require professional waterproofing.
Final Thoughts
Your shower remodel doesn’t have to be stressful. With a clear plan, the right team, and smart choices, you can build a space that feels right for your daily routine.
Think beyond looks—pick materials that hold up over time and fixtures that meet your needs. If you’re changing plumbing or walls, bring in the pros to avoid costly repairs.
The right shower layout brings comfort, function, and lasting value to your bathroom.
Take that first step—plan your remodel and enjoy the shower you’ve been waiting for.

