How to Apply Gold Leaf Step by Step Guide
Gold detailing can instantly change how a surface looks, but the result depends on how well the process is handled. Even small mistakes can affect the final finish, while the right approach creates a smooth, clean result that lasts.
Learning how to apply gold leaf is less about complexity and more about control, timing, and preparation.
I have seen beginners get great results once they understand the basics and avoid rushing.
In this post, you will learn the exact process, the materials that matter, and what to watch out for so your finish turns out right.
How to Apply Gold Leaf Step-by-Step
Applying gold leaf follows a simple process, but timing and handling are important. Each step builds on the next, so it’s important to follow the correct order. Below are the exact steps to apply gold leaf properly.
Materials You Need Before Starting
Before you begin, having the right tools makes the process easier and cleaner. Each material affects how well the gold leaf sticks and how the final finish looks.
| Category | Item | Purpose |
|---|---|---|
| Material | Gold size (oil-based adhesive) | Helps the gold leaf stick to the surface |
| Material | 23-karat gold leaf | Main material used for gilding |
| Material | Fine steel wool | Removes excess gold and cleans edges |
| Tool | Soft pouncing brush | Presses gold leaf evenly onto the surface |
| Tool | Soft cosmetic (blush) brush | Smooths the leaf and removes loose excess |
| Tool | Steel wool (small swab) | Cleans tight edges and detailed areas |
Gold leaf is extremely thin and lightweight, so handling and environment matter more than most people expect. Even slight airflow from a fan or open window can shift or tear the leaf during application.
Work in a still, draft-free area and handle the leaf as little as possible. Gentle placement and minimal contact help prevent wrinkles, tearing, and uneven edges.
Step 1: Prepare and Check the Gold Size
Apply gold size evenly to the surface and allow it to reach the right tackiness. Test it gently with your finger. It should feel sticky without leaving a fingerprint.
If it leaves a mark, give it more time to set. If it feels dry, the gold leaf may not stick properly and could result in an uneven finish.
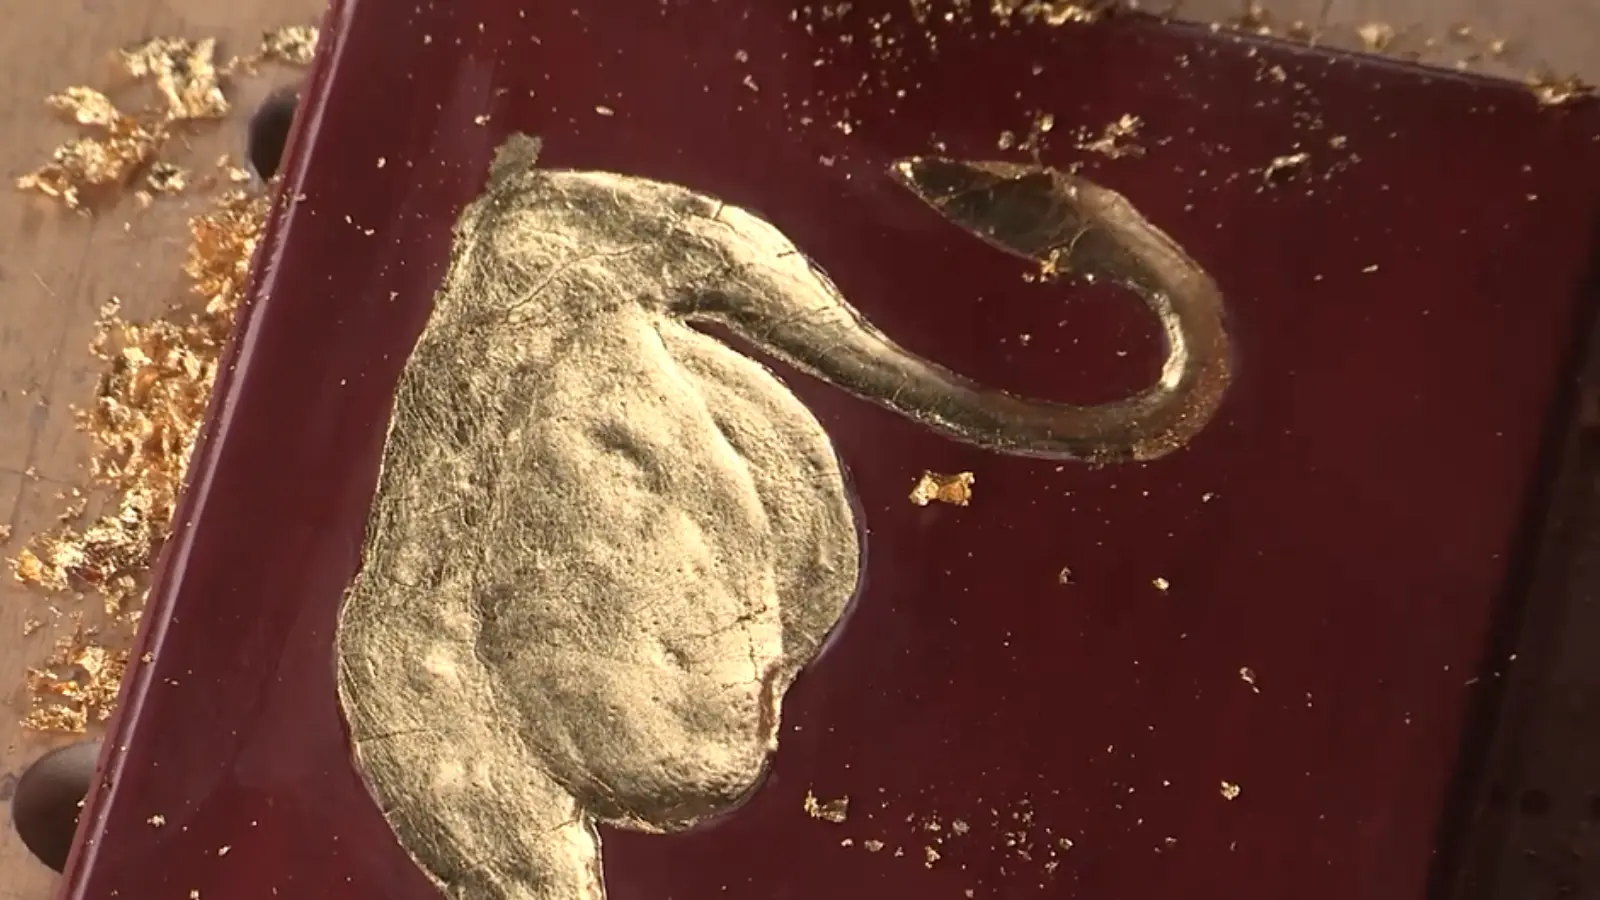
Step 2: Lay and Cover with Gold Leaf
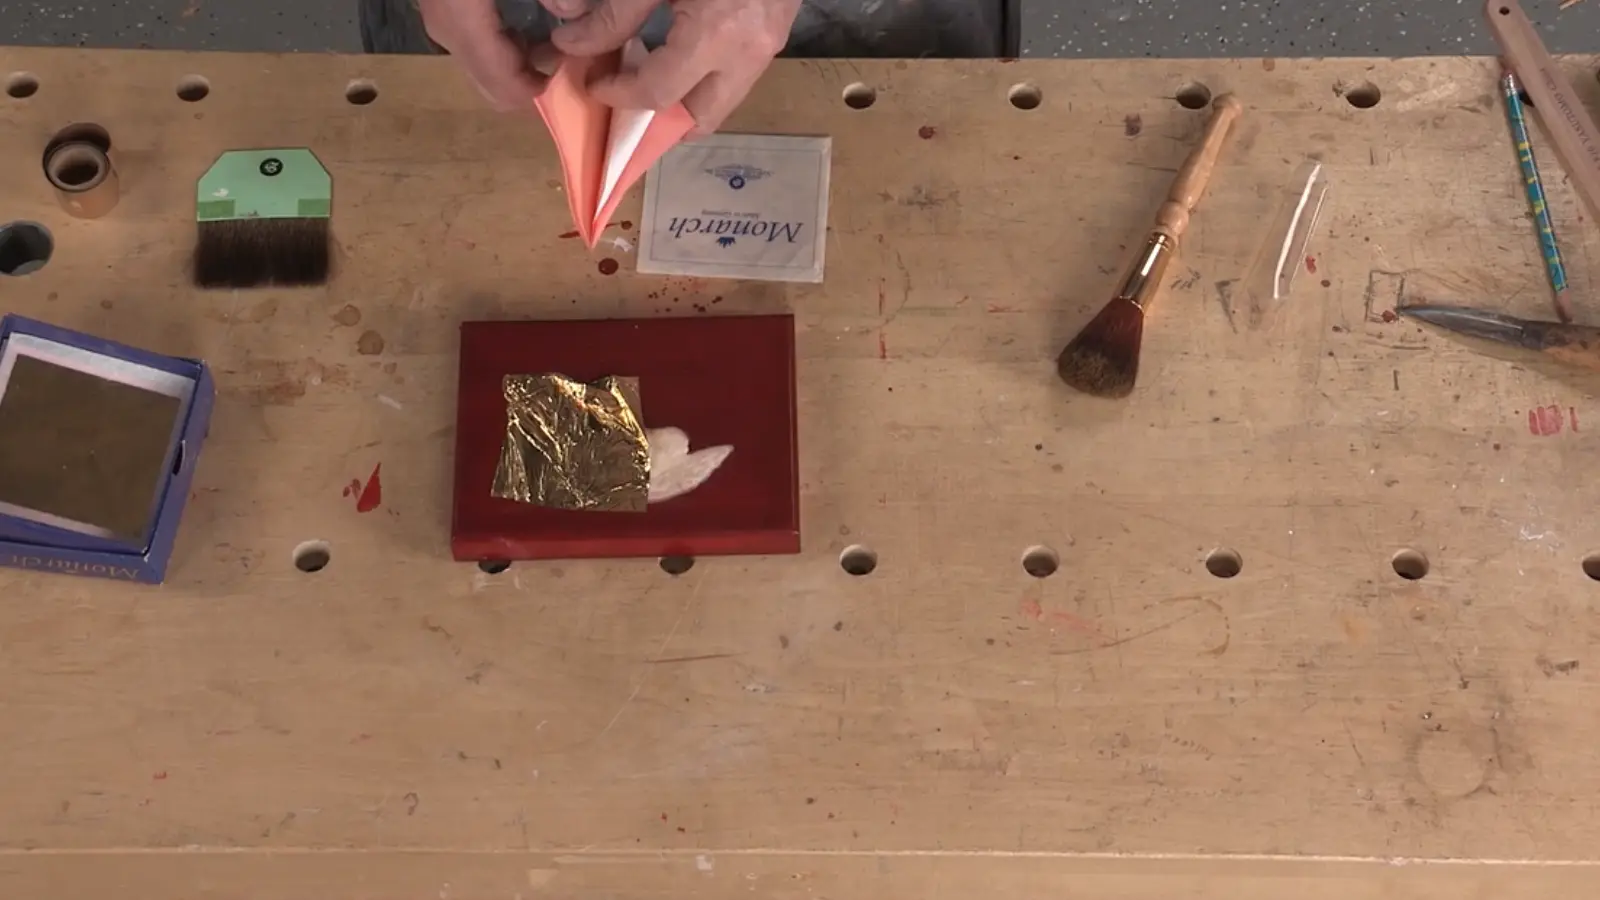
Place the gold leaf gently over the tacky surface, making sure it covers the entire area. Avoid pressing hard at this stage, as it can cause tearing or wrinkles.
Lay the leaf loosely and use slightly more than needed to ensure full coverage. This helps prevent gaps and gives a smoother final finish.
Step 3: Press, Fill Gaps, and Spread Excess

Use a soft pouncing brush to gently press the gold leaf onto the surface. Tap and brush lightly to help it stick evenly without tearing.
Collect any loose flakes or dust and reuse them to fill gaps or patchy areas. They will stick wherever the surface is still tacky, helping create full coverage.
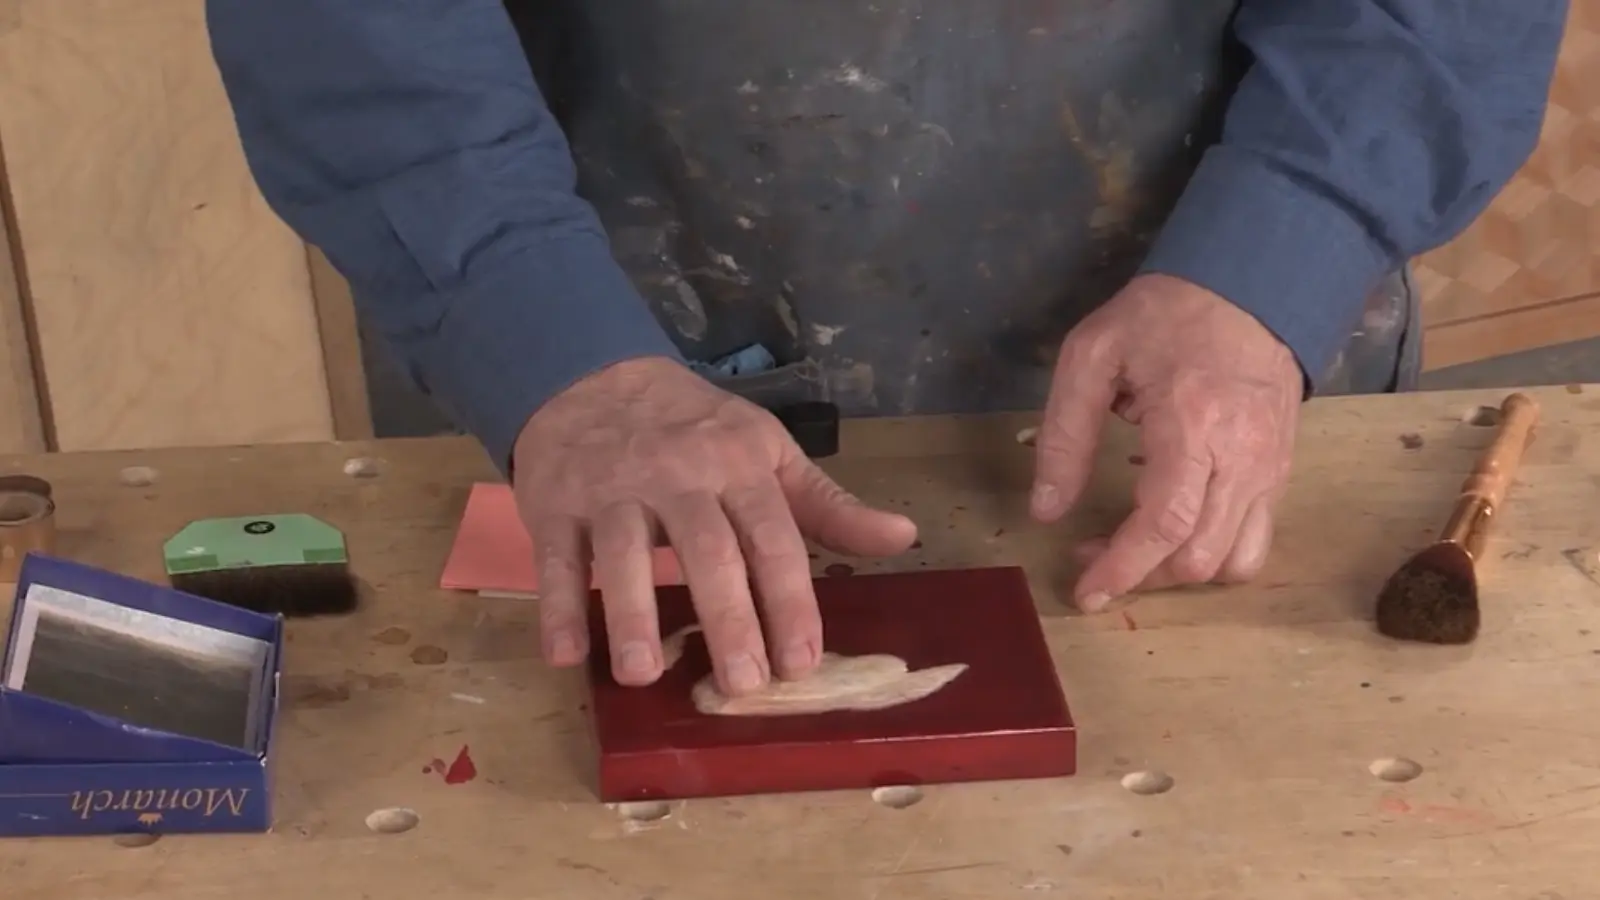
Step 4: Smooth and Refine the Surface
Use a very soft brush, such as a blush brush, to gently smooth the gold leaf. Brush lightly to help set the leaf evenly and remove any loose excess.
This step improves the overall finish and gives a cleaner look. Continue gentle brushing until the surface appears smooth and even.
Step 5: Clean Edges and Remove Excess Gold
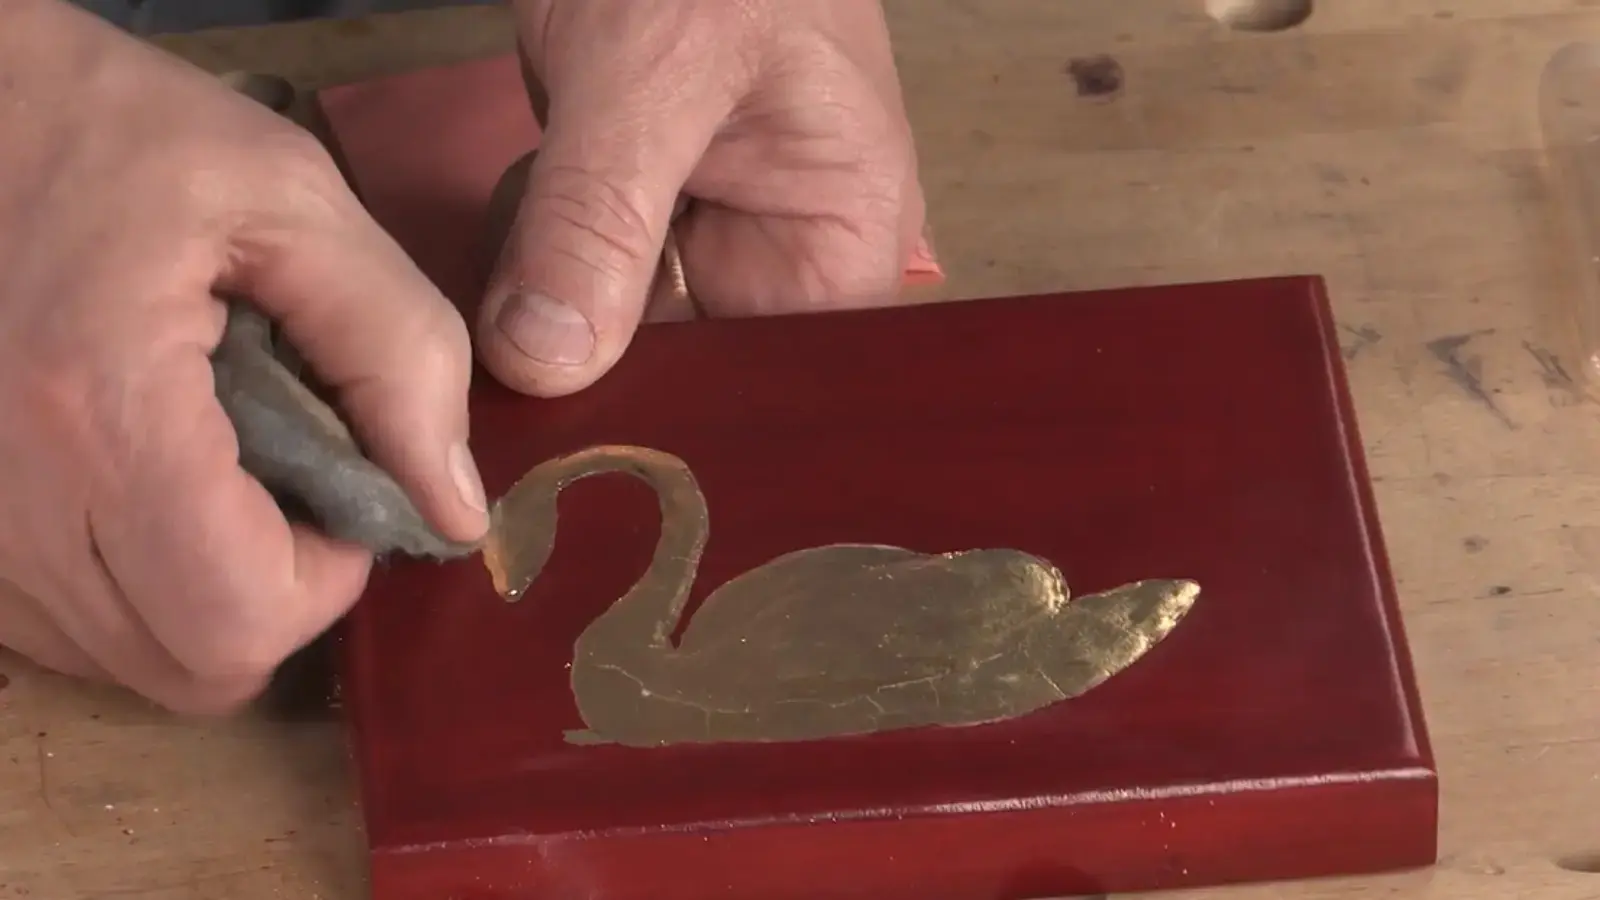
Use fine steel wool to remove unwanted gold from surrounding areas. Lightly buff open areas to clear extra gold without affecting the main surface.
For tight edges, roll the steel wool into a small swab and rub carefully for clean lines. Work gently throughout to avoid damaging the gilded area.
For a complete walkthrough of the whole process, check out the video tutorial below:
Do You Need to Seal Gold Leaf?
Sealing protects the finish and helps it last longer, but whether you need it depends on the type of gold leaf you are using.
Imitation gold leaf should always be sealed. It can tarnish or lose its color over time if left unprotected. A clear sealer or varnish creates a barrier and keeps the finish stable.
Real gold leaf does not tarnish, so sealing is not always required. However, it is still recommended for surfaces that are touched often or exposed to moisture, as it helps prevent wear and damage.
Apply the sealer in thin, even coats using a soft brush. Let each coat dry fully before adding another. Avoid heavy application, as it can dull the natural shine of the gold.
Sealing is a simple step, but it makes a noticeable difference in how long the finish stays clean and intact.
Common Mistakes and Why They Happen
Small mistakes during gold leaf application can affect both how well it sticks and how the final surface looks. Knowing what causes these issues helps you avoid uneven results and wasted effort.
- Incorrect Timing: Applying the leaf too early or too late affects bonding and leads to poor adhesion
- Wet Adhesive: Causes the leaf to slide, wrinkle, or lose its shape during placement
- Dry Adhesive: Prevents the leaf from sticking properly, leaving gaps or patchy areas
- Wrong Adhesive: Regular glue does not reach the right tackiness needed for gold leaf
- Airflow Issues: Even slight air movement can shift, fold, or tear the delicate leaf
- Over-Handling: Too much contact can break the leaf and create uneven edges
- Poor Surface Prep: Leads to weak bonding, peeling, and an inconsistent finish
Avoiding these issues keeps the process controlled and helps you achieve a smoother, more even result.
How the Process Changes Based on the Surface
The core process stays the same, but surface prep changes the final result. Each material reacts differently to adhesive and affects bonding.
| Surface Type | What It Needs | Why It Matters |
|---|---|---|
| Wood | Sanding and sealing before applying adhesive | Prevents uneven absorption and avoids dull or patchy areas |
| Glass / Metal | Thorough degreasing and cleaning | Ensures proper adhesion since any oil or residue blocks bonding |
| Canvas / Paper | Priming before applying adhesive | Controls absorption and creates a stable base for better bonding |
Proper preparation improves adhesion, creates a smoother finish, and helps the gold leaf last longer.
Conclusion
Mastering how to apply gold leaf comes down to patience and attention to detail. When each step is done carefully, from surface prep to final cleaning, the finish looks clean and consistent.
Small adjustments during the process can make a big difference in how the gold sits and reflects light. I have found that taking your time is what separates a rough result from a refined one.
If you are planning to try it, start with a small project and build confidence as you go. Gather your materials, follow the steps, and begin applying gold leaf with a steady approach.
Frequently Asked Questions
Can I Use Normal Glue to Apply Gold Leaf?
No, regular glue does not create the right tack. Gold leaf adhesive is designed to become sticky at the correct stage for proper bonding.
How Do I Know When the Adhesive is Ready?
The adhesive should feel slightly sticky, not wet or dry. A light finger drag should not leave residue but should feel tacky.
Why is My Gold Leaf Tearing During Application?
Tearing happens due to too much handling, airflow, or using wet adhesive. Gentle placement and correct timing help prevent damage.
Do I Always Need to Seal Gold Leaf?
Sealing is important for imitation gold to prevent discoloration. Pure gold may not always need sealing, but it still benefits from protection.