How I Built a Dry-Stack Garden Wall in Two Weekends
I built a 20-inch wall along the back of my vegetable beds last spring, and the whole thing went up over two weekends without a single bag of mortar. If you’ve been putting off a raised bed or a low garden wall because you think it means mixing concrete and racing a setting clock, dry-stack blocks change the job completely. You stack them and level as you go, and you can stop whenever your back tells you to.
This is the companion to my natural stone steps guide. Steps and walls often share the same slope, but they’re built differently, so I’m keeping this one strictly about the wall.
What You’ll Need
Dry-stack concrete wall blocks (your wall length times the number of courses)
Crushed gravel or road base for the footing, about 4 inches deep
Coarse sand for the levelling layer, roughly 1 inch
Landscape fabric to line the back of the wall
3/4-inch drainage gravel for backfill
A 4-foot spirit level
Rubber mallet
Hand tamper, or a plate compactor if you can rent one
Shovel, wheelbarrow, string line and stakes
Gloves and safety glasses
The blocks are heavier than they look on the pallet, so have a second person around for the delivery drop even if you plan to lay the wall solo.
STEP 1: PLAN THE RUN AND MARK IT OUT
Measure your length and decide your finished height before you buy anything, because both numbers drive your block count and your footing depth. Run a string line between two stakes at the exact height you want the top course to sit. In my experience a 10-foot wall three courses high works out to somewhere around 45 blocks depending on the block size, so I always order a spare 10 percent for cuts and breakages.
Walk the line and check for high spots in the ground. It’s far easier to shave down a bump now than to fight it when you’re two courses up and everything is leaning.
WHY I’D CHOOSE DRY-STACK BLOCKS OVER TIMBER OR SLEEPERS
For a garden wall under about two feet, I’d pick dry-stack blocks over timber or concrete sleepers every time. Stackable garden-wall blocks lock together without mortar, so you can lay and level a course, then walk away for the day without anything setting around you. Most weigh around 16 kilograms, light enough for one person to place, where a concrete sleeper can weigh close to 100 kilograms and needs two or three people to move; Brisbane retailer Australian Landscape Supplies, which stocks these blocks, advises that dry-stacked walls can be built unreinforced to 600 millimetres, and anything taller needs an engineered design.
I’ll be honest about the trade-off. Timber sleepers cost less up front and cut with a regular saw, so if you’re on a tight budget and don’t mind replacing rotted boards down the track, they’re not a wrong choice. I just don’t want to redo a wall in eight years, and concrete blocks outlast timber by a wide margin.
STEP 2: DIG AND COMPACT THE FOOTING
Dig a trench along your string line, about 6 inches deep and a few inches wider than your block on each side. Fill it with 4 inches of crushed base and compact it hard. This is the step people skip, and it’s the reason walls bow. Tamp it in two passes, wetting the gravel lightly between them so it locks tight.
STEP 3: SET THE LEVELLING LAYER
Spread about an inch of coarse sand over the compacted base and screed it flat. The sand lets you tap each block into a level seat without splitting your gravel bed. Get this layer right and the whole wall is easy from here.
STEP 4: LAY THE FIRST COURSE
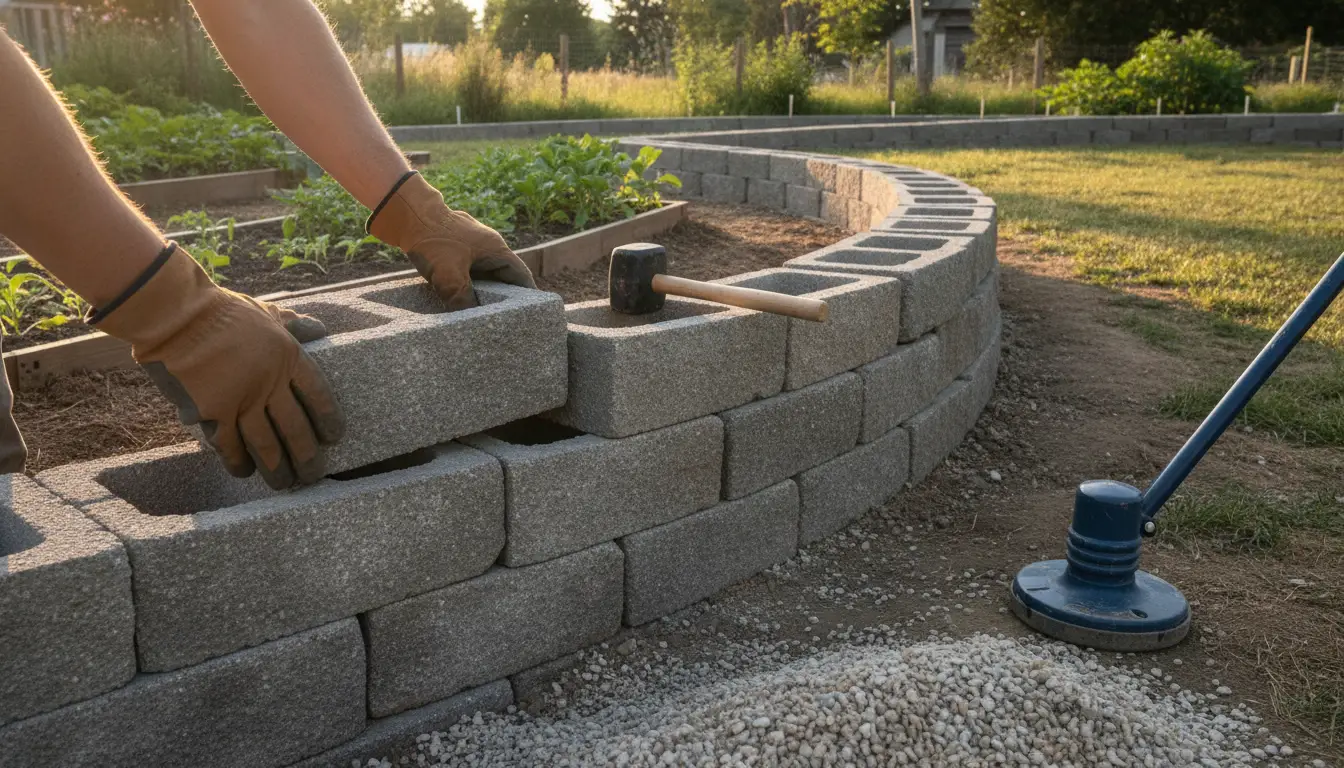
Set your first block at the lowest point of the run and work outward, checking level front to back and side to side on every single block. Tap high corners down with the rubber mallet. Spend real time here, because the first course sets the line for everything above it. If a block rocks, lift it and adjust the sand rather than forcing it.
STEP 5: STACK THE COURSES AND BACKFILL
Lay each new course so the blocks sit over the joints below, the way you’d stagger brickwork, which ties the wall together. Line the back with landscape fabric, then shovel 3/4-inch drainage gravel behind each course as you go. That gravel is what stops water pressure building behind the wall and pushing it forward over a wet winter. Set your top course and brush off the sand, and you’re done.
WHEN YOUR WALL NEEDS AN ENGINEER, NOT A WEEKEND
Height is the line I don’t cross on my own. Anything over about two feet, or a wall holding back a real slope, driveway, terrace or structure, is a job for a designed and reinforced build with proper drainage and often a geogrid tail dug into the bank. At that point you’re managing serious soil load, and a DIY dry stack isn’t the answer. If your project is taller than knee height and doing structural work, get an engineer to spec it before you order a single block.
What It Cost Me
Prices vary by region and by which block you pick, so treat these as ballpark for a 10-foot wall about 20 inches high.
| Item | Rough quantity | Approx. cost | |—|—|—| | Wall blocks | ~50 | $300–$700 | | Crushed base | 0.5 cubic yard | $35 | | Coarse sand | 2 bags | $15 | | Drainage gravel | 0.5 cubic yard | $40 | | Landscape fabric | 1 roll | $25 | | Plate compactor rental | 1 day | $70 |
The blocks are the whole budget conversation. A plain grey block sits at the bottom of the range and a textured facing block near the top, so choose the look before you fall in love with a price.
Money-Saving Tips
Rent the plate compactor for a single day and prep all your trenching first so you use it in one hit.
Buy base gravel and drainage gravel loose by the yard, not in bags. Bagged gravel costs several times more for the same volume.
Order blocks by the pallet if your wall is long. Split pallets and short-count top-ups usually carry a premium.
Keep your offcuts. Half blocks fill the ends of staggered courses, so cut once and reuse rather than buying dedicated corner pieces.
I’ve now built three of these around the yard, and the mortar-free method is the one I recommend to anyone starting out. Tell me in the comments what you’re building and how tall, and I’ll help you figure out whether it’s a weekend job or one to hand to an engineer.
Written by Marcus Reed, who has spent the last decade landscaping his own hillside property and building its walls and garden steps the slow, hands-on way.