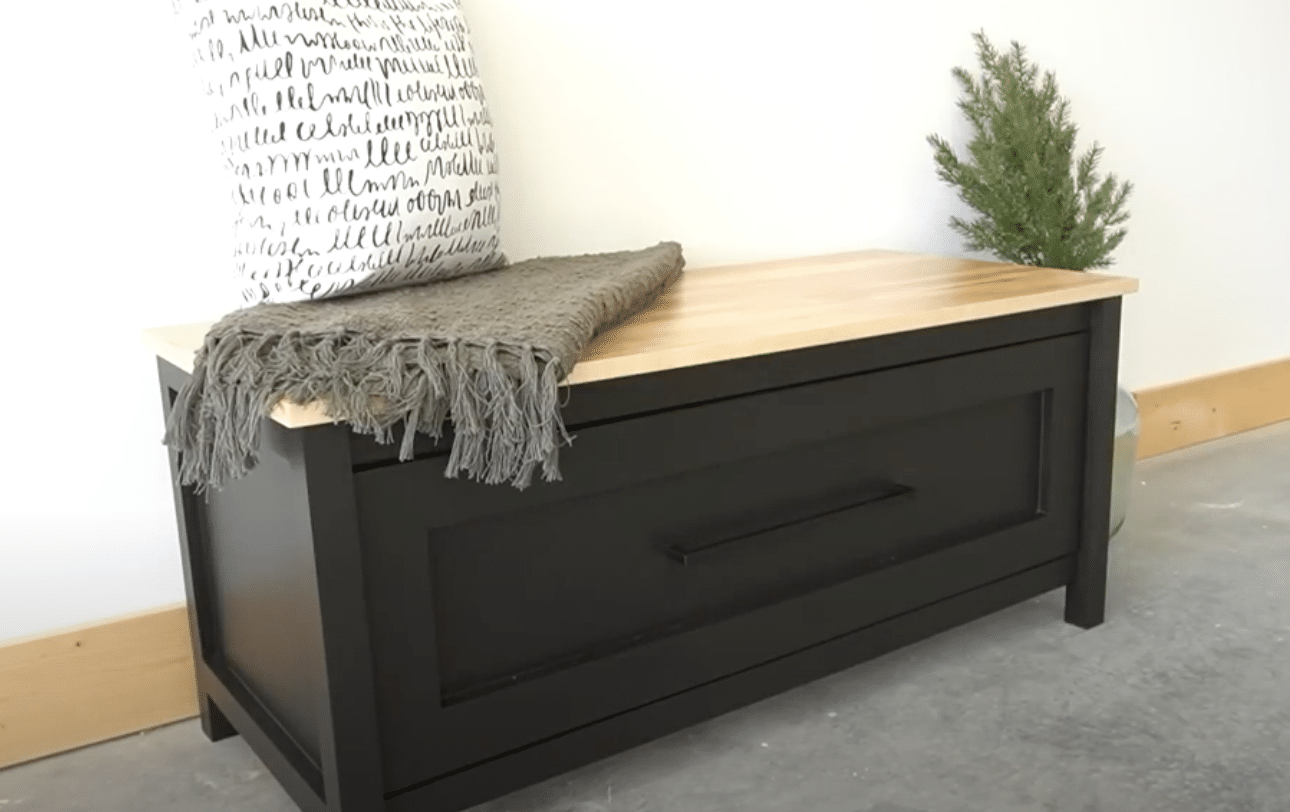
Easy Instructions for a DIY Storage Bench
I’m here to show you how to build a simple storage bench that looks great and saves space.
With just $100 worth of materials and basic tools, I made this bench in one weekend. It now holds all my kids’ toys and serves as comfy seating in our mudroom.
My neighbors have asked me to help them build similar ones, and I’ve already guided three families through this project.
Let’s start building your storage bench – I’ll walk you through each step in a way that even beginners can follow.
Benefits of Having a DIY Storage Bench
- Double-Duty Furniture: I’ve found that a storage bench serves two key purposes. It provides a comfortable place to sit and hidden storage space in one piece of furniture, helping you make the most of your room’s square footage.
- Money-Saver: Building your storage bench costs less than buying one from a store. From my experience, you’ll spend about $100 on materials, while similar pre-made benches can cost $300 or more.
- Perfect Fit for Your Space: When you build it yourself, you control the size. I can measure my space and create an ideal mudroom, entryway, or bedroom bench.
- Personal Style Match: You choose the paint color, fabric, and style that matches your home. I love picking materials that blend with my existing decor instead of settling for what’s available in stores.
- Storage Solution: It’s ideal for keeping items tidy and within reach.
Choosing the Right Design for Your DIY Storage Bench
| Design Type | Overview | Pros | Cons |
|---|---|---|---|
| Built-In Bench | Bench attached directly to a wall or structure, creating a seamless look. | – Space-saving – Customizable to fit spaces – Great stability |
– Permanent fixture – Higher construction effort |
| Standalone Bench | Movable bench not attached to any structure, can be placed anywhere. | – Flexibility in placement – Easy to relocate – Simple design |
– Takes up more floor space – May lack stability compared to built-ins |
| Bench with Drawers | Storage bench featuring drawers for organization. | – Organized storage – Accessible, especially for smaller items |
– More complex to build – Limited storage for larger items |
| Hinged-Top Bench | Bench with a hinged top that lifts to reveal storage underneath. | – Easy access to large storage – Simple design |
– Items may shift around – Requires open space above for access |
Tools and Materials Required
Tools:
- Circular Saw
- Kreg Pocket Hole Jig
- Drill/Driver
- Miter Saw
- Nail Gun (optional, for trim)
- Table Saw (optional, for dado cuts)
- Measuring Tape and Square
Materials:
- (1) sheet ¾″ plywood (for main bench structure)
- ¼ sheet ¼″ plywood (for drawer bottom)
- 2×2 lumber (for legs)
- 1×2 and 1×3 boards (for trim and support)
- 16″ ball-bearing drawer slides
- 1 ¼″ pocket hole screws
- 1 ¼″ brad nails
- Edge Banding
- Wood Glue
- Wood Filler
- Paint/Stain and Clear Polyurethane (for finishing)
How to Build a DIY Storage Bench
Step 1: Build the Side Panels
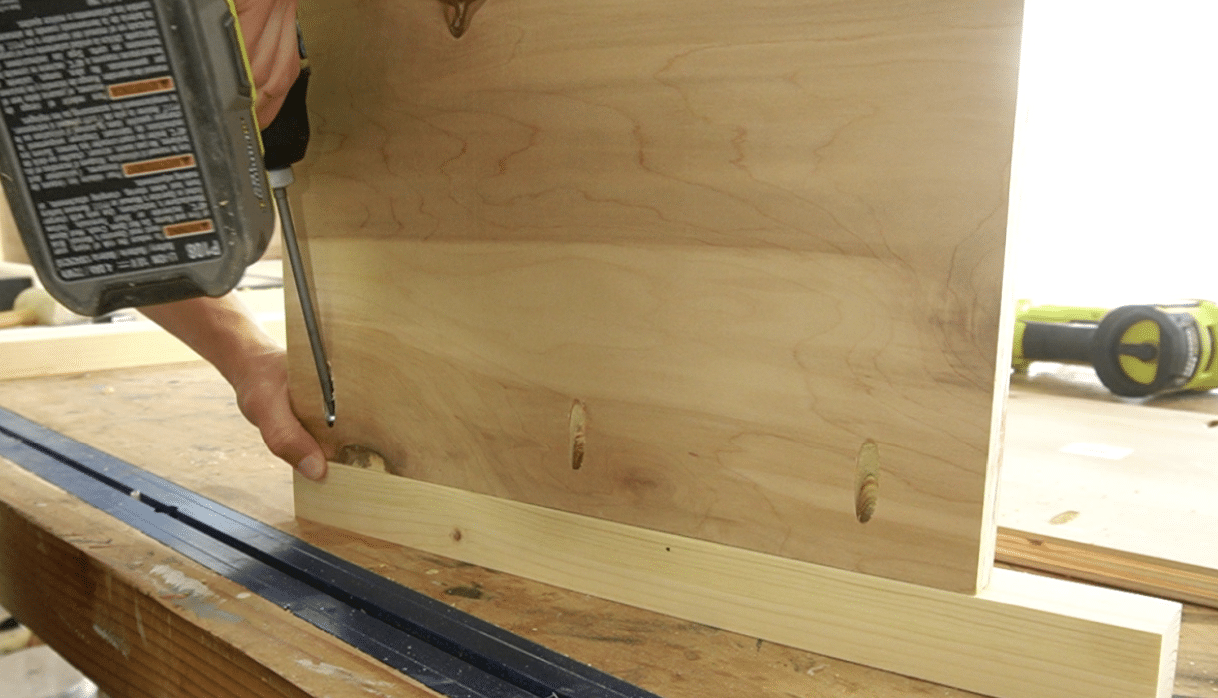
- Cut Legs and Panel Pieces: Start by cutting four pieces of 2×2 lumber to serve as the legs, each measuring 18 ½″ in length. Cut two plywood squares (15 ½″ each) for the side panels.
- Attach Panels to Legs: Use a pocket hole jig to drill holes along the edges of each plywood square. Attach the panels to the legs with pocket hole screws (1 ¼″ screws), keeping the panels flush with the inside of the legs. This provides a neat inset on the outer side for trim later.
Step 2: Assemble the Main Frame
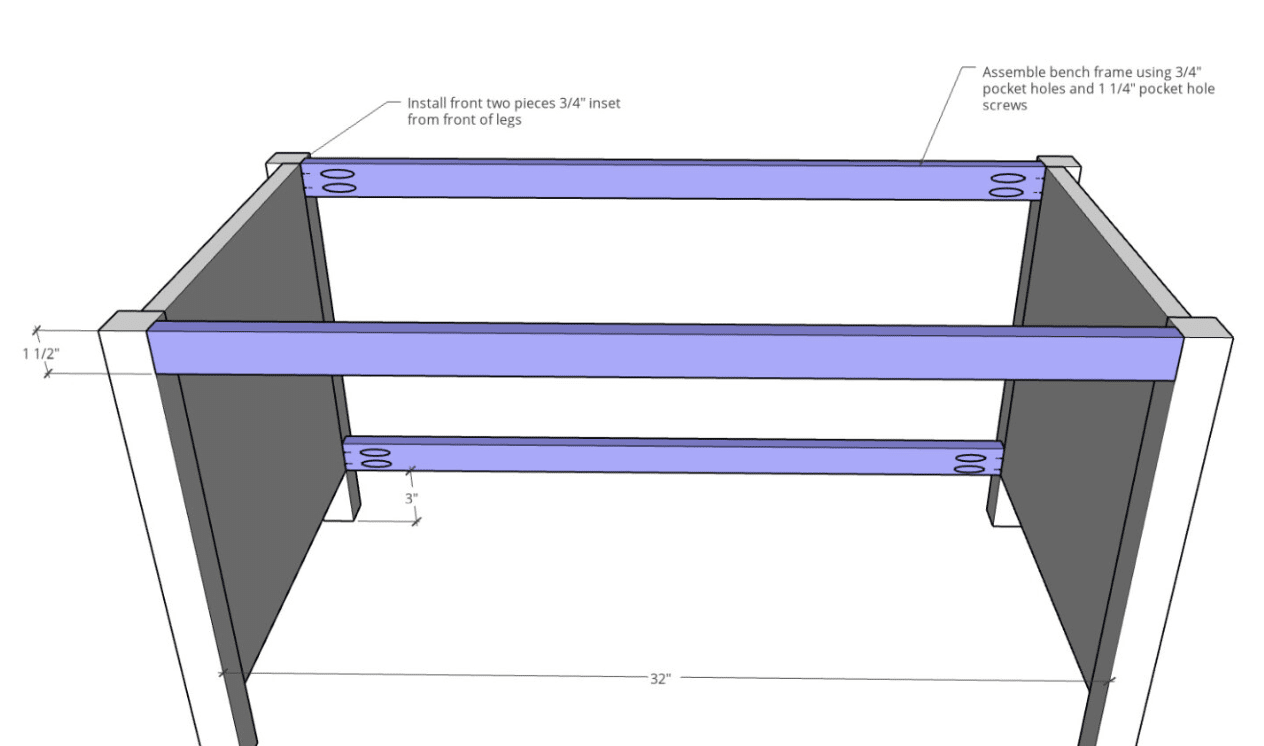
- Prepare Frame Pieces: Cut two strips of either plywood (ripped to 1 ½″ wide) or 1×2 boards to fit between the side panels for the frame.
- Attach Frame Pieces: Use pocket holes and screws to secure these strips between the side panels. Ensure the front frame piece is set ¾″ back from the front of the legs to allow for the drawer front trim. The bottom frame piece should be positioned 3″ from the ground.
Step 3: Install Top and Bottom Supports
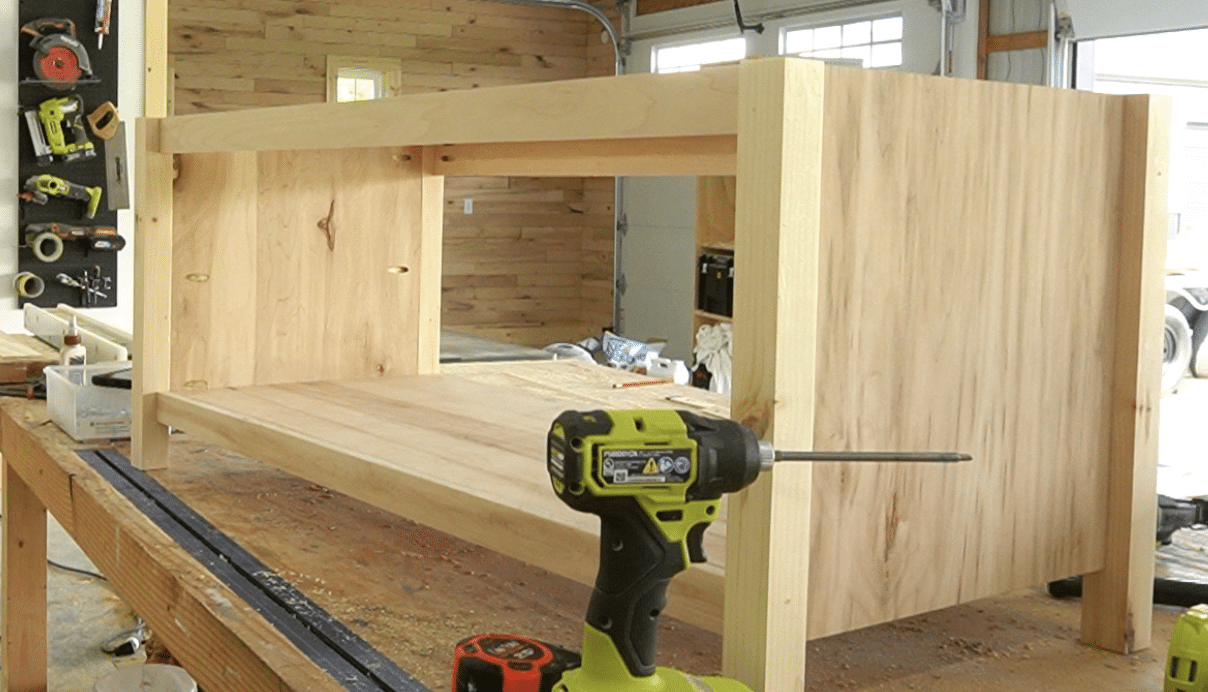
- Cut Support Boards: Cut two 1×3 boards or plywood strips (2 ½″ wide) for the top supports.
- Attach Supports: Place one support at the front and another at the back of the top frame, securing them with pocket screws. This will provide structure and allow for easy installation of the bench’s top.
Step 4: Install Drawer Slides
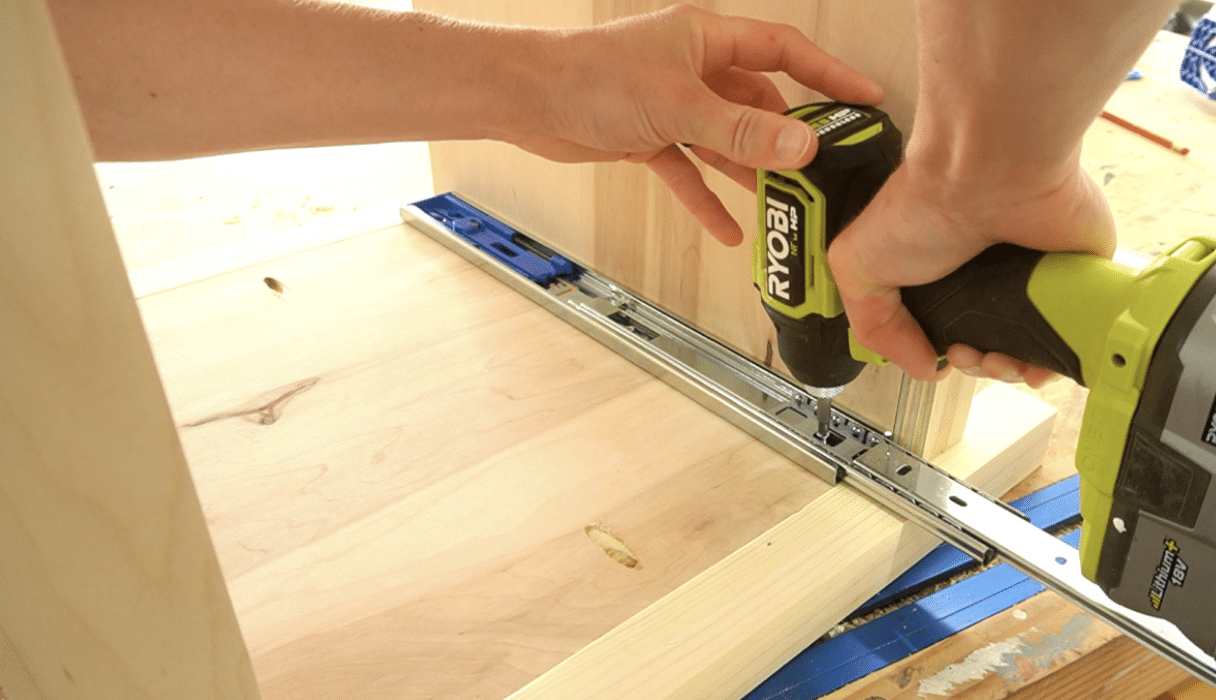
- Position Slides: Mark and install the 16″ ball-bearing drawer slides, ¾″ back from the front edge of the opening. Use screws to secure the slides, ensuring they’re aligned properly on both sides.
- Check Alignment: It’s crucial to check the alignment of the slides so the drawer will open and close smoothly once installed.
Step 5: Build and Install the Drawer
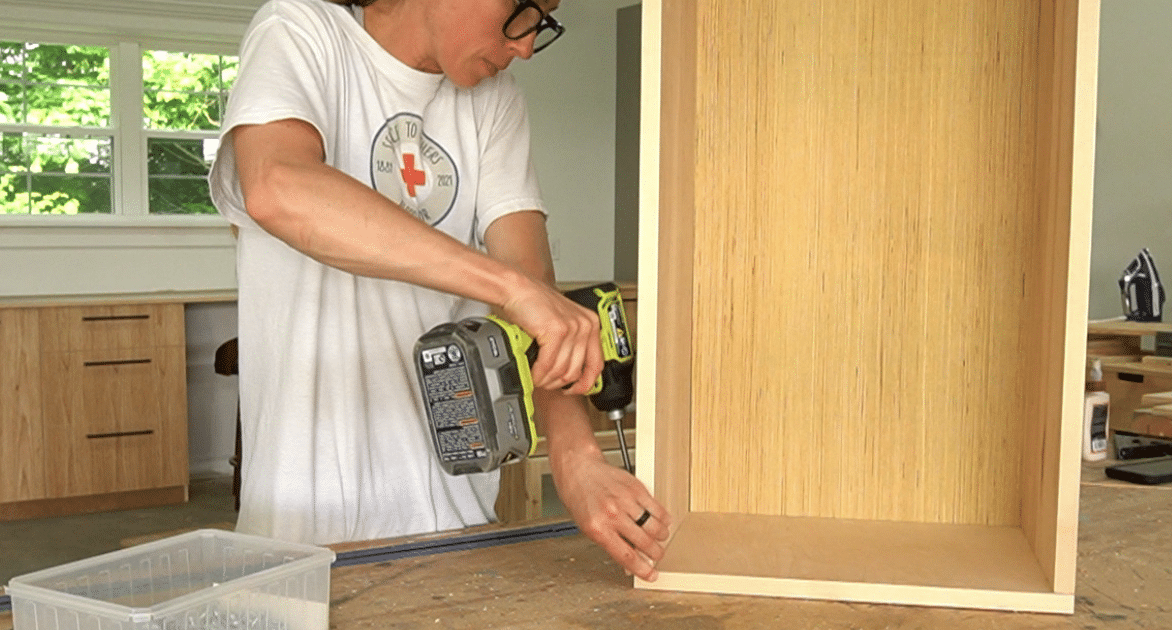
- Cut Drawer Pieces: Cut four pieces of ¾″ plywood for the drawer sides and front/back, and a ¼″ plywood piece for the drawer bottom.
- Create Bottom Groove: Use a table saw to cut a groove (¼″ dado) about ¼″ deep and ½″ from the bottom edge of each side piece to fit the bottom plywood.
- Assemble Drawer Box: Drill pocket holes in the front and back pieces of the drawer, then secure the sides using pocket hole screws, fitting the bottom panel into the grooves.
- Attach Drawer to Slides: Slide the drawer box onto the slides in the frame, checking for smooth movement.
Step 6: Attach Trim and Finish
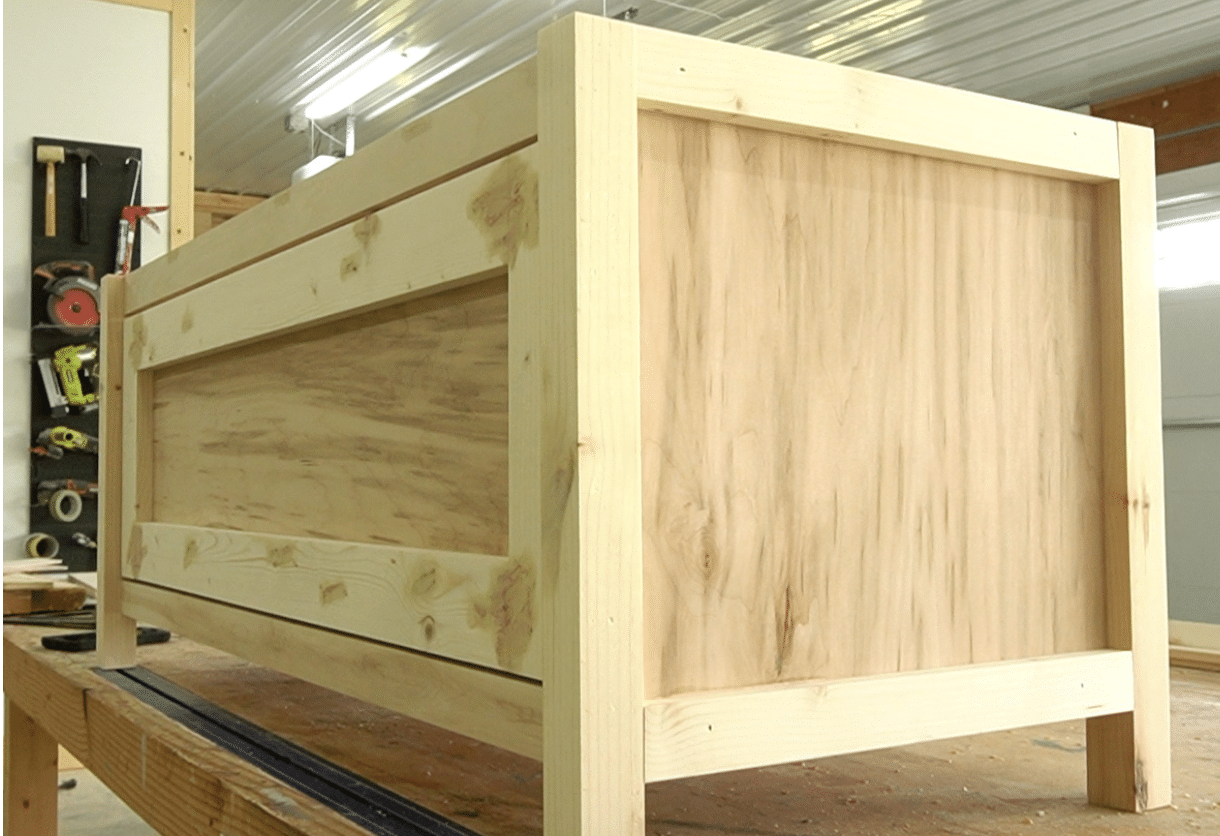
- Install Trim Pieces: Cut 1×3 boards to create a frame for the drawer front, leaving a small gap (about ⅛″) around the edges when attached. Glue and nail the pieces to the front of the drawer.
- Add Side Trim: Attach 1×2 trim pieces along the top and bottom edges of the bench sides.
- Finish and Secure: Sand all trim edges, apply wood filler as needed, and finish with paint or stain. Attach the top to the bench using screws through the top supports, then install a handle on the drawer front to complete your storage bench.
Painting and Finishing the Bench
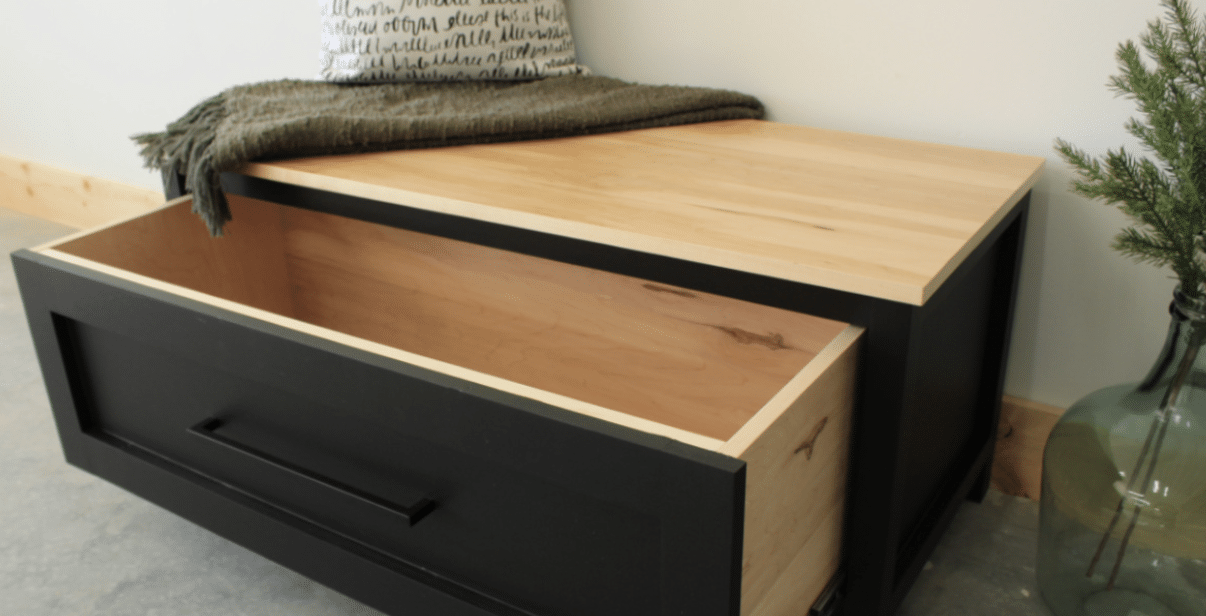
- Preparation for Painting: Remove the drawer from the bench after the full assembly to make painting easier.
- Sanding: Sand the entire bench and drawer front one final time, focusing on any rough edges or spots with wood filler. Use fine-grit sandpaper (around 220 grit) to achieve a smooth surface.
- Priming: Apply a coat of primer to the bench and drawer front, especially if using lighter-colored paint.
- Painting: Choose a durable, high-quality paint for furniture (acrylic latex or chalk paint works well). Use a brush or roller and apply at least two coats depending on your preferred finish.
- Clear Coat for Durability: Apply a clear polyurethane finish to protect the surface once the paint is dry. A water-based polyurethane works best for a natural look and won’t yellow over time.
- Reassemble and Final Touches: After the polyurethane has dried fully (usually 24 hours), reattach the drawer to the slides. Add any finishing touches, like the drawer handle, and inspect the entire bench for any missed spots or areas needing a touch-up.
For a more detailed tutorial, check out the below video:
Maintenance and Care Tips
- Dust the bench surface weekly with a soft cloth.
- Clean spills right away to prevent stains on the wood or fabric.
- Check and tighten screws every three months.
- Apply wood polish twice a year to protect the finish.
- Keep the hinges oiled to prevent squeaking.
- Vacuum the seat cushion regularly if it has fabric covering.
- Test the lid support yearly to ensure safe operation.
- Fix loose joints as soon as you notice them.
- Store heavy items at the bottom of the storage area.
- Keep the bench away from direct sunlight to prevent fading.
Common Mistakes to Avoid
Skipping the Planning Phase
I’ve seen many DIY builders rush into cutting wood without proper measurements. Take time to draw your plan first, list your materials, and check measurements twice.
This small step will save you from wasting materials and starting over.
Wrong Wood Selection
Some beginners pick the cheapest wood available. But low-quality wood can warp and split over time. I suggest using plywood for the box and solid wood for the frame.
This combo gives you strength without breaking your budget.
Improper Lid Support
Poor lid support is the most common safety issue I see. Make sure to use quality hinges and a proper lid support mechanism.
Test the lid multiple times before finishing the project. Your family’s safety matters most.
Wrapping It Up
Making your storage bench isn’t just about saving money—it’s about creating something useful that perfectly fits your needs.
I started this project because I needed extra storage, but I gained so much more: a new skill, a piece of furniture I’m proud of, and a solution that works for my family.
Now it’s your turn to build. Plan carefully, choose good materials, and focus on safety features like proper lid support. Don’t worry if you’re new to DIY – I’ve shared all the steps that worked for me.
Ready to start? Grab your measuring tape and make a list of materials.
When you finish your bench, I’d love to hear how it turned out—drop a comment below about your building experience!

