
Easy Guide to Furniture Stripping and Refinishing Techniques
Furniture stripping means taking off old paint, varnish, or finish from wooden furniture to give it new life. It’s the first step in making old pieces look fresh and clean again.
Why Stripping Furniture is a Great DIY Project? After finishing my dresser, I can tell you – this is a perfect weekend project.
You don’t need special skills or costly tools to get started. The results are clear to see, and the satisfaction of doing it yourself is worth every minute.
In this guide, I’ll walk you through everything I learned: picking the right stripping products, tools you’ll need, safety steps to take, and step-by-step instructions.
I made plenty of mistakes along the way, and I’ll share those too, so you can avoid them.
By the end of this article, you’ll have the knowledge to take on your first stripping project with confidence.
Benefits of Stripping Furniture
When I first looked at my grandmother’s old oak table sitting in my basement, I wasn’t sure if I should fix it up or buy a new one.
After spending three weekends working on it, I can share what I learned about the real value of furniture stripping.
Restoring the Original Beauty
I never knew what was hiding under those layers of old paint until I started stripping. The oak wood grain that emerged was stunning – with patterns and colors I didn’t expect.
My old table had character marks and tiny details that were completely hidden. The wood told a story that new furniture simply can’t match.
I spent hours gently removing decades of paint, and each layer revealed more of the table’s natural charm.
Saving Money by Refurbishing Old Pieces
I’ll be honest about the costs that, I spent $75 on stripping supplies and tools. A similar new oak table would have cost me over $800.
Even better, I already owned the piece, so there was no shopping needed. The money I saved went toward a nice dinner to celebrate finishing the project.
While it took time and effort, the financial benefit was clear. Plus, I now own all the tools for future projects.
Personalizing Your Furniture
The best part came after stripping – I could make the piece exactly how I wanted it. I chose a light stain that matched my kitchen perfectly.
You just can’t get this level of control with store-bought items. When friends visit, they often ask about the table, and I feel proud to tell them how I brought it back to life.
Each scratch and mark makes it unique, and knowing I did the work myself makes it mean so much more.
The whole process taught me that old furniture isn’t just about looks – it’s about giving new purpose to pieces that have history.
My grandmother’s table isn’t just furniture anymore; it’s a family piece I restored with my own hands. That feeling is worth more than any new table could offer.
What to Use to Strip Furniture?
After trying different methods on my grandmother’s table, let me share what actually worked for me.
I tested both chemical and natural options on different spots before committing to the full piece.
Chemical Strippers and Solvents
I started with a paste-type stripper for my first attempt. Here’s what I learned works best:
- For thick paint layers: I used a methylene chloride-free stripper paste. It needed about 30 minutes to work but didn’t run down vertical surfaces.
- For stubborn spots: A gel stripper worked well – I left it on for 15 minutes, then used light scraping.
- For final cleaning: Mineral spirits helped remove any leftover residue.
One important note: Always work in a well-ventilated space. I set up two fans in my garage and wore a respirator mask. The fumes are strong, even with safer modern formulas.
Natural and Eco-Friendly Alternatives
When working on smaller pieces in my house, I tried some gentler options:
- Soy-based stripper: This took longer (about 2 hours) but was much less harsh. The smell was mild enough that I could work indoors with good ventilation.
- Citrus stripper: Great for light finishes. I used this on a small side table with just one layer of varnish.
- Vinegar and hot water: This combo helped soften some water-based paints, though it required more elbow grease.
Essential Tools for Stripping
My tested list of must-have tools:
- Metal scraper: I bought two sizes – a 2-inch for details and a 4-inch for larger areas
- Plastic scraper: Essential for softer woods to prevent scratches
- Steel wool (0000 grade): Perfect for cleaning up after stripping
- Natural bristle brushes: I used these to apply stripper in corners
- Rubber gloves (chemical resistant): Regular cleaning gloves won’t hold up
- Drop cloths: The thick canvas type worked better than plastic
- Safety gear: Goggles, respirator mask, and long sleeves saved me from irritation
Extra items I found helpful:
- Old plastic containers for stripper
- Rags (lots of them)
- Wire brush for tough spots
- Plastic scrub pads for final cleaning
I store all these tools in a dedicated box now, ready for my next project. Start with the basics and add tools as you need them – that’s what worked best for me.
Different Methods for Stripping Furniture
Using Chemical Strippers
My first big project was a wooden chest, and my step-by-step process:
- I put on thick rubber gloves and safety goggles first
- Applied the stripper in thick layers using an old paintbrush
- Waited 20 minutes (learned this the hard way – rushing doesn’t help)
- Used a plastic scraper to remove the bubbled finish
- Needed 2-3 applications for stubborn spots
What worked well: The chemical stripper removed multiple layers at once. What didn’t: The smell was strong, even with windows open and fans running.
Heat Gun Method
I tried this on a small table, and here’s what I found:
- Kept the gun moving constantly to prevent wood damage
- Held it 2-3 inches from the surface
- Scraped as soon as the finish bubbled
- Worked in small, 4-inch sections
What worked well: No harsh chemicals needed. What didn’t: Had to be very careful not to scorch the wood. I did leave a small mark on my first attempt.
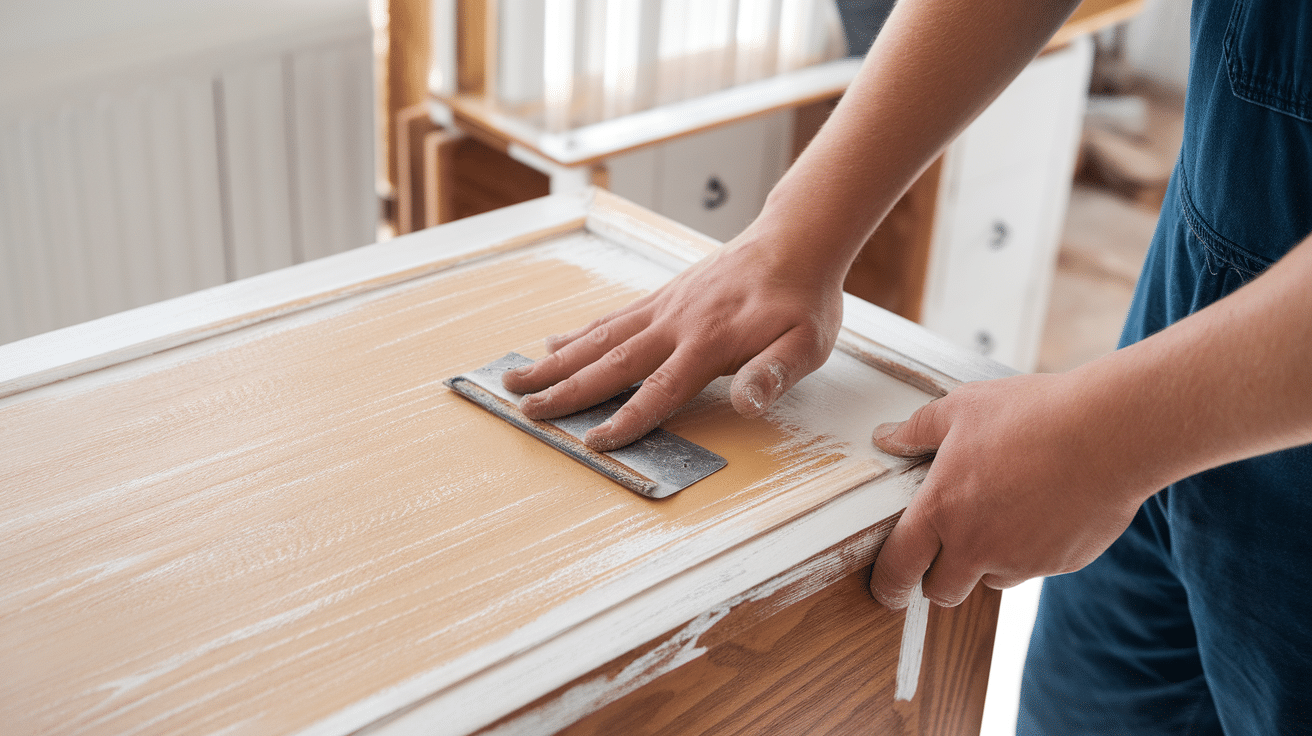
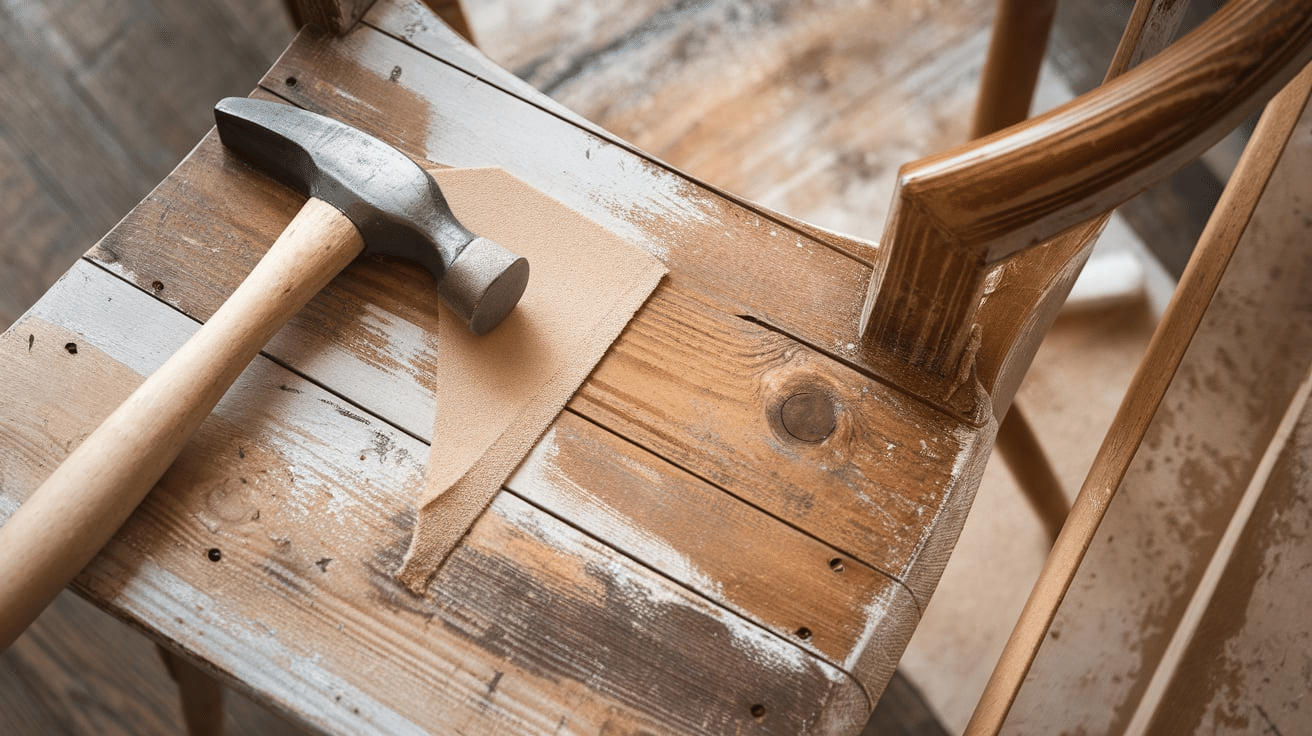
Sanding and Abrasive Methods
For my dining chairs, I chose sanding:
- Started with 80-grit sandpaper
- Moved to 120-grit for smoothing
- Finished with 220-grit for final touches
- Used a sanding block for flat surfaces
- Hand-sanded curved parts
What worked well: Complete control over the process. What didn’t: Created lots of dust, took the longest time.
Natural and Homemade Solutions
On my kitchen cabinet doors, I tested some gentler options:
White vinegar mixture:
- Mixed equal parts vinegar and hot water
- Applied with steel wool
- Let sit for 30 minutes
- Wiped clean with a damp cloth
Baking soda paste:
- Made thick paste with water
- Applied to tough spots
- Left for 15 minutes
- Scrubbed gently
What worked well: Safe to use indoors, no harsh fumes. What didn’t: Required more physical effort, only worked on lighter finishes.
I keep notes from each project now, marking down what worked best on different types of finishes.
The method you pick really depends on your specific piece – there’s no one-size-fits-all solution, as I learned through plenty of experimentation.
Tools and Materials Needed for Furniture Stripping
Based on my recent furniture stripping projects, here’s my complete checklist of everything I needed:
Stripping Agents and Solvents
- 1 can of gel-based stripper (paste type worked best for me)
- 1 bottle of mineral spirits for cleanup
- 1 bottle of white vinegar for natural cleaning
- 1 container of denatured alcohol for final wipe-down
- 1 spray bottle with plain water for neutralizing
Protective Gear
- 2 pairs of chemical-resistant rubber gloves (one as backup)
- 1 respirator mask with fresh cartridges
- 1 pair of safety goggles that seal around the eyes
- 1 long-sleeved old shirt
- 1 pair of closed-toe shoes
- 1 pack of disposable coveralls
- 2 drop cloths (canvas worked better than plastic)
Brushes, Scrapers, and Sandpaper
- 2 natural-bristle brushes (2-inch and 4-inch sizes)
- 1 plastic scraper (3-inch width)
- 1 metal scraper (2-inch width)
- 1 pack medium steel wool (0000 grade)
- 1 putty knife for tight spots
- Sandpaper sheets: 80, 120, and 220 grit
- 1 sanding block
- 1 wire brush for tough spots
- 1 pack of clean rags
- 1 pack of paper towels
Finishing Products (Paint, Stain, Sealer)
- Wood stain (I used 1 quart)
- Pre-stain wood conditioner (1 pint)
- Clear finish sealer (1 quart)
- 2 foam brushes for stain application
- 1 fine-bristle brush for sealer
- 1 tack cloth for dust removal
- 1 bottle of wood filler for repairs
- Wood putty matching your wood tone
- 1 stirring stick
Extra Items I Found Helpful:
- Plastic containers for stripping residue
- Old newspaper for covering work area
- Small bucket for clean water
- Trash bags for disposal
- Work light for better visibility
- Small brush for cleaning details
- Note pad for tracking progress
Step-by-Step Guide to Stripping Furniture
Step 1 – Preparing the Workspace
First, I cleared a 10×10-foot space in my garage. I laid down a canvas drop cloth, then added old newspapers on top for extra protection.
I opened both garage doors and set up two fans – one pointing in, one pointing out for good airflow. This took about 30 minutes to set up properly, but it saved me countless headaches later.
I removed all hardware from the dresser and stored each piece in labeled plastic bags. Take photos of where everything goes – trust me on this one.
I learned this after spending an hour trying to figure out which handles went where later.
Step 2 – Applying the Stripping Agent
I started with the top surface, working in small 2×2 foot sections. Using an old paintbrush, I applied the stripper in thick, even strokes, all going in the same direction.
The key is patience here – I waited a full 20 minutes before touching it. On my first try, I rushed after 5 minutes and just made a mess.
The stripper should look like thick mayo when you put it on. If it’s running, you’re using too much.
I found it helpful to work on flat surfaces first, then move to vertical ones once I got the hang of it.
Step 3 – Scraping off the Old Finish
This part was oddly satisfying. Using a plastic scraper, I removed the bubbled finish, working in the direction of the wood grain.
The first layer came off like butter. For stubborn spots, I applied more stripper and waited another 15 minutes.
I kept a cardboard box lined with a garbage bag nearby to dump the scraped-off gunk.
The smell was strong, so I took regular breaks for fresh air, even with my mask on.
Step 4 – Sanding the Surface
After scraping, I let the wood dry overnight. The next day, I started with 80-grit sandpaper on my sanding block, always moving with the grain.
Some spots needed extra attention, especially around the edges.
I moved up to 120-grit, then finished with 220-grit for a smooth surface.
Between each sanding, I wiped everything down with a tack cloth. This step made a huge difference in the final finish.
Step 5 – Cleaning and Drying the Furniture
The final cleanup was crucial. I wiped everything down with mineral spirits using old white cotton rags.
You can tell it’s clean when the rags come away clean. I changed rags often – this used more than I expected.
Then came the waiting game. I let the dresser dry for a full 24 hours in my garage with fans running.
Humidity was high that week, so I added a dehumidifier. Better to wait an extra day than rush this step – I learned this after having finished problems on an earlier project.
Looking back, each piece I’ve stripped has taught me something new.
The process takes time, but seeing the natural wood emerge from under old paint makes it worth the effort.
Just remember to take breaks and never rush the drying times.
Tips for Stripping Different Types of Furniture
After working on various pieces in my home, I’ve gathered specific tips for different materials. What did I learn from my hands-on experience with each type?
Stripping Wooden Furniture
When I stripped my oak dining table, I discovered some key techniques:
- Test spots matter: I always test in a hidden corner now. My first table showed different wood types under the finish!
- Grain direction counts: I scrape and sand with the grain, not against it. Made this mistake once – the scratches were hard to fix.
- Each wood needs different care:
- Pine (my bedside table): Needed gentle pressure to avoid dents
- Oak (dining table): Could handle firmer scraping
- Maple (kitchen chairs): Required extra time between stripper applications
One thing I wish I had known earlier is old and new wood react differently. My 1950s dresser needed half the stripping time of my newer bookshelf.
Stripping Metal Furniture
My metal patio set taught me these lessons:
- Start with wire brushing loose paint
- Small sections work best – I do 1-foot areas at a time
- Keep the stripper paste thick on vertical surfaces
- Watch for rust spots underneath
- Clean twice with mineral spirits to prevent rust
I messed up my first metal chair by letting the stripper sit too long – it started pitting the surface. Now I check every 10 minutes.
Stripping Painted Furniture
Painted pieces need special attention, as I learned with my bathroom cabinet:
- Count the paint layers first – check edges where paint chips show
- Multiple thin applications work better than one thick one
- Old paint might be lead-based (pre-1978):
- I sent a sample for testing
- Used wet-stripping methods to control dust
- Kept children and pets away
- Some spots needed paint softener before the stripper
My best tip: Keep the surface wet while working. When I let sections dry out, the remaining paint got harder to remove.
I keep a project notebook now with notes about what worked on each piece. This has saved me time and materials on later projects.
Remember, each piece tells you what it needs – you just have to pay attention and be patient.
Common Mistakes to Avoid When Stripping Furniture
Using Harsh Chemicals Improperly
My first project taught me some hard lessons about chemical strippers:
- I didn’t read the instructions fully and mixed two different strippers – the reaction ruined part of my coffee table surface
- When I first started, I poured stripper straight from the can – it splashed on my arm despite wearing long sleeves
- I tried working in poor lighting and missed spots where stripper pooled, which ate into the wood
What I do now?
- Pour the stripper into a small container first
- Work in bright light
- Use only one product at a time
- Apply with a brush, never pour directly
- Check the weather – humidity above 85% or below 30% affects drying time
Not Protecting Surrounding Surfaces
This mistake cost me money and time:
- Stripper dripped through my thin plastic drop cloth onto the garage floor
- Chemical splashes marked my walls permanently
- Metal hardware I forgot to remove got damaged
My current setup includes:
- Two layers of drop cloths – canvas on bottom, paper on top
- Walls covered 3 feet up with plastic sheeting
- Remove ALL hardware – even if it seems protected
- Keep cleaning supplies ready for immediate spill cleanup
- Cover nearby items – stripper vapor can damage surfaces too
Over-Scraping and Damaging the Wood
My enthusiasm led to some permanent damage:
- Pressed too hard with a metal scraper – left deep grooves in my pine table
- Scraped against the wood grain – created scratches that needed extra sanding
- Got impatient and scraped before the stripper fully worked – damaging the wood surface
What works better?
- Use plastic scrapers on softwoods
- Let the stripper work completely – usually 20-30 minutes
- Apply light pressure – let the stripper do the work
- Follow the wood grain always
- Test pressure on a hidden spot first
The biggest lesson I learned: you can’t rush this process. Every time I tried to speed things up, I made mistakes that took longer to fix than if I’d just been patient in the first place.
How to Refinish Stripped Furniture?
After stripping six pieces of furniture in my home, the refinishing stage became my favorite part. I’ll share what I learned about bringing these pieces back to life.
Staining or Painting the Furniture
The first piece I refinished was my grandmother’s dresser, and the process opened my eyes to several important steps:
I started by testing stains on the bottom of the dresser – this saved me from a big mistake. The first stain I picked looked nothing like the sample on the can.
I tried three different shades before finding the right one. Wood takes stains differently based on their type and age.
For the actual staining, I used a pre-stain wood conditioner first. Skipped this on my second project and got blotchy results.
The conditioner helps the wood take stain evenly. I let it dry for 2 hours, then started staining.
My method now:
- Apply thin, even coats with a lint-free cloth
- Wait 5-10 minutes
- Wipe off excess with a clean cloth
- Let dry for 24 hours
- Add a second coat if needed
For painted pieces, I learned to:
- Use wood filler for any gaps
- Sand between primer coats
- Apply thin paint layers
- Wait for full drying time between coats
Sealing and Protecting the New Finish
The sealing stage protects all your hard work. I messed up my first attempt by rushing – the sealer bubbled and I had to start over. Here’s my current process:
Start in a dust-free space. I wait 24 hours after staining, then wipe with a tack cloth. The first sealer coat goes on thin – I use a high-quality brush and work in the wood grain direction.
Three thin coats work better than one thick coat. I wait 6 hours between coats and sand lightly with 320-grit paper between each layer.
The final coat needs 72 hours to harden fully – I learned this when I put items on a table too soon and got marks in the finish.
For daily care, I now:
- Use coasters and pads
- Clean with a soft, dry cloth
- Keep pieces out of direct sunlight
- Check every few months for wear
- Touch up sealer yearly in high-use areas
The waiting times felt long at first, but rushing the process only led to redoing work. Each piece I finish looks better than the last because I learn something new every time.
Conclusion
After spending months stripping and refinishing furniture in my home, I can tell you this: good work takes time, but the results last for years.
When done right, you’ll save money and own pieces that hold meaning. My grandmother’s table now sits in my kitchen, looking better than new, with every ring and mark telling a family story.
Start small – maybe a side table or simple chair. Get comfortable with the process before taking on bigger projects.
Keep your workspace well-ventilated, always use safety gear, and never rush the drying times.
Remember: furniture stripping isn’t about speed. It’s about bringing old pieces back to life, one careful step at a time.
The satisfaction of seeing bare wood emerge from under old finish, then giving it new life – that feeling makes every hour of work worthwhile.
Frequently Asked Questions
How Long Does it Take to Strip One Piece of Furniture?
From my experience stripping twelve pieces, a small table takes 2-3 days total. This includes stripping (4-6 hours), drying time (24 hours), and finishing (24 hours).
Larger pieces like dressers need 4-5 days. Weather and humidity can change at these times.
What Type of Stripper Works Best on Old Paint?
After testing many products, I found gel strippers work best on old paint. They stick to vertical surfaces without dripping and remove multiple layers at once.
For paint older than 30 years, I always test for lead first with a home testing kit.
Can I Strip Furniture Indoors During Winter?
I tried this once – not recommended. Even with windows open, the fumes were too strong. I now use my garage with two fans for ventilation.
If you must work indoors, use natural strippers, but know they take longer.
How Much Does it Cost to Strip an Average Piece?
For my recent side table project, I spent: $25 on the stripper, $15 on safety gear, $20 on sandpaper and tools.
Total cost was about $60. This covered supplies I could use again. Compare this to $200-300 for professional stripping.
Why Did My Wood Turn Blotchy After Stripping?
This happened on my first dresser. The cause? I skipped the wood conditioner before staining.
Some woods, like pine and maple, need conditioner to absorb stains evenly. Now I always test on the bottom of pieces first.


