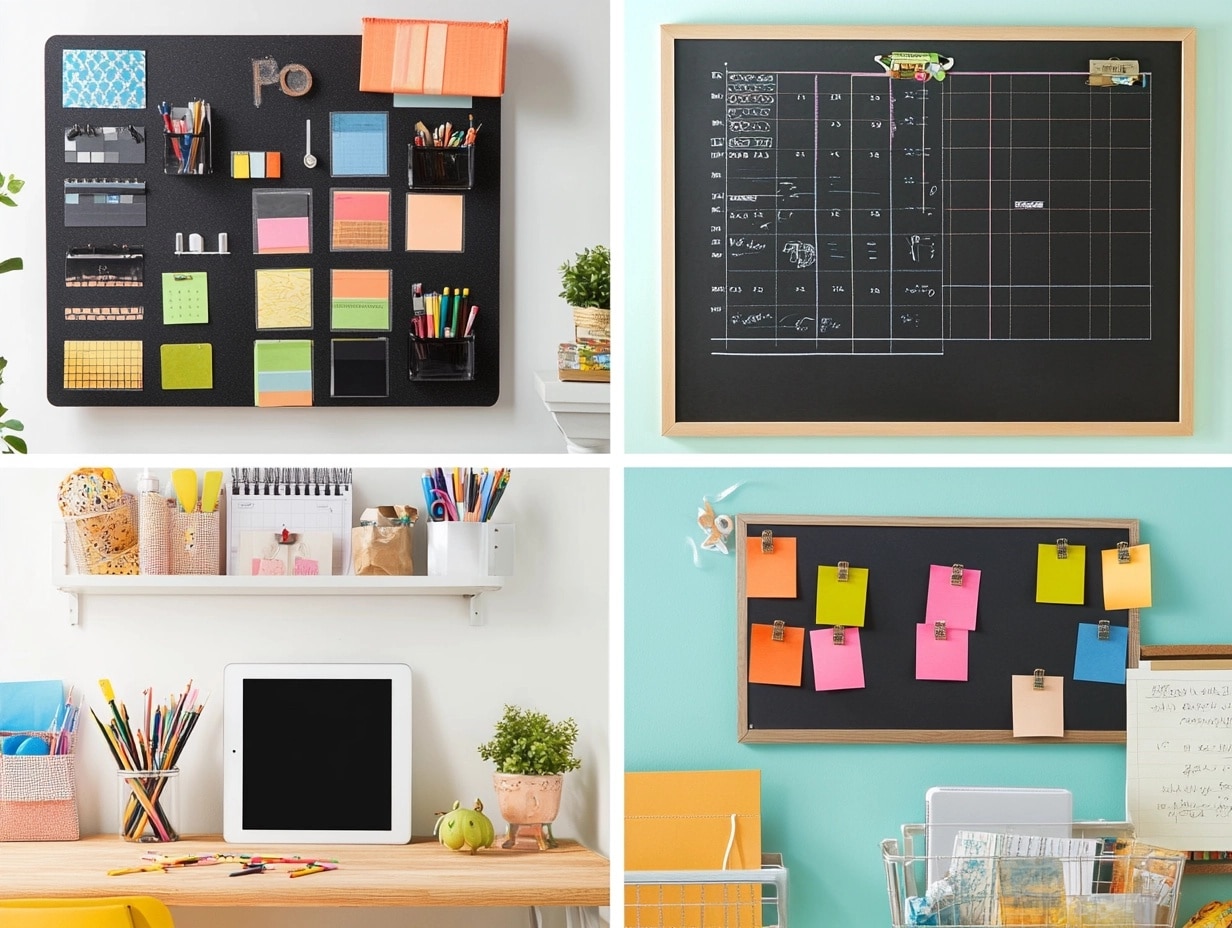
22 Command Center Wall Ideas for a More Organized Home
Walking into my kitchen one morning, surrounded by scattered papers, missing permission slips, and forgotten appointments, I knew something had to change.
That’s when I created my first command center wall – a game-changer for my family’s organization.
Whether managing a busy household, working from home, or simply trying to keep track of life’s details, a well-designed command center can transform chaos into calm.
I’ve tested various setups over the years and am excited to share the most effective ideas I’ve discovered.
List of Command Center Wall Ideas
1. Magnetic Calendar Wall
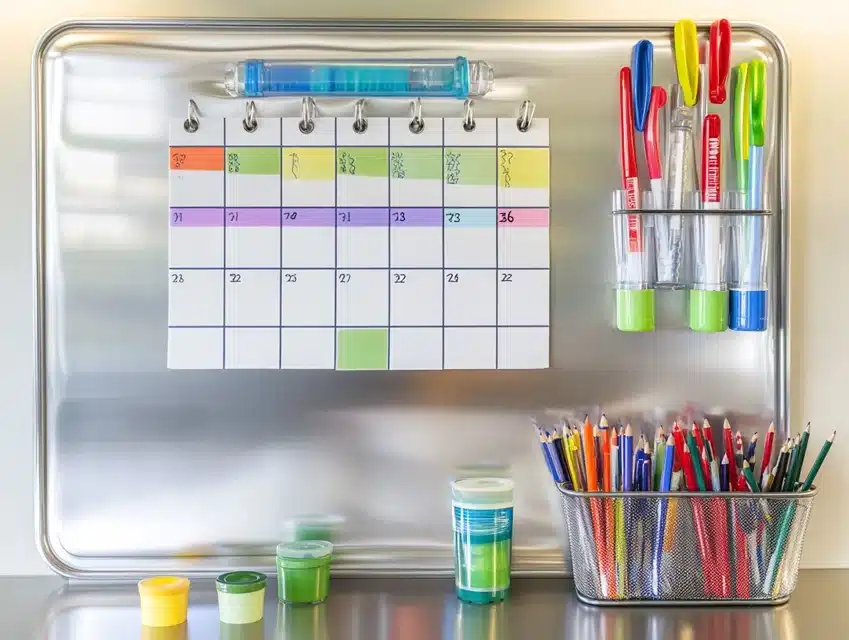
My first successful command center started with a magnetic board, and it remains one of the most practical solutions I’ve tried.
The secret is to use a large magnetic board (at least 24″ x 36″) as your base.
I’ve found that metallic silver or whiteboards blend seamlessly with most home decor.
The magnetic surface lets you easily move and adjust items without leaving marks or holes.
The game-changer here is using different-colored magnets for each family member.
Green for mom, blue for dad, red for kids—suddenly, everyone’s schedules become instantly recognizable.
I added small magnetic containers along the bottom edge to hold markers, and they’ve never fallen off once.
Pro tip: get magnetic backing tape to turn any paper into a magnetic note.
The best part? The calendar layout can change monthly, making it perfect for evolving family schedules.
Quick DIY Steps:
- Mount the magnetic board using heavy-duty anchors and create a sturdy frame
- Create calendar grid using colorful washi tape or thin magnetic strips
- Add a slim floating shelf below for supplies and seasonal decorations
2. Chalkboard Command Center
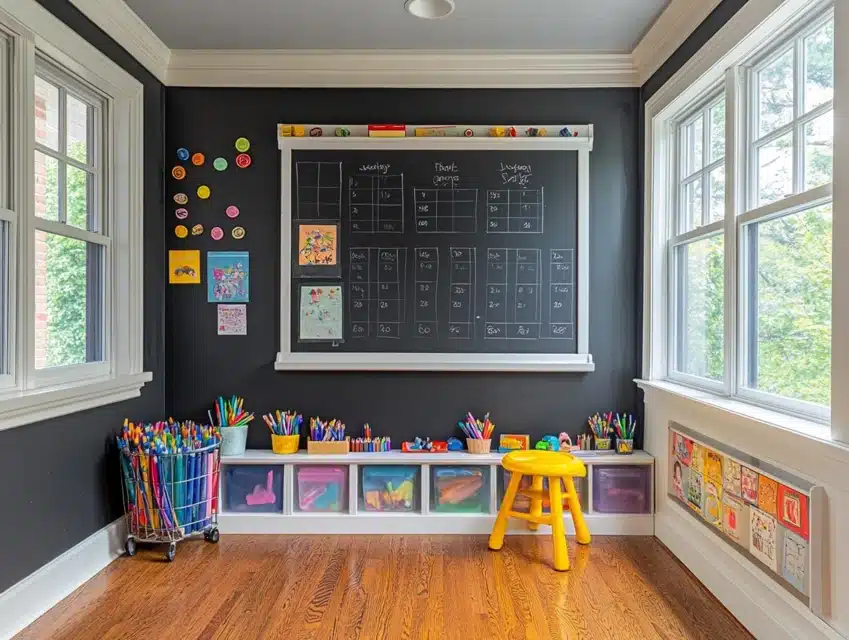
The chalkboard command center in my mudroom has become our family’s communication hub.
Using chalkboard paint gives you the freedom to create exactly the size you need – I went with a 4′ x 6′ section that makes a statement while remaining practical.
The matte black surface looks surprisingly sophisticated, especially when framed with simple white molding.
What makes this setup special is its flexibility. We have permanent sections drawn with chalk markers (weekly calendar, shopping list, chore chart) and space for daily notes and doodles.
My kids particularly love adding their own touches, making it feel like a true family space.
The best part about a chalkboard wall is how it grows with your family – we’ve changed the layout countless times as our needs evolved, and it’s always perfect for quick reminders or impromptu art sessions.
Quick DIY Steps:
- Prime and paint your chosen wall section with quality chalkboard paint
- Add a decorative frame using simple molding for a polished look
- Install a sleek picture ledge below for chalk and erasers
3. Pegboard Organizer
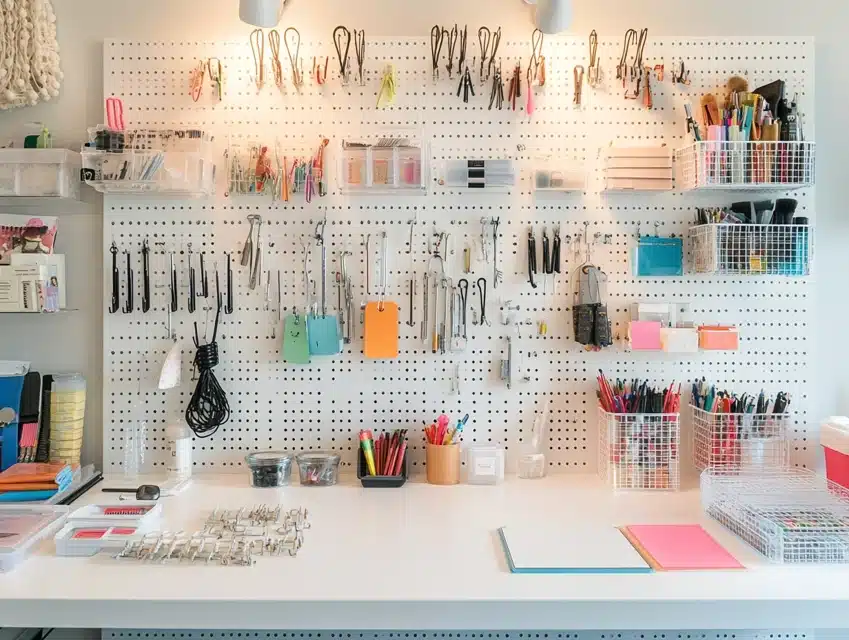
After trying several fixed organizing systems, pegboards offer unmatched versatility.
I installed a 4′ x 4′ white pegboard and it’s been a revelation. Unlike fixed systems, I can rearrange the entire layout seasonally or as our needs change.
During school months, we have more homework organizers; during summer, we add more space for activity schedules.
The key to making a pegboard system work is choosing the right accessories. I use a mix of wire baskets for papers, hooks for keys and masks, and clear containers for supplies.
The best part? Everything sits about 2 inches off the wall, creating a clean, floating look that adds dimension to the space.
I painted my pegboard to match our wall color, making it look like a custom built-in feature. Monthly reconfigurations keep the space fresh and perfectly aligned with our current needs.
Quick DIY Steps:
- Mount pegboard using spacers to allow room for hooks
- Paint the board and frame to match your room’s aesthetic
- Arrange accessories in zones (daily items at eye level, less-used items higher or lower)
4. Family Message Hub with Clipboards
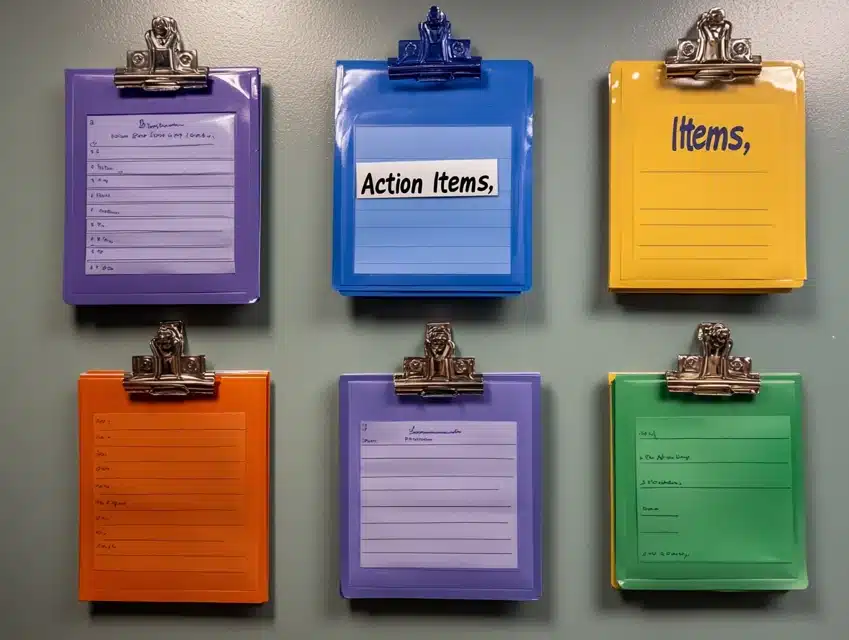
After seeing too many papers get lost in the shuffle, I created what I call our “Family Message Hub” using simple clipboards.
The beauty of this system lies in its simplicity and visual organization. Each family member has their own clipboard, instantly recognizable by color.
What I love most about this setup is how it keeps everyone’s papers separate but visible.
School forms, sports schedules, and artwork all have their designated spots.
The clipboards also double as decor – I chose ones with metallic finishes that catch the light beautifully throughout the day.
What really makes this system work is the “action items” clipboard in the center.
Anything requiring immediate attention goes there, eliminating the “I never saw that!” excuse that used to drive me crazy.
During our weekly family meetings, we clear out old papers and update each board, keeping everything current and relevant.
Quick DIY Steps:
- Paint clipboards in coordinating colors for a cohesive look
- Mount them in a diamond or grid pattern using level and anchors
- Add personalized name tags or labels for each family member
5. Hidden Door Command Center
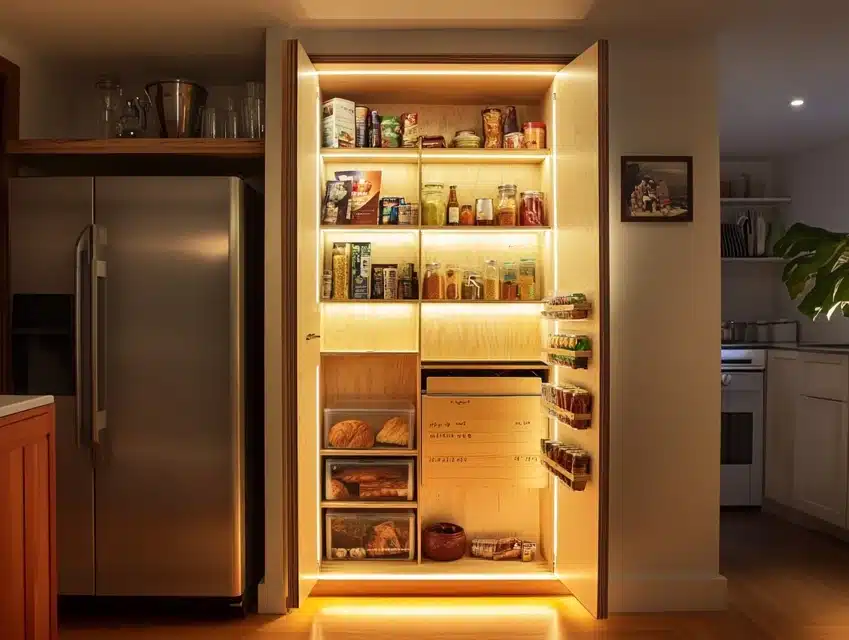
The game-changing moment in my home organization came when I realized the back of our pantry door was prime real estate.
This hidden command center has become my secret weapon for keeping our home running smoothly.
I used the full height of the door, creating zones for different types of information – calendar at eye level, meal planning in the middle, and cleaning schedules below.
The genius of this system is that everything is accessible when you need it but completely hidden when you don’t.
I added thin LED strip lighting that activates when the door opens, making it easy to check schedules even during late-night kitchen runs.
The whole system disappears when guests come over, but remains perfectly organized behind the scenes.
Quick DIY Steps:
- Cover door with thin plywood as your base for mounting items
- Install organizational tools using command strips to avoid door damage
- Add battery-operated LED lighting for visibility
6. Tech-Integrated Wall Station
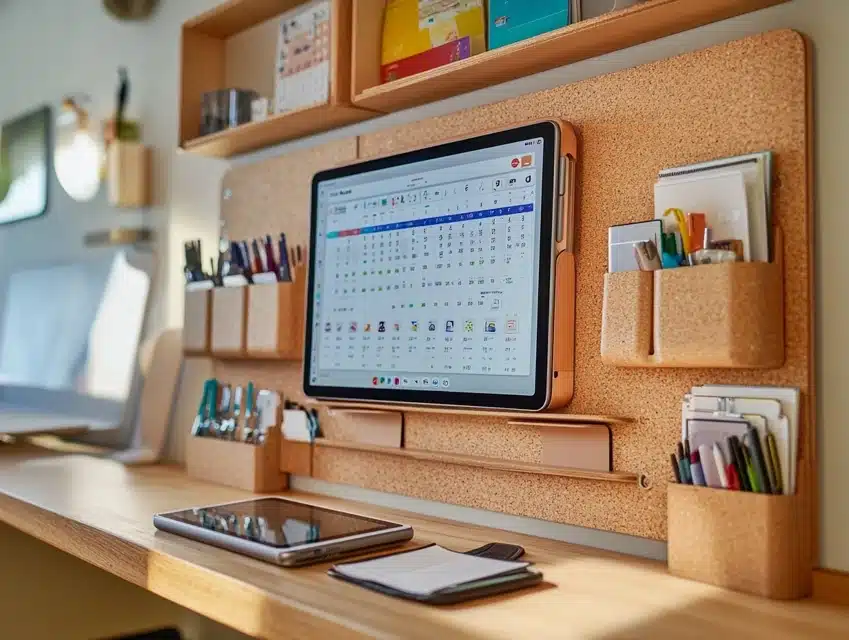
Recognizing that modern families need both digital and analog organization, I created our “Digital-Analog Bridge.”
This setup combines traditional paper organization with smart home features.
The centerpiece is a mounted tablet displaying our shared digital calendar, flanked by traditional cork boards and file holders.
A small shelf below houses a charging station for family devices.
What makes this station special is how it bridges the gap between old and new.
While the tablet shows real-time updates from everyone’s digital calendars, the surrounding cork boards display the tangible items that technology can’t handle – kids’ artwork, wedding invitations, and those important paper forms that still exist in our digital world.
Quick DIY Steps:
- Install a secure tablet mount at eye level with nearby power access
- Create a charging station using a decorative box and power strip
- Mount surrounding organizational elements in a balanced layout
7. Multi-Level Family Organization Zone
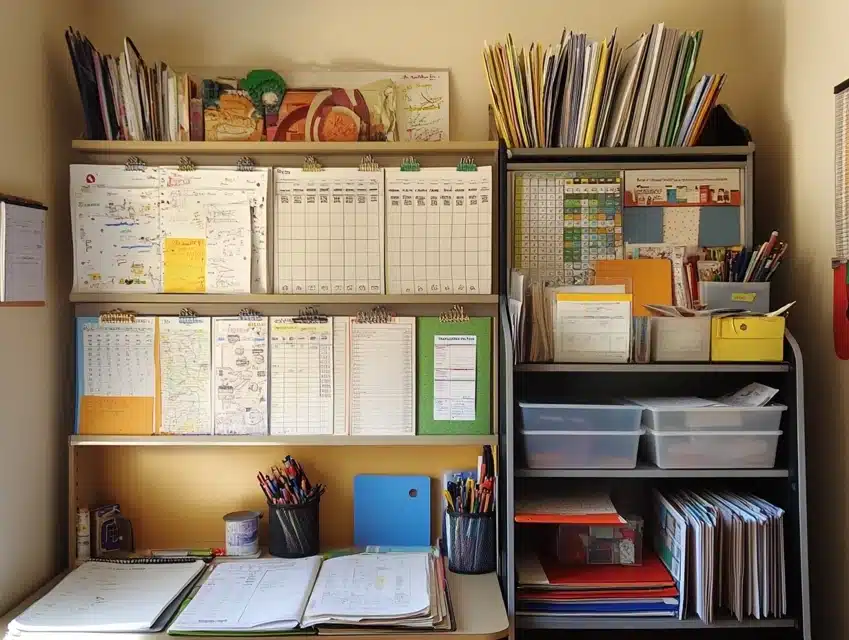
This setup came from realizing that my kids couldn’t reach half of our old command center.
I redesigned our space with height-appropriate zones, and it transformed how our family stays organized.
The bottom level sits at my children’s height, featuring their chore charts, reward systems, and homework folders.
The middle section holds our family calendar and shared information, while the top level manages household paperwork and bills – perfectly out of little hands’ reach.
What I love most about this system is how it grows with the family. Each child’s section expands or changes as their responsibilities increase.
The color-coding system we use makes it easy for everyone to find their zone quickly.
Plus, having dedicated spaces has significantly reduced the “I didn’t know where to put it” paper piles.
Quick DIY Steps:
- Mark three distinct zones on your wall at different heights
- Install adjustable shelving systems that can move as kids grow
- Create clear boundaries between zones using paint or washi tape
8. Seasonal Rotation Command Center
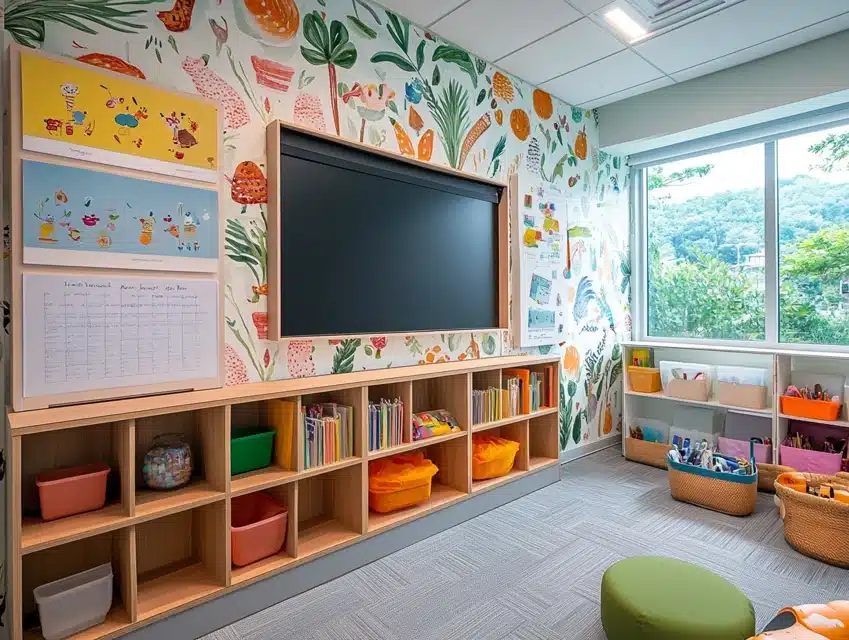
After years of static organization systems, I created what I call our “Living Command Center.”
This setup changes with the seasons, both in function and appearance. The core structure stays the same, but the elements adapt to our current needs.
During summer, it holds camp schedules and outdoor activity planners. Come fall, it transitions to school routines and holiday planning.
The magic lies in the modular design. Every element can be easily swapped out or rearranged.
I use magnetic paint under removable wallpaper, allowing me to change both the look and function seamlessly.
The seasonal changes keep the space fresh and relevant, and my family stays more engaged with our organization system.
Quick DIY Steps:
- Create a neutral base with magnetic paint or large magnetic boards
- Design interchangeable modules for different seasonal needs
- Set up an easily accessible storage system for off-season elements
9. Library-Style File Wall
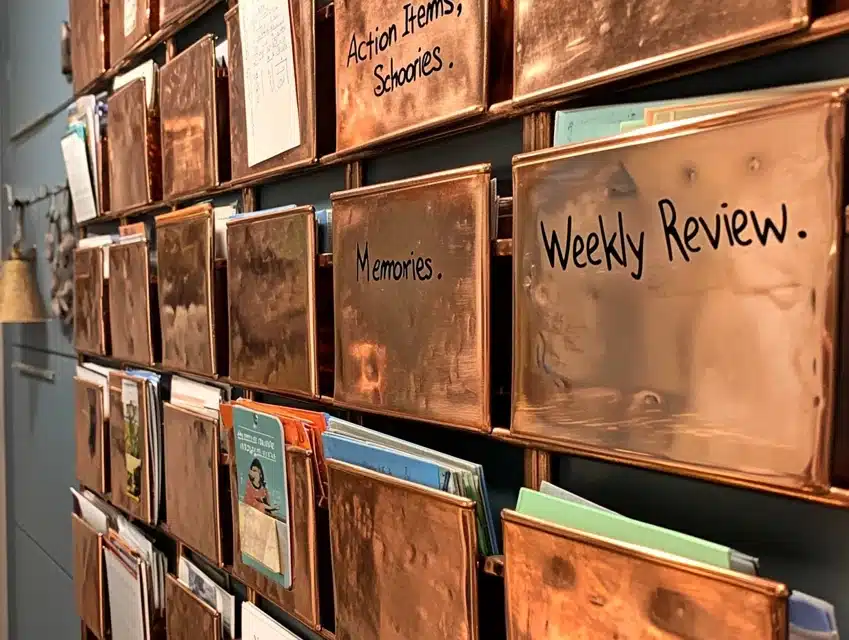
Inspired by old-school library systems, I transformed our hallway wall into what my kids call the “Family Filing System.”
Instead of letting papers pile up on counters, everything gets sorted into beautiful wall-mounted file holders, each labeled with clear categories like “Action Items,” “School,” “Memories,” and “Upcoming Events.”
The real breakthrough came when I added a “Weekly Review” slot.
Every Sunday, we go through each category together, moving items where they need to go.
The system looks elegant – I chose copper-finished holders that add warmth to our hallway – while keeping everything impeccably organized.
The best part? Important papers never get lost anymore.
Quick DIY Steps:
- Install a series of matching file holders in a grid pattern
- Create a clear labeling system with consistent fonts and colors
- Add a designated “inbox” area for new items
10. Kitchen Command Hub
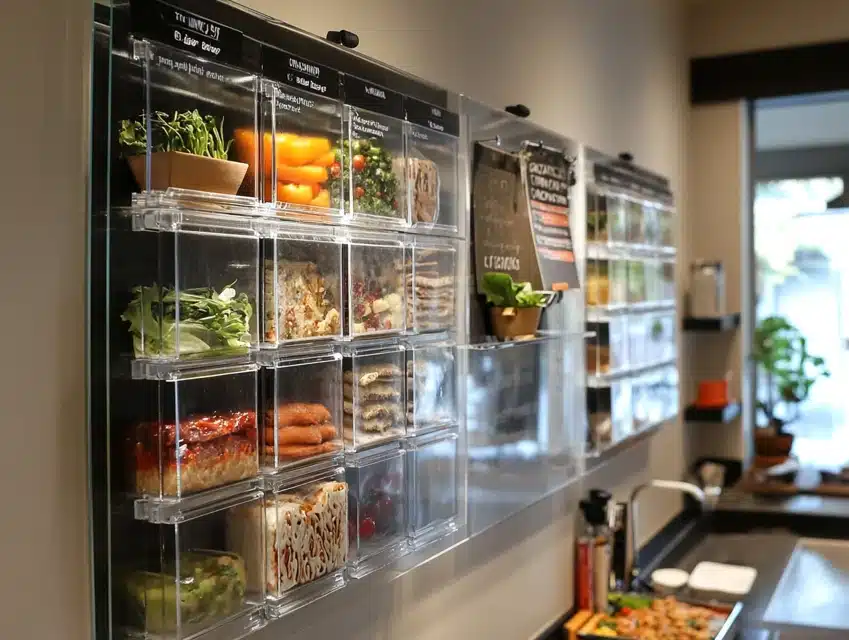
Living in my kitchen for most of the day, I realized this space needed its own specialized command center.
I carved out what I call our “Kitchen Control Station” – a dedicated area that combines meal planning, grocery lists, and everyday family organization.
The centerpiece is a glass-covered menu board where we plan our weekly meals.
Next to it, clear acrylic pockets hold takeout menus, recipes torn from magazines, and our running grocery list.
What makes this hub unique is its kitchen-specific features. I added a section for appliance manuals, a spot for favorite recipes, and a rotating dinner duty chart.
My favorite element is the “Quick Meals” list – perfect for those hectic weeknight dinners.
The whole system helps us stay organized while reducing food waste and mealtime stress.
Quick DIY Steps:
- Mount a large glass panel for the menu board
- Install acrylic pockets in a cascading layout
- Create designated zones for different kitchen activities
11. Modern Minimalist Command Wall
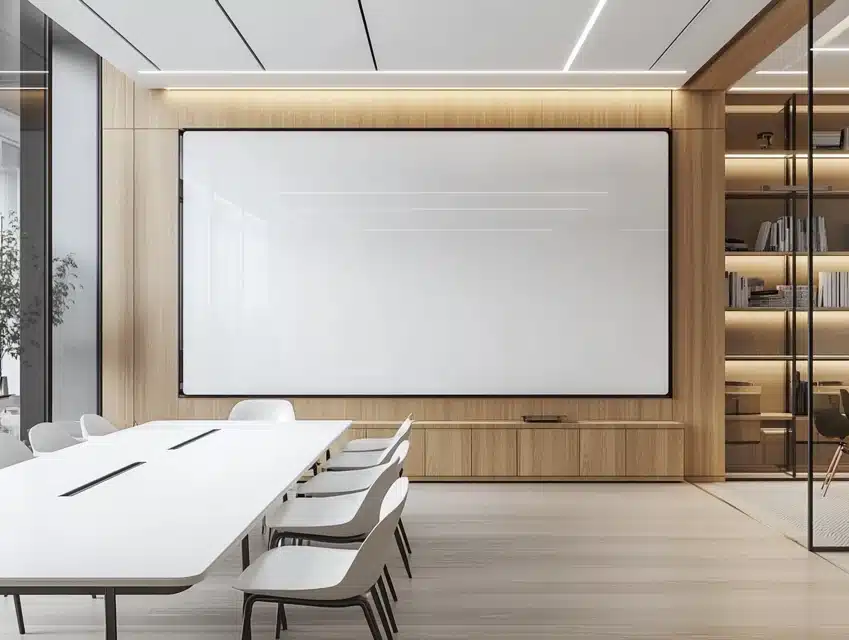
After feeling overwhelmed by cluttered command centers, I stripped everything down to create what I now call our “Zen Zone.”
This minimalist approach uses a clean, monochromatic color scheme with simple lines and essential elements only.
The main feature is a large white board divided into clean sections using thin black lines. We keep only the most crucial information visible, using a “less is more” philosophy.
The beauty of this system lies in its simplicity. Each family member has just one designated spot for urgent items.
Everything else goes into sleek, hidden storage behind sliding panels.
The result? A calming space that manages our chaos without creating visual noise.
It’s amazing how much more we use the system when it’s not overwhelming to look at.
Quick DIY Steps:
- Paint a large section of wall in a single, neutral color
- Install sliding panels for hidden storage
- Create minimalist dividing lines using thin tape or paint
12. Entryway Drop Zone
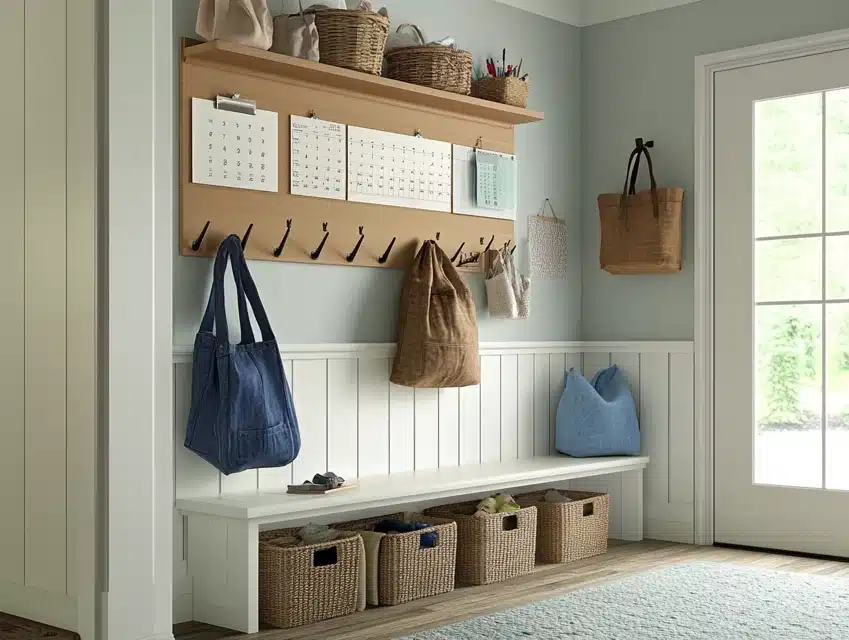
The moment I transformed our entryway into what we call the “Family Landing Pad,” our morning rush changed completely.
This command center catches everything as we enter and exit the house. The design focuses on quick access and easy drop-offs.
Each family member has their own hook section with a small bulletin board above and a basket below.
What makes this system special is its traffic-flow design.
Everything you need when leaving the house (keys, bags, upcoming event reminders) is at grab-level.
The weekly calendar sits prominently at eye level, making it impossible to miss important dates as you head out.
I added a small bench beneath for shoe storage and those moments when you need to sit and sort through things.
Quick DIY Steps:
- Create individual stations with hooks and storage
- Install a prominent calendar at eye-level
- Add seating and shoe storage below
13. Study Station Command Center
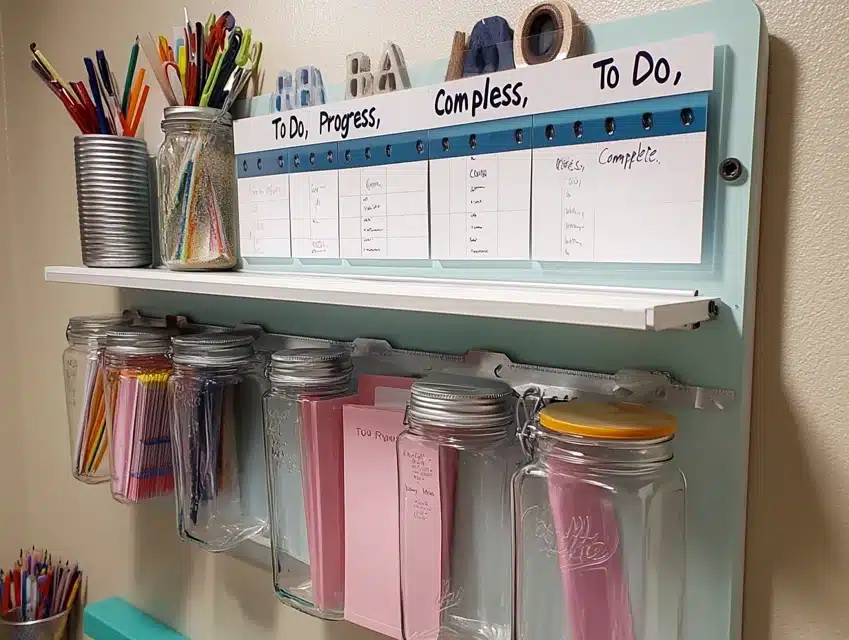
When remote learning became part of our lives, I transformed an unused wall into what we call our “Academic Action Station.”
Unlike typical command centers, this one focuses entirely on school and learning.
The focal point is a large weekly assignment tracker divided by subject.
Below it, clear folders hold current projects, while a row of mason jars keeps supplies perfectly organized.
The real success of this system comes from its homework-tracking method.
Each child has a magnetic slider they use to move across their assignments, from “To Do” to “In Progress” to “Complete.”
This visual system eliminated the constant “Did you finish your homework?” questions.
Even after returning to in-person learning, this setup continues to keep our academic life in order.
Quick DIY Steps:
- Install a magnetic tracking board with moveable sections
- Create a supply organization system at child height
- Set up individual homework stations with proper lighting
14. Built-In Cabinet Command Center
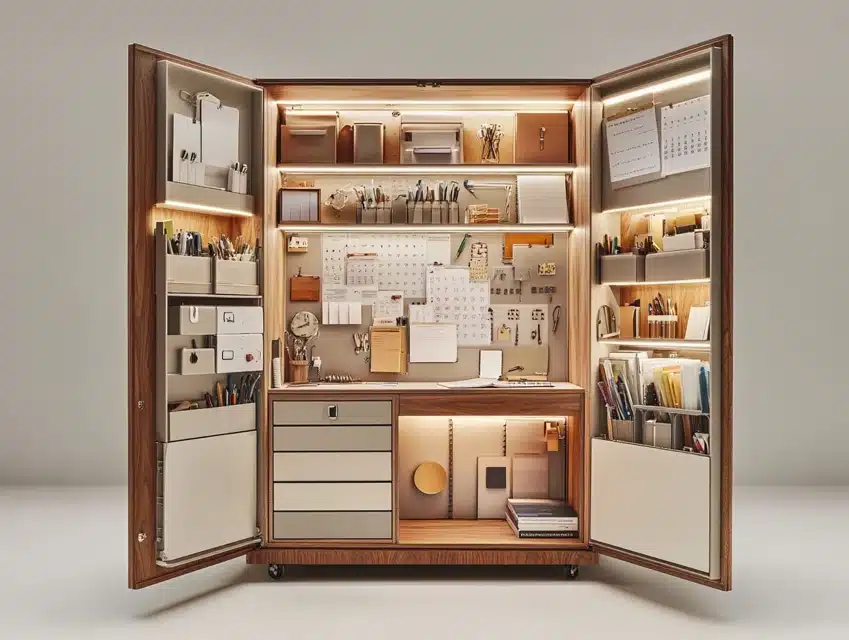
Tired of having our organization system always visible, I converted an old built-in cabinet into what we lovingly call our “Stealth Command Station.”
The genius is in the doors – when closed, it looks like a normal cabinet, but open them to reveal a complete family command center.
The inside of each door has magnetic boards, while the cabinet interior holds shelves and filing systems.
What makes this setup special is its ability to hide clutter instantly. During parties or when we want a cleaner look, everything disappears behind closed doors.
I added LED strips that automatically light up when the doors open, making it easy to check schedules even in dim lighting.
Quick DIY Steps:
- Add organizational elements to cabinet door interiors
- Install proper lighting for visibility
- Create zones for different types of information
15. Vintage-Inspired Message Center
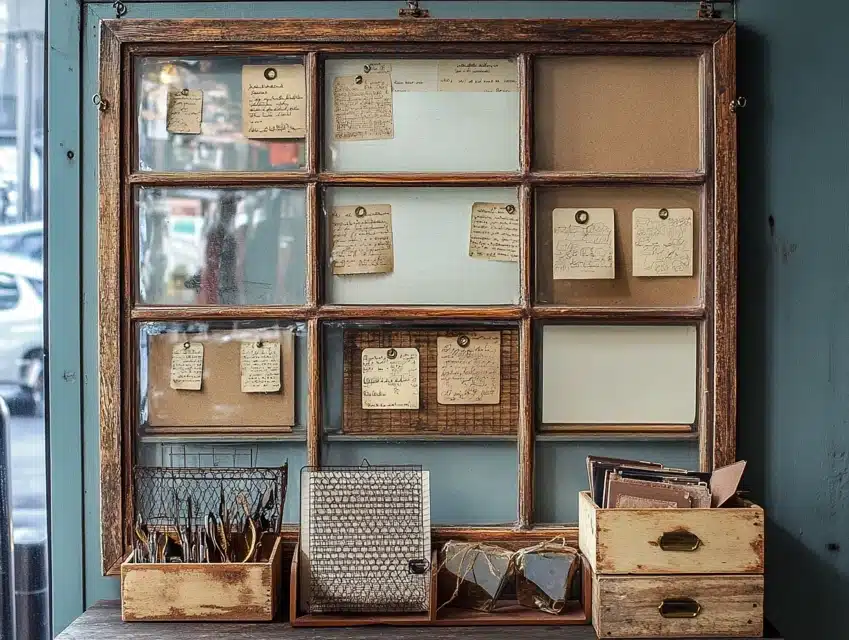
Drawing inspiration from old post offices, I created our “Heritage Hub.” This command center combines vintage aesthetics with modern functionality.
I used an antique window frame as the base, replacing the glass panes with different organizational surfaces – some with cork, others with whiteboard material, and one special pane with chicken wire for hanging cards.
The charm of this system lies in its character. Each section has a brass label holder, and I use vintage-style tags for categories.
Mail slots below, made from old wooden boxes, sort incoming and outgoing papers.
It’s not just functional; it’s become a conversation piece that adds personality to our home.
Quick DIY Steps:
- Source and restore a vintage window frame
- Insert different organizational materials into panes
- Create a coordinated labeling system
16. Kids’ Interactive Command Center
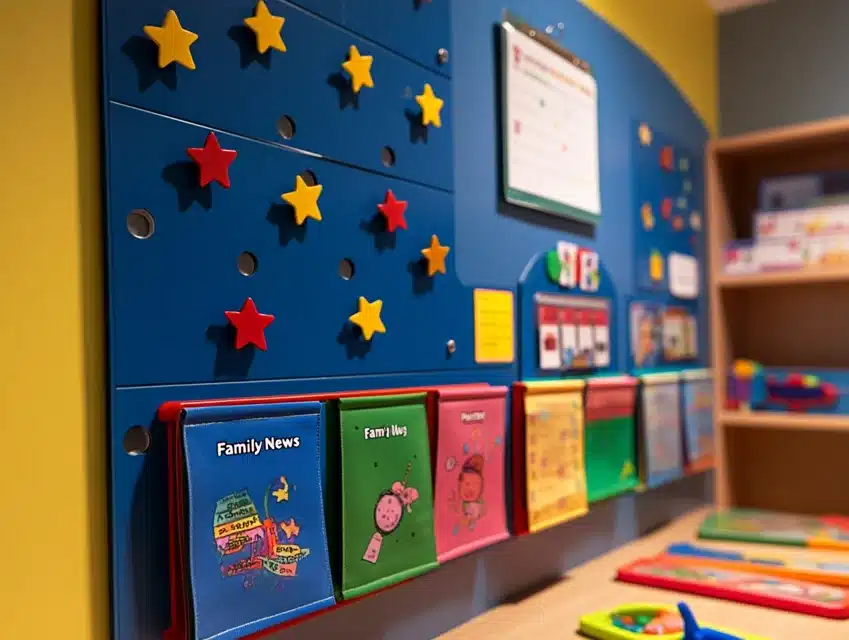
After noticing my children’s disinterest in our regular command center, I created what they now call their “Mission Control.”
Set at their eye level, this interactive space features bright colors and moveable elements. The centerpiece is a reward chart with magnetic stars they can move themselves.
Next to it, clear pockets hold their weekly schedules with pictures instead of just words, making it easy for even our youngest to understand their daily routines.
What really makes this space work is its hands-on nature. Each child has their own “mission board” where they can track their goals and achievements.
We added a “Family News” section where kids can post their artwork or special announcements.
The whole system teaches organization skills while making it fun and engaging.
Quick DIY Steps:
- Create a magnetic board at child height
- Design picture-based organizational systems
- Add interactive elements that kids can manage themselves
17. Small Space Command Center
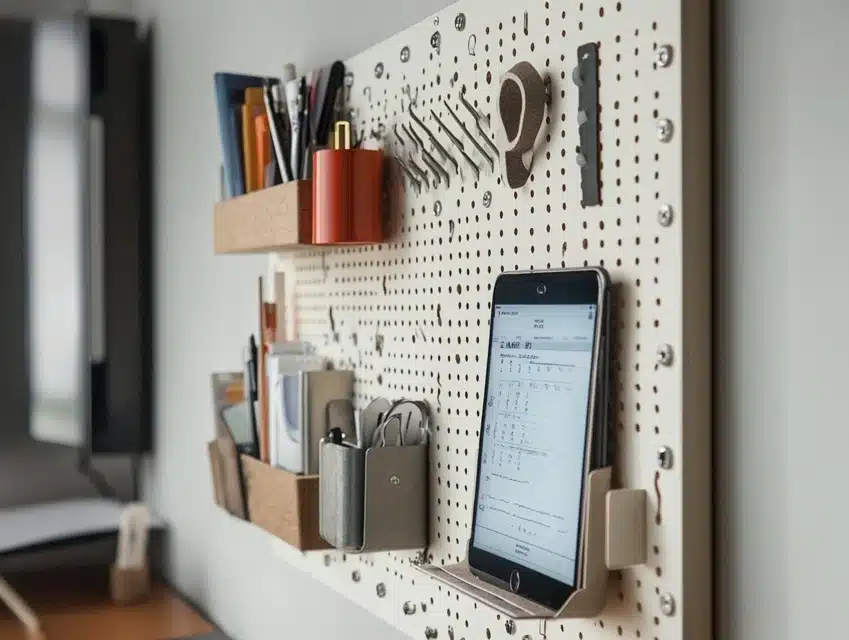
Living in an apartment taught me to make every inch count.
I developed what I call our “Micro Manager” – a compact command center that fits perfectly in a tiny corner but packs all the functionality of larger systems.
Using vertical space cleverly, I installed a narrow pegboard column with adjustable components that can be rearranged as needed.
The brilliance of this system is its space efficiency. Everything has multiple purposes – the mail holder doubles as a tablet stand, and the calendar can flip up to reveal extra storage behind it.
Despite its small footprint, we’ve managed to include a family calendar, mail sorting system, and even a small bulletin board for important notes.
Quick DIY Steps:
- Install a vertical organization system in a narrow space
- Create multi-functional storage solutions
- Maximize vertical space with adjustable components
18. Eco-Friendly Organization Hub
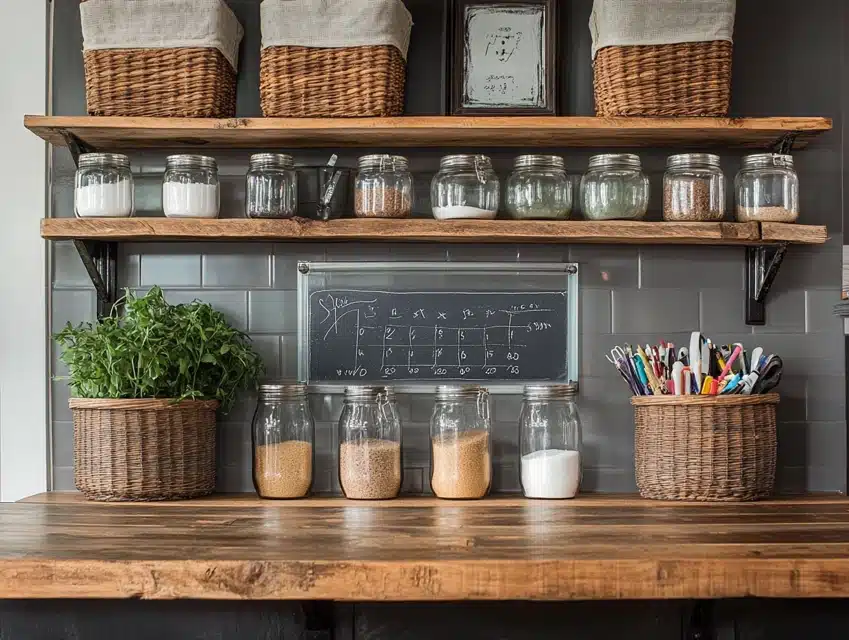
Combining my passion for organization with environmental consciousness, I built our “Green Command Center” using entirely sustainable materials.
The base is made from reclaimed wood, while old mason jars serve as supply holders.
Instead of plastic organizers, I use woven baskets made from recycled materials, and all our paper products are stored in repurposed wooden crates.
What makes this system special is its zero-waste approach. We use washable chalk markers on glass surfaces instead of paper notes, and all our organizing containers can be repurposed or recycled.
Even our calendar is a reusable glass panel where we write and wipe clean each month.
It’s become a teaching tool for our kids about sustainable living while keeping us organized.
Quick DIY Steps:
- Source sustainable materials for the main structure
- Create reusable writing surfaces from glass or wood
- Set up a paper recycling system within the command center
19. Smart Home Integration Center
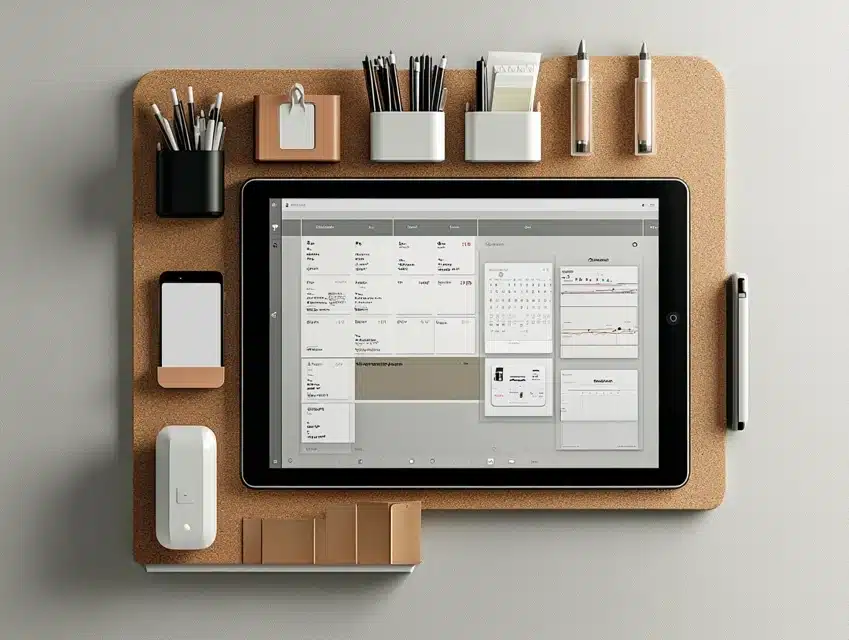
Combining traditional organization with modern technology, I created our “Smart Command HQ.”
The heart of this system is a wall-mounted tablet that syncs with our family’s digital calendars, shopping lists, and reminders.
Around it, I arranged traditional elements like a bulletin board and paper filing system.
What makes this setup unique is how it bridges the digital-analog divide – when someone adds an event to their phone, it automatically appears on our central display.
The key feature is the charging station built into the bottom shelf, keeping all our devices organized and powered.
Voice commands can add items to our shopping list or set reminders that appear both digitally and on our physical message board.
It’s perfect for families straddling both worlds of organization.
Quick DIY Steps:
- Mount a secure tablet holder with hidden cable management
- Create a charging station with labeled spots for each device
- Install traditional organizing elements around the digital hub
20. Working Parent Command Center
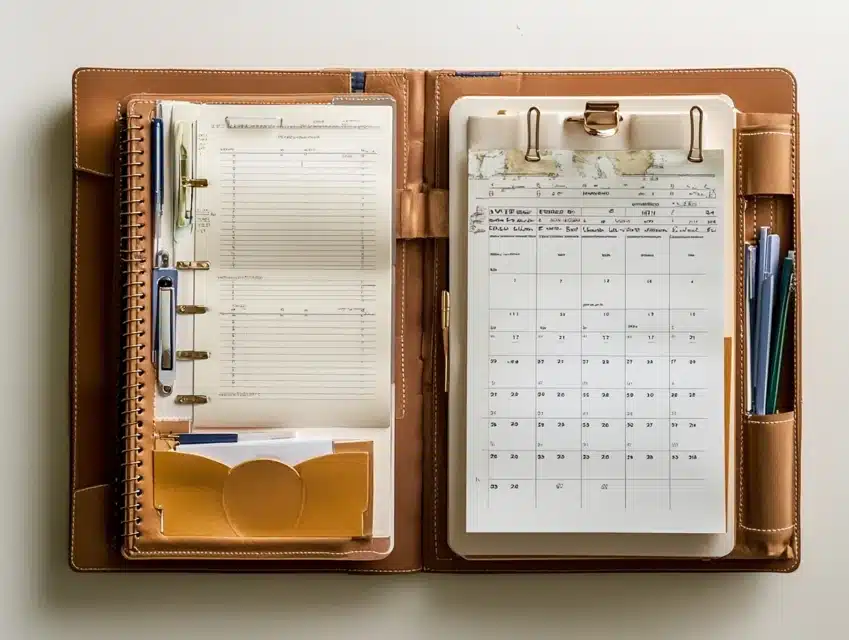
After juggling remote work with family life, I designed what I call the “Work-Life Balance Board.”
This unique command center has two distinct sections – one for work commitments and another for family responsibilities.
The design helps maintain boundaries while keeping everything visible in one place.
What makes this system effective is its clear separation of duties while maintaining overall family coordination.
Work projects and deadlines stay in their zone, while family events and chores have their own space.
A central calendar bridges both sections, helping prevent double-booking and ensuring family time doesn’t get overtaken by work commitments.
Quick DIY Steps:
- Create distinct zones for work and family life
- Install a unified calendar system in the center
- Add separate storage solutions for work and home documents
21. All-Season Activity Center
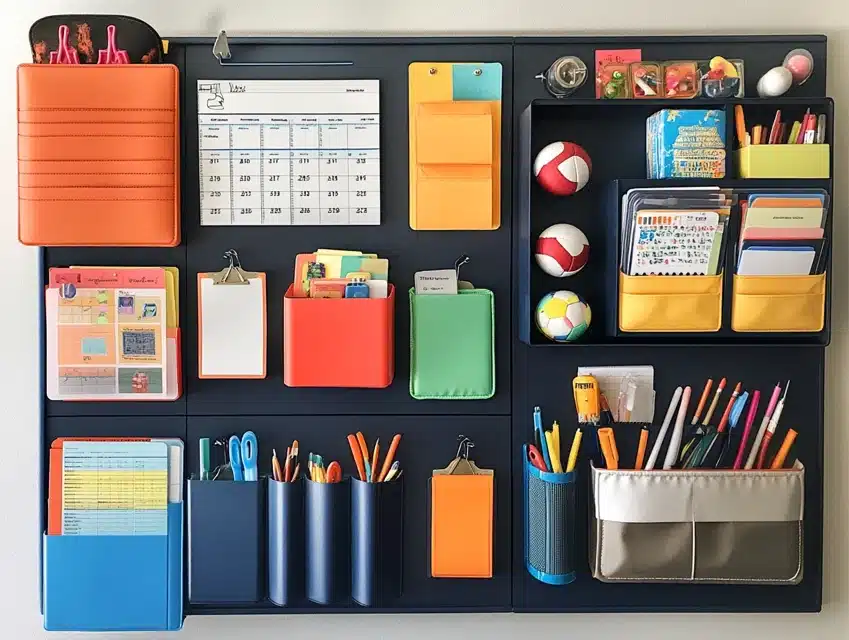
The constant rotation of sports gear, seasonal activities, and changing schedules inspired my “Season Switcher” command center.
This adaptable system features moveable components that we rearrange as activities change throughout the year.
During soccer season, there’s a spot for practice schedules and game day essentials.
In winter, it transforms to track indoor activities and snow day procedures.
The genius lies in its modular design – magnetic strips hold interchangeable pockets and organizers that we can easily swap out.
We keep off-season components stored in labeled boxes, ready to rotate in when needed.
This system has eliminated the chaos of seasonal transitions and keeps us prepared for whatever activities are current.
Quick DIY Steps:
- Install a magnetic backing board for flexibility
- Create seasonal modules that can be easily swapped
- Design a storage system for off-season components
22. Emergency Ready Command Center
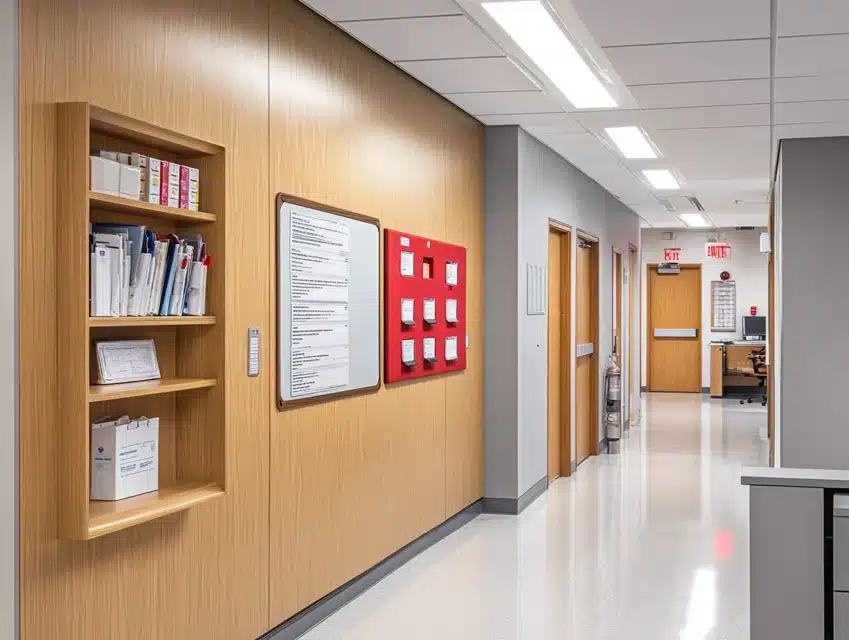
After a power outage caught us unprepared, I developed our “Family Ready Station.”
While maintaining daily organization, this command center includes essential emergency information and supplies.
Behind the regular calendar and message board, a hidden panel holds emergency contact numbers, evacuation plans, and copies of important documents.
The brilliance of this system is how it incorporates emergency preparedness into our daily organization without creating anxiety.
Monthly maintenance is part of our regular schedule, ensuring emergency supplies stay updated.
It gives our family peace of mind while keeping daily operations running smoothly.
Quick DIY Steps:
- Create a hidden panel for emergency information
- Install a secure document storage system
- Add emergency supply storage that’s easily accessible
Conclusion
Creating a command center is more than hanging a calendar on the wall—it’s about building a system that works seamlessly with your family’s unique rhythm.
After exploring these ideas and implementing several in my home, I’ve learned that the best command centers evolve with your family’s needs.
Whether you choose a tech-savvy setup or a simple bulletin board system, the key is consistency and accessibility.
Remember, you can start small and expand your command center as you discover what works best for your household.
The goal isn’t perfection but creating a functional space that helps your family stay connected and organized.
Frequently Asked Questions
What’s the Ideal Height to Mount a Family Command Center?
Mount the main elements at eye level for adults (around 60 inches from the floor). If children need access, create zones at their height (typically 36-48 inches) or use a multi-level design.
How Do I Maintain My Command Center so It Doesn’t Become Cluttered?
Set aside 10 minutes each Sunday for a quick reset. Remove outdated papers, update the calendar, and wipe down surfaces. Create a “one in, one out” rule for posted items to prevent overcrowding.
What’s the Minimum Wall Space Needed for An Effective Command Center?
You can create a functional command center in as little as 24 x 36 inches of wall space. Focus on essential elements like a calendar and message board, then expand if space allows.
How Can I Make My Command Center Blend with My Home’s Decor?
Choose organizers and boards in colors that complement your home’s color scheme. Frame bulletin boards or use decorative washi tape to add style. Consider hiding components behind cabinet doors if you prefer a cleaner look.
What Are the Must-Have Elements for a Basic Command Center?
Start with three core elements: a calendar for scheduling, a message board for notes and reminders, and a paper management system for incoming mail and documents. Add other components based on your family’s specific needs.

