
Back House Sunroom Addition: Costs, Types & Build Tips
A back house sunroom addition is one of the smartest upgrades you can make to your home.
It adds usable living space, brings in natural light, and can return a significant portion of your investment in property value. But it’s not a simple weekend project.
The right sunroom starts with the right decisions, purpose, type, foundation, design, and budget, all of which must align before construction begins.
This post walks you through every phase of the process. From choosing the right sunroom type to avoiding the mistakes that cost homeowners thousands, you’ll find everything you need to move forward with confidence.
Read through, take notes, and start planning the addition your home deserves.
Step-by-Step Process to Build a Back House Sunroom Addition
Building a back-house sunroom addition requires planning before a single nail is driven. Here’s a quick overview of the full process so you know what to expect.
Step 1: Define the Purpose of Your Sunroom
Decide how you’ll use the space, lounging, dining, or growing plants. Your answer drives every decision after this, from size to insulation to budget.
A lounging room needs different flooring than a plant room. A dining space needs more square footage than a reading nook.
Step 2: Choose the Location at the Back of the House
Pick which back wall the sunroom will attach to. The direction it faces affects sunlight exposure, structural tie-in, and overall cost.
A south-facing wall gets the most year-round light. A poor location choice can mean more excavation and higher labor costs.
Step 3: Select Your Sunroom Type
Choose between a screen room, a 3-season, or a 4-season sunroom. Each type comes with different comfort levels, materials, and price points.
Your local climate plays a big role in this decision. The type you choose also determines whether you need HVAC, insulation, or just a basic frame.
Decide Between Prefab or Custom Build
You also need to decide how the sunroom will be built. This affects cost, timeline, and design flexibility.
- Prefab Kits: Faster to install, lower cost, limited design options
- Custom Build: Fully tailored to your home, higher cost, longer timeline
Prefab works well for simple layouts and tighter budgets. Custom builds are better when you want a seamless match with your home’s structure and design.
Step 4: Set Your Budget
Pin down a realistic number before anything else moves forward. Costs vary widely based on size, type, and finishes, so having a clear range keeps the project on track.
Always add a 10–15% buffer for unexpected expenses. Foundation surprises and permit fees can push costs up fast.
Step 5: Get Permits and Approvals
Check with your local building department and pull the required permits. Skipping this step can lead to fines, forced removal, or problems when selling your home.
Most approvals take 2–6 weeks, depending on your area. Submit your plans early to avoid delaying your start date.
You also need to check local zoning rules before finalizing your plan. Most areas have setback requirements, which define how close you can build to property lines.
Common Zoning Checks:
- Setbacks from rear and side boundaries
- Maximum lot coverage limits
- Height restrictions for additions
Ignoring zoning rules can stop your project before it starts. Always confirm these details before submitting plans.
Step 6: Prepare the Foundation
Your contractor will pour a slab, set piers, or extend your existing foundation. This is the most critical phase, a weak base leads to cracks, shifting, and costly repairs.
The right foundation type depends on your soil, slope, and sunroom size. Don’t cut corners here, it’s the base everything else rests on.
Step 7: Frame the Structure
The frame connects your sunroom to the house and carries the load of the roof and walls. This must be done correctly to avoid long-term structural issues.
Load distribution needs to be verified by a qualified contractor or structural engineer. Improper framing is one of the top causes of sunroom failure.
Step 8: Install Windows, Doors, and Roof
This is where light control and insulation come together. Your choices here directly affect comfort, energy efficiency, and curb appeal.
Double-pane or low-E glass keeps heat out in summer and warmth in during winter. A well-sealed door prevents drafts and energy loss year-round.
Step 9: Add Electrical and HVAC
Run wiring and plan heating or cooling before the walls close up. Retrofitting later is expensive and disruptive. At a minimum, every sunroom needs outlets and proper lighting.
A mini-split system is often the easiest and most efficient option for climate control.
Step 10: Handle Interior Finishing
Flooring, walls, trim, and paint bring the space to life. Choose moisture-resistant materials that withstand the sunroom environment.
Tile, luxury vinyl, and concrete are all smart flooring picks. Light, neutral paint tones keep the space feeling open and airy.
Each step builds on the one before it. Get the order right, and the project stays on budget and on schedule.
Choosing the Right Type of Sunroom
The type of sunroom you choose affects your budget, comfort, and how often you’ll actually use the space.
Three-Season Sunroom
A three-season sunroom is built for spring, summer, and fall use. It’s a popular middle-ground option for homeowners who want an enclosed space without the cost of full insulation.
- Built with lighter materials like vinyl and aluminum frames
- Lower insulation levels keep construction costs down
- Not designed for extreme cold or harsh winter conditions
It’s a smart choice if you live in a mild climate and don’t need year-round access.
Four-Season Sunroom

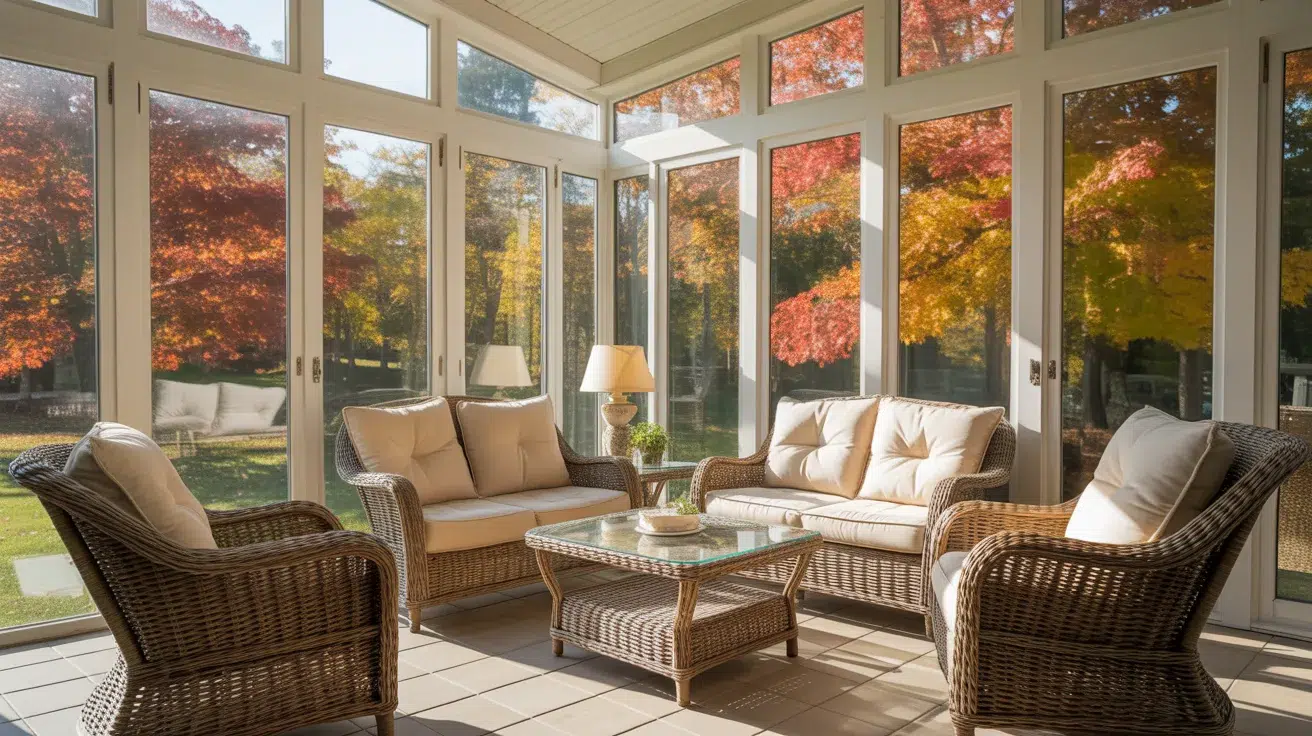
A four-season sunroom works like a fully functional room in your home. It’s the most comfortable and most expensive option of the three.
- Fully insulated with HVAC integration for year-round comfort
- Uses specialized double or triple-pane glass to control temperature
- Requires stronger structural support to handle the added load
If you want a space you can use every day regardless of the weather, this is the right investment.
Screen Room
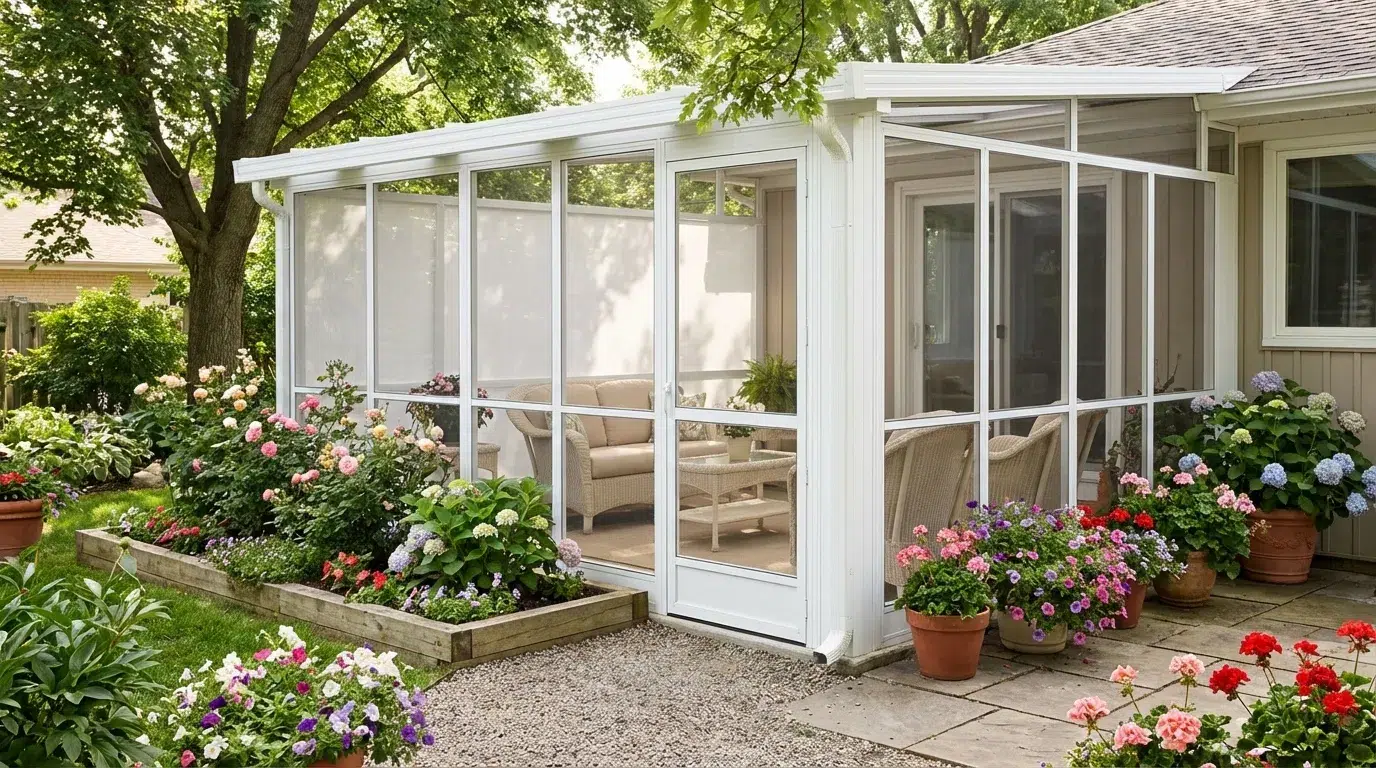
A screen room is the simplest and most affordable sunroom option. It’s designed for open-air enjoyment, not weather protection.
- Focused on ventilation with mesh or screen panels instead of glass
- Offers no insulation and minimal protection from rain or cold
- Best suited for warm climates with mild, predictable weather
It’s a great low-cost option if you just want to enjoy the outdoors without bugs or direct sun.
Each sunroom type serves a different need and budget. Pick the one that matches your climate, lifestyle, and how much you plan to invest.
How Costs Work for a Back House Sunroom Addition
Sunroom costs depend on size, type, materials, and the complexity of the foundation. Hidden costs like permits, HVAC, and electrical are often left out of initial quotes, so knowing the full picture matters.
| Cost Item | Estimated Range | Notes |
|---|---|---|
| Screen Room | $8,000 – $20,000 | Lowest cost, minimal insulation |
| 3-Season Sunroom | $20,000 – $40,000 | Mid-range, seasonal use |
| 4-Season Sunroom | $40,000 – $80,000+ | Full insulation, HVAC included |
| Foundation Work | $5,000 – $15,000 | Varies by terrain and complexity |
| Permits & Approvals | $500 – $2,500 | Required in most locations |
| Electrical & HVAC | $3,000 – $10,000 | Often missing from base quotes |
The biggest budgeting mistakes happen when homeowners focus only on the base build price. Always ask for an itemized quote, and keep a 10–15% buffer for costs that may arise after work has already started.
One more way to estimate your budget is by looking at the cost per square foot. This helps you compare quotes more accurately.
Cost Per Square Foot Estimates:
- Screen Room: $50 – $150 per sq ft depending on materials and screening quality
- 3-Season Sunroom: $150 – $300 per sq ft with basic insulation and glass
- 4-Season Sunroom: $250 – $500+ per sq ft with full insulation, HVAC, and high-performance glass
Use these ranges to sanity-check contractor quotes. If a number feels too low, it usually means something important is missing.
Foundation and Structural Requirements Explained
The foundation carries the full weight of your sunroom, glass panels, roof, and frame combined. Get it wrong, and you’ll deal with shifting, cracks, and leaks down the line.
There are three options:
- a concrete slab for maximum stability,
- piers for sloped or uneven ground,
- and a full foundation extension for the strongest structural tie-in.
Your choice depends on your terrain, sunroom type, and budget. The frame must also connect properly to your existing walls and roofline.
Poor integration is a leading cause of water intrusion and long-term instability. Always have a qualified contractor verify load distribution before framing begins.
Drainage planning is just as important as the foundation itself. Water that collects around the base can weaken the structure over time.
Key Drainage Considerations:
- Slope the ground away from the sunroom to prevent water buildup
- Install proper gutters and downspouts to direct rainwater away
- Use a vapor barrier under slabs to control moisture
Poor drainage is one of the most common causes of long-term damage. Fixing it later is expensive, so it needs to be handled during the foundation stage.
Designing the Sunroom to Match Your Existing Home

A sunroom that blends with your home looks intentional, not tacked on. A well-designed addition can return about 50–80% of its cost in added property value, depending on location and build quality.
- Roofline: Match it to your existing structure to prevent visual and structural imbalance
- Exterior Materials: Use the same siding, trim, and color for seamless continuity
- Door Systems: Choose sliding or folding doors to create a smooth indoor-outdoor flow
- Light Orientation: Face the sunroom south to maximize natural light throughout the day
- Design Mismatch: A poorly matched addition looks cheap and can hurt your resale value
A well-designed sunroom feels like a natural extension of your home, not an afterthought. Get the design right, and it adds both daily comfort and long-term market value.
Timeline and Construction Phases
A back house sunroom addition typically takes 6–12 weeks from start to finish. Planning and permits alone can take 2–6 weeks, depending on your location, so submit early to avoid delays.
Foundation work usually wraps up in about a week. Structure installation depends on your build type, prefab kits can go up in 1–2 weeks, while custom builds take longer but offer more design flexibility.
Finishing work adds 1–3 weeks, depending on the amount of interior work involved. Weather can push any phase back, so plan your start date around your local climate and build in buffer time from the beginning.
Common Mistakes that Can Ruin a Sunroom Addition
Small oversights during planning and construction can turn a great project into a costly fix. These are the mistakes that show up most often and hurt the most.
- Wrong Sunroom Type: Choosing a screen room in a cold climate makes the space unusable
- Poor Insulation: Skipping proper insulation leads to heat loss and high energy bills
- Structural Shortcuts: Skipping reinforcement causes shifting, cracking, and long-term damage
- No Ventilation Plan: Ignoring airflow and cooling turns the sunroom into an uncomfortable space
- Budget Underestimation: Focusing only on base cost leaves you blindsided by hidden expenses
Every one of these mistakes is avoidable with the right planning upfront. Get the details right early, and your sunroom stays functional, comfortable, and worth every dollar spent.
Conclusion
A back-house sunroom addition can add real comfort, usable space, and long-term value when it’s planned the right way.
Every step, from defining the purpose to choosing the structure and setting a clear budget, plays a direct role in how the final space performs.
Small shortcuts early on often lead to bigger costs later, so it pays to stay precise from the start. Focus on the details that matter, work with the right professionals, and move step by step.
With the right approach, your sunroom becomes a space you’ll actually use and enjoy every day.
Frequently Asked Questions
Can a Sunroom Be Added to a Second-Floor Level?
Yes, but it requires significant structural reinforcement. The existing floor must support the added load of glass, framing, and roofing. A structural engineer should assess the feasibility before any planning begins. Costs are considerably higher than ground-level additions.
Do Sunrooms Require Homeowners Insurance Updates?
Yes. A sunroom addition increases your home’s square footage and replacement value. Failing to update your policy can leave you underinsured if damage occurs. Notify your insurance provider before construction starts to ensure full coverage from day one.
Can a Sunroom Be Built on a Sloped Backyard?
Yes, but foundation work becomes more complex and costly. Pier systems or a stepped foundation are typically used on sloped terrain. Proper grading and drainage planning are also essential to prevent water pooling around the base of the structure.


